Classic Vanilla Tres Leche Cake is the ultimate summer party and birthday cake! My mom recently celebrated a birthday, and requested we make this gorgeous-looking dessert that we discovered in the June/July issue of
Fine Cooking Magazine.
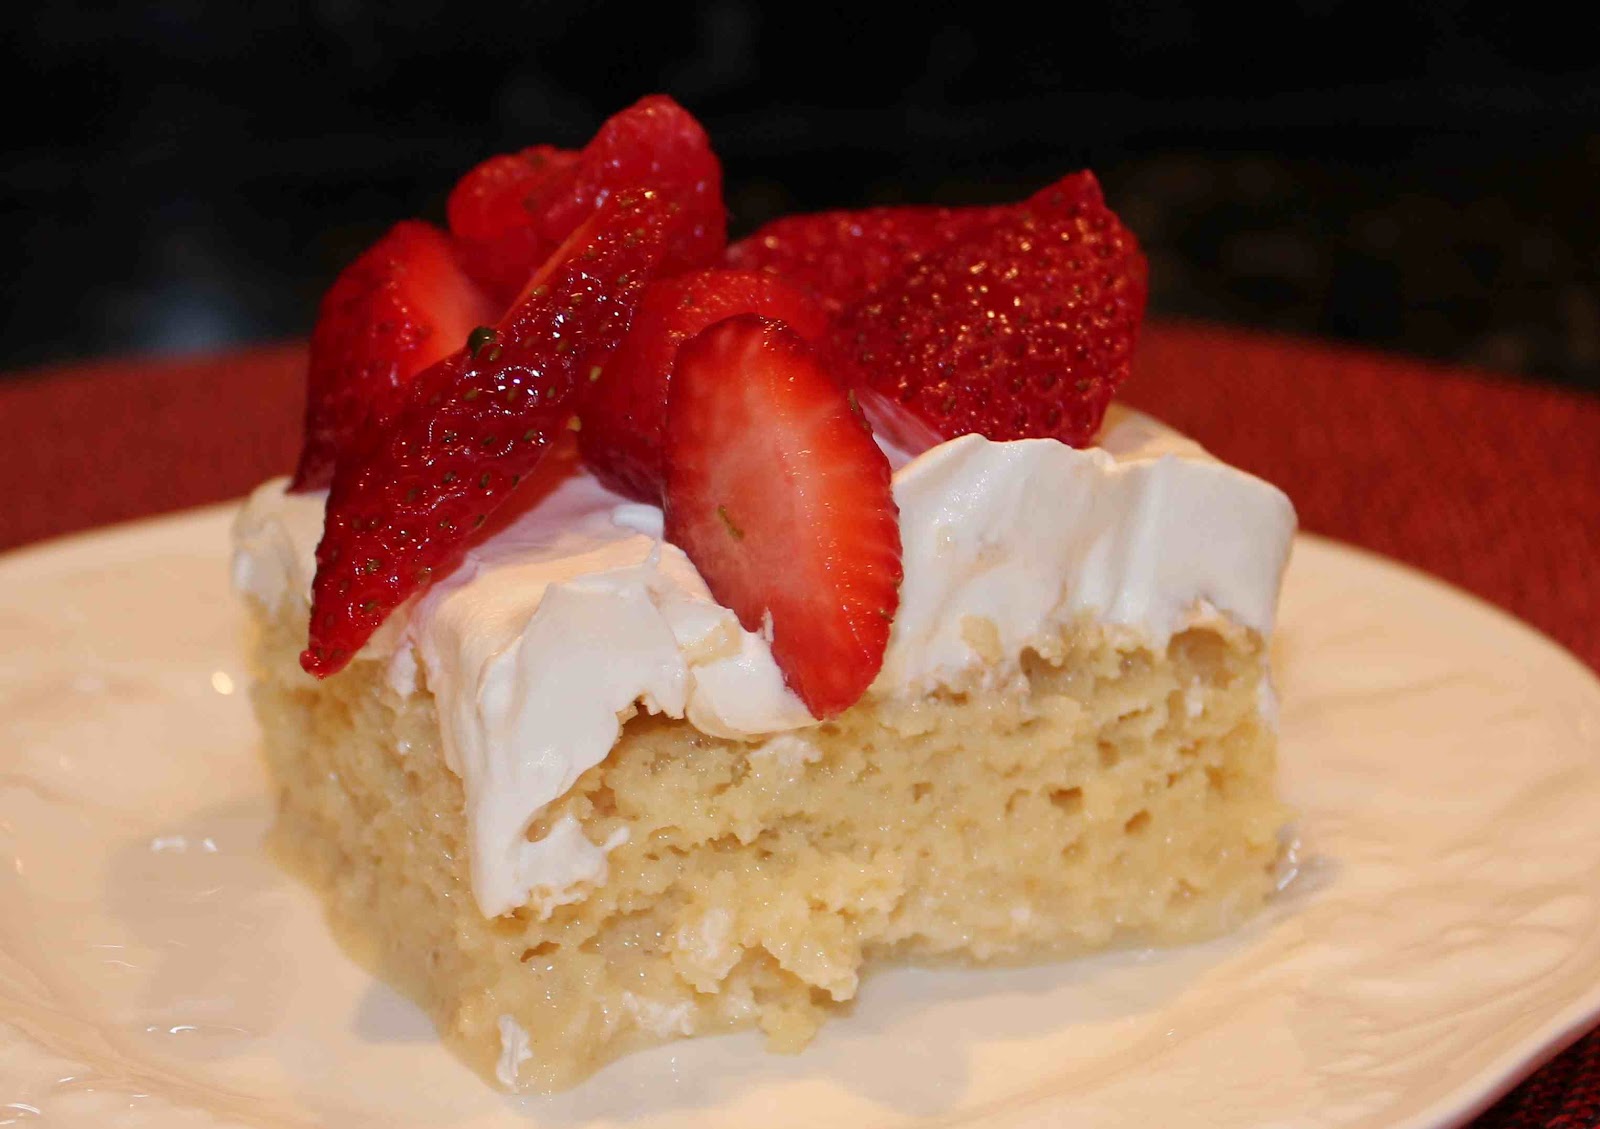
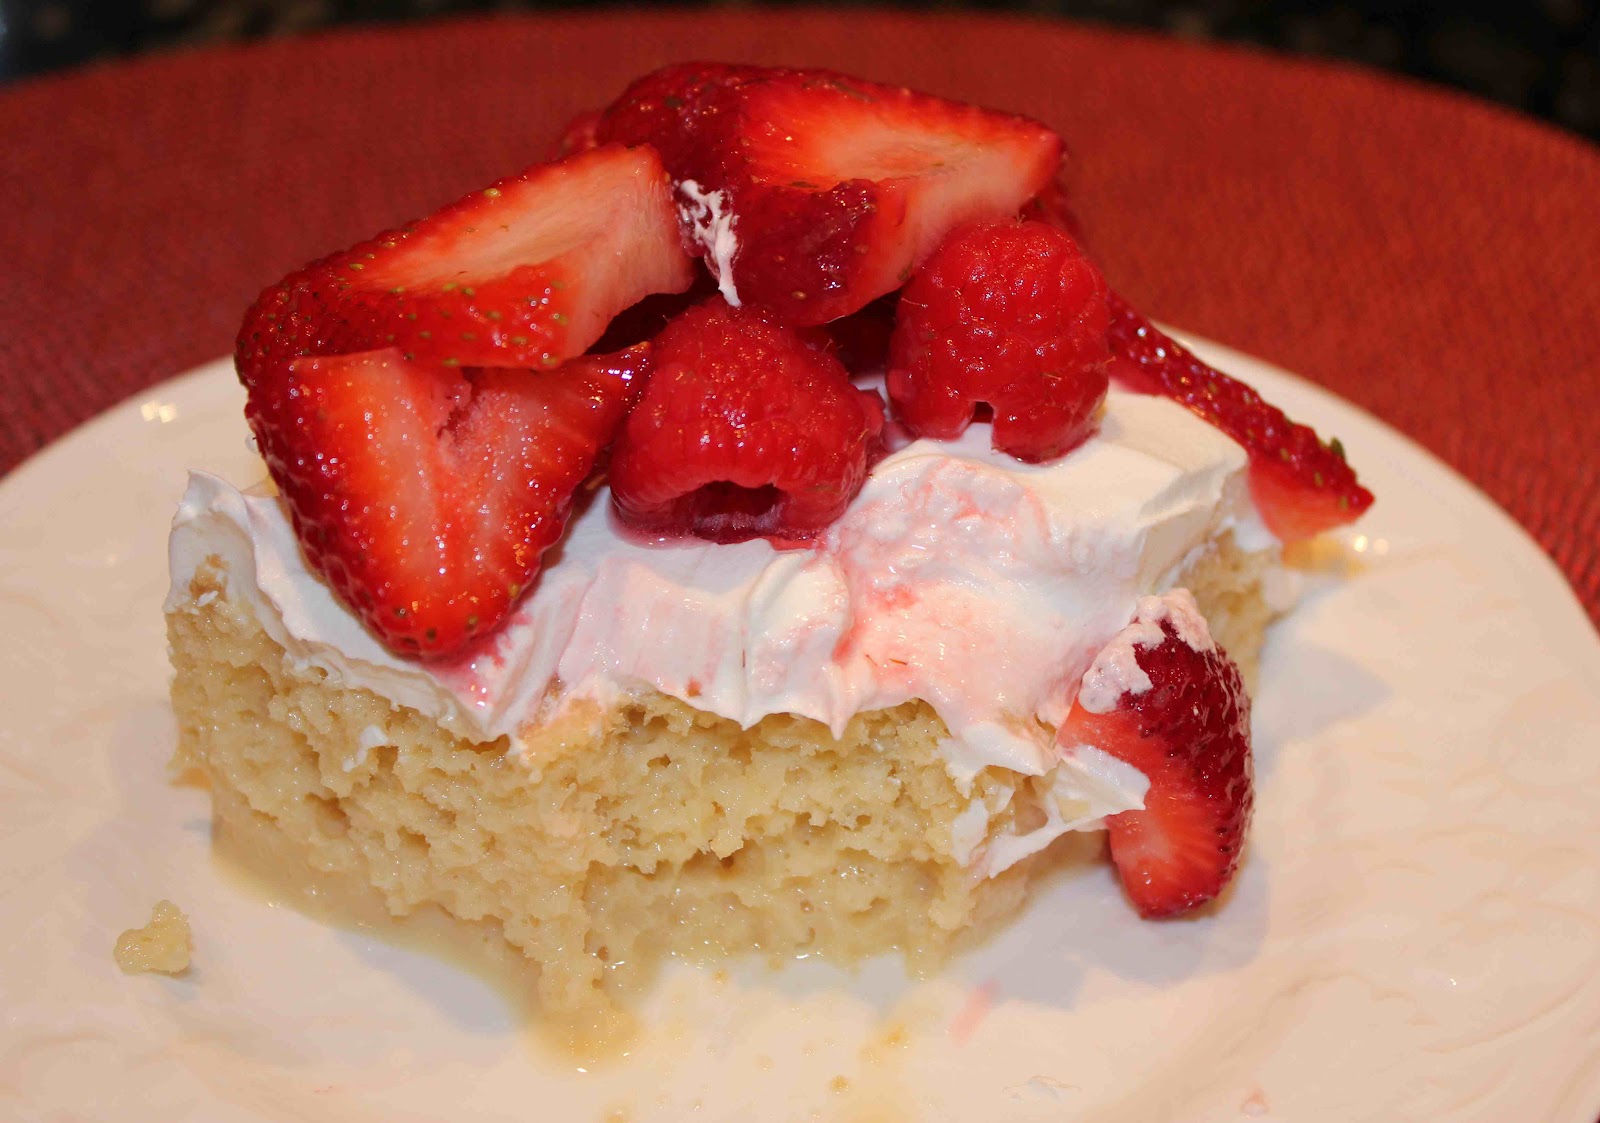
Soaked in sweet milk topped with billowy whipped cream, this Latin-American inspired dessert was also addicting and did not disappoint! Luscious and moist, while not mushy, the tres leche cake was sweet, but not too sweet. It had a cloud-like texture from the egg whites, which created an airiness that helped soak up the milk mixture later.
Three milks make up the soaking mixture, in which the cake gets its Spanish name: “tres leches.” Condensed milk adds sweetness, while evaporated milk and whole milk lightens the cake’s texture.
The whipped topping finishes the cake off. While some tres leches cakes are topped with meringe, this one uses sweetened whipped cream. (We actually used Cool Whip, which was easier and just as tasty). Layer it on thick and garnish with sliced fruit, nuts, chocolate shavings or coconut.
Enjoy!
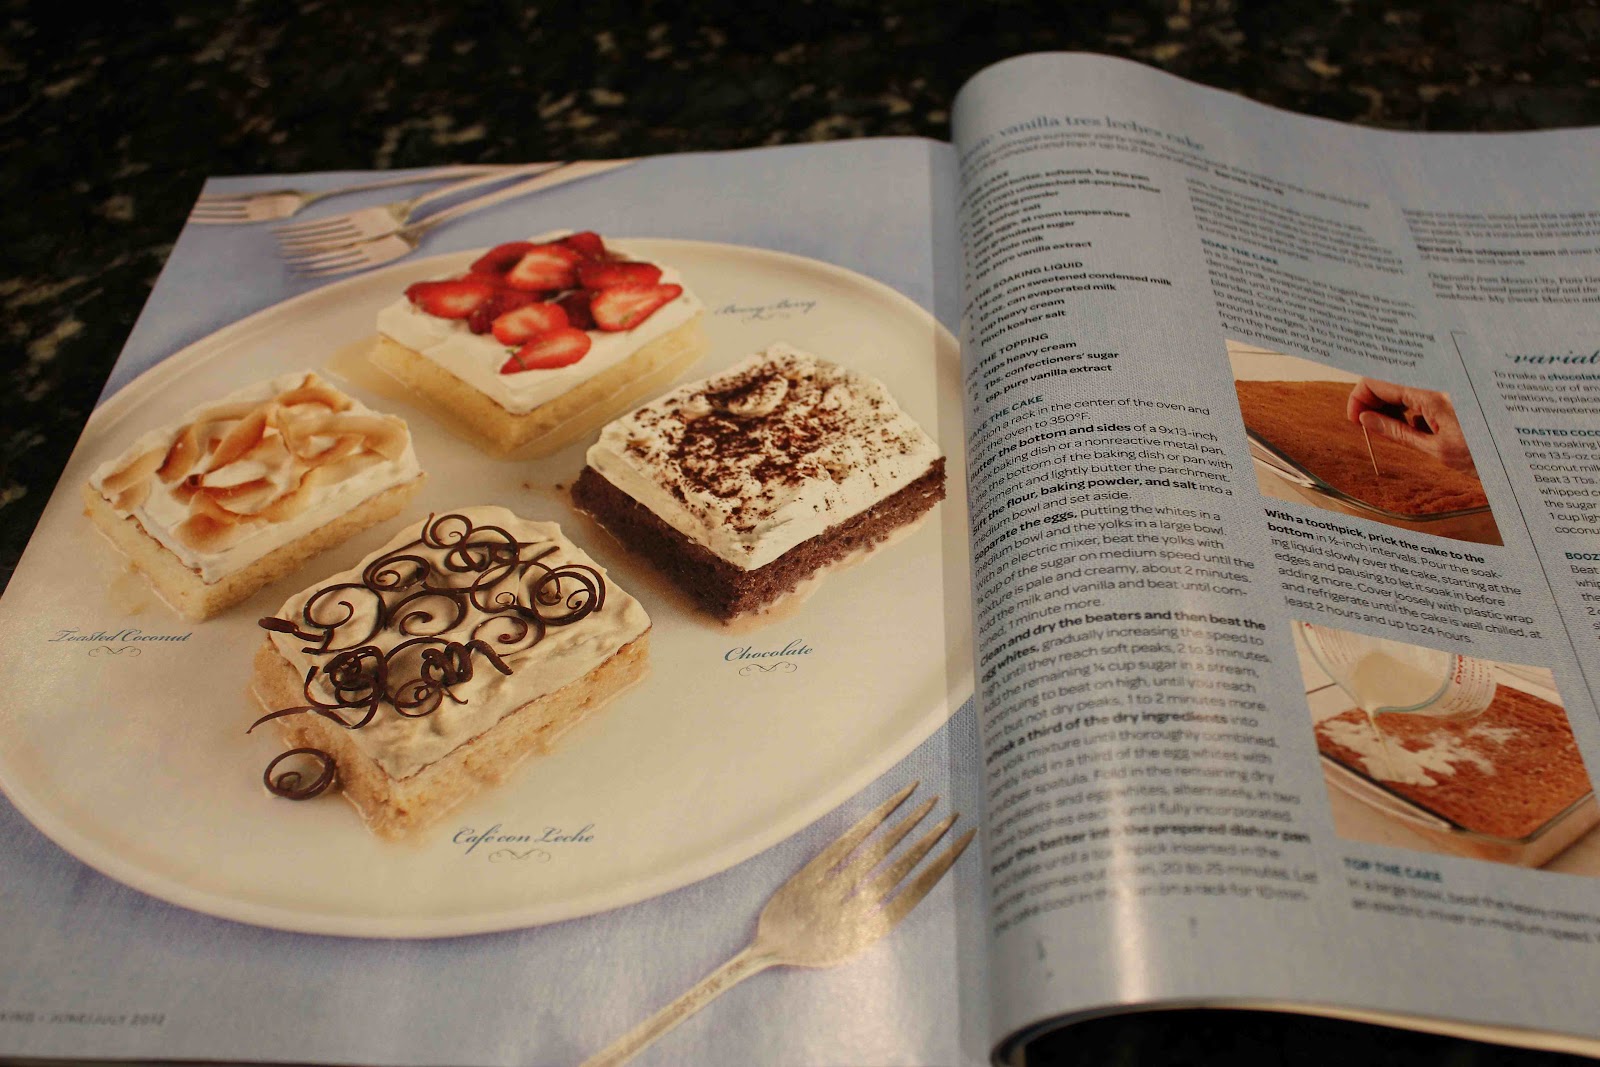
*P.S. >>> There are four different variations of this tres leche cake: chocolate, coconut, cafe con leche or boozy berry, as seen below.
 |
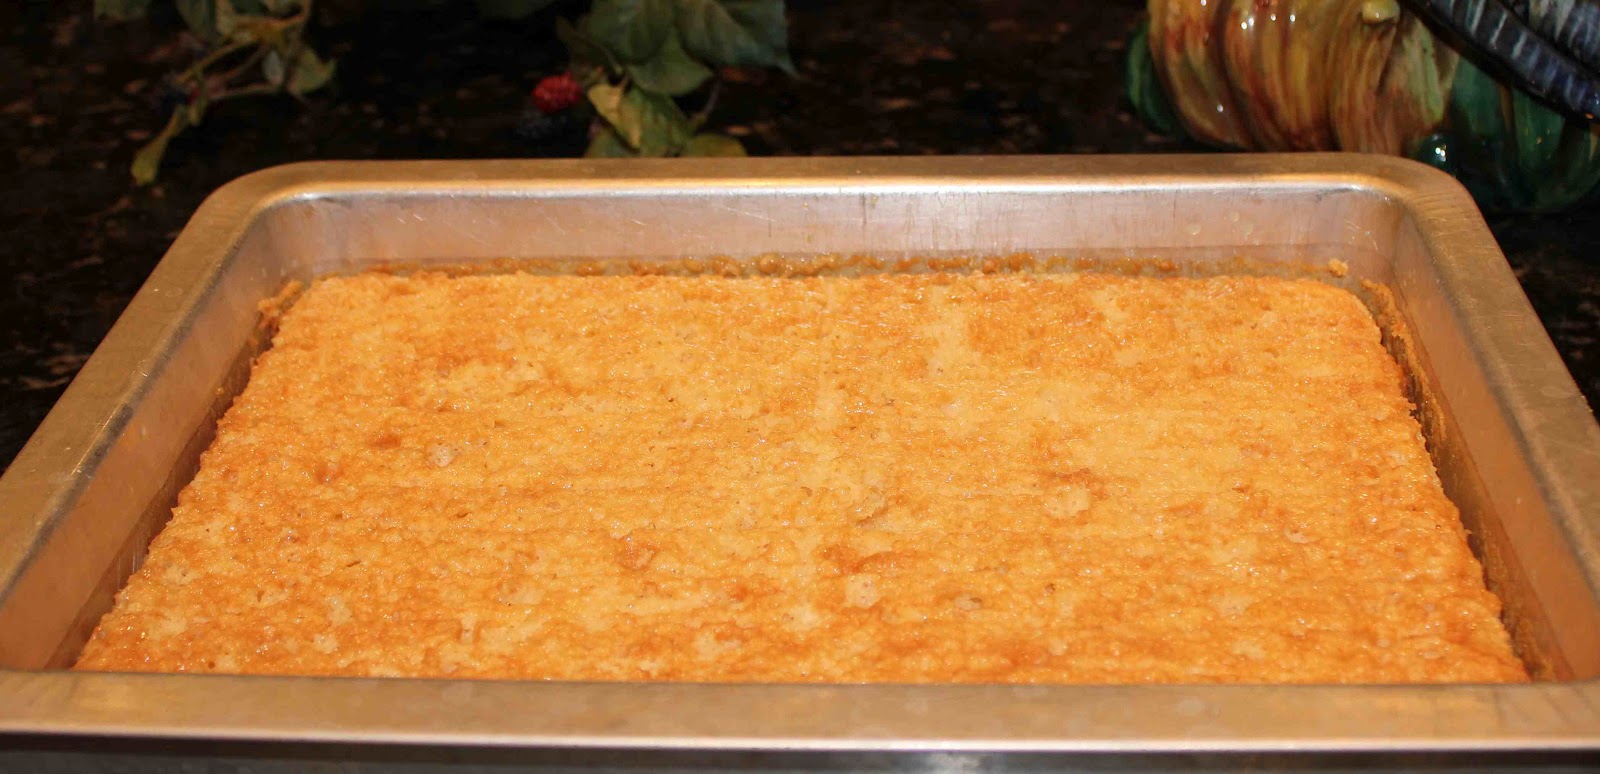
| After baking the cake and letting it cool, prick the cake to the bottom with a toothpick in 1/2-inch intervals. |
 |
| Fine Cooking Magazine…classic vanilla tres leches cake |
 |
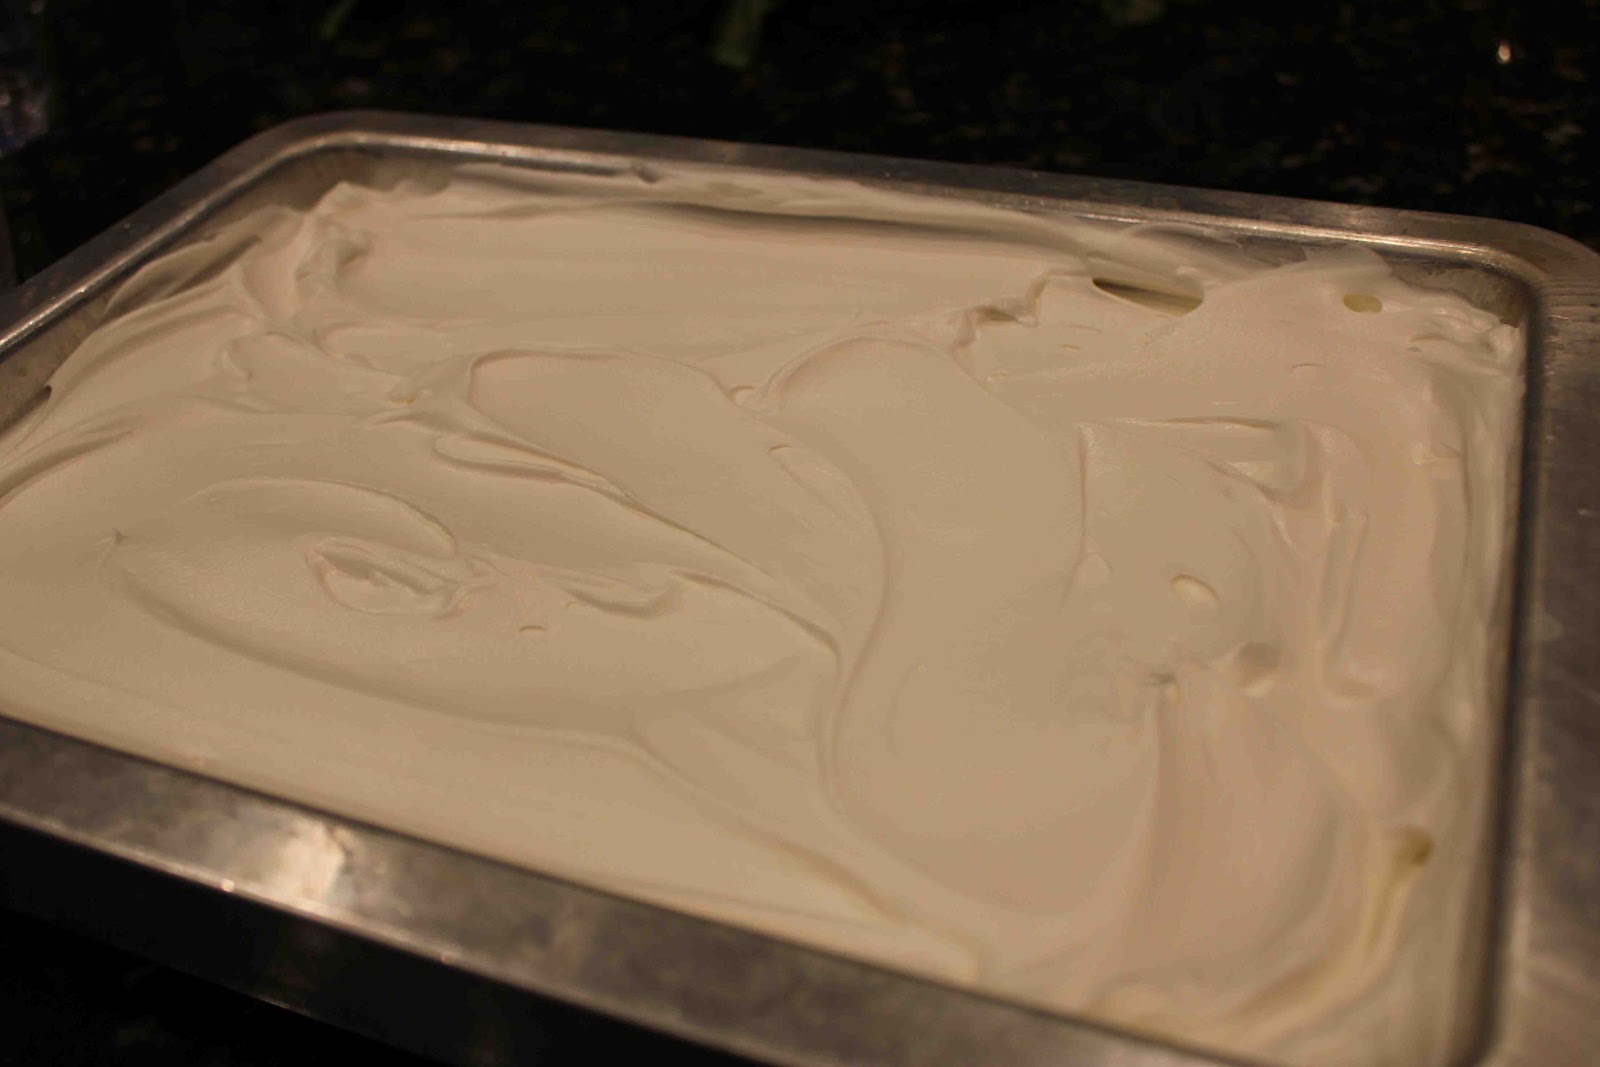
| After pouring soaking liquid onto the cake, prepare frosting (or simply top cake with Cool Whip). |
 |
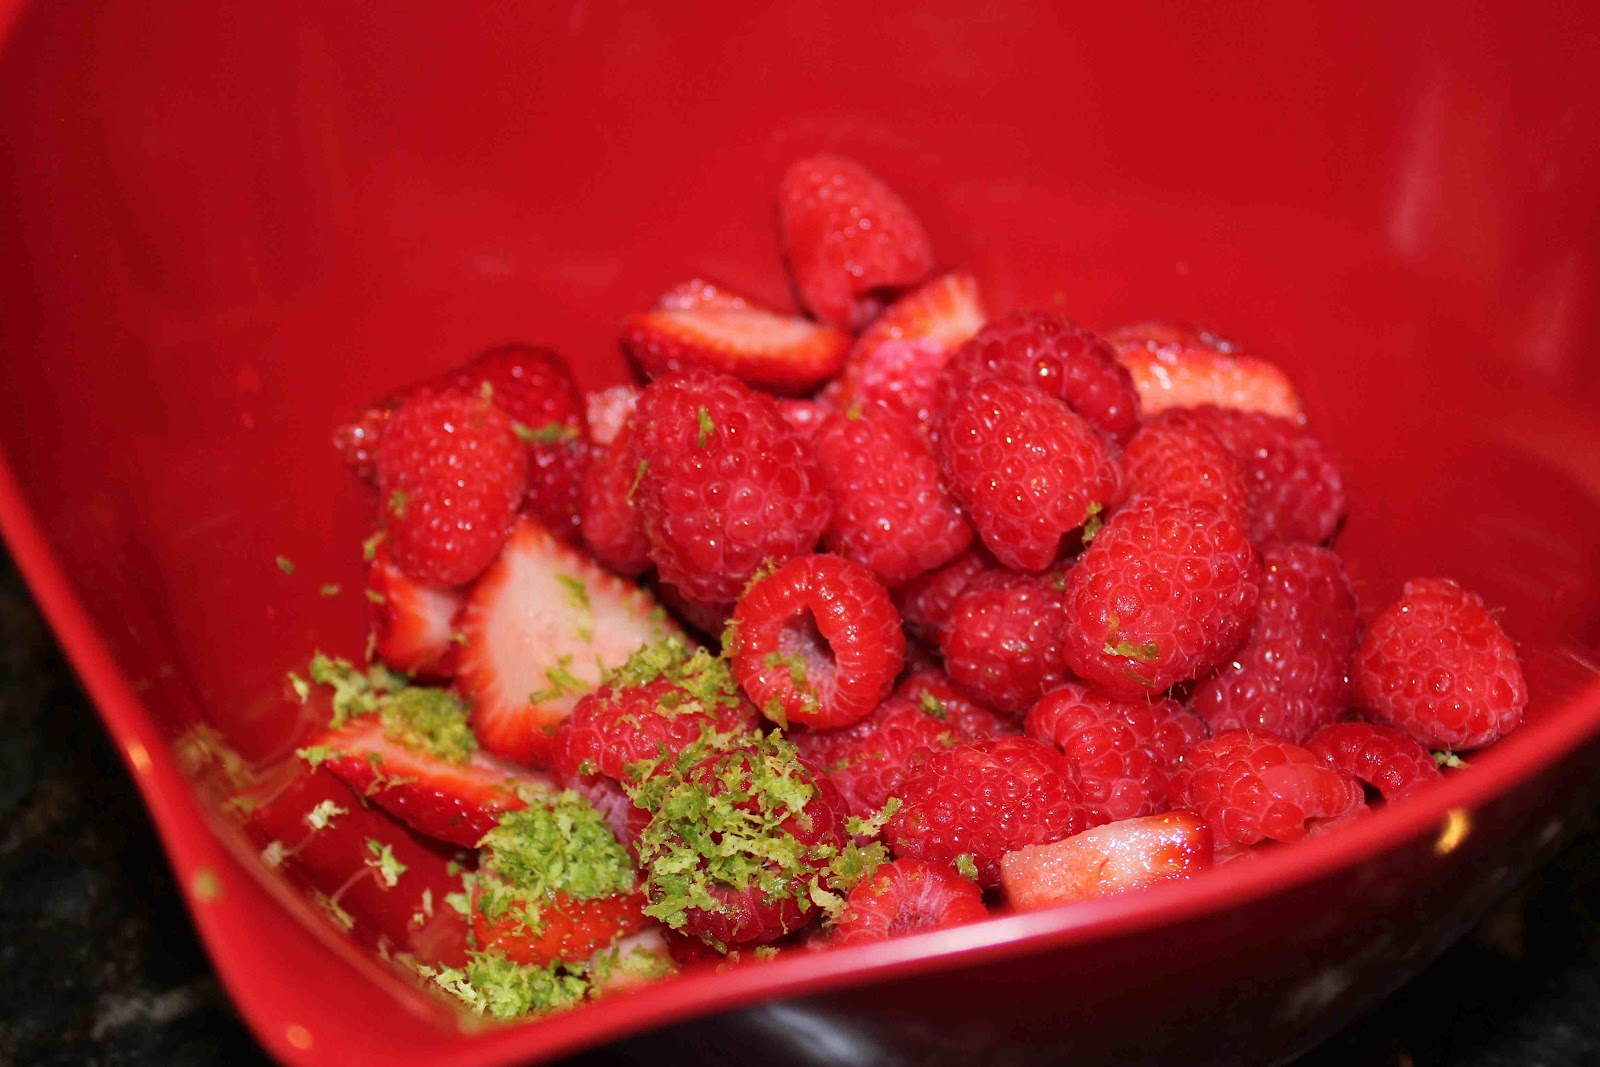
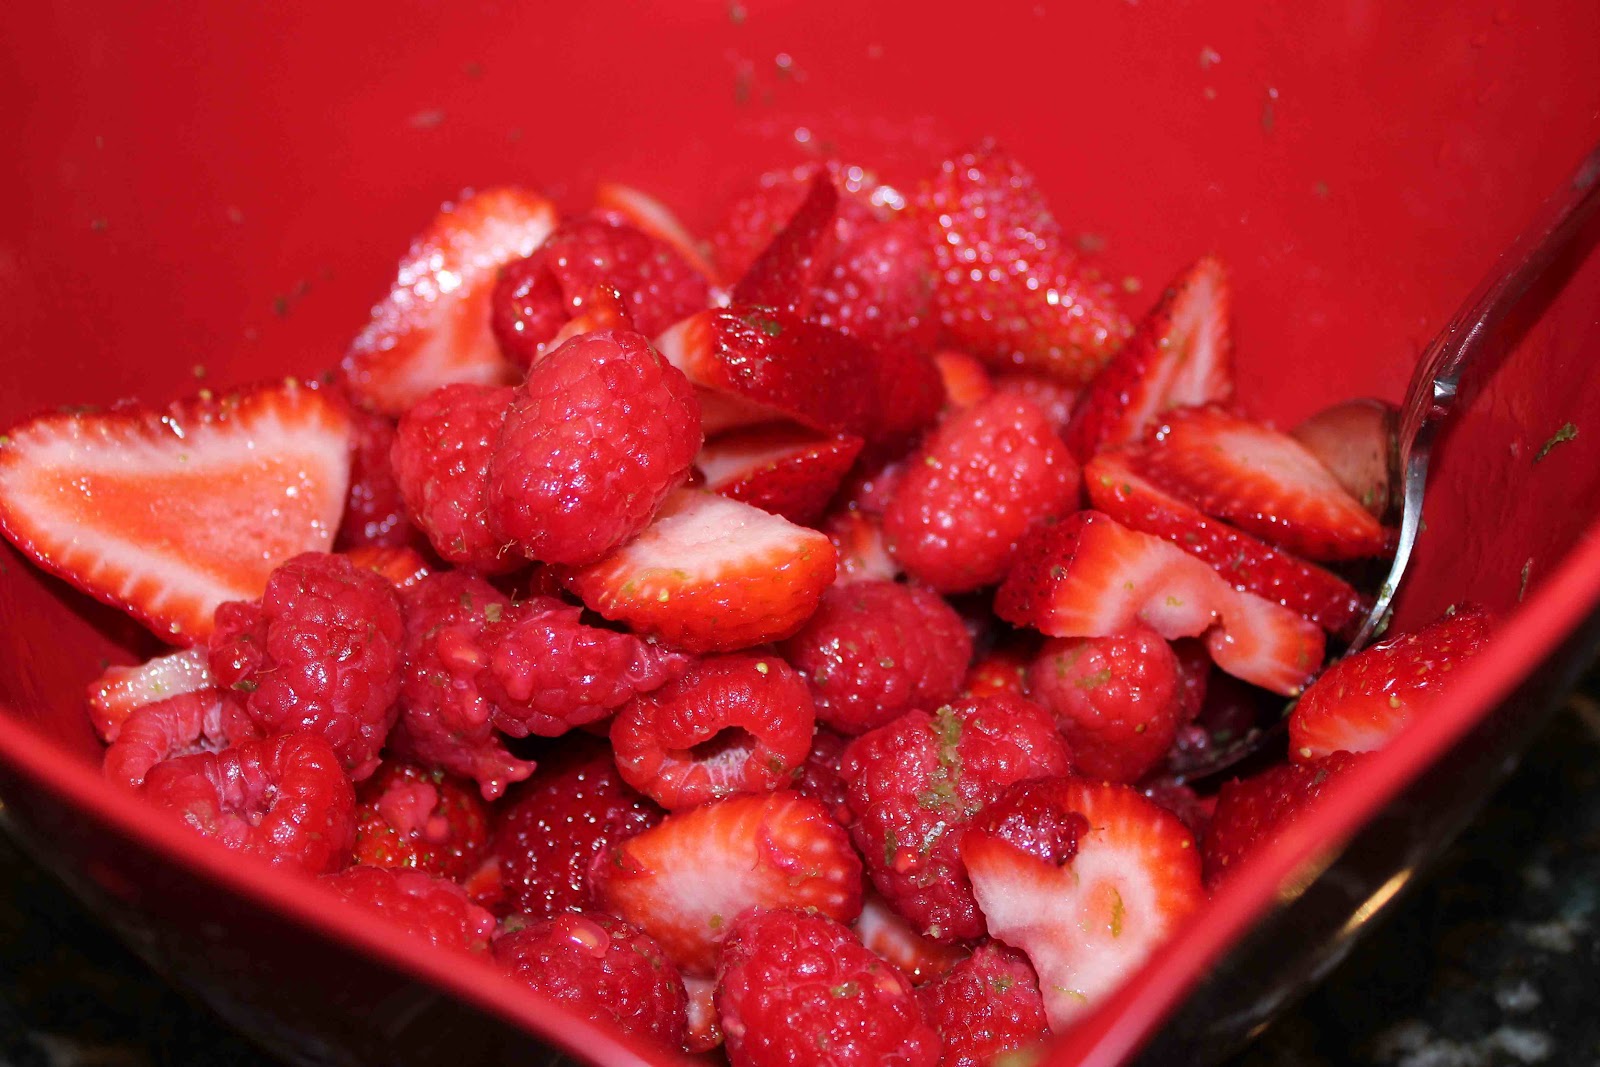
| Combine berries and lime zest. |
 |
| Spoon berries over frosting. |
 |
| Be prepared to dig in! |
 |
| Enjoy! |
Classic Vanilla Tres Leche Cake
Ingredients
FOR THE CAKE
Unsalted buter; softened, for the pan
4 1/2 oz (1 cup) unbleached all-purpose flour
1 1/2 tsp. baking powder
1/4 tsp. kosher salt
5 large eggs, at room temperature
1 cup granulated sugar
1/3 cup whole milk
3/4 tsp. pure vanilla extract
FOR THE SOAKING LIQUID
1 (14 oz.) can sweetened condensed milk
1 (12 oz.) can evaporated milk
1/2 cup heavy cream
Pinch kosher salt
FOR THE FROSTING
2 1/2 cups heavy cream
2 Tbsp. confectioners’ sugar
1/2 tsp. pure vanilla extract
*(to save on time, just use Cool Whip for the frosting)
TOPPING
2 cups strawberries
2 cups raspberries
1 tsp. grated lime zest
Directions
BAKE THE CAKE
1. Position a rack in the center of the oven and heat the oven to 350 degrees F.
2. Butter the bottom and sides of a 9 x 13-inch Pyrex baking dish or a non-reactive metal pan. Line the bottom of the baking dish or pan with parchment and lightly butter the parchment.
3. Sift the flour, baking powder, and salt into a medium bowl and set aside.
4. Separate the eggs, putting the whites in a medium bowl and the yolks in a large bowl. With an electric mixer, beat the yolks with 3/4 cup sugar on medium speed until the mixture is pale and creamy, about 2 minutes. Add the milk and vanilla and beat until combined, 1 minute more.
5. Clean and dry the beaters and then beat the egg whites, gradually increasing the speed to high, until they reach soft peaks, 2 to 3 minutes. Add the remaining 1/4 cup sugar in a stream, continuing to beat on high, until you reach firm but not dry peaks, 1 to 2 minutes more.
6. Whisk a third of the dry ingredients into the yolk mixture until thoroughly combined. Gently fold in a third of the egg whites with a rubber spatula. Fold in the remaining dry ingredients and egg whites, alternatively, in two more batches each, until fully incorporated.
7. Pour the batter into the prepared dish or pan and bake until a toothpick comes out clean from the center, 20 to 25 minutes. Let the cake cool in the pan on a rack for 10 minutes, then invert the cake onto the rack, remove the parchment, and let cool completely. Return the cake to the baking dish or pan (the cake will soak up more of the liquid if returned to the pan it was baked in), or invert it onto a rimmed platter.
SOAK THE CAKE
8. In a 2-quart saucepan, stir together the condensed milk, evaporated milk, heavy cream, and salt until the condensed milk is well blended. Cook over medium-low heat, stirring to avoid scorching, until it begins to bubble around the edges, 3 to 5 minutes. Remove from the heat and pour into a heatproof 4-cup measuring cup.
9. With a toothpick, prick the cake to the bottom in 1/2-inch intervals. Pour the soaking liquid slowly over the cake, starting at the edges and pausing to let it soak in before adding more. Cover loosely with plastic wrap and refrigerate until the cake is well chilled, at least 2 hours and up to 24 hours.
TOP THE CAKE
10. In a large bowl, beat the heavy cream with an electric mixer on medium speed. When it begins to thicken, slowly add the sugar and vanilla and continue to beat just until it holds firm peaks, 3 to 4 minutes (be careful not to over beat).
11. Spread the whipped cream (or Cool Whip) all over the top of the cake and serve.
12. Combine berries and lime zest. Spoon over whipped topping.
Yield: 12-16 servings
Recipe from: Fine Cooking June/July 2012
*Variations
To make a chocolate version of the classic or any of the following variations, replace 1/3 cup of the flour with the unsweetened cocoa powder.
TOASTED COCONUT
In the soaking liquid, substitute one 13.5-oz can unsweetened coconut milk for the cream. Beat 3 Tbsp. dark rum into the whipped cream topping with the sugar and vanilla. Scatter 1 cup lightly toasted flaked coconut over the topping.
BOOZY BERRY
Beat 3 Tbsp. gin or tequila into the whipped cream topping with the sugar and vanilla. Combine 2 cups each raspberries and sliced strawberries with 1 tsp. finely grated lemon or lime zest. Spoon over topping.
CAFE CON LECHE
In the soaking liquid, substitute strong brewed coffee for 1/2 cup of the evaporated milk. For the topping, stir 1 tsp. instant coffee into 2 Tbsp. of the cream until dissolved. Add the remaining cream and beat as directed. Sprinkle the topping with toasted slivered almonds or chocolate curls.