Lemon Ice Box Pie

What can I say…. with apple, pumpkin, and pecan pies to look forward to, here’s a refreshing end-of-the summer dessert before we head into the fall season.  
For Labor Day last weekend, my parents had my husband and me over for lunch as we grilled out hamburgers.  For dessert, my mom had prepared this wonderful Lemon Ice Box Pie and a Chocolate Ice Box Pie (to be blogged next.)  The men (my husband and my dad) ate the chocolate version, while the girls (my mom and I) opted for the lemon.  
This Lemon Ice Box Pie is a family recipe from my Aunt Jolene.  Jolene has some wonderful recipes, including Mrs. Kelm’s Chocolate Cake, Oatmeal Chocolate Chip Cookies, and Chicken Enchiladas.  The lemon pie was a perfect balance of sweet and tart. Not too strong…absolutely perfect.  It’s even better topped with cool whip and accompanied by a cup of coffee (if you like coffee). 
For those that live in Dallas, it’s supposed to be 105 degrees F on Tuesday 😦 You ought to make this Lemon Pie to celebrate our last days of 100+ degree temperatures for the season (hopefully.)  Enjoy!
  

Lemon Ice Box Pie
Ingredients
3 egg yolks
3 Tbsp corn starch
1/4 cup lemon juice
1 Tbsp. lemon rind
3/4 cup sugar
1 cup milk
1/4 cup melted butter
1 cup sour cream
1 baked pie shell

Directions
1.  Mix the corn starch and the sugar. Set aside.
2.  Scald the milk. Add sugar mixture gradually, stirring constantly until thick.  Stir in lemon juice.
3.  Temper egg yolks and add to milk mixture;  cook for 2 minutes longer.  Fold the butter, sour cream, and lemon rind into the mixture.
4.  Pour into baked pie shell and refrigerate until set.  Top with whipped cream.

Yield: 8 servings
Family recipe, Aunt Jolene

Are you ready for Thanksgiving yet?

 
I’m a little late posting this, but back in mid-August when it was 110 degrees F outside and Dallas was on its 50-something day of 100+ degree temperature kick, I made turkey and dressing, or as I called it, “Thanksgiving in August” (similar to the “Christmas in July” phrase.)
My husband Matt has told me all along, that turkey and dressing is his favorite meal of all-time and wished we ate Thankgiving dinner more than just once a year.  I finally “granted” his request, and made a small-scale version of this celebrated meal, and he LOVED it!  Matt even told me that this was the BEST meal I’ve ever cooked while we’ve been married!
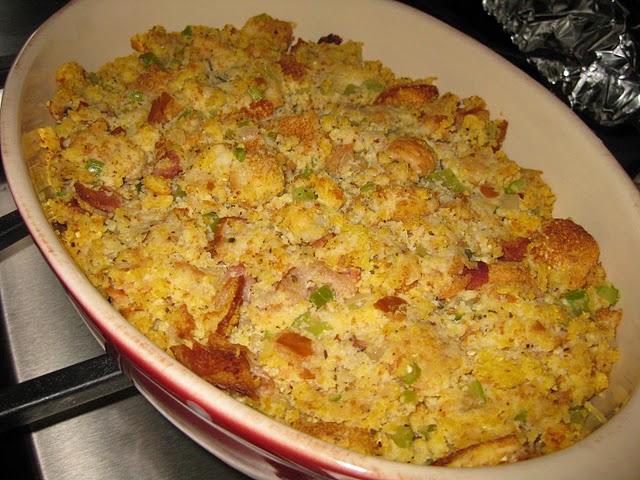
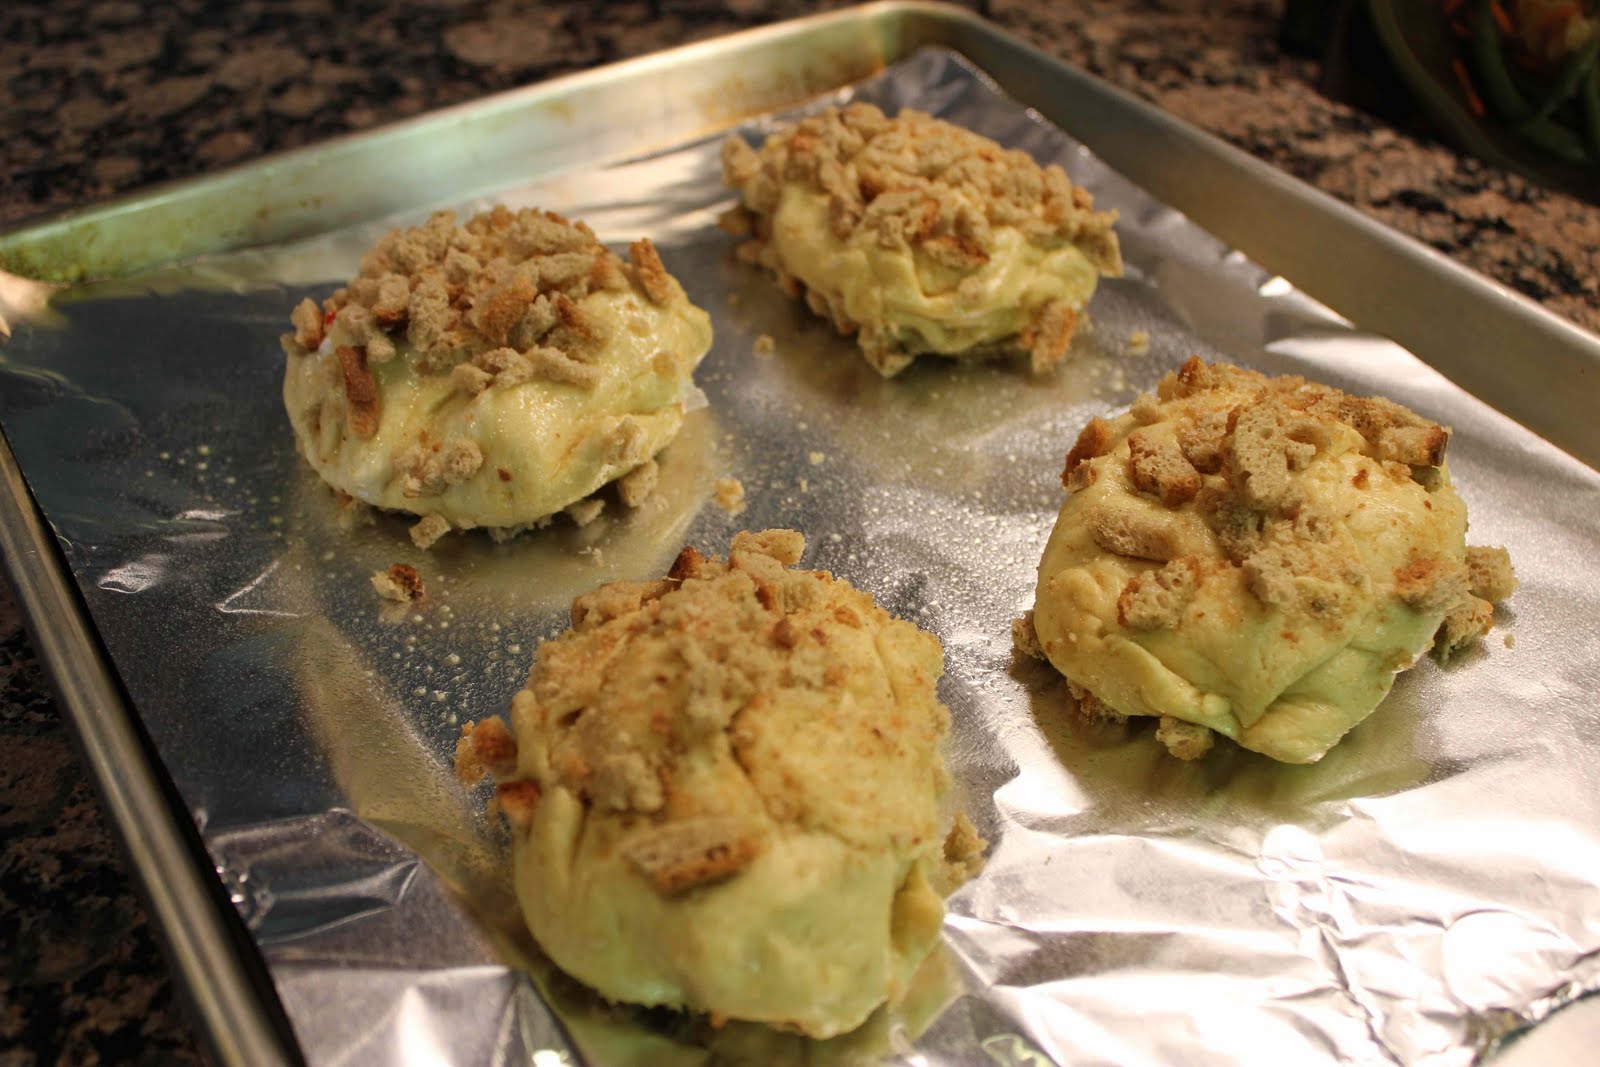
Our favorite part from this “Thanksgiving dinner” was the dressing, also known as Corn Bread Stuffing, a recipe that my mom has used nearly every year since 1976.  The stuffing was simple to make, moist, flavorful, delicious, and by-far,  the highlight of the evening.  In addition, absolutely no butter is used in this recipe.  The “no butter” part is actually a funny story (Paula, if you are reading this, you’re going to laugh)….

My mother-law, Paula, is a country cook….she doesn’t follow recipes, she has them memorized and will change up a recipe every time she makes it depending on what she has in the kitchen, or what mood she’s in.  I was over at Paula’s for Thanksgiving two years ago, helping her make stuffing/dressing (whatever you want to call it).  Instead of sautéing the onions and celery in water, like my recipe calls for, Paula stuck in a whole stick of butter!  I remember saying, “What are you doing???” Then, to my amazement, she threw in another whole stick of butter!!!  Now I was really shocked!!  Paula just laughed and said something about that’s how a country cook makes stuffing, and you can never have too much butter.  Honestly, I can’t remember exactly what she said because I was too fixed on the fact that she added 2 sticks of butter to sauté an onion and celery in!

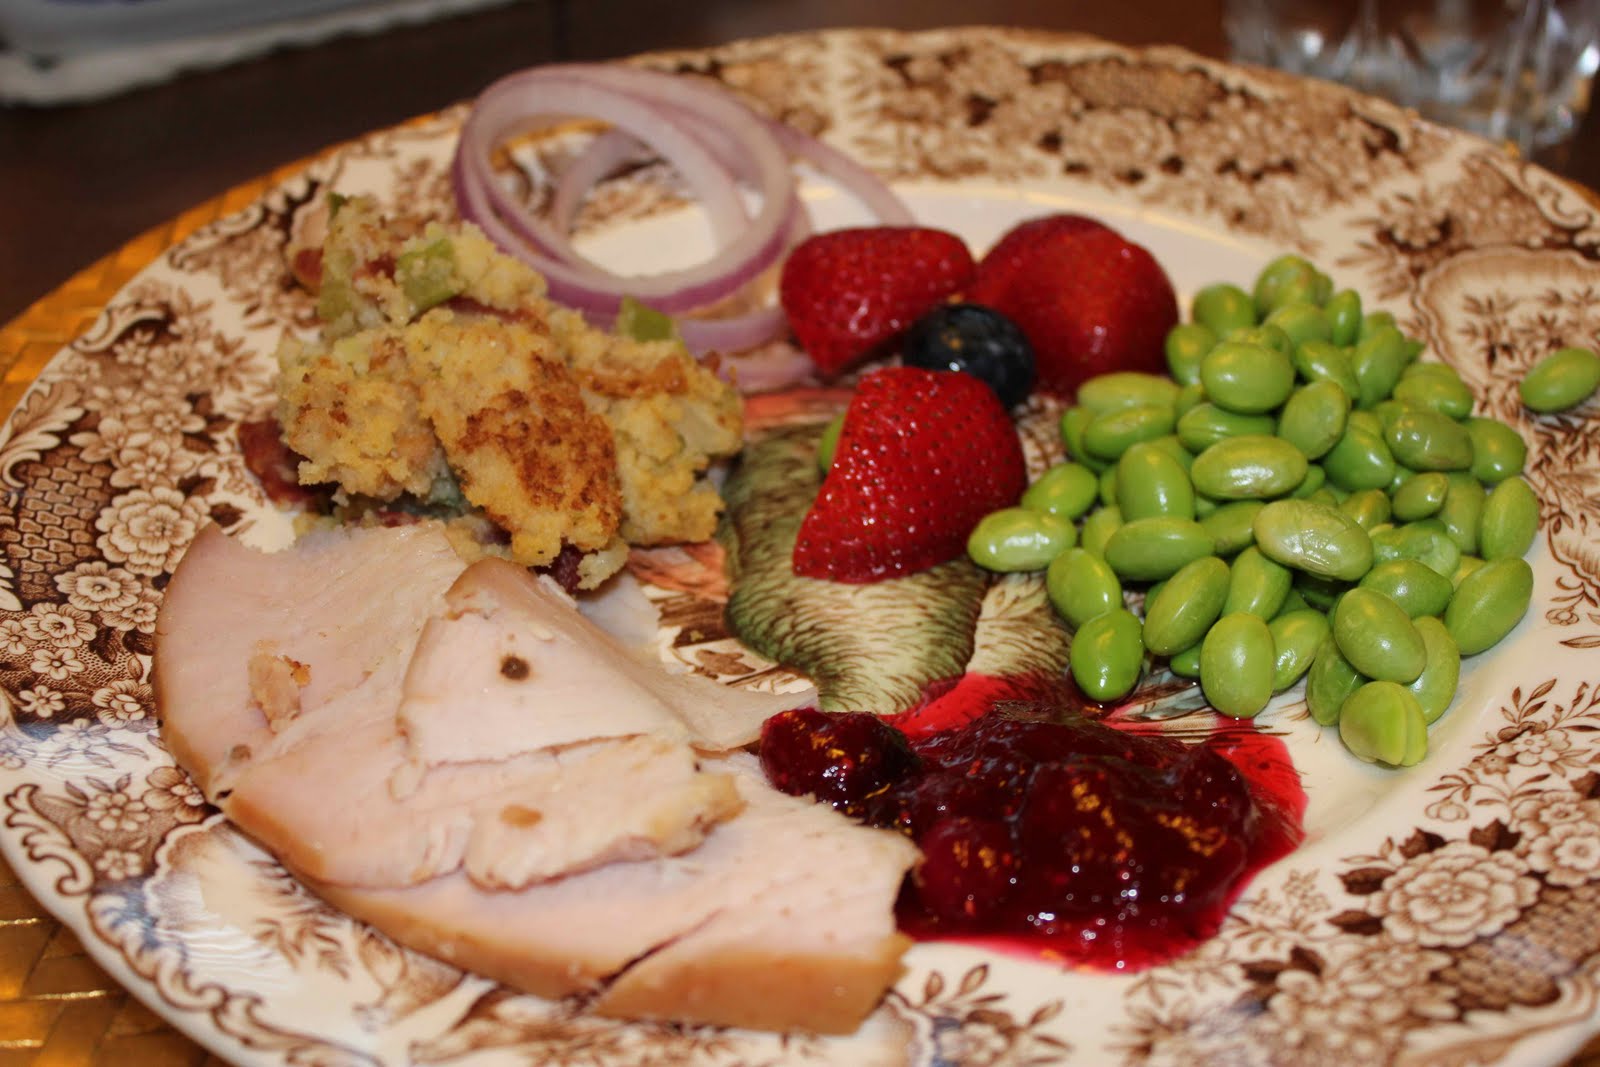
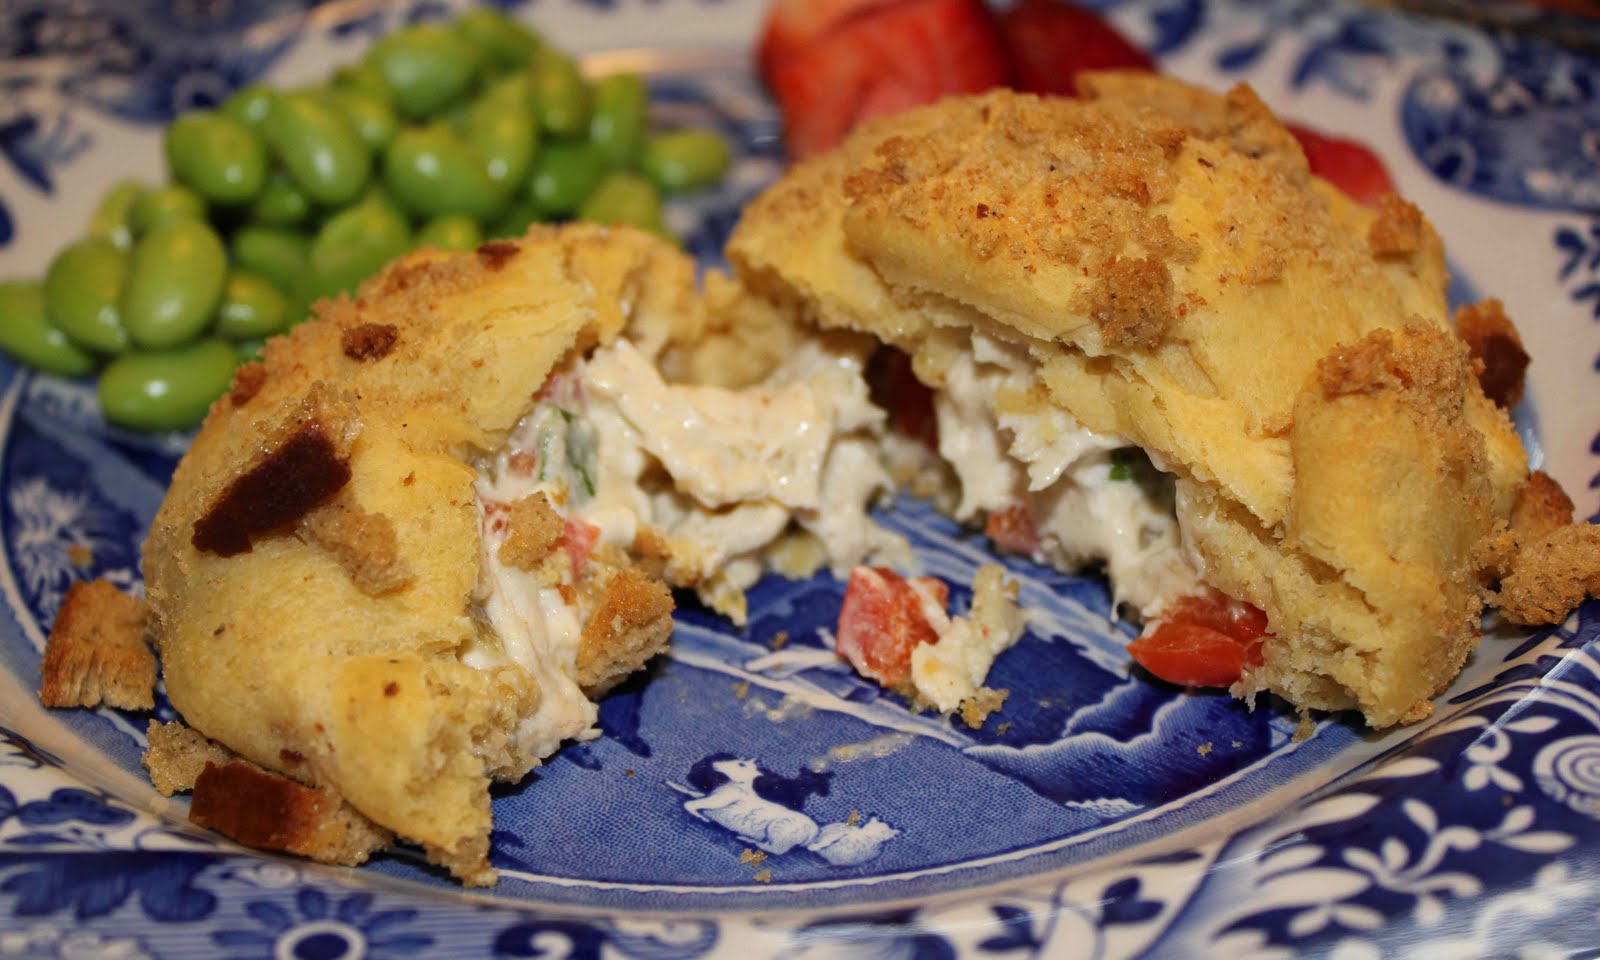
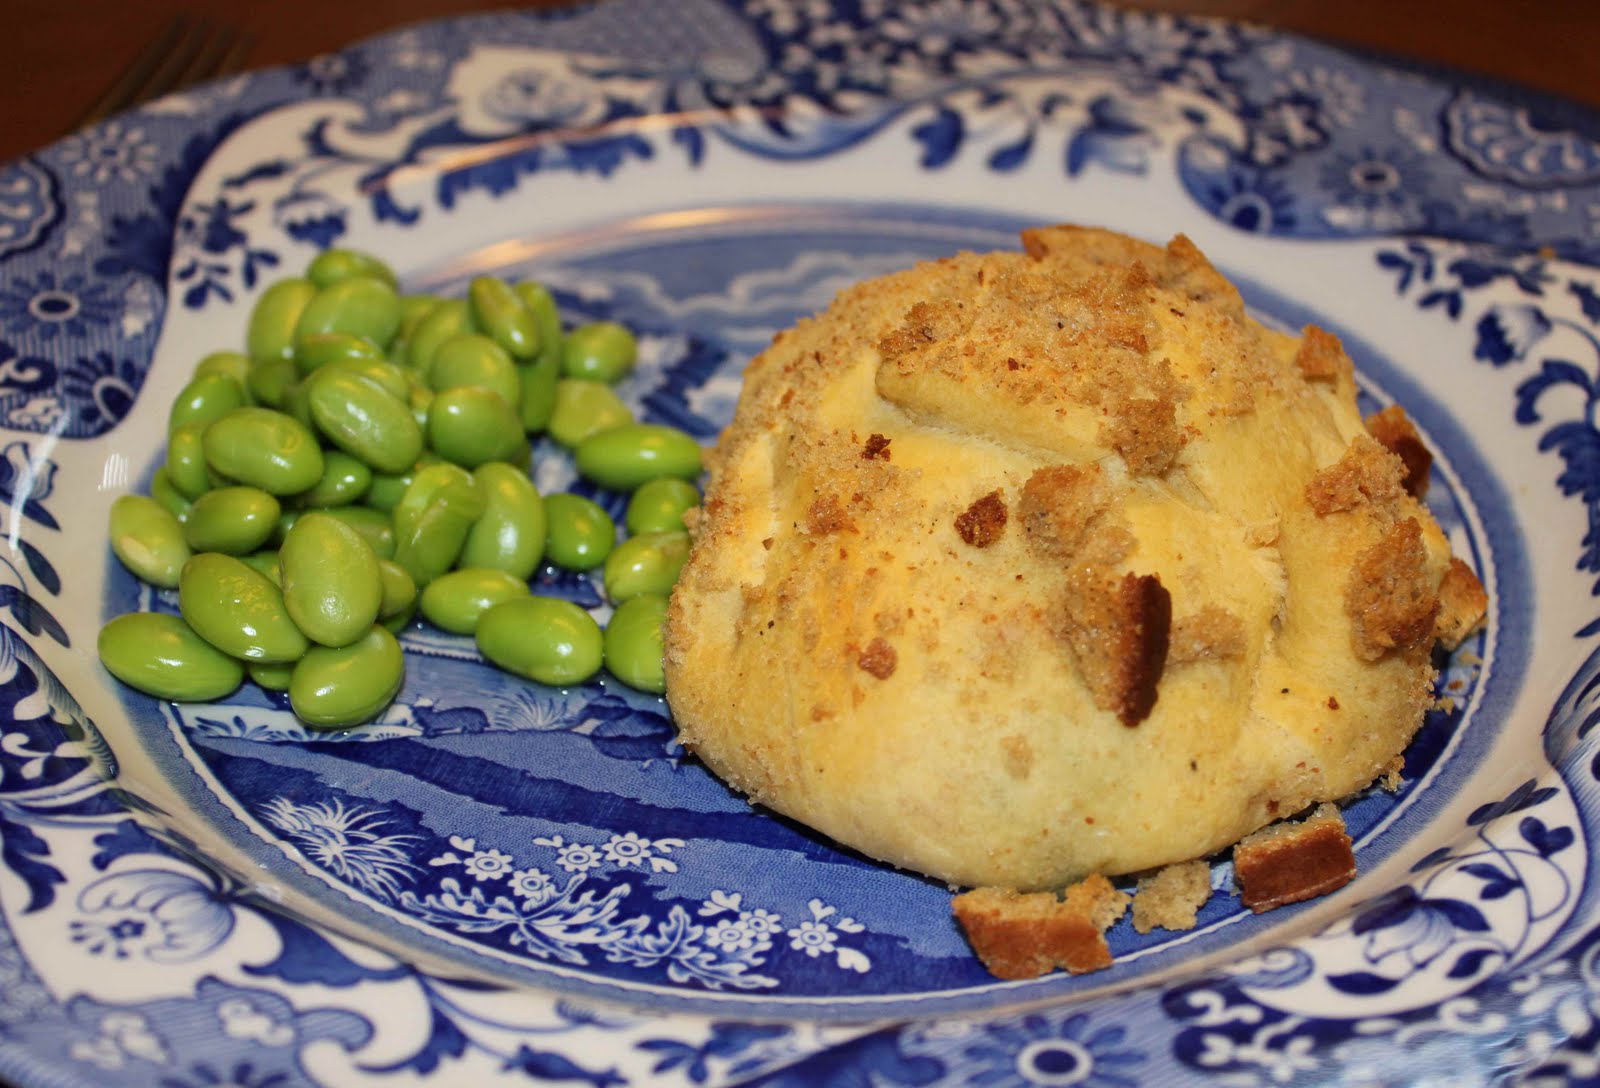
Needless to say, my stuffing was good.  For the turkey, I had Matt buy some turkey breast from Spring Creek BBQ (which was a little weird because the turkey was smoked.  I’m used to roasted turkey on the real day, but it was good none-the-less).  We had fruit, corn on the cob for Matt, and shelled edamame for me as a side.

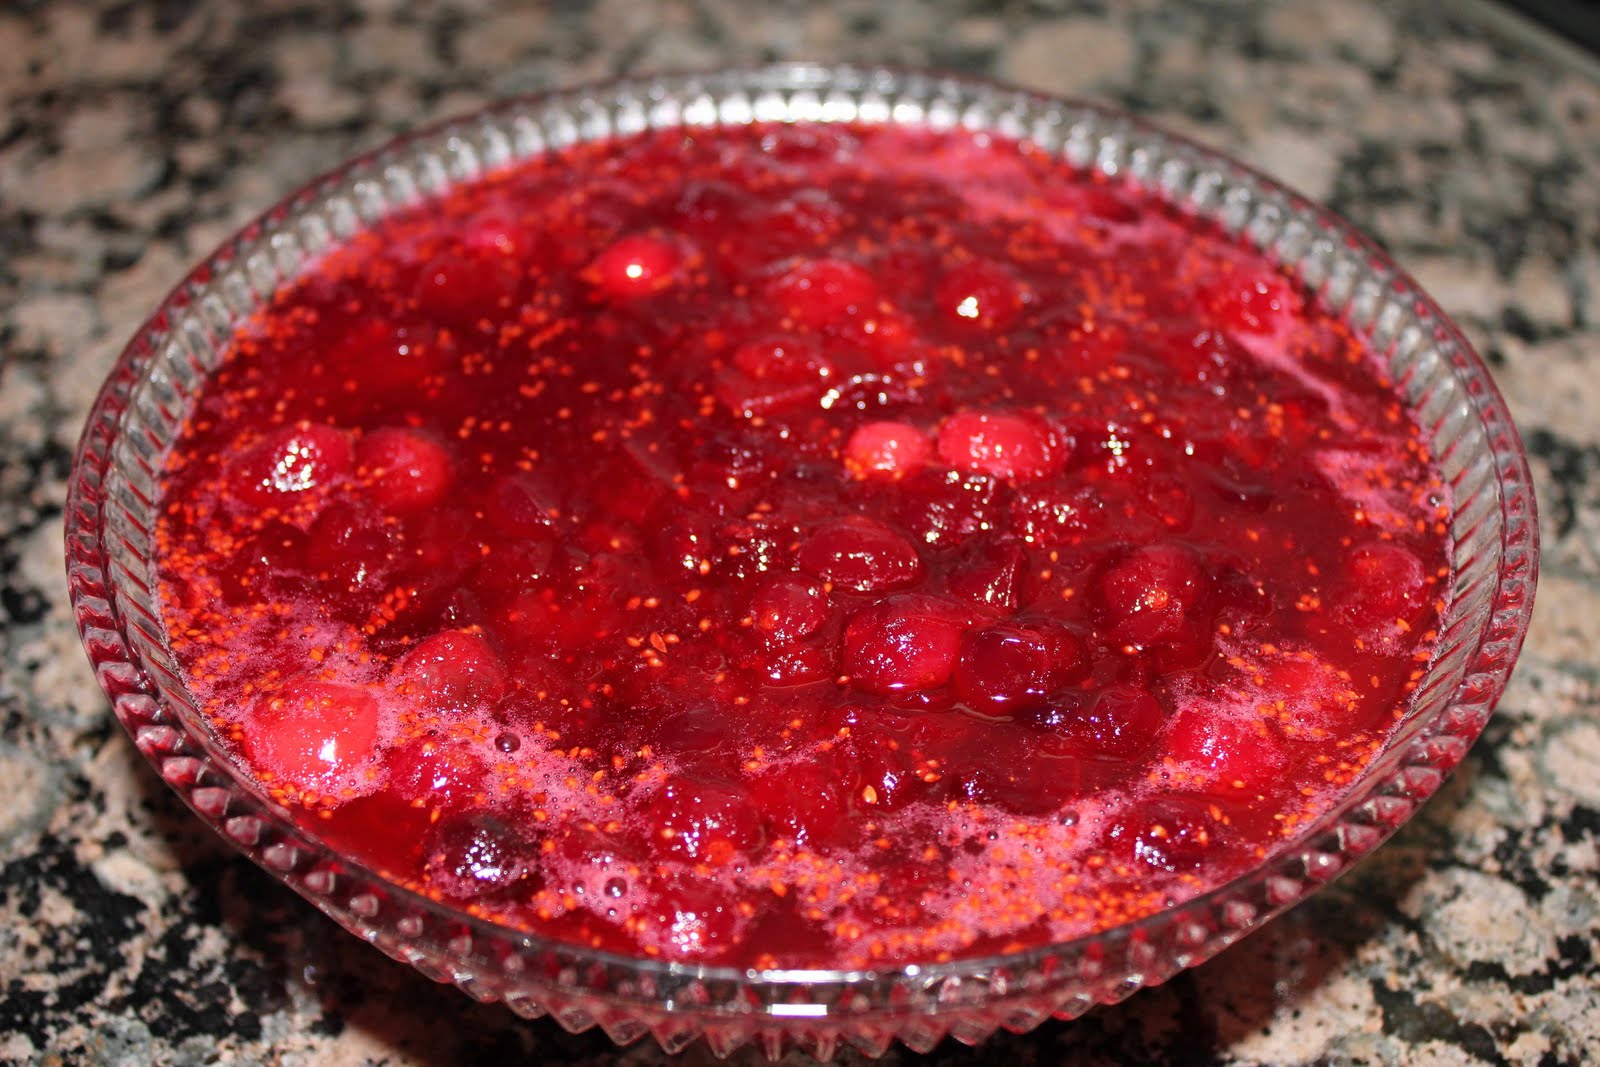
I also made homemade cranberry sauce (recipe below).  You can find the recipe on nearly every frozen package of cranberries, so that is what I used.  It was a little tart, when you compare it to jam, but still very good.  Some recipes call for a little orange juice or zest, which I think would pair wonderfully with cranberries; I’ll have to try that next time!

All in all, our Thanksgiving dinner in August was a hit!  Paula, especially, got extremely excited and started craving turkey and dressing herself.  She then told all of her friends about it, and they had the craving too!  Maybe now that its cooler, you too, can make turkey and dressing. Just call it “Thanksgiving in September.”  Plus, it will give you good practice for the big day come November 24th.

Now for the Cranberry Sauce recipe:

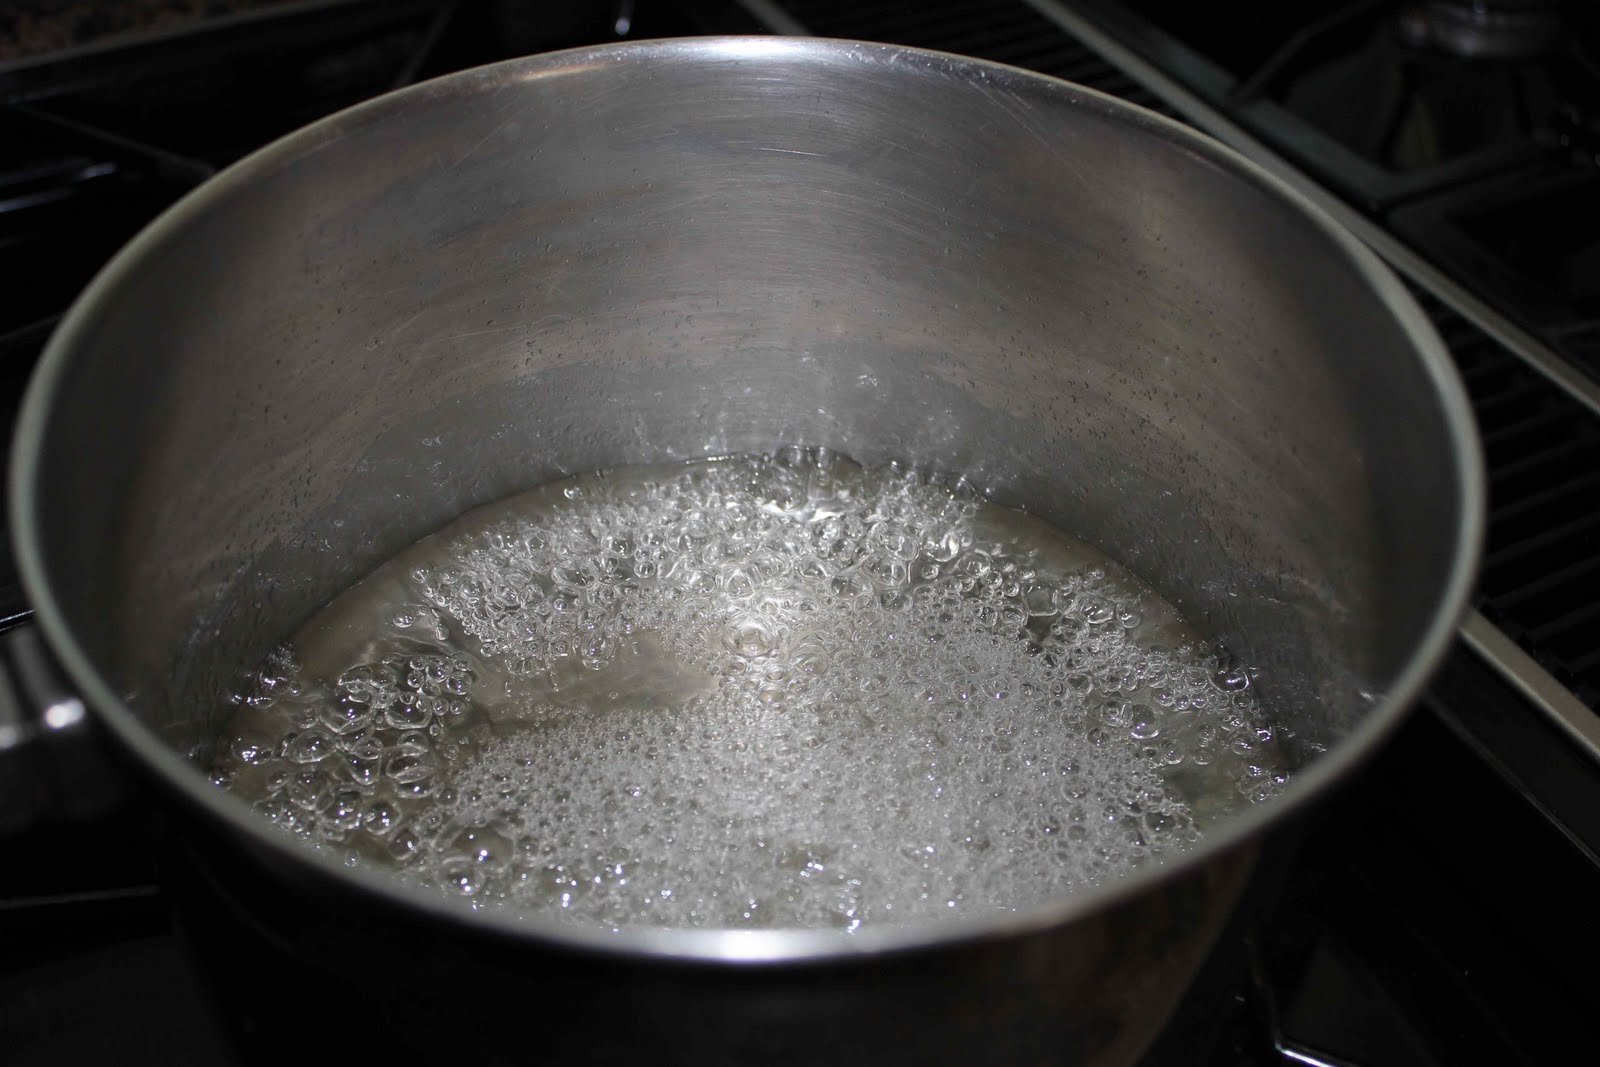
Bring sugar and water to a boil in a medium saucepan.

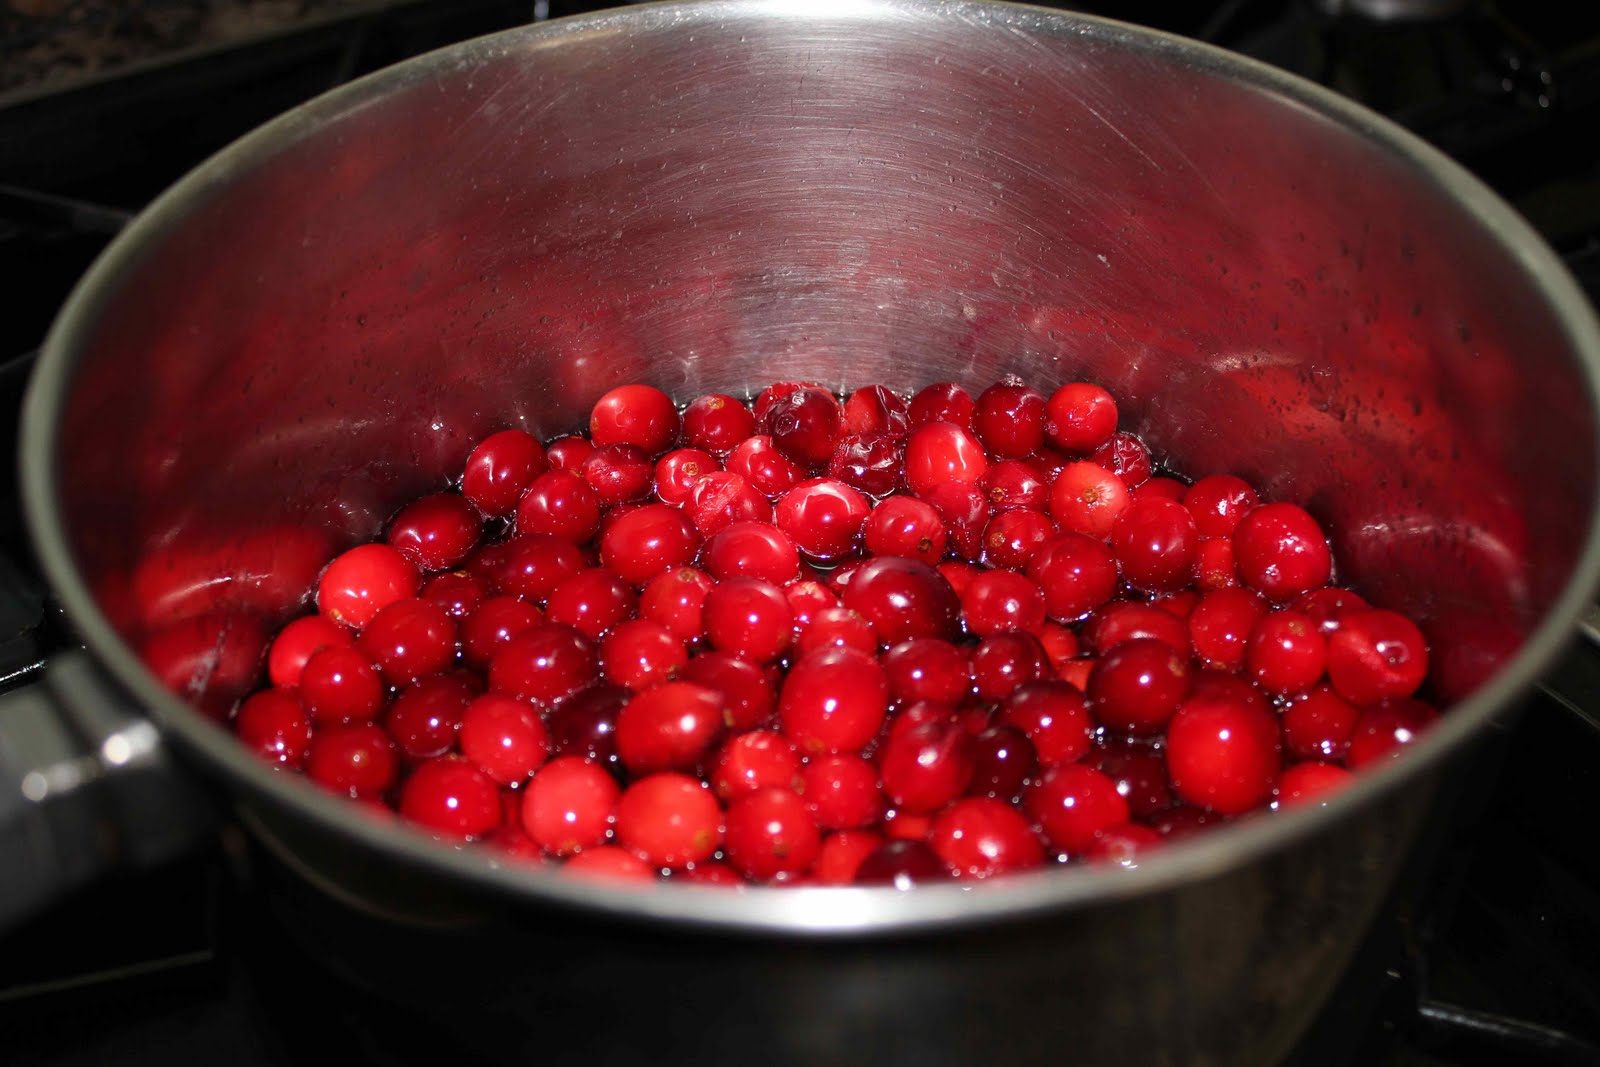
Add the fresh or frozen cranberries.

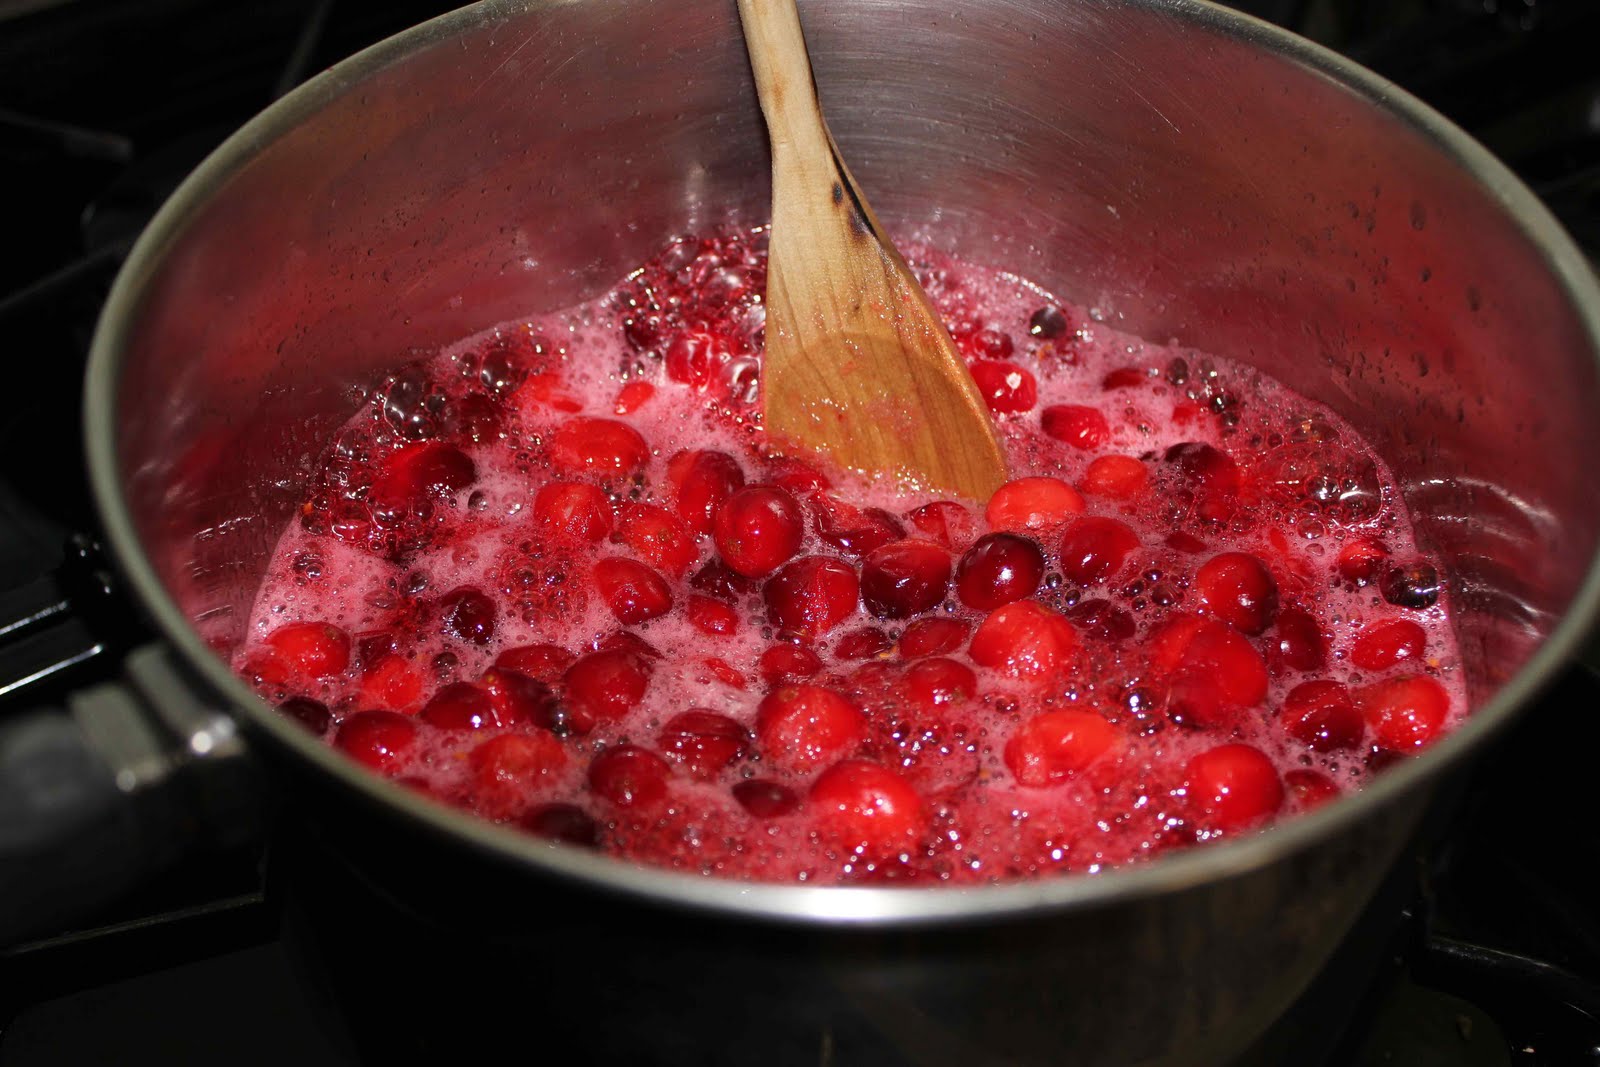
Return to a boil and cook until their skins pop.

Remove from heat, cool to room temperature, and then refrigerate until ready to serve.

Cranberry Sauce
Ingredients
3 cups (12 ounces) fresh or frozen cranberries
1 cup sugar
1 cup water
Directions
1.  Rinse cranberries thoroughly.  In a medium saucepan bring sugar and water to a boil.
2.  Add cranberries, return to boiling and stir occassionally until thier skins pop.
3.  Remove from heat, cool to room temperatue, and refrigerate until ready to serve.
Yield: 8-12 servings
Recipe on the back of nearly cranberry packages.

Mexican Chicken Crescent Squares

These Mexican Chicken Crescent Squares are a new recipe that I just discovered and loved!  They are from The Gathering of Friends cookbook by Michelle Huxtable and Alyse Christensen.  I was so impressed by the bold, slightly spicy flavor from the green chilies and chili powder.  The cream cheese is subtle, yet insures that the chicken remains moist and juicy, and who doesn’t love crescent rolls topped with crunchy seasoned stuffing?
My cousin in Houston makes a similar chicken square recipe for her family and her three kids love them!  The only difference in her recipe is that she used pimentos instead of red peppers and seasoned croutons instead of seasoned stuffing.
Enjoy and let me know what you think!
Combine chicken, cream cheese, green chilies, green onions, chili powder, red peppers, and cumin.
Roll out crescent rolls and press seams together to form a rectangle.  Place equal amounts of chicken in each roll.

Roll up edges and seal.

Dip in melted butter and roll in crushed stuffing.

Bake for 20 minutes in a 350 degree F oven.

Serve hot.

Mexican Chicken Crescent Squares
Ingredients
2 cups chicken, shredded
1/4 cup red peppers, diced
6 oz. cream cheese, softened
1/8 tsp cumin
1/2 cup butter, melted
2-8 oz. cans refrigerated crescent rolls
1 can green chilies, diced
1 cup dry seasoned stuffing, crushed
1 tbsp. green onions, chopped
1/8 tsp chili powder

Directions
1.  Mix together cream cheese, green chilies, green onions, chili powder, red peppers, and cumin.  Add chicken and combine.
2.  Separate crescent rolls to form 8 rectangles, pressing seams together.  Place an equal amount of chicken mixture in the middle of each rectangle and roll up ends. Seal edges.  Dip each square in melted butter and then roll in crushed stuffing.
3.  Place on baking sheet and bake for 20 minutes at 350 degrees F.

Yield: 8 servings
The Gathering of Friends, (Volume 1) by Michelle Huxtable and Alyse Christensen

Parmesan Roasted Potato Wedges

If you know me well enough, you know that I HATE potatoes….baked or mashed that is.  Roasted potatoes on the other hand, I absolutely LOVE!  I think the mushy texture of baked or mashed potatoes are what get me.  However, if there is something I can “crunch” on, like these crispy potatoes, I will love it.

I made these Parmesan Roasted Potato Wedges earlier this summer for girls night with my mom and sister.  I served them with grilled chicken and fruit, and it was delicous.  I think a steak or pork tenderloin would pair perfectly with this side dish as well.

As far as taste goes, the potatoes were great..soft in the inside, crispy on the outside!  In my opinion, Parmesan cheese can make almost anything taste good.  I’m also a huge fan of olive oil…its bold and delicious.  The Italian herbs and seasoning added to a powerful yet wonderful flavor to these potatoes as they perfectly browned in the oven as they roasted at 450 degrees F.

Enjoy!

Toss potato wedges with olive oil, herbs, salt & pepper, and parmesan.

Bake for 40-45 minutes at 450 degrees F. tossing 3-4 times in between.

Enjoy!

Parmesan Roasted Potato Wedges
Ingredients
3 lbs Yukon Gold Potatoes (or whatever you have)
1/4 cup olive oil
1/2 teaspoons salt
1/4 teaspoon pepper
1/2 teaspoon rosemary
1/2 teaspoon thyme
1 tablespoon parsley
1/4 cup parmesan cheese

Directions
1. Preheat oven to 450 degrees F.
2. Cut potatoes in half lengthwise, then 2 more times to create a ‘wedge.’ Toss with olive oil, herbs, salt & pepper, and parmesan.
3. Spread on a baking sheet and bake for 40-45 minutes, tossing 3-4 times in between.

Yield: 4-6 servings
How Sweet It Is

Baked Mozzarella Bites

Who in this world doesn’t like fried mozzarella sticks???? Actually, I can answer that question: my Dad. Dad doesn’t like any any cheese except for on pizza and in “cheese”cake.  He’s so funny!
To my excitement, and hopefully yours, I discovered a healthy version to the infamously fatty, yet delicious fried mozzarella sticks… Baked Mozzarella Sticks from Cooking Light.  With only 91 calories, 5g of fat, and 7g of protein, these are the most healthy and delicious cheese sticks I’ve ever heard of!  As a kid, my mom would take my sister and me to Sonic where we would order two slushees and mozzarella sticks.  As I got older and started eating healthier, I discovered the nutritional flaws with Sonic’s delicious cheese sticks.  
As most of you may know, baking rather than frying foods, will instantly cut fat and calories.  My cheese sticks saved 17g of fat and over 350 calories when compared to Sonic’s!   In addition, my stomach doesn’t feel bad because these mozzarella bits are virtually grease-free!  (As I’ve gotten older, I can’t handle fried foods anymore or else I’ll get sick.)  In addition, the flavor is great, and the panko crumbs add a nice “crunch”.  Marinara sauce is optional, but a great addition.  Take a look at these nutritional stats comparing my mozzarella sticks versus Sonic’s:
Sonic’s Mozzarella Sticks: 
440 Calories | 22g Fat | Saturated Fat 9g | Protein 19g | Sodium 1050mg 
Baked Mozzarella Bites
91 Calories | 5.1g Fat | Saturated Fat 2.8g | Protein 7.2g | Sodium 162mg 
If you’re not convinced to make these yet, I don’t know what will.  They would also be a healthy and quick after-school snack for kids now that most schools start back tomorrow.  The kids won’t have to wait long either…you can make these in less than 20 minutes.  Let me know what you think and enjoy!
Heat Panko crumbs in a skillet over medium-high heat for 2 minutes, or until browned.
Dredge 1-inch mozzarella pieces in egg.

Roll cheese sticks in Panko crumbs.

Place on a cookie sheet, coated with non-stick cooking spray.

Bake for 3-4 minutes at 425 degrees F, or until cheese is softened.

Serve warm with marinara sauce.

Baked Mozzarella Bites
Ingredients
1/3 cup panko (Japanese breadcrumbs)
3 (1-ounce) sticks part-mozzarella string cheese
1 egg, beaten
Cooking Spray
1/4 cup marinara sauce (such as Newman’s Own Marinara)

Directions
1.  Preheat oven to 425 degrees F.
2.  Heat a medium skillet over medium heat.  Add 1/3 cup panko to pan, and cook for 2 minutes or until toasted, stirring frequently.  Remove from heat, and place the panko in a shallow dish.
3.  Cut mozzarella sticks into 1-inch pieces.  Working with one piece at a time, dip cheese in egg; dredge in panko. Place cheese on a baking sheet coating with cooking spray.  Bake at 425 degrees F for 3-4 minutes, or until cheese is softened and thoroughly heated.
4.  Pour the marinara sauce into a microwave-safe bowl.  Microwave on HIGH 1 minute or until thoroughly heated, stirring after 30 seconds.  Serve with mozzarella pieces.

Yield: 4 servings (3 mozzarella bites and 1 tablespoon sauce)
Cooking Light

Calories: 91
Fat: 5.1g
Saturated Fat: 2.8g
Protein: 7.2g
Sodium: 162mg
Calcium: 162mg

Baked Blueberry Oatmeal

Looking for a new breakfast dish?  Well, I found the perfect one in Heidi Swanson’s Super Natural Every Day: Well-loved Recipes from My Natural Foods Kitchen called Baked Oatmeal!  I bookmarked this recipe back in April when I visited my sister at Oklahoma State University to run a 10k, and I’ve been meaning to make it ever since… I don’t know why I waited for so long!
I’ve made this baked oatmeal twice, once using blueberries, natural cane sugar and pecans. The second time I made it with raspberries, maple syrup, and walnuts. Both were amazing; it’s probably the best baked oatmeal I’ve had in my entire life!  It tastes like a cross between a berry crisp/crumble and blueberry/berry pie!
You can use maple or natural cane sugar. Both add a subtle sweetness to the baked The sweetness from the natural cane sugar adds a subtle flavor, while the combination of blueberries and/or raspberries and bananas cannot be beat.  I think what really gives this oatmeal its flavor, is the 1 1/2 teaspoon of cinnamon.  The cinnamon is warm and reminds me of fall, but is not overly powerful.  The pecans or walnut finish off the oatmeal and gives it the “crunch” you’d be looking for.
Drizzle your oatmeal with extra maple syrup for an even sweeter taste…but I think the juicy blueberries and/or raspberries add enough moisture and sweetness that you may not even want syrup.
*Note…You can make this over the weekend and enjoy it for breakfast for the next few mornings. Yum!
Mix together the oats, half of the nuts, cinnamon, natural cane sugar, salt, and baking powder.

Meanwhile, combine the egg, milk, half of the melted butter, and vanilla.
Slice bananas and layer onto the bottom of a greased baking dish.
Top with two-thirds of the berries.

Sprinkle the oat mixture on top.
Next, pour the milk mixture over the oats.
Finally, top with the remaining blueberries and nuts.
Bake for 35 to 45 minutes at 375 degrees F or until top is nicely golden and set.
Remove from oven and serve immediately.


Baked Blueberry Oatmeal
Ingredients
2 cups rolled oats
1/2 cup walnut pieces, chopped (can substitute pecans)
1/3 cup natural cane sugar or maple syrup, plus more for serving
1 tsp aluminum-free baking powder
1 1/2 tsp ground cinnamon
scant 1/2 tsp fine-grain sea salt
2 cups milk (I used skim)
1 large egg
3 Tbsp unsalted butter, melted and cooled slightly
2 tsp pure vanilla extract
2 ripe bananas, cut into 1/2 inch pieces
1 1/2 cups blueberries, raspberries or mixed berries

Directions
1. Preheat the oven to 375 degrees F with a rack in the top third of the oven.  Generously butter the inside of an 8-inch square baking dish.
2.  In a bowl, mix together the oats, half the walnuts, the sugar, if using, the baking powder, cinnamon, and salt.
3.  In another bowl, whisk together the maple syrup, if using, the milk, egg, half of the butter, and the vanilla.
4.  Arrange the bananas in a single layer in the bottom of the prepared baking dish.  Sprinkle two-thirds of the berries over the top.  Cover the fruit with the oat mixture.  Slowly drizzle the milk mixture over the oats.  Gently give the baking dish a couple thwacks on the countertop to make sure the milk moves through the oats.  Scatter the remaining berries and remaining walnuts across the top.
5.  Bake for 35 to 45 minutes, until the top is nicely golden and the oat mixture has set.  Remove from the oven and let cool for a few minutes.  Drizzle the remaining melted butter on the top and serve.  Sprinkle with a bit more sugar or drizzle with maple syrup if you want it a bit sweeter.

Yield: 6 generously, or 12 as part of a larger brunch spread
Recipe from: Super Natural Every Day: Well-loved Recipes from My Natural Foods Kitchen  by Heidi Swanson

Grilled Tomato Basil Chicken

I made this Grilled Tomato Basil Chicken a few weeks ago for girls night with my mom, sister and me.  My dad was at a church meeting, and my husband was at dinner with work, so with the men out of the picture, us girls had a lovely evening at my house. This chicken recipe serves two, but since we all “eat like birds” (which I hear from time to time), it was plenty of food for us. 
If you’re trying to eat healthy, this grilled chicken recipe would be right up your alley.  It has an Italian twist with a flavorful and tasty homemade basil-pesto sauce, fresh Parmesan cheese, juicy red tomatoes, and extra fresh chopped basil to top it off.  The aroma of this dish is detectible and makes you feel like you really are sitting in a fine Italian food restaurant.  A slice of Garlic Ciabatta Bread, and you’ll have a complete meal. 
This recipe is from a new food blog I just discovered, How Sweet It Is, along with some other sinfully sweet looking desserts that I’ll have to try!
Enjoy!  

Grilled Tomato Basil Chicken
Ingredients
2 boneless, skinless chicken breasts
2 large tomatoes
1/4 cup fresh chopped basil
1 tablespoon olive oil
1 clove garlic, chopped
2 tablespoons parmesan cheese

for Marinade:
1/4 cup olive oil
2 tablespoons red wine vinegar
1 tablespoon dried basil
1 tsp dried mustard
2 cloves garlic, minced
2 tablespoons parmesan cheese

Directions
1. 2-24 hours before cooking, tenderize meat (with a meat tenderizer or frying pan), season generously with salt and pepper, and place in a ziplock bag.  Add marinade ingredients and make sure all chicken is covered.  Store in the refrigerator, flipping occasionally, until 30 minutes before grilling.
2.  Preheat oven to 375 degrees F.
3.  Preheat grill, grill pan, or skillet on medium heat (I used a cast iron Le Crueset grill pan) and add 1 tablespoon olive oil.  Grill chicken 2-3 minutes on each side, until just cooked.  Place in a baking dish and bake at 350 degrees for 20 minutes, or until chicken is cooked through.
4.  While chicken is baking, chop one tomato and slice the other into thick rounds.  Lay slices of tomato on a platter.  When chicken is done, slice and lay on top of tomato.  Cover with basil, chopped tomato, garlic and parmesan.

Yield: 2 servings
How Sweet It Is

Breakfast Tacos in Aspen

This past weekend, my family and I traveled to Aspen, Colorado to escape this torturous Texas heat of 110 degree F temperatures.  We thoroughly enjoyed waking up to a crisp 42 degree morning, and 82 degree high in the afternoon.
Every morning, my sister, her boyfriend Colby, and I would wake up around 6:30 – 7:00 and head out to run 6 miles (Colby ran about 10 miles) along the Roaring Fork River in Aspen.  After returning from our run, we would always be starving.  For three days in a row, we (actually my parents…I have to give them credit) made all of us breakfast tacos.  I must admit, I have not eaten sausage in over two years.  Back in January of 2009, I gave food poisoning to my husband, Matt, from two week old sausage!  Poor Matt, I caused him to lose 11 pounds in 12 hours.  hehe 🙂  Ever since then, he has not eaten sausage, and I don’t blame him.
I thoroughly enjoyed these breakfast tacos, especially the sausage, every morning!  These breakfast tacos were a weeknight “breakfast for dinner” tradition that my family and I enjoyed making while I was growing up.  If you want to change up the recipe, you can substitute bacon for sausage, add cheese, salsa, and/or jalapenos if desired.  We usually make these breakfast tacos just as you see here.  Plain and simple…eggs, sausage, and tortilla.
Enjoy!
P.S.  Our hotel, the Hyatt Grand Aspen provides spacious kitchens with Viking appliances, Le Creuset skillets and pans, Wustof knives, a complete place setting of plates, mugs, and cups, and plenty of utensils.  This is our favorite place to stay in Aspen… plus it is gorgeous on the inside! 
You can rent a unit with a spacious kitchen as seen below.  
Cook the sausage over medium-high heat until well done and no longer pink.

Drain sausage on a paper towel.

Meanwhile, scramble the eggs.

Place scrambled eggs and sausage into a flour tortilla.

Roll up the tortilla and enjoy!

Breakfast Tacos
Ingredients
6-8 sausage patties (we used Jimmy Dean) 
6 eggs
4 flour tortillas
Salt and pepper to taste
Directions
1. Slice sausage into sausage patties and cook on both sides over medium-high heat, or until no longer pink in the center.
2. Place cooked sausage on paper towels to soak in the extra grease.
3. Meanwhile, scramble the eggs.
4. Warm tortilla in the microwave for about 20 seconds.
5. Spoon eggs and crumbled sausage over tortilla and roll into a burrito.
Serves: 4

Peach Cobbler

My husband, Matt will tell you that this the best peach cobbler in the world! Recently my mom made this cobbler for dessert, but Matt had to work late and couldn’t attend.  Later that night, I brought home leftover cobbler, and Matt demolished the pan, which is uncharacteristic for him.  He is not a leftovers type of guy, so I was shocked to see the pan empty!
Just three days later, my parents invited us over for lunch after church and my dad grilled out Chateaubriand Steaks, as usual…yum!  For dessert, Matt suggested Peach Cobbler again!  Usually I would never ask for a dessert three days after having just had it, but my mom’s Peach Cobbler was even better the second time!  I think she increased the baking time a few extra minutes, which made the crust a little crispier and even more buttery!
Try this recipe for you and your family.  I promise it’s the easiest Peach Cobbler you’ll ever make, and the taste is extraordinary.  We used freshly sliced peaches, but if you’re lazy, or don’t have fresh peaches on hand, feel free to use canned peaches.  Just don’t sweeten them with sugar and water over the stove like you would the fresh fruit.  
Finally, don’t forget to serve this cobbler hot with a big scoop of vanilla ice cream.  When you’re done, store the cobbler in the refrigerator (if you have any leftovers.)  As a kid growing up, my favorite part about Peach Cobbler was eating it cold out of the refrigerator the next day!  It is surprisingly good cold.  Enjoy!
For fresh fruit only, sweeten peaches with sugar and water in a sauce pan.
Meanwhile, mix flour, sugar, baking powder, and salt. 

Gradually stir in milk and beat until smooth.

Pour milk mixture over melted butter.

Spoon peaches on top.  Do not stir peaches into the batter.

Bake for 30 to 40 minutes in a 375 degree oven.

Peach Cobbler
Ingredients
1/2 cup (1 stick) unsalted butter
*3 to 3 1/2 cups fresh sliced peaches (can also use berries, optional), sweetened to taste with 3/4 cup sugar
3/4 cup water
1 cup flour
1 cup sugar
1/4 tsp salt
1 tsp baking powder
1 cup milk
*Note: Can use canned peaches, but do not sweeten them with the 3/4 cup sugar and 3/4 cup water
Directions
1. Melt butter in a 9 x 13-inch pan in an oven, preheating to 375 degree F.
2. For fresh fruit only: heat sweetened fruit and water in saucepan.  
3. In the meantime, mix flour, sugar, baking powder and salt in mixing bowl.  Gradually stir in milk and beat until smooth.
4. Pour over butter and top with fruit mixture.  
5. Bake for 30-40 minutes at 375 degrees F.
Yield: 10 to 12 servings

Penne alla Betsy

If you’ve never had Penne alla Betsy, then this is a recipe that you need to try! (By the way, this is a repeat from my blog, and it has been too long since I’ve eaten it…since August 2010!)  I made it for dinner tonight because it was quick and easy, and one of my favorites.  In addition, last night I had my sister and mom over for dinner and fixed Grilled Tomato Basil Chicken (to be blogged soon) and I had leftover fresh basil, which this recipe calls for.

Penne alla Betsy incorporates some of my favorite ingredients: pasta, shrimp, a creamy tomato sauce, and tons of fresh basil.  It is so flavorful, and can be prepared and served up within 20 minute.  Note: the recipe calls for raw shrimp, but I used cooked shrimp, and did not saute it in the pan for as long…I simply warmed it up.

The Penne alla Betsy recipe comes from Ree Drummond’s cookbook, The Pioneer Woman Cooks: Recipes from an Accidental Country Girl.  I really like this cookbook, not just for the recipes, but for the step-by-step picture instructions she shows, and the interesting stories behind each recipe.  (Sorry, but I don’t have a really interesting story relating to making Penne alla Betsy.  All I can remember is making this recipe for the first time for my husband, Matt.  I also remember being shocked with how good this dish was!)

For those of you who have not heard of Pioneer Woman, she is a city girl that married a cowboy, who is referred to as the Marlboro Man, from Oklahoma.  The Pioneer Woman has attracted millions of followers to her blog, and she is extremely popular in the cooking world.

Enjoy Penne alla Betsy!

Saute shrimp over medium-high heat in 1 tbsp butter and olive oil for about 2 minutes, or until opaque.

Remove shrimp and saute onion and garlic in remaining 1 tbsp butter and olive oil over medium heat for about 3 minutes, or until onion is translucent.

Add tomato sauce and heavy cream and stir until combined.

Add shrimp to sauce.

Add herbs and cooked, drained pasta.  Sprinkle with salt and pepper.

Serve and garnish with Parmesan cheese, if desired.


Penne alla Betsy
Serves: 4-6
Ingredients
  • 1 lb. penne pasta
  • 1 lb. large shrimp
  • 2 tbsp butter
  • 2 tbsp olive oil
  • 1 small onion, finely chopped
  • 2 garlic cloves, finely chopped
  • 1/2 cup dry white wine (I omitted)
  • 1 (14.5 oz.) can tomato sauce
  • 1 cup heavy cream
  • Milk for thinning
  • 1/4 cup chopped flat-leaf parsley
  • 6 basil leaves, cut in chiffonade
  • Salt
  • Freshly ground black pepper
Instructions
  1. Bring pot of water to a boil. Cook the penne until al dente (firm yet tender). Drain and set aside.
  2. Begin by peeling and deveining shrimp and rising them under cold water.
  3. In a small skillet over medium-heat, add 1 tablespoon of butter and 1 tablespoon of olive oil. When the pan is hot, add the shrimp. Stir and cook on both sides until it is just starting to turn opaque, about 2 minutes. Remove to a plate and allow to cool slightly.
  4. In a large skillet over medium heat, add the remaining butter and olive oil. Add the garlic and onion. Stir to combine and cook, stirring occasionally, until the onion is translucent, about 3 minutes.
  5. If using wine, pour into pan and allow to evaporate, about 45 seconds. Pour in the tomato sauce and stir to combine. Reduce the heat to low.
  6. Pour in the cream. Stir well to combine; reduce heat to simmer.
  7. Add the shrimp to the sauce and stir gently to combine. Next add the herbs and cooked, drained pasta. Stir gently to coat. If the sauce is too thick, add a little milk to get it to the right consistency. Add salt and pepper. Serve.
Notes
Source: The Pioneer Woman