Cedar Planked Salmon

IMG_3689

As you know, I write a Resident Recipe column in our monthly neighborhood magazine. The magazine is quite impressive for a neighborhood publication and includes 70 full-color pages each month!

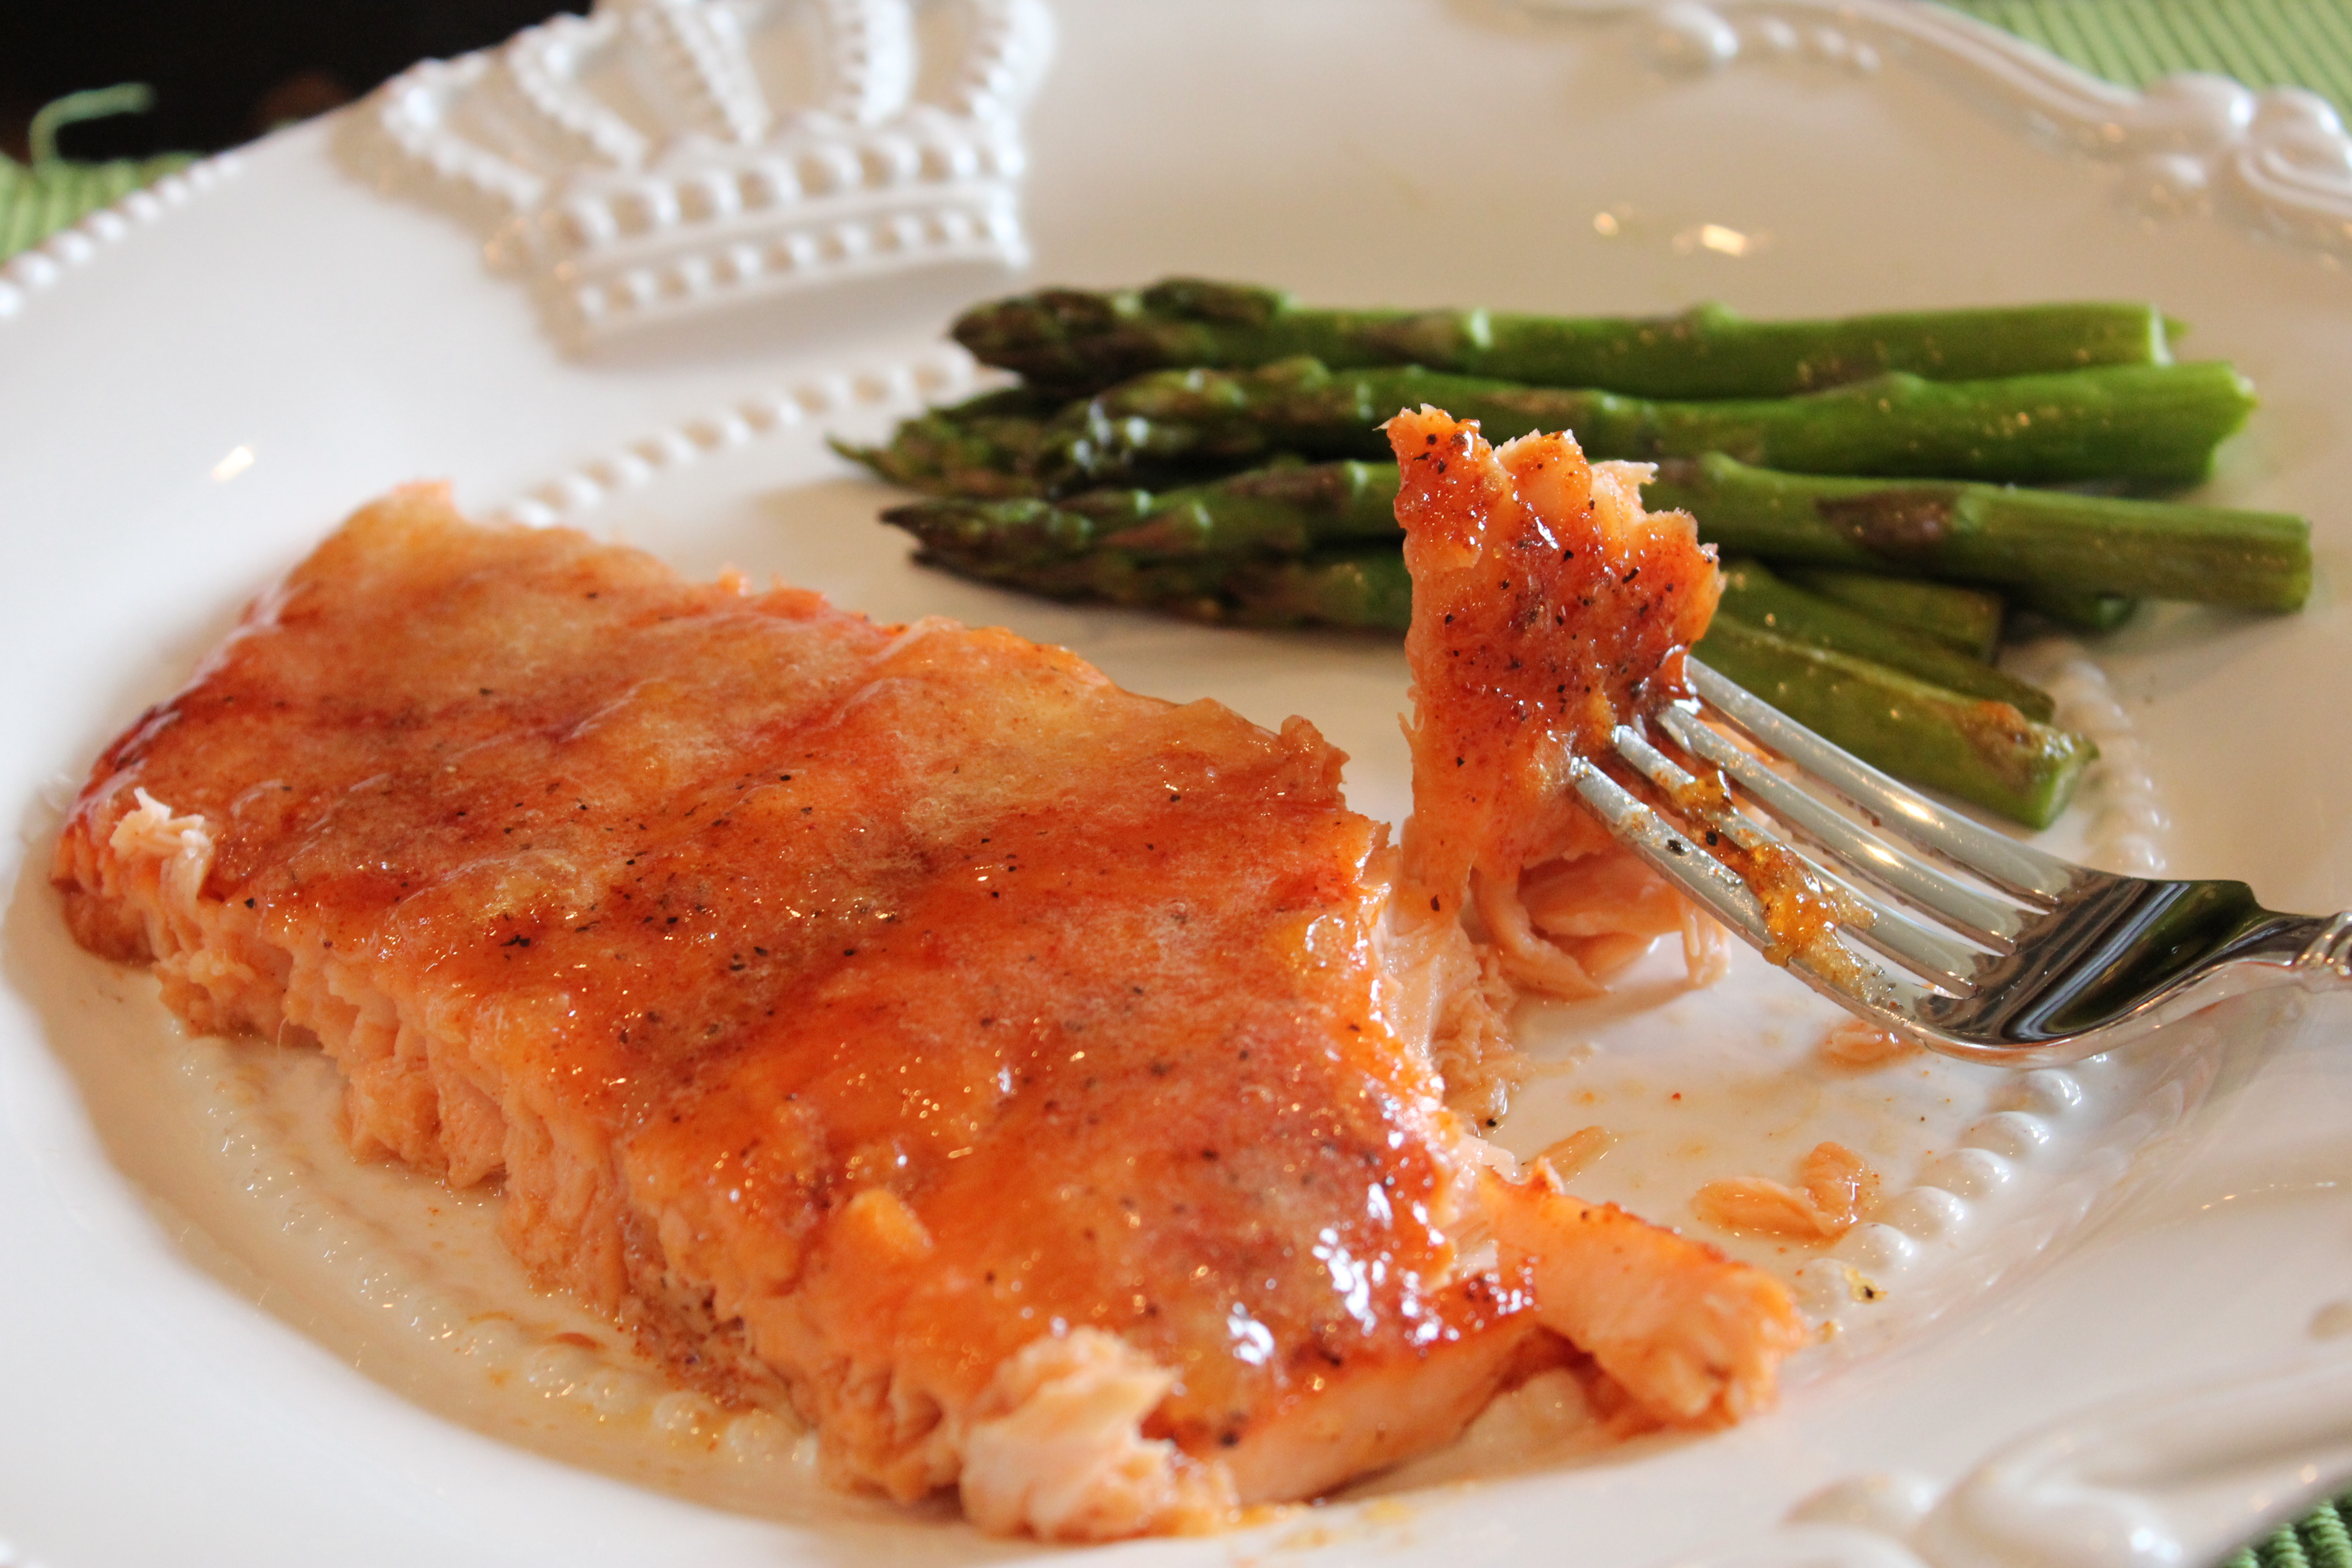
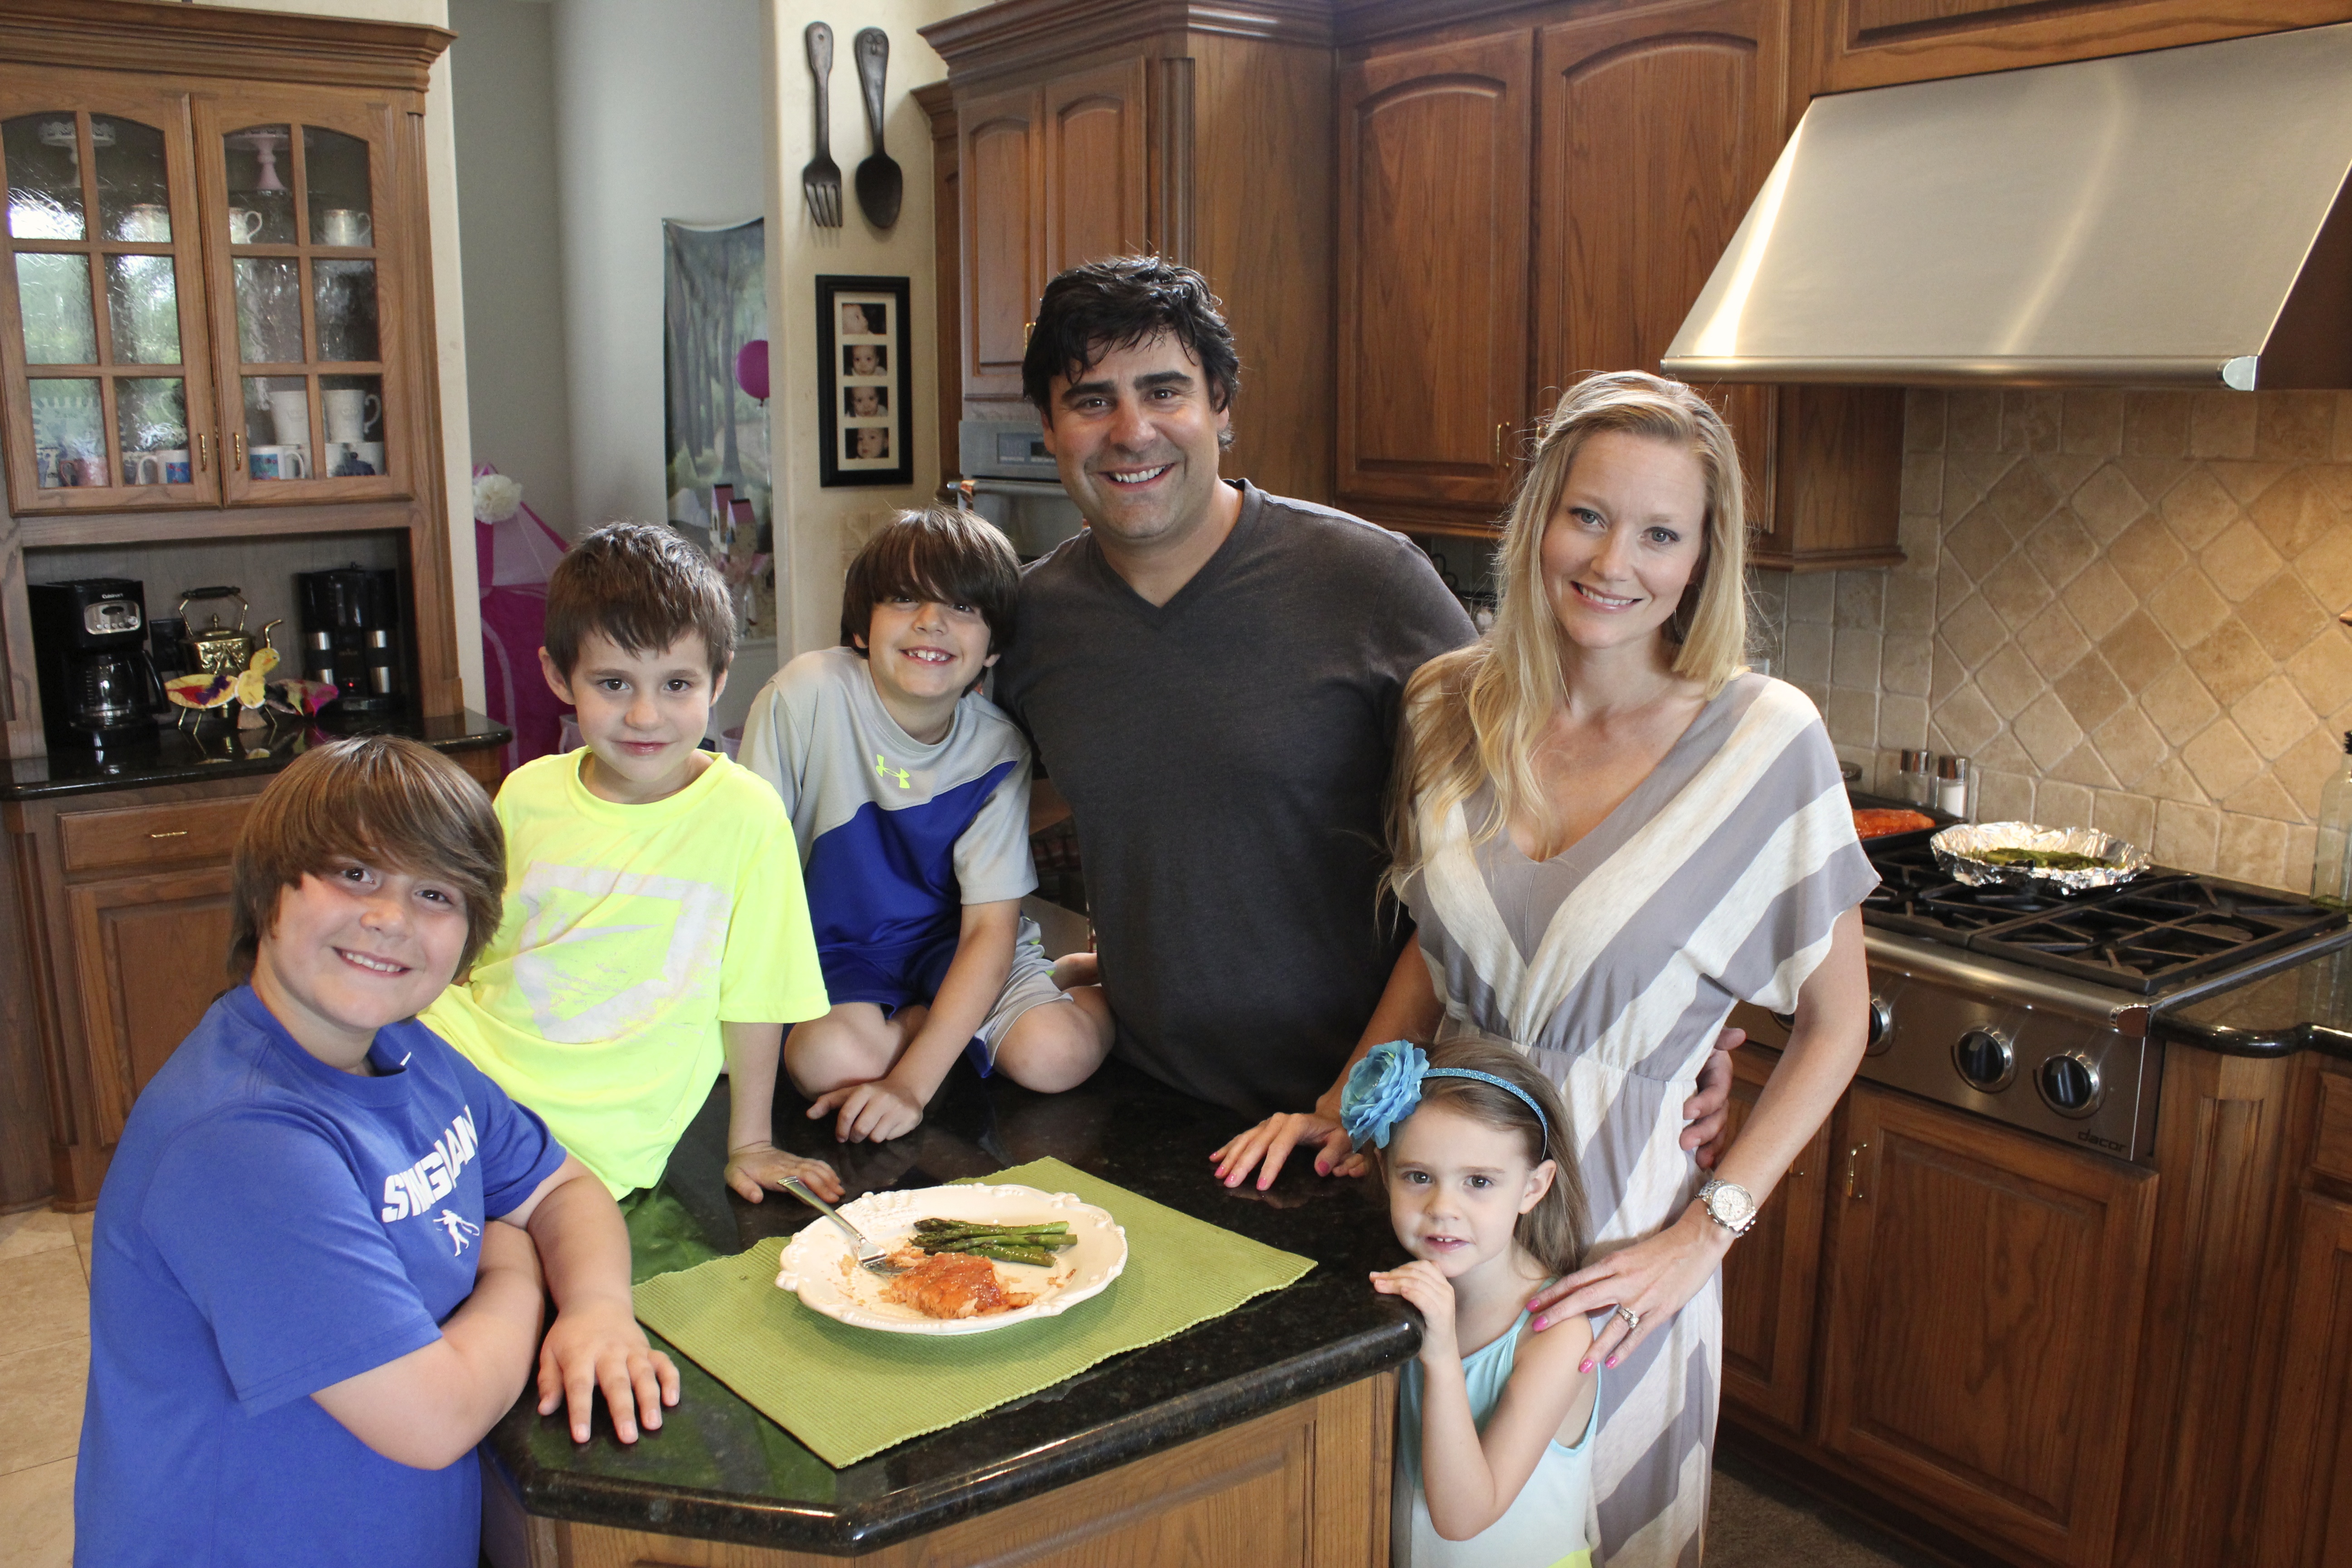
For the month of July, I interviewed Joseph, his wife Shawna and their four kids as they shared with me one of their favorite recipes for the grill: Cedar Planked Salmon.

One great thing about being the resident recipe columnist is that I get to taste all of the food featured in our magazine! The family was gracious enough to let me try the salmon, and I can say with all honesty that it was  was outstanding! Matt wasn’t with me at the time, so with as much willpower as I could generate, I saved him a small piece to try when I got home.

“The salmon was truly incredible!!” says Matt. For a guy who eats at 5-star restaurants nearly every week for work, trust him when he says “this is the best tasting salmon I’ve ever eaten!”

IMG_3670
The salmon hits the grill! Brushed with olive oil and seasoned with John Henry’s summer peach rub and raspberry chipotle rub.


Here’s the excerpt from the resident recipe article below:

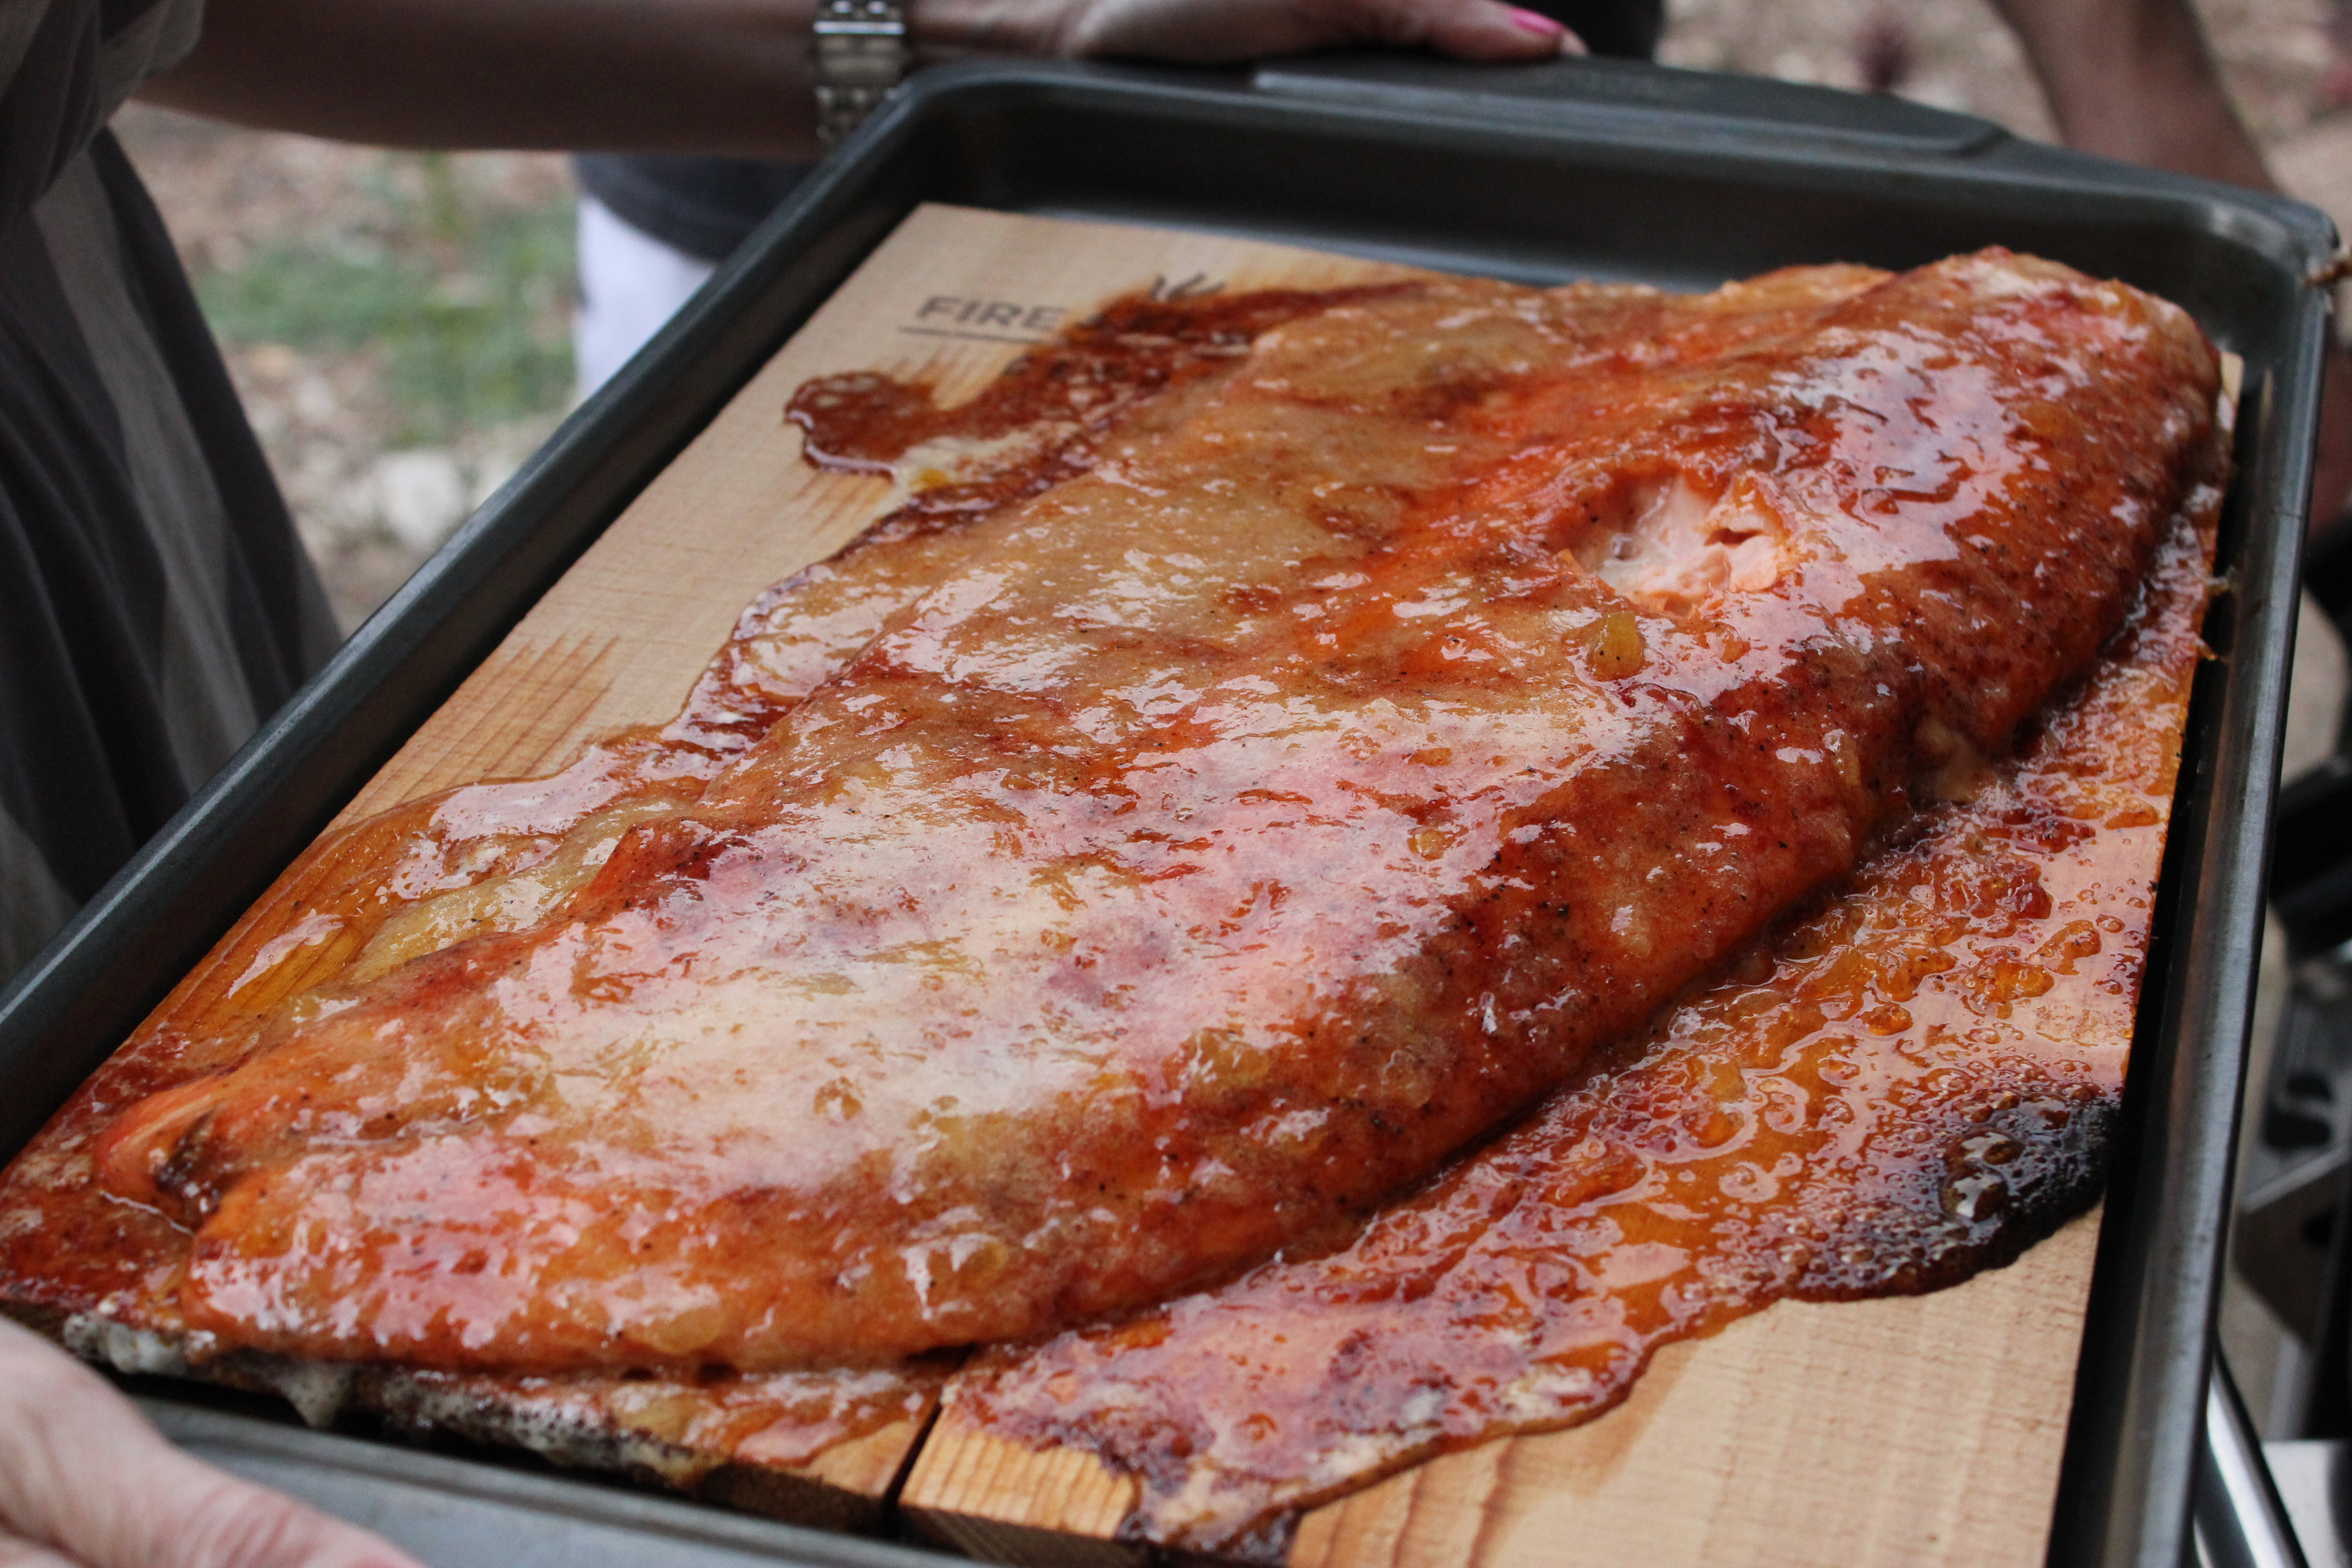
Summer is here, which means it’s time to heat up the grill for some backyard barbecuing, and neighborhood resident Joseph knows how to grill an incredible cedar planked salmon that would make any meat eater enjoy fish!!

While Joseph is a red meat lover himself, he says they key to seafood is to “make it not taste like fish.” Using his father’s recipe, Joseph has perfected his cedar plank salmon so that even his kids love it. In a matter of minutes, the family of six can devour an entire filet (or two of salmon) in just one dinner. Enjoy!

IMG_3674
Joseph adds the peach, apricot and pineapple glaze during the last 10 minutes of cook time.
IMG_3682
Check out that nice caramelized glaze!
IMG_3689
Serve with grilled asparagus for a well-rounded meal.
IMG_3698
Joseph, his wife Shawna and their four kids… ready to all dig in!


Cedar Planked Salmon
Serves: 6
Ingredients
  • 1 salmon filet (1 ½-2 pounds), skin removed
  • Olive oil
  • *John Henry’s Raspberry Chipotle Rub
  • *John Henry’s Summer Peach Rub
  • *Cedar grilling plank, soaked in water at least 5 hours before using
  • 1-2 Tbsp. Apricot preserves
  • 1-2 Tbsp. Peach preserves
  • 1-2 Tbsp. Pineapple preserves
Instructions
  1. FOR THE SALMON: Soak cedar-grilling plate in water at least 5 hours before using (so it won’t catch on fire when placed on the grill.)
  2. Rub a generous amount of olive oil all over the front and back of the salmon filet. Place salmon in a glass dish.
  3. Place salmon in a glass dish and generously sprinkle over salmon a 2:1 ratio of John Henry’s summer peach to raspberry chipotle rub. Make sure to use enough rub so it can caramelize on the grill. Place salmon in the refrigerator for 2-3 hours to marinate.
  4. Preheat grill to 275 degrees F. Do NOT let the grill get hotter than 300 degrees F or you risk drying out the salmon.
  5. Place salmon on a cedar grilling plate and grill it for 25-30 minutes, or until done. Depending on how large your salmon filet is, the cook time may be shorter or longer.
  6. FOR THE GLAZE: 10 minutes before the salmon is ready, combine about 1-2 tablespoons each of apricot, peach and pineapple preserves in a food processor. Combine until well blended.
  7. Pour the combined preserves over salmon and continuing grilling for 10 more minutes or until salmon flakes easily with a fork.
Notes
*John Henry’s rub can be purchased at Barbeques Galore, Elliott’s Hardware or online. A cedar grilling plank can be purchased at Kroger or just about any grocery store.


Whole Wheat Waffles

waffles6

Getting to sleep in as late as you want is one of the best things about the weekends!  Today I slept in until about 10: 30 am, which was much later than I thought, and woke up to a wonderfully sweet aroma of my my mom cooking in the kitchen.

I had no clue what she was making, but the smell was so sweet and inviting, first thing that came to my mind was “why is she making cookies at 10:30 in the morning”?

Instead, I was pleasantly surprised to find that she had just finished cooking up a batch of whole wheat waffles. (Funny story…my sister Brittany made these exact same waffles for her and Colby for breakfast this morning all the way up in Michigan! Great minds think alike!!!)

waffle ingredients
All the ingredients you will need…

The recipe for these waffles is adapted from 100 Days of Real Food, in which Lisa, the blogger, cuts out processed foods and replace it with REAL food. Processed food is terribly bad for you, so the less of it you can eat, the better.

The ingredient list is simple for this healthy waffle recipe, and makes for a quick and easy breakfast. The original recipe calls for 1 3/4 cups of milk, but my mom didn’t have enough, so she used half buttermilk and half skim milk. We love the addition of buttermilk, as it gives the waffles a richer taste.

Once you gather your ingredients, simply whisk them together in a large bowl and ladle the batter into a hot waffle iron.

waffle batter
Mix together the eggs, milk, honey, oil, honey, cinnamon and baking soda. Add in flour, baking powder and salt.

I like using a Belgian waffle iron (it has deeper and wider pockets) better than a traditional waffle iron. For some reason, Belgian waffles just taste better….kind of like how ice cream tastes better in a pretty bowl, or yogurt tastes better eaten with a plastic spoon instead of a metal spoon.

Anyways, within 10 minutes you’ve got a hot, fresh, healthy and NON-PROCESSED breakfast ready to enjoy.

whole wheat waffles

whole wheat waffles
Top with a pat of butter, fresh fruit and maple syrup.

Top these with a pat of butter, maple syrup and fresh berries for a hearty meal.

I must say, these are the BEST waffles I’ve ever eaten! They taste better than any hotel breakfast or diner that I’ve ever been to.

waffles6

waffles

Whole Wheat Waffles
Serves: 8 (4-inch square) waffles
Adapted from: 100 Days of Real Food
Ingredients
  • 2 large eggs
  • 1 cup buttermilk (or you can use all skim milk)
  • 3/4 cup skim milk
  • 1/4 cup coconut oil, melted
  • 1 Tbsp. honey
  • 1/2 tsp. ground cinnamon
  • 1/4 tsp. baking soda
  • 1 1/2 cups white whole-wheat flour (King Arthur)
  • 2 tsp. baking powder
  • 1/8 tsp. salt
  • 100% pure maple syrup, for serving
  • Fresh cut strawberries and blueberries, for serving
Instructions
  1. Preheat your waffle iron.
  2. In a large mixing bowl whisk together the eggs, milks, oil, honey, cinnamon and baking soda until well combined.
  3. Add in the flour, baking powder, and salt and whisk together until the large lumps disappear.
  4. When the waffle iron is hot, dab it with a little butter and then ladle a scant 1/2 cup of batter (depending on the size of your waffle iron) onto the center of the iron. Follow the instructions that came with your waffle maker to know how long it should be cooked (ours takes about 3-4 minutes each).
  5. Keep waffles warm until you finish cooking all of them. Top with pure maple syrup and fresh fruit.

Homemade Cheese Crackers

cheese crackers

Ever thought of making homemade Cheez-It crackers before?

I hadn’t either….that is, until my mom purchased Jennifer Perillo’s cookbook called Homemade with Love.

In the cookbook, Perillo talks about how her girls loved those cheesy crackers shaped like a fish (Goldfish), but that she wasn’t crazy about the ingredients. Talk about processed food!

Thus, Perillo decided to make her own homemade Cheez-It crackers. While Perillo’s recipe looks delicious, we made significant alterations, and thus created a homemade cheese cracker recipe on her own.

cheez-itAs kids, my sister Brittany was the one who was obsessed with cheddar Goldfish and Cheez-Its. Come 4 pm, my sister and I would be glued in front of the television watching our favorite afternoon shows like Arthur and Zoom.

I liked Cheez-It, but not as much as Brittany did. I was more of a pretzel fan.

I will tell you, this recipe of homemade cheese crackers will blow the doors off of  the Cheez-It brand. As Brittany describes, “Cheez-Its have a slightly burnt flavor”. That’s not the case with these  crackers.

There’s something about the fresh, non-processed, and extra cheesy taste that Cheez-It just can’t duplicate. It’s kind of like eating homemade mac and cheese as opposed to the boxed version… homemade is ten times better!
cheese crackers

Plus, if you can please a bunch of 5-year olds, you’ve got a winning recipe!

Mom mom teaches Sunday morning Bible class to a group of kindergarteners. For snack time, they always get a cup of regular ole Cheez-It crackers. On mom’s last Sunday of the quarter, she brought in her homemade cheese crackers and the kids loved them!! (As do I).

The crackers are pretty simple, to make, so don’t be too intimidated by the instruction…they are just very detailed.

Enjoy!!!

cheese crackers


Homemade Cheese Crackers
Ingredients
  • 3/4 cup all-purpose flour, plus more for sprinkling
  • 1/2 tsp. (3 grams) salt
  • 1/4 tsp. (1 gram) sweet paprika
  • 1/4 tsp. (1 gram) dry mustard powder
  • 6 ounces sharp cheddar cheese, shredded
  • 1/4 cup very cold unsalted butter, shredded using a box grater
  • 1 Tbsp. milk
Instructions
  1. Preheat over to 400 degrees F. Line two 9 x 13-inch baking sheets with parchment paper.
  2. Add the flour, salt, paprika, and mustard powder to the bowl of a food processor. Pulse once or twice until the mixture forms a sandy texture. Pour in the milk and pulse a few more times, just until a ball of dough forms.
  3. Divide the dough into two equal pieces. Place half between two sheets of parchment paper and set the other half aside. Roll out to an 1/8-inch thickness. Lift one side of the parchment, and sprinkle it with a bit of flour. Place the parchment back on top.
  4. Flip the dough over, still keeping it between the parchment sheets, and peel off the top layer of paper.
  5. Use a pastry wheel or sharp pairing knife to trim the sides to form a square (save the scraps to re-roll). Cut the dough into 1-inch squares.
  6. Transfer the cutouts to the prepared baking sheets (they can be placed pretty close to each other since they won’t spread). Use the tip of a metal skewer or toothpick to pierce a hold in the center of each cracker.
  7. Bake 9-10 minutes until fragrant and the edges are golden. Keep a close eye on them, as they go from done to burnt pretty quickly.
  8. Let the crackers cool on the sheet for 2 minutes, then use a small offset spatula to transfer them to a wire rack to finish cooling completely.
  9. Store crackers in an airtight container for up to 3 days.

Chocolate Eclair Dessert

chocolate eclair dessert

I had never heard of Chocolate Eclair Dessert before until I visited my aunt Jolene in Houston a few years ago. As soon as I took that first bite, I knew this would be a recipe that I would frequently make.

If you’re looking for a fancy-looking, comfort food-tasting, easy-to-make dessert for a crowd, this is a winner. Tonight we had life groups at our church and so I brought this, and the pan was gone by the time I got home in just a few hours!

While the name, “chocolate eclair” sounds elegant, making this dish is not complex…it’s actually a NO-BAKE dessert! All you need are graham crackers, instant pudding mix, milk and cocoa to make this pretty, layered dessert.

Word to the wise: make this a day before you actually plan on eating it. That is, if you can wait that long!!!  Allowing it to sit in the refrigerator lets the graham crackers soften and absorb the pudding mixture.

Enjoy…it is soooo good!

chocolate eclair dessert

chocolate eclair dessert

Chocolate Eclair Dessert
Serves: 10-12
Ingredients
  • 2 (3.5 oz) boxes instant vanilla (or french vanilla) pudding
  • 3 1/4 cups skim milk, divided
  • 1 (12 oz) container Cool Whip
  • Graham crackers
  • 1/3 cup cocoa
  • 1 cup sugar
  • 1 stick (1/2 cup) butter
  • 1 tsp. vanilla
Instructions
  1. FOR THE FILLING: Combine pudding mix and 3 cups of milk; beat. Stir in Cool Whip.
  2. Place layer of graham crackers in the bottom of a 9 x 13-inch dish. Spread 1/2 of the pudding mixture over the graham crackers. Repeat with another layer of graham crackers and pudding; then top with a final layer of graham crackers.
  3. FOR THE TOPPING: Bring cocoa, 1/4 cup milk and sugar to a full rolling boil; boil about 1 minute, stirring very frequently. Remove from heat and cool one minute. Add butter and vanilla; stir until butter is melted.
  4. Pour chocolate topping over the top layer of graham crackers.
  5. Refrigerate overnight.

‘Supernatural’ Brownies and Happy Father’s Day


IMG_7450

Happy Father’s Day to all who are Dads!

For those of you who know my Dad, you know that he LOVES chocolate. Fortunately for him, he had a DOUBLE-DOSE of brownies this weekend!!

My sister Brittany came in from Michigan this weekend and while she and my mom were perusing the Internet, they came across a recipe for brownies from Saveur called Nick’s Supernatural Brownies. Mom and Brittany made the brownies on Friday, and called me up that night to tell me how good they were!

I was a little jealous that I wasn’t at my parent’s house to try the brownies, so the next day I decided to whip up a batch for myself… and with hopes to give some to my father-in-law, Tony. (Sorry Tony – As I’m writing this, there are only 3-4 brownies left!!)

On Sunday when my parent’s came over to my house for Father’s Day, they brought over 4 of their brownies. We did a little comparing, and noticed that our brownies looked a little different.

Mom’s were thicker, lighter in color and slightly sweeter. The reason:

  • she baked her’s in a 9 x 13″ pan
  • she used light brown sugar
  • she used semi-sweet chocolate.
supernatural brownies
Mom’s brownies: thicker, lighter in color and slightly sweeter.
supernatural brownies
Close-up of my mom’s version.

My version of the supernatural brownies were darker, slightly more fudgy, thinner, and not quite as sweet. The reason:

  • I baked mine in an 8″ square pan since I halved the recipe.
  • I used dark brown sugar
  • I used unsweetened chocolate
supernatural brownies
My brownies: slightly thinner, darker, and more fudgy.
brownie sundae
These brownies are great with a scoop of vanilla bean ice cream and chocolate fudge sauce!

So, which brownies are better, my mom’s version or mine?

It’s hard to tell. Matt likes mine better, I like Mom’s because they were slightly sweeter, and Dad was indifferent… chocolate is chocolate in his opinion!

Anyways, Happy Father’s Day!!!

‘Supernatural Brownies’
Cook time:
Total time:
Serves: 24
Ingredients
  • 16 Tbsp. unsalted butter, plus more for greasing
  • 8 oz. bittersweet chocolate, cut into 1/4″ pieces (Mom used semi-sweet, I used unsweetened)
  • 4 eggs
  • 1 cup sugar
  • 1 cup firmly packed light brown sugar (I used dark brown sugar)
  • 2 tsp. vanilla extract
  • 1/2 tsp. fine salt
  • 1 cup flour
Instructions
  1. Heat oven to 350°. Grease a 9″ x 13″ baking pan with butter and line with parchment paper; grease paper. Set pan aside.
  2. Pour enough water into a 4-quart saucepan that it reaches a depth of 1″. Bring to a boil; reduce heat to low. Combine butter and chocolate in a medium bowl; set bowl over saucepan. Cook, stirring, until melted and smooth, about 5 minutes. Remove from heat; set aside.
  3. Whisk together eggs in a large bowl. Add sugar, brown sugar, vanilla, and salt; whisk to combine. Stir in chocolate mixture; fold in flour. Pour batter into prepared pan; spread evenly. Bake until a toothpick inserted into center comes out clean, 30–35 minutes. Let cool on a rack. Cut and serve.
Notes
Recipe adapted from: Nick Malgieri


Pumpkin Roll

pumpkin roll

I promised John, a coworker of mine, I would make him a pumpkin roll for Thanksgiving.

Well, 6 months and 21 days later I’m finally fulfilling my promise of a pumpkin roll!  Better late than never!!!

To be honest, I was quite intimidated when John requested I make this cake back in November.  I had heard that pumpkin rolls were hard to make, and I was nervous that the cake would crack as I was rolling it, or that it would not stay together.

DO NOT BE AFRAID… Pumpkin rolls are easier than you think, so don’t be intimidated!!! Mixing the cake batter takes only minutes, and baking the cake takes less than 15 minutes. Plus, unlike a layer cake, there is no slicing cake layers, filling, frosting or decorating. Simply lather the cake with cream cheese filling, roll it up, dust with powdered sugar and you’re done!

A big thanks goes out to to the Brown-Eyed Baker, who posted a great pumpkin roll recipe with excellent instructions and ingredients for this no-fail, traditional Thanksgiving dessert.

John – If you’re reading this, I hope you enjoyed your three slices of pumpkin roll today!!  I do indeed keep my promises. 🙂

IMG_3792
Bake cake for 12-15 minutes.
IMG_3795
While cake is baking, sprinkle powdered sugar on a piece of parchment paper.
pumpkin roll
Flip cake out onto powdered sugar-lined parchment paper.
pumpkin roll
Carefully peel back parchment paper from top of cake.
IMG_3804
Roll the cake into a cylinder using the parchment paper to help you.
IMG_3805
Let cake cool to room temperature on a wire rack.
IMG_3808
Carefully unroll the cake. Spread the cream cheese filling evenly over the surface of the cake, then re-roll the cake.
IMG_3812
Tidy/pretty-up the end of the cake by trimming off the ends.
pumpkin roll
Don’t forget to dust the pumpkin roll with powdered sugar!
pumpkin roll
Cut a nice-sized slice and enjoy!

A neat story about John’s request for pumpkin rolls:

A lady his mom used to work with would take requests every holiday season for pumpkin rolls. The lady would charge her coworkers $12 for each roll, which seems like a pretty good deal to me. One year the lady had over 500 orders from her friends and coworkers. John’s mom would buy one every year and thus you can see how his love for pumpkin rolls developed!

Pumpkin Roll
Serves: 8
Ingredients
  • ¾ cup all-purpose flour
  • ½ teaspoon baking powder
  • ½ teaspoon baking soda
  • ½ teaspoon ground cinnamon
  • ½ teaspoon ground cloves
  • ¼ teaspoon salt
  • 1 cup granulated sugar
  • 3 eggs
  • ⅔ cup canned pure pumpkin
  • 8 ounces 1/3-less fat cream cheese, at room temperature
  • 6 tablespoons unsalted butter, at room temperature
  • 1 1/4 cups powdered sugar
  • 1 teaspoon vanilla extract
  • Powdered sugar, for sprinkling
Instructions
  1. MAKE THE CAKE: Preheat oven to 375 degrees F. Grease a 15×10-inch jelly roll pan. Line the pan with parchment paper, then grease and flour the parchment. Set aside.
  2. In a small bowl, whisk together the flour, baking powder, baking soda, cinnamon, cloves and salt; set aside.
  3. With an electric mixer on medium speed, beat the sugar and eggs together until combined and thick, about 2 minutes. Add the pumpkin and mix to combine. Add the dry ingredients and use a rubber spatula to fold and mix until no flour is remaining. Pour the batter into the prepared pan and smooth into an even layer.
  4. Bake for 12 to 14 minutes, or until the top of the cake springs back when lightly pressed. While the cake is in the oven, place a piece of parchment paper on the counter and sprinkle liberally with powdered sugar.
  5. When the cake comes out of the oven, immediately run a knife around the sides of the pan to loosen the cake. Turn the cake out onto the prepared piece of parchment paper. Carefully peel off the parchment paper from the top of the cake and discard. Starting with a short end, carefully roll up the cake with the parchment paper. Place the rolled cake on a wire rack seam-side down and allow to cool to room temperature.
  6. MAKE THE FILLING: Using an electric mixer on medium speed, beat together the cream cheese and butter until smooth and creamy. Add the powdered sugar and beat until completely smooth and light. Add the vanilla extract and mix briefly to combine.
  7. Carefully unroll the cake. Spread the cream cheese filling evenly over the surface of the cake. Re-roll the cake, then wrap tightly in plastic wrap and refrigerate for at least 1 hour. When ready to serve, place the pumpkin roll on a serving platter and dust with powdered sugar. Leftovers should be wrapped in plastic wrap or placed in an airtight container and refrigerated.
Notes
Adapted from: Brown-Eyed Baker

Hominy Casserole

hominy casserole

Happy 91st Birthday Nanny!!!

One year ago today we celebrated Nanny’s 90th birthday. It was a special day for her and the family as she turned the big 9-0. Family members from all over the great state of Texas (from Houston to Dallas to Midland to Arlington) made the drive to Odessa, Texas to celebrate with Nanny on her big day.

Compliments to my cousin Brooke for organizing the party, which was a big success!

IMG_1985
My sister and mom eagerly await as Nanny opens her gift.

The party was Western-themed with cowboy boots, red and blue bandanas and BBQ.

IMG_1994.JPG Brooke’s Dad Kimmy has this amazing grill where you can cook lots of meat at one time. Check out all the tasty hamburgers on the grill!

IMG_2001

IMG_2002

The only bad thing about his grill is that it says Texas Tech! 🙂

IMG_2003

We also enjoyed a cupcake-cake. I’m not sure if that’s the correct name, but it looks like a cake from afar, but when you look closer, the cake is actually made up of alternative chocolate and vanilla cupcakes.

IMG_1987

We also got to spend time with our little cousins. Aren’t they cute?

IMG_1990

Some more family pictures…

IMG_2016

And a neat picture of four of the six siblings in our family. My grandmother Nila was the oldest sibling, but she passed away in 1989. Her brother Theron passed away in 2011. Wade, Jolene, Nanny and Uny are the remaining siblings. 🙂

IMG_2008

One of the dishes I discovered at Nanny’s birthday was my aunt Patty’s hominy casserole. I had never heard of a hominy casserole, but fell in love with it after my very first bite.

The recipe is super easy.

hominy casserole

Simply combine 2 cans of hominy, a can of green chilies, 1/2 sweet red pepper and Monterey Jack cheese together in a bowl.

hominy casserole

They you pour it into a baking dish.

hominy casserole

Top with the remaining cheese.

hominy casserole

And bake for 30 minutes at 350 degrees F.

hominy casserole

Beautiful, right? It’s super delicious and has a southwestern/Tex-Mex taste to it from the hominy. I used fat-free sour cream to lighten it up a little, but the full fat version would give you the best flavor.

Yellow or white hominy you ask? I used white, but I hear yellow is sweeter. Next time I’ll try the yellow variety. Enjoy!

Hominy casserole

hominy casserole

Hominy Casserole
Cook time:
Total time:
Serves: 6
Ingredients
  • 2 (15-oz) cans hominy, drained
  • 8 oz sour cream
  • 1 1/2 cups montery and cheddar jack cheese, grated
  • 1 (4-oz) can chopped green chiles
  • 1/2 chopped sweet red pepper
  • salt and pepper to taste
Instructions
  1. Preheat oven to 350 degrees F.
  2. Set aside half of the cheese.
  3. Mix the remaining cheese with the remainder of the ingredients and pour into a 9×9-inch baking pan. Top with remaining cheese.
  4. Bake for 30 minutes or until bubbly around the edges.


Chicken Pot Pie

Chicken Pot Pie

Chicken pot pie. The ULTIMATE comfort food!

Surprisingly, my mom never made chicken pot pie from scratch. Mom – if you did make it, sorry because I don’t remember. 🙂

Instead, ever week or so we would eat individual Marie Callender’s chicken pot pies. We absolutely loved them!

As a kid, I had a method to eating my chicken pot pie. First, instead of eating the pie pie right side up, I would eat it upside down. If you’ve ever made a Marie Callender’s pot pie, you bake it in a cardboard container for 50 minutes or so. When it was done, we just flipped it out of its container on our plate, and never thought to turn it right side up!

Each member of our family ate our pot pies in a special way. I would cut a circle in the top of the pot pie, carefully remove the crust and eat it first. I would then eat the rest of the pot pie going in a circle, making sure I got a bite of flakey crust with eat bite!

My dad would pile his pot pie with a ginormous amount of green peas. My mom ate hers normal, of course, and my sister…we’ll I can’t remember how she ate hers. All I know is that she had leftover crust, while mine was pretty much gone!

Chicken Pot Pie

As mentioned before, I am the resident recipe columnist for our monthly neighborhood magazine. For the month of June I interviewed one of my neighbors, Mary Ann, a retired nurse who has a passion for cooking.

Not only was Mary Ann willing to be a part of the magazine, but she was gracious and sweet enough to cook me an entire chicken pot pie to take home after I completed her photo shoot for the magazine.

Since I had a 10-inch wide, 2 to 3-inch deep chicken pot pie all for myself and Matt, I thought it fitting to invite our entire family over for dinner to share. It was neat to have my parents and Matt parents all around the same dining table for some well-needed family time. If you know me, I LOVE family and enjoy ever moment I can get with them.

Chicken Pot Pie

For those that don’t live in my neighborhood and therefore don’t get our magazine, I’m sharing with you this delicious pot pie recipe and an excerpt from my article:

If you’re looking for old-fashioned, ultimate comfort food, then search no more.  Resident Mary Ann, a retired nurse and freestyle cook, makes you feel right at home with her delicious deep dish chicken pot pie.  Overflowing with fresh veggies, savory chicken and topped with a lid of golden-brown, flaky crust, this pot pie is the quintessential supper food sure to bring the family together.

As a freestyle cook, Mary Ann encourages you to add or substitute your favorite kind of soup, leftover ham, turkey, and/or your choice vegetable favorites. “This is comfort food, so the process should be personal,” she says. Enjoy!

Chicken Pot Pie

Enjoy your family time and I hope this chicken pot pie brings back happy memories to you as much as it did me!

Chicken Pot Pie
Serves: 6
Ingredients
  • 10-inch baking dish, 2 ½ to 3 inch deep
  • 2 refrigerated piecrusts or 2 large frozen puff pastries, thawed
  • 2 cups chopped chicken, poached; or leftover rotisserie chicken
  • 1 can cream of onion soup
  • 1 can potato soup
  • 2 cups vegetable mixture (1 red onion, 1/2 cup celery, 1 chopped red pepper, 1/2 cup chopped mushroom, 2 Tbsp. olive oil)
  • 2 cups of cooked or leftover carrots, asparagus, peas and/or green beans
  • 1 Tbsp. fresh or freeze-dried poultry herbs, chives, pepper, & garlic
  • 1 beaten egg
Instructions
  1. Preheat convection oven to 375 degrees F. If using a conventional oven, preheat to 400 degrees F.
  2. Sauté veggies in oil until lightly browned; turn out in bowl.
  3. Add the chicken and soup, and mix together. (If the mixture seems dry, add a little more soup of your choice).
  4. Place bottom crust in baking dish and spoon chicken mixture inside.
  5. Top with herbs and pepper by recipe and to taste.
  6. Place top crust on top, seal, and cut a few slits into the pie crust.
  7. Brush top crust with egg wash.
  8. Place pie in oven and cook for 40 minutes or until golden brown.
Notes
Source: my neighbor, Mary Ann


Patriotic Fruit Skewers for Memorial Day

Happy Memorial Day

Happy Memorial Day! I hope everyone is enjoying their day! With nice weather in Texas, we’ll be out enjoying the sun all day long.

If you’ve got plans for grilling out or meeting up with friends, check out this super simple Patriotic Fruit Skewer recipe below.

With patriotic red, white and blue colors of  strawberries, blueberries, and marshmallows, these  fruit skewers are perfect for backyard BBQs on Memorial Day and/or the 4th of July. Drizzle a little chocolate fudge sauce on top, and you’ve got a winner!

You can arrange the fruit any way you want. I threaded 3 blueberries, followed by a strawberry and marshmallow, and repeated the pattern three times. You can also thread fudgy brownie bites on these as well! I plan on baking these chewy brownies today, and will be adding them to the fruit skewers.

Don’t forget the chocolate fudge sauce; you could even dust them in powdered sugar. Yum!

Patriotic fruit skewers
Thread fruit onto skewers, alternating between three blueberries, 1 strawberry and 1 jumbo marshmallow.
IMG_3785
Drizzle with chocolate sauce.
IMG_3781
Close-up!
IMG_3778
Perfect for Memorial Day or 4th of July festivities!

Enjoy! What are your Memorial Day plans?

We’re going to swim and grill out with neighborhood friends.

Patriotic Fruit Skewers
Ingredients
  • stainless steel or wooden skewers
  • 1 pint strawberries
  • 1 pint blueberries
  • 1 package jumbo-sized marshmallows
  • chocolate syrup
Instructions
  1. Wash and dry berries. Cut the stems off of the strawberries.
  2. Thread berries and marshmallows on skewers, alternating with three blueberries, 1 strawberry and one jumbo-sized marshmallow.
  3. Drizzle chocolate syrup over fruit if desired.


Classic Chess Pie

chess pie

Last weekend was Mother’s Day and I hope everyone had a great time with their mom. Even though it was her special day, my mom spent Saturday afternoon in the kitchen baking up a new pie recipe: Classic Chess Pie!

One of Matt’s all-time favorite pie recipes is Furr’s Butter Chess Pie. My mom knew that and decided she would take a stab at recreating the Furr’s classic, and according to Matt, succeeded!!

chess pie

For those that don’t know, chess pie is a classic dessert characteristic of the south. Recipes vary, but are generally similar in that they call for a single crust filled with eggs, butter, granulated sugar and vanilla. Not to be confused with buttermilk pie, which is also a traditional pie of the south, chess pie includes cornmeal;  buttermilk pie does not.

I must say, I had never tried a chess pie before, and was extremely impressed! Now one of my most favorite pies of all-time, I’m going to request this classic chess pie for every special occasion.

Did I mention it’s a breeze to make? With a store-bought crust, prep time takes about 5 minutes. The hard part is waiting for the pie to bake! Enjoy.

Classic Chess Pie
Prep time:
Cook time:
Total time:
Serves: 8
Recipe from: Southern Living 2000.
Ingredients
  • 1/2 (15-ounce) package refrigerated pie crusts
  • 2 cups sugar
  • 2 Tbsp. cornmeal
  • 1 Tbsp. all-purpose flour
  • 1/4 tsp. salt
  • 1/2 cup butter, melted
  • 1/4 cup milk (we used skim)
  • 1 Tbsp. white vinegar
  • 1/2 tsp. vanilla extract
  • 4 large eggs, lightly beaten
Instructions
  1. Fit pie crust into a 9-inch pie plate according to package directions; fold edges under, and crimp.
  2. Line pastry with aluminum foil, and fill with pie weights or dried beans.
  3. Bake at 425 degrees F for 4-5 minutes. Remove weights and foil; bake 2 minutes more or until golden. Cool.
  4. Stir together sugar and next 7 ingredients until blended. Add eggs, stirring well. Pour into pie crust.
  5. Bake at 350 degrees F. for 50-55 minutes, shielding edges with aluminum foil after 10 minutes to prevent excessive browning. Cool completely on a wire rack.