Chicken Pesto Pasta

chicken pesto pasta

Working full-time and not getting home until after 6 pm many days of the week, I’m usually starved and ready for food! As you all know, I love to cook, so eating cereal for dinner is not my idea of a great dinner. When Matt’s home, I will almost always prepare a homemade dinner. That’s where this quick and easy chicken pesto pasta dish comes in hand!

With only 5 main ingredients plus a few pantry staples, you’ll have a delicious Italian meal sitting on your table in less than 30 minutes.

If you know Matt, he can be very direct, which is good if you’re wanting an honest opinion. There’s been many a nights that I’ve cooked dinner, and he says “I don’t like this”, or “the chicken is dry”. Need I say more? Hahaha?

While I don’t always like to hear it, it helps me to become a better cook because I definitely know what I need to work on.

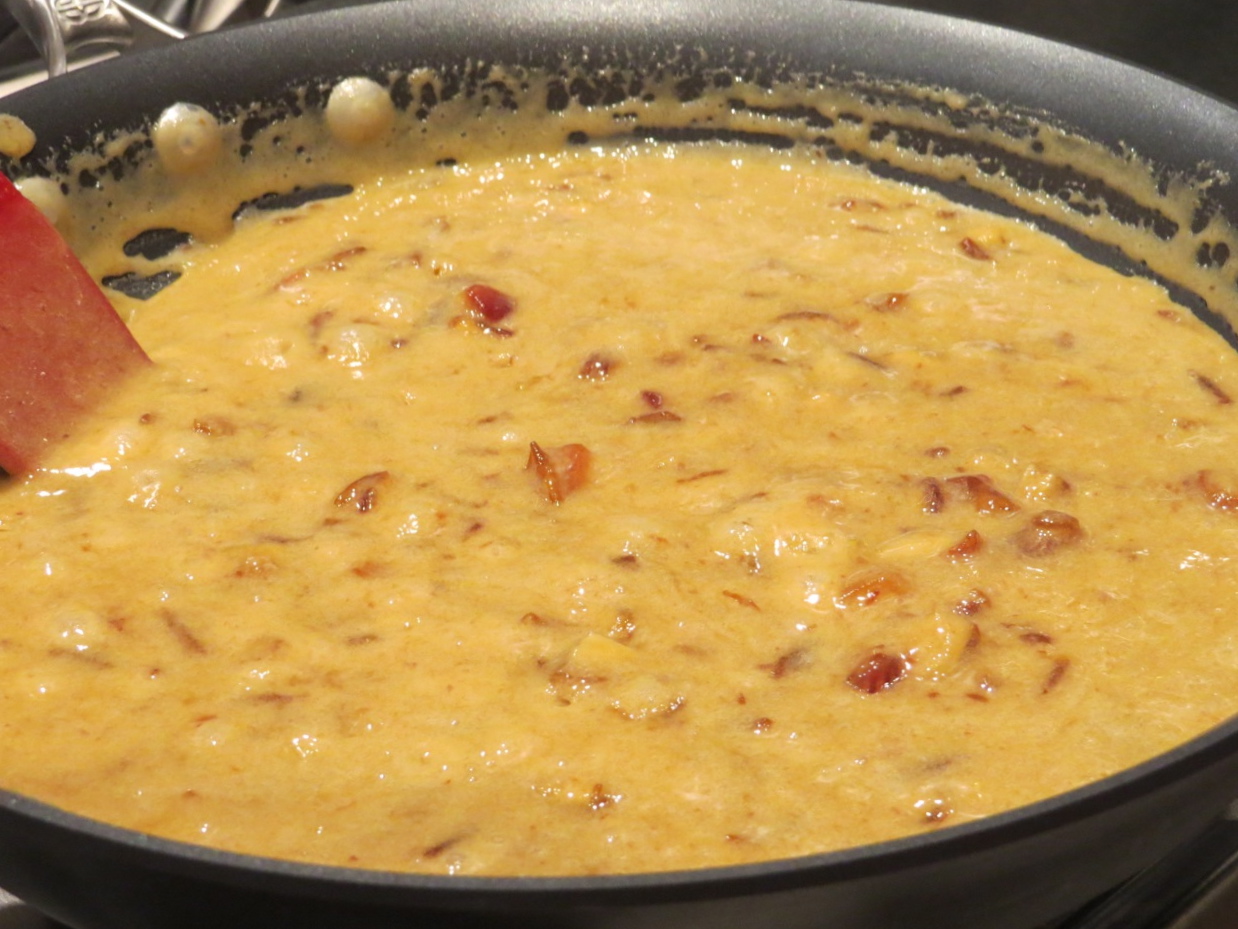
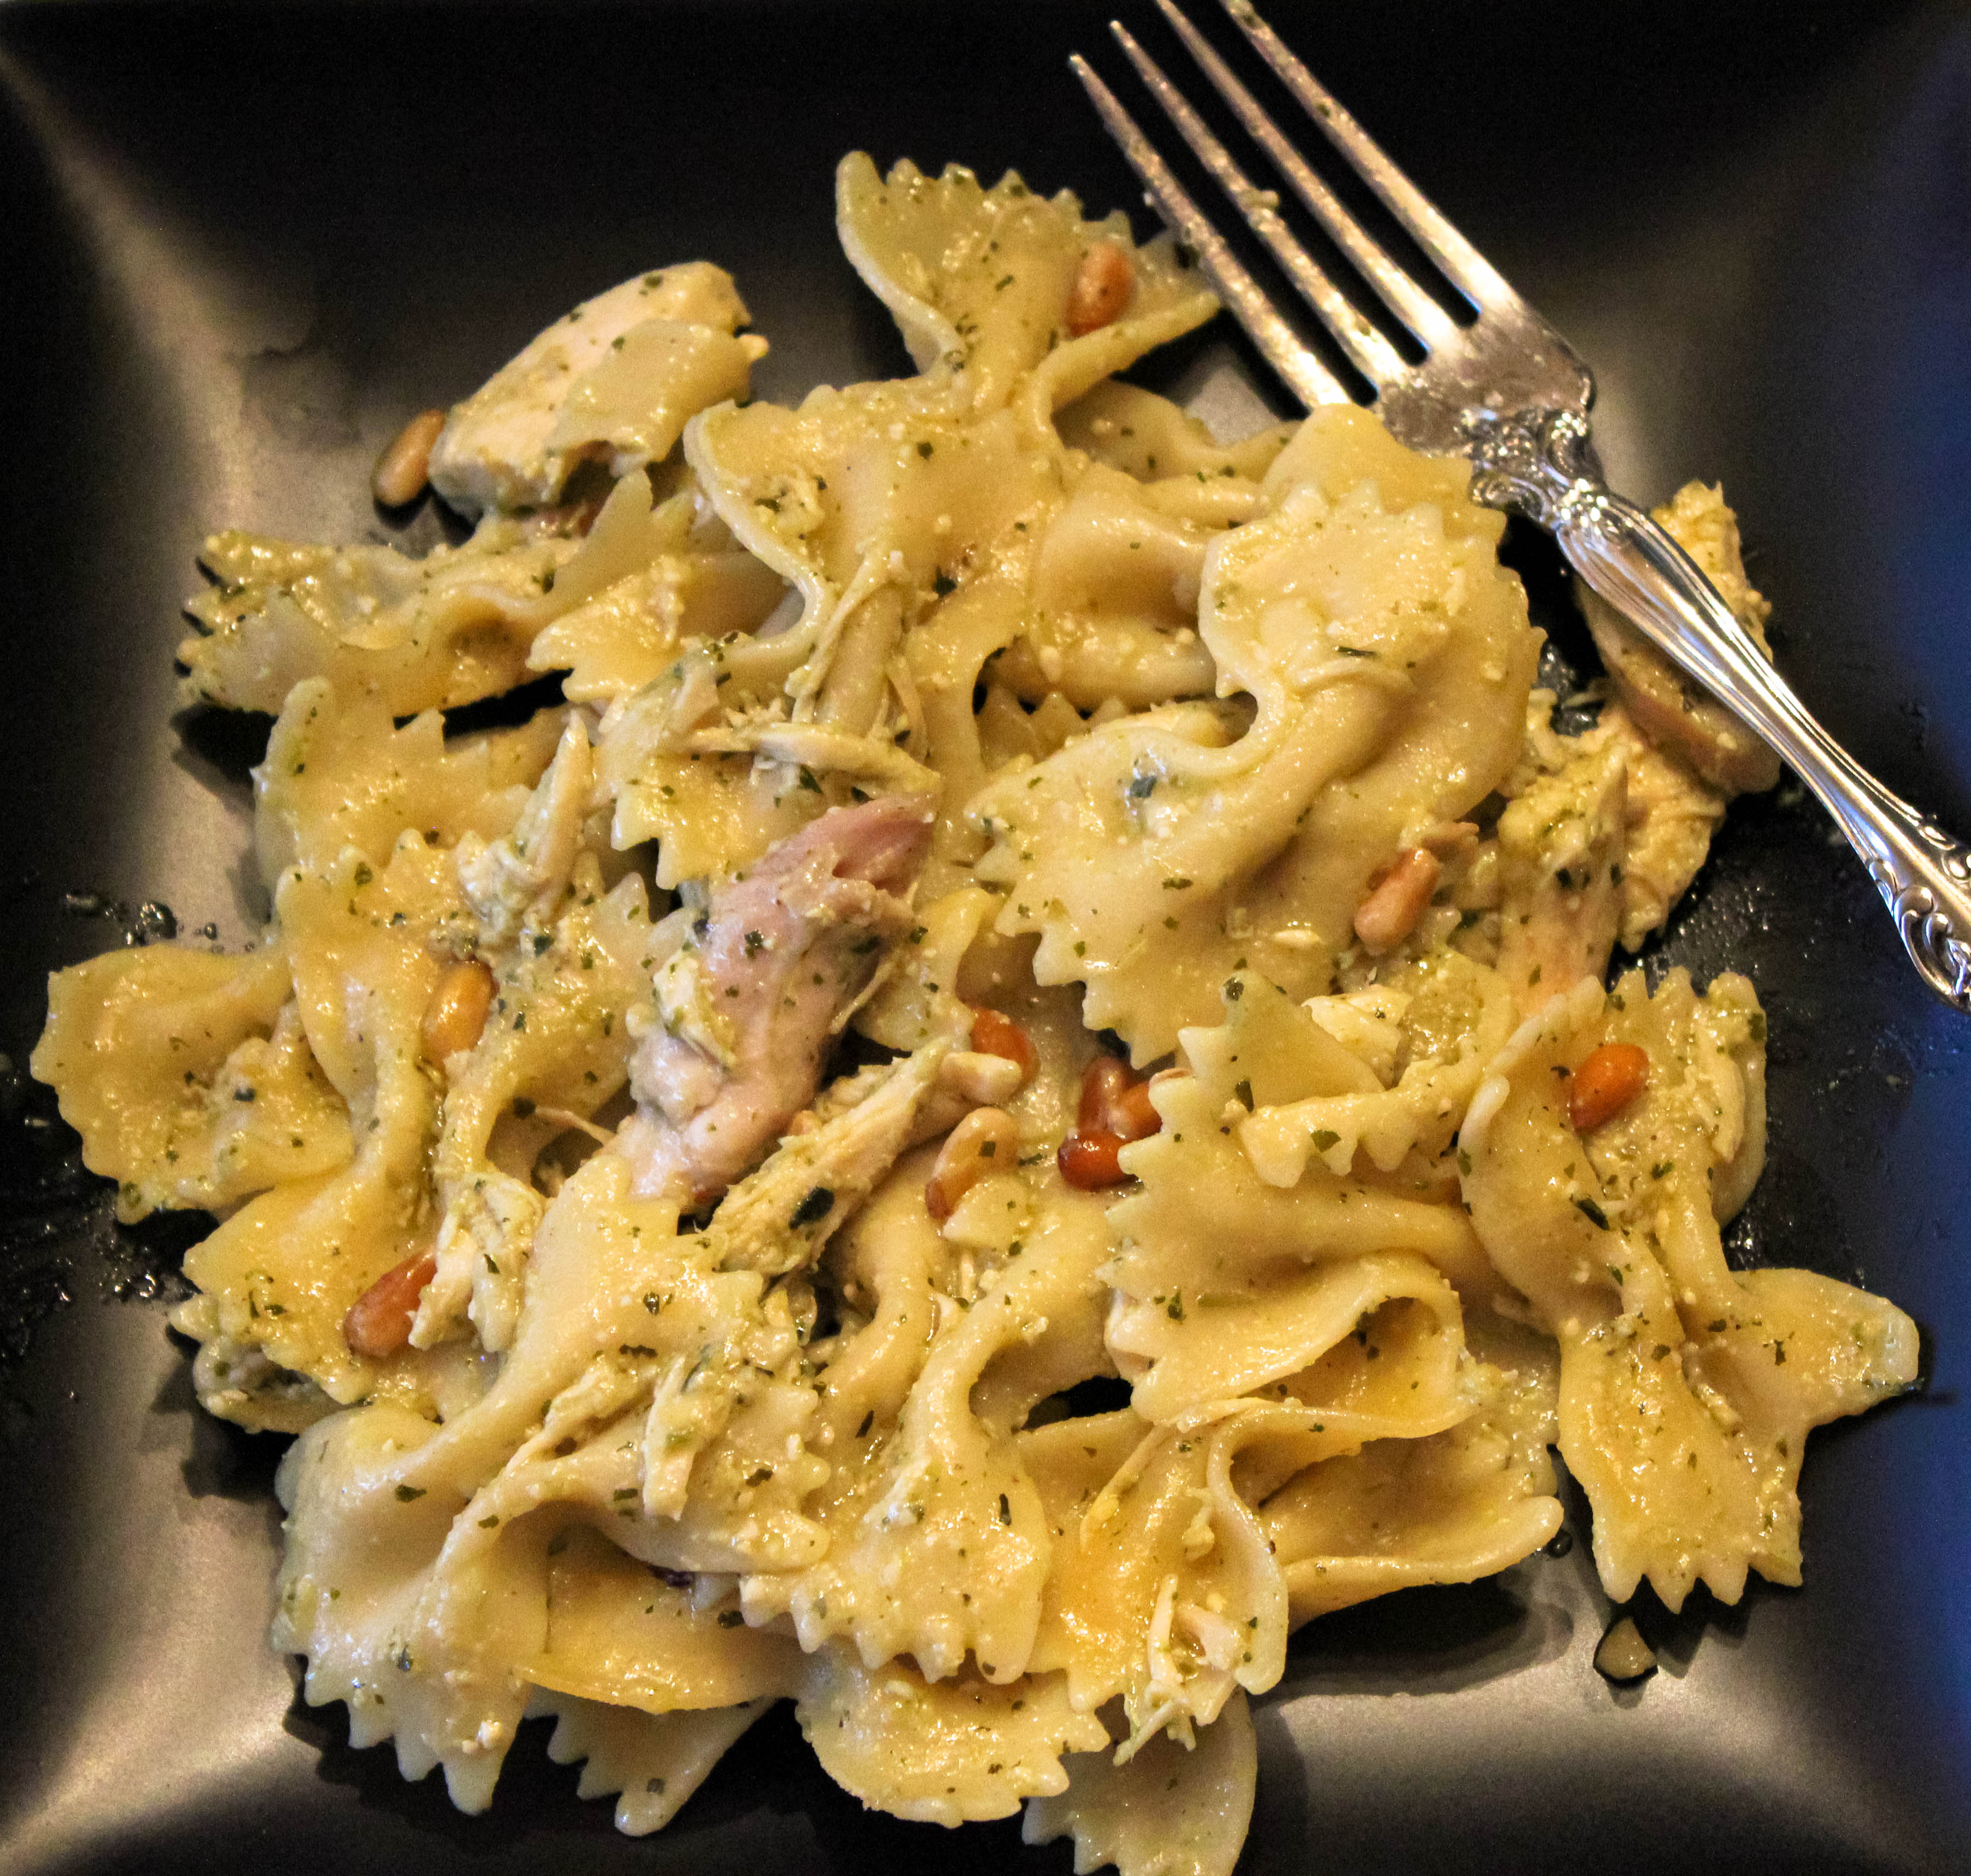
With this dish, Matt loved it every bit of it! No complaints, only praise. I think he went back for seconds, maybe thirds. While the pictures don’t do it justice, the pesto combined with the chicken broth, crisp pine nuts, juicy rotisserie chicken and fresh lemon juice makes for a perfect combination.

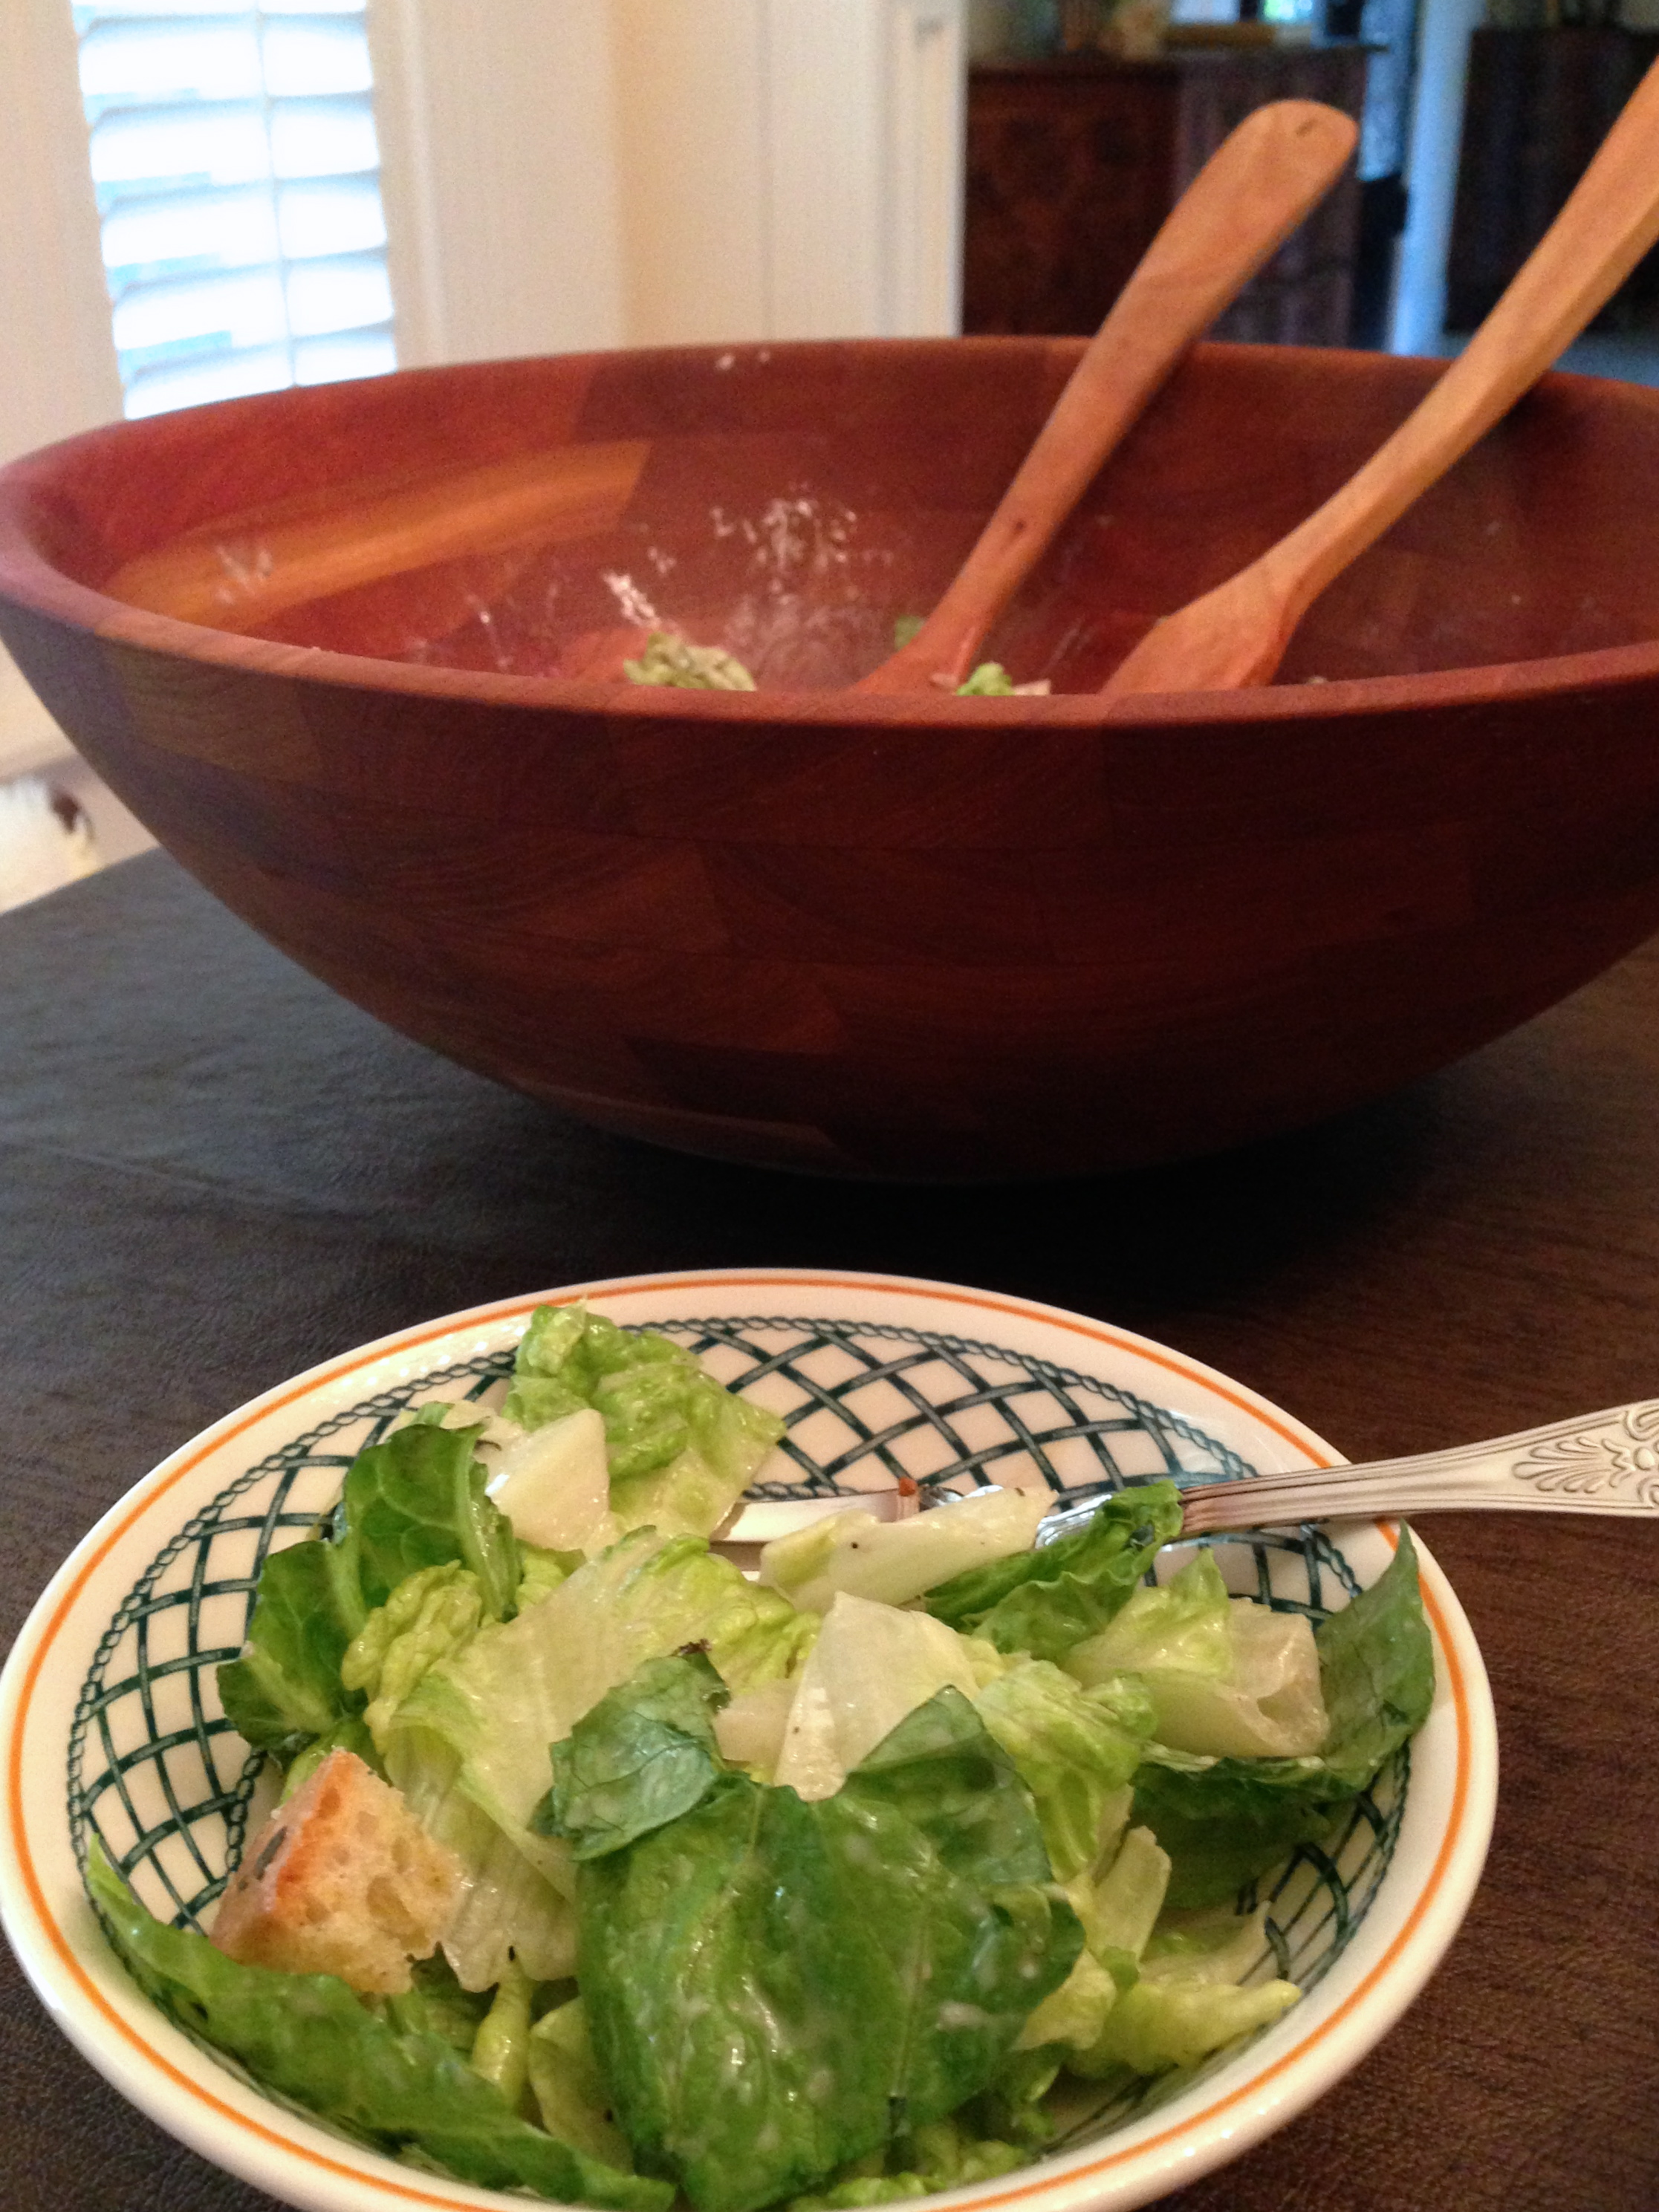
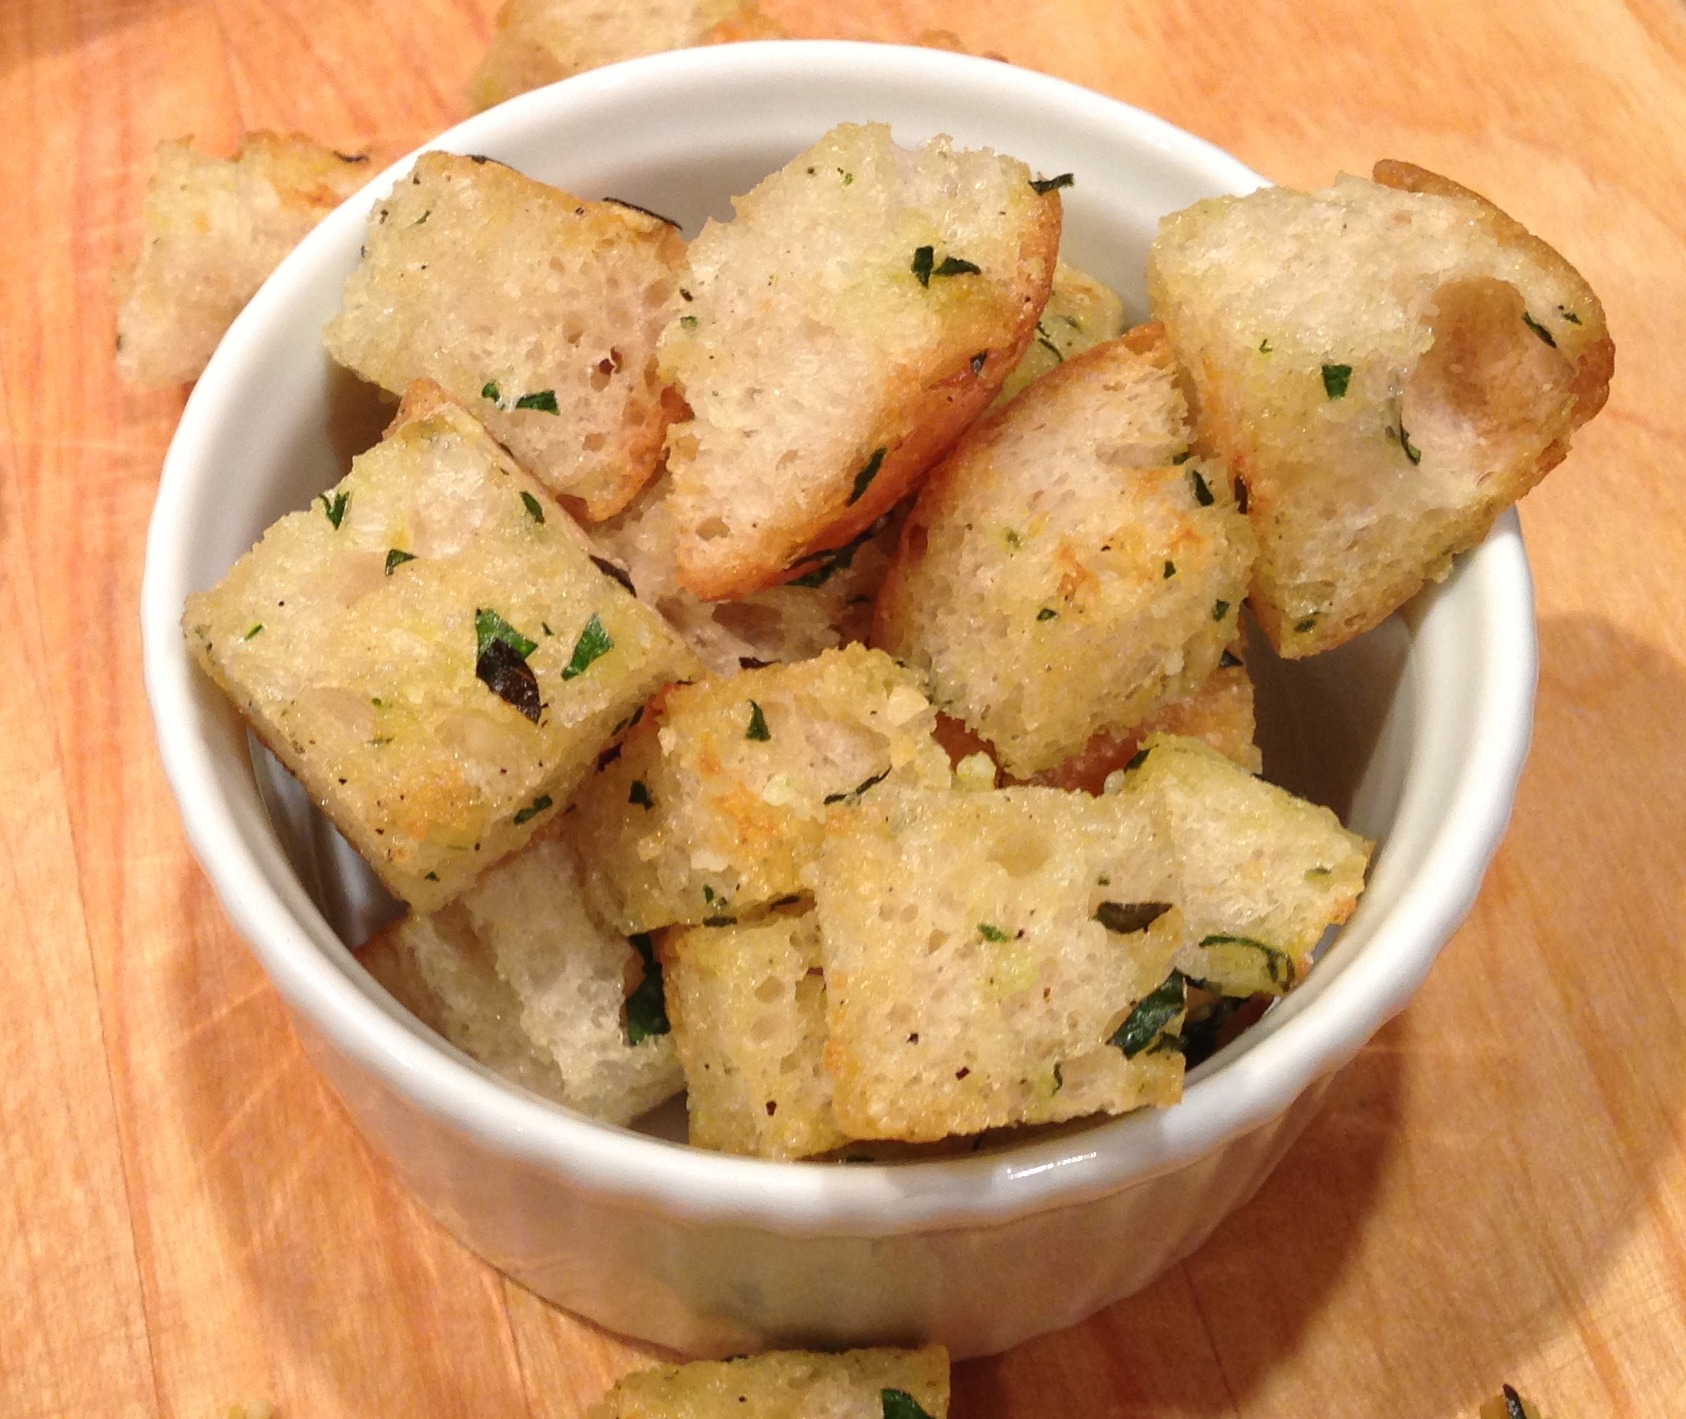
Top it off with some fresh Parmesan cheese and a side salad, and you’ve got yourself a meal. Enjoy!

chicken pesto pasta
chicken pesto pasta

Chicken Pesto Pasta
Prep time:
Cook time:
Total time:
Serves: 4
Recipe adapted from Prevention Magazine
Ingredients
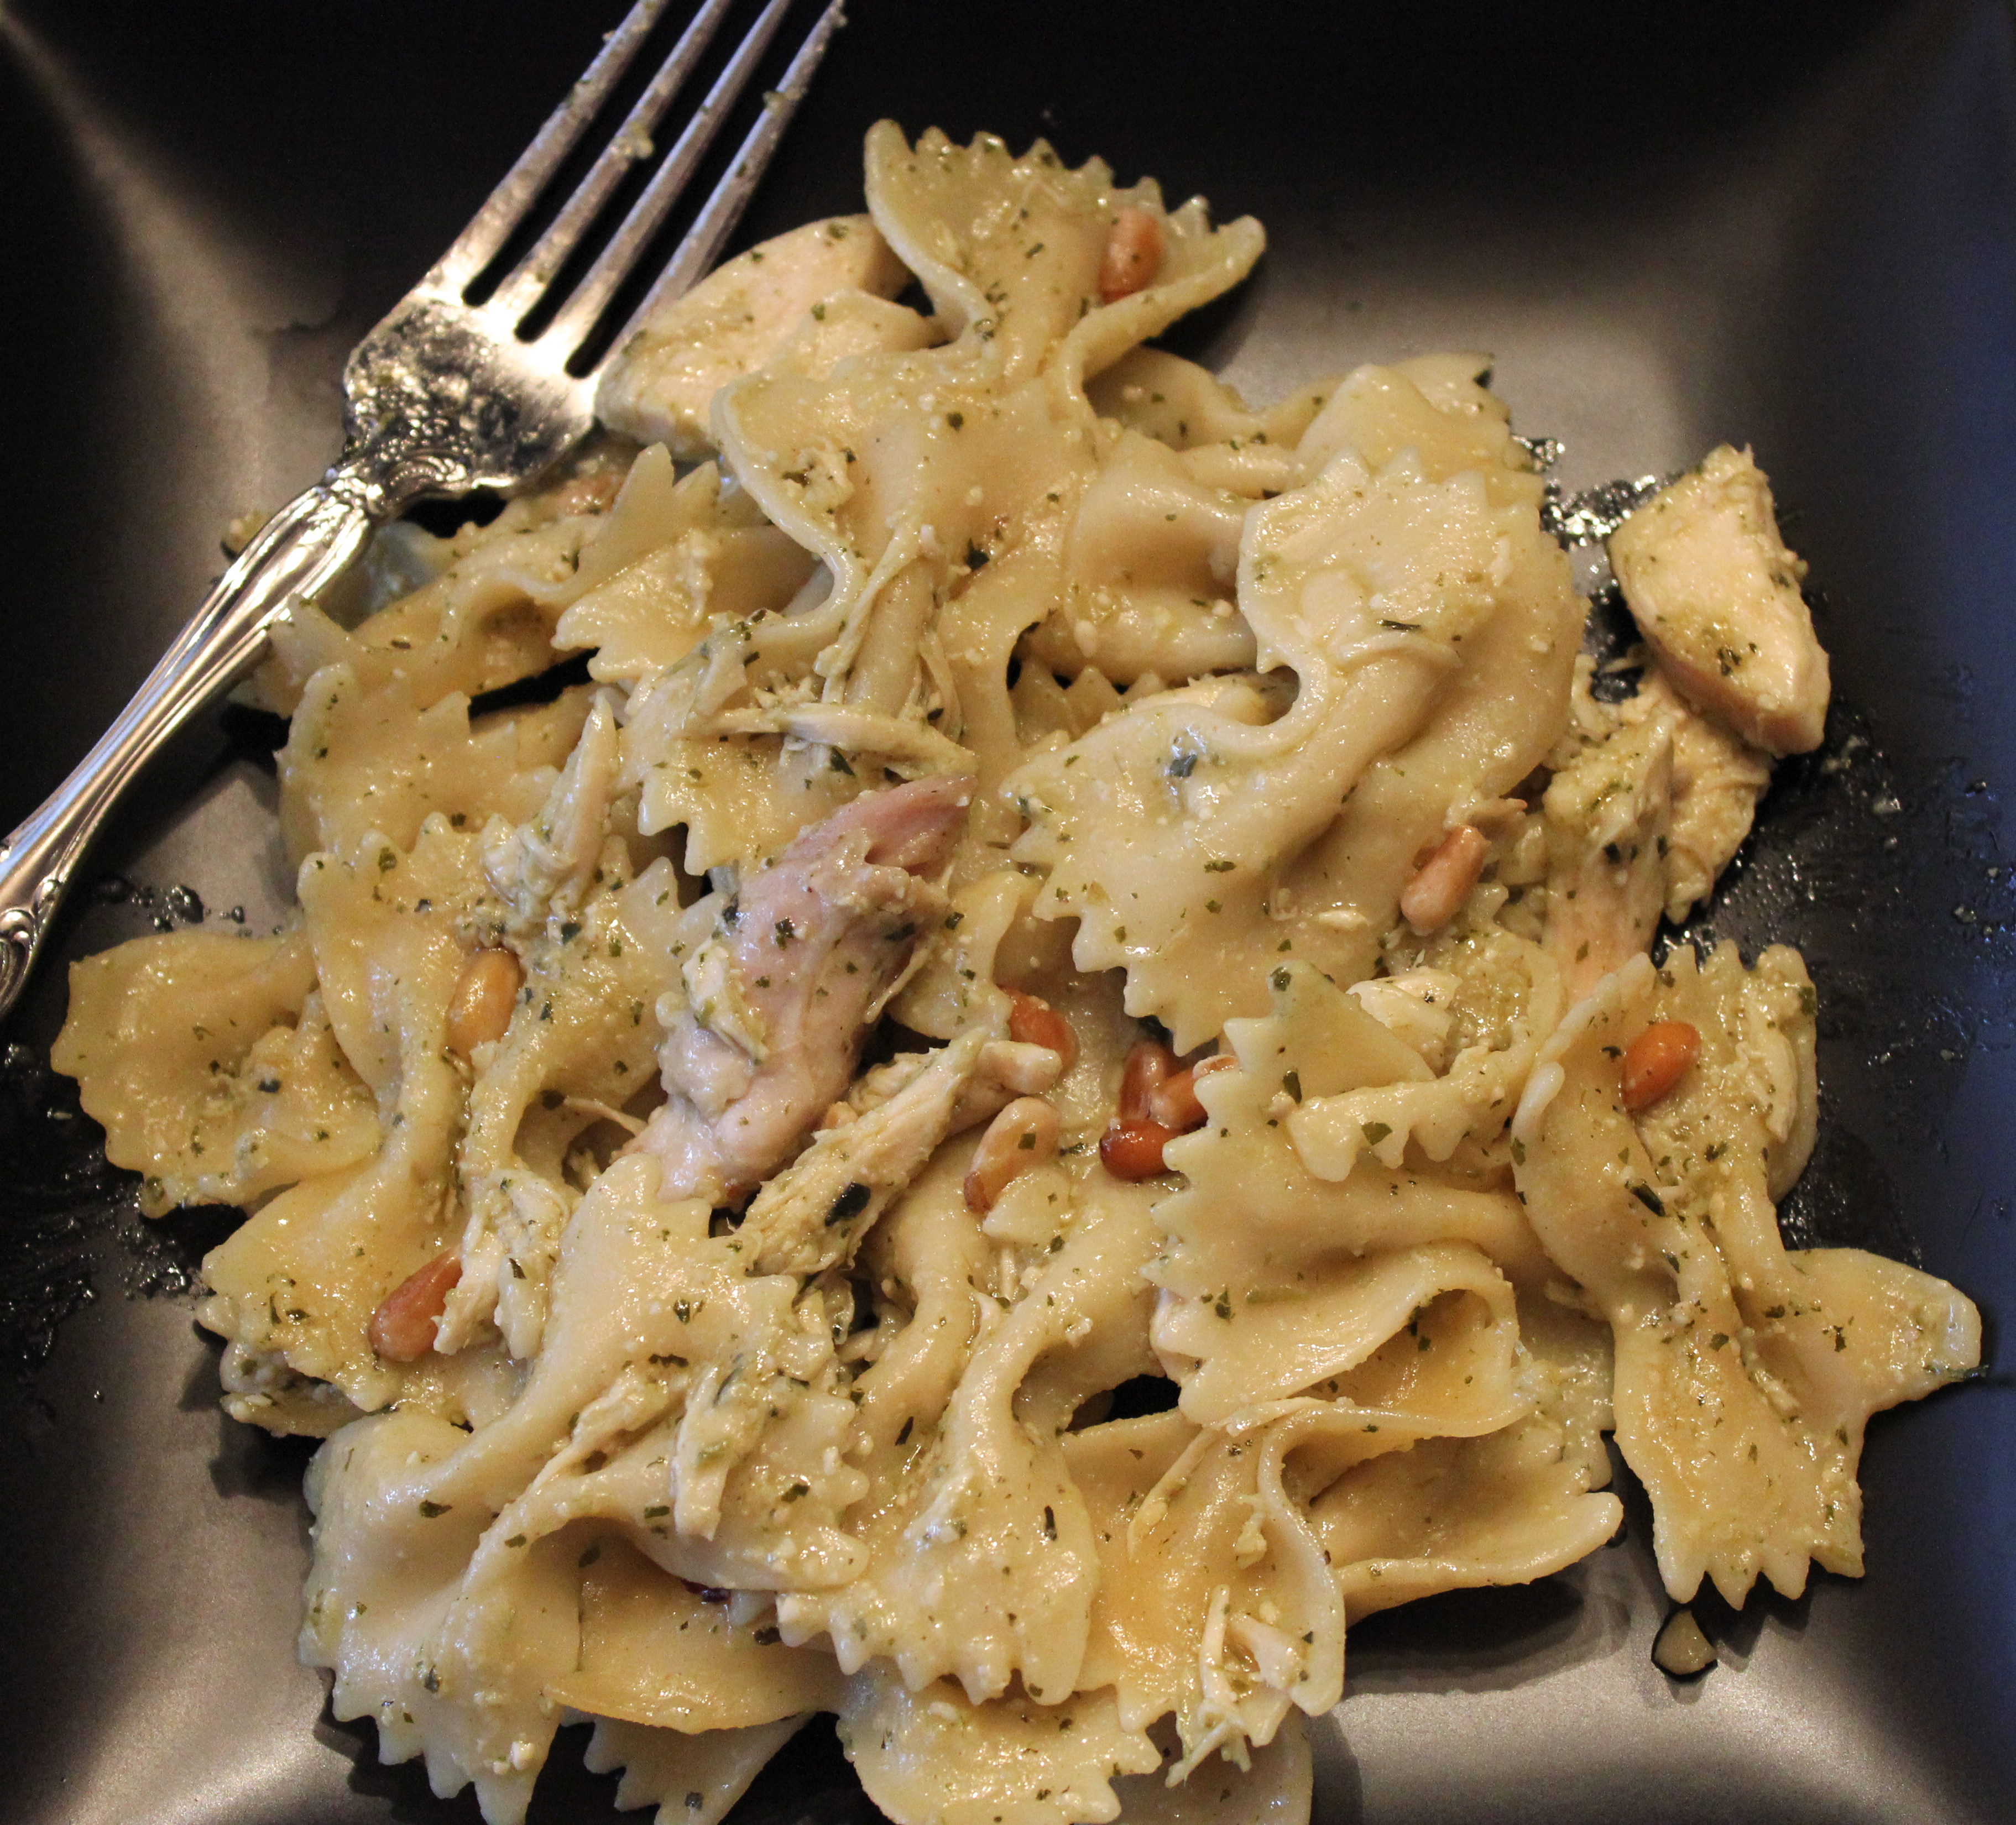
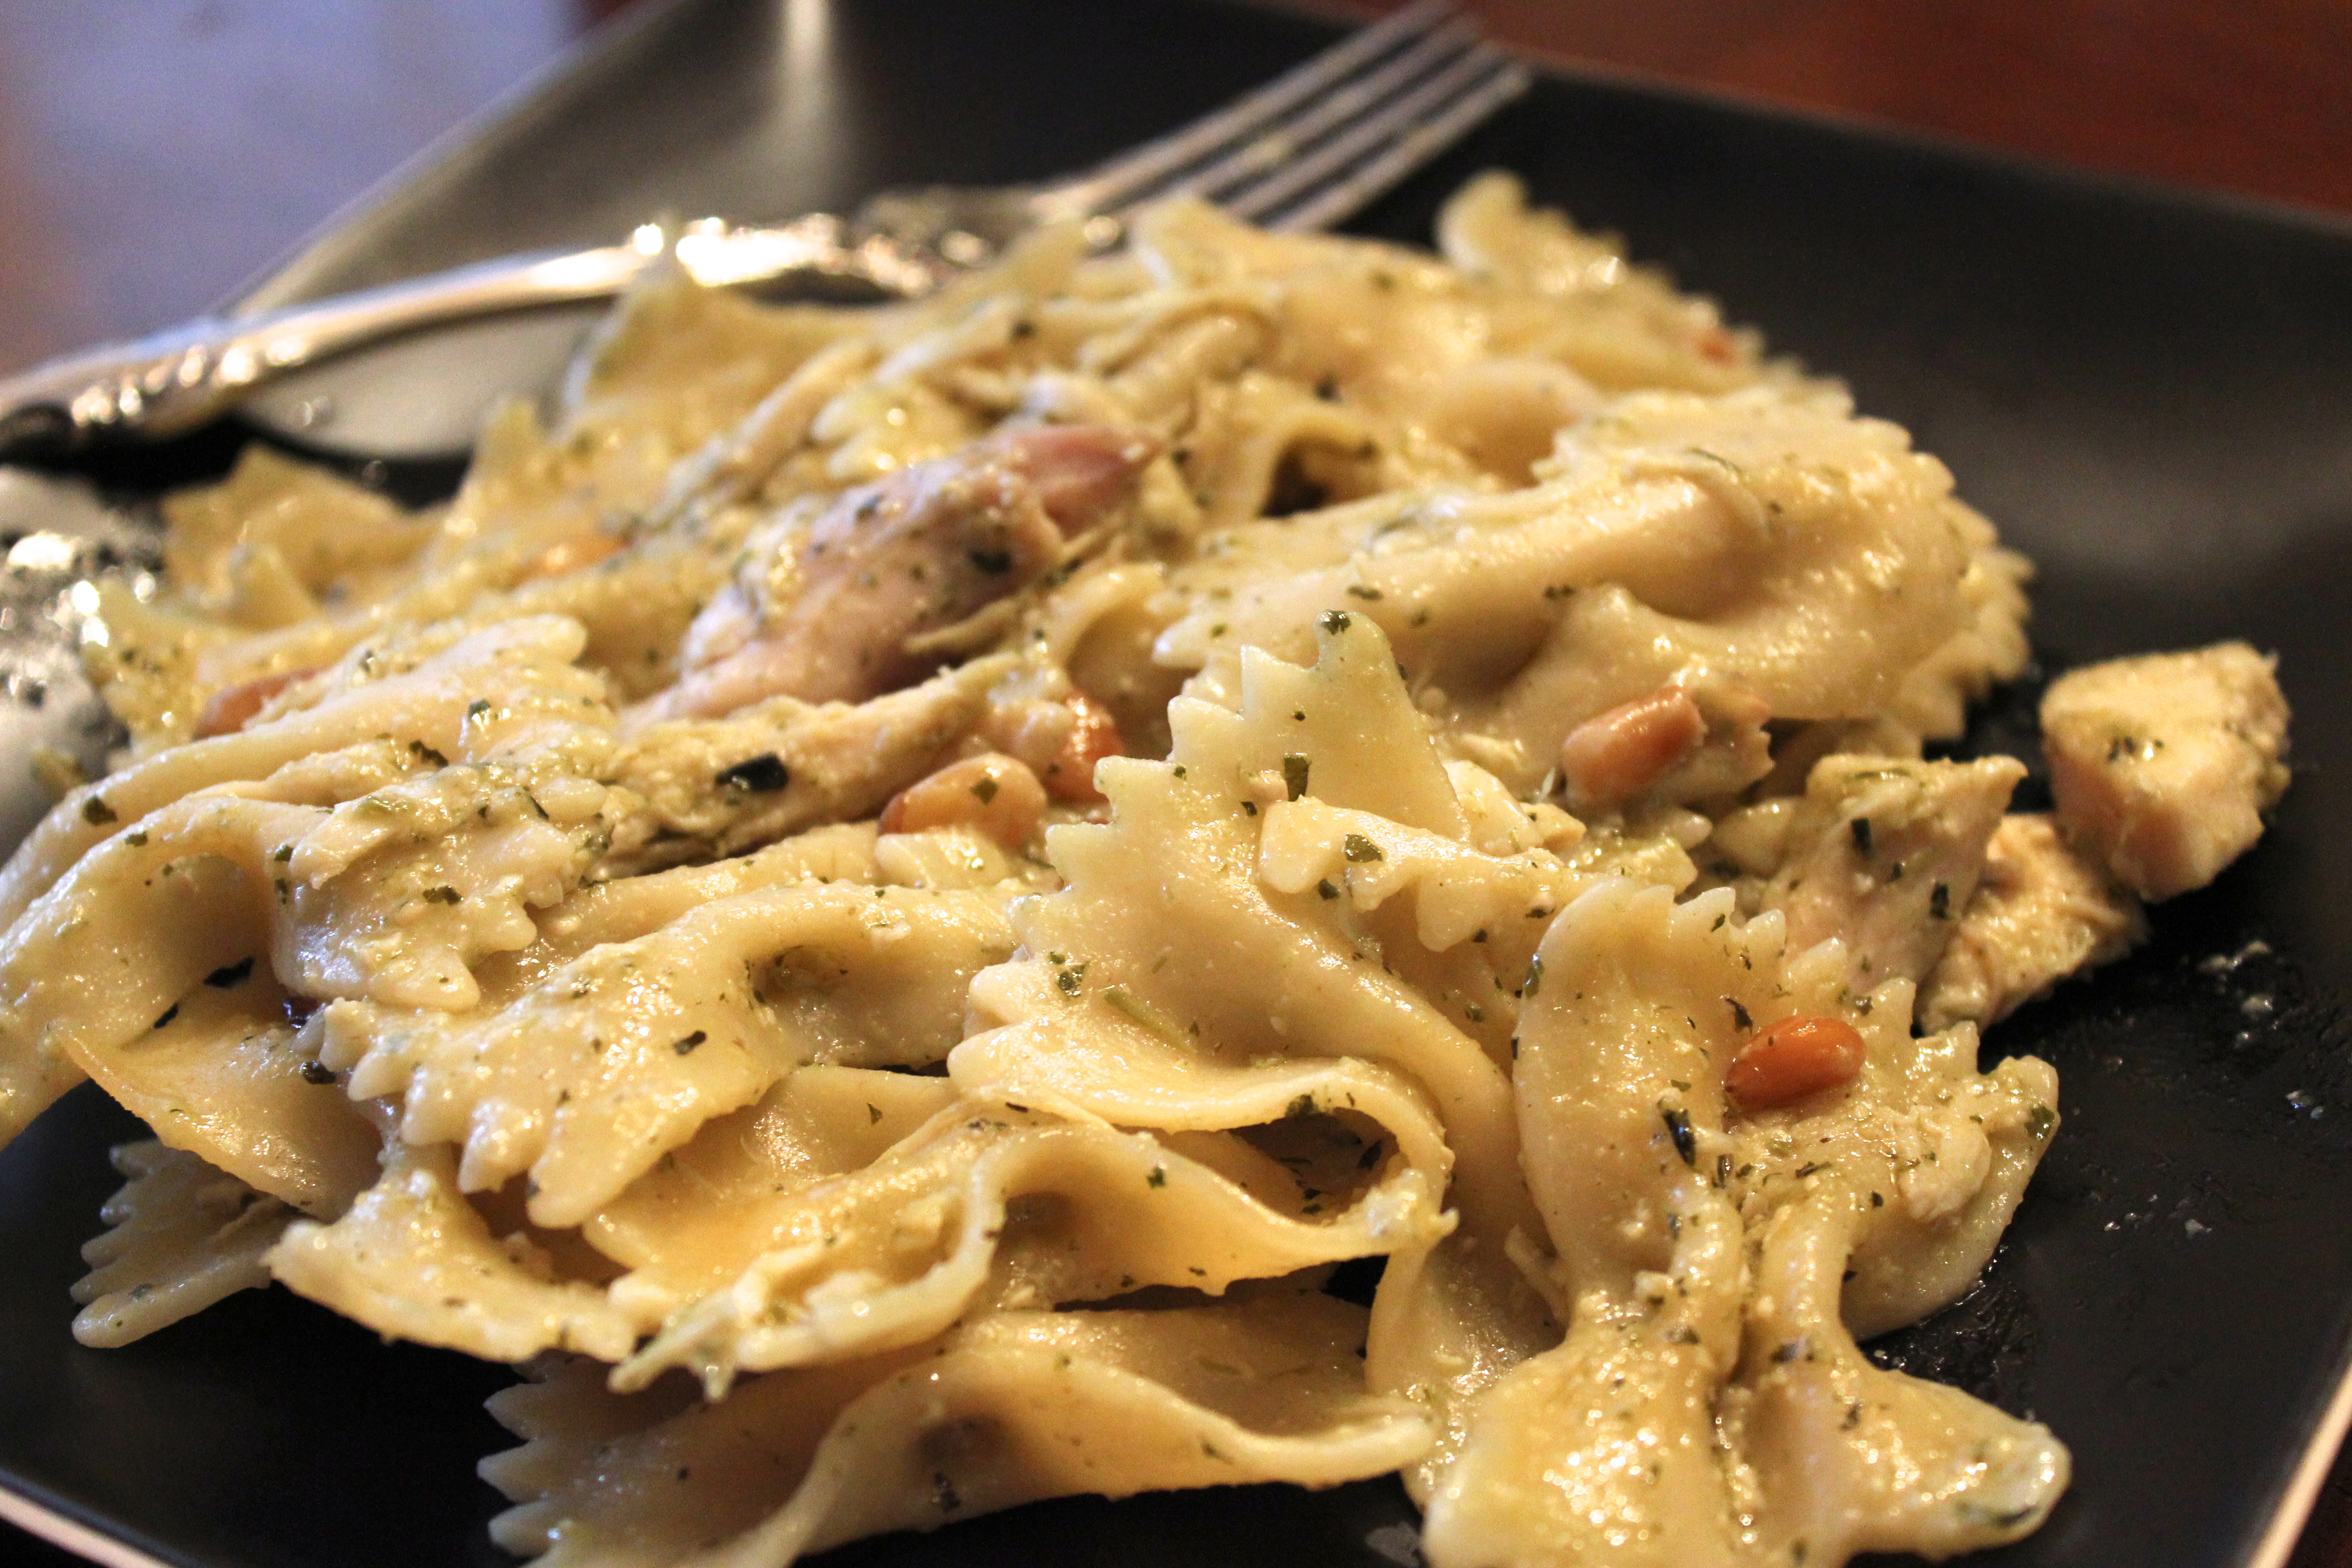
  • 2 cups shredded rotisserie chicken
  • 1 1/2 cups reduced-sodium chicken broth
  • 1/2 cup basil pesto
  • 10 oz. bow-tie pasta (can use fettuccine, rotini, or pasta of your choice)
  • 1-2 Tbsp. fresh lemon juice
  • 1/4 cup pine nuts, toasted
  • 1-2 Tbsp. olive oil, optional
Instructions
  1. Stir together chicken, broth, and 1/4 cup of the pesto in a large, deep skillet.
  2. Cook pasta, drain and add to skillet with lemon juice to taste. Cook over medium heat, stirring, until heated through, about 3 minutes.
  3. Season to taste with salt and pepper and top with pine nuts. Drizzle with oil, optional, and remaining 1/4 cup pesto.
Calories: 497 Fat: 15.5 Saturated fat: 3 Carbohydrates: 55 Sodium: 354 Fiber: 7 Protein: 34


Nutella Cookie Cups

nutella cookie cups

Matt and I hosted small groups at our house tonight for church and as always, I was volunteered to make the dessert. 🙂

If it were up to Matt, I’d make chocolate chip cookies every time we had small groups. But I get sick of making the same thing over and over again, and so I wanted to try out these Nutella cookie cups.

My friend Julie made them a few months back for a work luncheon and they were a huge hit!

nutella cookie cups

There’s just something magical about that delicious chocolate hazelnut spread. With only a handful of ingredients: skim milk, cocoa and hazelnuts, the unique taste of Nutella is something to rave about.

From cookies and toast to apples and ice cream, you can put Nutella on just about anything!

nutella cookie cups

These cookie cups are surprisingly easy to make. All you need is your favorite sugar cookie dough recipe, jar of Nutella, and a mini muffin pan.

I used this M&M cookie dough recipe and left out the M&Ms. It might be worth it to add mini chocolate chips to the cookie dough cups to make them extra chocolatey!

What did Matt think? He said they were terrible, but that’s because he didn’t know how to peel of the paper muffin liners completely! These little suckers are rich, but not too rich. The chocolate hazelnut spread adds a nice sweetness that is not nearly as overpowering as a scoop of straight chocolate. I’ll definitely be making these again.

Enjoy and good luck eating just one!

nutella cookie cups

Nutella Cookie Cups
Serves: 24
Ingredients
  • 3/4 cup (1 1/2 sticks) unsalted butter, softened
  • 3/4 cup light brown sugar, packed
  • 1/4 cup granulated sugar
  • 1 large egg
  • 2 tsp. vanilla extract
  • 2 cups all-purpose flour
  • 1 tsp. baking soda
  • 2 tsp. cornstarch
  • 1/4 tsp. salt
  • 1 (13 oz) jar Nutella hazelnut spread
Instructions
  1. Preheat oven to 350 degrees F. Grease a mini muffin pan or line with paper muffin cups.
  2. In bowl of a stand mixer fitted with a paddle attachment, combine the butter, sugars, egg, vanilla and beat on medium-high speed until well-creamed, light and fluffy, about 5 minutes.
  3. Scrape down the sides of the bowl and add the flour, cornstarch, baking soda and salt and mix until just combined, about 1 minute.
  4. Roll dough into balls about 1.5 inches thick (or you can use an ice cream scoop), and place into the mini muffin tin.
  5. Bake for 12-15 minutes, until golden brown but not too dark around the edges. When done, remove from oven and let sit for about 2 minutes. Then make wells for the Nutella with a shot glass or similar object. Add 1 tablespoon Nutella to each cup.
  6. Let cool 15-20 minutes in tin. Remove from tin and enjoy. Nutella will solidify in about an hour, which makes them safe to transport.


Foolproof Vodka Pie Crust and Dad’s favorite Chocolate Ice Box Pie

chocolate ice box pie with foolproof pie crust

My mom found an new favorite pie crust and it has an unlikely ingredient: Vodka.

Supposedly the vodka, because it is 80-proof, will mostly evaporate in the oven, meaning that the crust gets the liquid it needs but much of it will not stay. It creates an perfect pie crust with lots of flaky layers.

Worried about the boozy vibe of your pie? Don’t be. My family doesn’t drink and thus we were worried about the same thing. According to Smitten Kitchen, vodka, by definition, is colorless and odorless, so once it’s baked, you’ll forget it was ever in there.

chocolate ice box pie with foolproof pie crust

It was my parent’s 38th anniversary last week, and Mom made my Dad one of his favorite desserts:  chocolate ice box pie. While I’ve blogged this pie before, we’ve never had a really good crust that we liked until now.

We usually bake  a store-bought crust to save on time. Plus Matt and Paula don’t even like pie crust. They will scoop out the chocolate, or whatever flavor pie filling, and leave the shell of the pie crust behind.

However, for those of us who LIKE pie crust (everyone else in this world besides Matt and Paula), we wanted a good crust recipe and found one!

vodka pie crust
Prick the bottom and sides of the pie crust with a fork. Line with foil and pie weights and bake for 10-12 minutes at 450 degrees F.
vodka pie crust
Let cool completely, then pour in the chocolate pie filling.
chocolate ice box pie
Look at all those flaky layers in the crust!

chocolate ice box pie with foolproof pie crust

chocolate ice box pie
I love these plates from Neiman Marcus. This one is tiffany blue, but there are three other colors: bubblegum pink, lavender purple and periwinkle blue.

Enjoy!

For the chocolate ice box pie recipe, click HERE.

Foolproof Pie Crust
Serves: 8
Recipe adapted from Cooks Illustrated, November 2007
Ingredients
  • 2 1/2 cups (12 1/2 ounces) unbleached all-purpose flour
  • 1 tsp. table salt
  • 2 Tbsp. sugar
  • 12 Tbsp. (1 1/2 sticks) cold unsalted butter, cut into 1/4-inch slices
  • 1/2 cup cold vegetable shortening, cut into small bites
  • 1/4 cup cold vodka
  • 1/4 cup cold water
Instructions
  1. Process 1 1/2 cups flour, salt, and sugar in food processor until combined, about 2 one-second pulses. Add butter and shortening and process until homogeneous dough just starts to collect in uneven clumps, about 15 seconds (dough will resemble cottage cheese curds and there should be no uncoated flour).
  2. Scrape bowl with rubber spatula and redistribute dough evenly around processor blade. Add remaining cup flour and pulse until mixture is evenly distributed around bowl and mass of dough has been broken up, 4 to 6 quick pulses. Empty mixture into medium bowl.
  3. Sprinkle vodka and water over mixture. With rubber spatula, use folding motion to mix, pressing down on dough until dough is slightly tacky and sticks together.
  4. Divide dough into two even balls and flatten each into 4-inch disk. Wrap each in plastic wrap and refrigerate at least 45 minutes or up to 2 days.
  5. To fit into a standard 9-inch pie dish, roll out the dough to a 12-inch circle. Carefully transfer your dough to the pie plate. Prick the bottom and sides of the crust with a fork. Line the pie crust with foil and add ceramic pie weights (rice or beans to will also work) to keep the pie crust from rising.
  6. Bake at 450 degrees for 10-12 minutes or until golden.
Notes
Makes enough for one 9-inch double-crust pie.


Upside-Down Wedding Cake (No really!)

wedding cake

Gorgeous cake right?

It sure was!!! While the bridal party, the parents, the in-laws, the grandparents, the kids, the wedding guests and I got to thoroughly enjoy this cake, my sister Brittany and her husband Colby did not. 😦

That’s what typically happens during weddings, right? (Wrong if you’re my mother in-law Paula.  She  wouldn’t have had the slightest bit of trouble sitting down to enjoy a nice big slice of cake!) But the bride and groom are not at all like Paula, and thus didn’t really get a chance to enjoy their beautifully crafted wedding cake. They were doing their due diligence of visiting and thanking people for coming.

Like I said, the cake was AWESOME!!! Each layer of the tiered cake had a different flavor. One was red velvet with mini chocolate chips, another was strawberry, and the last was white chocolate pound cake.

I had the red velvet. BEST. RED VELVET CAKE. EVER!!!

grooms cake

grooms cake

Let’s not forget the groom’s cake, which was chocolate s’mores: a chocolate cake with a thin filling of crushed graham crackers and marshmallow creme. The top of the cake mirrored a track and it had chocolate and white chocolate tuxedo dipped strawberry groomsmen running around it.

Plus, instead of alcohol (we don’t drink), there was a coffee/hot chocolate bar, and party favor bags with pink and white M&Ms, white chocolate covered pretzels, Hershey’s Kisses, popcorn and jelly beans!

Don’t worry, it wasn’t a sugar reception. There was normal food too like pb&j, ham and cheese and chicken salad sandwiches. Talk about walking away full!

169533_10151113907924206_1767173077_o

But anyways… Happy 1st Anniversary to my sister Brittany and her husband Colby!!!

One of my favorite wedding traditions is the 1 year “save a piece of your cake” tradition. While the taste of the cake one year later isn’t all that good, it’s still fun cutting a large slice and remembering the good times from your wedding.

wedding cake

BUT UNFORTUNATELY for Brittany and Colby, someone at the reception venue threw her cake into the trash!!!!

My mom was the one who realized it late that night and had to break the bad news to Brittany. Yikes!!! And yikes for several reasons….

  1. Not only did their wedding cake get thrown in the trash…
  2. It was raining cats and dogs on the night of their wedding in the middle of August!!!
  3. Brittany’s wedding dress almost got ruined because a skunk sprayed the dogs two nights before her wedding and the dogs brought the skunk stench inside the house!
  4. Ask Brittany for the other mishaps…. there were quite a few!

Image 7

So in order to make things right, the bakery who made the wedding cake offered to ship Brittany and Colby a replica to them in Michigan. Sounds great, right?

Fresh cake. Check.

Something to look forward to in the mail. Check.

BUT…the bakery is in Dallas, and Brittany and Colby live in Michigan!!! Let’s hope for save travels for that cake.

And this is what arrived in the mail:
upside down wedding cake

Obviously safe travels weren’t necessarily obtained for the poor cake. Apparently it was thrown around in it’s box, huge gaps in the cake crushed, and buttercream frosting all over the place!

Honestly, I think its hilarious and “par for the course” as Matt would say. I told Brittany she should have ordered cake balls.

Matt called it an “upside-down wedding cake”.

Mom said that maybe the bakery was sending her a “replica” of the one in the trashcan!!! Hahaha. 🙂

upside down wedding cake

upside down wedding cake

upside down wedding cake

img1

Anyways, I hope ya’ll enjoyed your 1st Anniversary and Matt and I wish you many many more!!!!

Blueberry Sweet Muffins

blueberry muffins

Taking advantage of summer blueberries, I finally got around to making these blueberry sweet muffins, a recipe I had been eyeing out of Southern Living Comfort Food: A Delicious Trip Down Memory Lane.

But before I get to the muffins, somebody pinch me!! 63 degrees in Dallas, TEXAS in the middle of August???? I couldn’t believe it! So, instead of sleeping in late on this Saturday morning, I figured I better take advantage of the nice weather and go for a run.

Morning runs are the best despite getting up at the crack of dawn. 🙂 However, once I’m up, I’m good to go for the rest of the day!

texas sunrise
Enjoying the cool weather and sunrise. Gorgeous view except for the power lines!

The great thing about these muffins is that they are a cinch to whip up. After running, I didn’t have much patience for waiting around for breakfast, and was able to get these on the table in under 30 minutes from start to finish!

The recipe is almost effortless, plus I can almost guarantee you’ll have all the ingredients in your pantry.

IMG_4141
Start by whisking the egg, milk and oil together in a small bowl.
blue
Combine the flour, soda, sugar and salt together in a medium bowl.


I actually substituted white whole wheat flour for the all-purpose flour. I think using 100% all-purpose would taste better, but they say white whole wheat is better for you, thus I wanted to try it out.

So what’s the difference between whole wheat flour and white whole-wheat flour? It’s the type of wheat used. White whole wheat flour is made with white wheat, which lacks bran color. It is milder in flavor and lighter in color. Nutritionally it is the same. Think of white whole wheat flour as a sort of albino version.  To learn more, click HERE. 

To finish making the muffins, you’ll pour the wet ingredients into the dry ones, and stir until just combined. Then you’ll fold in your blueberries. That’s it! Then just scoop the batter into lined muffin cups and bake for 20 minutes.

IMG_4143
Bake at 400 degrees F for 20-25 minutes.


Let the muffins cool slightly in the pan, then transfer them to a wire rack and let them cool completely.

I like mine hot so that I can drizzle them with some Colorado honey. Enjoy!!

blueberry muffins

blueberry muffins blueberry muffins

  • For those living in Dallas, did you enjoy the cooler weather this morning? What is your favorite breakfast muffin?


Blueberry Sweet Muffins
Prep time:
Cook time:
Total time:
Serves: 10
Recipe adapted from Southern Living Comfort Food: a delicious trip down memory lane
Ingredients
  • 1 1/2 cups all-purpose flour (I used white whole wheat flour)
  • 1/ 2 cup sugar
  • 2 tsp. baking powder
  • 1/2 tsp. salt
  • 1/3 cup milk (I used skim)
  • 1/4 cup vegetable oil
  • 1 large egg
  • 1 cup fresh or frozen blueberries
  • 1 Tbsp. sugar
Instructions
  1. Preheat oven to 400 degrees F. Combine first 4 ingredients in a large bowl; make a well in center of mixture.
  2. Stir together milk, oil, and egg; add to dry ingredients, stirring just until moistened. Fold in blueberries.
  3. Spoon into greased or paper-lined standard muffin pans, filling two-thirds full. Sprinkle batter with 1 tablespoon of sugar.
  4. Bake for 20-25 minutes or until muffins are golden. (I baked mine at 375 degrees F in a convection oven for 20 minutes). Remove from pans immediately and cool on wire racks.


Gordon, Texas and Nila’s Skillet Cookies

Skillet Cookies

This past weekend my sister and I headed to “out to the country” to visit relatives who just built a house in Gordon, Texas.

99% of you have probably NEVER heard or Gordon, and there’s a good reason why.

Gordon: Population: 519. At least that’s what the sign said. 🙂

The little town is about 30 minutes west of Weatherford off I-20, and is the epitome of Texas country. It has everything you’d ever image from a small Texas town including windy dirt roads and rolling hills, a 6-man football team, cows, cowboy boots, cowboy hats, horses, and stables. It’s peaceful and perfect. Almost like what you would expect from the movies.

gordon texas
Brittany and I went running and stopped for a picture at the top of the hill. It doesn’t look like a big hill, but trust us, it was!!
IMG_1573
Cousins 🙂
gordon texas
Horseback riding at the stables.
IMG_1568
Our cousins had a blast on their horses.
IMG_1571
We had breakfast at a little cafe. The pancakes were as big as the plate and this cow was staring at us the whole time!
gordon texas
We went to a farmers market in downtown Gordon and picked up some fresh eggs, honey and homemade whole wheat loaf bread. Then our cousins played in a nearby park.
gordon texas
The gorgeous view and sunset from my aunt and uncle’s porch in Gordon, Texas.

We also got to visit with my great aunt Nanny. She’s  91 years old and still LOVES sweets, especially chocolate thus we brought her my Mom’s secret ingredient brownies.

Nanny’s older sister was Nila, my grandmother. Recently my mom, sister and I had been going through Nila’s old green recipe box and tabbing the ones we wanted to make. One of those recipes were these easy no-bake skillet cookies.

IMG_1589
My great aunt Nanny.
skillet cookie recipe
Nila’s handwritten recipe for Skillet Cookies.

skillet cookie recipe

All our relatives at Gordon LOVED the skillet cookies and thus we kept going back for seconds and thirds. No one, including us had ever heard of a cookie like this, and while the ingredient list (dates, pecans, coconut, sugar, butter and eggs) doesn’t sound too appetizing, the cookies are surprisingly good!

Not only are the skillet cookies pretty (I think they look like little truffles rolled in finely shredded coconut), they take less than 30 minutes to make.

Sometimes old-timey recipes are the best ones; case in point: these skillet cookies. Now we’ll just have to see what other recipes Nila has in that old green box of hers!!

Skillet Cookies
Combine butter, sugars, karo, and dates in a large skillet.
skillet cookies
Cook on medium-low for 8-10 minutes, stirring constantly.  Remove from heat, add vanilla, nuts and Rice Krispies and mix well.
Skillet Cookies
Pinch dough into balls and roll in shredded unsweetened coconut.

Skillet Cookies

Nila’s Skillet Cookies
Prep time:
Cook time:
Total time:
Nila’s Skillet Cookies
Ingredients
  • 2 eggs (well-beaten)
  • 1/2 cup brown sugar
  • 1 cup white sugar
  • 1/2 stick unsalted butter
  • 2 Tbsp. Karo syrup
  • 1 tsp. vanilla
  • 1 package (8 oz) chopped dates
  • 1 cup chopped pecans
  • 3 cups Rice Krispies
  • Coconut, unsweetened and finely shredded
Instructions
  1. Combine eggs, sugar, butter, Karo and dates in a large skillet.
  2. Cook for 8-10 minutes on medium-low, stirring constantly. We saw tiny little bubbles start to form, but we did not bring to a full boil.
  3. Remove from fire/heat and add vanilla, nuts and Rice Krispies.
  4. Mix well and let cool slightly.
  5. Butter your fingers (butter works better than cooking spray), and pinch dough into balls. Roll the balls in the coconut.


Pam’s “2 x 4” Chili

IMG_3906

August in Texas means mornings so humid and warm that its nearly unpleasant to go for a walk or run, scorching hot summer afternoons leaving your backyard looking like a dessert, back-to-school shopping, and last-minute vacations for those escpaing the heat and enjoying their last getaway before school starts.

As mentioned before, I write the resident recipe column for our monthly neighborhood magazine. For this month’s article, I featured a resident who discovered this “2 x 4” Chili while on a camping trip with her father in August. It’s a neat story, and a ridiculously simple yet delicious recipe, so enjoy! An excerpt from the article appears below:

“Road trip! Pack your bags,” Pam’s father announced. “We are headed for Blue Lake and Bear Mountain in Colorado where we’ll be camping in a tent and staying in a campground area!”

For those of you who know Pam, she is more at home at a spa rather than a tent, but she was only 12 years old and he was her beloved father. When they arrived at the campgrounds, they overheard the campers next to them talking about having “2 x 4” for dinner. Curious as they were, they asked for the recipe, which consisted of 2 pounds of beef, 2 cans of Rotel, 2 cans of minestrone soup, and 2 cans of Ranch Style Beans; hence the name “2 x 4”.

Who knew that this road trip would teach Pam an extremely quick recipe to share with her carnivorous friends and neighbors!

IMG_3890
All you need are 2 cans Rotel, 2 cans Ranch Style beans, 2 cans minestrone soup and 2 pounds of beef.
IMG_3895
Once the beef is browned, add the rest of the ingredients.
IMG_3893
Combine ingredients, cover and simmer for 15 minutes.

While this recipe originates on the campgrounds, you don’t have to go camping to enjoy this delicious chili. Pam and her husband have “2 x 4” for dinner at least 2-3 times per month, and even enjoy it served with their elegant Gianni Versace Medusa China, Waterford crystal and Grand Baroque sterling!

2 x 4 chili
Set a beautiful table with your finest of china, or simply eat on paper plates while camping. 🙂

IMG_3898

2 x 4 chili
Doesn’t this look delicious?
2 x 4 chili
Top with Fritos and shredded cheddar cheese.
IMG_3923
The chef!
Pam’s “2 x 4” Chili
Serves: 4-6
Ingredients
  • 2 lbs. ground round
  • 2 cans Rotel
  • 2 cans minestrone soup
  • 2 cans Ranch Style Beans
Instructions
  1. Brown beef in a large sauce pan over medium-high heat and cook until crumbly and brown.
  2. Add Rotel, minestrone and Ranch Style Beans, and stir.
  3. Cover and simmer on low for 15 minutes.
  4. Serve with Fritos and shredded sharp cheddar cheese.


Spiced Pork Tenderloin with Maple-Chipotle Sauce

IMG_1474

I don’t know about you, but summer is definitely my favorite time of the year.

I used to like cold weather better… bundling up in warm jackets, sipping hot chocolate, and sitting by the fire, BUT…. as I’ve gotten older, I’ve come to LOVE being outdoors!

Being outdoors in the sun and warmth mean getting a tan, working up a sweat from a nice long run, pool parties, backyard grilling, summer vacation, more daylight, and more productivity (at least for me)!!

IMG_1484

When I heard my mom and dad were grilling out for dinner this week, I couldn’t help but invite myself over. Don’t worry, I don’t normally invite myself over to friends’ houses, but these are my parents. 🙂

I love anything grilled, and this pork tenderloin, was fast, easy and healthy. It’s got a nice smokey taste to it from the adobe chilies, paired with sweet maple syrup and tangy cider vinegar, for a surprisingly good combination of flavors.

My parent’s cat, Pippa even liked the tenderloin. (Yes, Pippa is named after Kate Middleton’s sister. Silly, I know….but a super cute name for a cat). Pippa is not your normal cat. She is not independent or weird, or aloof like most cats. In fact, she behaves like my dog Skippy… a lap dog who loves attention, food, and being petted.

IMG_1493
Who ever heard of a cat begging for people food…. in your lap???

Enjoy the rest of your summer and TGIF!!

Spiced Pork Tenderloin with Maple-Chipotle Sauce

Spiced Pork Tenderloin with Maple-Chipotle Sauce
Serves: 8
Spiced Pork Tenderloin with Maple-Chipotle Sauce
Ingredients
  • 1/2 tsp. salt
  • 1/2 tsp. dried thyme
  • 1/4 tsp. ground nutmeg
  • 1/4 tsp. ground cinnamon
  • 1/4 tsp. freshly ground black pepper
  • 1/8 tsp. ground allspice
  • 2 (1-pound) pork tenderloins, trimmed
  • 2 tsp. olive oil
  • 1 (7-ounce) can chipotle chiles, canned in adobo sauce
  • 1/2 cup maple syrup
  • 3 Tbsp. fat-free, less-sodium chicken broth
  • 1 1/2 Tbsp. cider vinegar
Instructions
  1. TO PREPARE PORK: combine first 6 ingredients; sprinkle evenly over pork. Place in a large zip-top plastic bag; seal and refrigerate 3 hours.
  2. Preheat oven to 375 degrees F.
  3. Remove pork from bag. Place pork in a roasting pan; drizzle with oil. Bake at 375 for 30 minutes or until a thermometer inserted in center of pork registers 155 degrees F.
  4. Remove pork from pan; cover and let stand 10 minutes.
  5. TO PREPARE SAUCE: remove 2 teaspoons adobo sauce from can of chiles; reserve remaining chiles and sauce for another use. Add 2 teaspoons adobo sauce, syrup, broth and vinegar to roasting pan, scraping pan to loosen browned bits.
  6. Cook over medium heat 5 minutes, stirring constantly.
  7. Remove from heat. Place pork in pan, turning to coat. Remove pork from pan, reserving sauce in pan.
  8. Cut pork into 1/2-inch thick slices. Strain sauce through a fine sieve into a bowl; serve with pork.
Calories: 201 Fat: 5.1g Carbohydrates: 13.8g Sodium: 229mg Fiber: 0.3g Protein: 23.9g Cholesterol: 74mg


Heath Bar Poke Cake

heath bar poke cake

There must be something in the water, because within the past year Matt and I have had no less than 10 baby showers/baby gift shopping that we’ve had to do!

Last night, it was my turn to make dinner for my friend Ashely and her husband, who just had a baby. For the main course I made aunt Jolene’s chicken enchiladas, spanish rice, ranch style beans and a side salad with Catalina dressing.

Is is crazy that when making meals for friends, the first thing that comes into my mind is dessert? LOL. I knew Ashely was a big fan of poke cakes, so this Heath Bar Poke Cake immediately came to mind!

I’ve never been much of a cake fan, that is….unless it is loaded with icing so as to cover up the dryness of the cake. I can’t stand dry cakes….so poke cakes are the perfect solution in yielding a moist cake!! 🙂

As for poke cakes, here are a few of my favorites: My friend Katie makes a great chocolate poke drizzled in vanilla Jell-O pudding  and topped with crushed Oreos. Yum!!! Then there’s this awesome Classic Vanilla Tres Leche Cake that my mom requested for her birthday last year.

Finally…. I just discovered the recipe for this Heath Bar Poke cake when Matt and I had dinner over at a friends house just a few weeks ago. What I like about this cake is that it is super easy to make, it’s sweet, and the Heath milk chocolate toffee bits add a nice crunch atop the Cool Whip frosting. Delicious!!!!

Do you have a favorite poke cake combination? Let me know!

heath bar poke cake
Once the cake is removed from the oven, poke holes evenly over the top of the cake using the end of a wooden spoon, a skewer or the tines of a fork.
heath bar poke cake
Evenly pour a can of sweetened condensed milk over the hot cake.
heath bar poke cake
Evenly pour the caramel sauce on top of the hot cake.
heath bar poke cake
Let cake cool completely before frosting with 8 ounces of Cool Whip and Heath milk chocolate toffee bits.

heath bar poke cake heath bar poke cake

Heath Bar Poke Cake
Cook time:
Total time:
Serves: 12
Ingredients
  • 1 chocolate cake mix (I used Duncan Hines milk chocolate)
  • 1 (14-ounce) can sweetened condensed milk
  • 1 12-ounce) jar caramel sauce
  • 8 ounces Cool Whip
  • 1/2 of a 1 (8-ounce) package Heath milk chocolate toffee bits
Instructions
  1. Bake chocolate cake according to box instructions in a 9 x 13-inch cake pan.
  2. While cake is still hot, immediately poke holes all over the top of the cake. You can use the end of a wooden spoon, a skewer, the tines of a fork, etc.
  3. Slowly pour the can of condensed milk all over the top of the cake, making sure to drizzle it evenly all over the top. Then pour the caramel sauce all over the cake.
  4. After the cake has cooled completely, spread Cool Whip over the top of the cake. Decorate with Heath milk chocolate toffee bits.


Parmesan Skillet Croutons

IMG_0825

Unless you count restaurants, I doubt very many of you have ever eaten homemade croutons….I sure haven’t.

I think my mom was in the “baking mood” as I like to call it, and wanted to make something different than cookies or muffins in the kitchen. Flipping through Jennifer Perillo’s cookbook, Homemade with Love, mom discovered this quick and easy recipe for croutons!

Not only are they well seasoned, these croutons are easy and quick to make, they are impressive to serve. Mom made these for dinner, served a top a caesar side salad, fresh bread and spaghetti.

Did I mention Italian food is my favorite? Enjoy!!

IMG_0851
Serve croutons with a caesar side salad.
parmesan skillet croutons
Parmesan Skillet Croutons


Parmesan Skillet Croutons
Prep time:
Cook time:
Total time:
Serves: 2 cups
Source: Homemade with Love by Jennifer Perillo
Ingredients
  • 2 cups (80 grams) cubed day-old baguette
  • 1 tsp. (2 grams) finely chopped fresh flat-leaf parsley
  • 2 Tbsp. (6 grams) grated Parmesan cheese
  • Sea salt and freshly ground black pepper
  • 1 Tbsp. (15 mL) extra virgin olive oil
Instructions
  1. Toss all ingredients together in a bowl until the bread cubes are well coated.
  2. Heat an 8-inch (20 cm) skillet over medium heat. Add the seasoned bread cubes to the pan and cook, turning occasionally, until golden all over, 5 to 7 minutes.
  3. Store in an airtight container for up to 3 days.