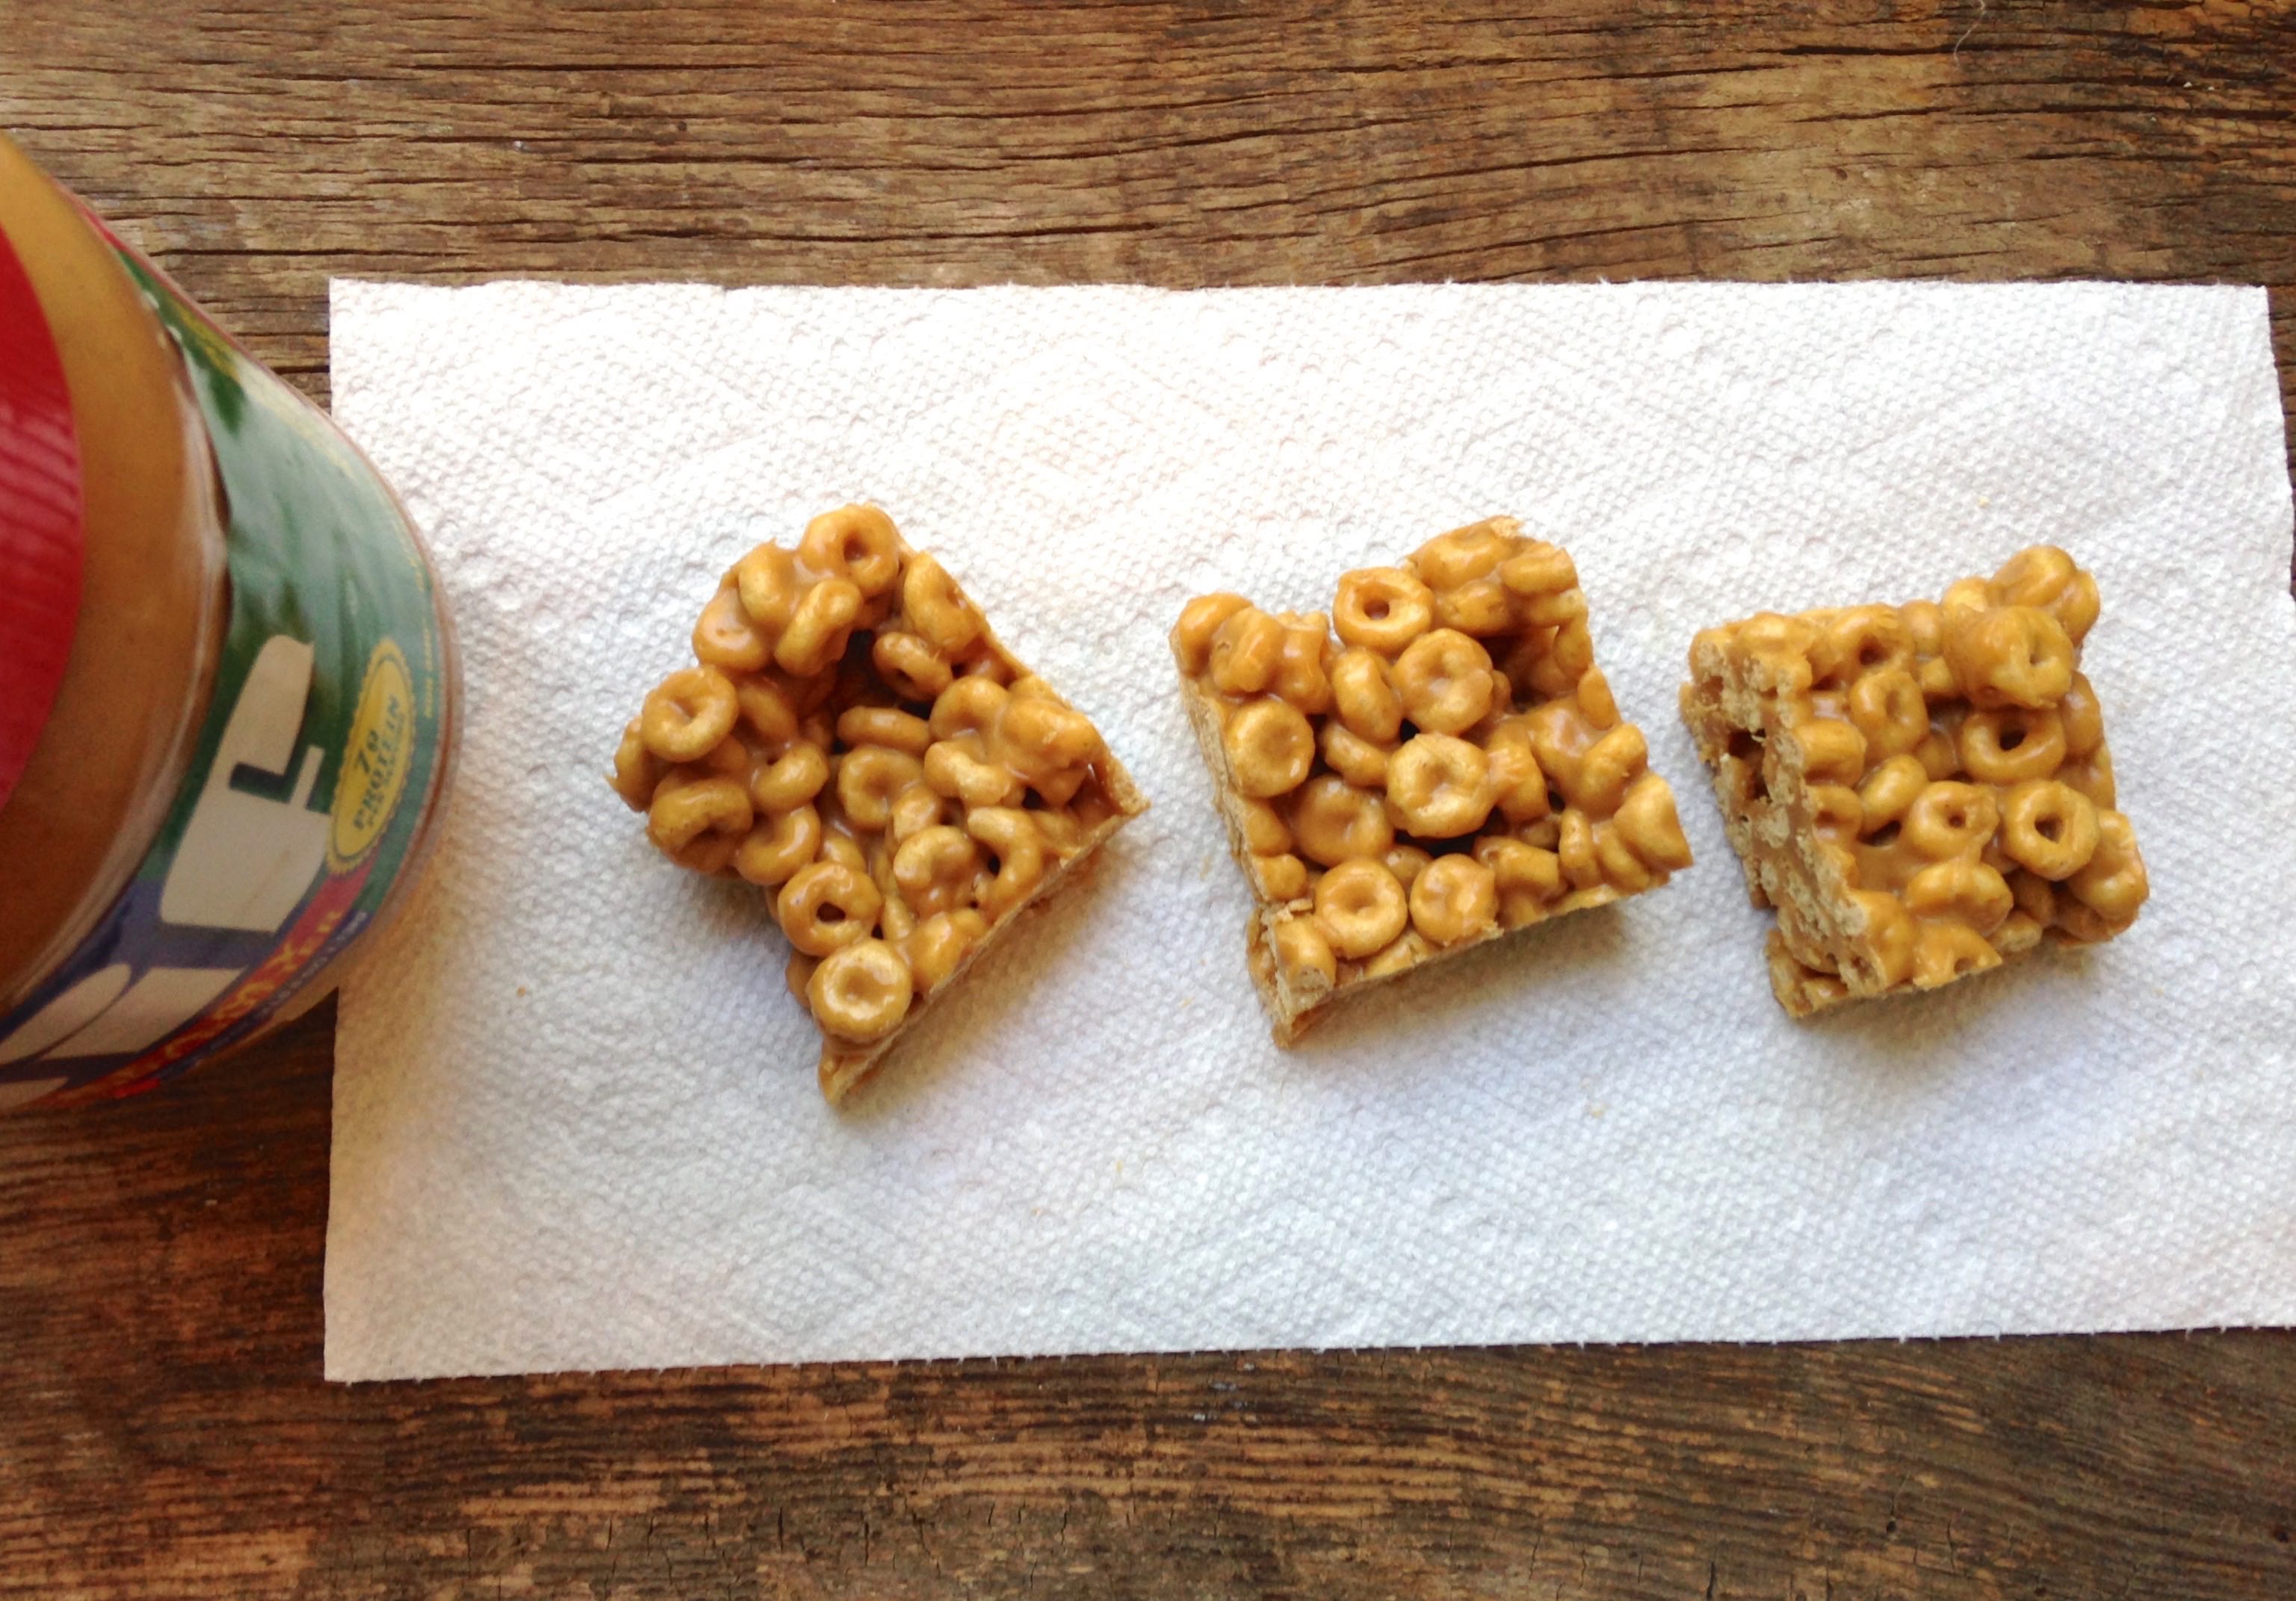
If you’re looking for a quick, easy recipe that’s toddler friendly, then look no further. With just three ingredients, and no baking required, you can almost make these Peanut Butter Cheerio Bars blindfolded.
Okay, blindfolded may be a bad example; you’ve got to measure the ingredients right! Lol. But seriously, they are super easy. This would be a great “first” recipe for your toddler to HELP you make if they are into cooking with you. 🙂
For those without kids, bring out the inner-kid in you, and feel free to whip these up for yourself. Who says you have to be a kid to eat Cheerios and peanut butter? Any age can enjoy these!
Say cheese!
Enjoy.
Peanut Butter Cheerio Bars
Cook time:
Total time:
Serves: 12 bars
Ingredients
3/4 cup smooth peanut butter (I used Jif)
1/2 cup honey (I used Nature Nates from McKinney, TX)
3 cups Honey Nut Cheerios
Instructions
Heat peanut butter and honey in a sauce pan over medium-low heat until combined.
Stir in Cheerios.
Press into greased 8-inch square pan lined with foil. Refrigerate for an hour, then cut into bars.
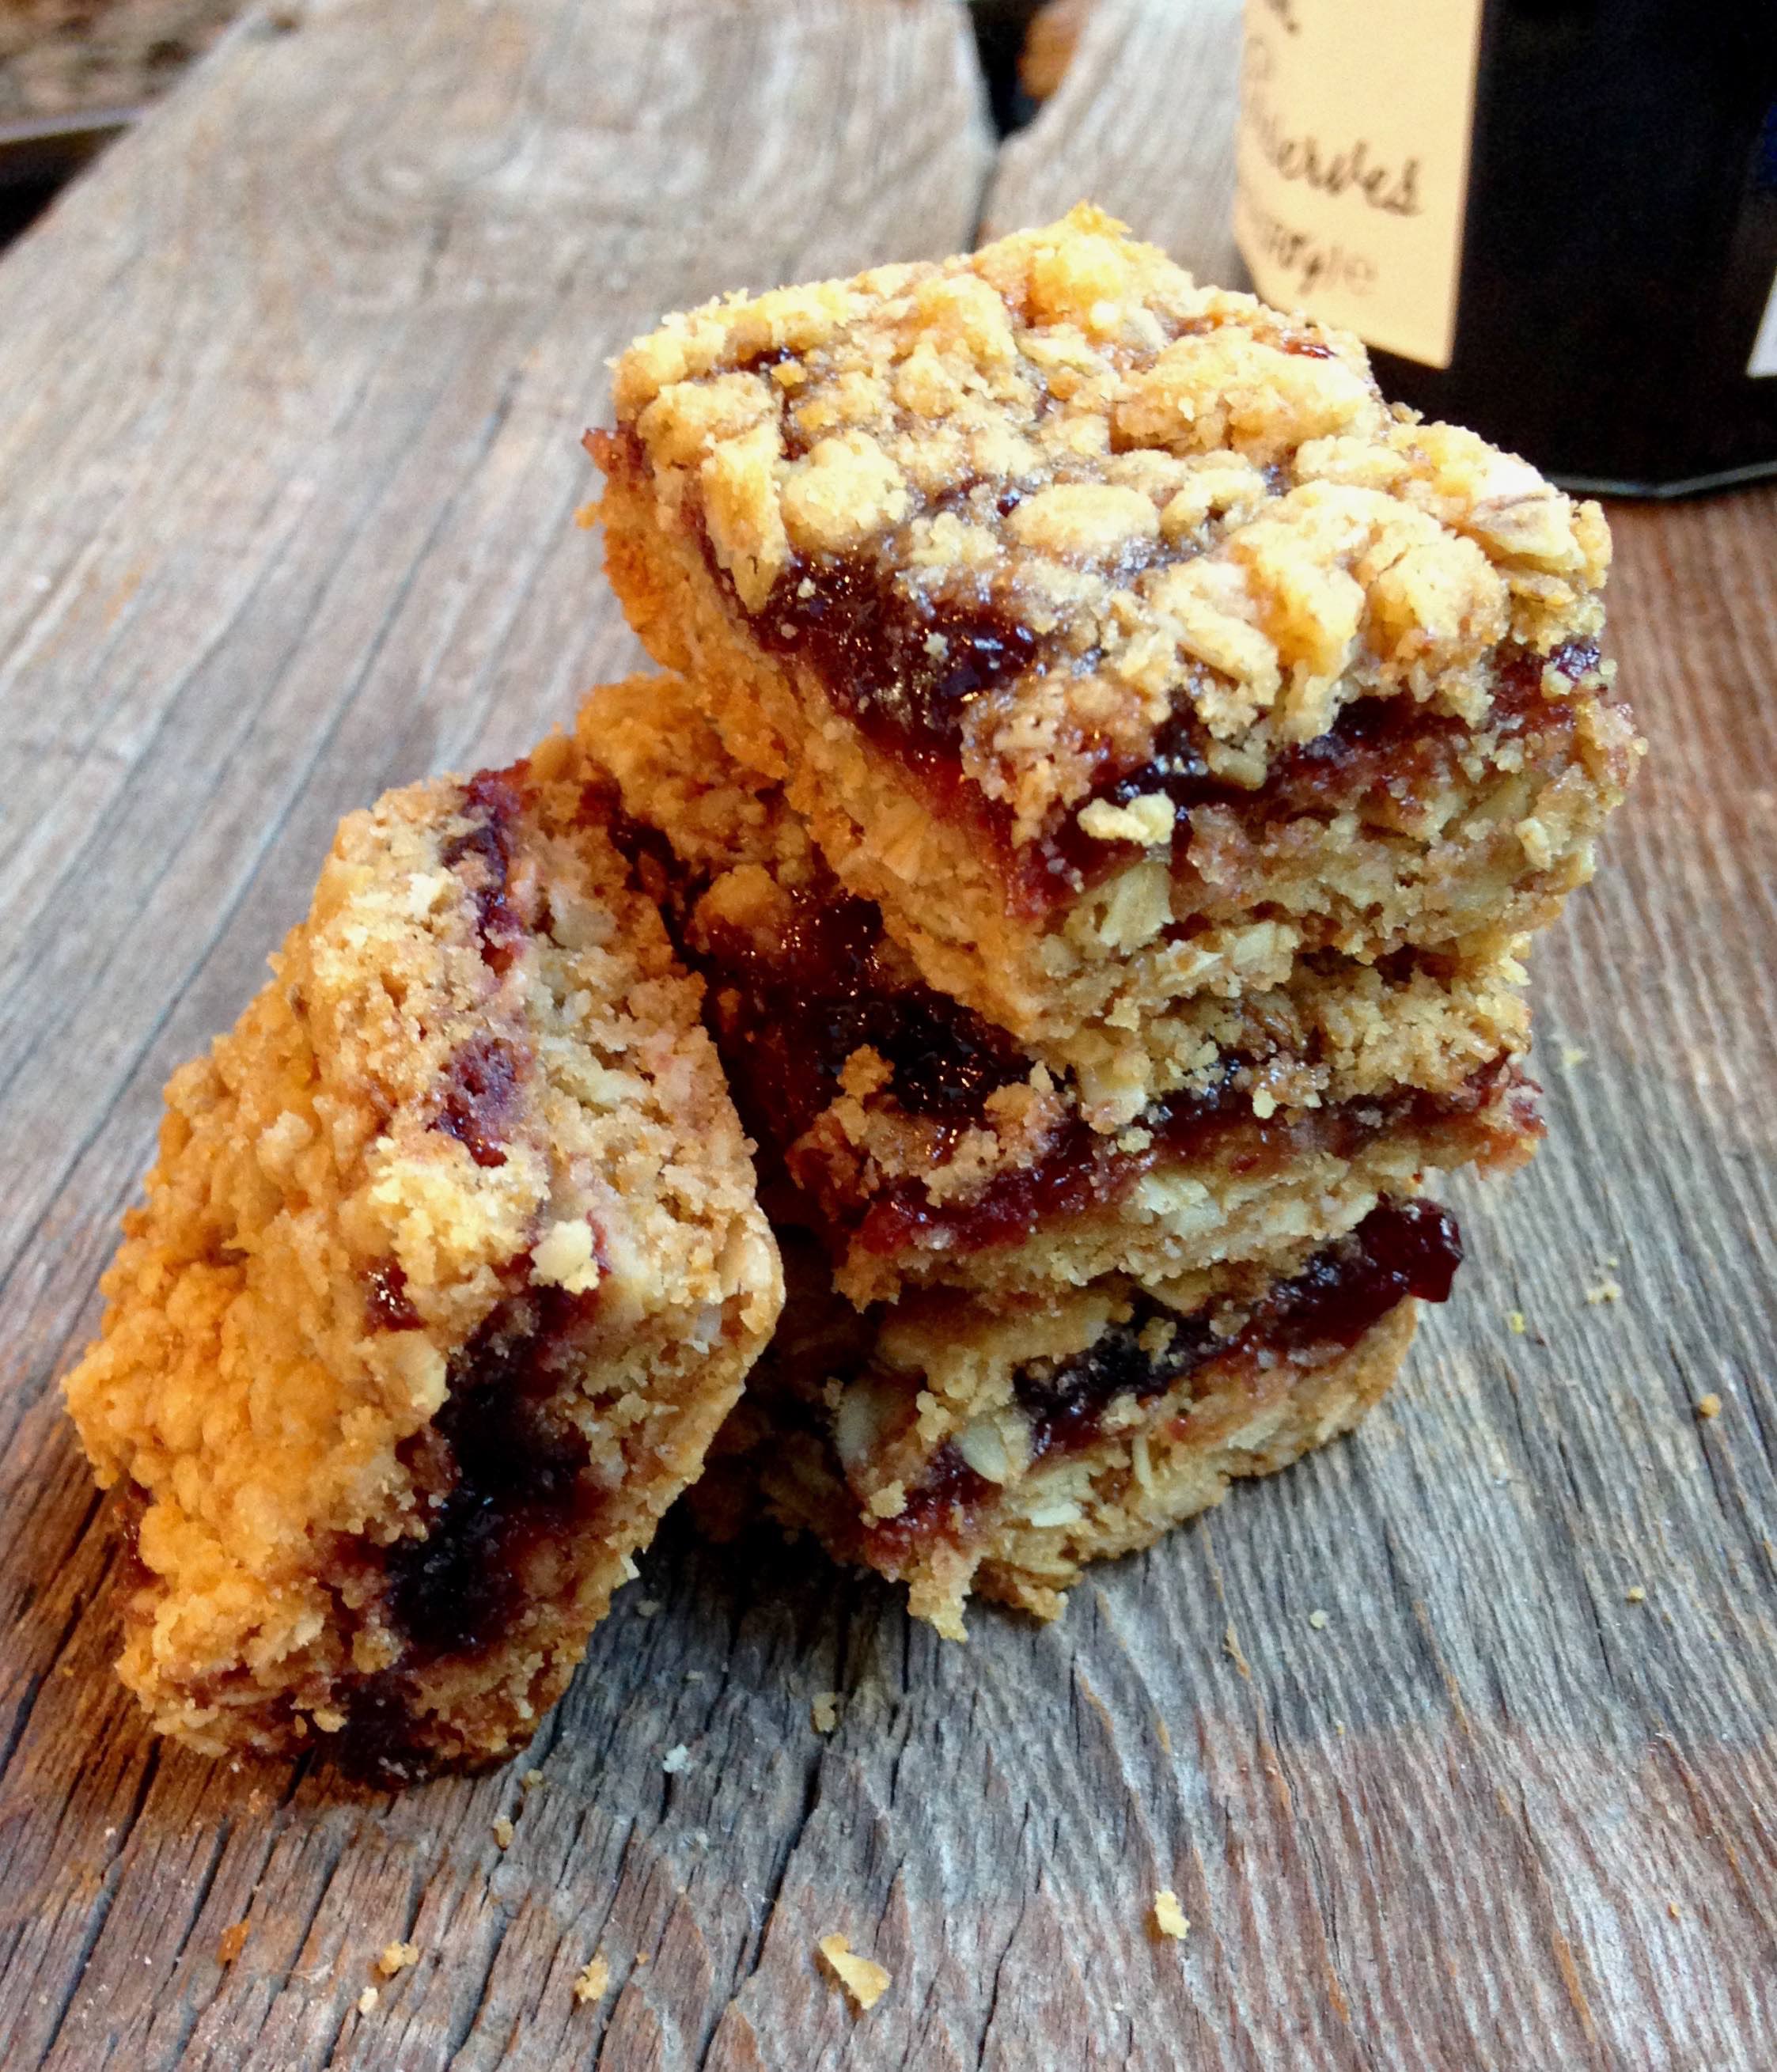
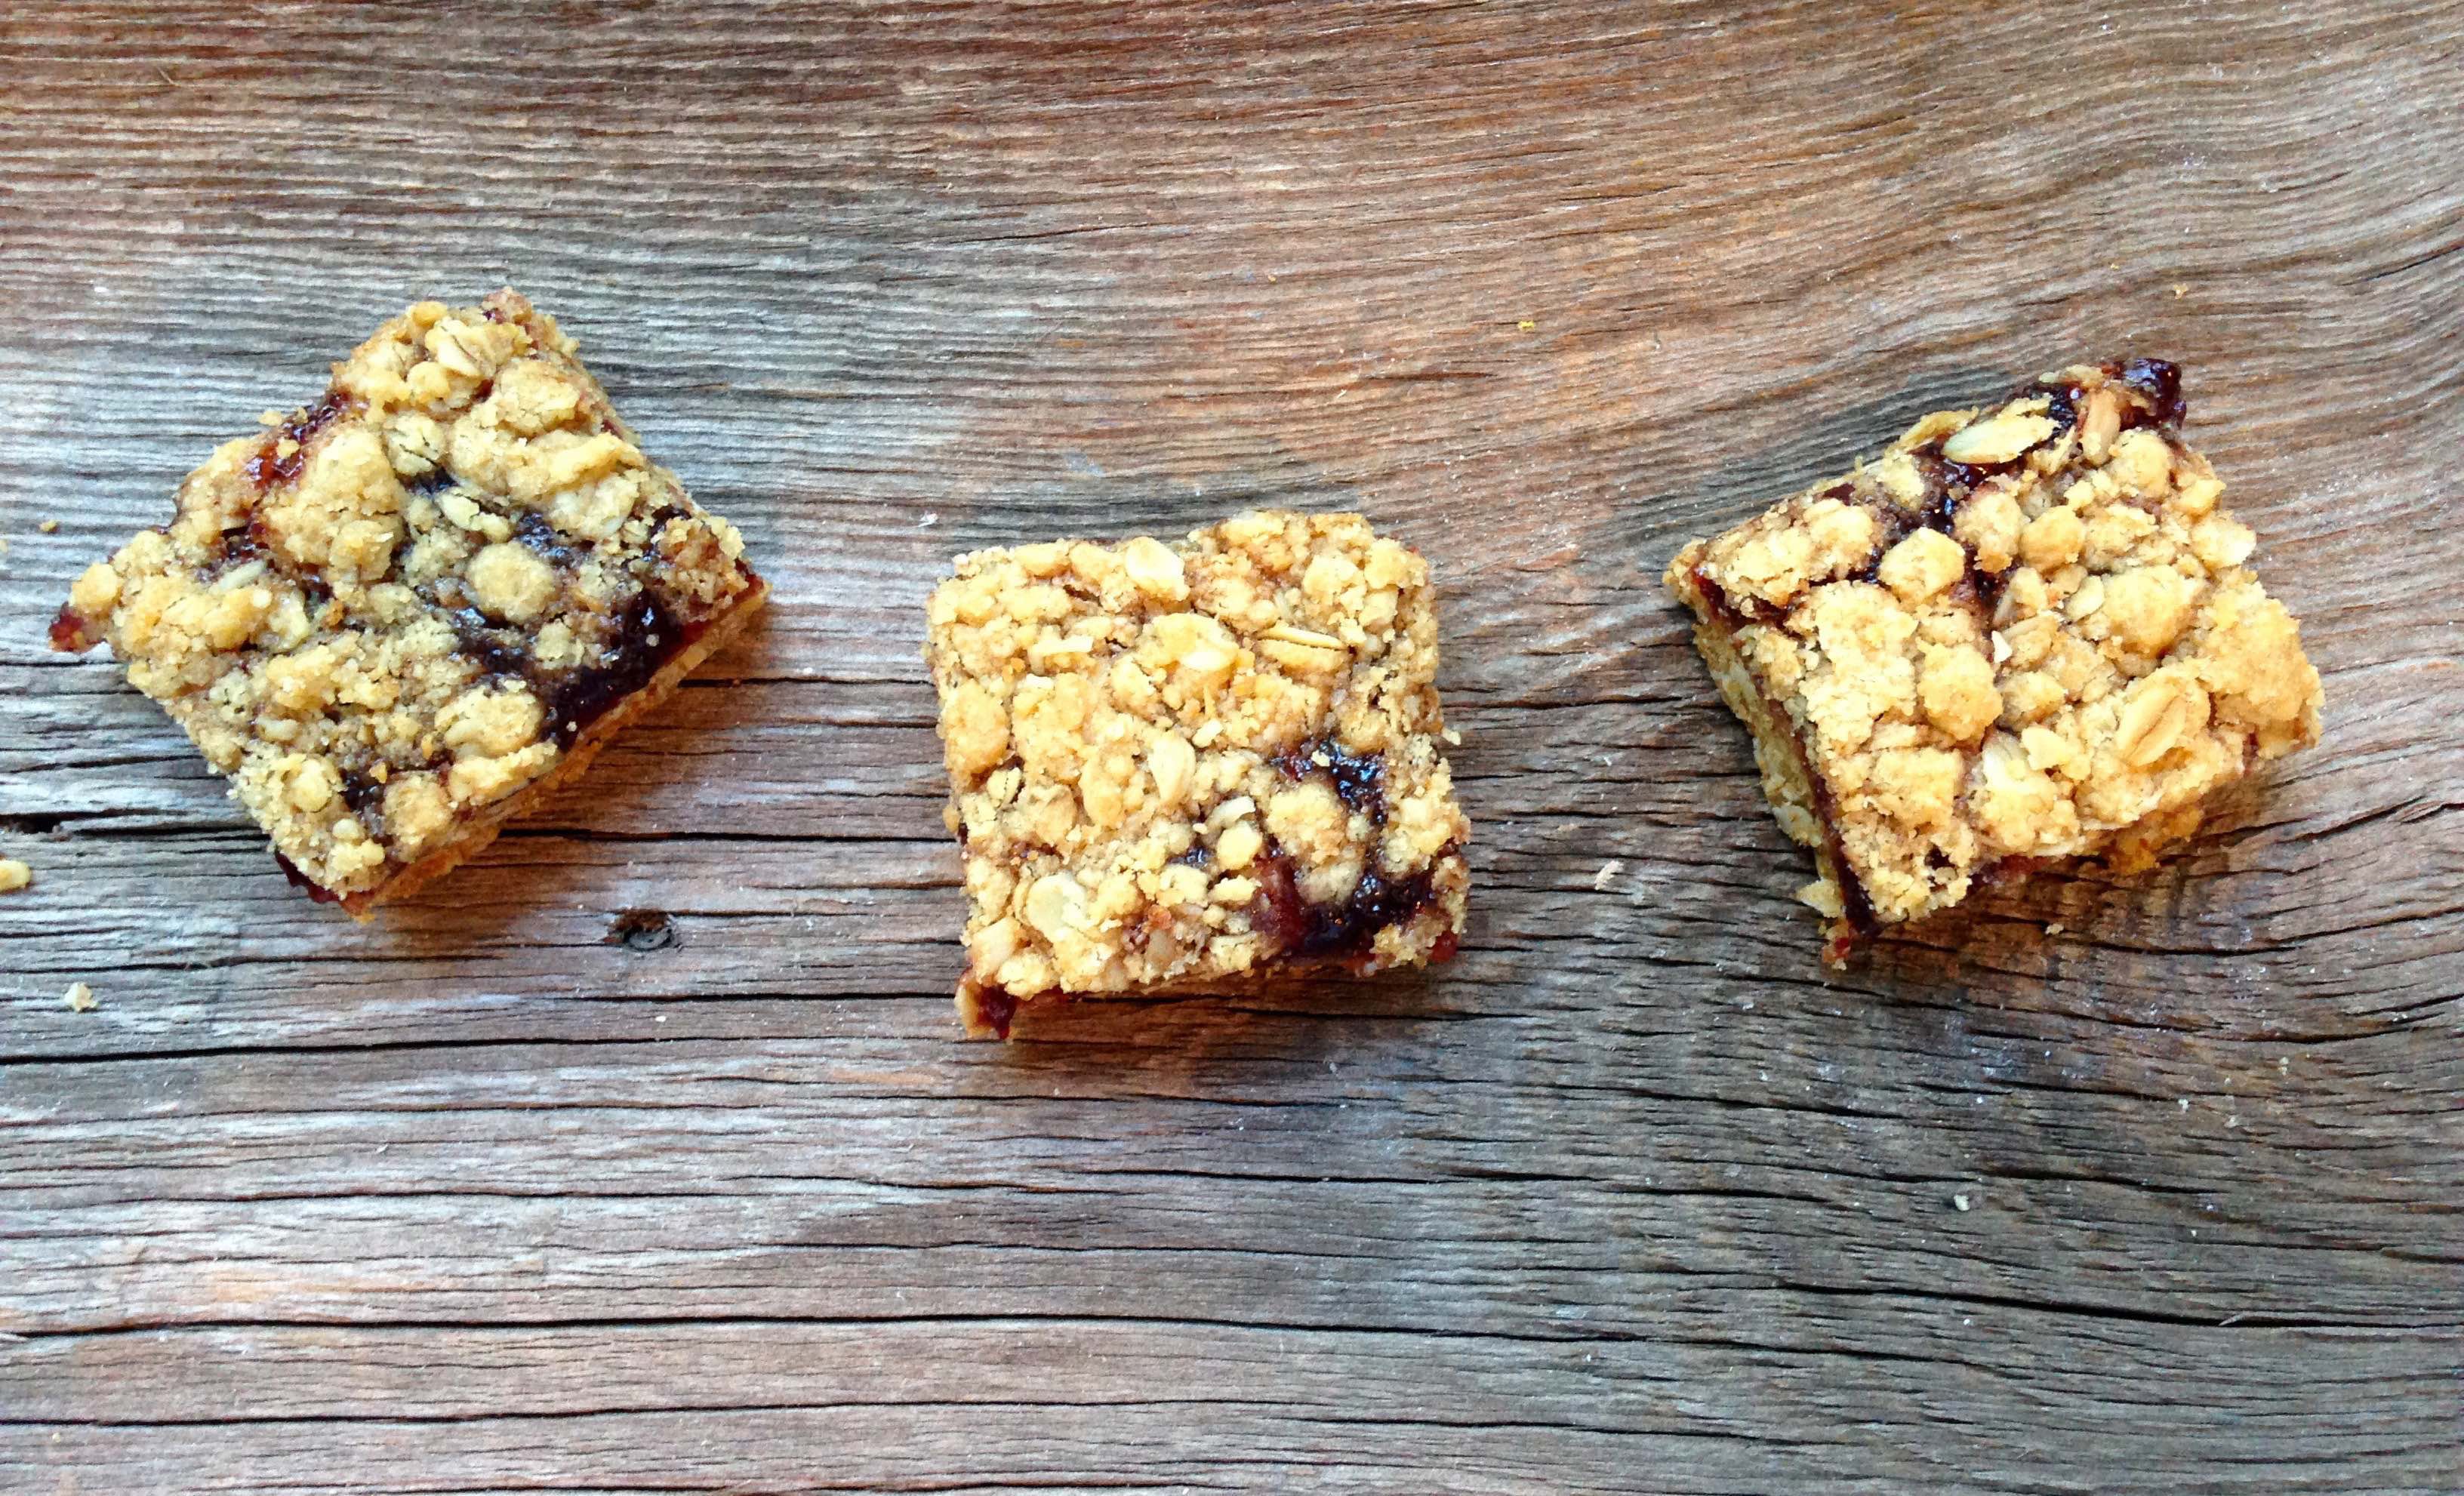
I love granola bars; all kinds of granola bars! To me they are like a “healthy” cookie. If you think about it, granola bars are essentially cookies, but since they have oats, and perhaps dried fruit, you get to call them “granola” bars.
Here’s a super simple “granola bar” recipe that I like to call Oatmeal Jam Cookie bars. Yes, I used the word “cookie” because they have a whole stick of butter and taste too delicious and buttery to be called a granola bar.
My mom and her friend Janice would make these for my friend Andy and me when we were toddlers.
They are great because even though they contain butter and brown sugar, they also have a whole cup of rolled oats. We used cherry preserves for the jam, but feel free to use strawberry, grape, blueberry or whatever your favorite flavor is.
When Janice would make these, she would add a layer of peanut butter and call it “Andy Casserole”. Her method involved spreading 3/4 cup peanut butter onto the oatmeal mixture, then spreading the jam on top of the peanut butter. Then she would finish by sprinkling the remaining crumb mixture on top and baking them as usual per the recipe below.
Harper loved these, just like I did when I was a kid.
Happy baking and enjoy!
Harper in my almost 30 year old sweatshirt.So silly!
Oatmeal Jam Bar Cookies
Prep time:
Cook time:
Total time:
Serves: 24
Ingredients
1/2 cup room-temperature butter
1/2 cup light-brown sugar
1 cup flour
1/4 tsp. baking soda
1/8 tsp. salt
1 cup rolled oats
3/4 cup fruit-only jam or preserves
Instructions
Heat oven to 350 degrees F. Butter an 8″ square pan, line it with aluminum foil and then butter the foil.
Mix all the ingredients together except the jam.
Press 2 cups of the mixture into the bottom of the prepared pan. Spread the jam to within 1/4″ of the edge. Sprinkle remaining crumb mixture over the top and lightly press it into the jam.
Bake 35 to 40 minutes and allow to cool on a wire rack before cutting.
Serving size: 1 Calories: 103 Fat: 4 g Carbohydrates: 16 g Sodium: 60 mg Protein: 1 g
Notes
For “pb&j” bars: spread 3/4 cup peanut butter onto the oatmeal mixture, and then spread jam on top of the peanut butter. Finish by sprinkling the remaining crumb mixture and then bake as usual.
I love protein/power ball recipes. They are almost always no-bake, easy recipes that are a whole lot healthier than the prepackaged stuff you buy at the grocery store. Plus, all the ingredients are all-natural… you know what’s going in them…. so there’s no preserves. 🙂
These taste just like the LARABARs you find at the store. Feel free to make substitutions for different flavor combinations. For example, instead dried cherries, use dried blueberries, appricots or cranberries. Instead of peanuts, use cashews. Just make sure you use the same ratio of fruit/date mixture to nut mixture.
My next combo will be “blueberry muffin” with dates, dried blueberries, cashews, and lemon zest. Yum! Or you could do a “PB&J” version with dates, fresh cherries, peanuts, and 1-2 tablespoons of creamy peanut butter. The flavors are endless!
Let me know your favorite and enjoy!
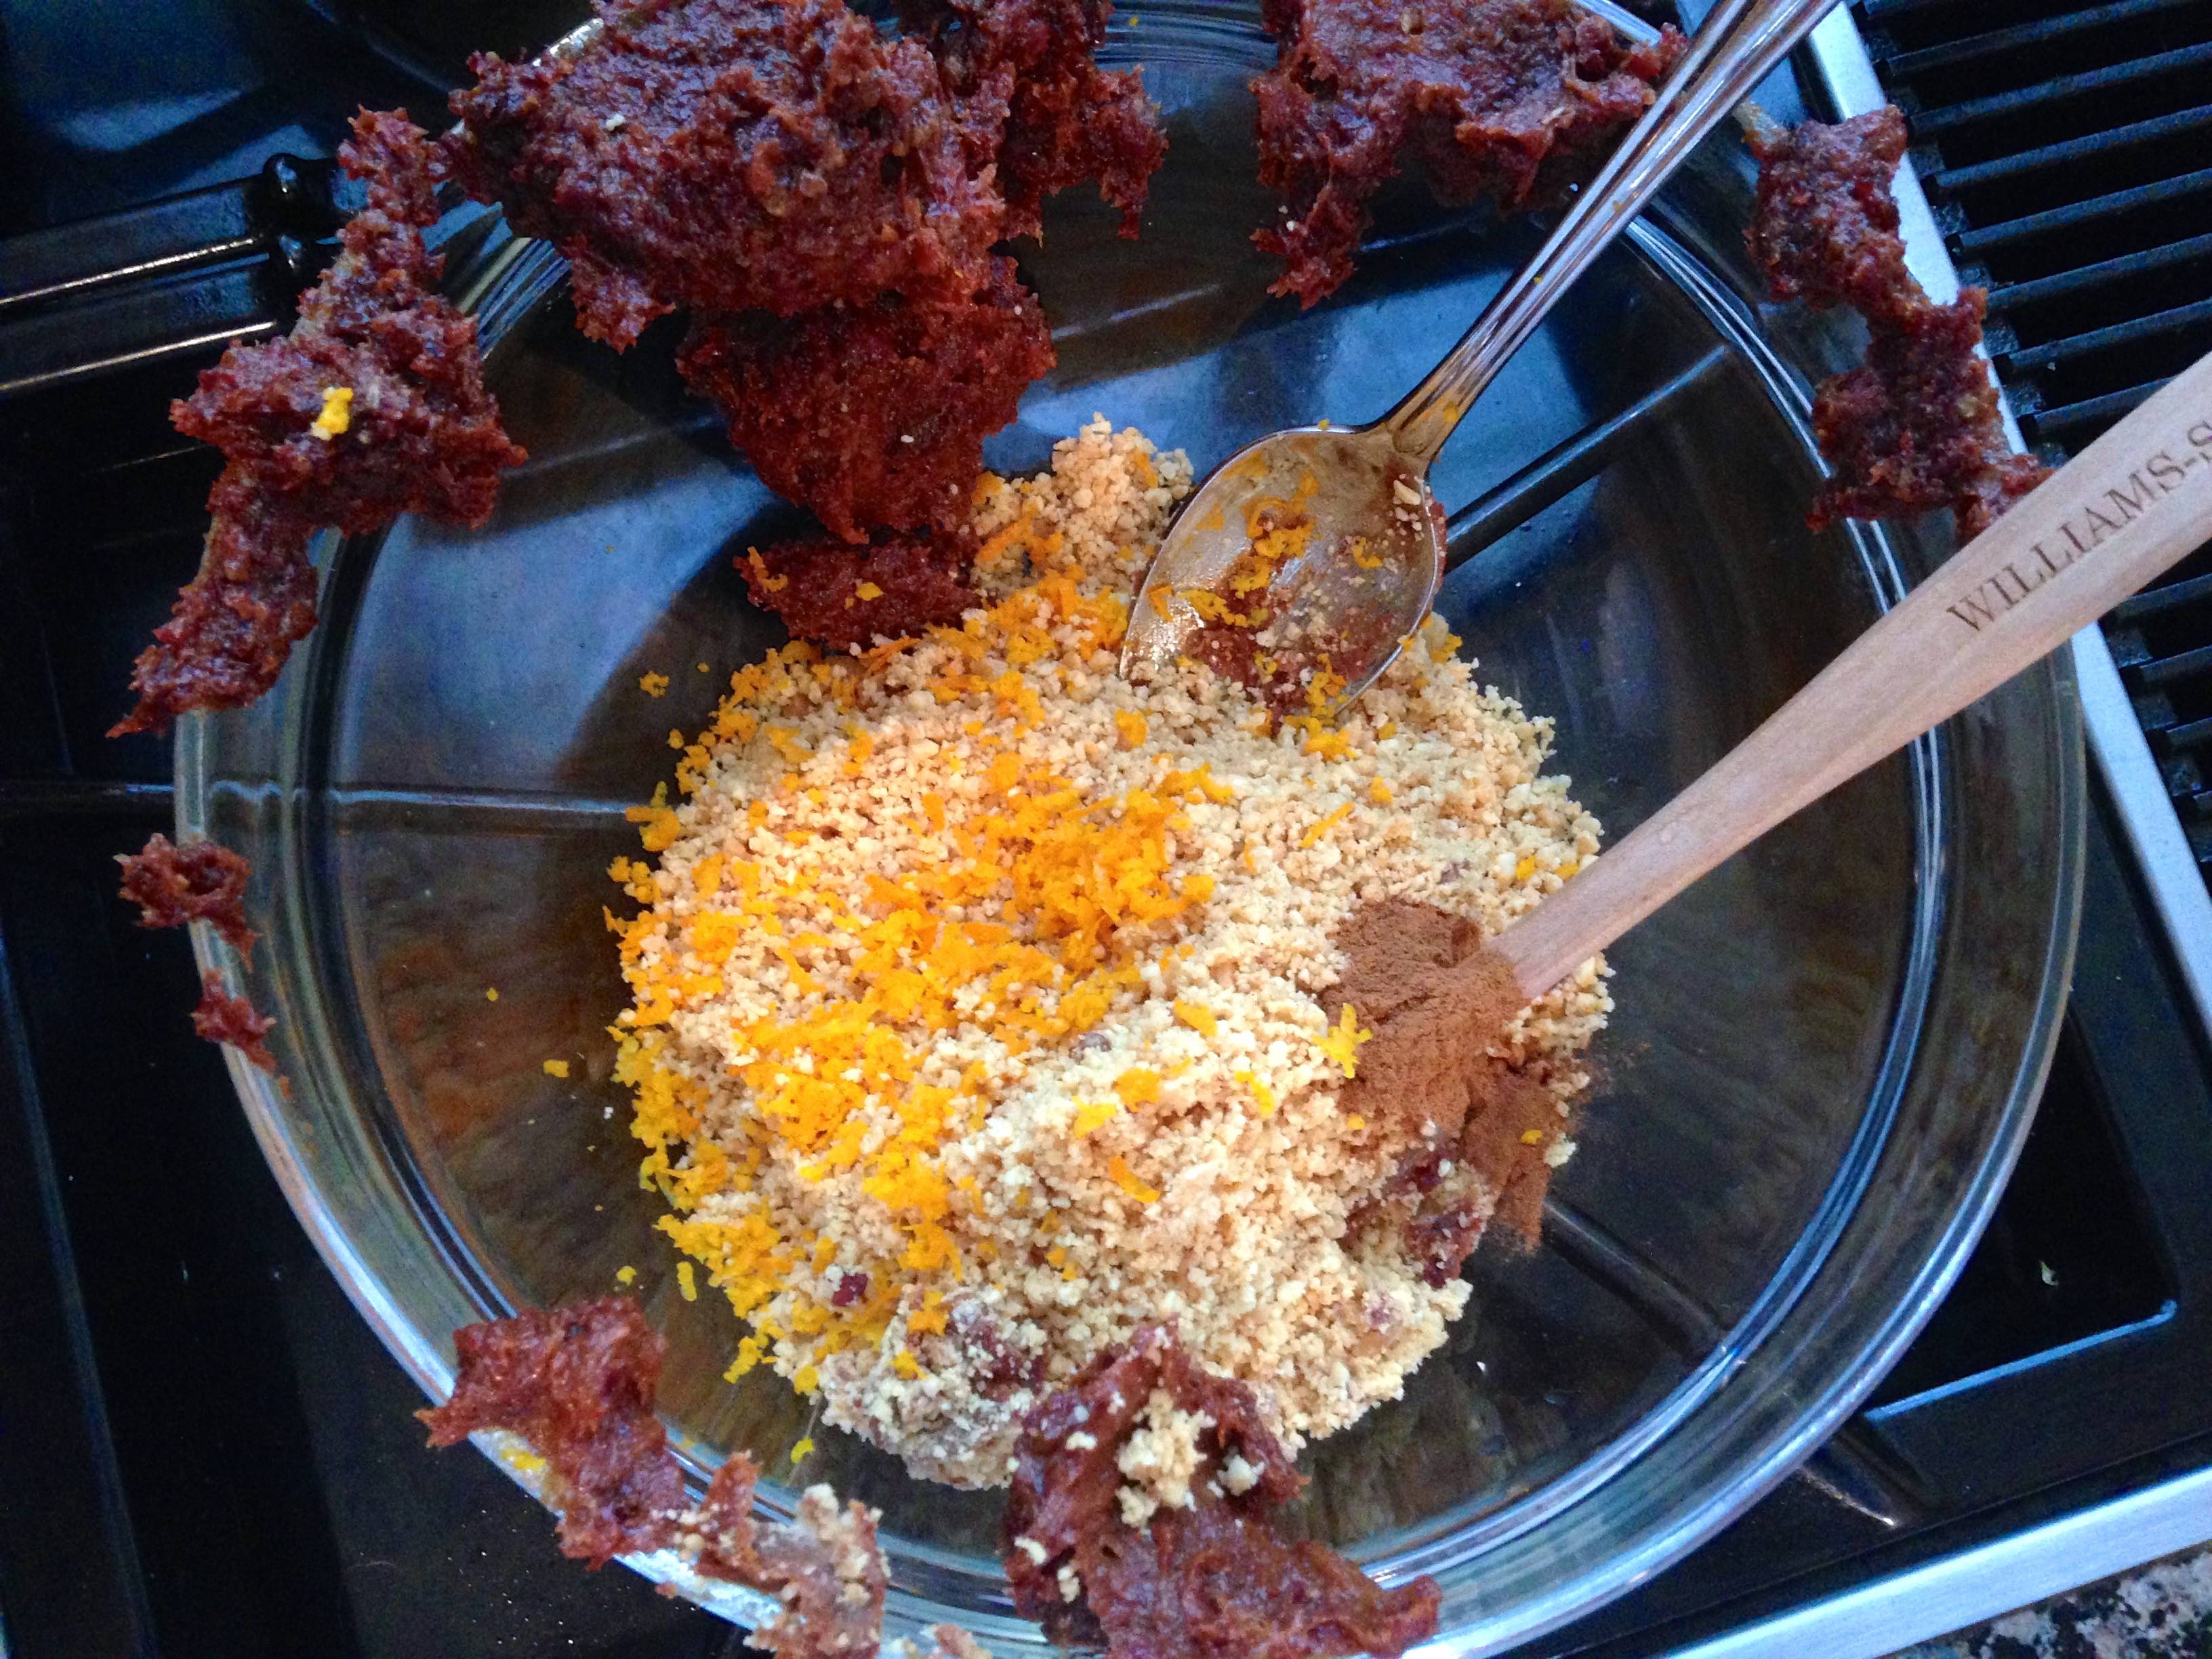
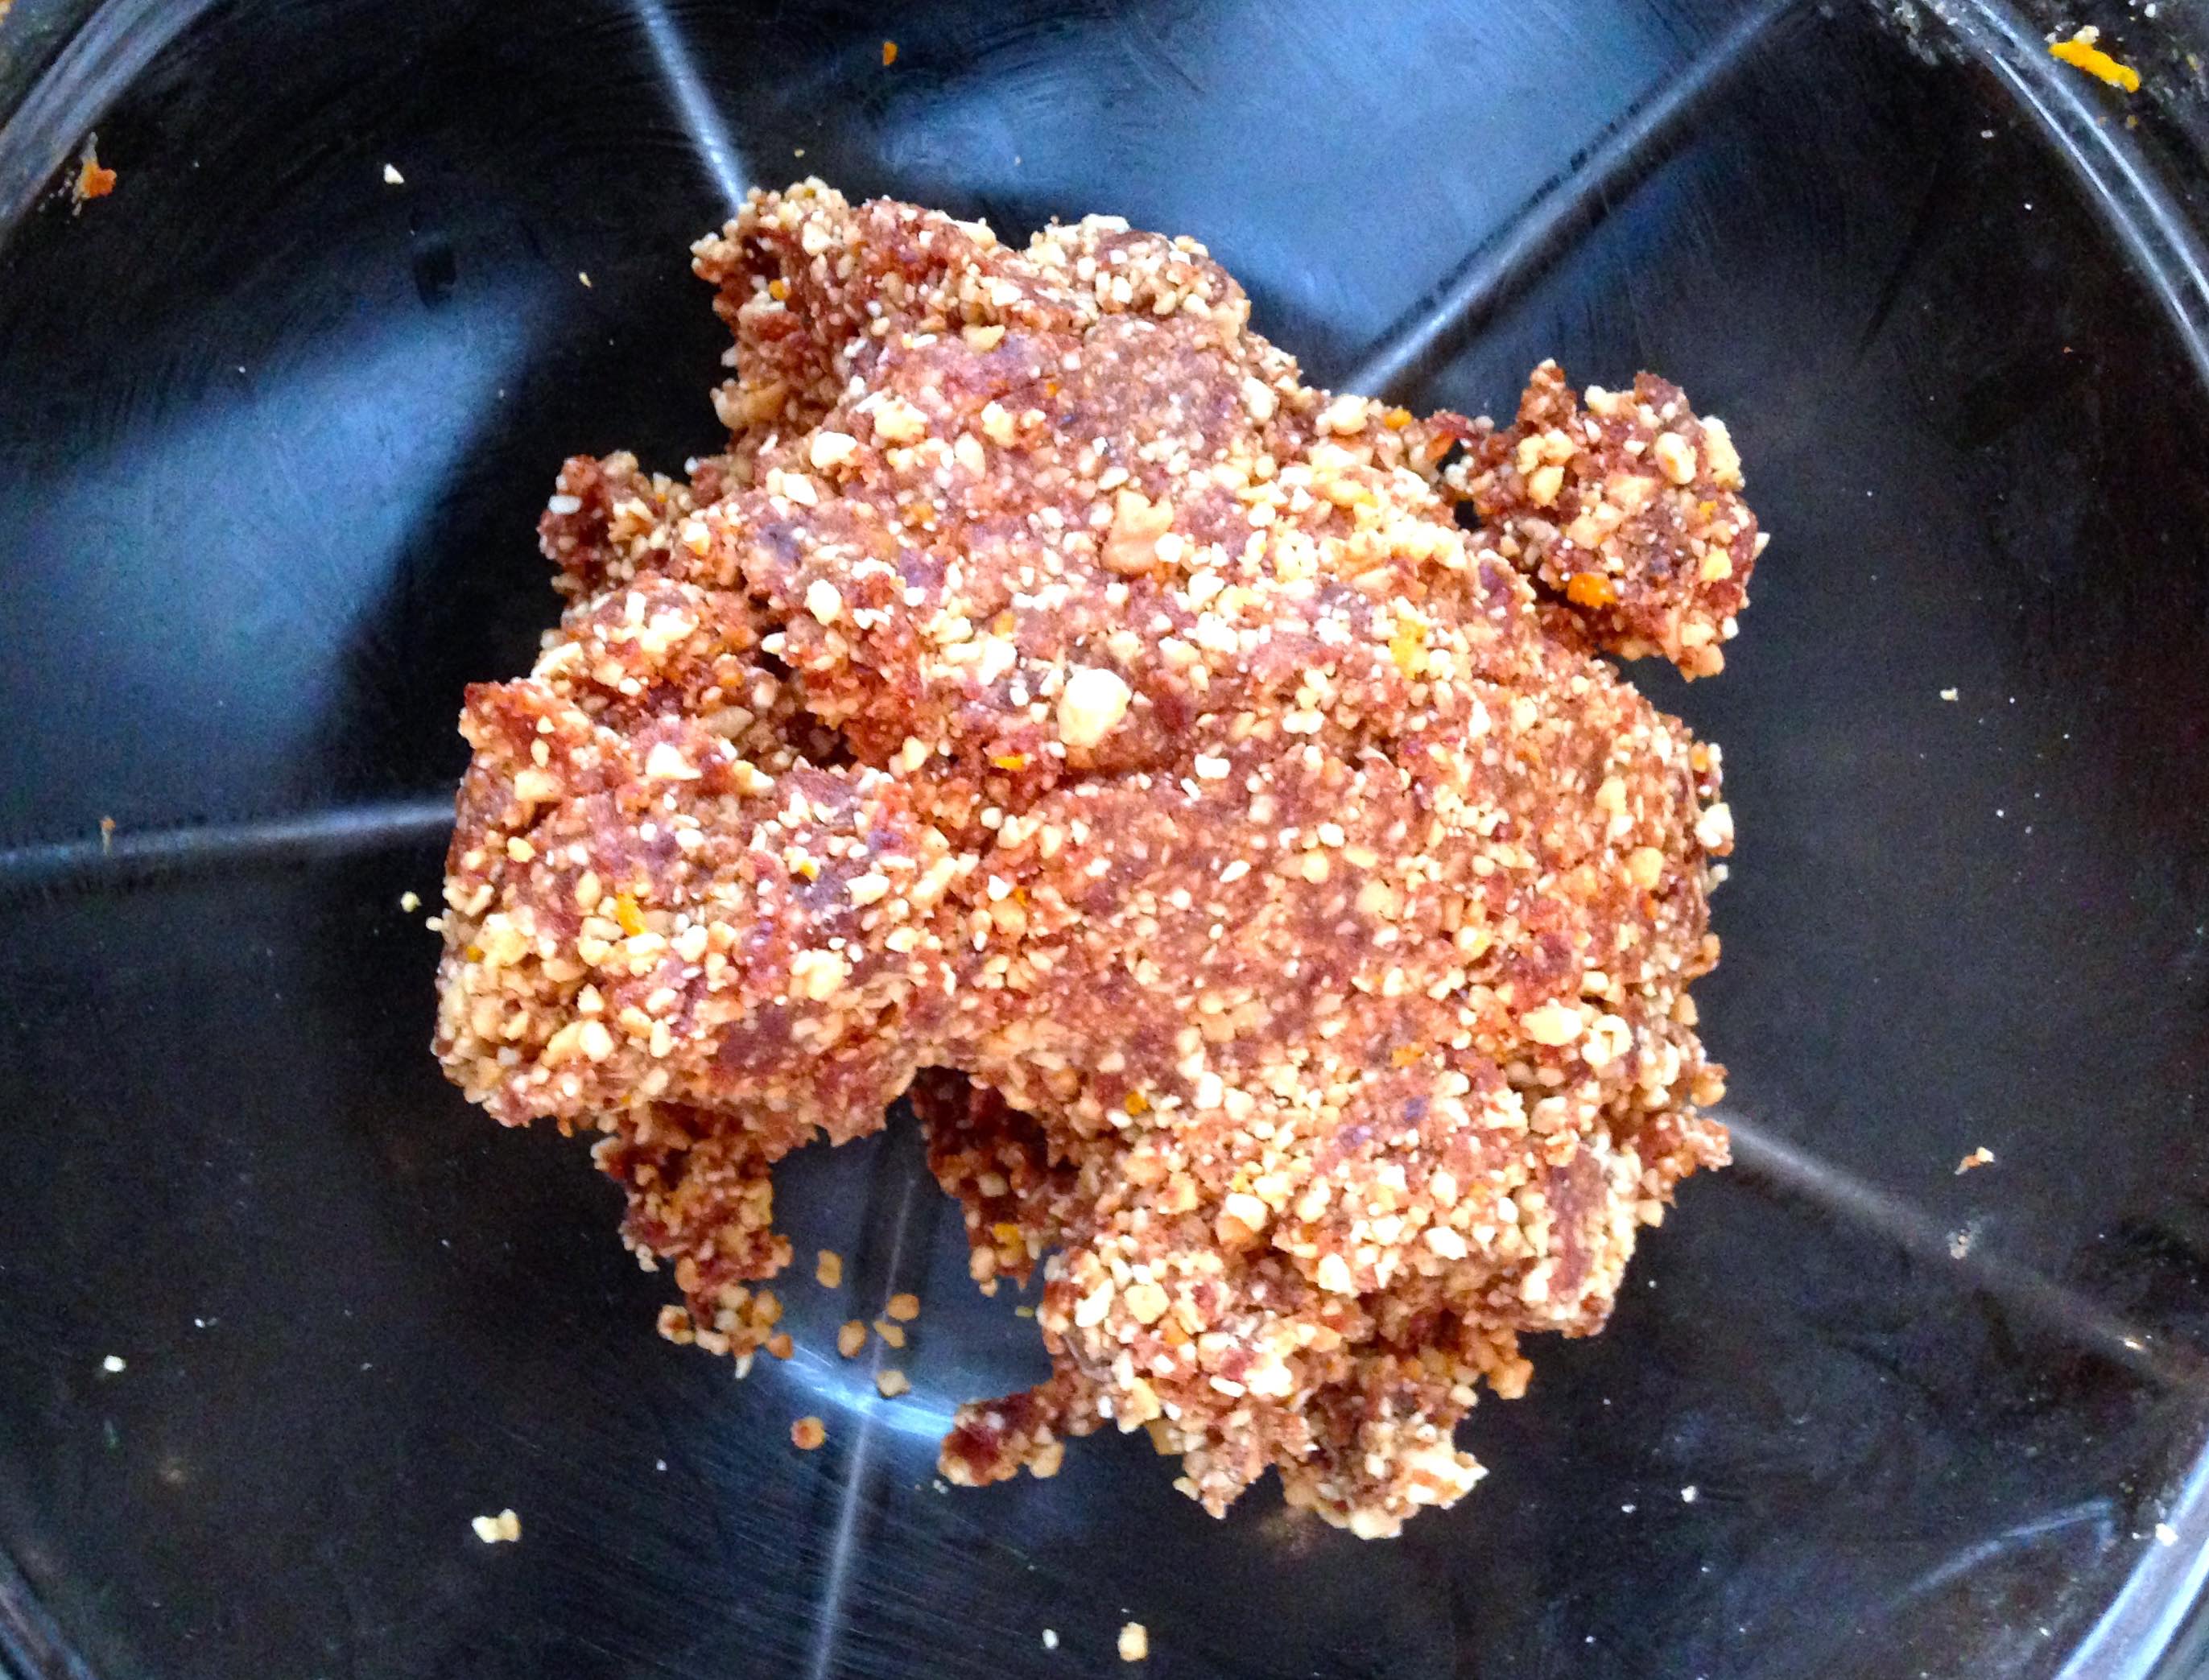
Process your dates and cherries in a food processor.Remove the dates and cherries, and process the nuts.Combine all ingredients together in a bowl.Press together with your hands and roll into one inch balls.
One of my favorite pictures. She loves to swing!
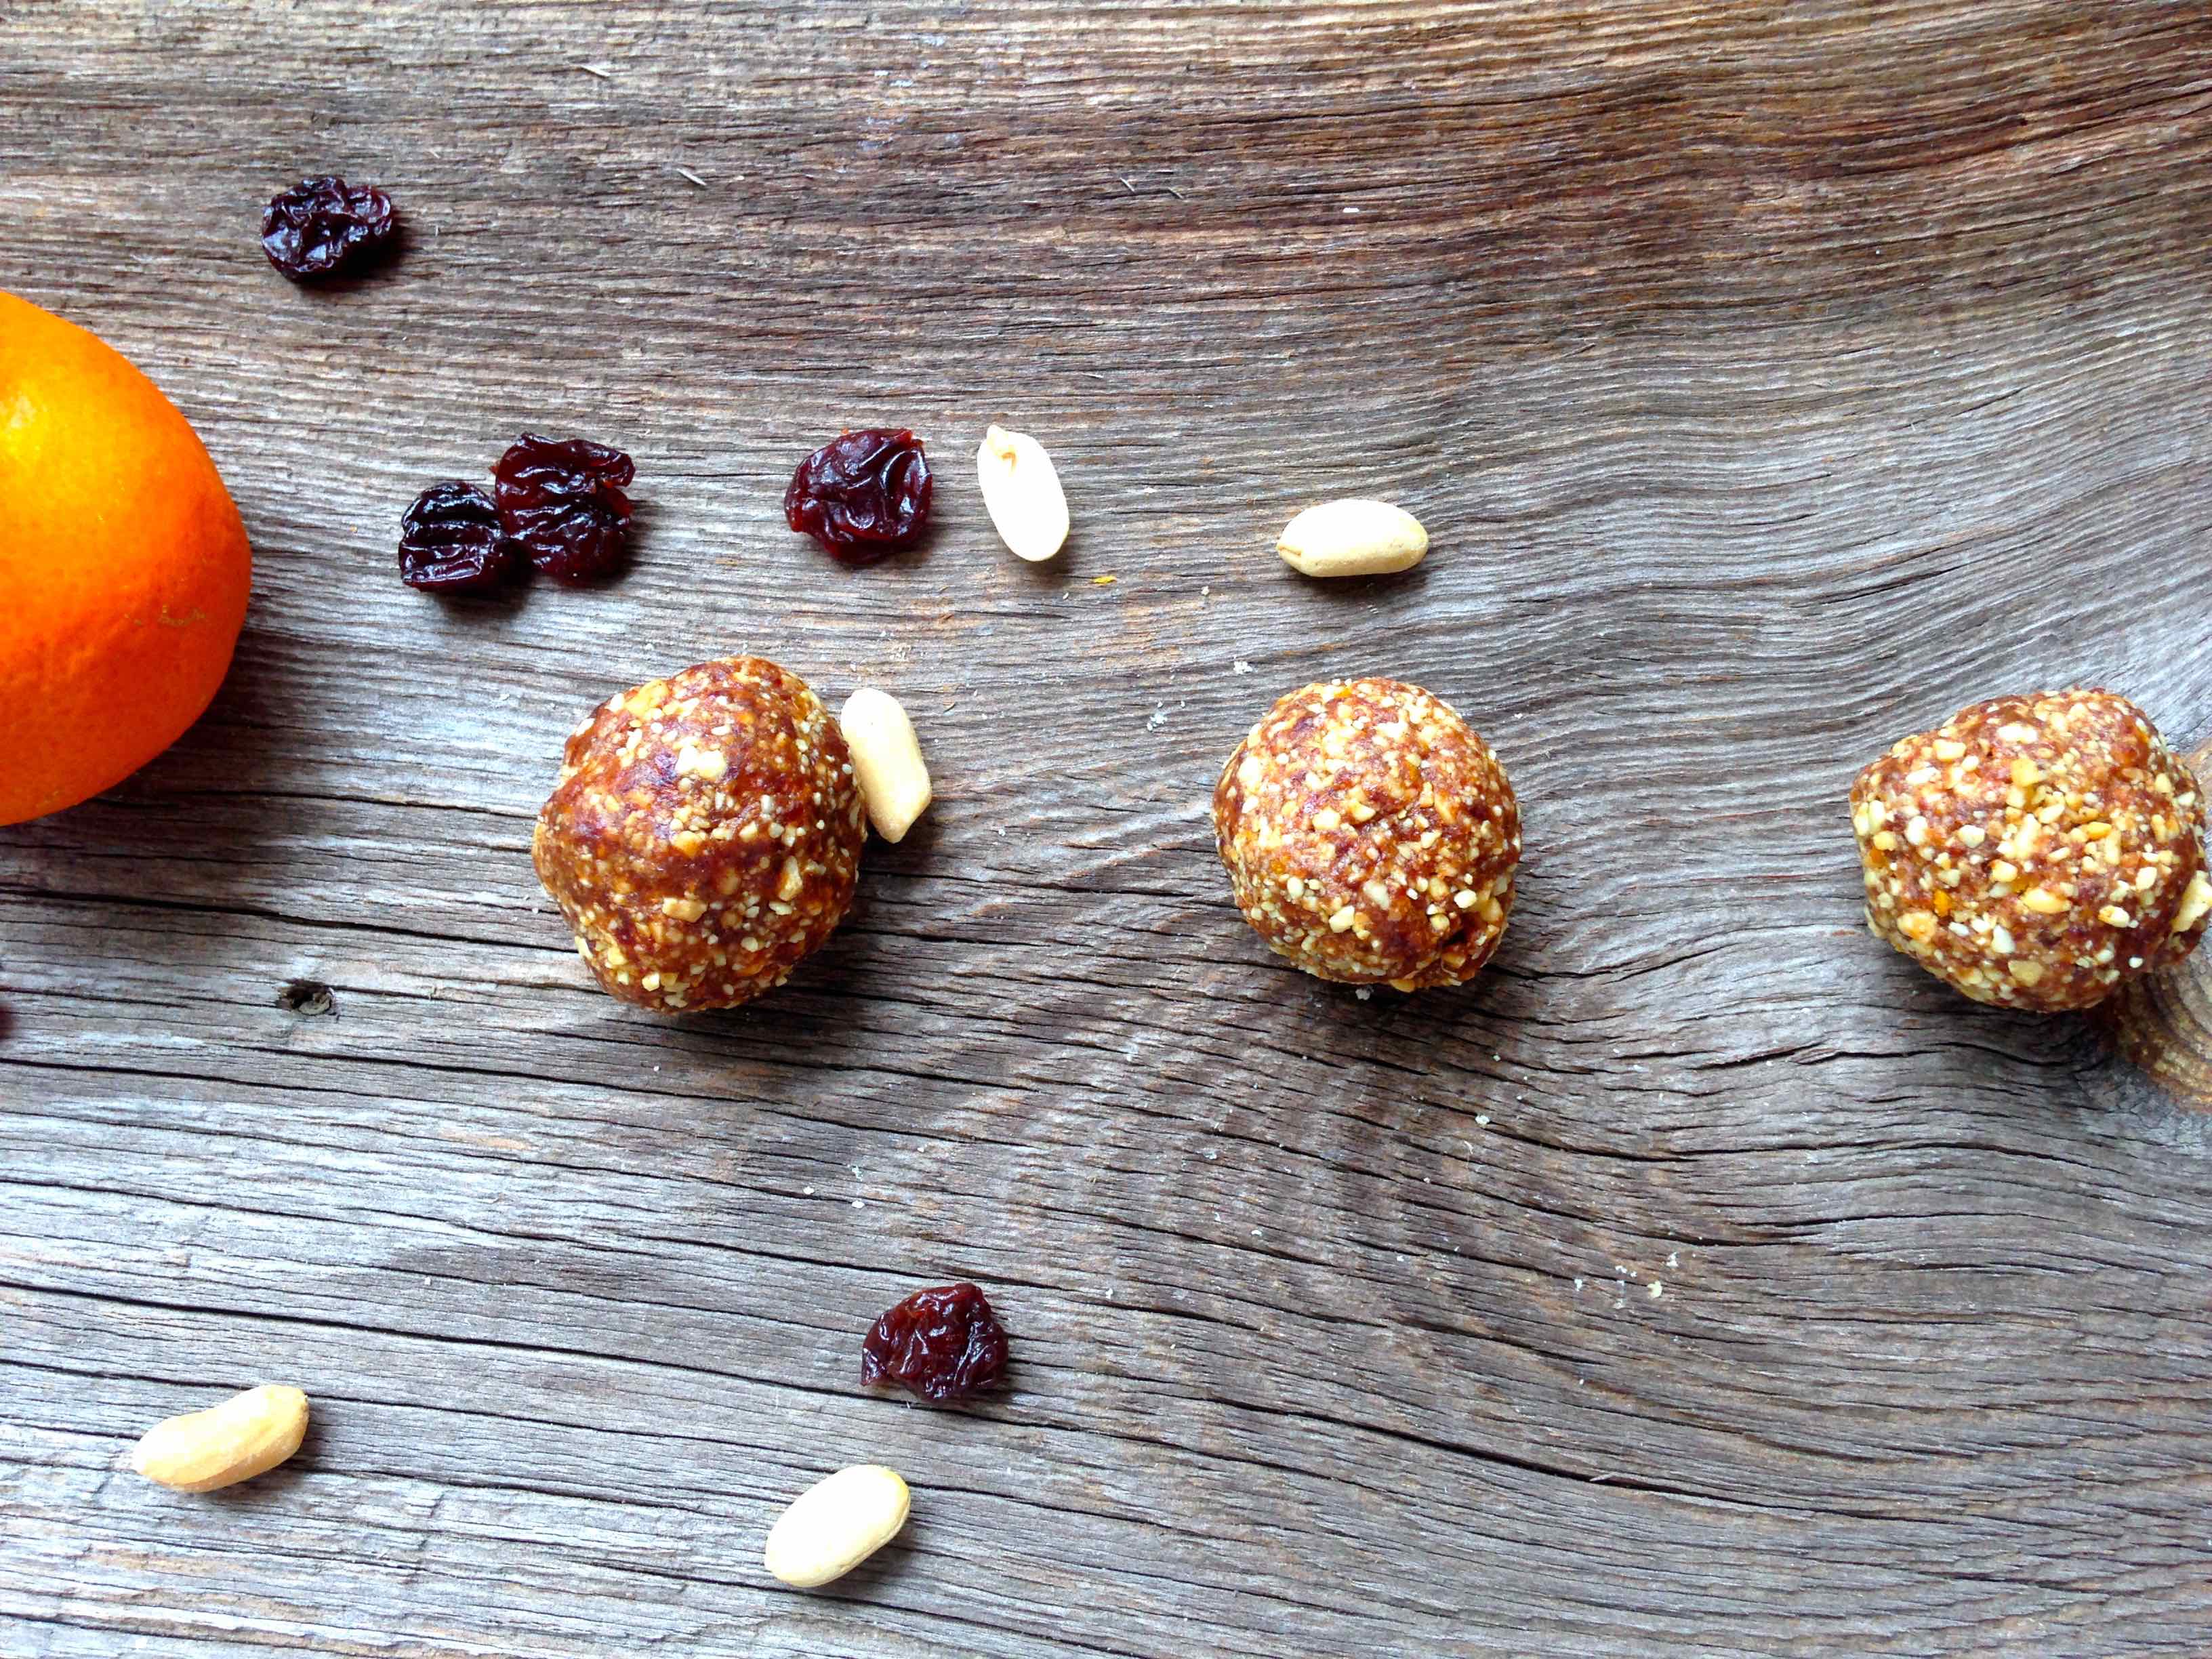
Cherry Orange LARA Power Balls
Prep time:
Total time:
Serves: 15-20 balls
Ingredients
1/2 cup dried cherries
1/2 cup seedless/pitted whole dates
1 cup peanuts
1 tsp. finely grated orange zest
1/2 tsp. cinnamon
Instructions
Place the dates and cherries in a food processor. Blend until it becomes like a paste. Transfer the blended dates and cherries to a bowl.
Add the nuts to the food processor and pulse until chopped fairly small (but not too much, not nut flour. You want texture). Add the nuts, along with the cinnamon and orange zest to the fruit paste. Use your fingers to knead the nuts into the paste.
Roll into one-inch balls or you can mold them into individual bars wrapped in cling wrap. Refrigerate the balls after making to maintain freshness and let the form set. If you find your Lara bars are a bit crumbly add a few tablespoons of warm water and process again.
Armed and ready for our first road trip, my mom had these delicious oat cakes ready to go.
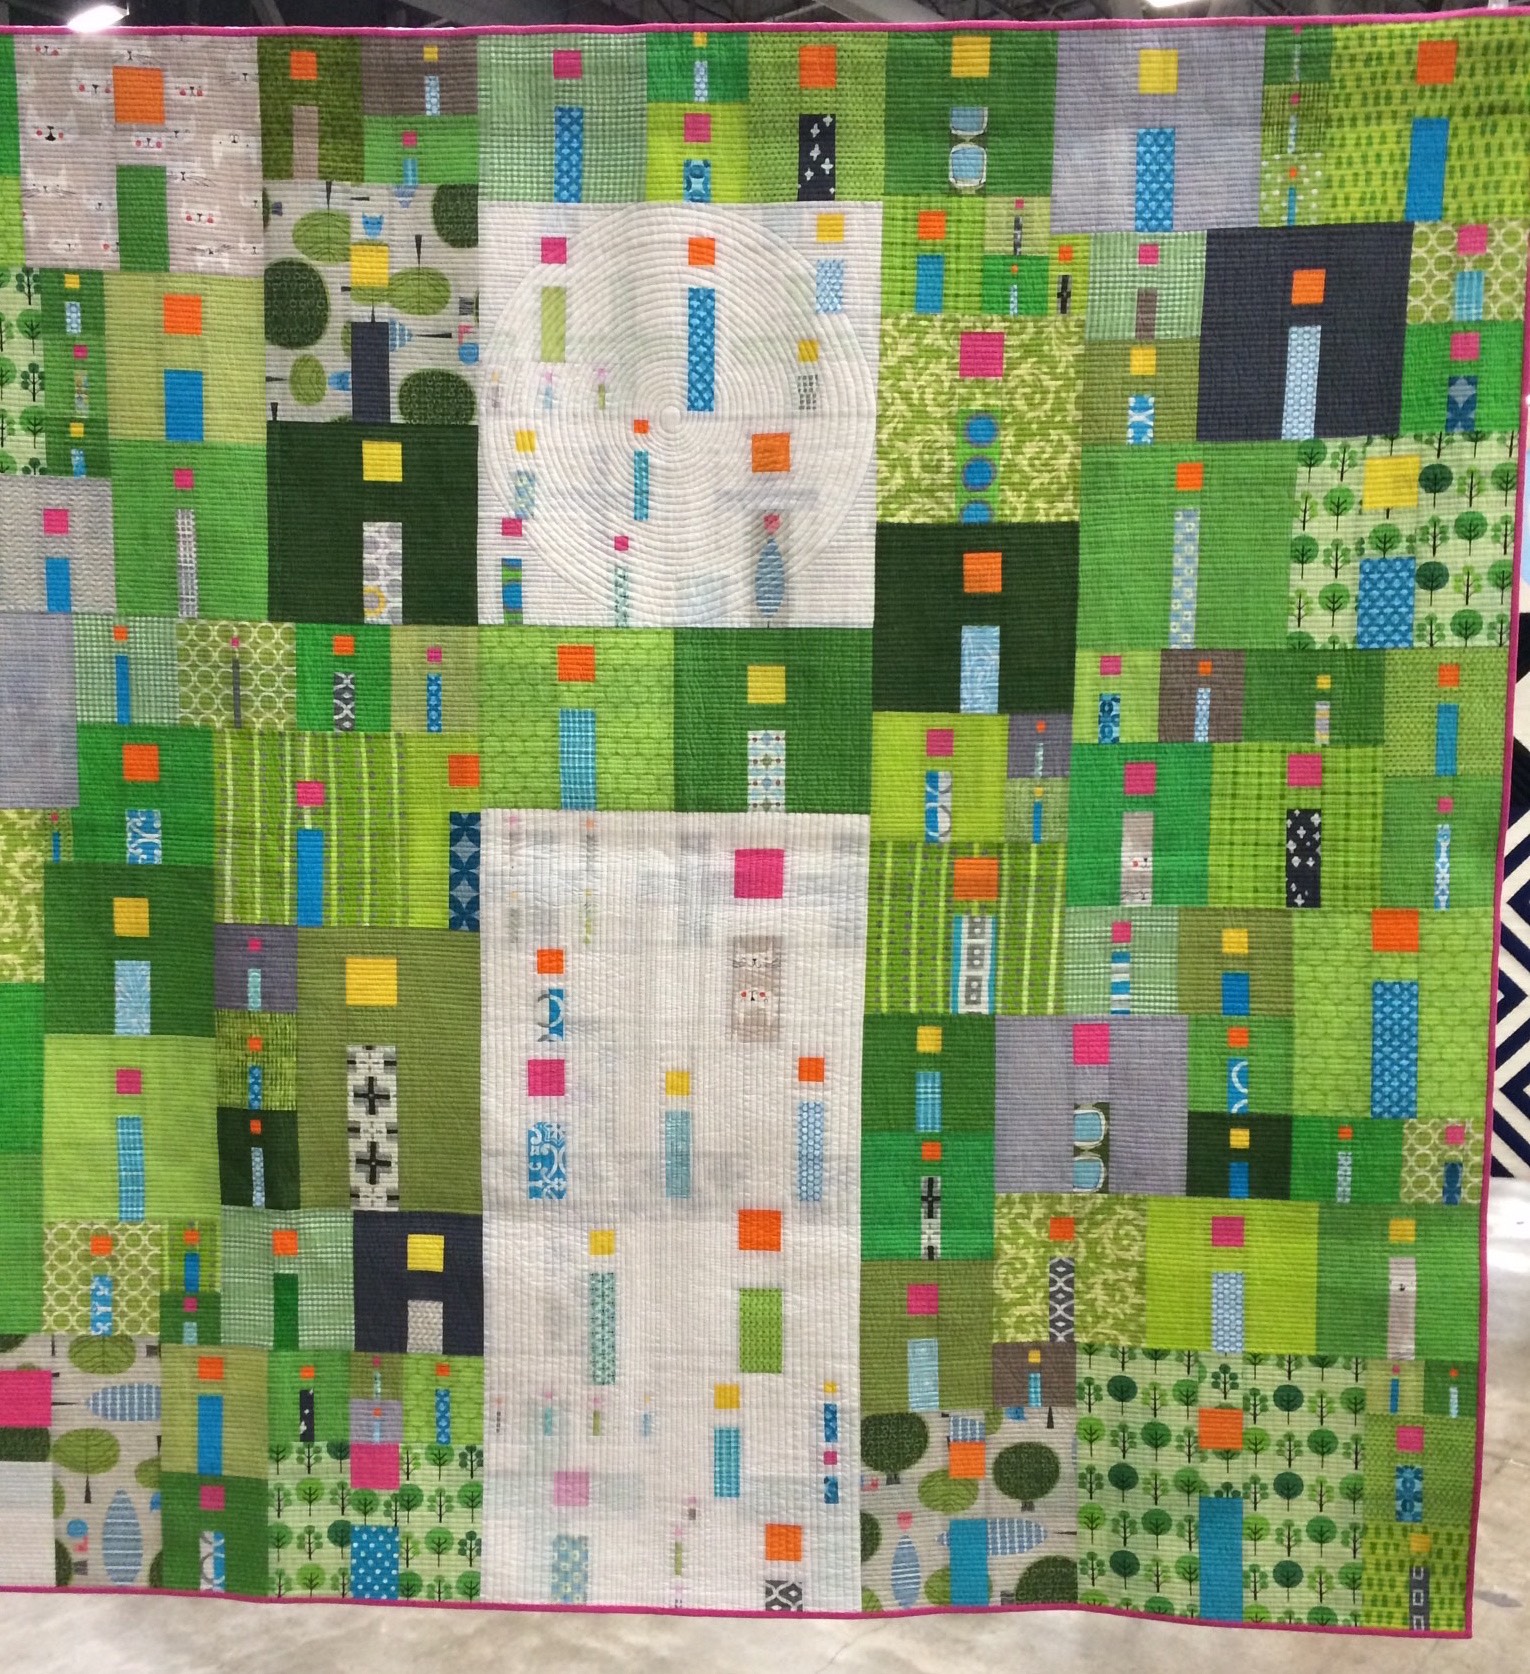
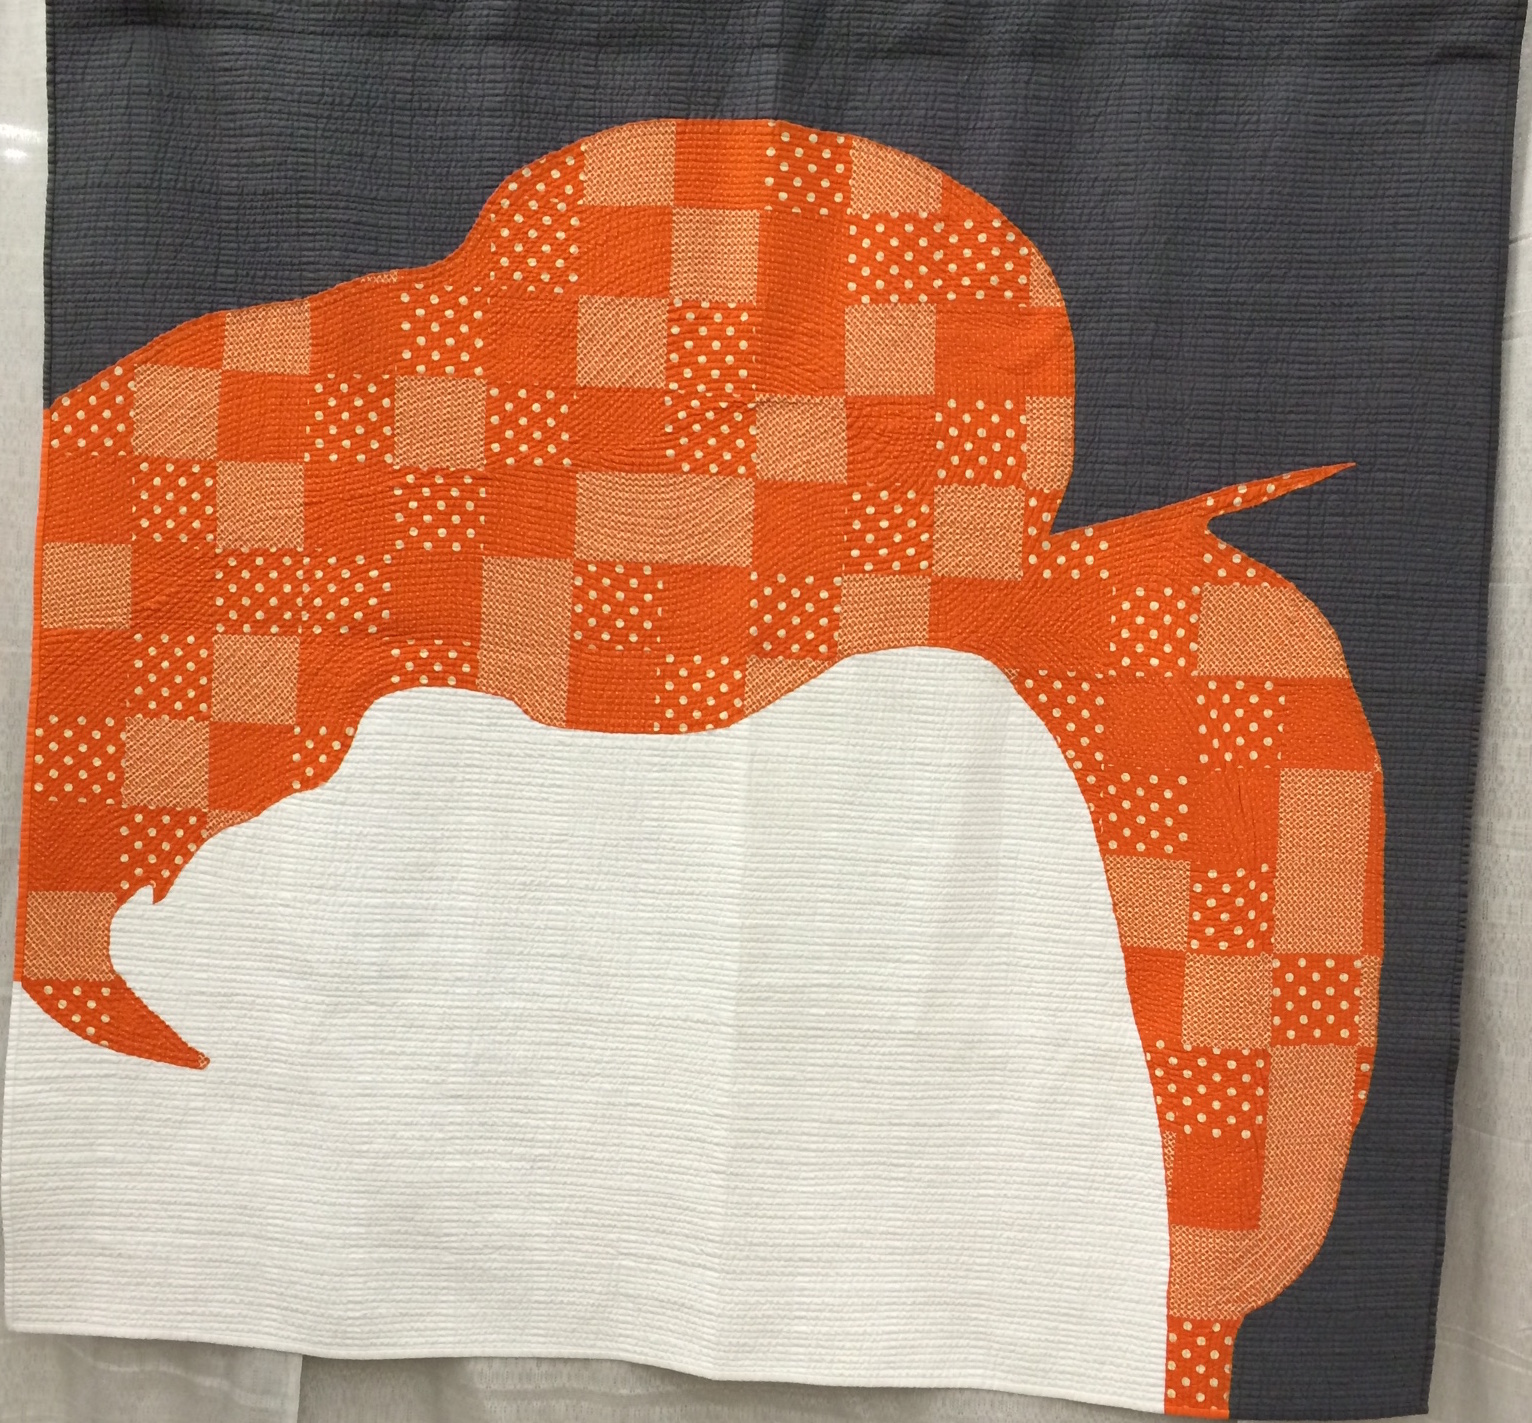
Last week my mom, her friend Jenni, Harper, and I went to the 2015 QuiltCon in Austin, Texas. QuiltCon is the international show and conference of the Modern Quilt Guild. Basically there were lots of modern quilts, which was cool to see.
One quilt was even made out of Goodwill clothes. Care to guess how much they were asking for it? $12,000!!!! Talk about pure profit for that quilter!
Below are just a few of my favorites from the show. More info about QuiltCon HERE.
The Goodwill quilt. It was made out of clothes all purchased from Goodwill. The asking price was $12,000!Close up of the Goodwill quilt.Best in ShowThe “Conan” quiltPretty quilting on this one.
I recently got interested in quilting and am in the process of making Harper a baby quilt, so I thought it would be fun to tag along with my mom and Jenni. I’m still a rookie, but hope to be making lots of quilts soon!
Mom and Jenni take their quilt show road trips very seriously, especially when it comes to nice hotels. Every year when they go to the quilt show, they stay at the Four Seasons. Usually the quilt show is in Houston.
Harper was excited and said, “I don’t always spend the night in hotels, but when I do I make sure it’s really fancy!” lol. We ended up staying at The Four Seasons Austin, which was a really good decision. Not only does the hotel back up to miles of hiking trails along Lady Bird Lake, it was also just one block away from the Austin Convention Center which is where QuiltCon was. That was a life saver for me as it allowed me to go back to the hotel every 3 hours to feed Harper or let her take a nap.
Mommy said no jumping on the bed!Just a little tummy time and cartoons to start my day!
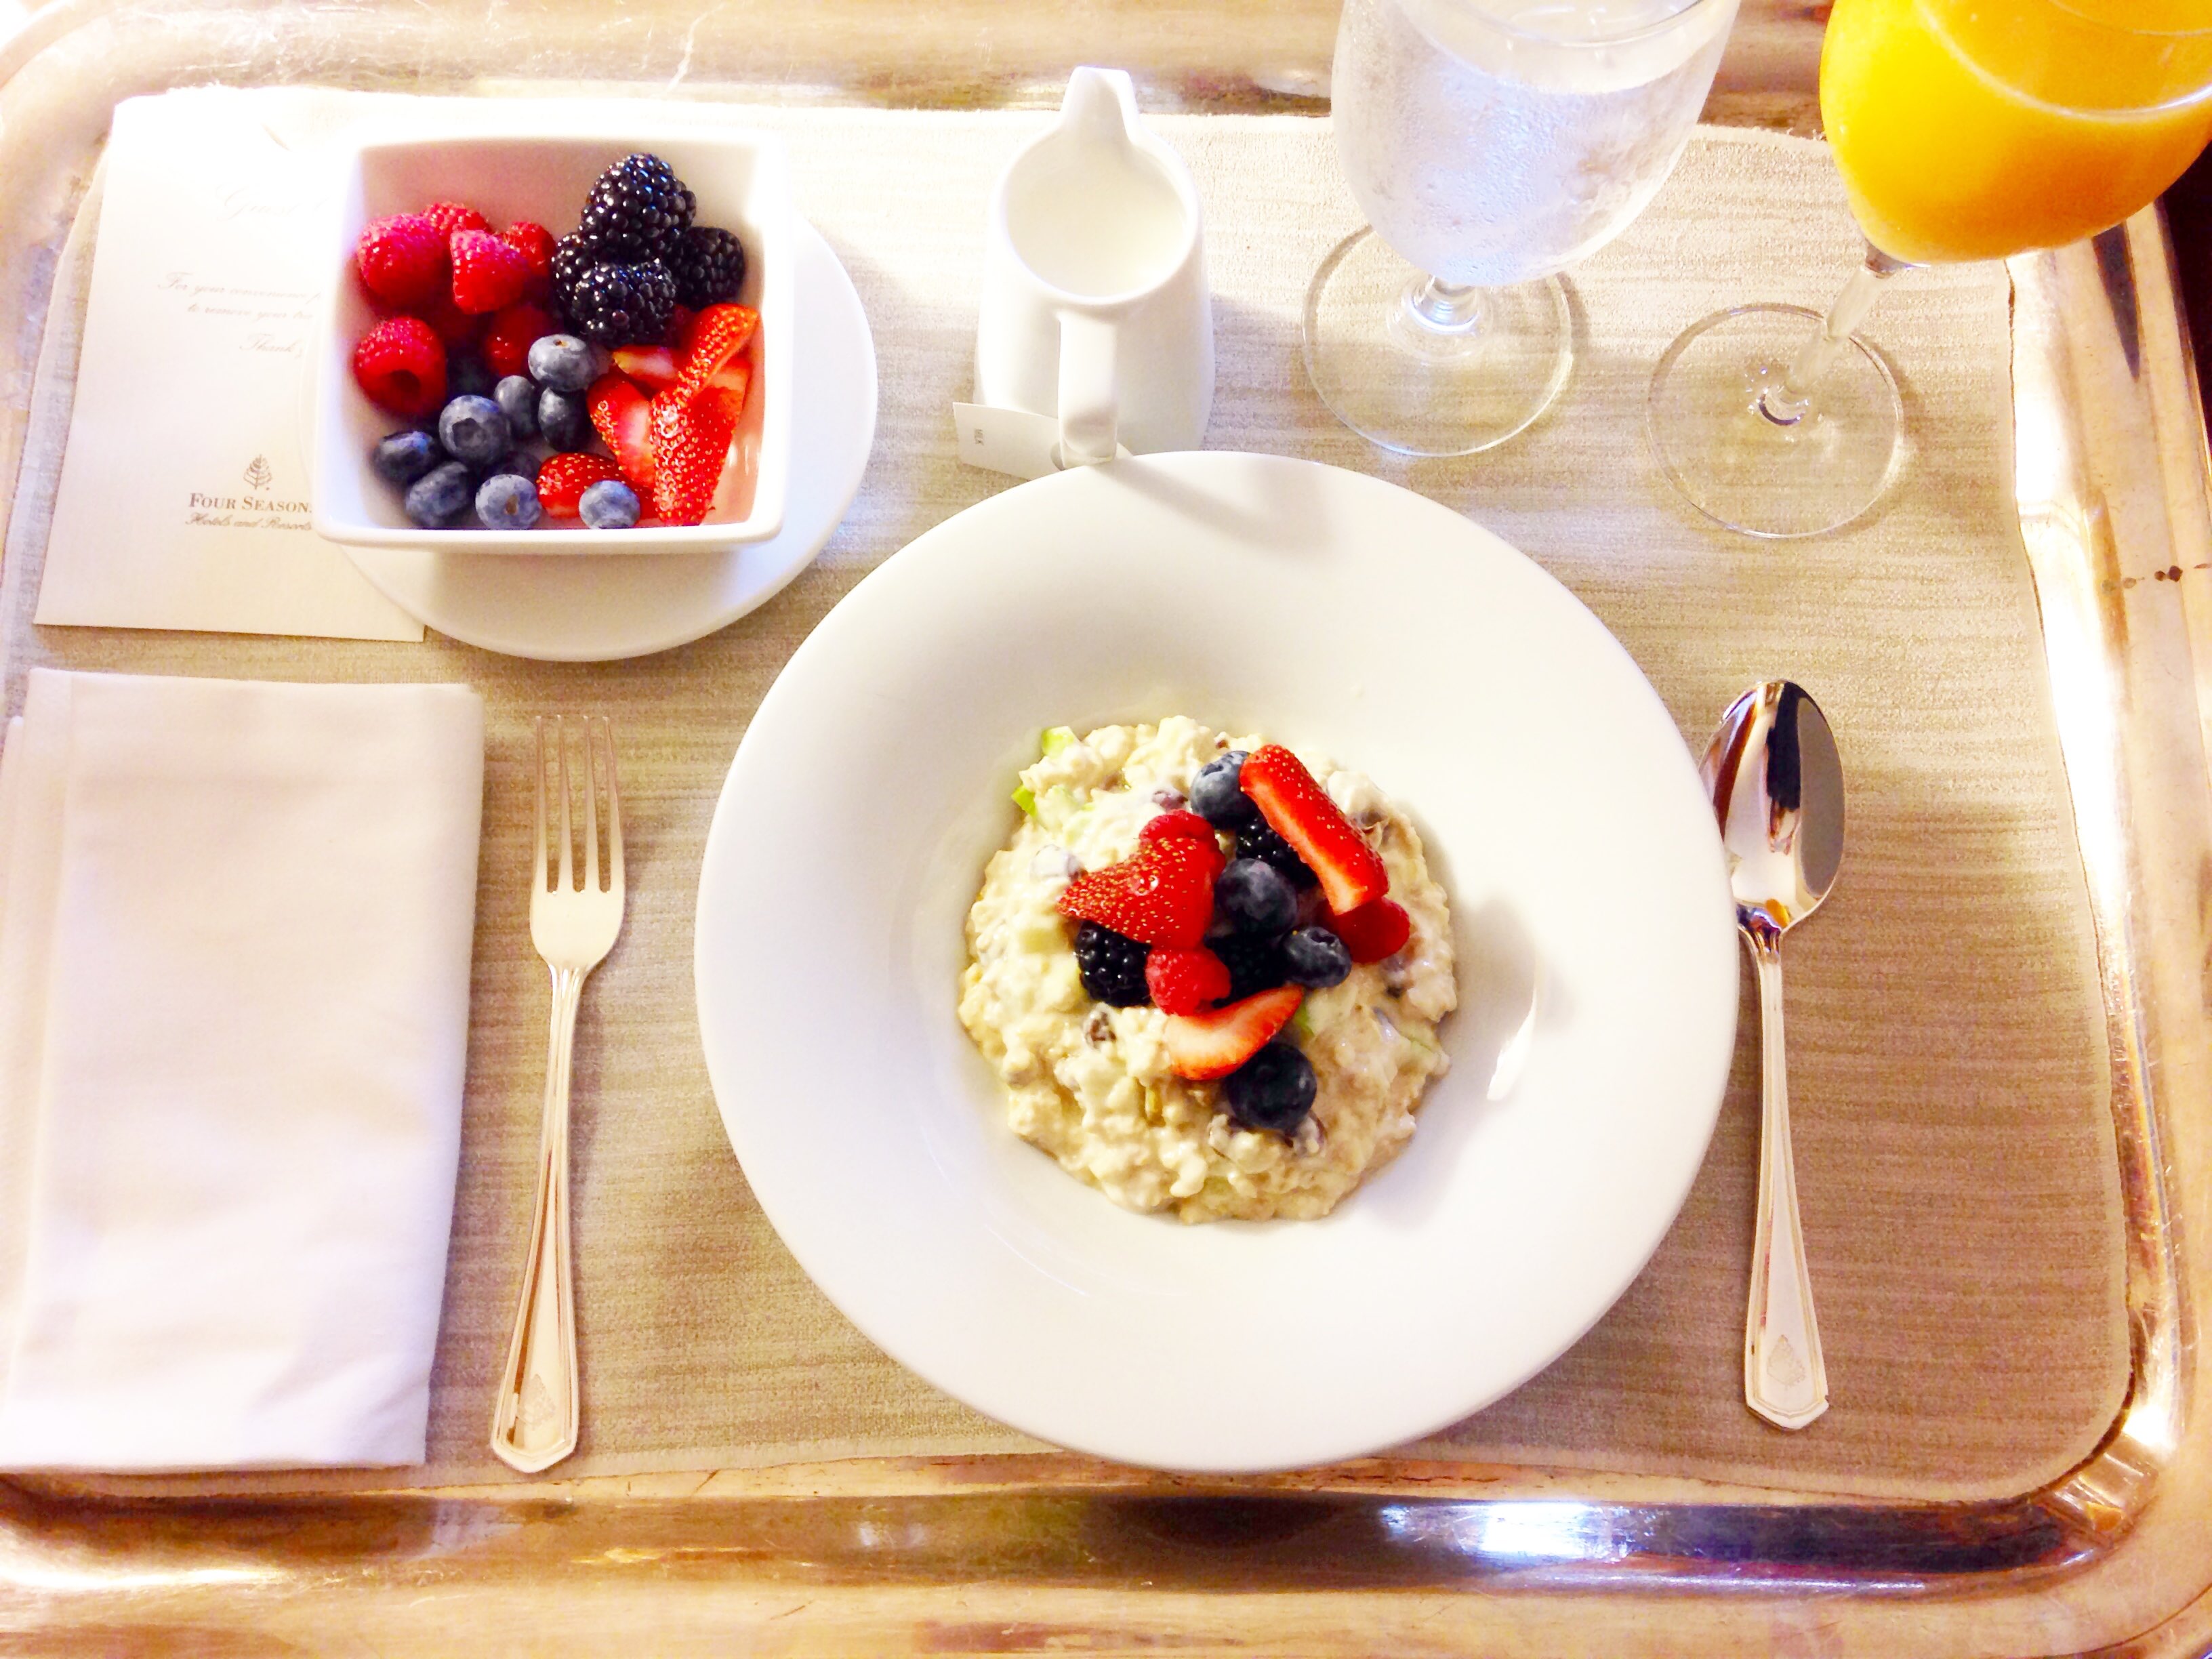
Want to know the best part of the trip?? The food! Austin is is known for their outstanding restaurants and dining, and while we didn’t eat out, The Four Seasons had some amazing cuisine.
For dinner we dinned at Trio Restaurant. Unfortunately I didn’t get a picture, but I ordered the Purple Potato Gnocchi with caramelized broccoli, broccoli puree, manchego cheese. My mom got the Jumbo Lump Crab Cake with pickled peach, spicy mayo and house mustard atop salad greens. Jenni got the stuffed pork chop. To finish it off, we all ordered room service: cheesecake in a jar topped with fresh berries! All extremely delicious!
The next morning lived up and perhaps surpassed dinner’s menu. Harper was slow to rise, so I ordered the Bircher Swiss Muesli via room service. It was the best swiss oatmeal I’ve ever had! It had vanilla yogurt, oats, raisins, diced green apples, and grapes. Yum!
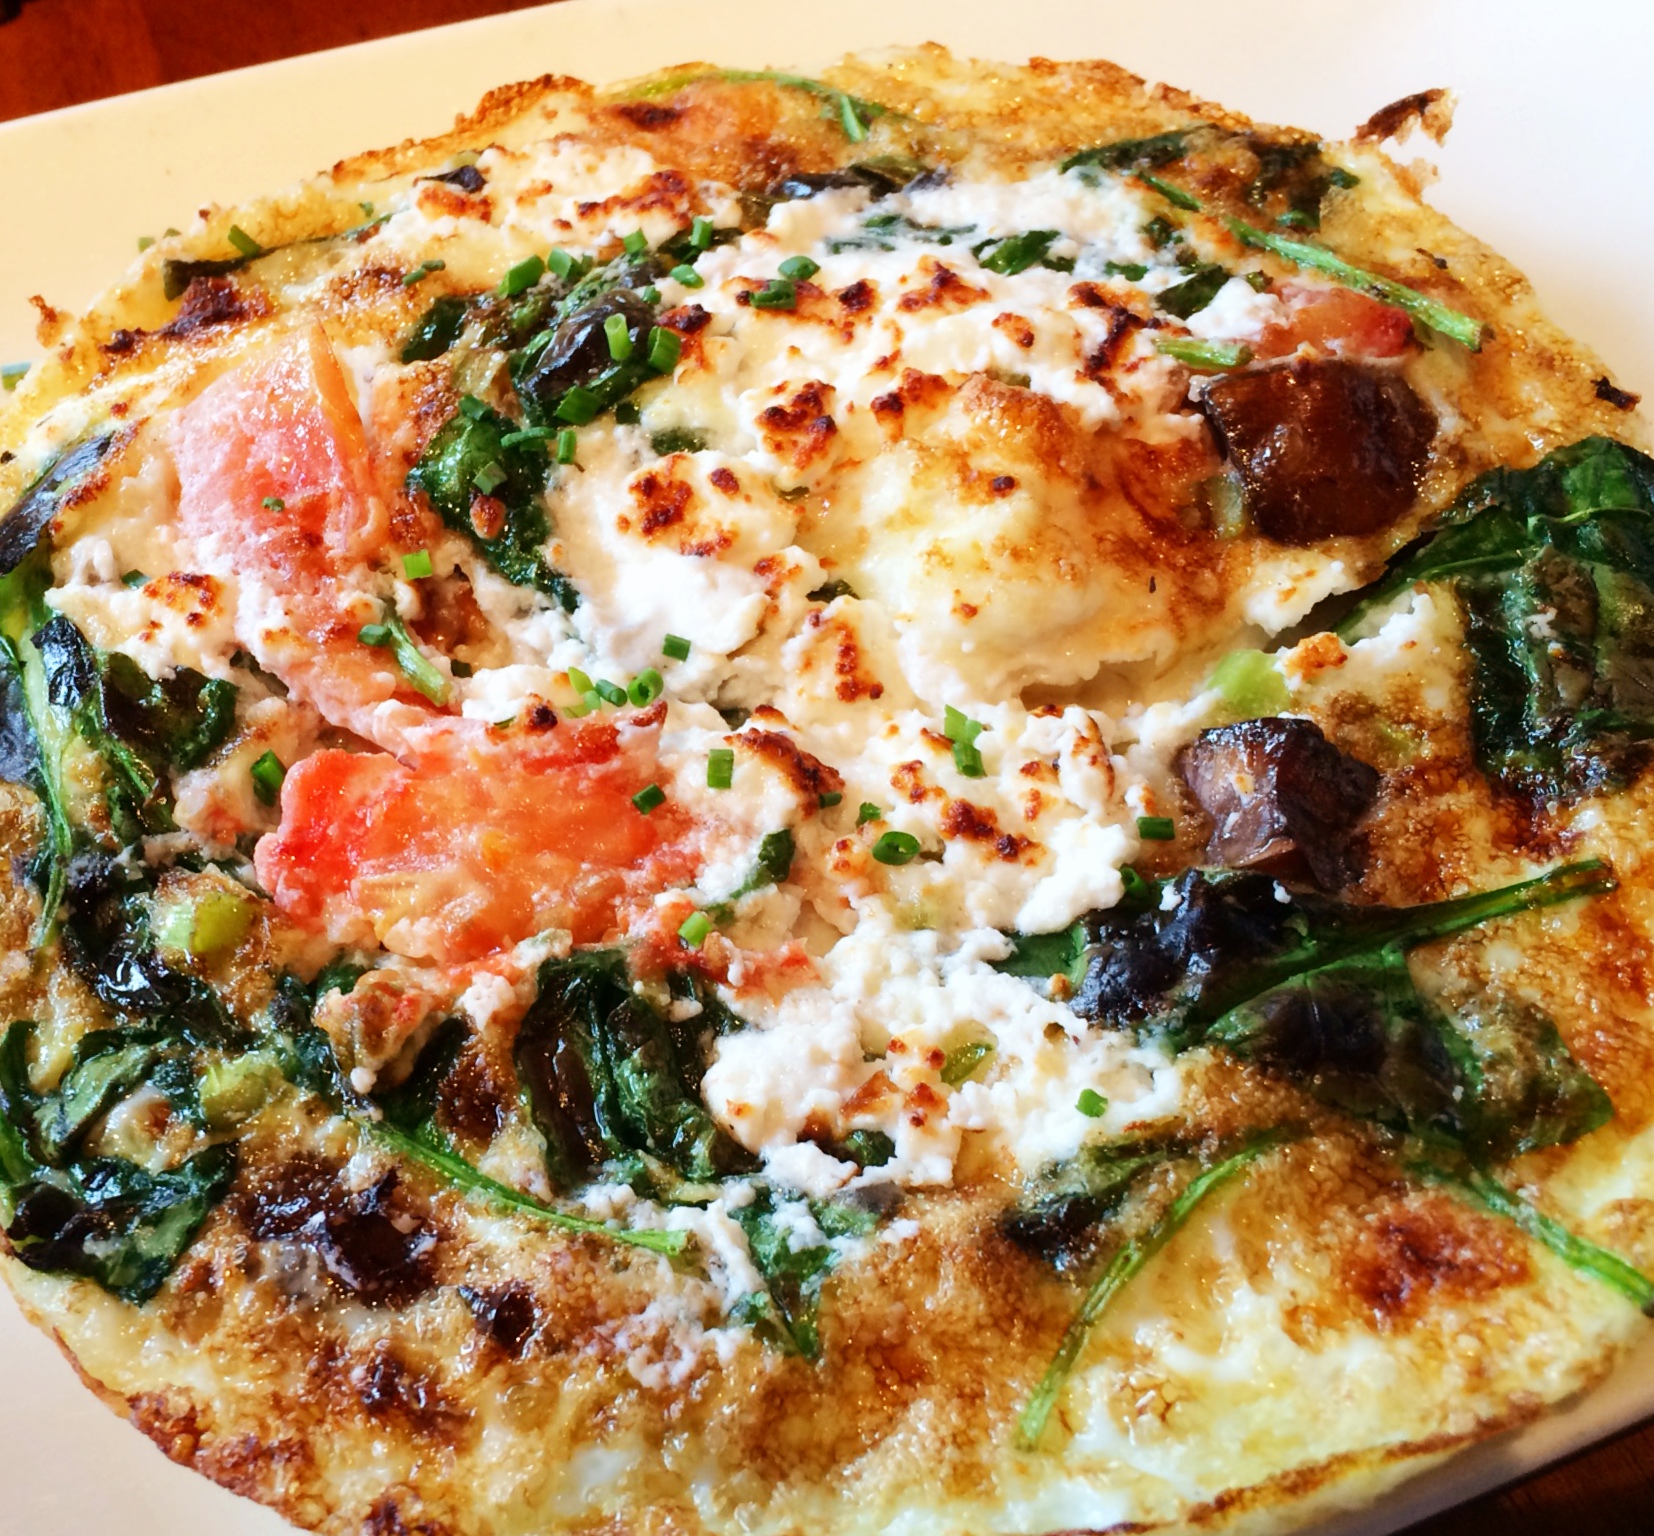
Mom and Jenni ate downstairs at Trio Restaurant again. Mom ordered the Egg White Frittata with spinach, goat cheese, and oven-dried tomatoes, while Jenni got the Trio of Pancakes: banana-blueberry, gingerbread, and oatmeal pecan.
Four Seasons Austin Bircher MuesliFour Seasons Austin Egg White Frittata
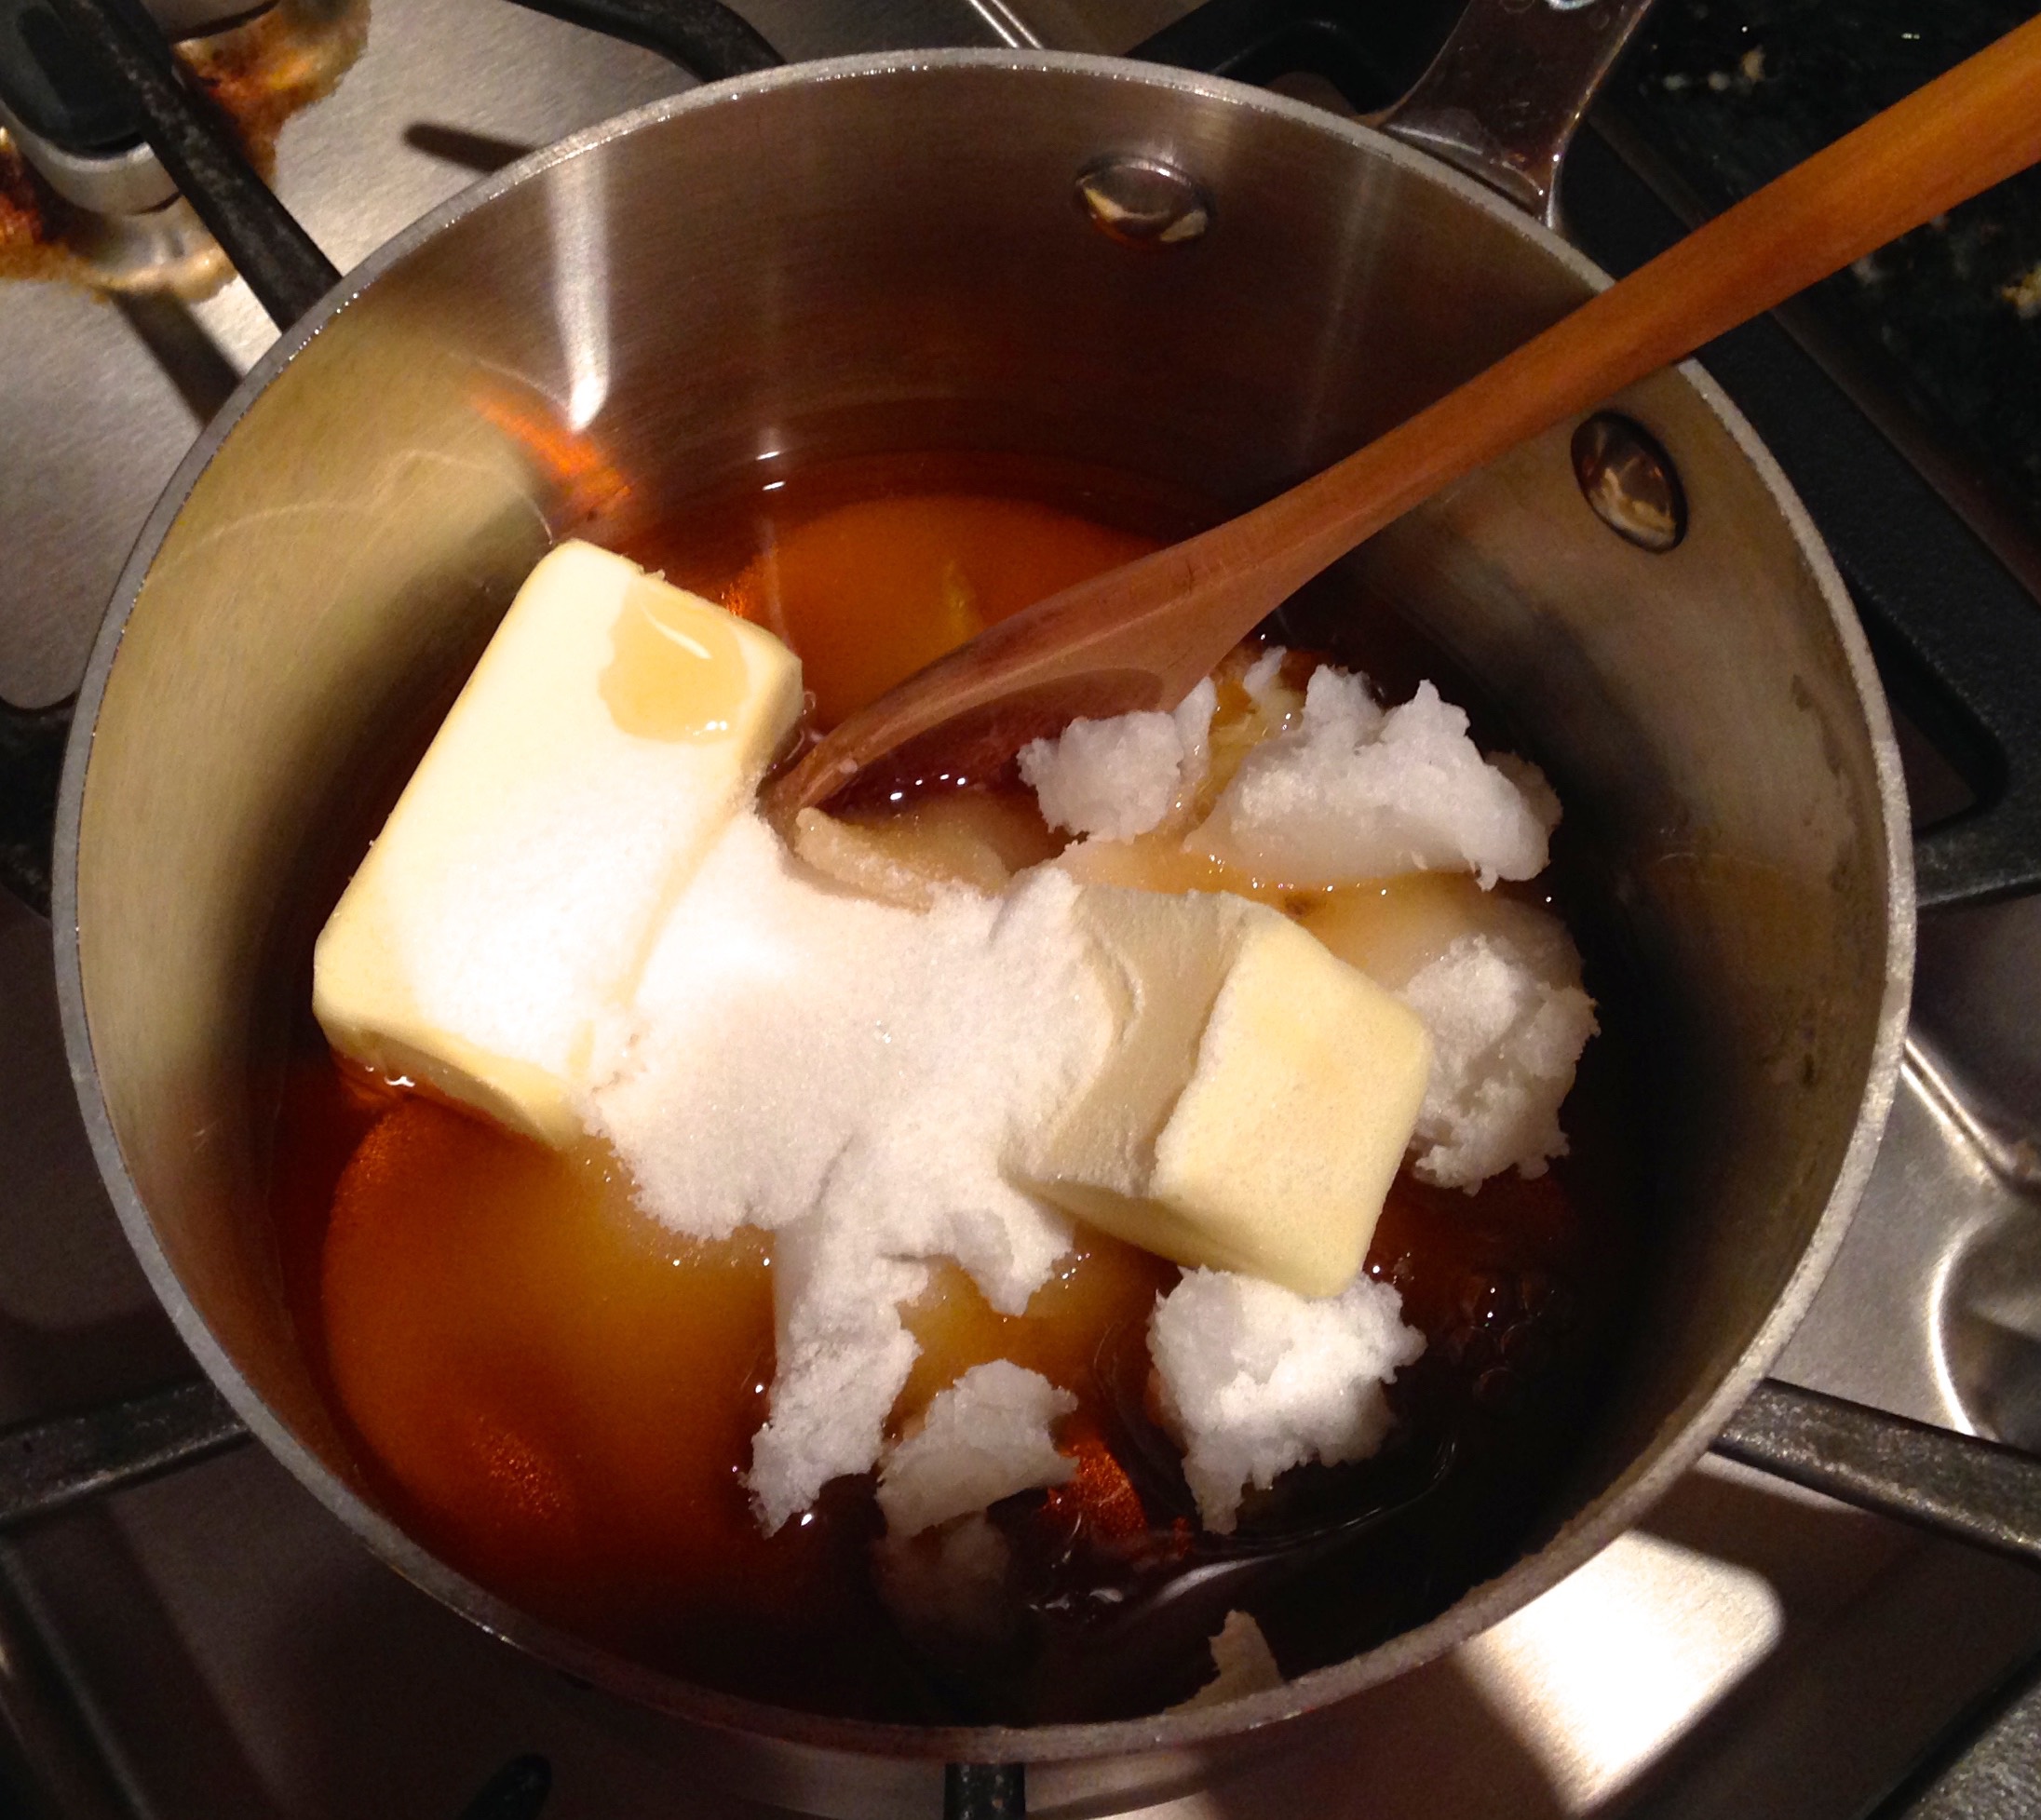
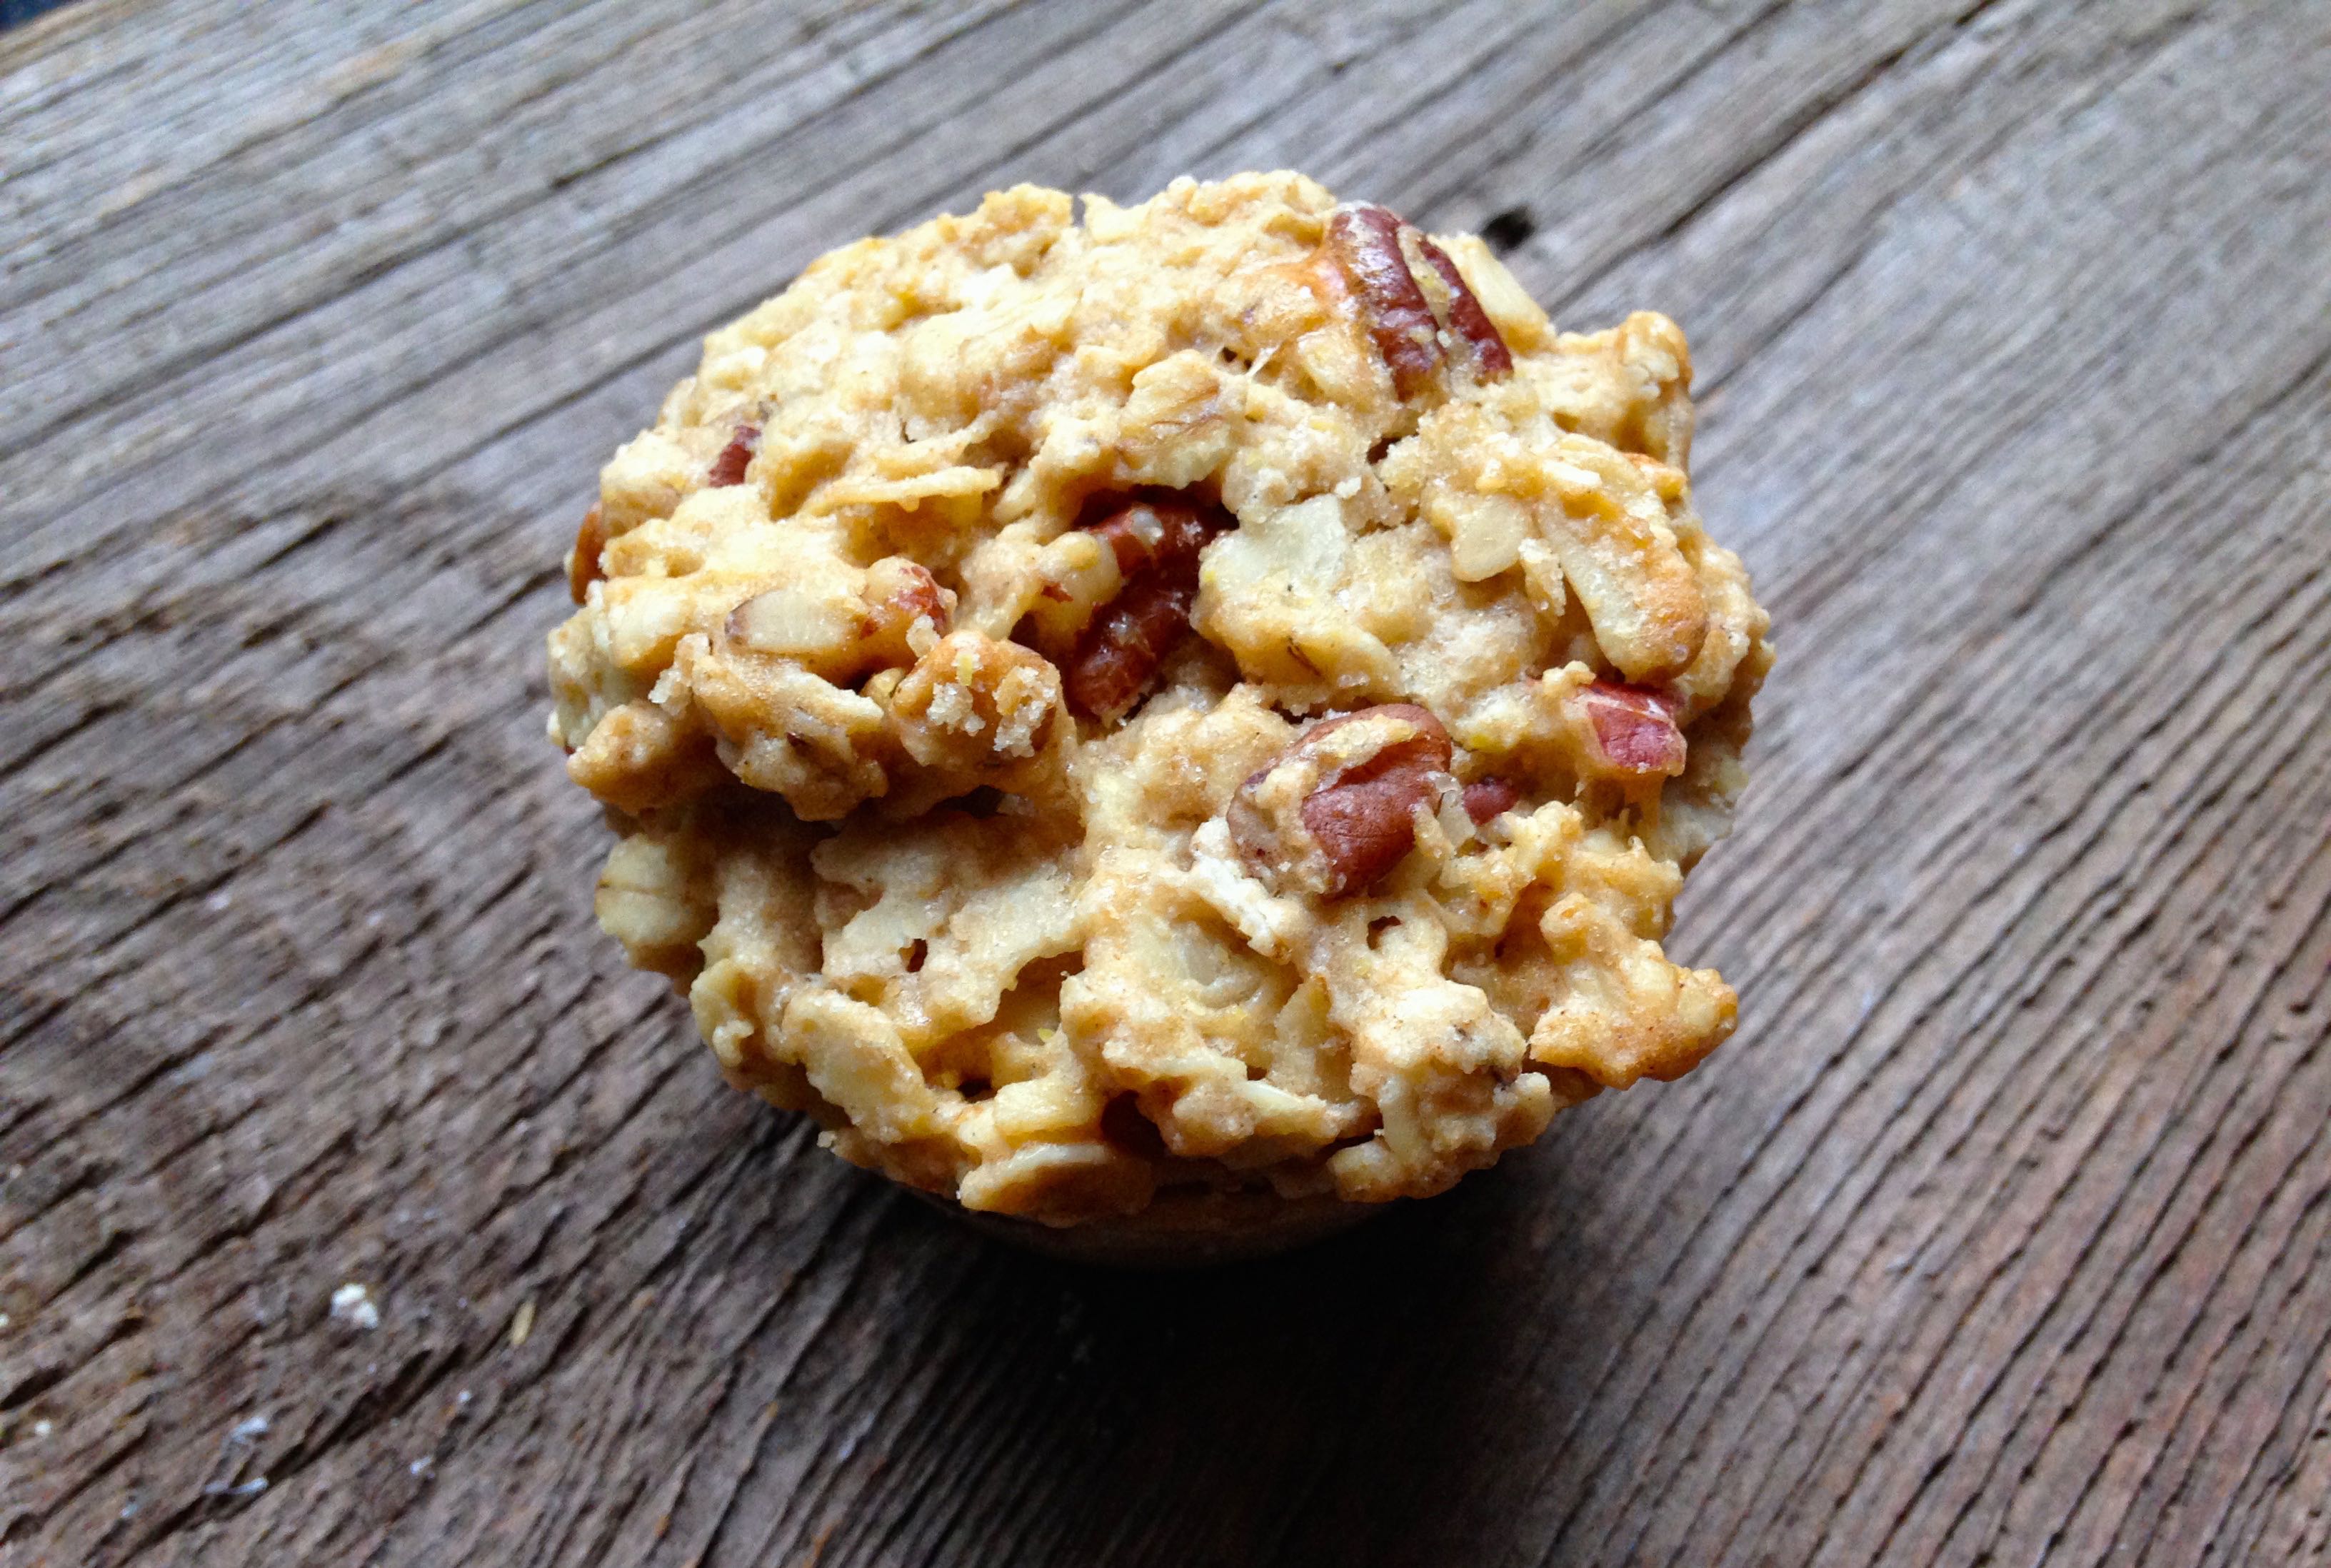
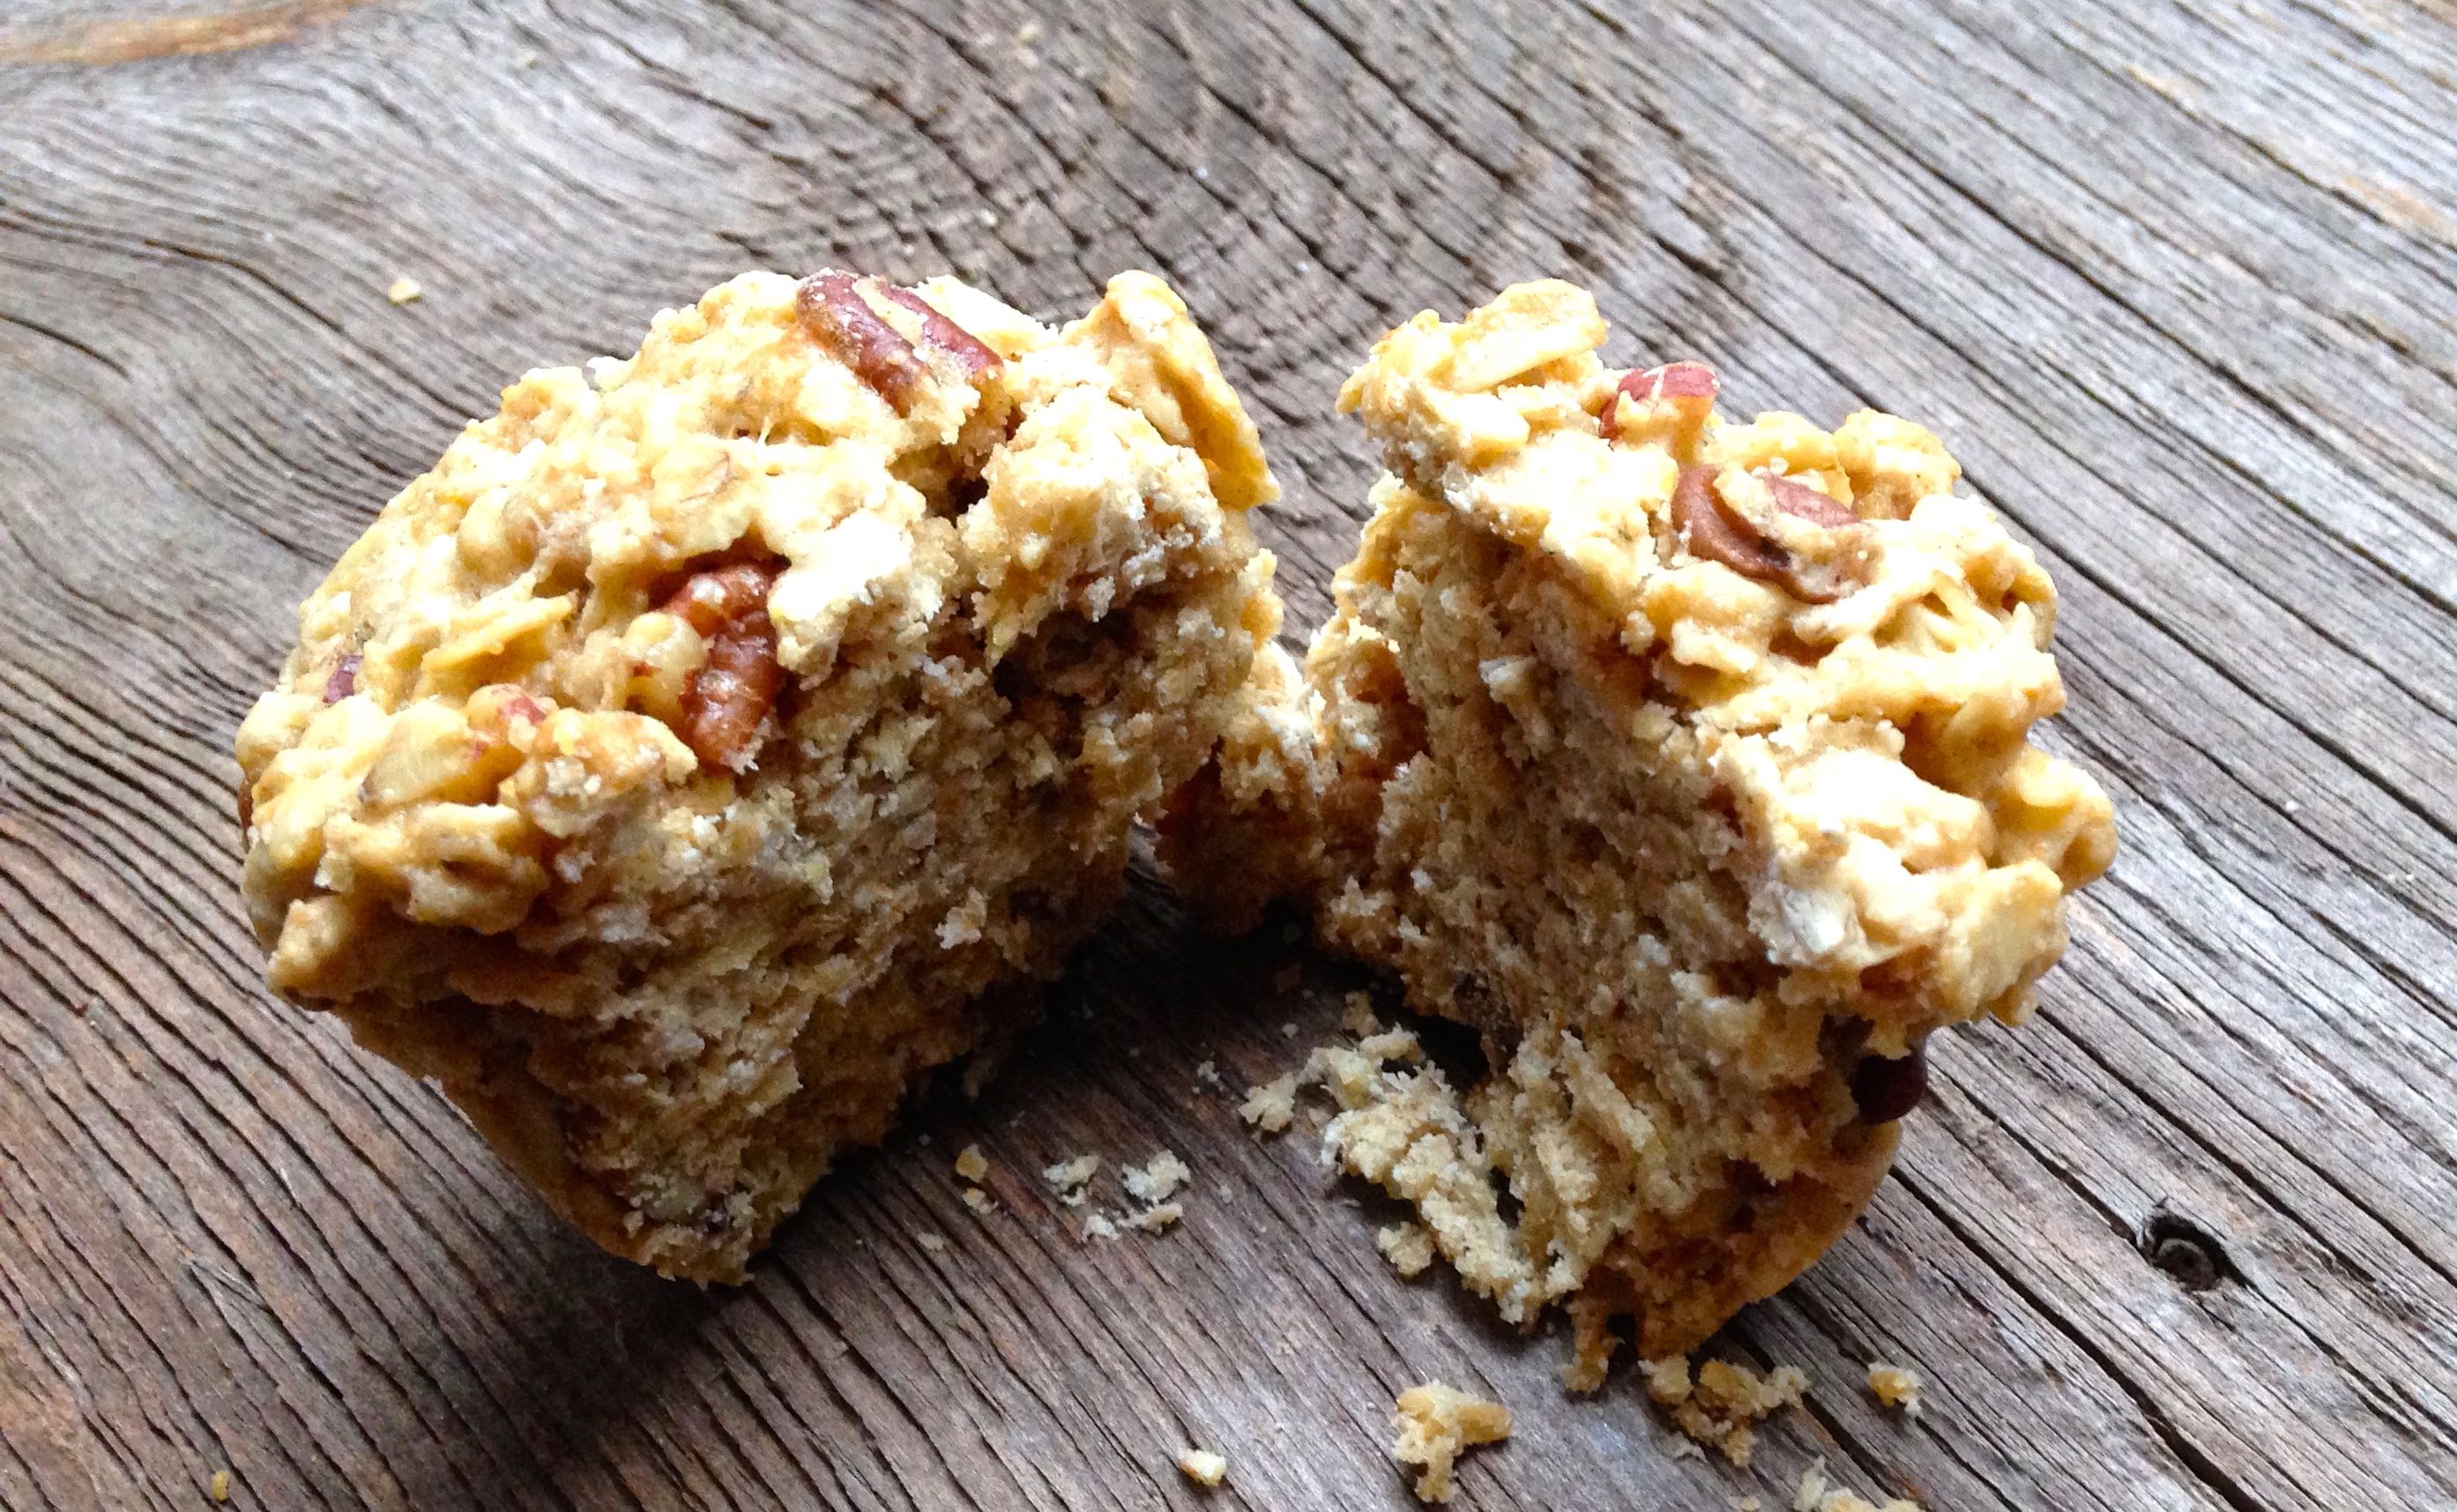
As I sit here drooling about the food I’m writing about, lets talk about these oat cakes. The best way I can describe them is as a cross between a muffin and scone. You cook the oat cakes in a muffin pan, but unlike a light and fluffy muffin, they are dense and thick like a scone.
Oats, whole wheat pastry flour, pure maple syrup, golden flaxseeds, and coconut oil make up the wholesome ingredients included, which make these great to snack on.
These oat cakes are nothing like anything you’ve ever had, but if you’re like me, you’ll love them! At first you may think you overcooked them because they are pretty dense… a lot like a hockey puck, lol. Don’t worry, they are just loaded with oats and made to taste this way. I seriously could eat one of these instead of a chocolate chip cookie every day.
Enjoy!
Oat Cakes
Prep time:
Cook time:
Total time:
Serves: 12
Adapted From: “Super Natural Every Day: Well-Loved Recipes from My Natural Foods Kitchen” by Heidi Swanson
Ingredients
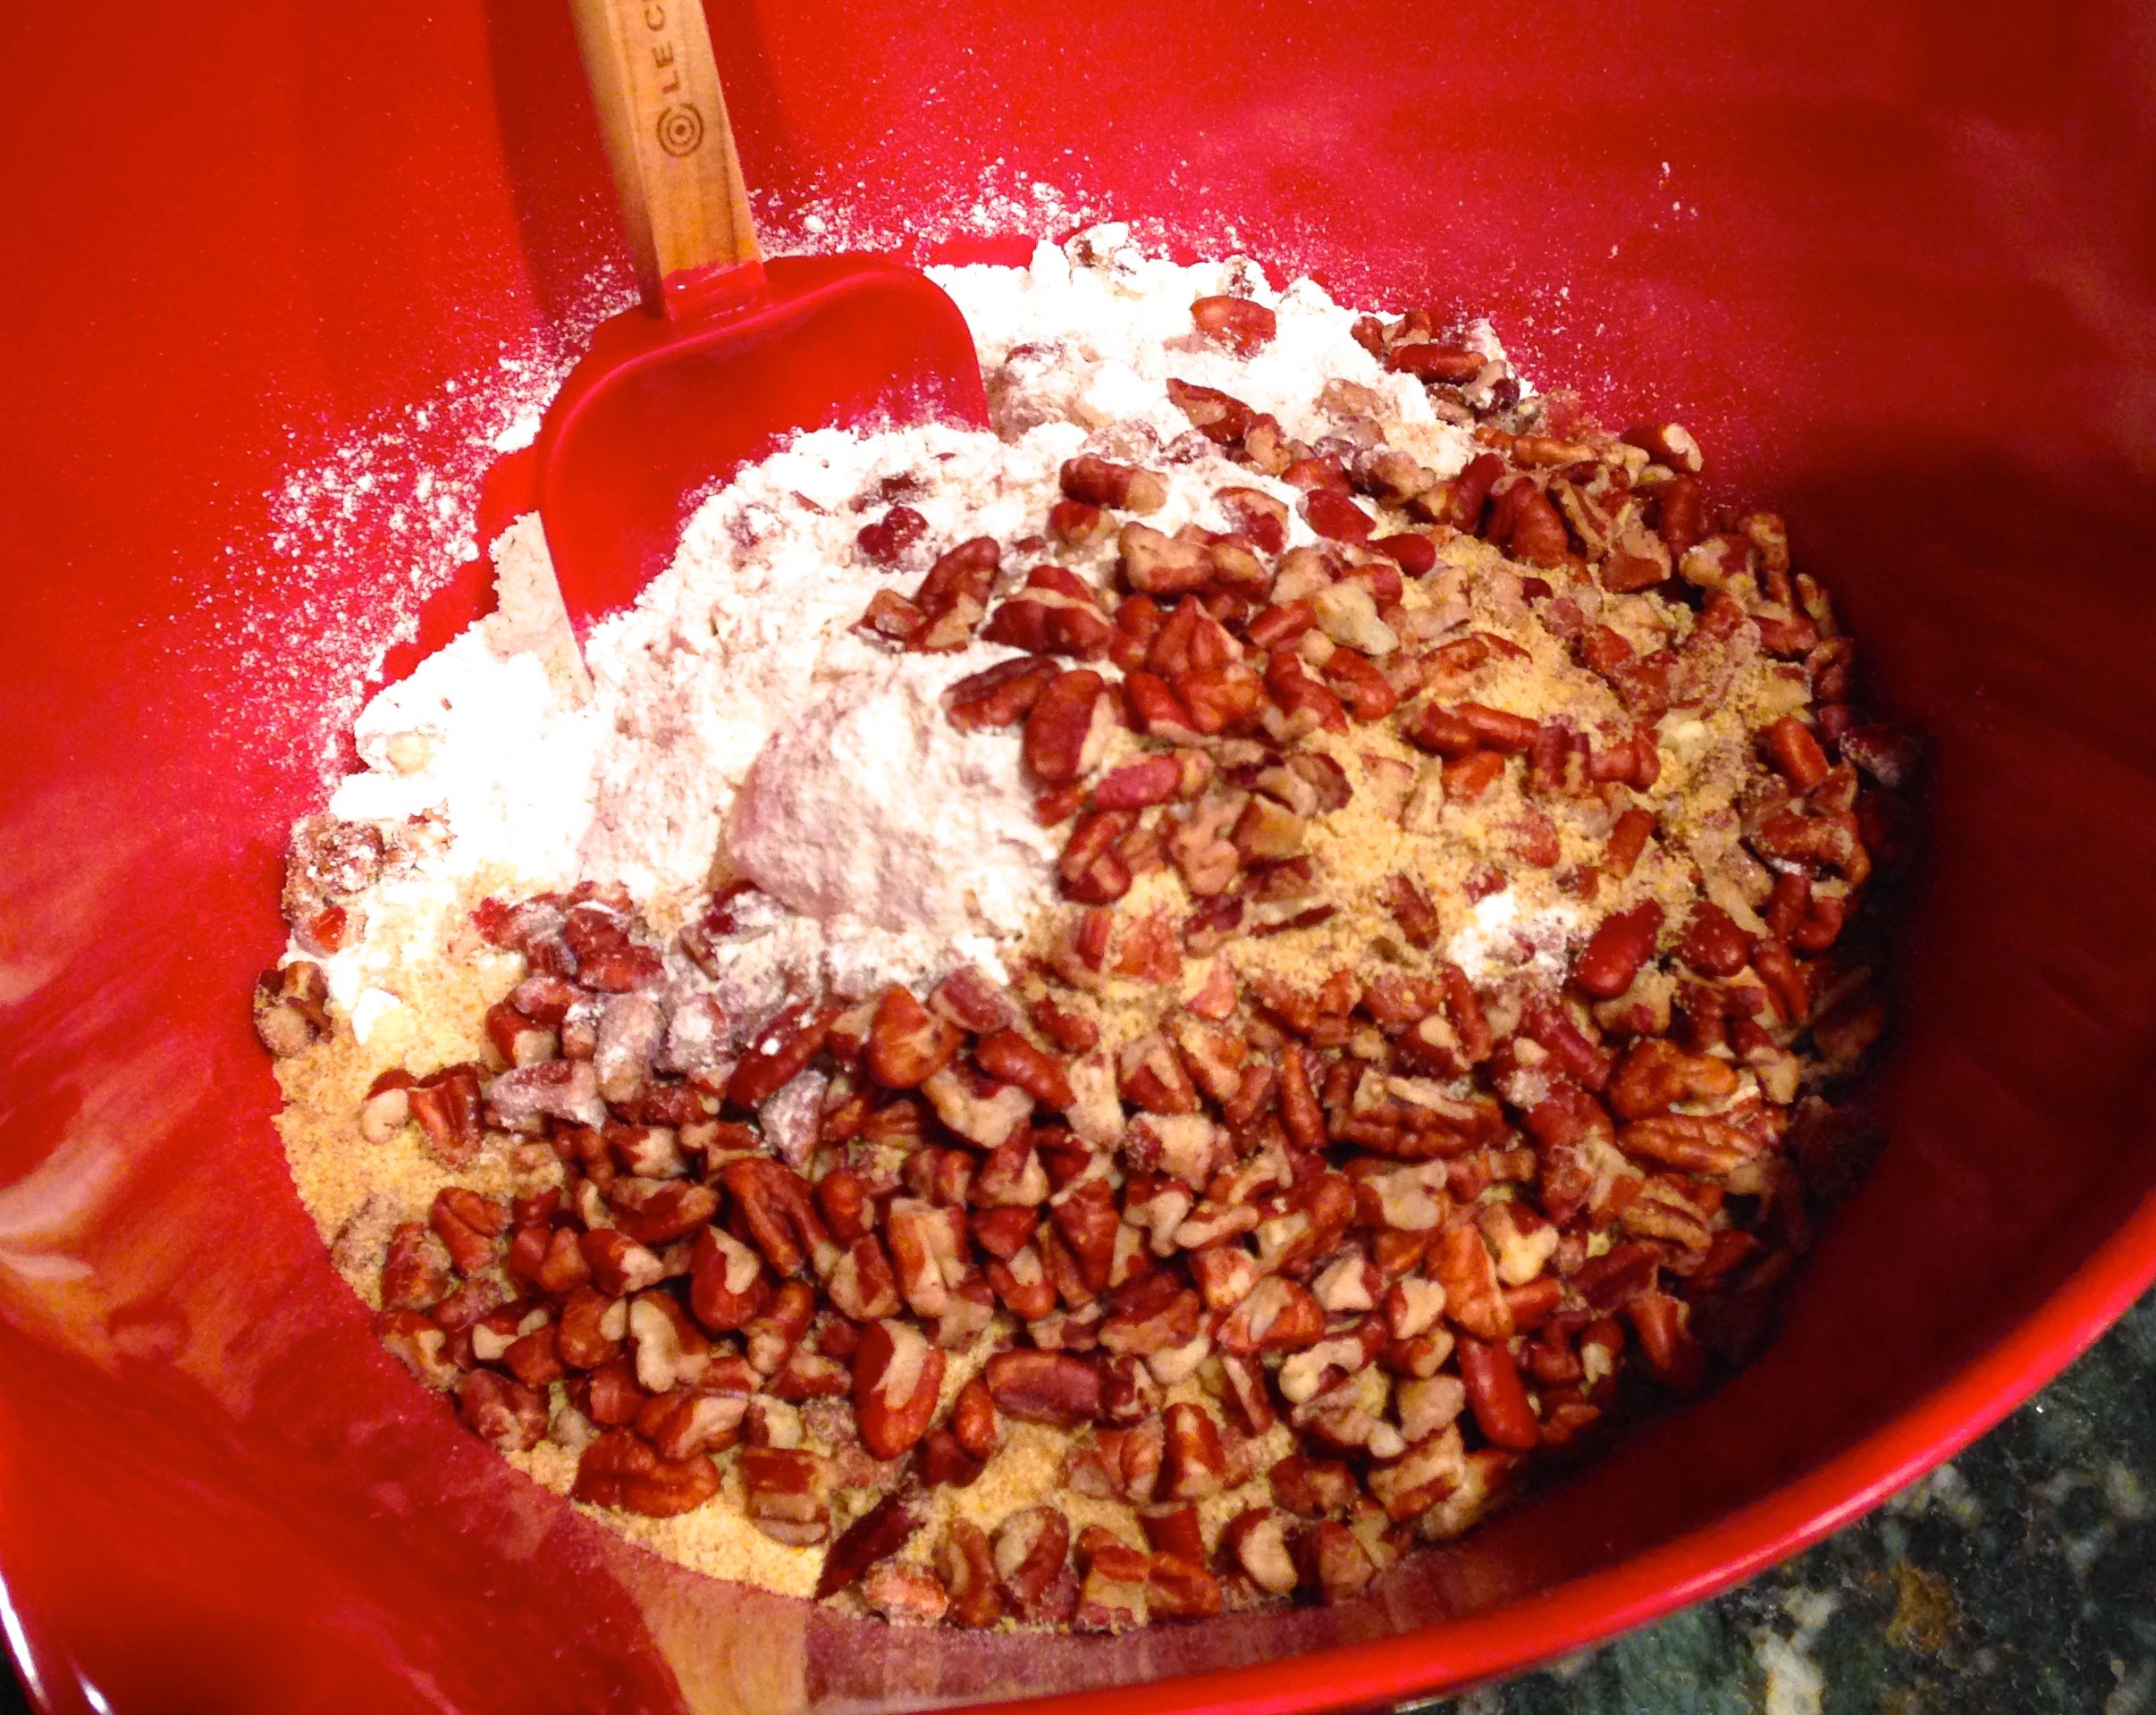
3 cups / 10.5 oz / 300 g rolled oats
2 cups / 8 oz / 225 g whole wheat pastry flour
1/2 tsp. aluminum-free baking powder
2 tsp. fine-grain sea salt
1/4 cup/ 1.5 oz / 45 g golden flaxseeds
3/4 cup / 3 oz / 85 g chopped walnuts or pecans, lightly toasted
1/3 cup / 2.5 oz / 70 g extra-virgin coconut oil
1/3 cup / 3 oz / 85 g unsalted butter
3/4 cup / 180 ml maple syrup
2 large eggs
Instructions
Preheat oven to 325 degrees F with a rack in the top third of the oven. Butter a standard 12-cup muffin pan. (You can also use a 24-cup mini muffin pan. Just shorten the bake time by 10 minutes).
Combine the oats, flour, baking powder, salt, flaxseeds, and walnuts in a large mixing bowl.
In a medium saucepan over low heat, combine the coconut oil, butter, and maple syrup, and slowly melt together. Stir just until the butter melts and sugar has dissolved, but don’t let the mixture get too hot. You don’t want it to cook the eggs on contact in the next step.
Pour the coconut oil mixture over the oat mixture. Stir a bit with a fork, add the eggs, and stir again until everything comes together into a wet dough. Spoon the dough into the muffin cups filling them completely.
Bake for 25 to 30 minutes, until the edges of each oat cake are deeply golden. Remove the pan from the oven and let cool for a couple minutes. Then, run a knife around the edges of the cakes and tip them out onto a cooling rack. Serve warm or at room temperature.
Just like I said with my milk makin’ cookies recipe, you don’t have to be the mother of a newborn to enjoy these. Those lactation cookies and these no bake snack bites just have wholesome ingredients which promote lactation. Trust me, these won’t turn you into a milk producing cow! lol.
There’s actually a special word for these kinds of foods and it’s called galactagogues. “Galacta-what?” Galactagogues are substances that naturally promote breast milk production. They generally include herbs or foods that increase a mother’s supply. While you can take them as supplements or teas, you can also consume them as delicious cookies or snack bites!
So, what foods are considered to be galactagogues?
*whole grains, especially oats/oatmeal
dark leafy greens (kale, spinach, broccoli)
fennel
garlic
chickpeas
*nuts and seeds, especially almonds
ginger
papaya
spices like cumin seeds, anise seeds, fennel seeds, and turmeric
*brewer’s yeast
The foods listed above with an asterisk * are included in these yummy snack bites.
I actually have an almost identical snack bite recipe from a few years back, but they don’t have brewer’s yeast and there’s a little less honey. I like this recipe better. The extra bit of honey make the bites easy to roll into balls, and add a natural sweetness without refined sugar.
Enjoy!
No Bake Lactation Bites
Prep time:
Total time:
Serves: 24
Ingredients
1 cup oats
1 cup coconut
1/2 cup peanut butter
1/2 cup honey
1/2 cup golden ground flaxseed
1 Tbsp. brewer’s yeast
1/2 cup chocolate chips
1/2 tsp. vanilla
Instructions
Mix all ingredients together and roll into 1 inch balls.
First of all, HAPPY BIRTHDAY TO MY HUSBAND MATT! He turns “old” today. Not really, but I do make fun of him since he’s 7 years older than me… 8 years if you count today. 🙂
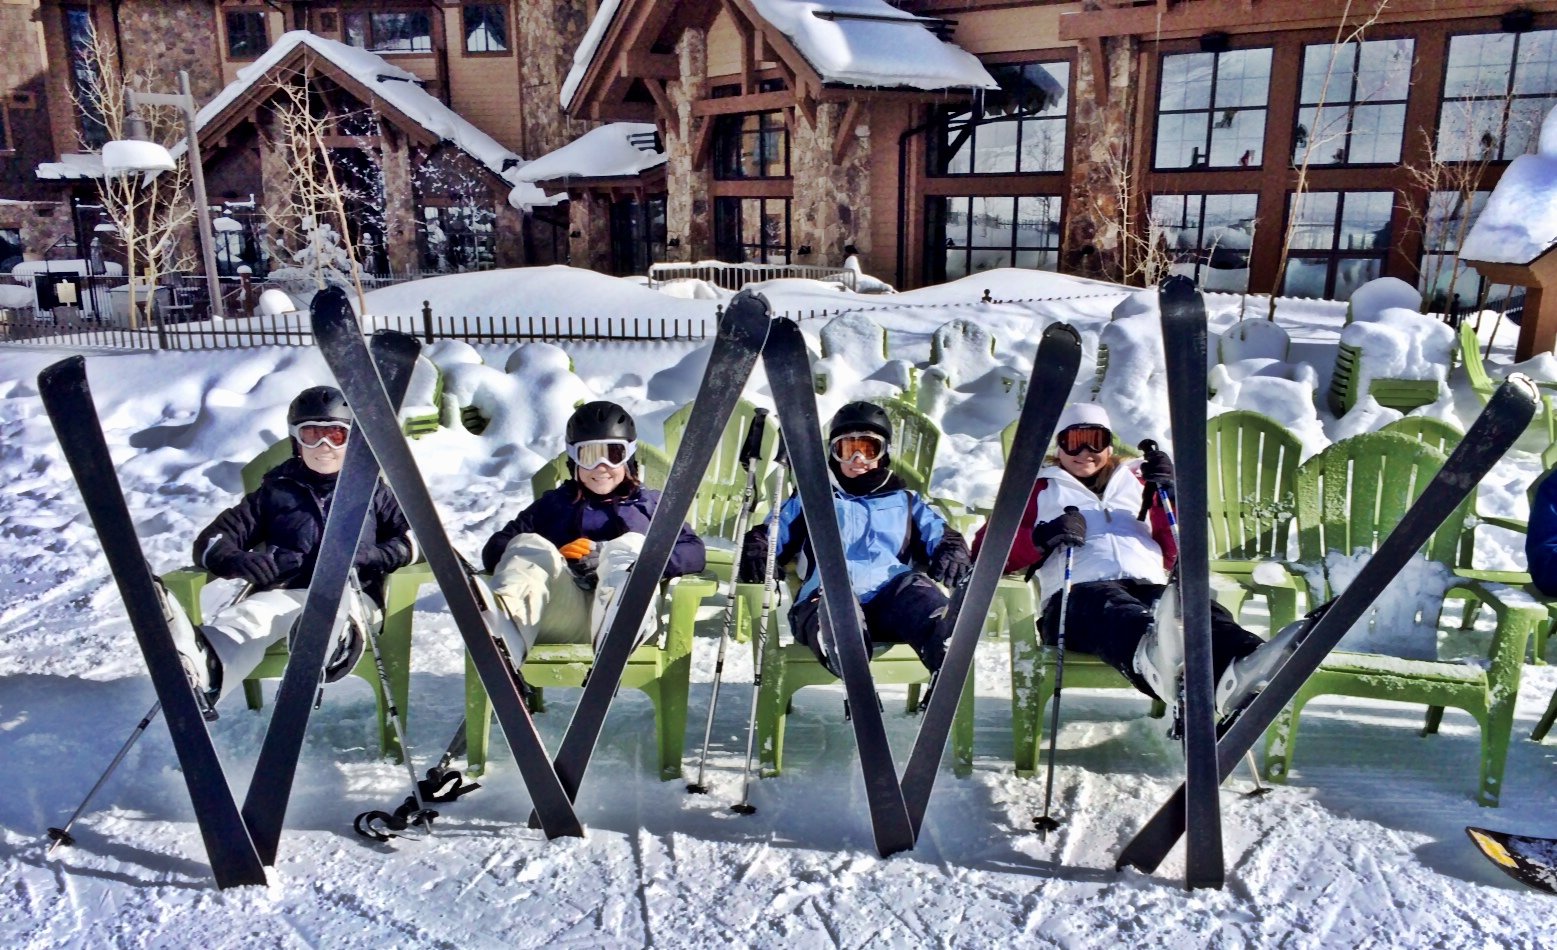
Second, now that it’s finally in the 70s here in Texas, I kind of wish for the freezing temperatures that most of the nation has experienced this winter. NOT!! But, when you have freezing temps, you might as well make the most of it, and that’s what we did last week in Breckenridge, Colorado.
A group of us from church thought it would be fun to take a ski trip to Colorado and we literally couldn’t have planned it for a better time.
Breck got TONS of snow!!!! Here’s a picture of us driving in. The picture doesn’t do it justice but there was snow everywhere!
Day 1: Putting on our gear and ready to hit the slopes.
There was soooo much snow, that both Jeff’s truck and Chris’ suburban got stuck in the driveway at our condo. It took them an hour to get out, and as you can see from the picture above, we learned our lesson and had to buy some chains for the back tires. I think it was the first time us Texans ever had to put on chains, and it took the guys about 45 minutes to learn how. LOL.
While we were away, the midwest was hit by another Polar Vortex, Dallas got another ice and snow storm with schools that were cancelled, and Breckenridge got record snowfall! In just 48 hours, they got over 26 inches of snow!
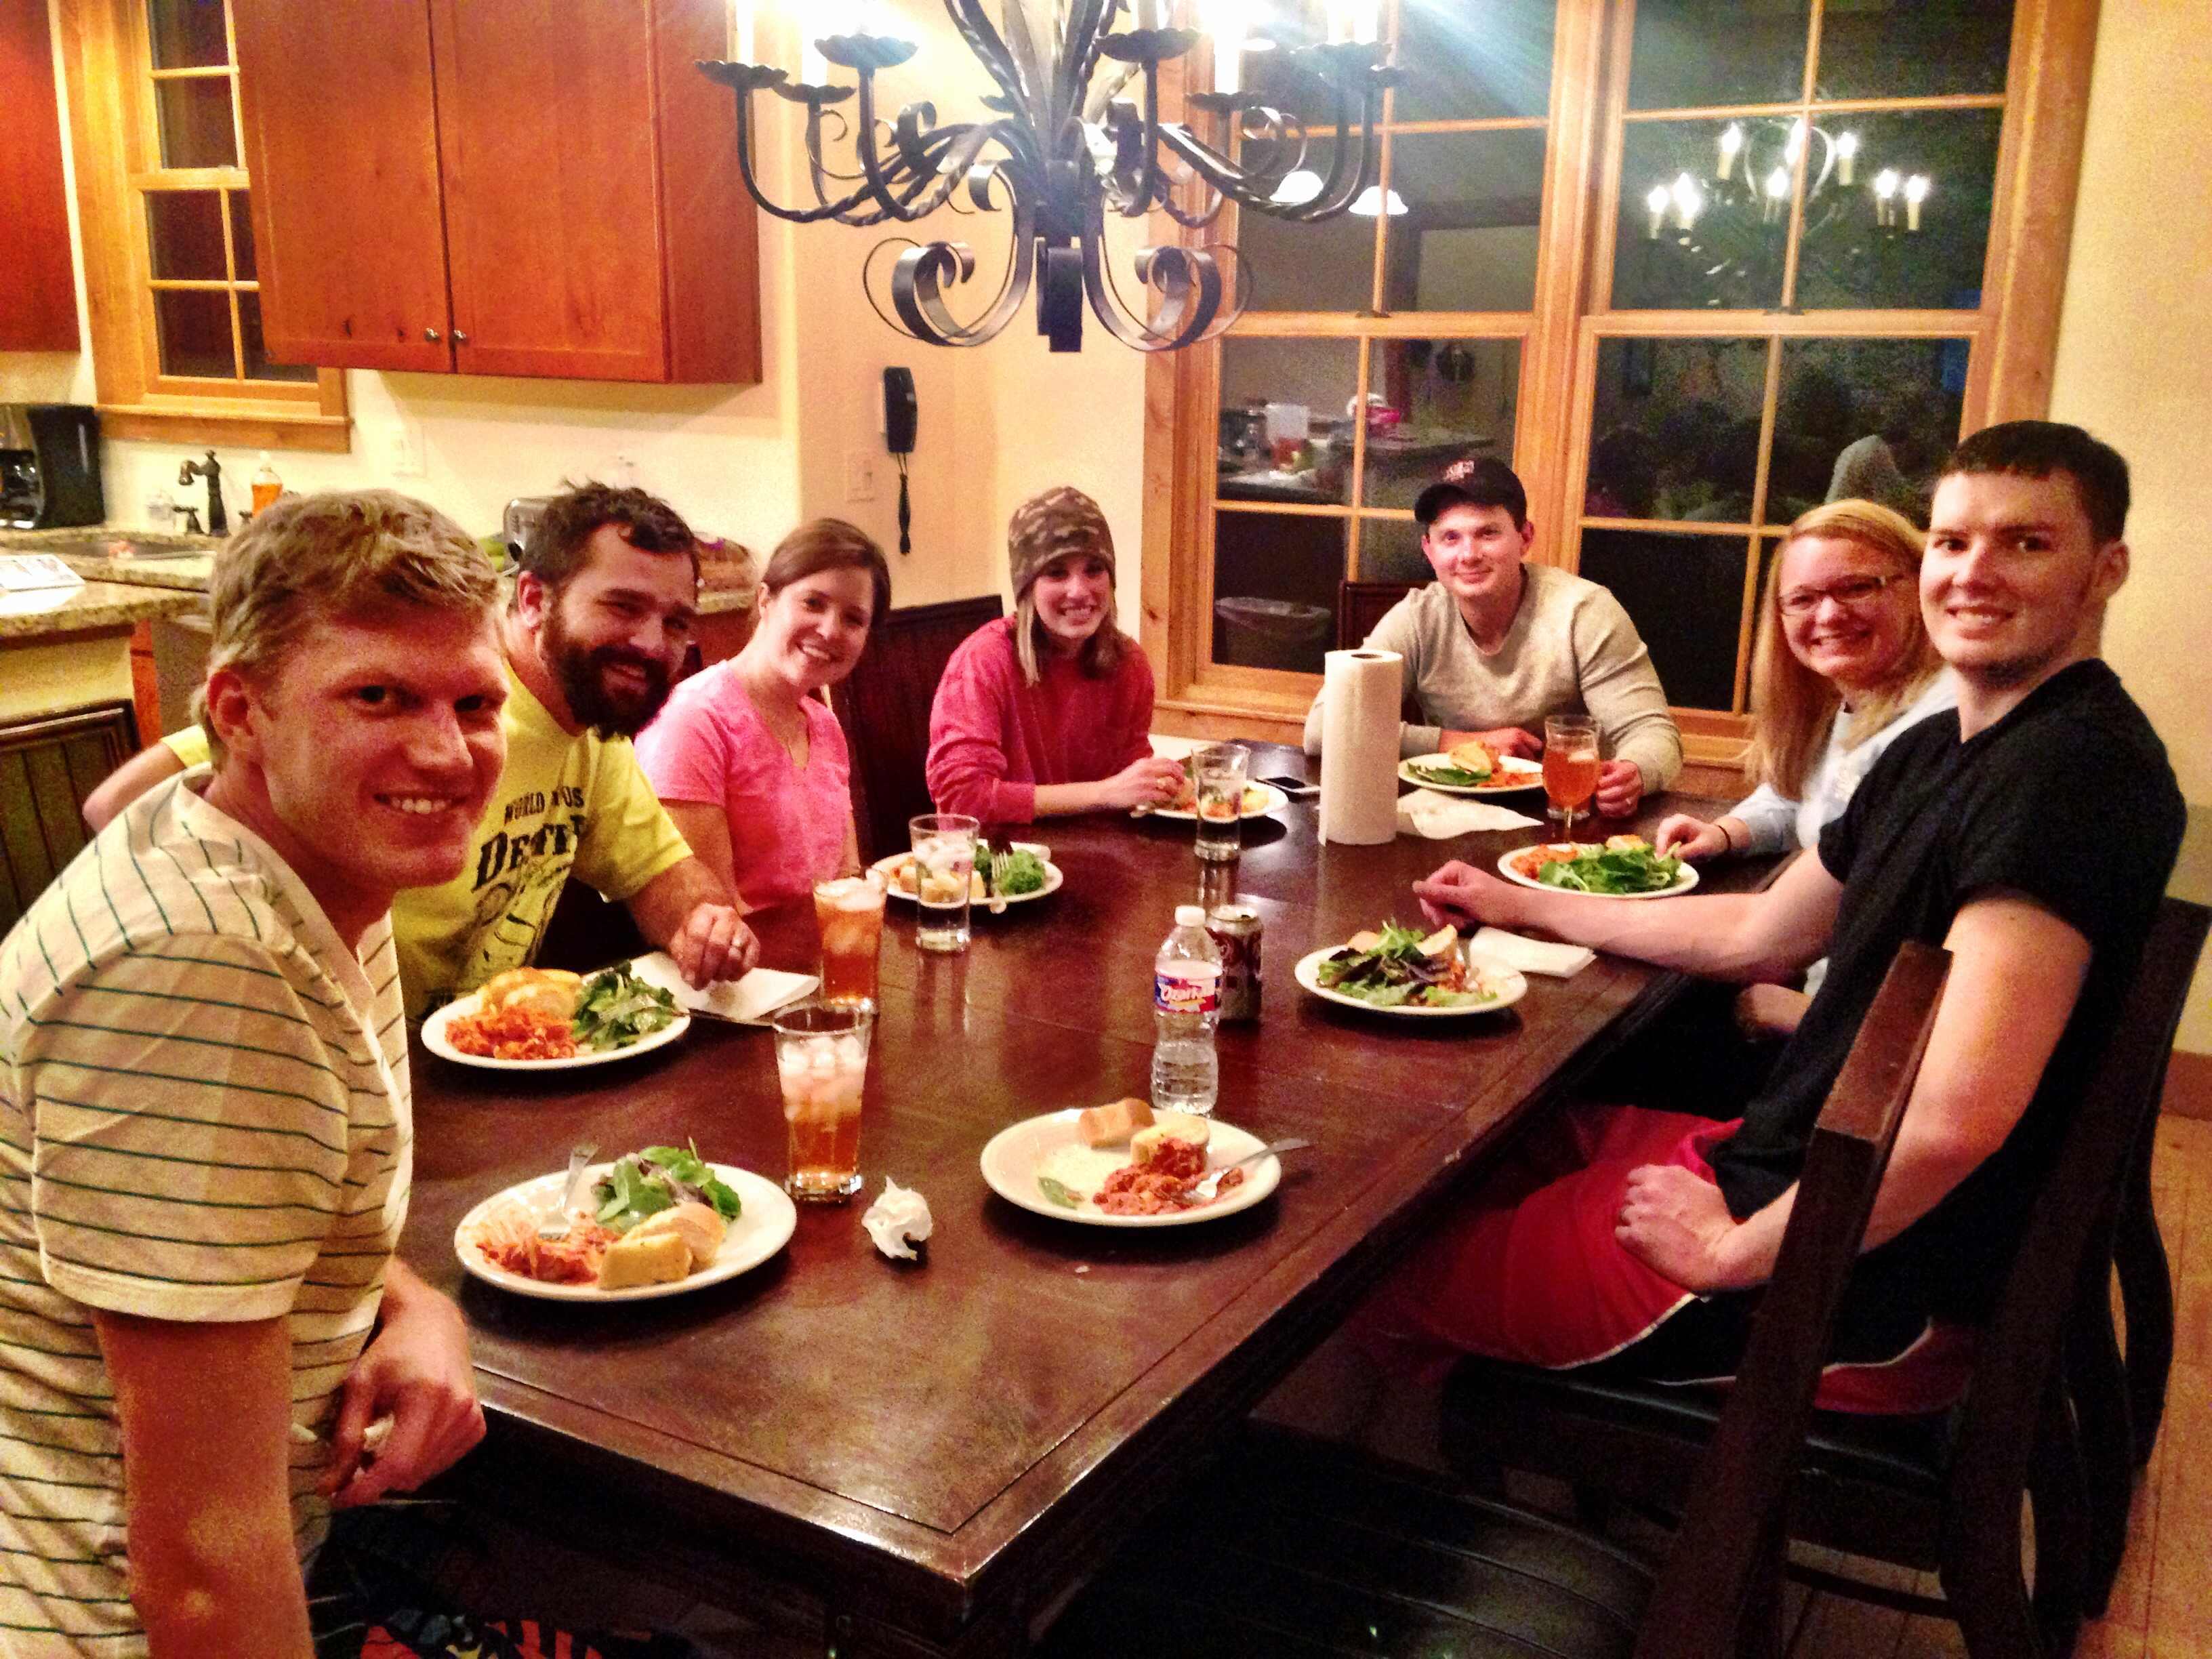
Day 1: Group picture!
Day 1 of skiing was a blast. Although it was blizzard conditions, and un-groomed runs, there was plenty of snow and we all had a blast.
Tough guys.
Day 2 of skiing was perfect. We saw blue skies, groomed runs, and explored even more runs than the first day.
As the guys say, “It’s time to shred some pow pow!”. haha.
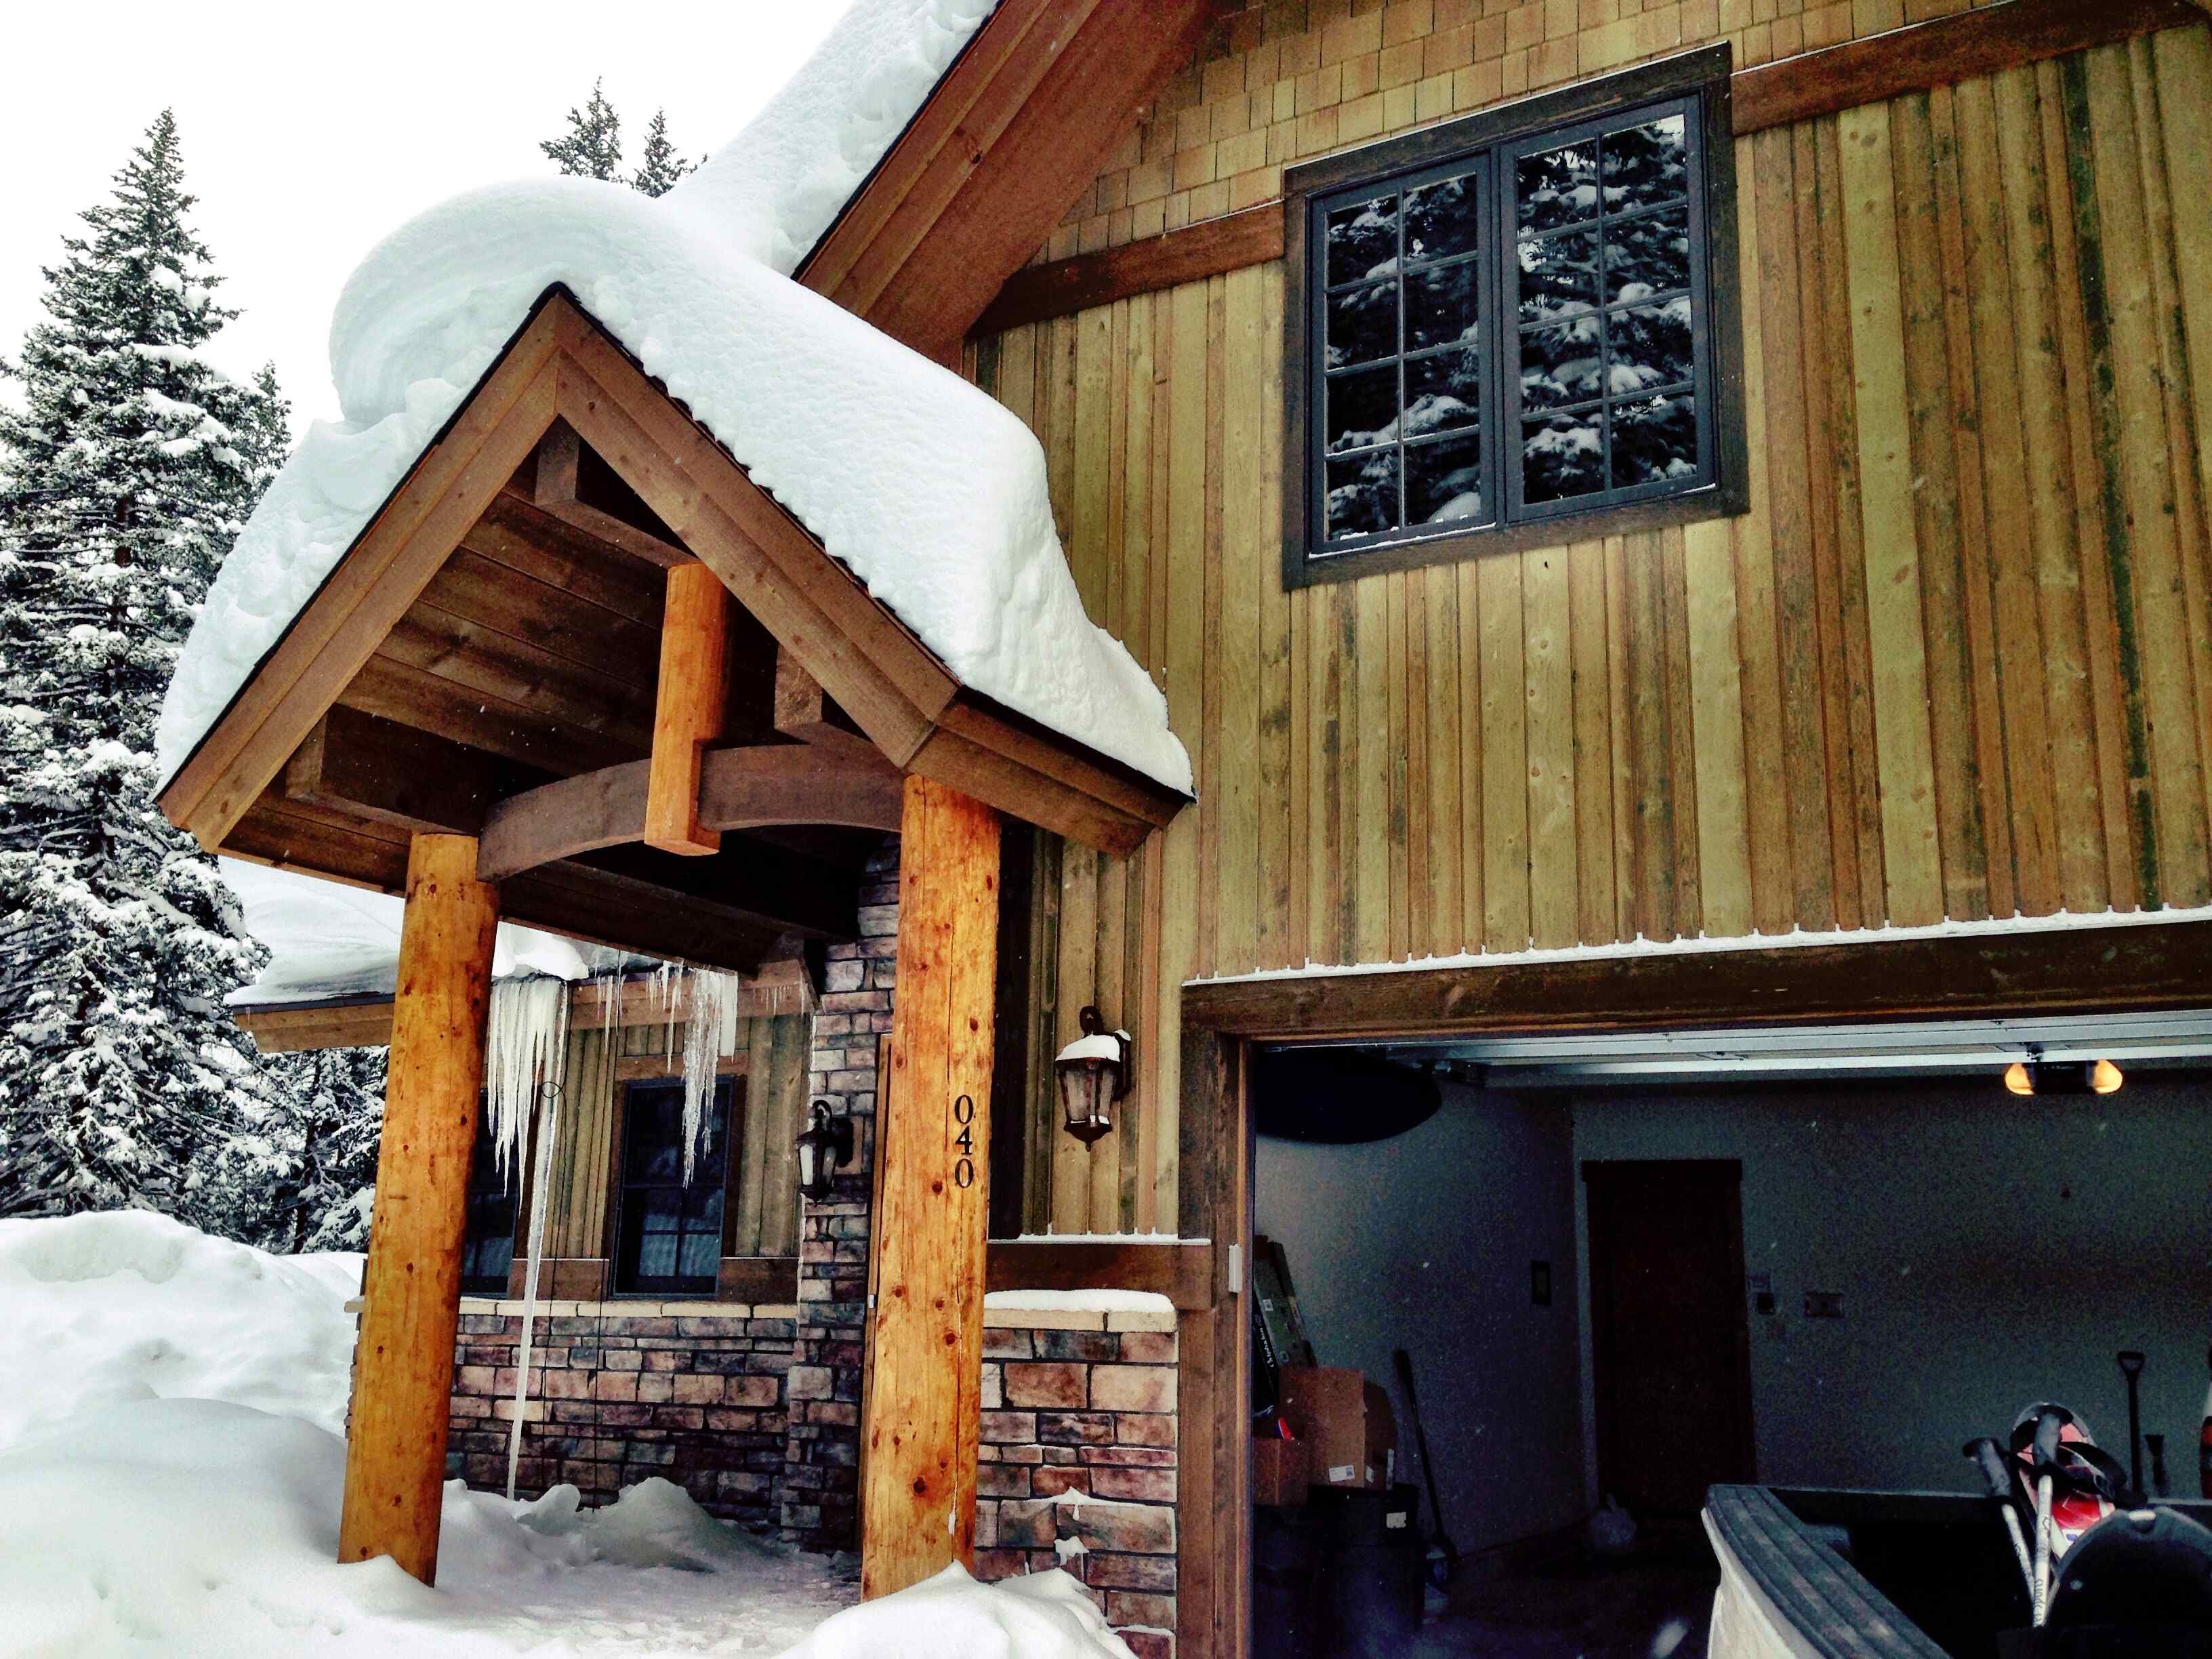
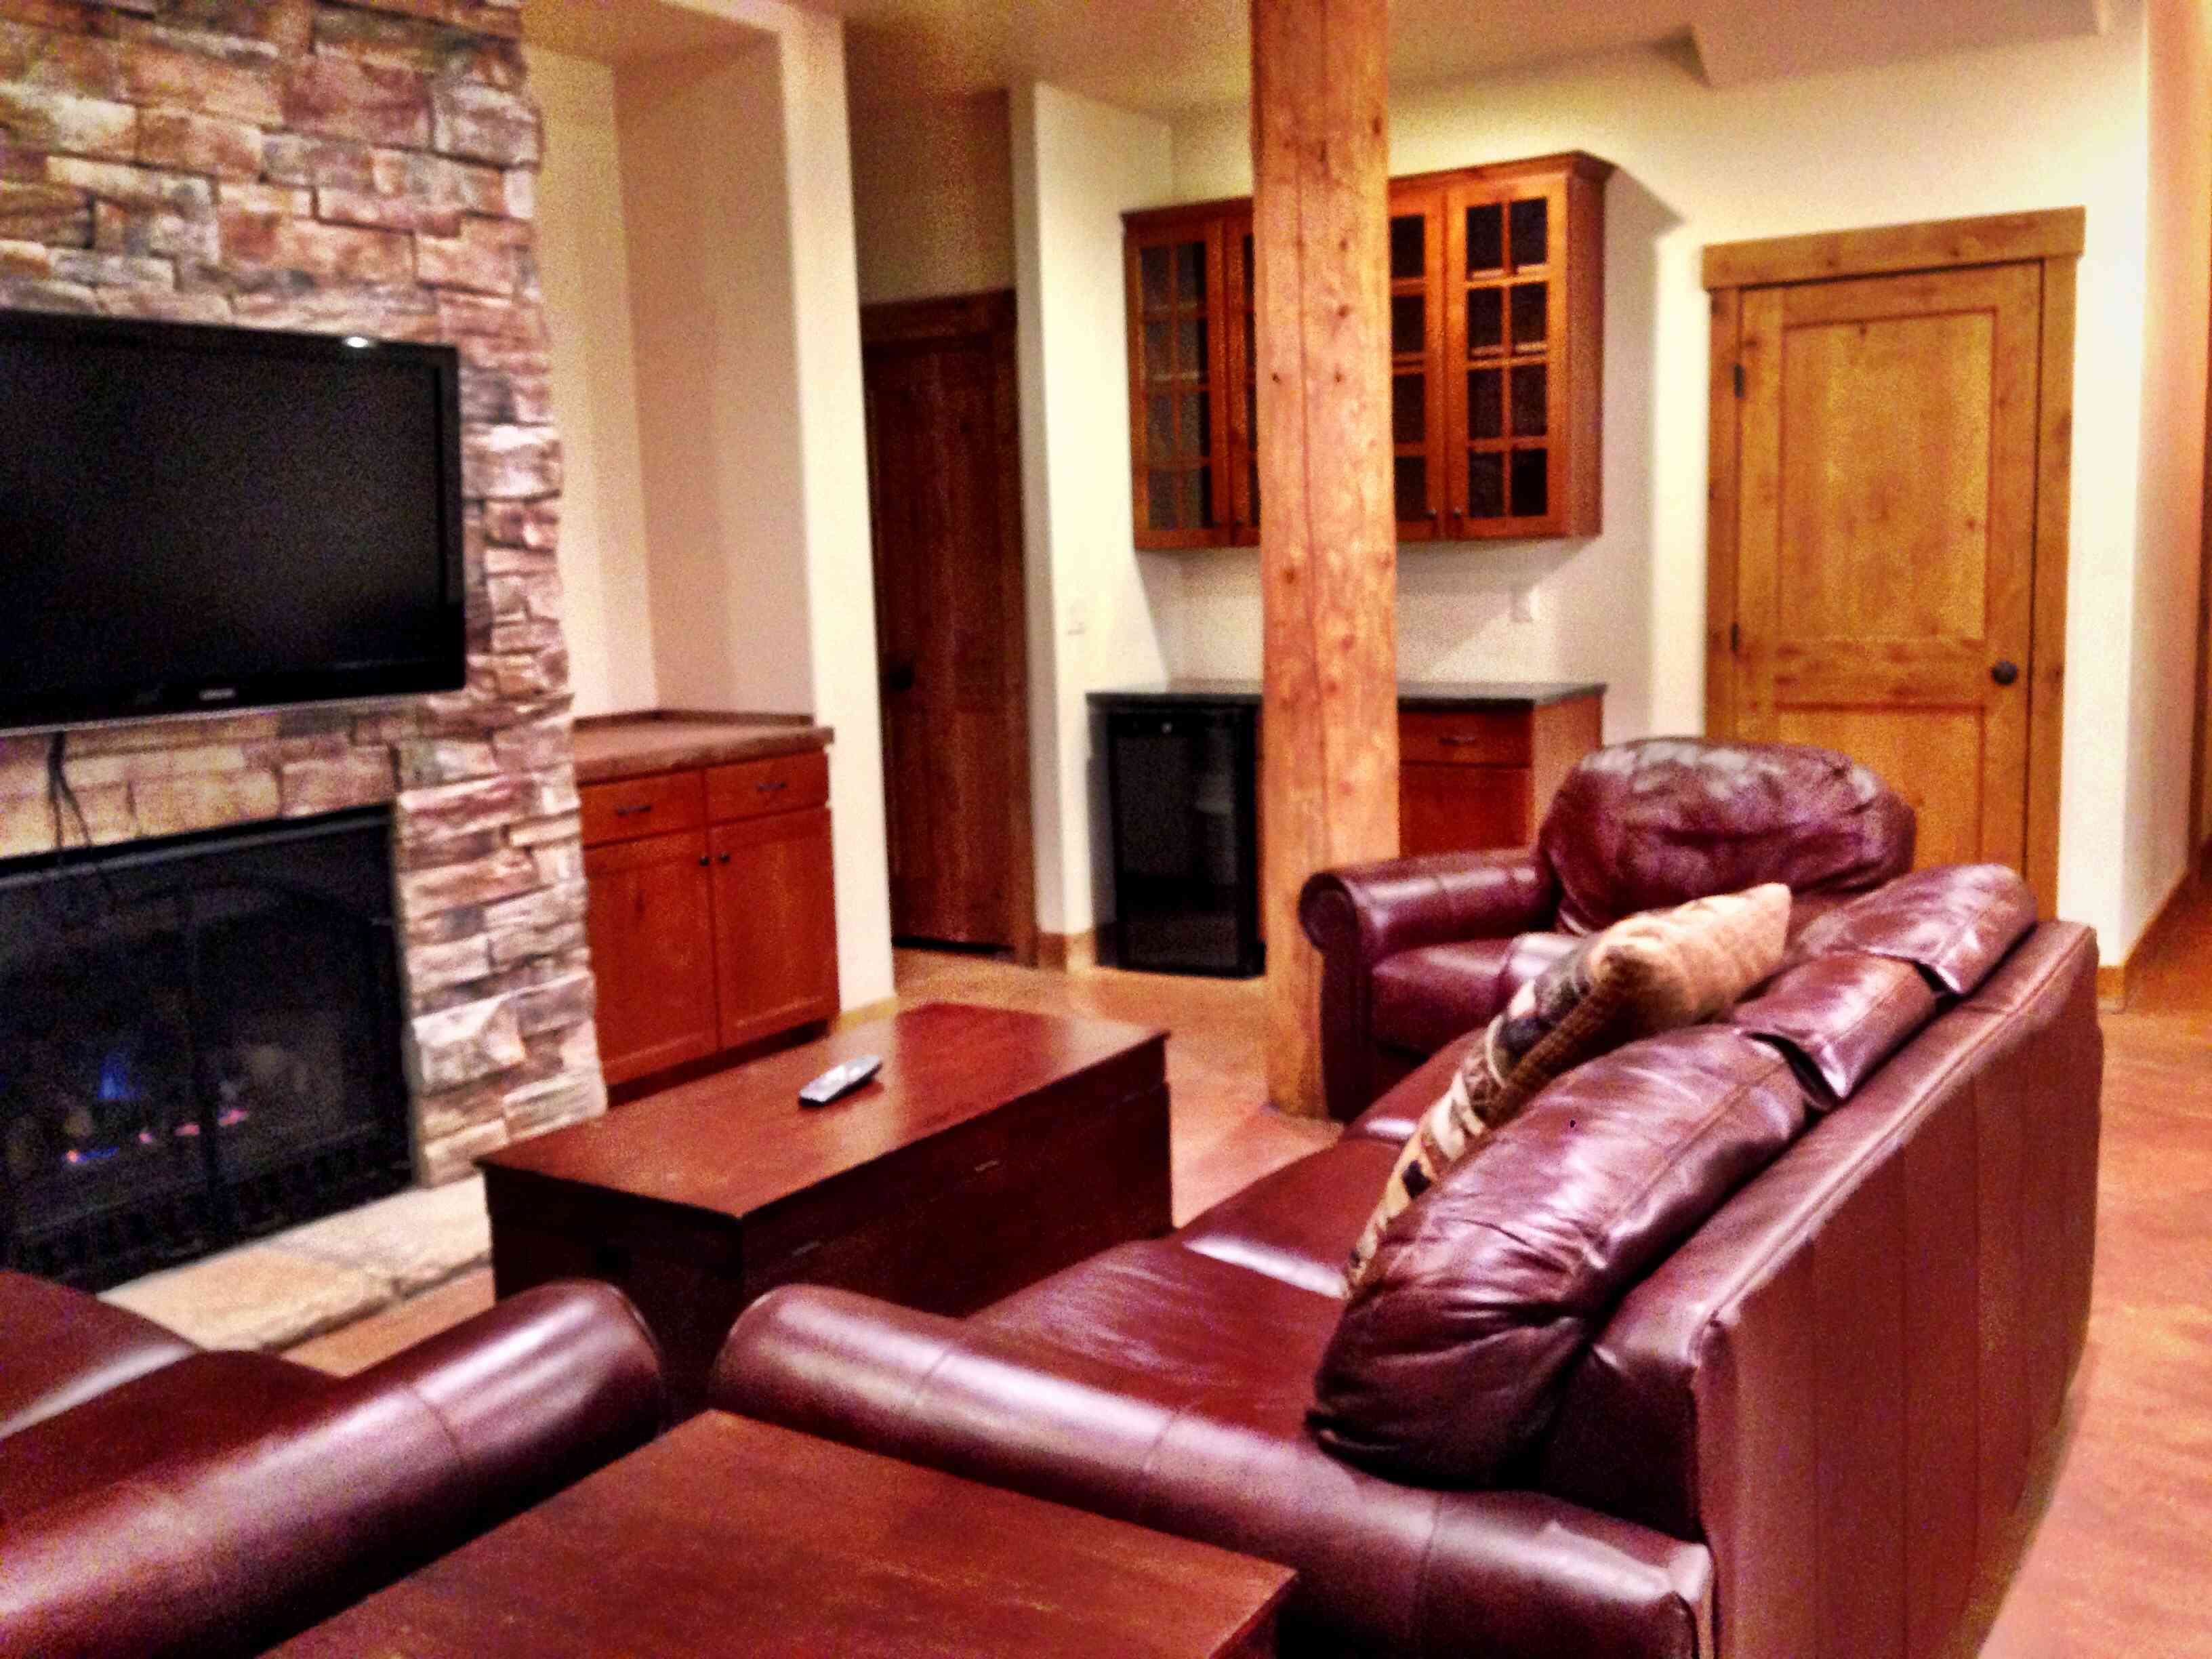
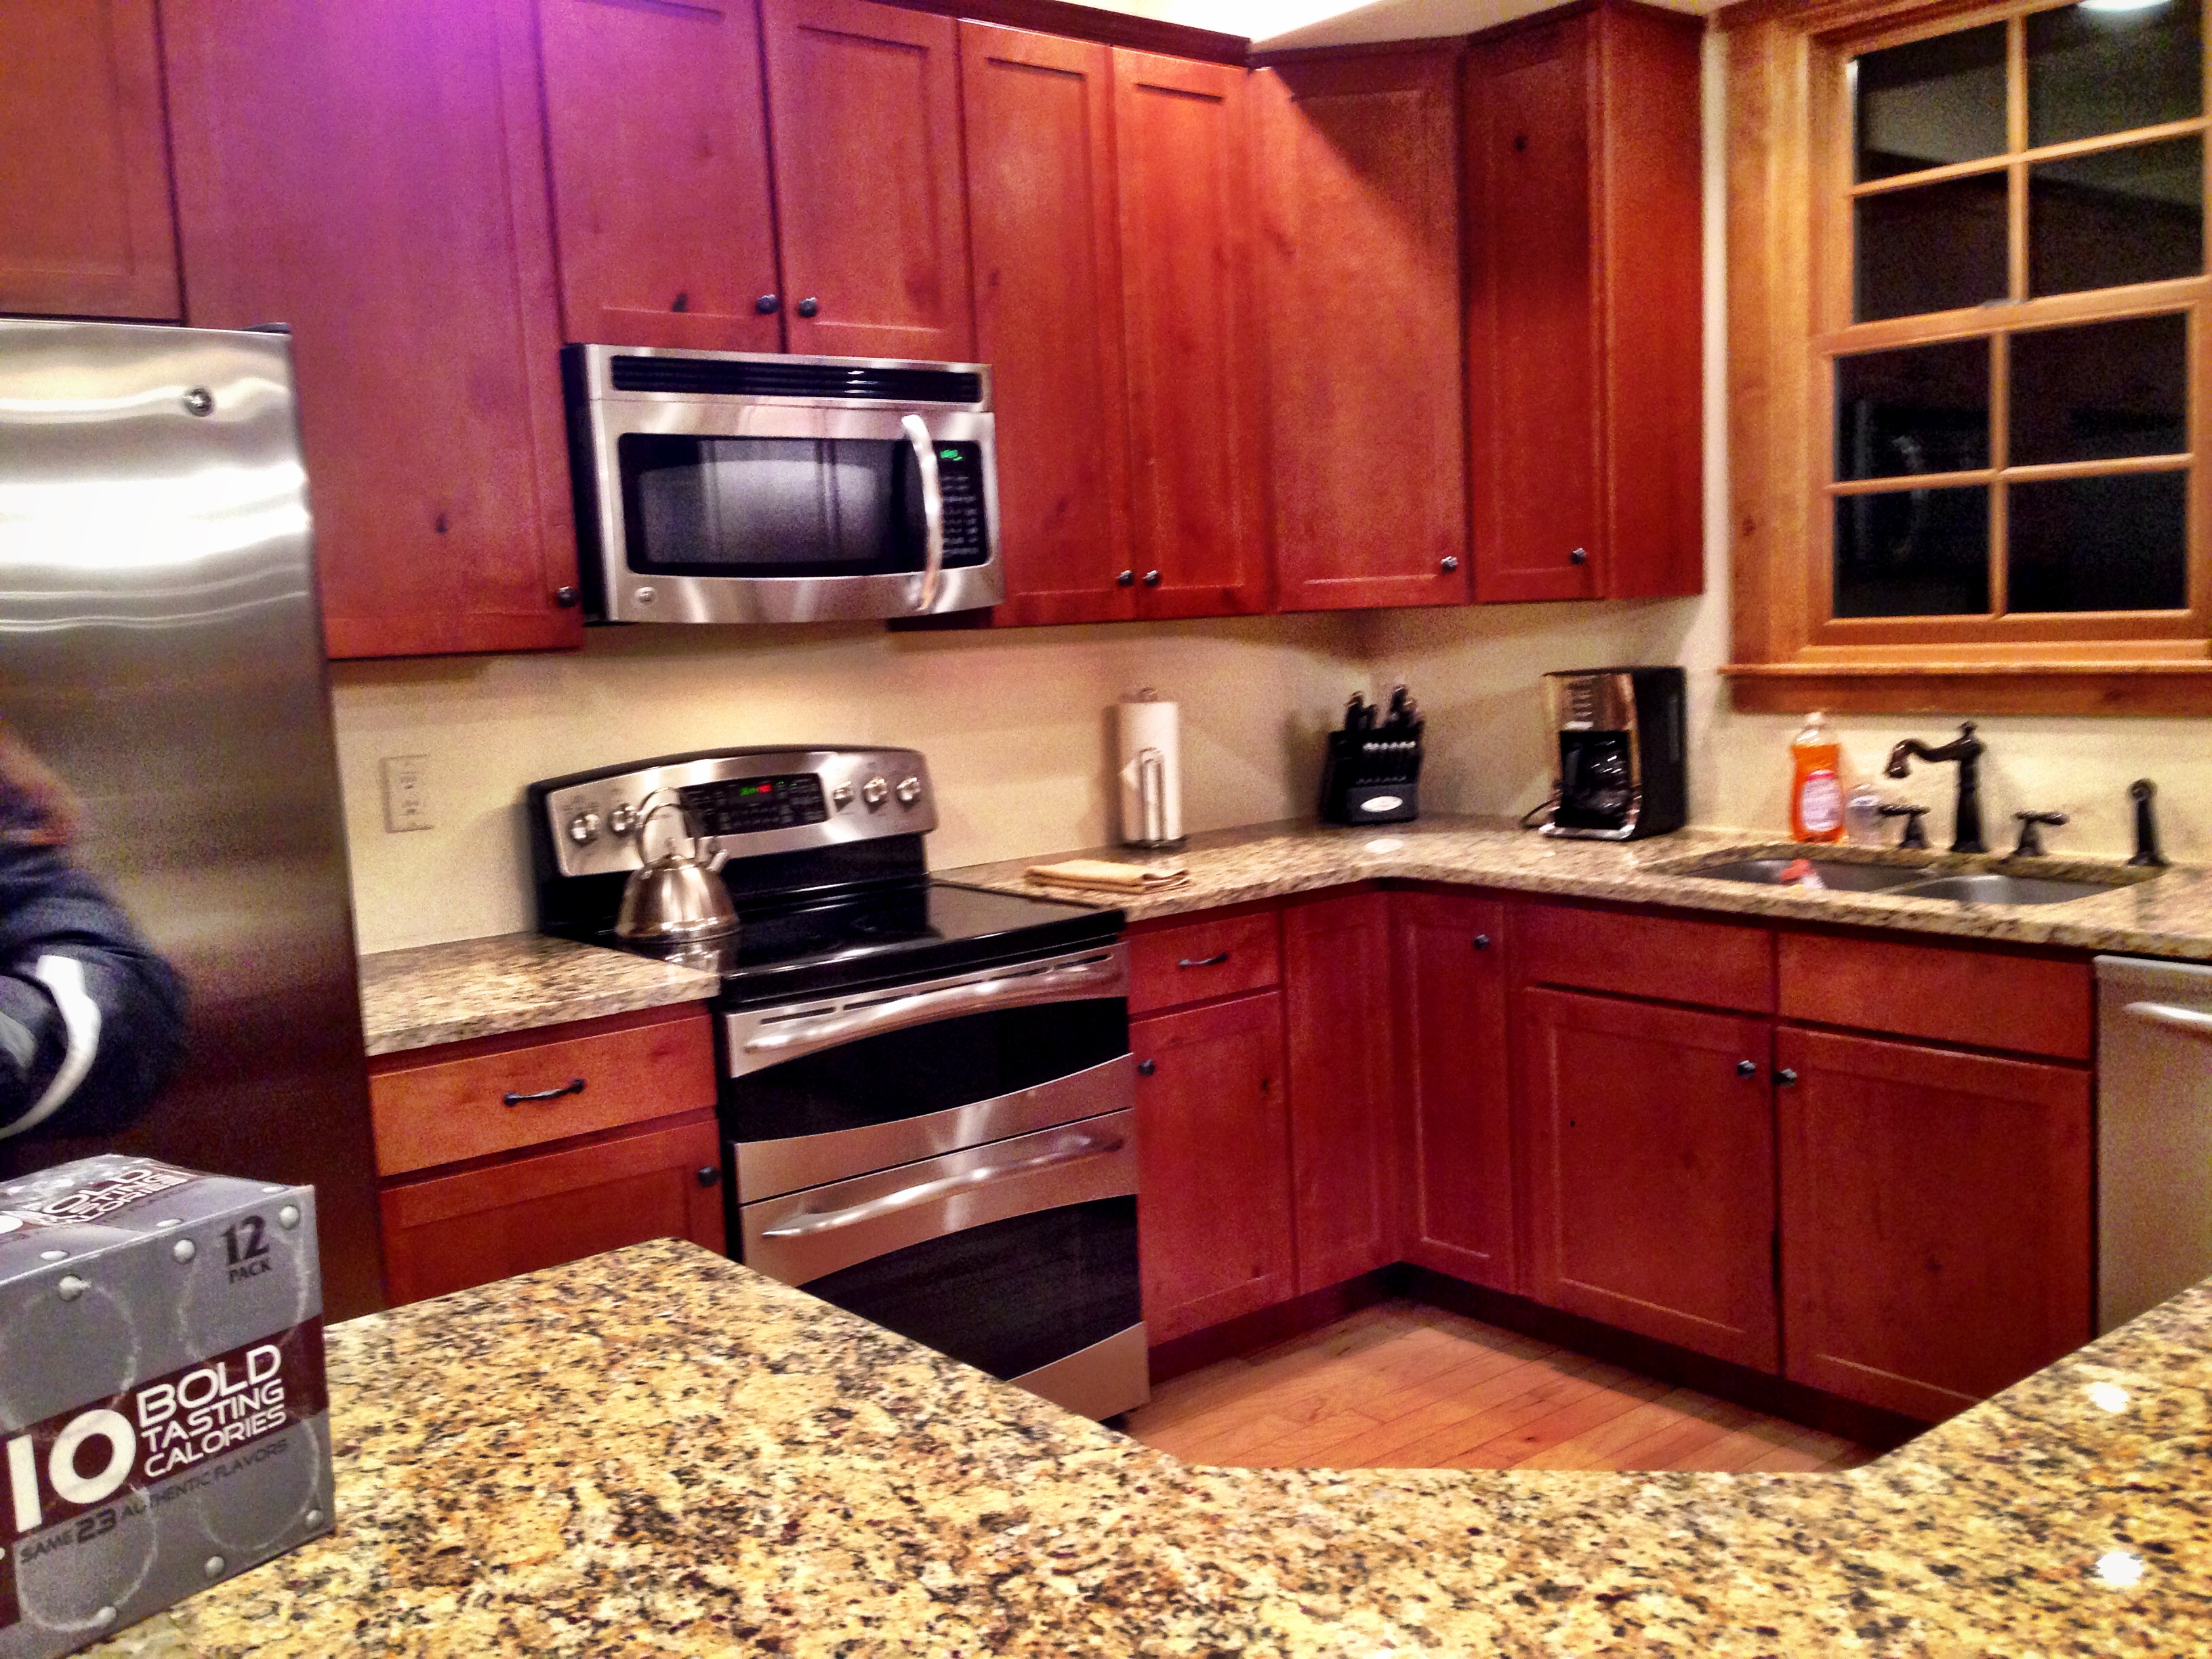
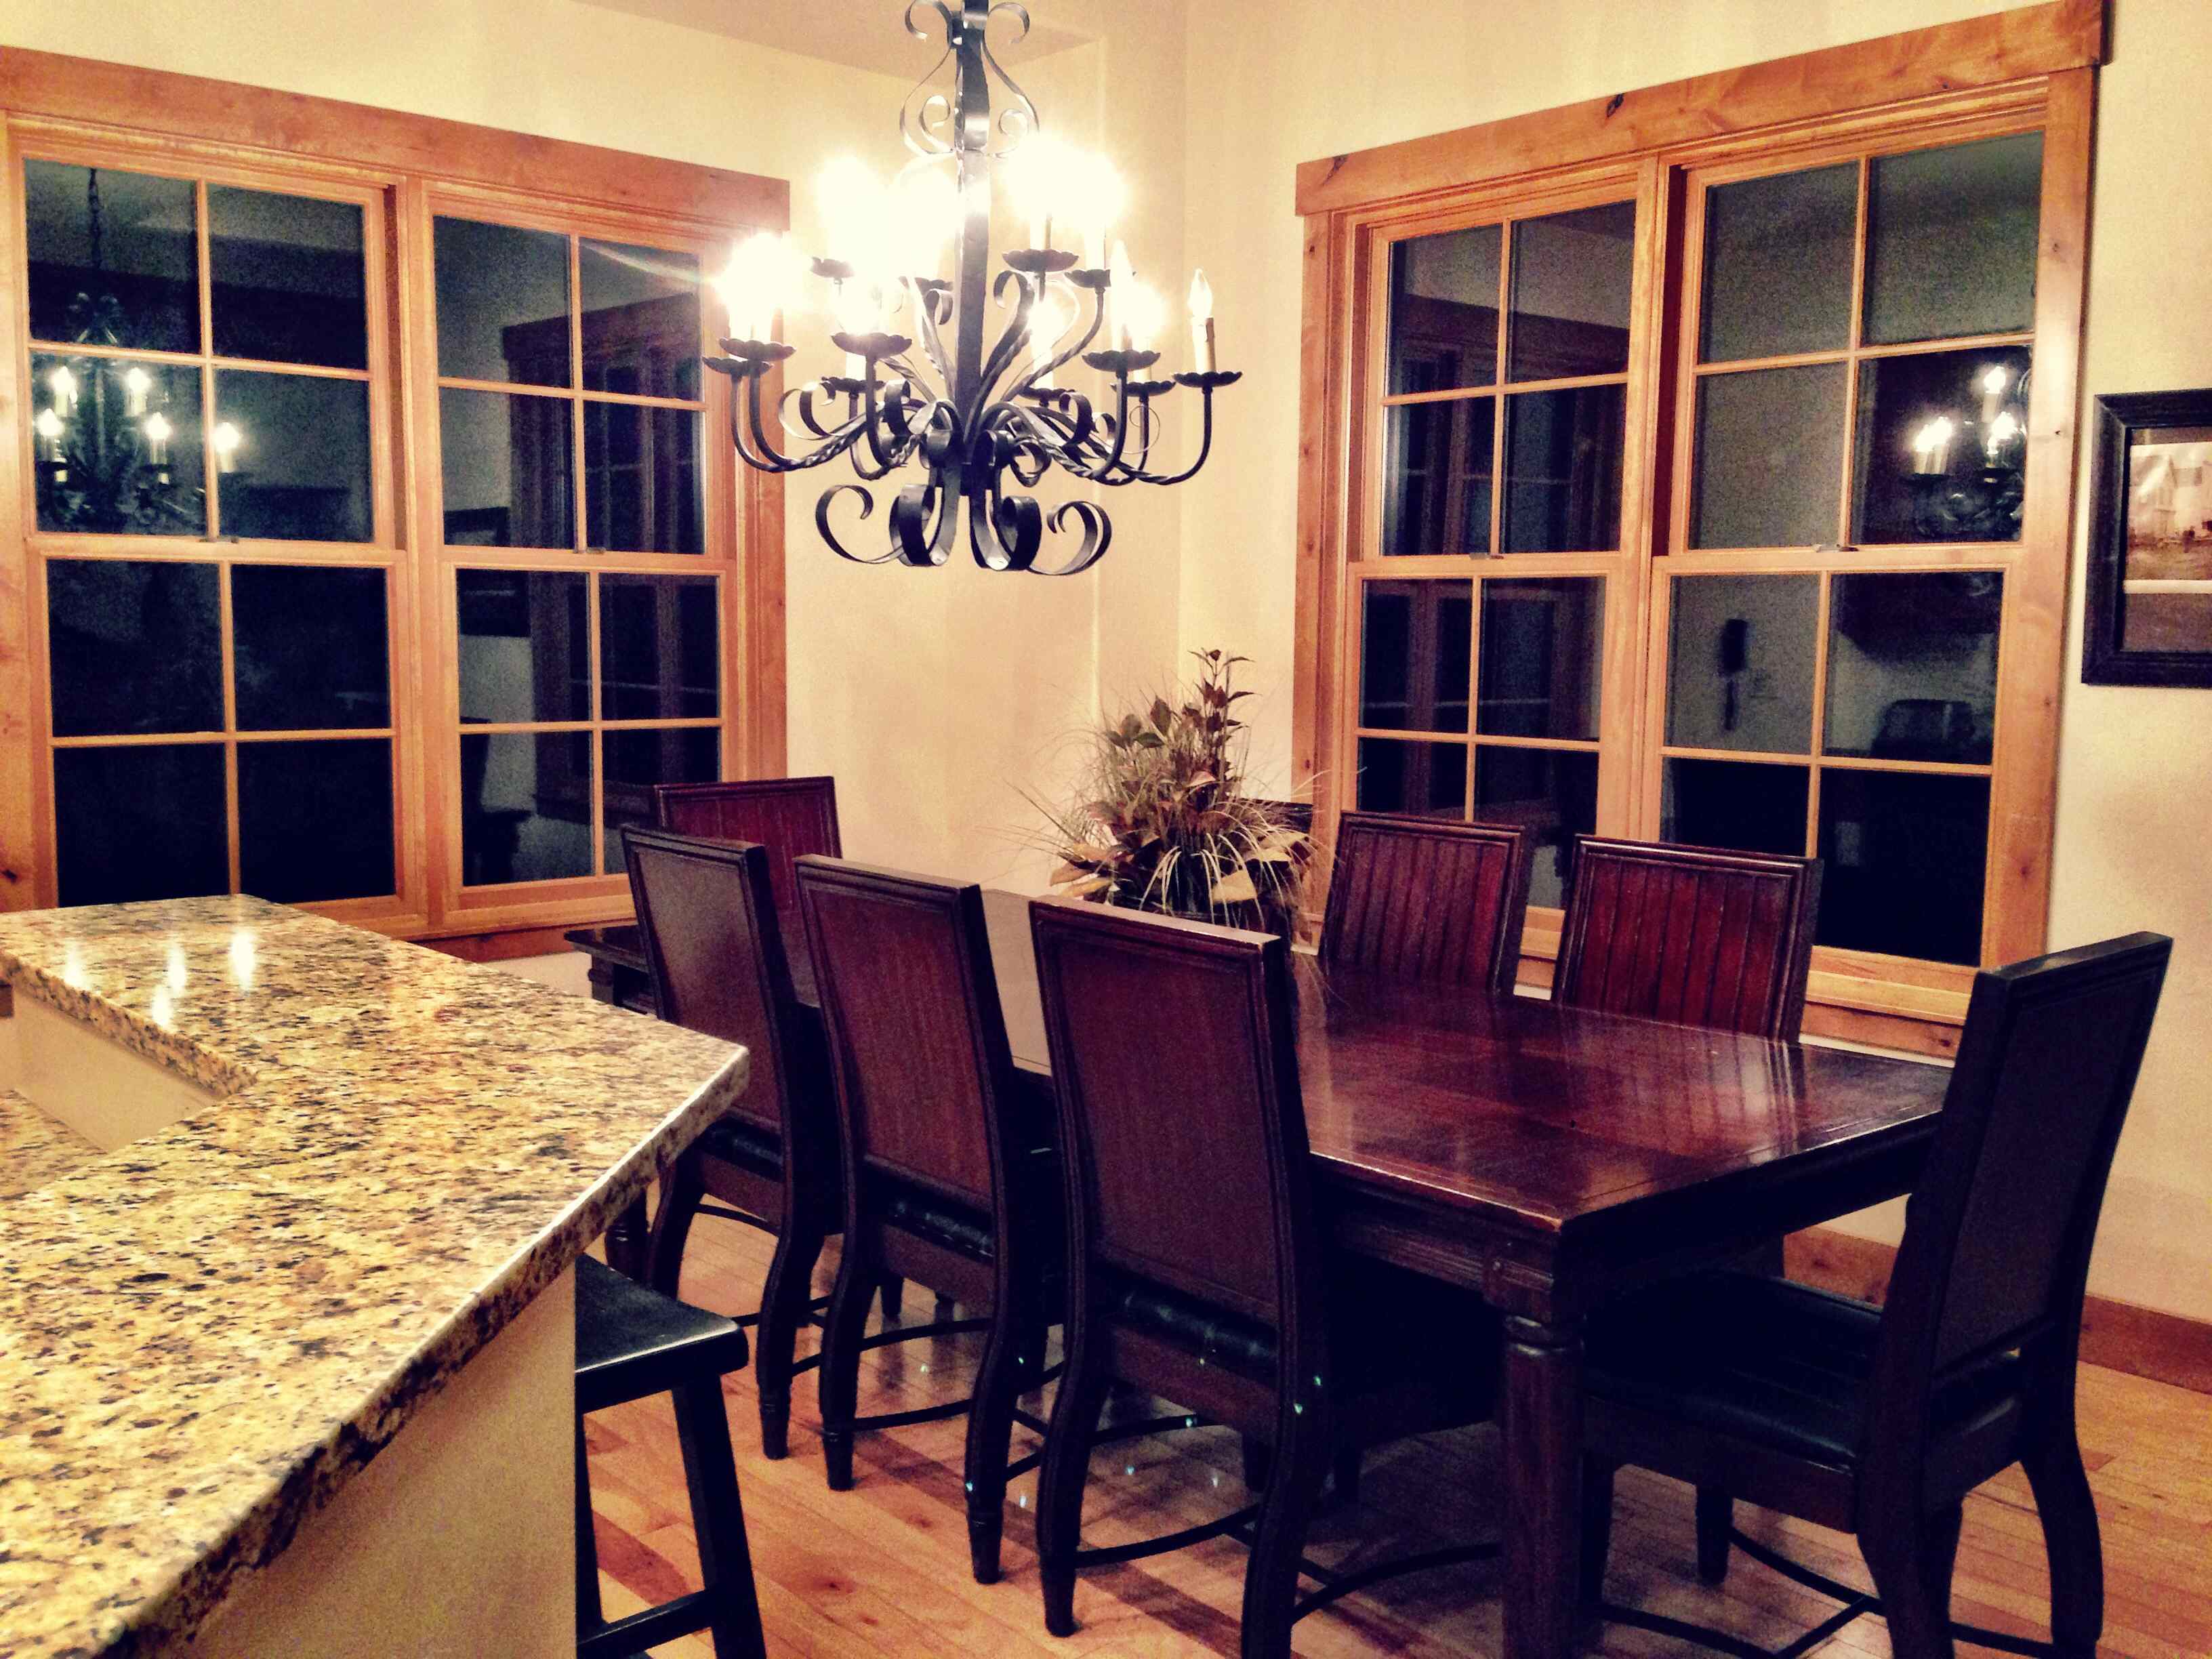
The girls.Taking a little break at Peak 7.Our condo.
We had a gorgeous condo for the week. Even though both cars got stuck in the driveway for an hour on the first day, everything else went smoothly. We even had a two-car garage to park both cars.
View from the condo/hot tub.Living room.Kitchen where plenty of food was made!Dining room table.
One of my favorite memories was our group breakfasts and dinners at the house. Robin and I bought a Stouffer’s lasagna, salad, and garlic bread and we had a home-cooked dinner on the first night, along with birthday cake cupcakes for both Ashley and Robin’s birthdays.
Dinner, night 1: Home-cooked lasagna
On the second night, we also stayed in and Katie made hearty chili in a crockpot along with chips and queso. The girls then curled up on the couch to watch Juan Pablo on The Bachelor while the guys played some pool.
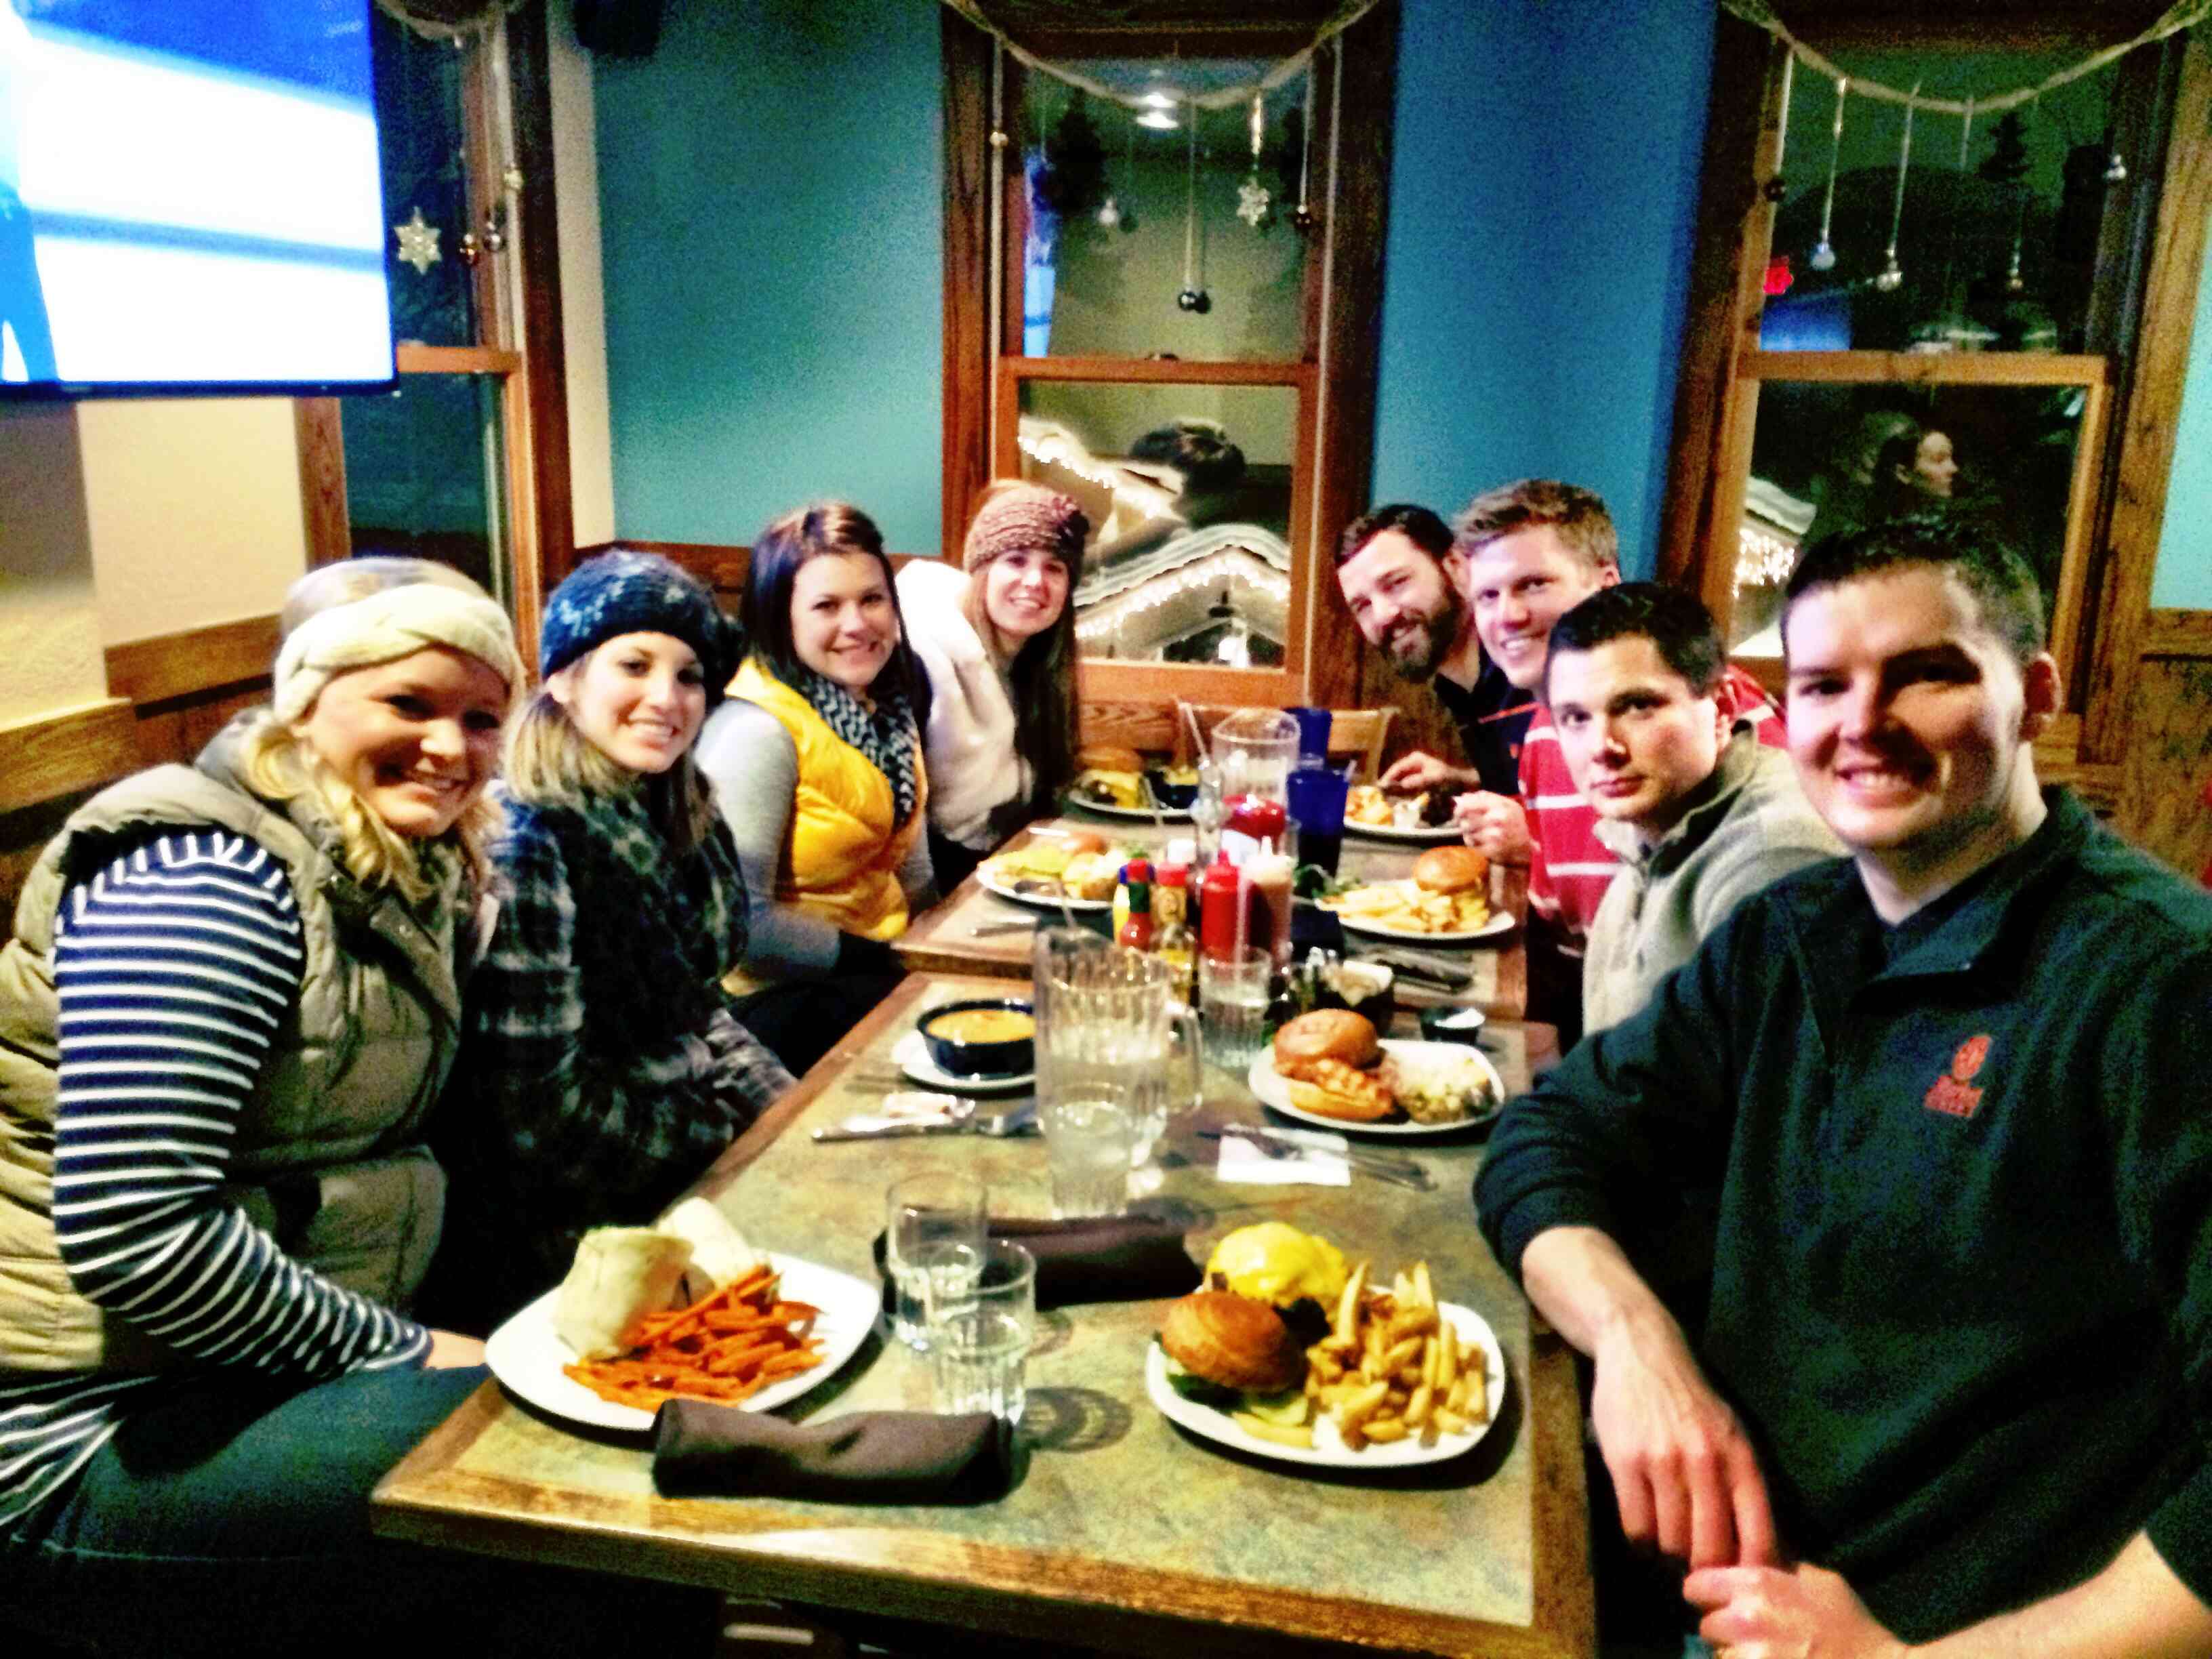
Out on the town for dinner.
Another night we hit downtown Breckenridge and ate out. There’s actually a pretty good steak restaurant in Breck called Kenosha Steakhouse. It wasn’t one of those super fancy steakhouses like Pappa’s Bros; instead it had a laid-back atmosphere, with steak, burgers, chicken sandwiches, soups, and salads on the menu. It was pretty good!
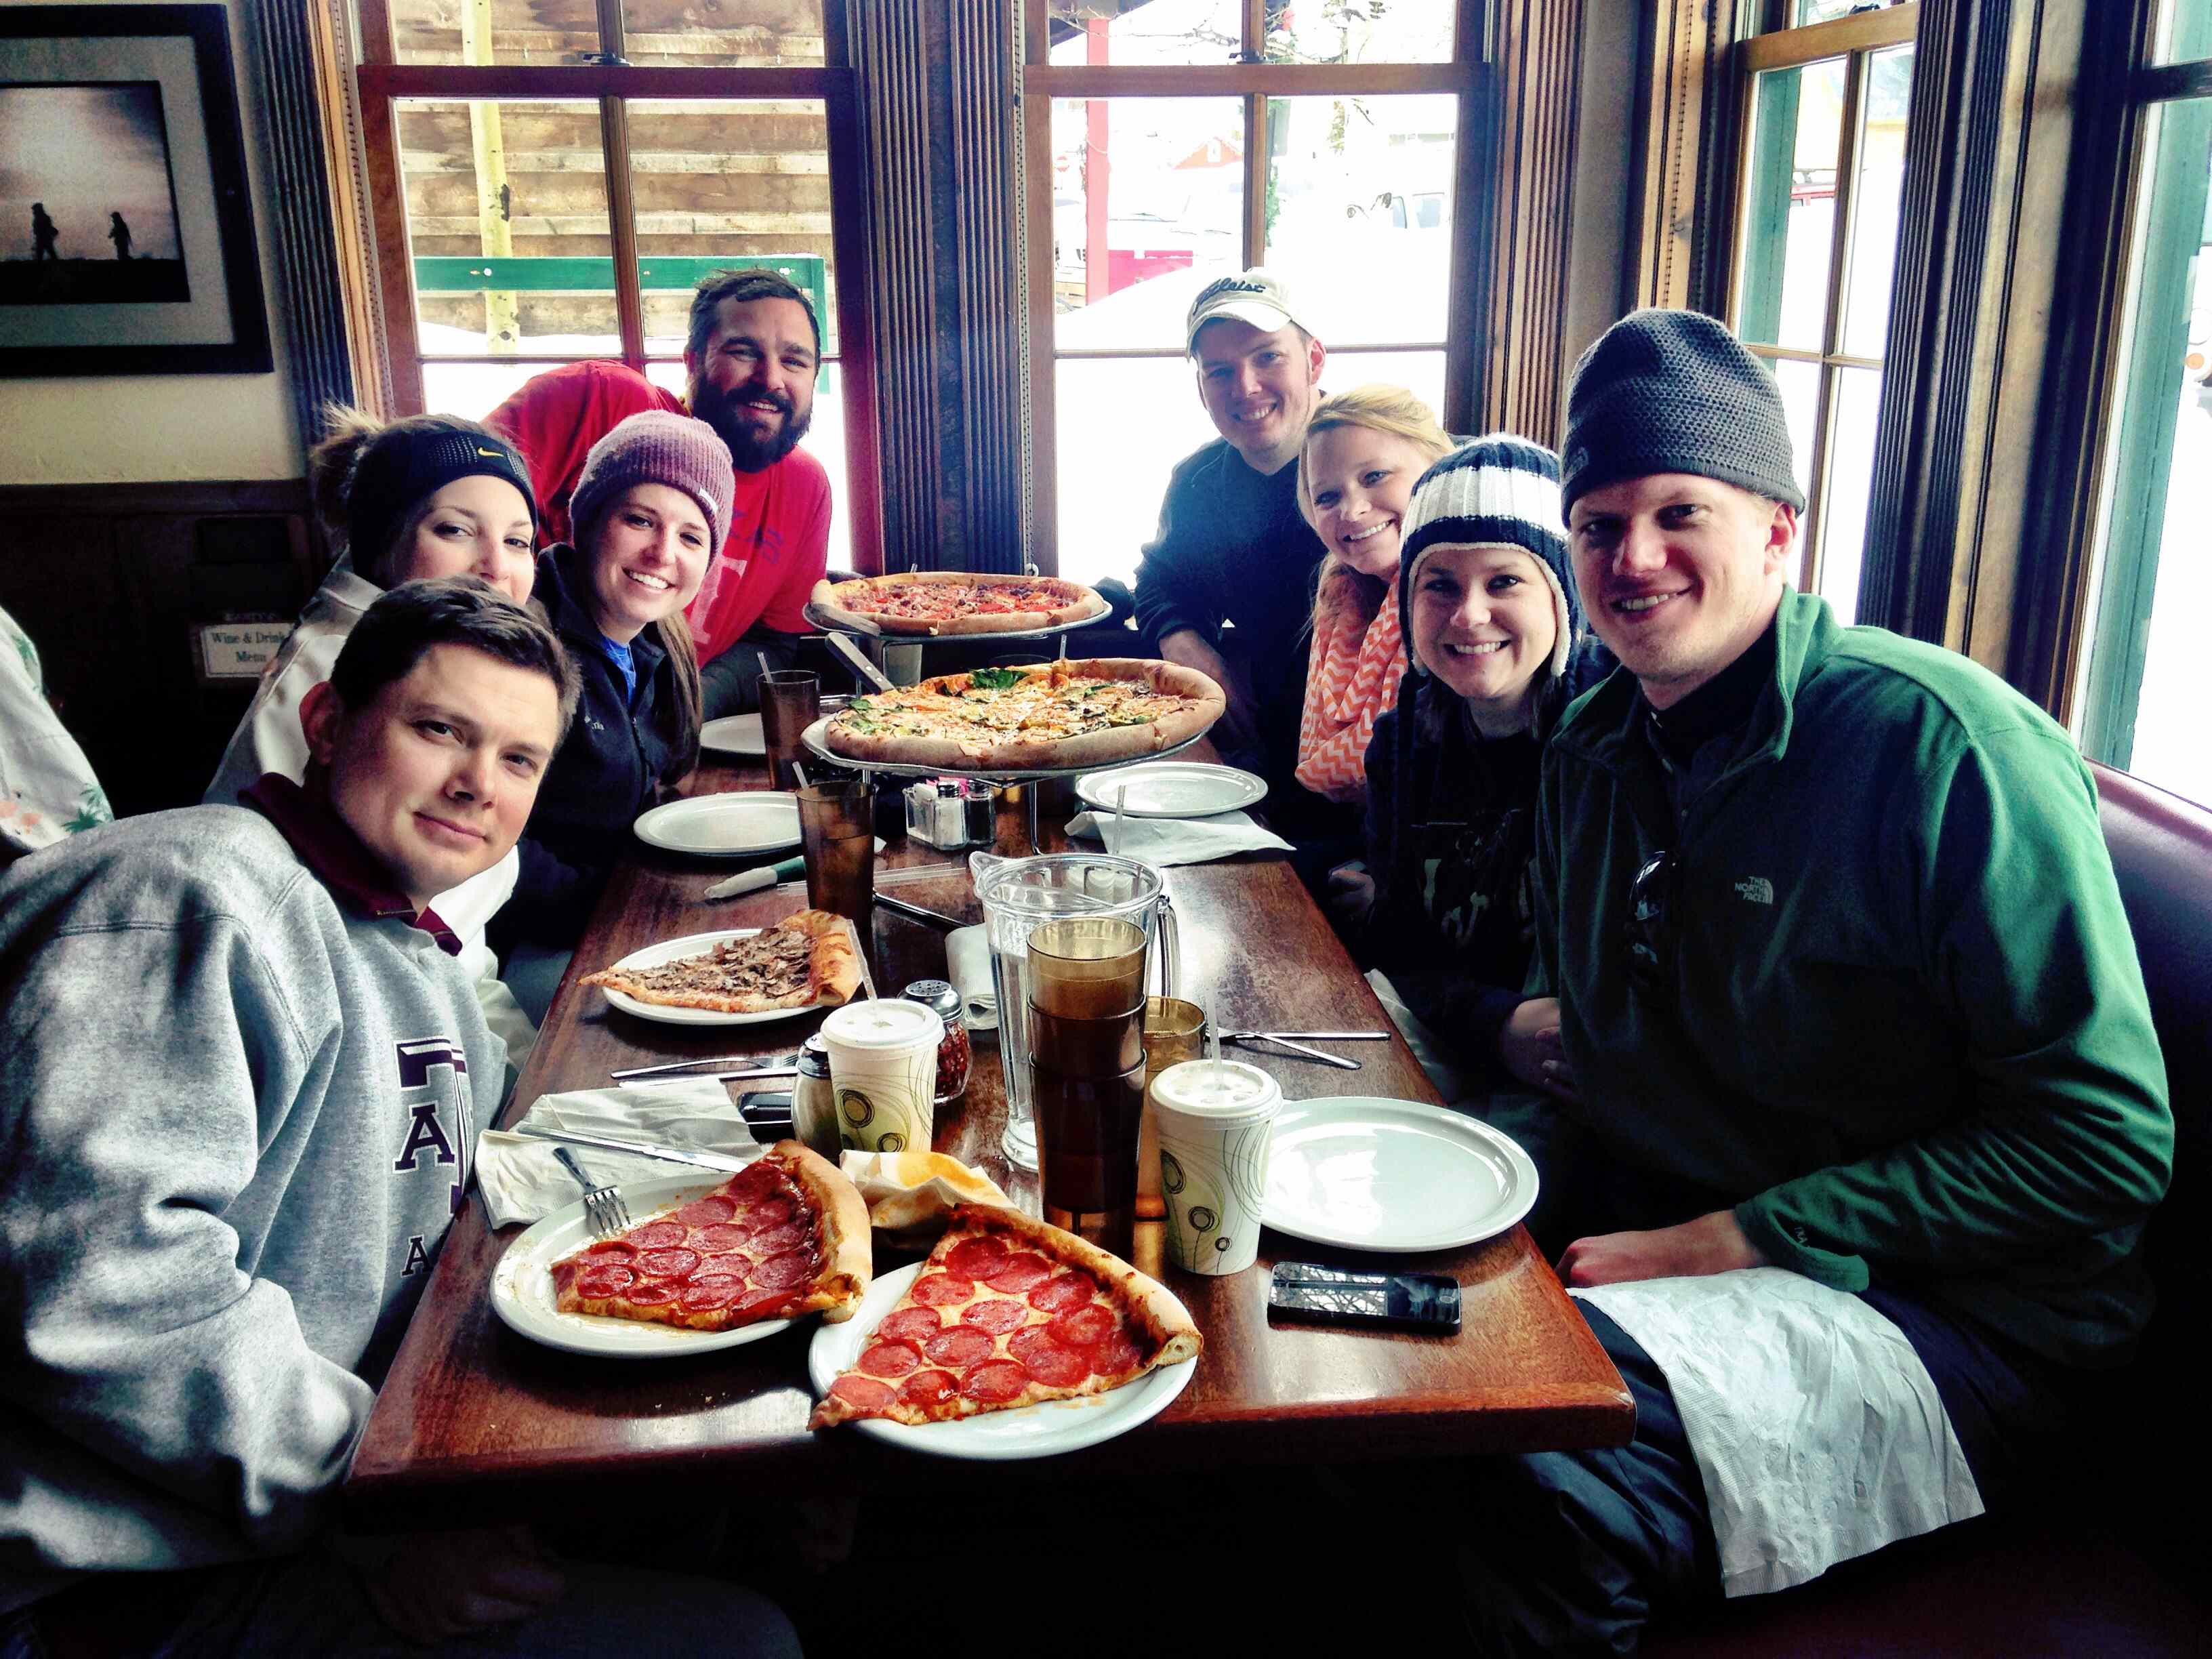
Last day of skiing and Fatty’s pizza for lunch!
On our last day of skiing, we woke up to Ashley’s yummy homemade breakfast sausage casserole. Yum…. I need to get her recipe!
We only skied for a half-day since we were all exhausted. Plus, a storm was blowing in. Instead of eating on the slopes, where the food is outrageously expensive (one slice of pepperoni pizza cost $10.99), we decided to eat in town at a place called Fatty’s Pizzeria, which was recommended to us by two of our friends from back home in Texas.
I guess they call it “Fatty’s” for a reason, because the pizza very cheesy, greasy, and large! It was actually extremely good pizza, and moderately priced for restaurant in a resort-destination. Matt and I each got a slice of pizza (one slice was only $2.75 plus $0.25-0.50 for toppings). The others split large pizzas for about $22/pizza.
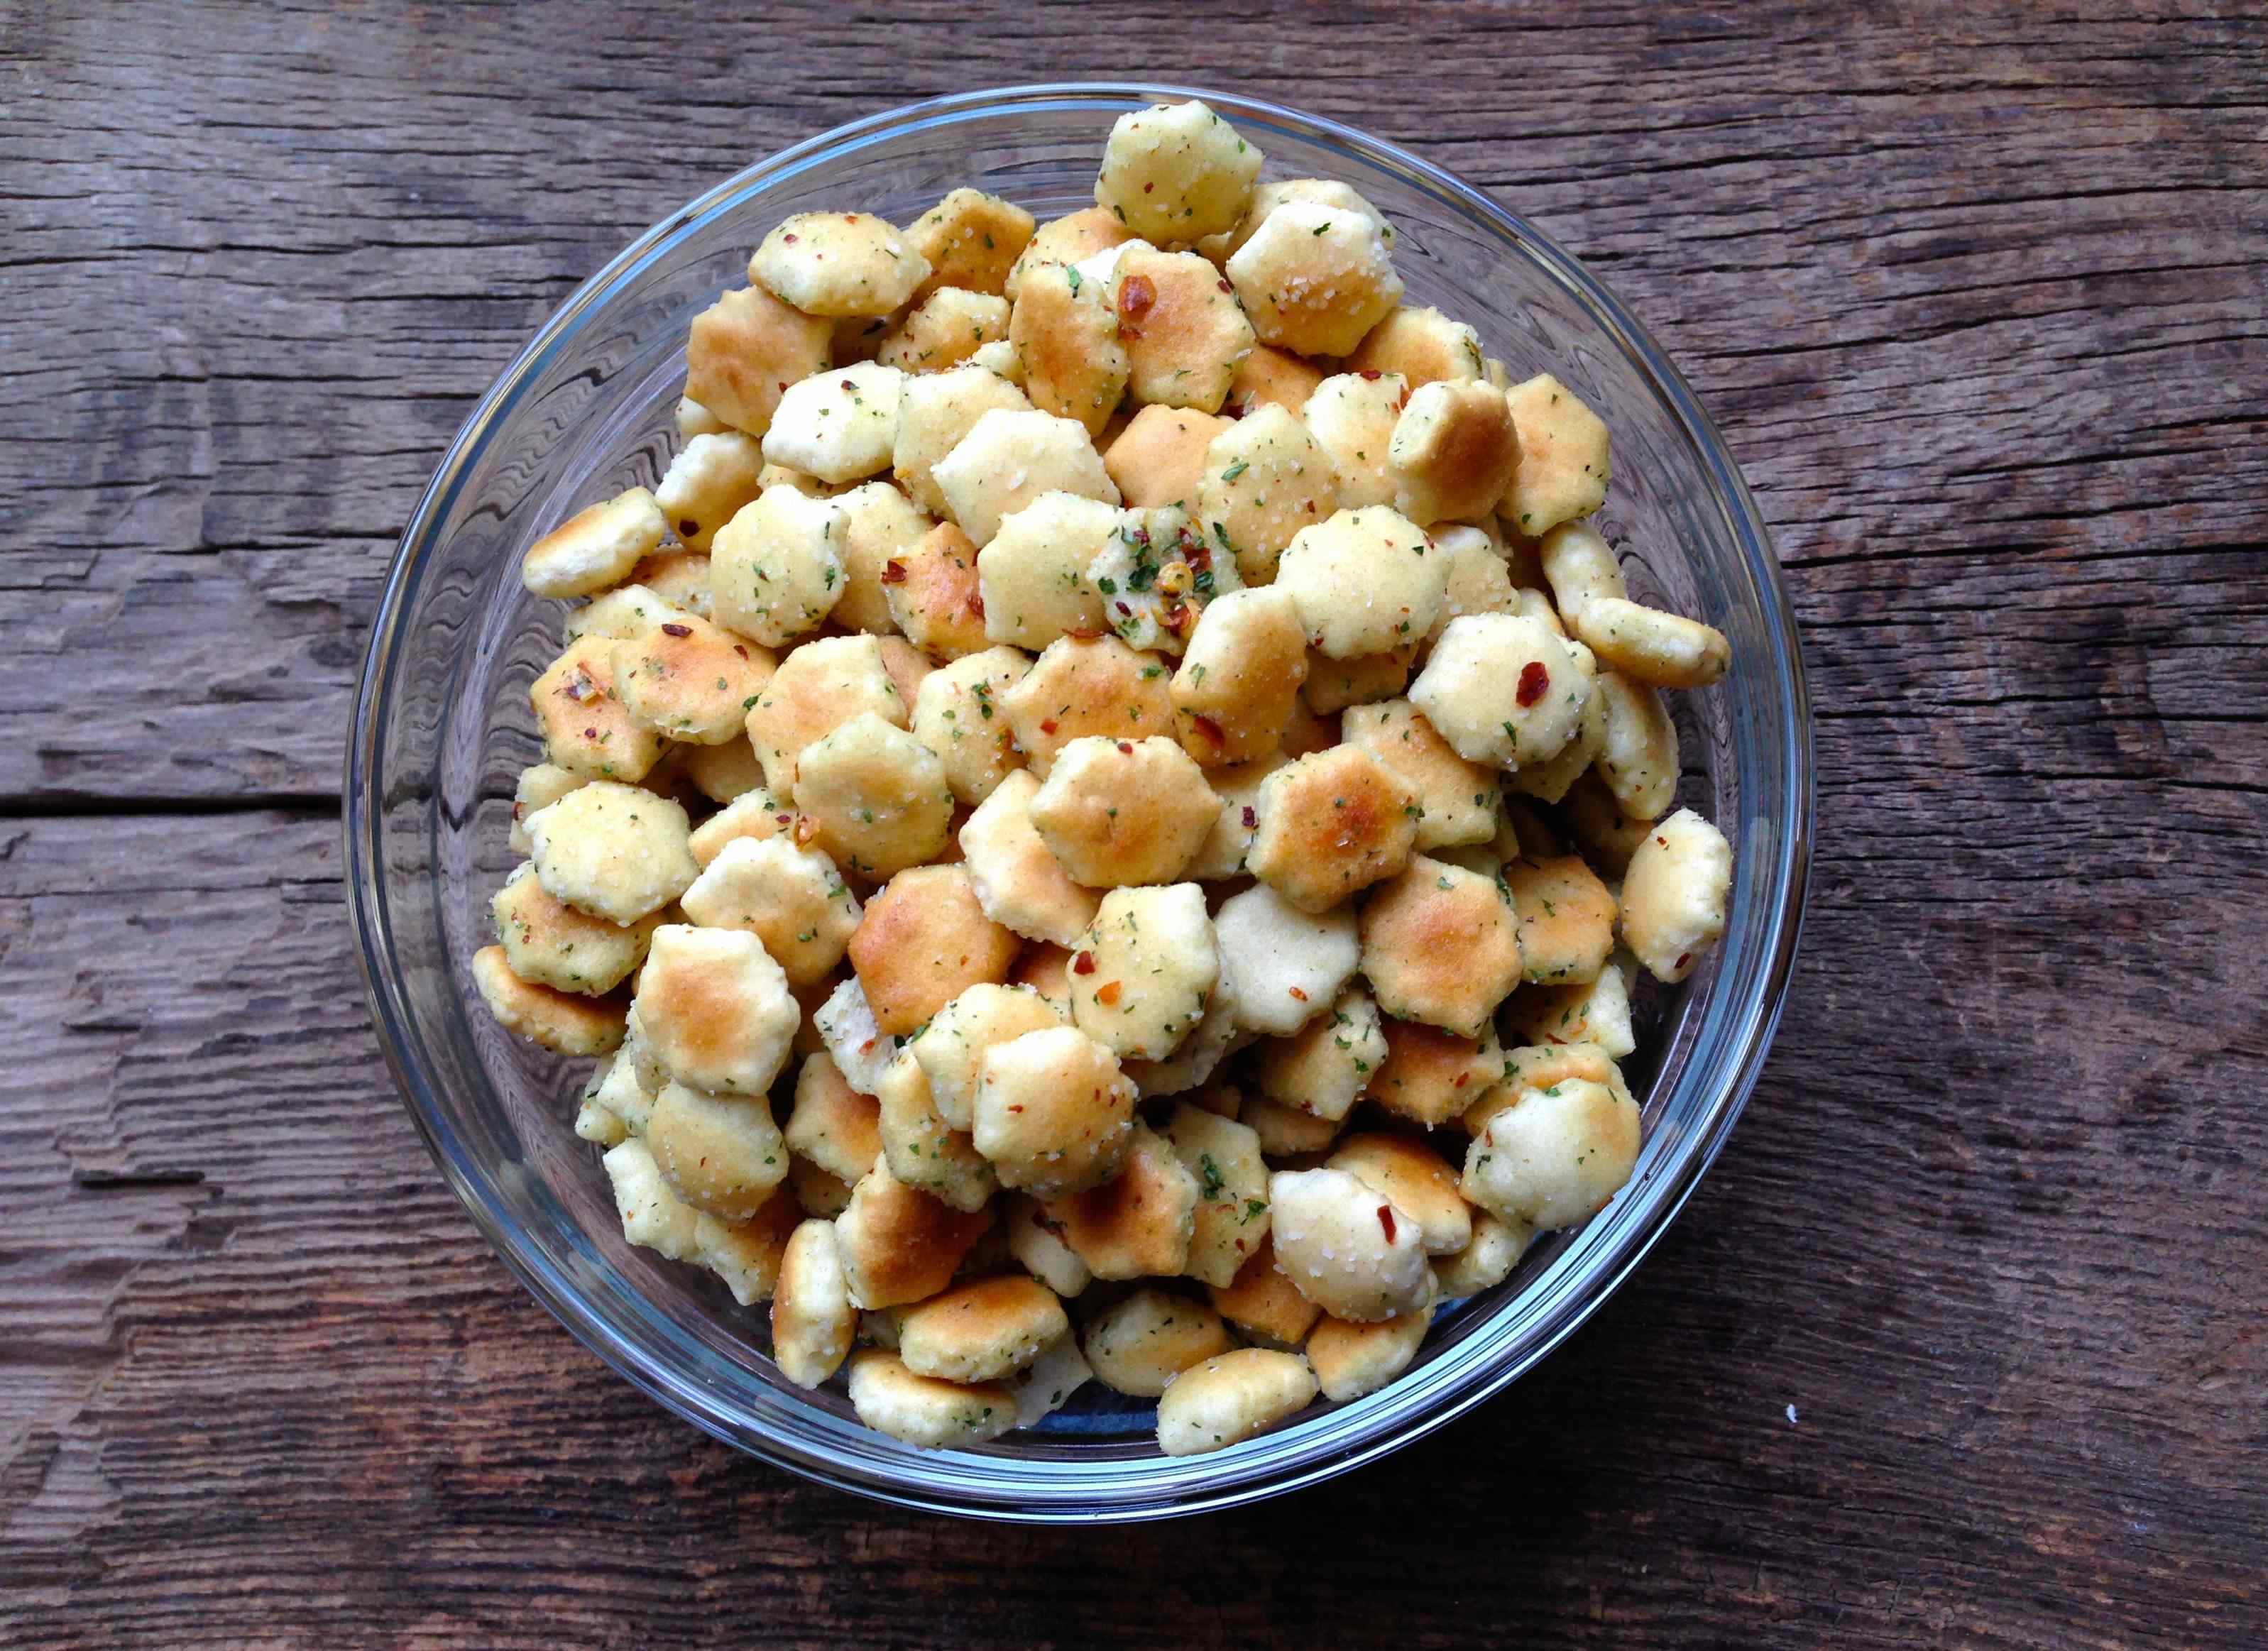
Spicy Oyster Crackers.
Now, let’s get to the Spicy Oyster Cracker recipe!
When I say we had A LOT of food in the house, I am not joking. Each couple brought snacks and treats that probably could of lasted us two weeks!
Robin made Spicy Oyster Crackers, that look similar to my pictures. I LOVED them and was hooked, so the moment I returned to Dallas, I set out to make some crackers on my own.
These crackers are perfect for a road trip snack or with a large bowl of pipping hot soup. They really are spicy from the red pepper flakes and have a wonderful flavor from the Ranch dressing mix.
This isn’t Robin’s recipe exactly, but it is very similar. I found a few Spicy Oyster Cracker recipes online, but eventually made up my own. I actually got pretty frustrated because every recipe online says to use a “package of oyster crackers”. That doesn’t tell me anything! Is it a 10 ounce bag, 12, 16 or 20 or what???
My solution? I bought the cheapest bag of oyster crackers I could find at Kroger, which was 10 ounces, so I figured that would work. The recipe also called for 1 packet of Hidden Valley Ranch mix. Unfortunately, I had halved my Taco Soup recipe from the week before, so I only had half a packet of the Ranch dressing mix on had. Oh well, I made it work by halving the rest of the recipe and the crackers turned out well.
Don’t get too addicted to these. Enjoy!
Spicy Oyster Crackers
Prep time:
Total time:
Serves: 8
Ingredients
1 package (10 oz) Kroger Value Oyster & Soup Crackers
1/4 cup vegetable oil
1/2 packet (1 oz) Hidden Valley Ranch dressing mix
1 1/2 Tbsp. crushed red pepper flakes
1/2 tsp. garlic powder
Instructions
Mix together vegetable oil, Ranch dressing mix, red pepper flakes and garlic powder in a small bowl.
Put crackers in a gallon Ziploc bag, and pour mixture over crackers.
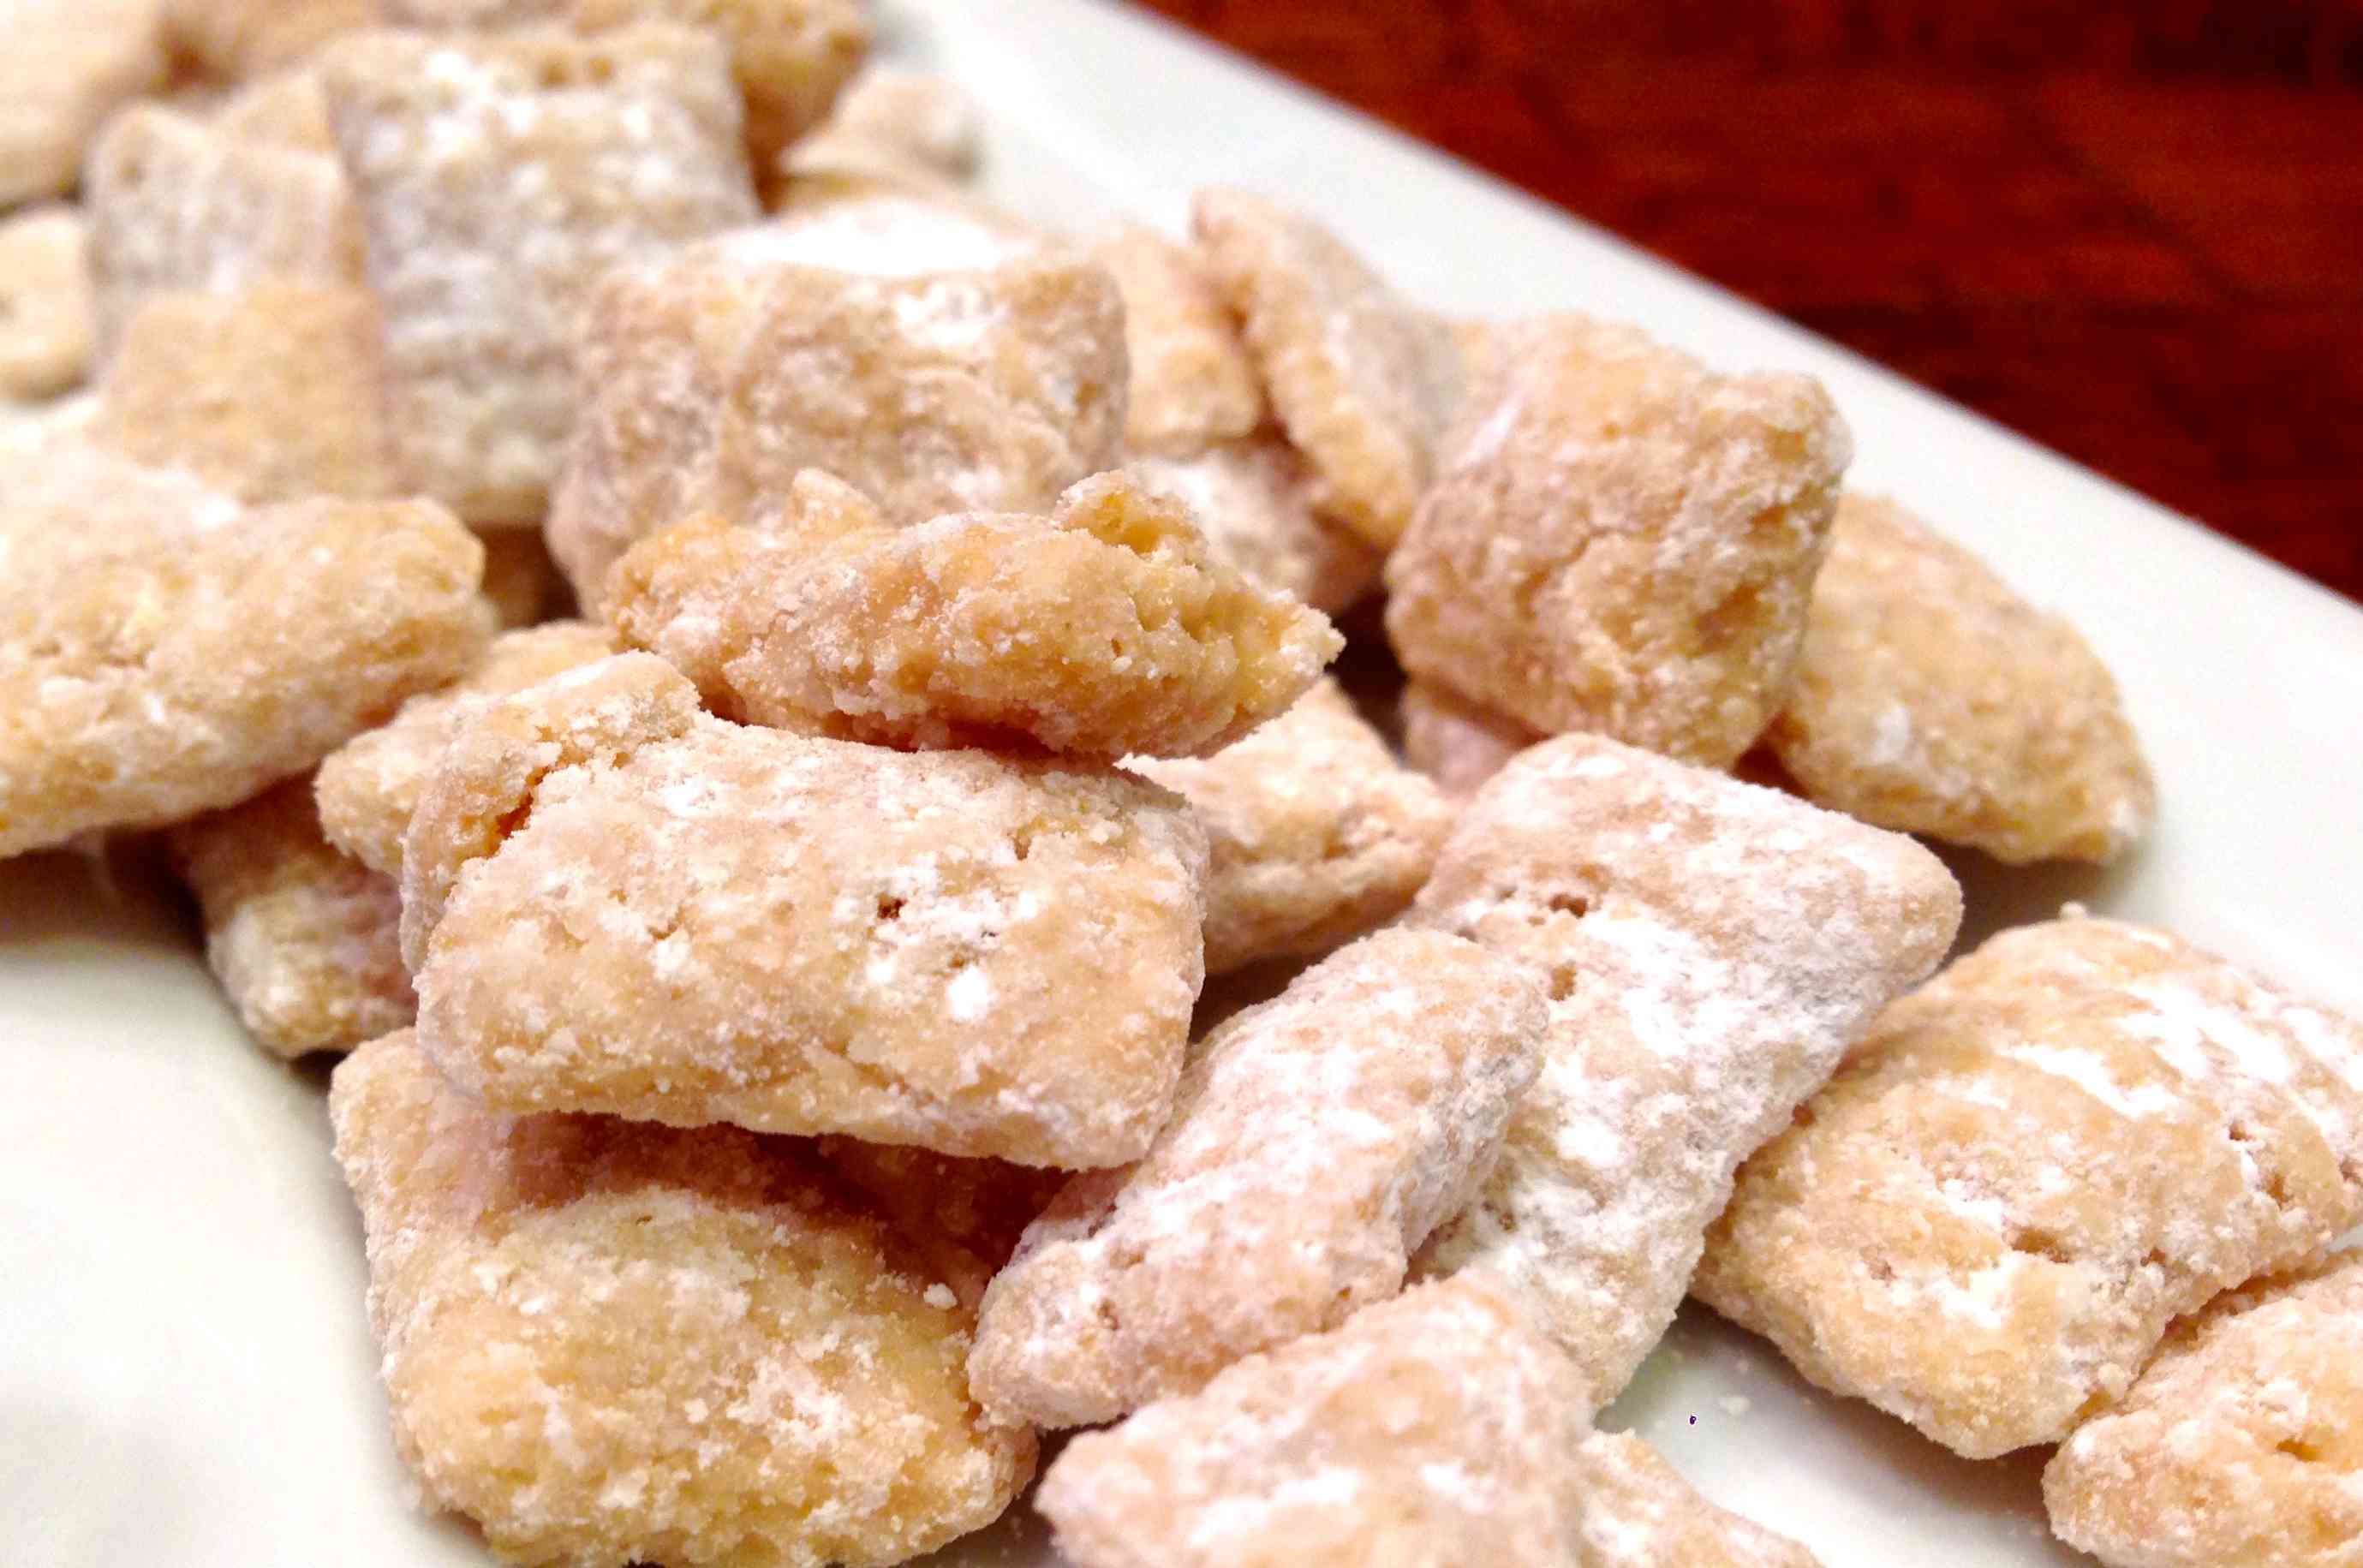
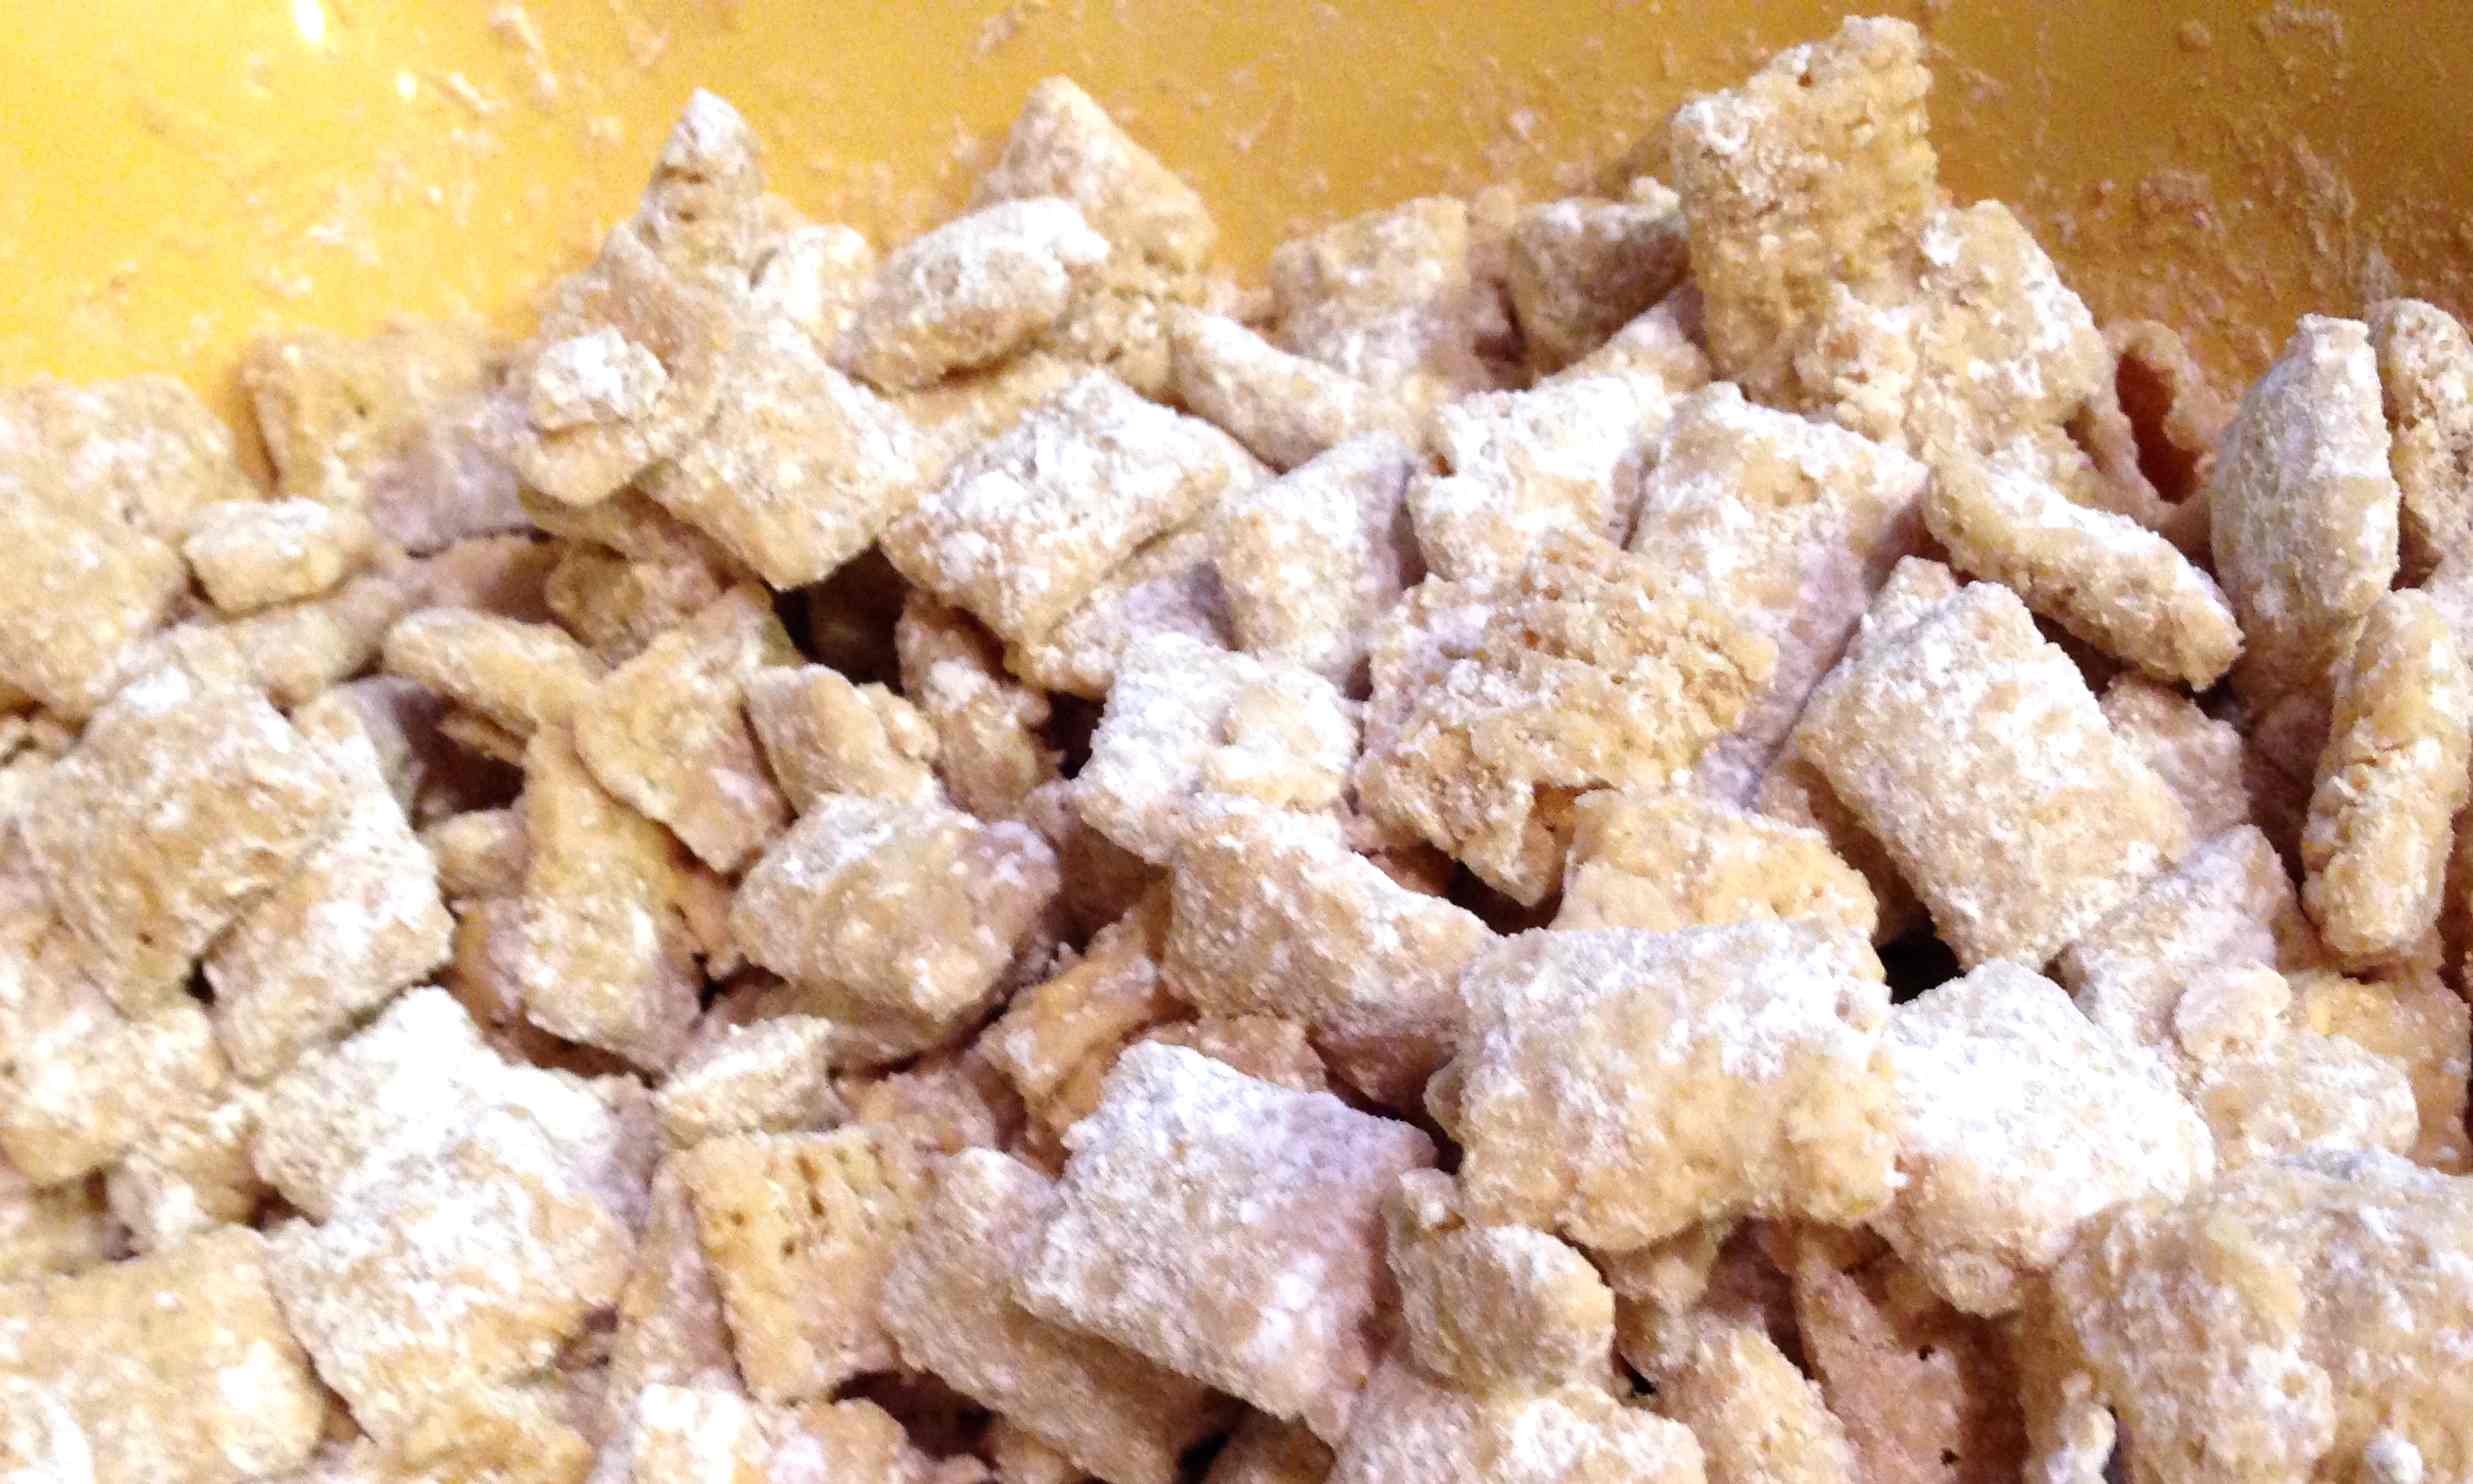
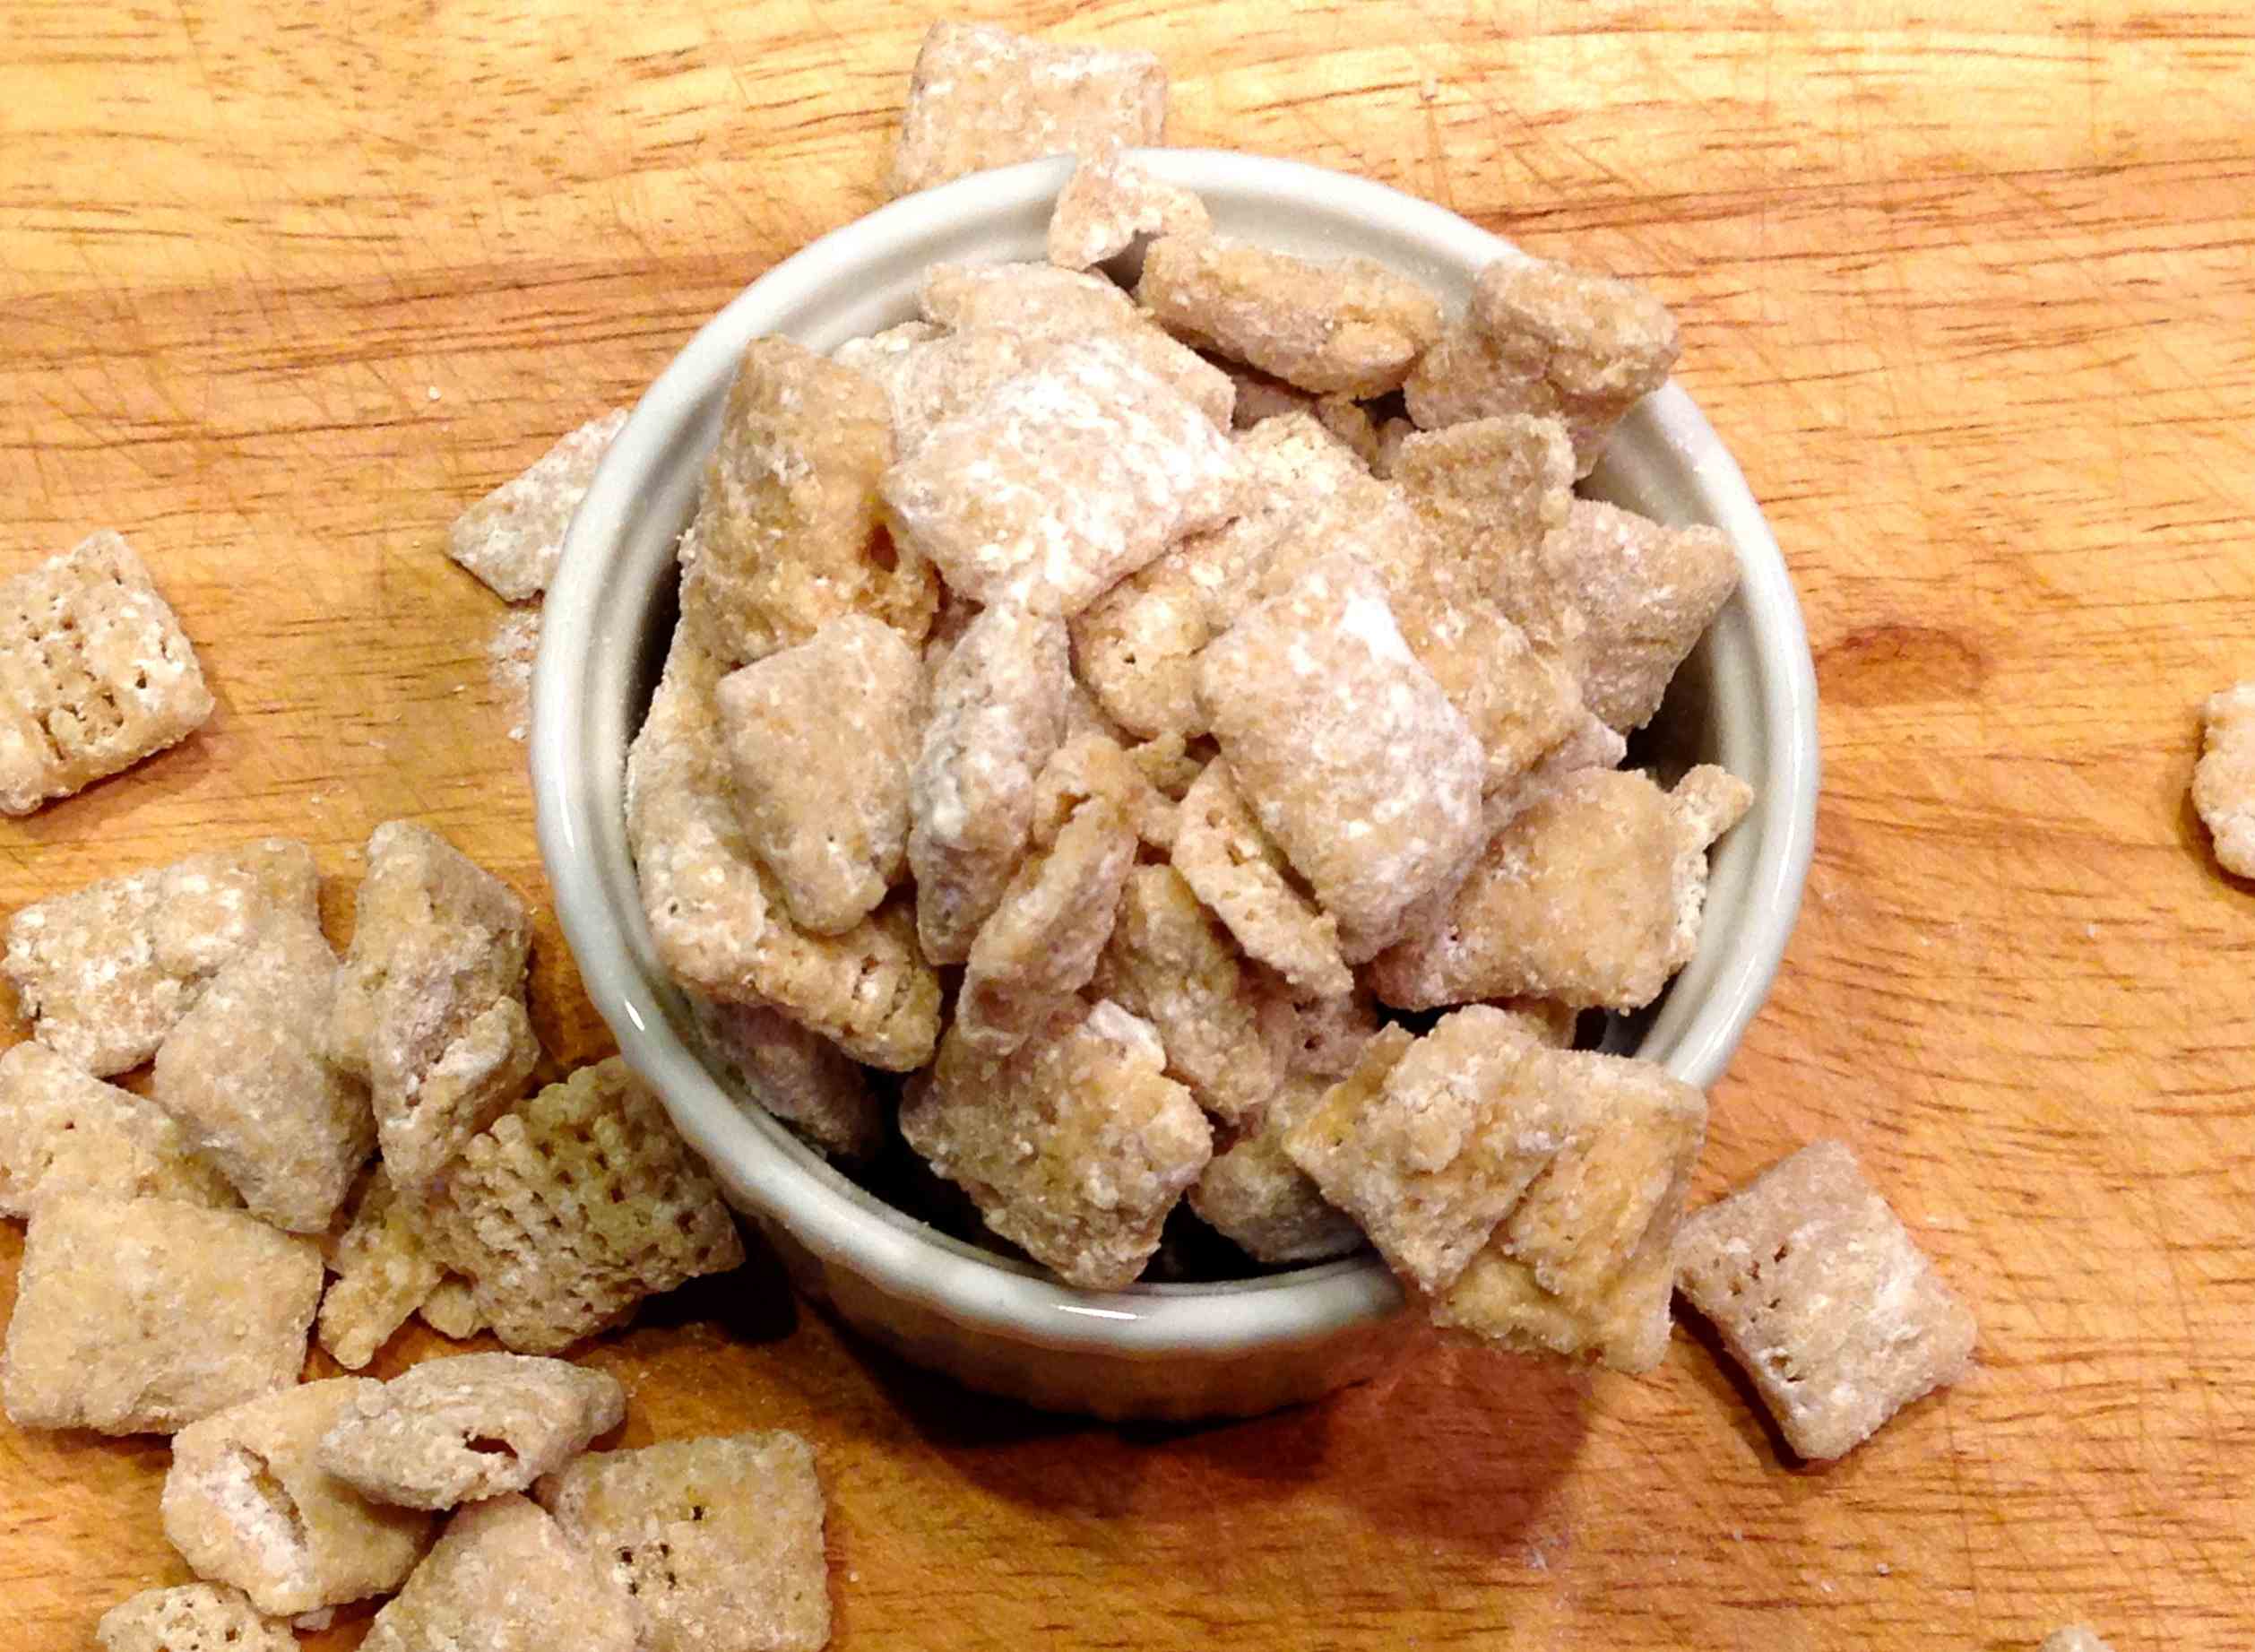
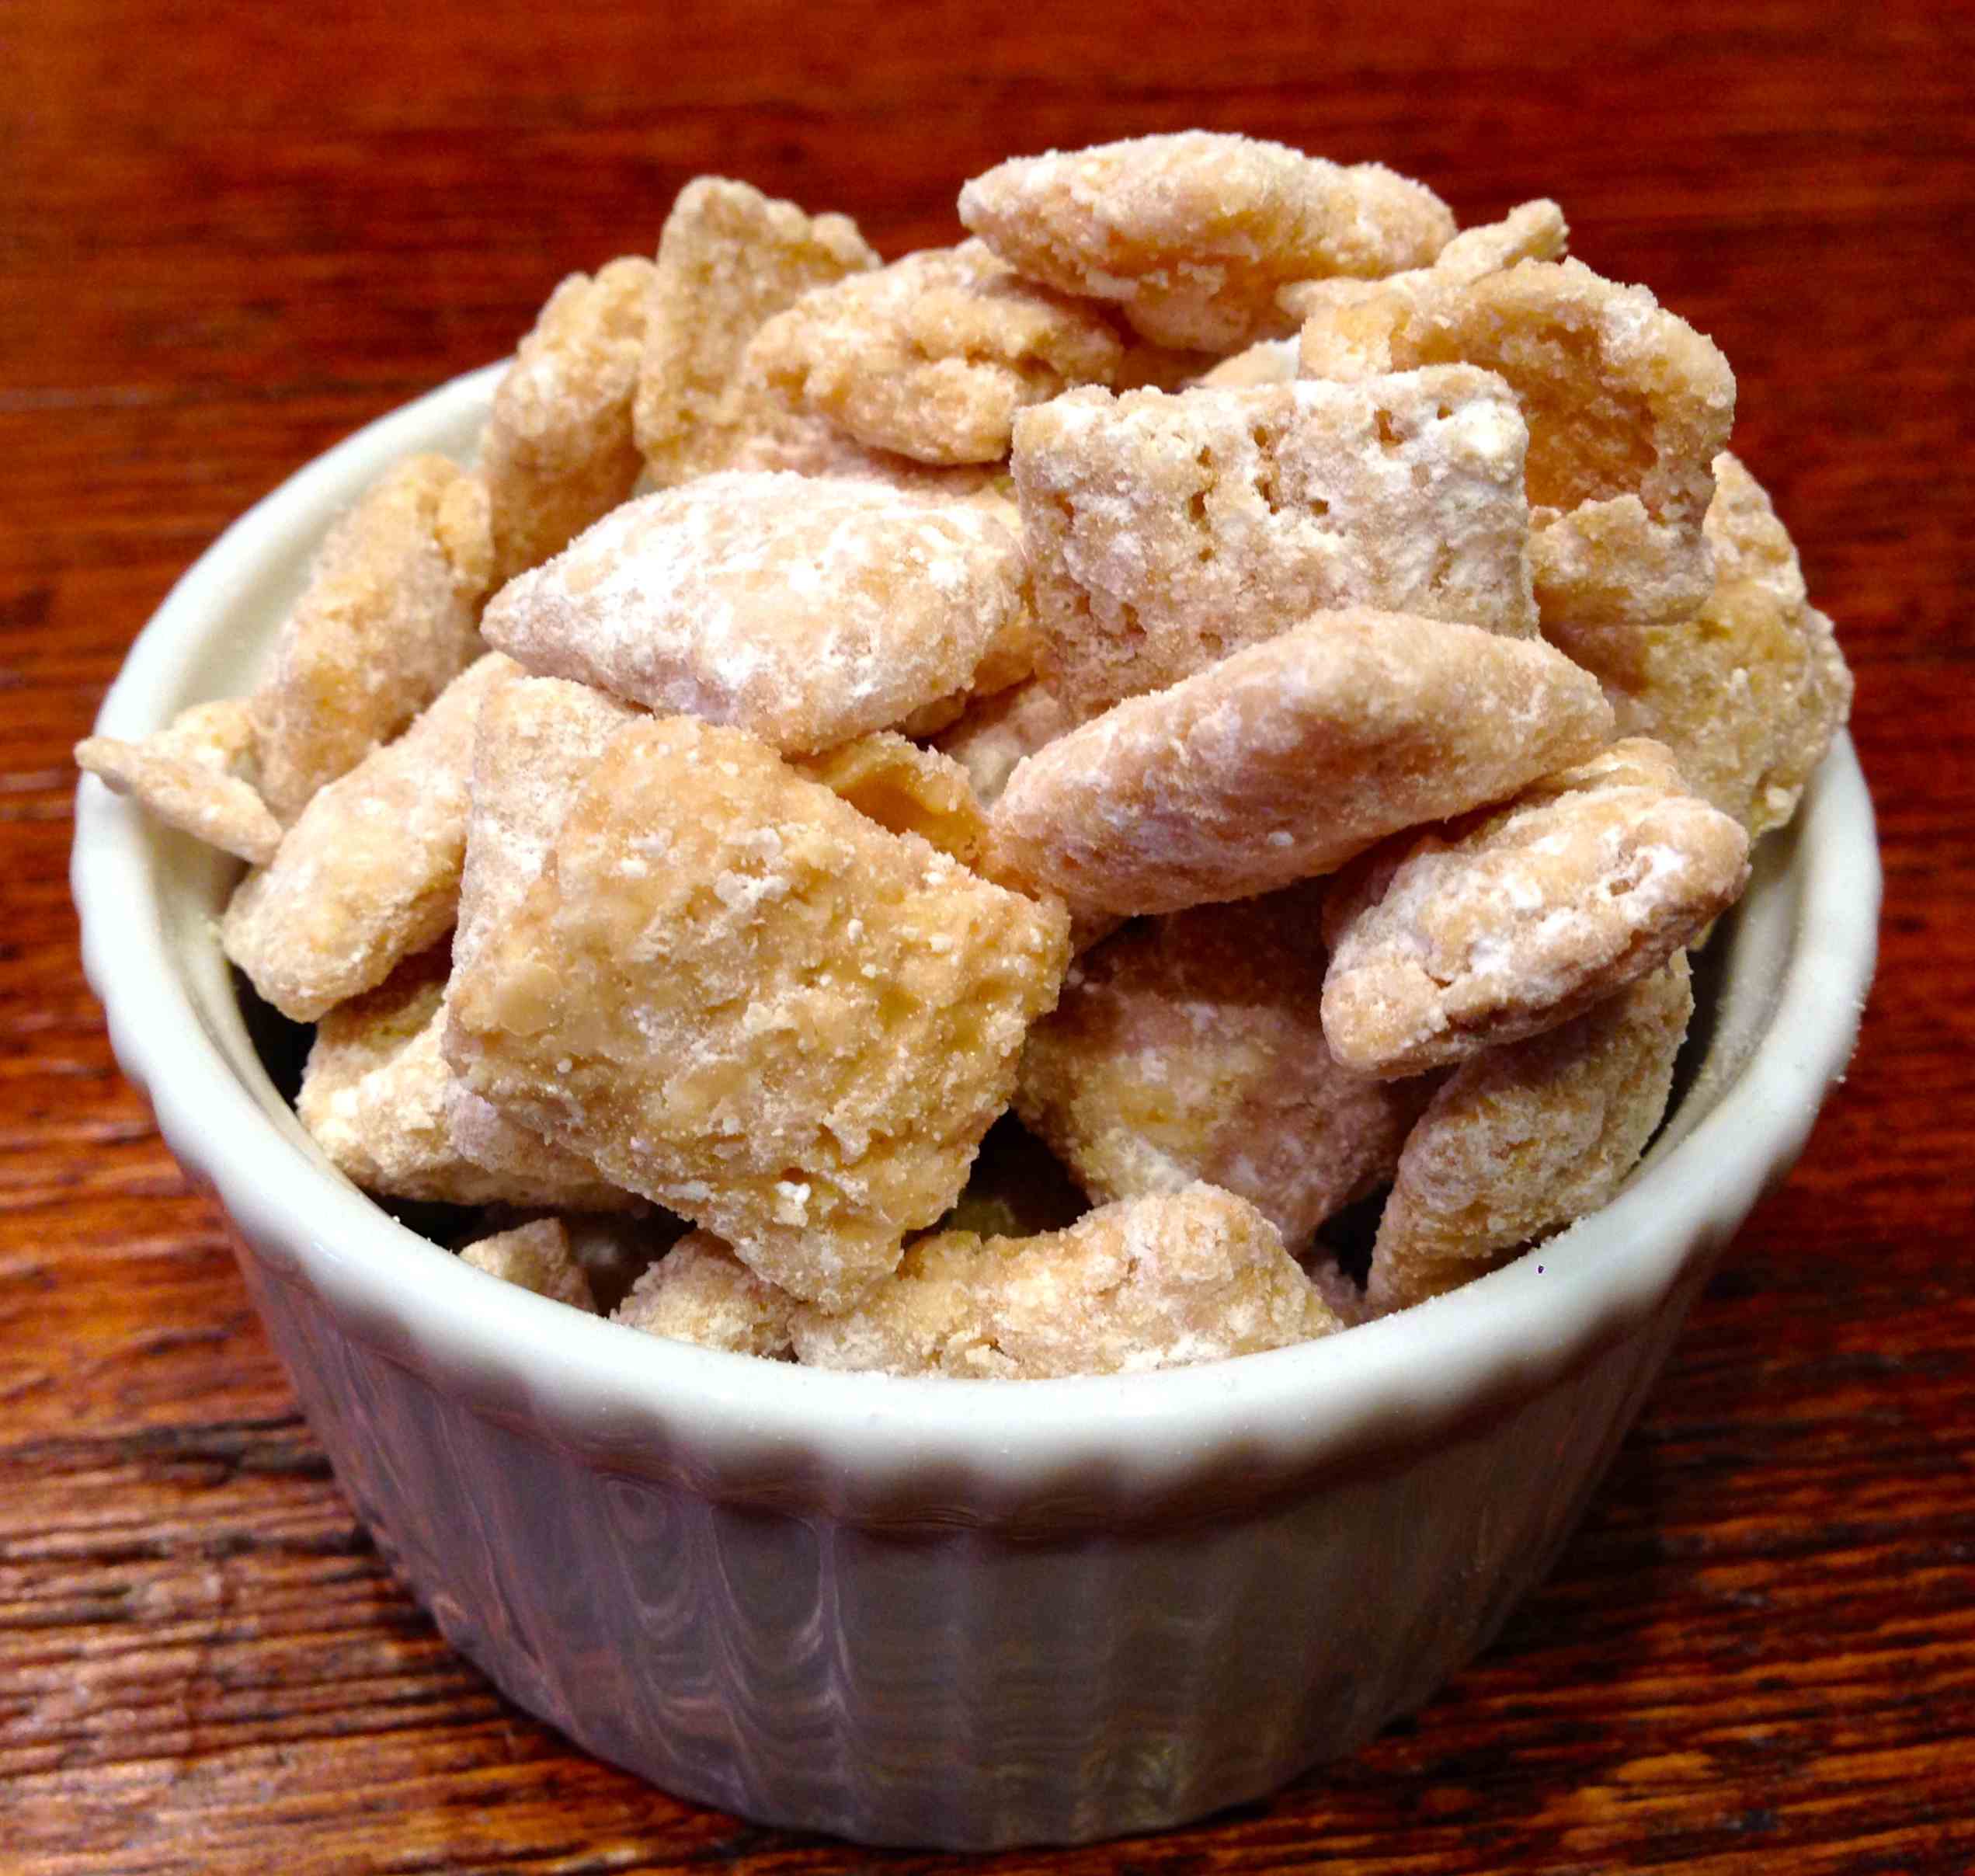
A few weeks ago Matt and I hosted a Super Bowl party at our house. Everyone brought finger foods and I of course made the desserts. I had been craving Puppy Chow and was going to make it the old-fashioned way with semi-sweet chocolate chips, but I had leftover Vanilla Flavored Almond Bark from making the White Chocolate-Dipped Oreos, so I thought I’d change it up a bit.
I actually made two batches of Puppy Chow: a regular chocolate version and a white chocolate version, and let me tell you…the white chocolate version blew the doors off the regular version!
I can’t believe you don’t see more recipes out there using white chocolate because it makes the Puppy Chow much sweeter and creamier! This will definitely be my go-to recipe in the future.
Combine the melted white chocolate with peanut butter and chex mix cereal. Toss with powdered sugar in a large bowl or plastic bag.Overflowing with Puppy Chow!
As was mentioned in my post yesterday, Skippy is one good dog! During the “photo shoot”, he sat there patiently awaiting a little bite.
Not only does Puppy Chow have the name “puppy”, it also contains peanut butter – Skippy’s favorite food of all time. 🙂
Skippy wants some!
I ate waaaay too much of this stuff, but it was well worth it. Enjoy!
White Chocolate Puppy chow
Prep time:
Cook time:
Total time:
Serves: 2-3 dozen
Ingredients
9 cups crispy rice cereal squares
1/2 cup creamy peanut butter
1 cup white chocolate
1 1/2 cups confectioners’ sugar
Instructions
In a saucepan over low heat, melt the chocolate; add peanut butter and mix until smooth.
Remove from heat, add cereal and stir until coated.
Pour powdered sugar into large plastic bag, add coated cereal and shake until well coated. Store in airtight container.
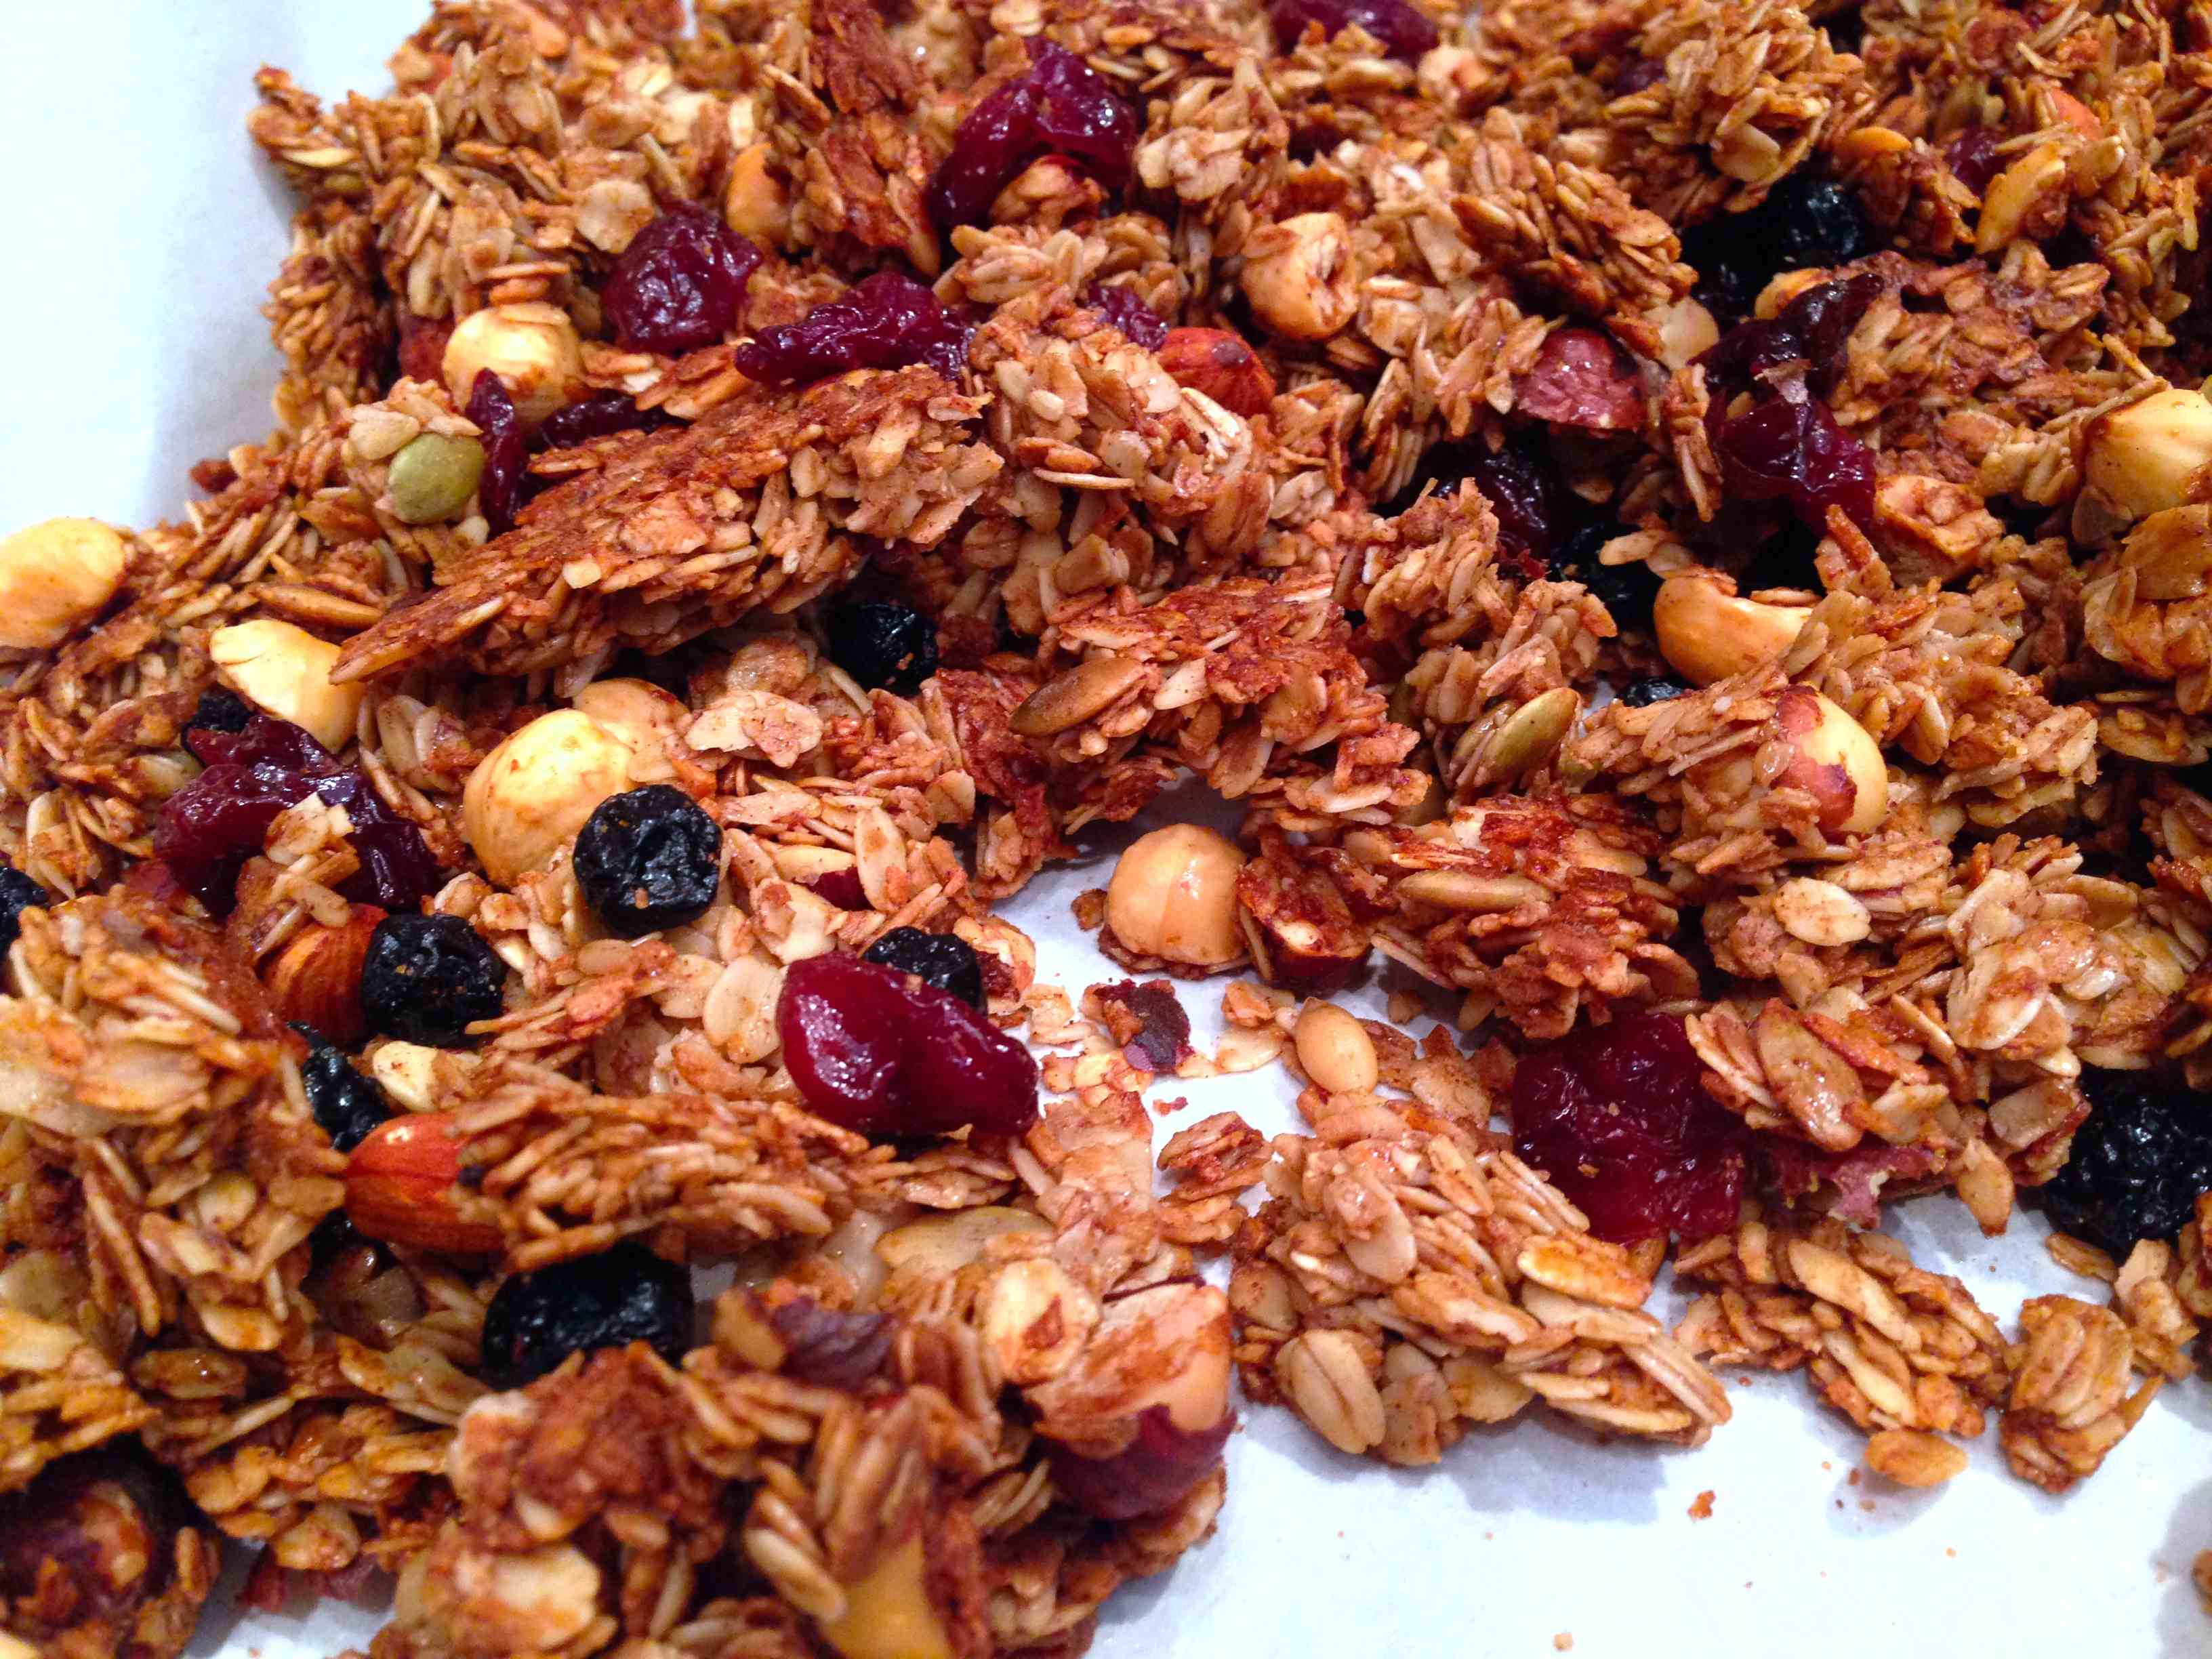
There’s not really a unique story about this granola other than the fact that homemade granola is one of my biggest weaknesses.
My sister discovered this recipe via The Vintage Mixer not too long ago and made it when she came home from Michigan over the holidays.
Homemade granola is actually super simple to make and well-worth the time, especially over the boxed kind. All you have to do is mix up the ingredients, bake it on a cookie sheet for 40-45 minutes, let it cool, and then break into large clusters or chunks of granola.
It makes for a quick breakfast in the morning served atop plain greek yogurt or simply by itself for a snack.
Enjoy!
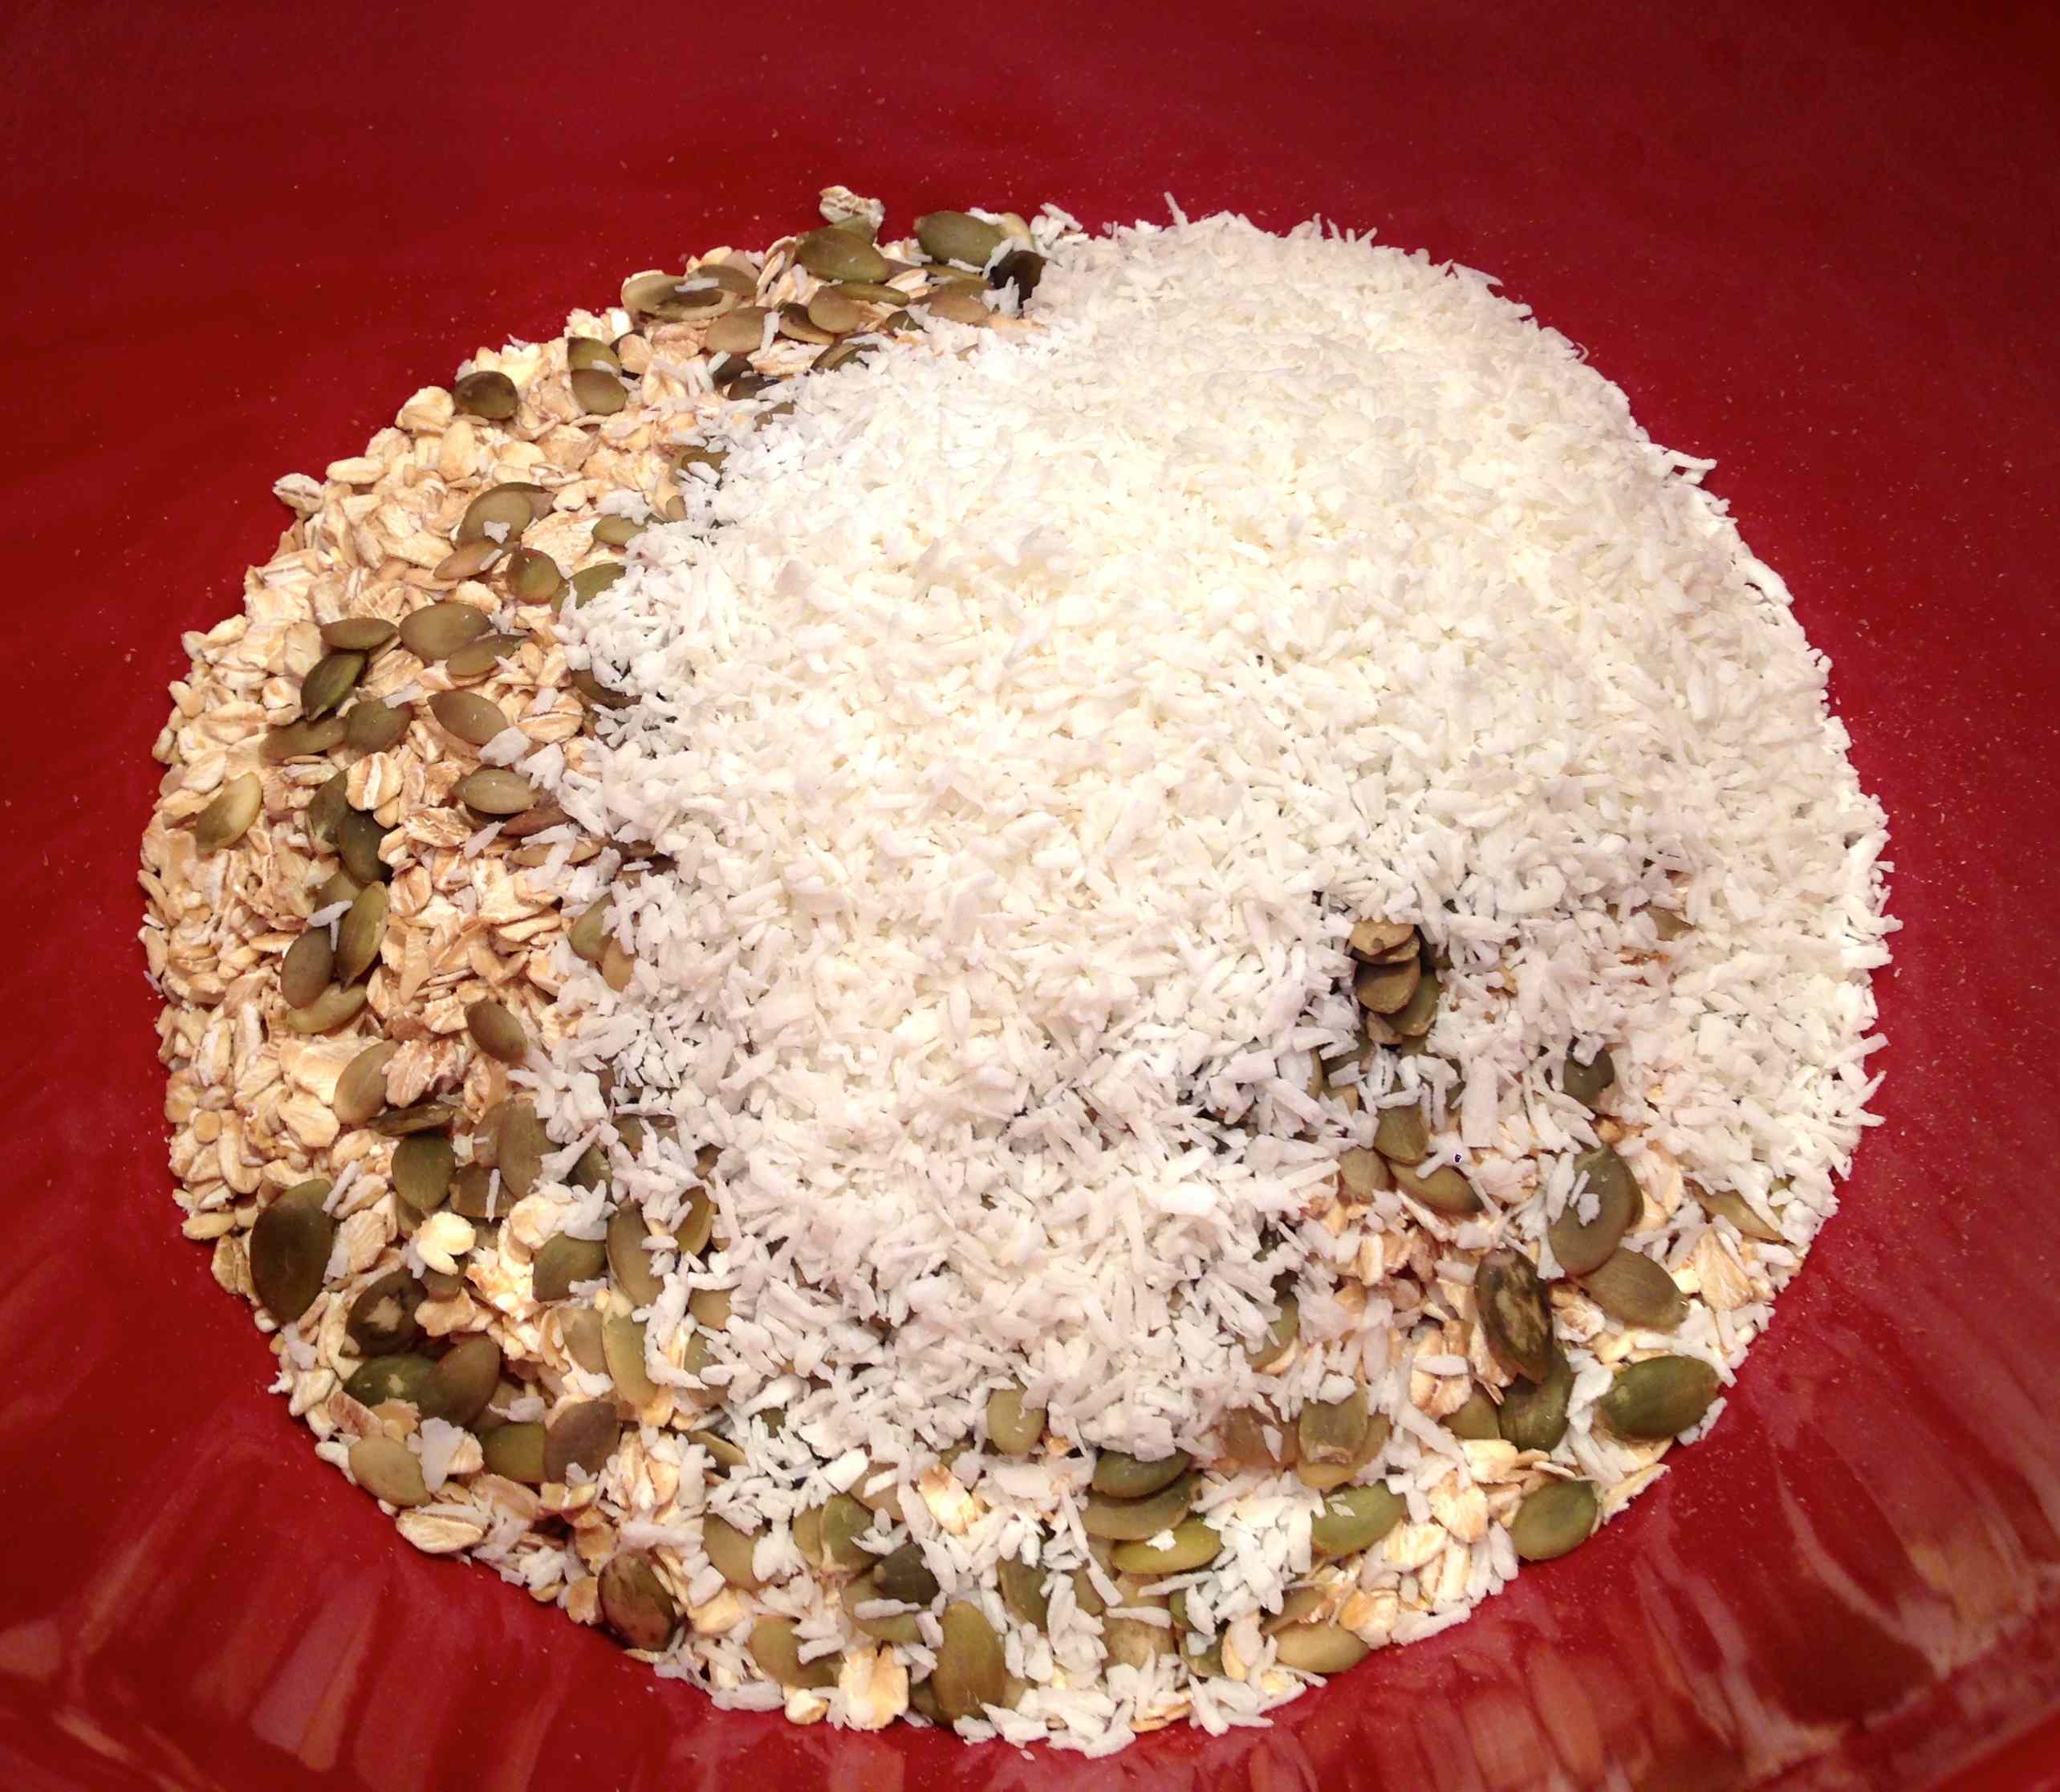
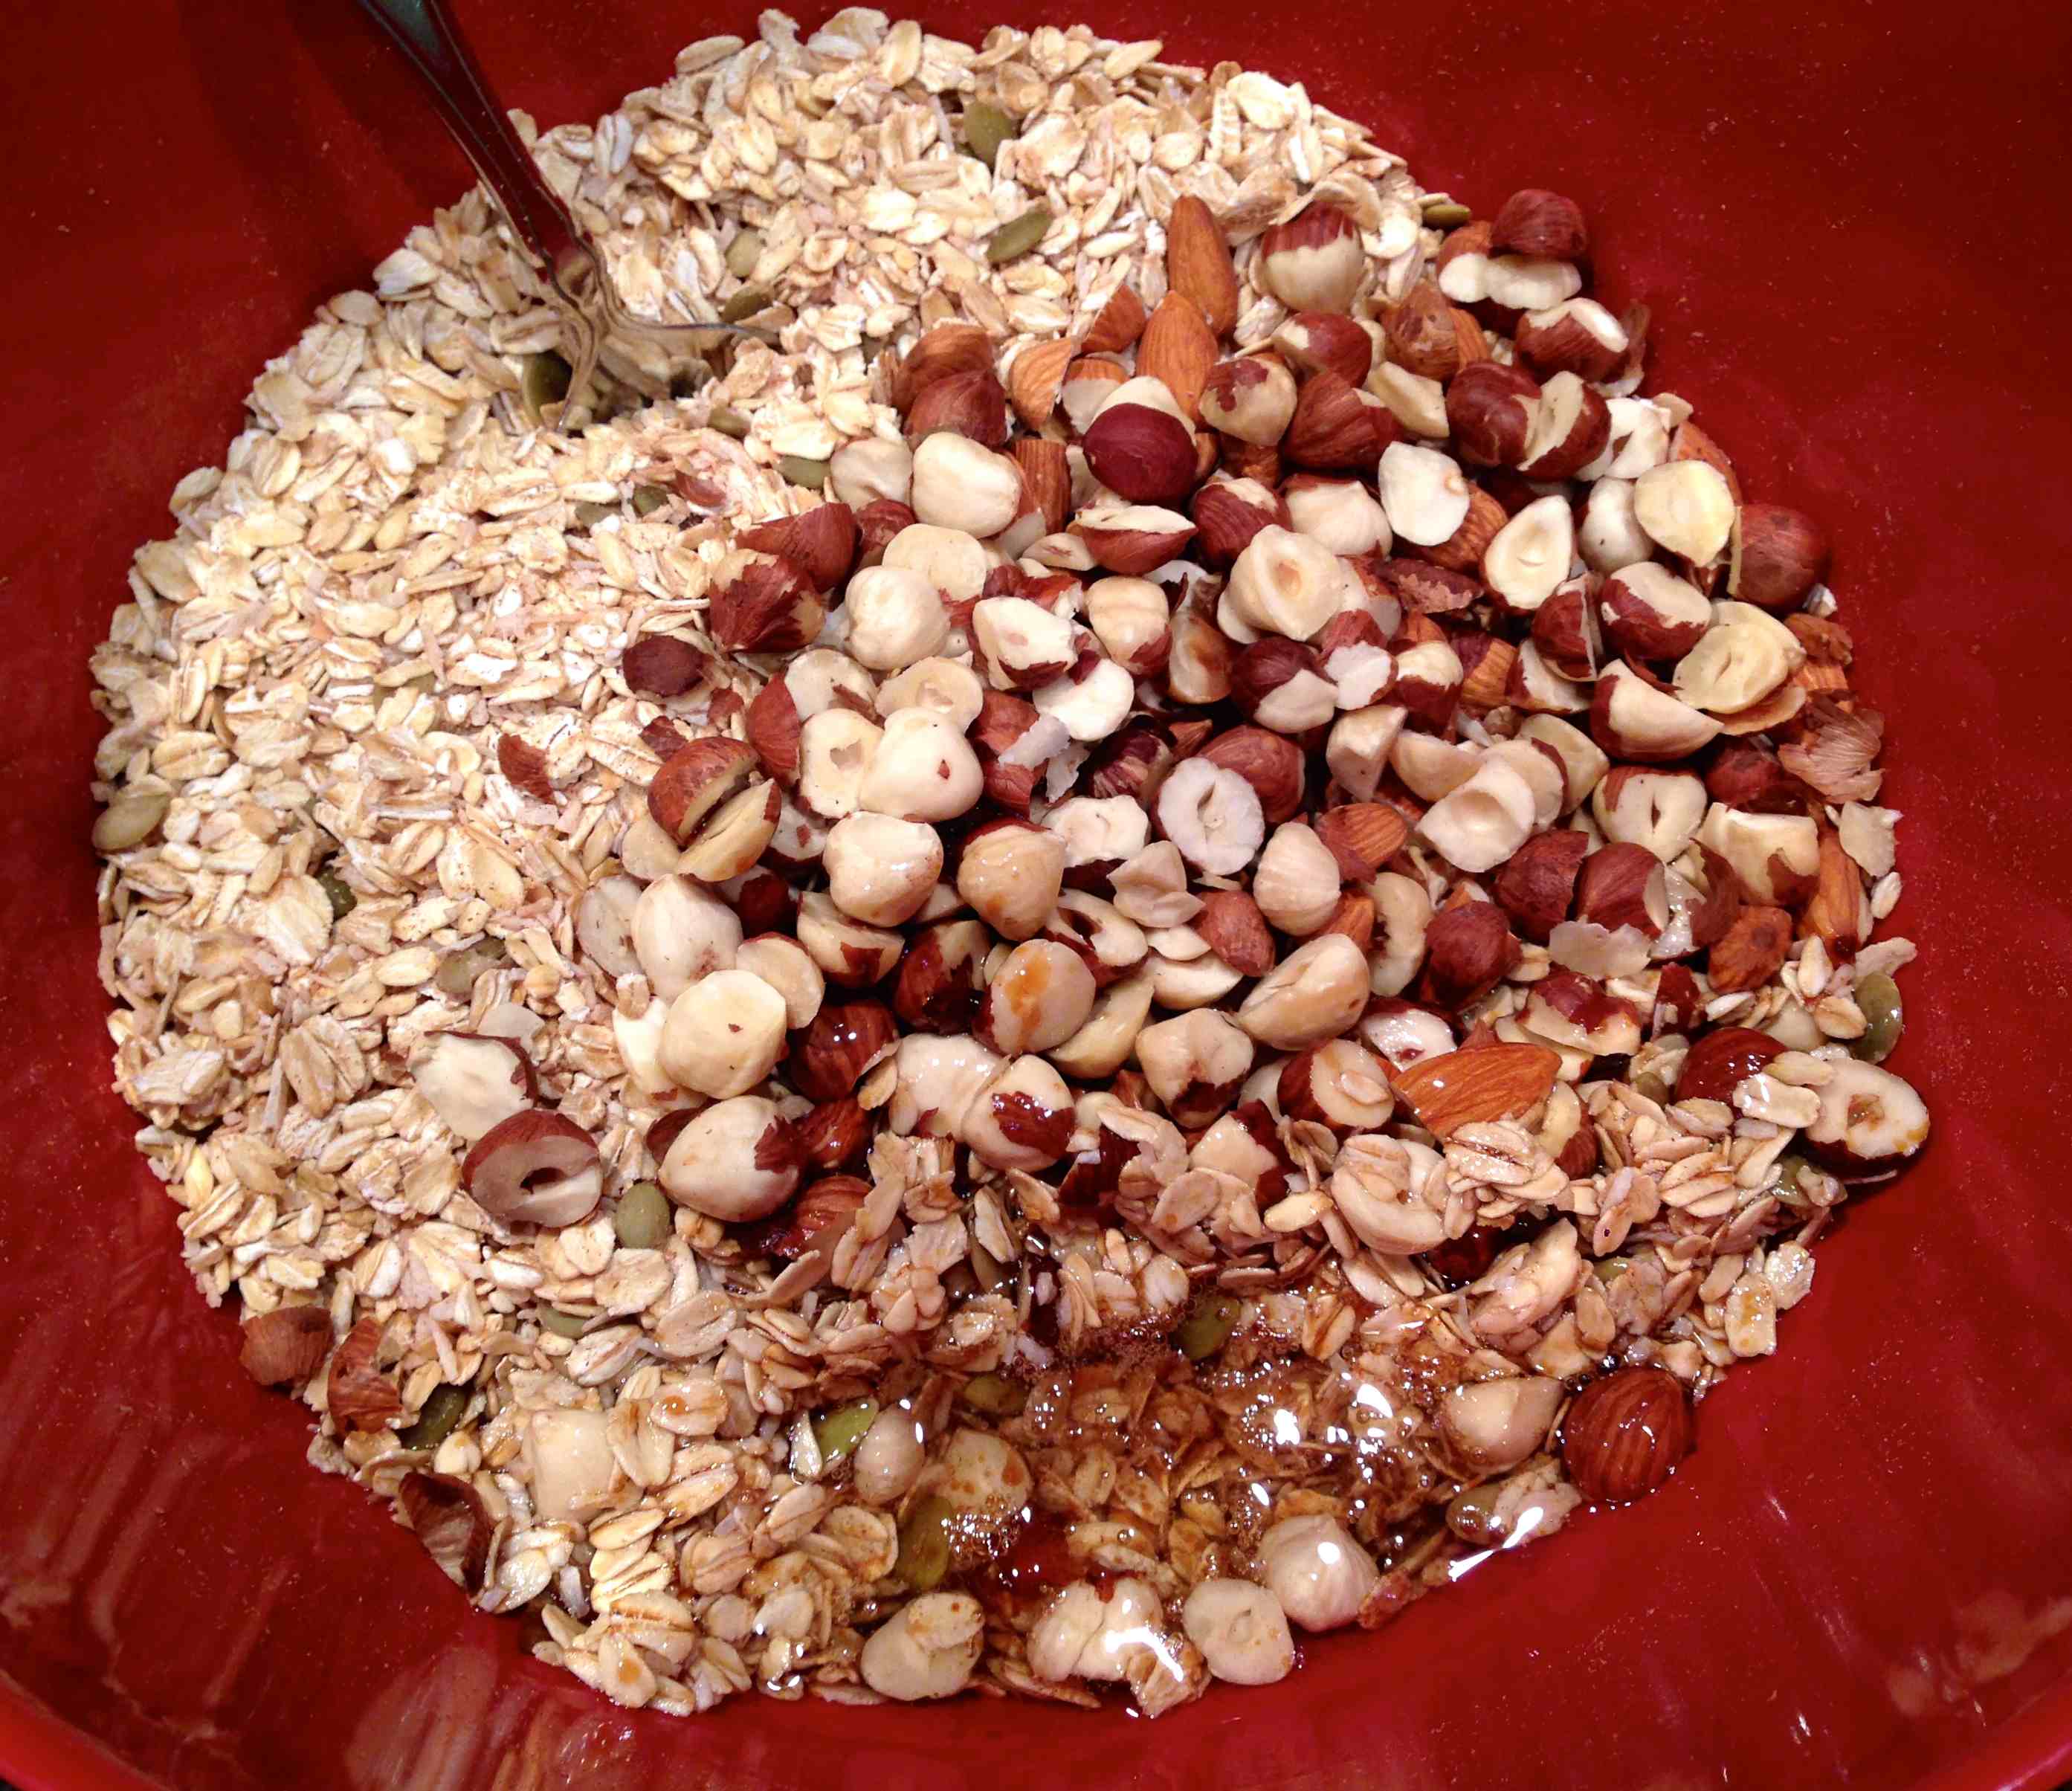
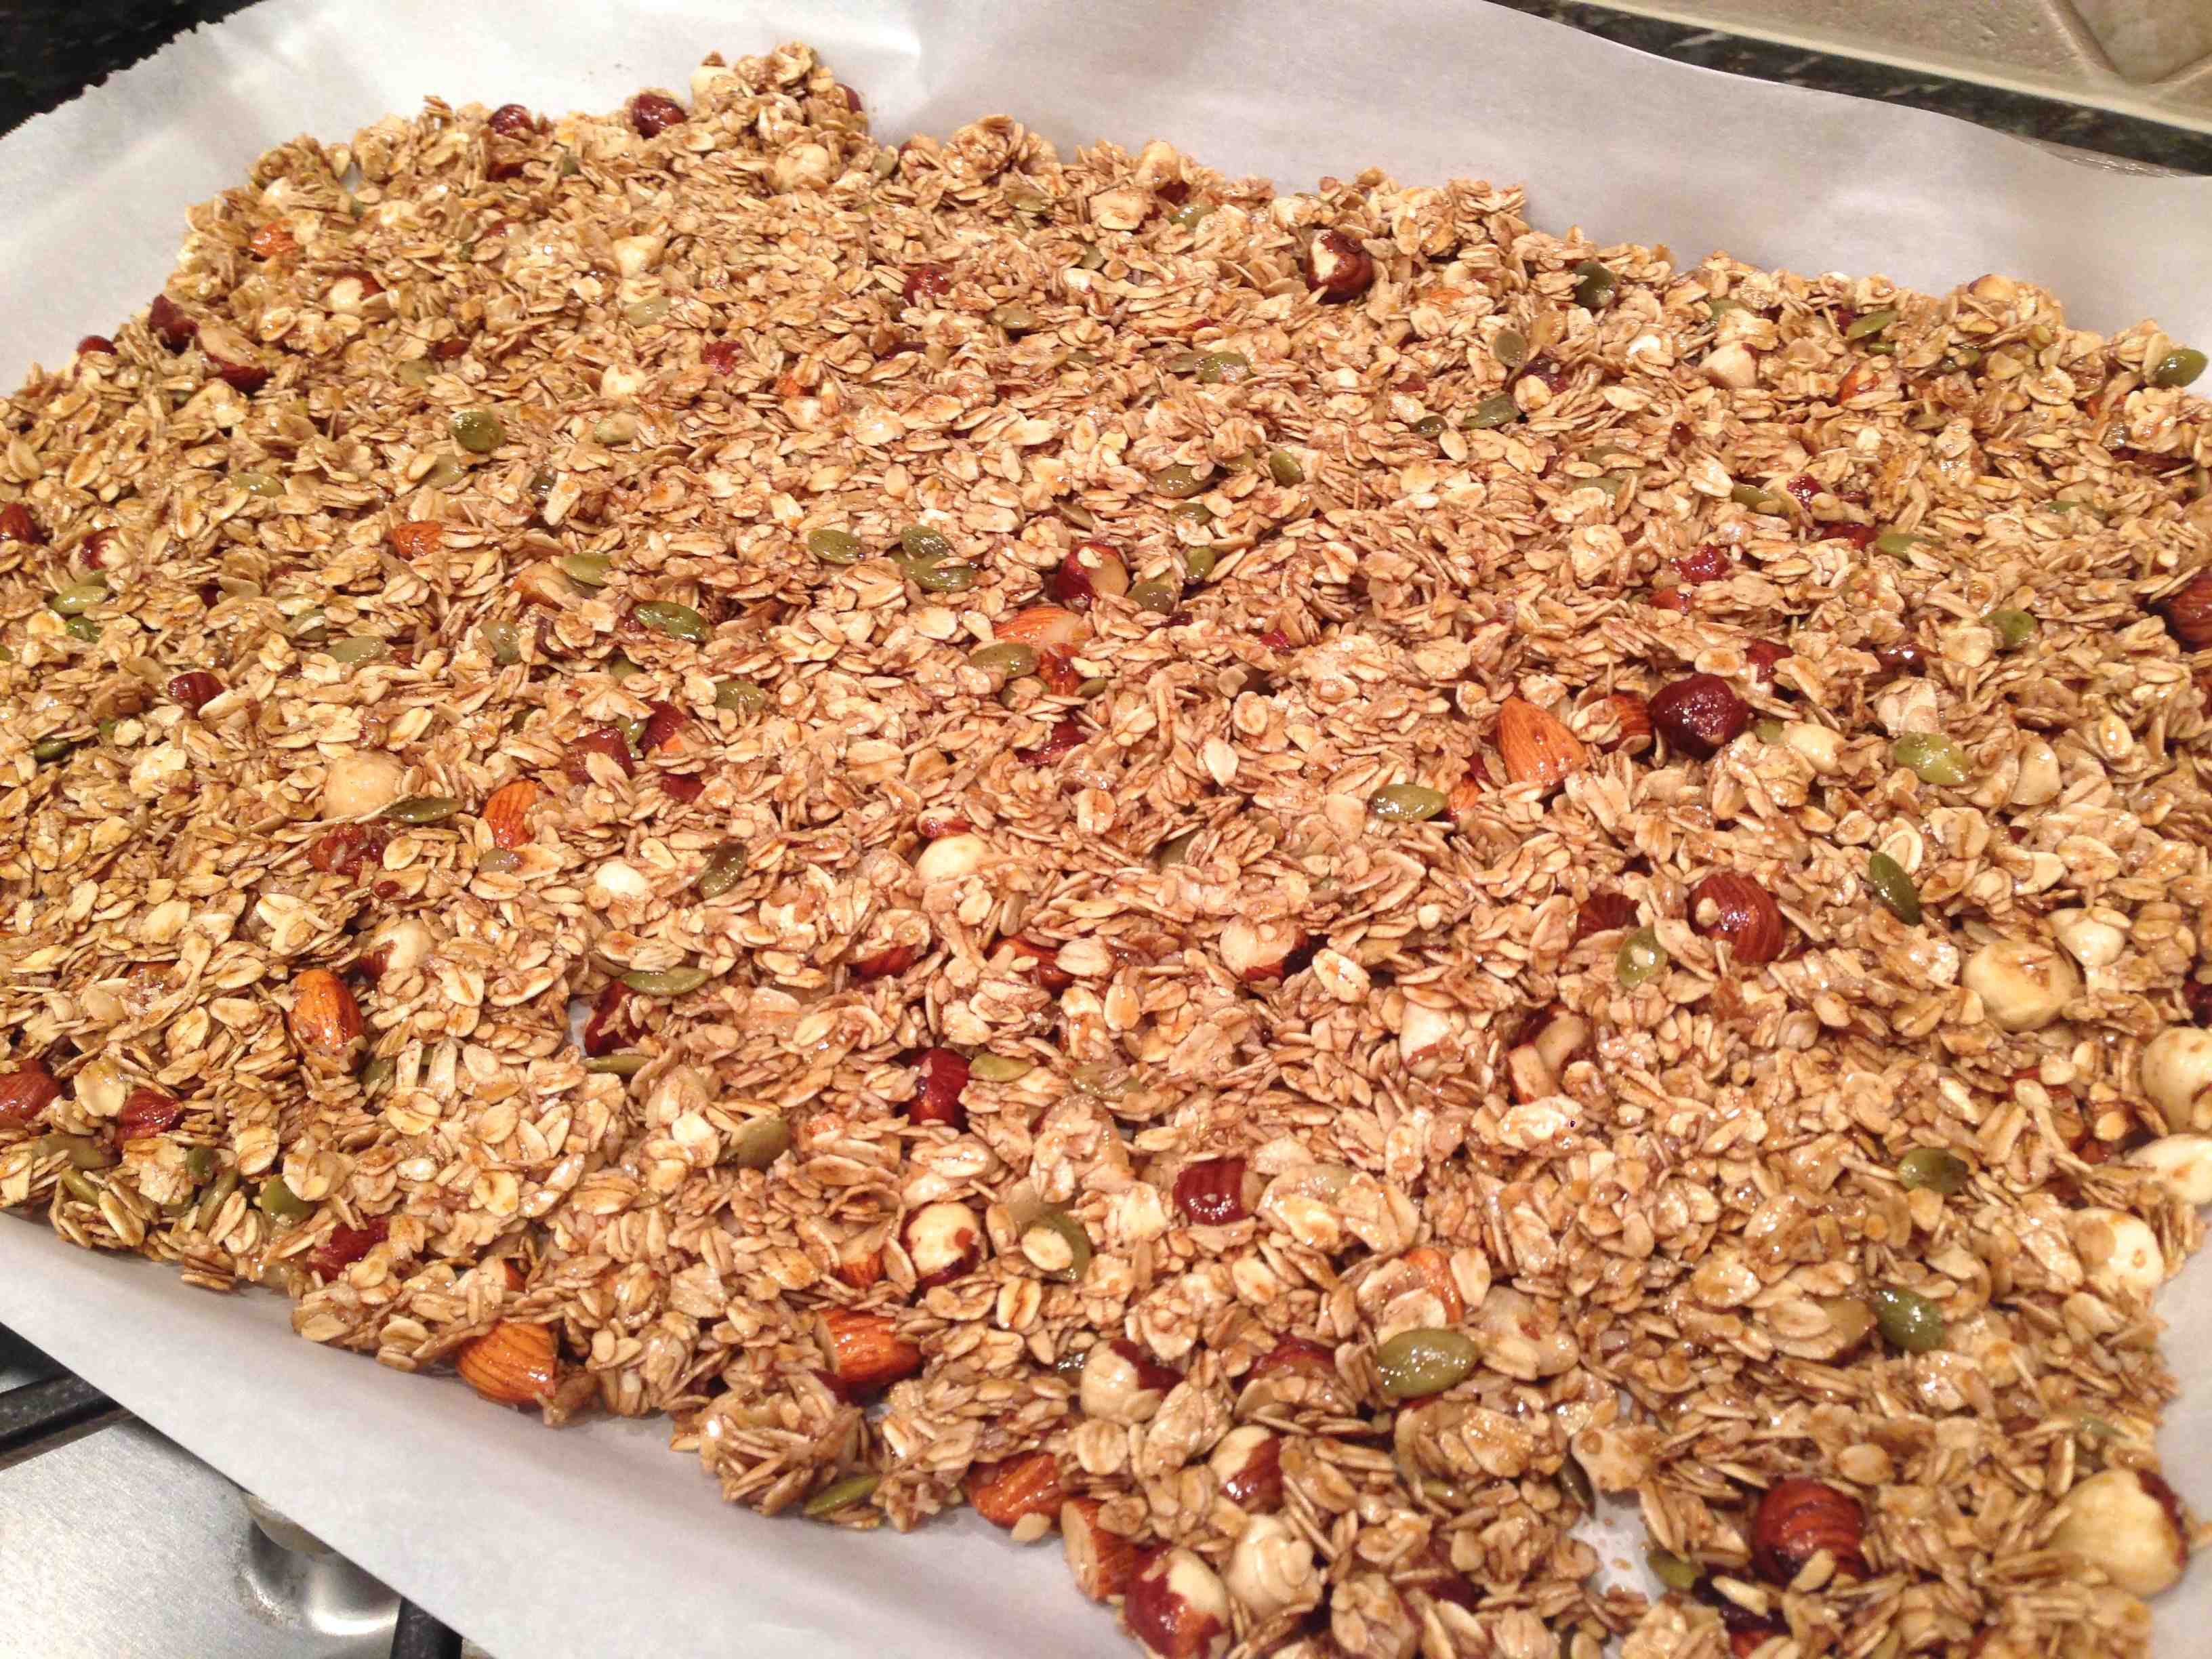
Mix coconut oil, maple syrup, molasses and brown sugar in a pot over medium heat. Stir in vanilla after removing from heat.Mix together oats, pumpkin seeds, coconut, hazelnuts, cinnamon and salt.Pour syrup mixture over the oats.Fold egg whites into the oat mixture and pour out onto the baking sheet.Bake at 325 degrees for 40-45 minutes or until golden.Let cool completely, break into large clusters, then add in cherries/dried fruit.
Cherry and Hazelnut Granola with Clusters
Prep time:
Cook time:
Total time:
Serves: 5 cups
Adapted from: The Vintage Mixer
Ingredients
3 1/2 cups thick rolled oats
1/4 cup pumpkin seeds
1/2 cup coconut flakes, unsweetened
1 cup hazelnuts, roughly chopped
1 1/2 tsp. cinnamon
1 tsp. sea salt
1/2 cup coconut oil
1/2 cup pure maple syrup
1 Tbsp. molasses
1 Tbsp. brown sugar
2 tsp. vanilla extract
1 egg white
1 cup dried cherries, blueberries or other dried fruit
Instructions
In a pot over medium heat, mix together coconut oil, maple syrup, molasses and brown sugar. Remove from heat and stir in vanilla extract.
Meanwhile, in a large bowl mix together oats, pumpkin seeds, coconut, hazelnuts, cinnamon and salt. Pour the hot oil syrup mixture over the oats. Then, using a whisk, whip the egg white until its frothy. Fold the egg white into the oat mixture.
Line a large baking tray with foil then pour out the oats onto the baking sheets. Bake at 325 degrees for 40-45 minutes or until golden. Don’t stir this during baking or the clusters will break up.
Let cool completely, then add in cherries/dried fruit and store in a large jar.
Notes
The secret to making clusters in your granola is folding in an egg white before cooking, then not stirring the oats during baking. Also, do not toss the granola or break it up until after it has completely cooled.
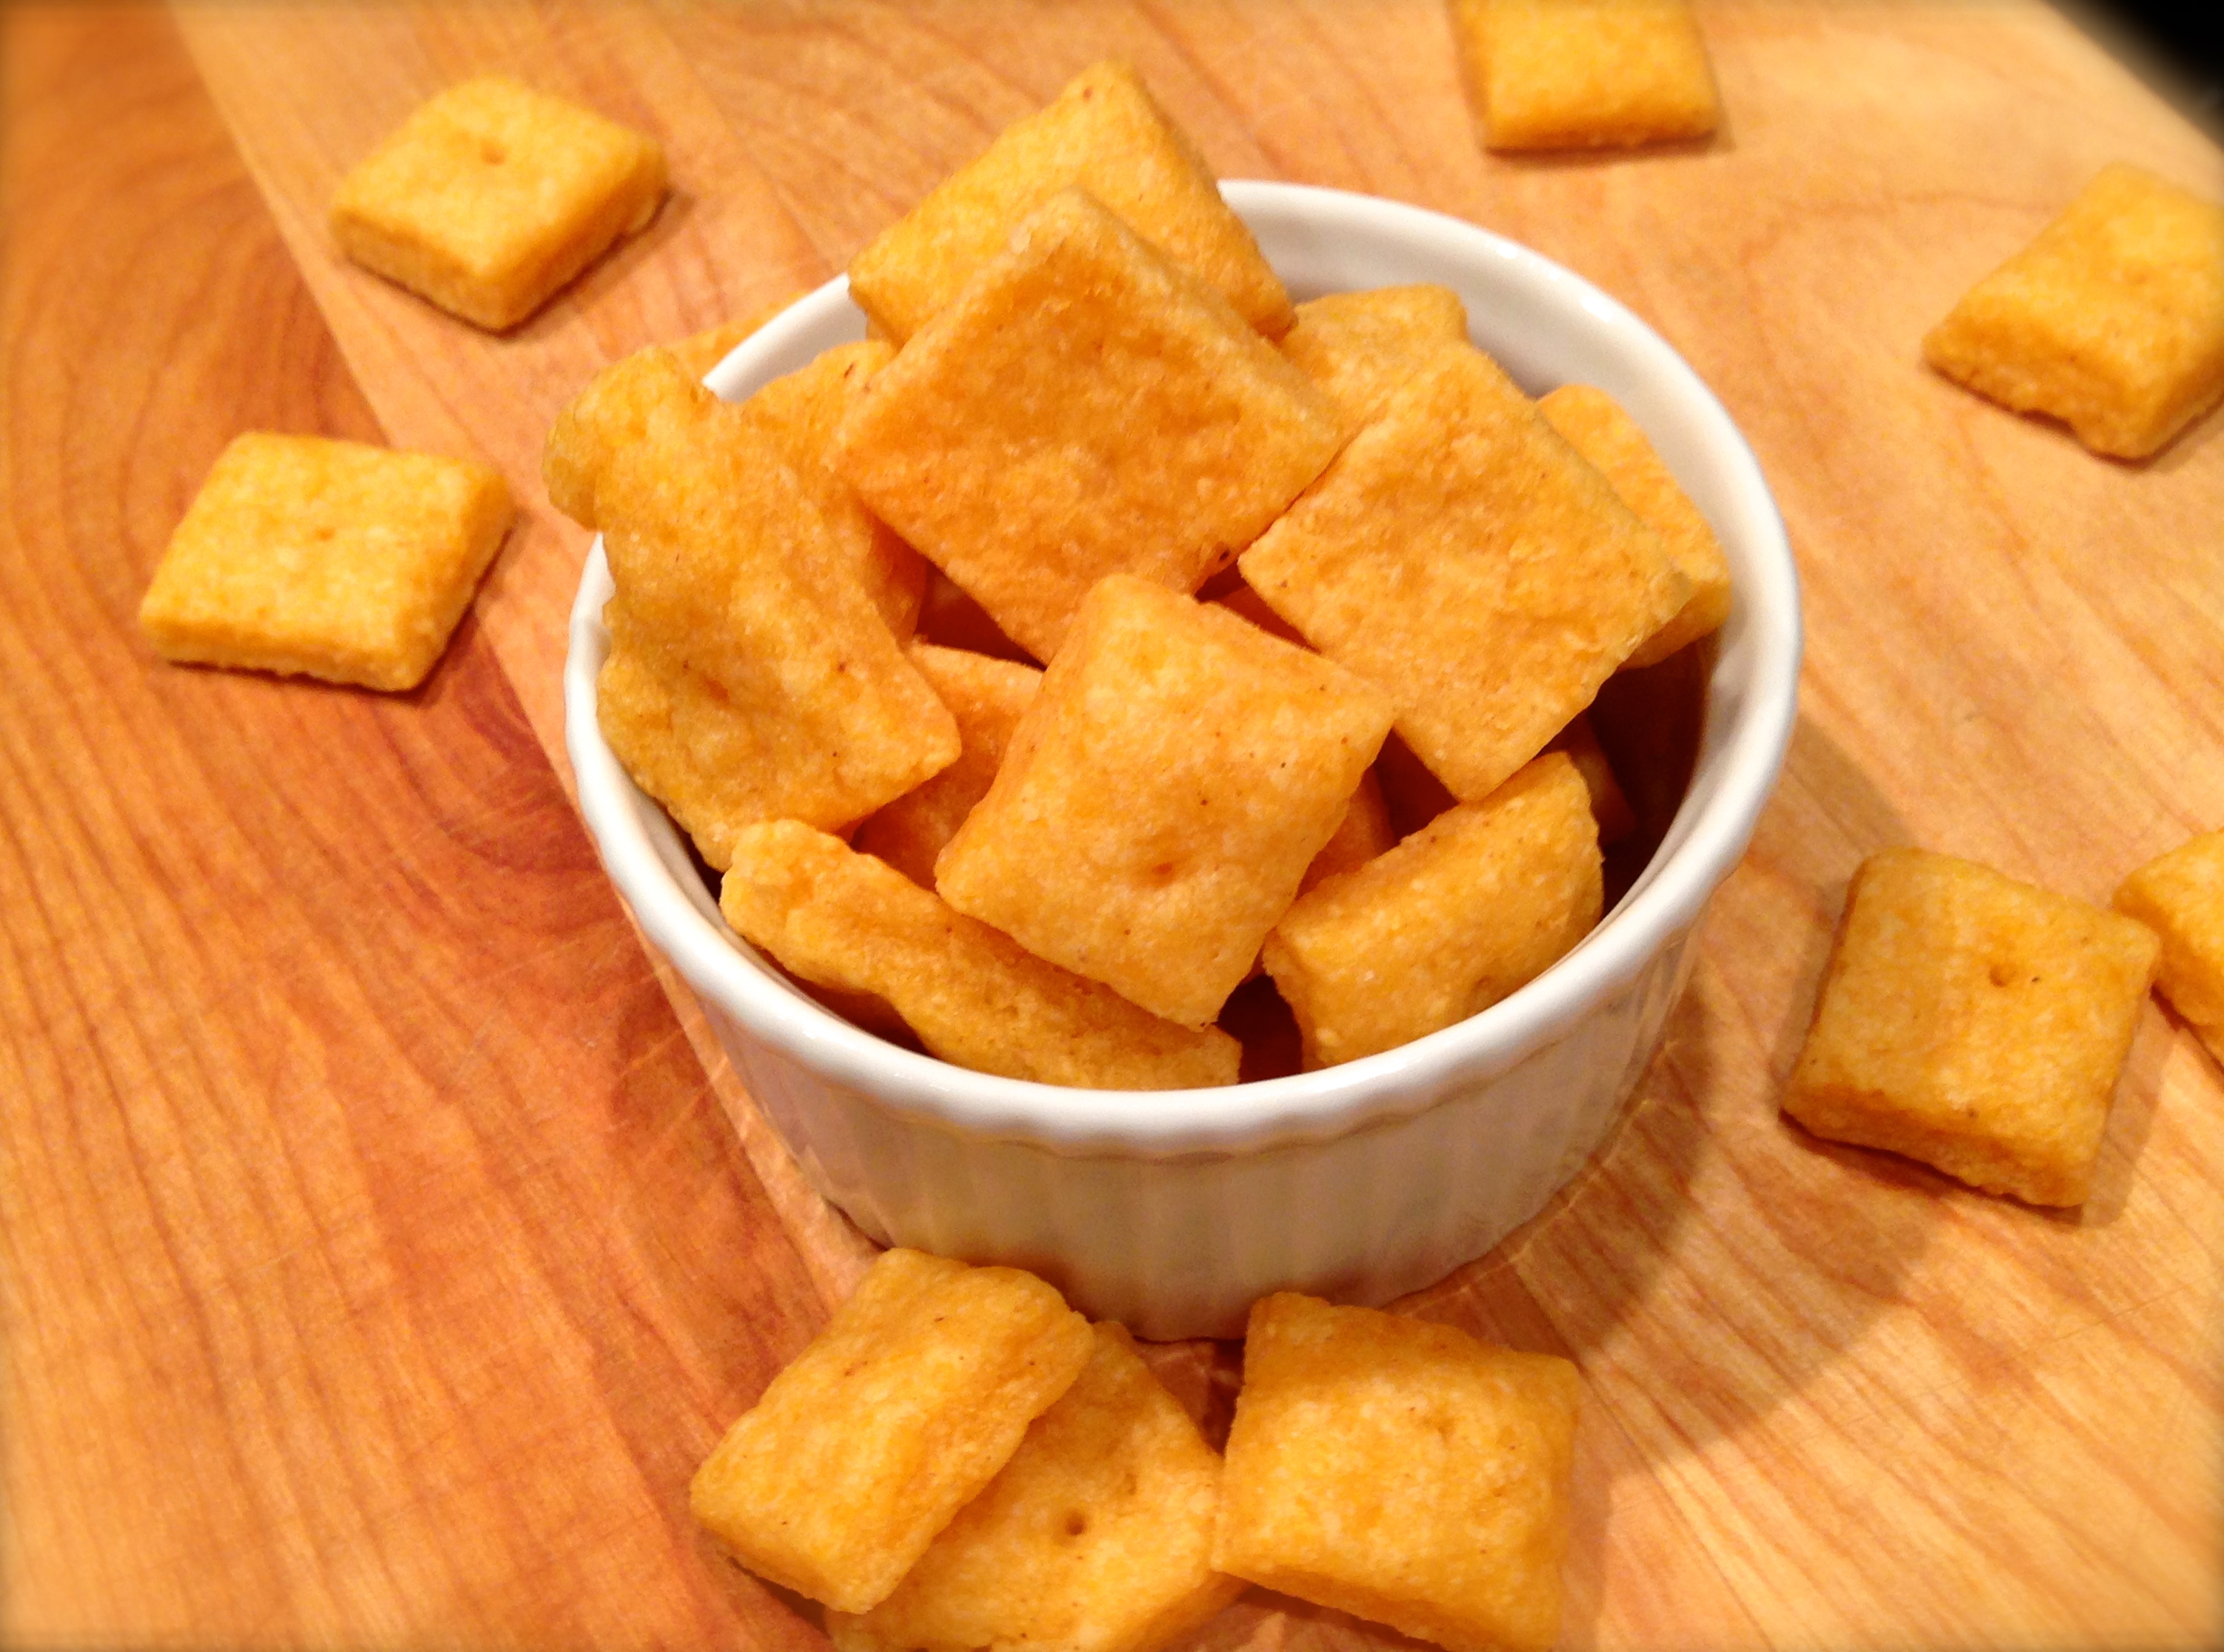
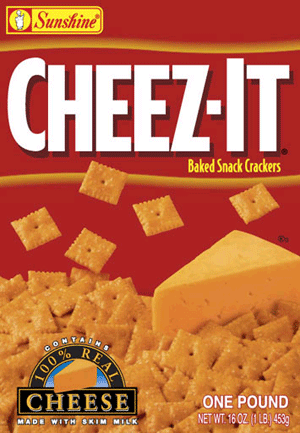
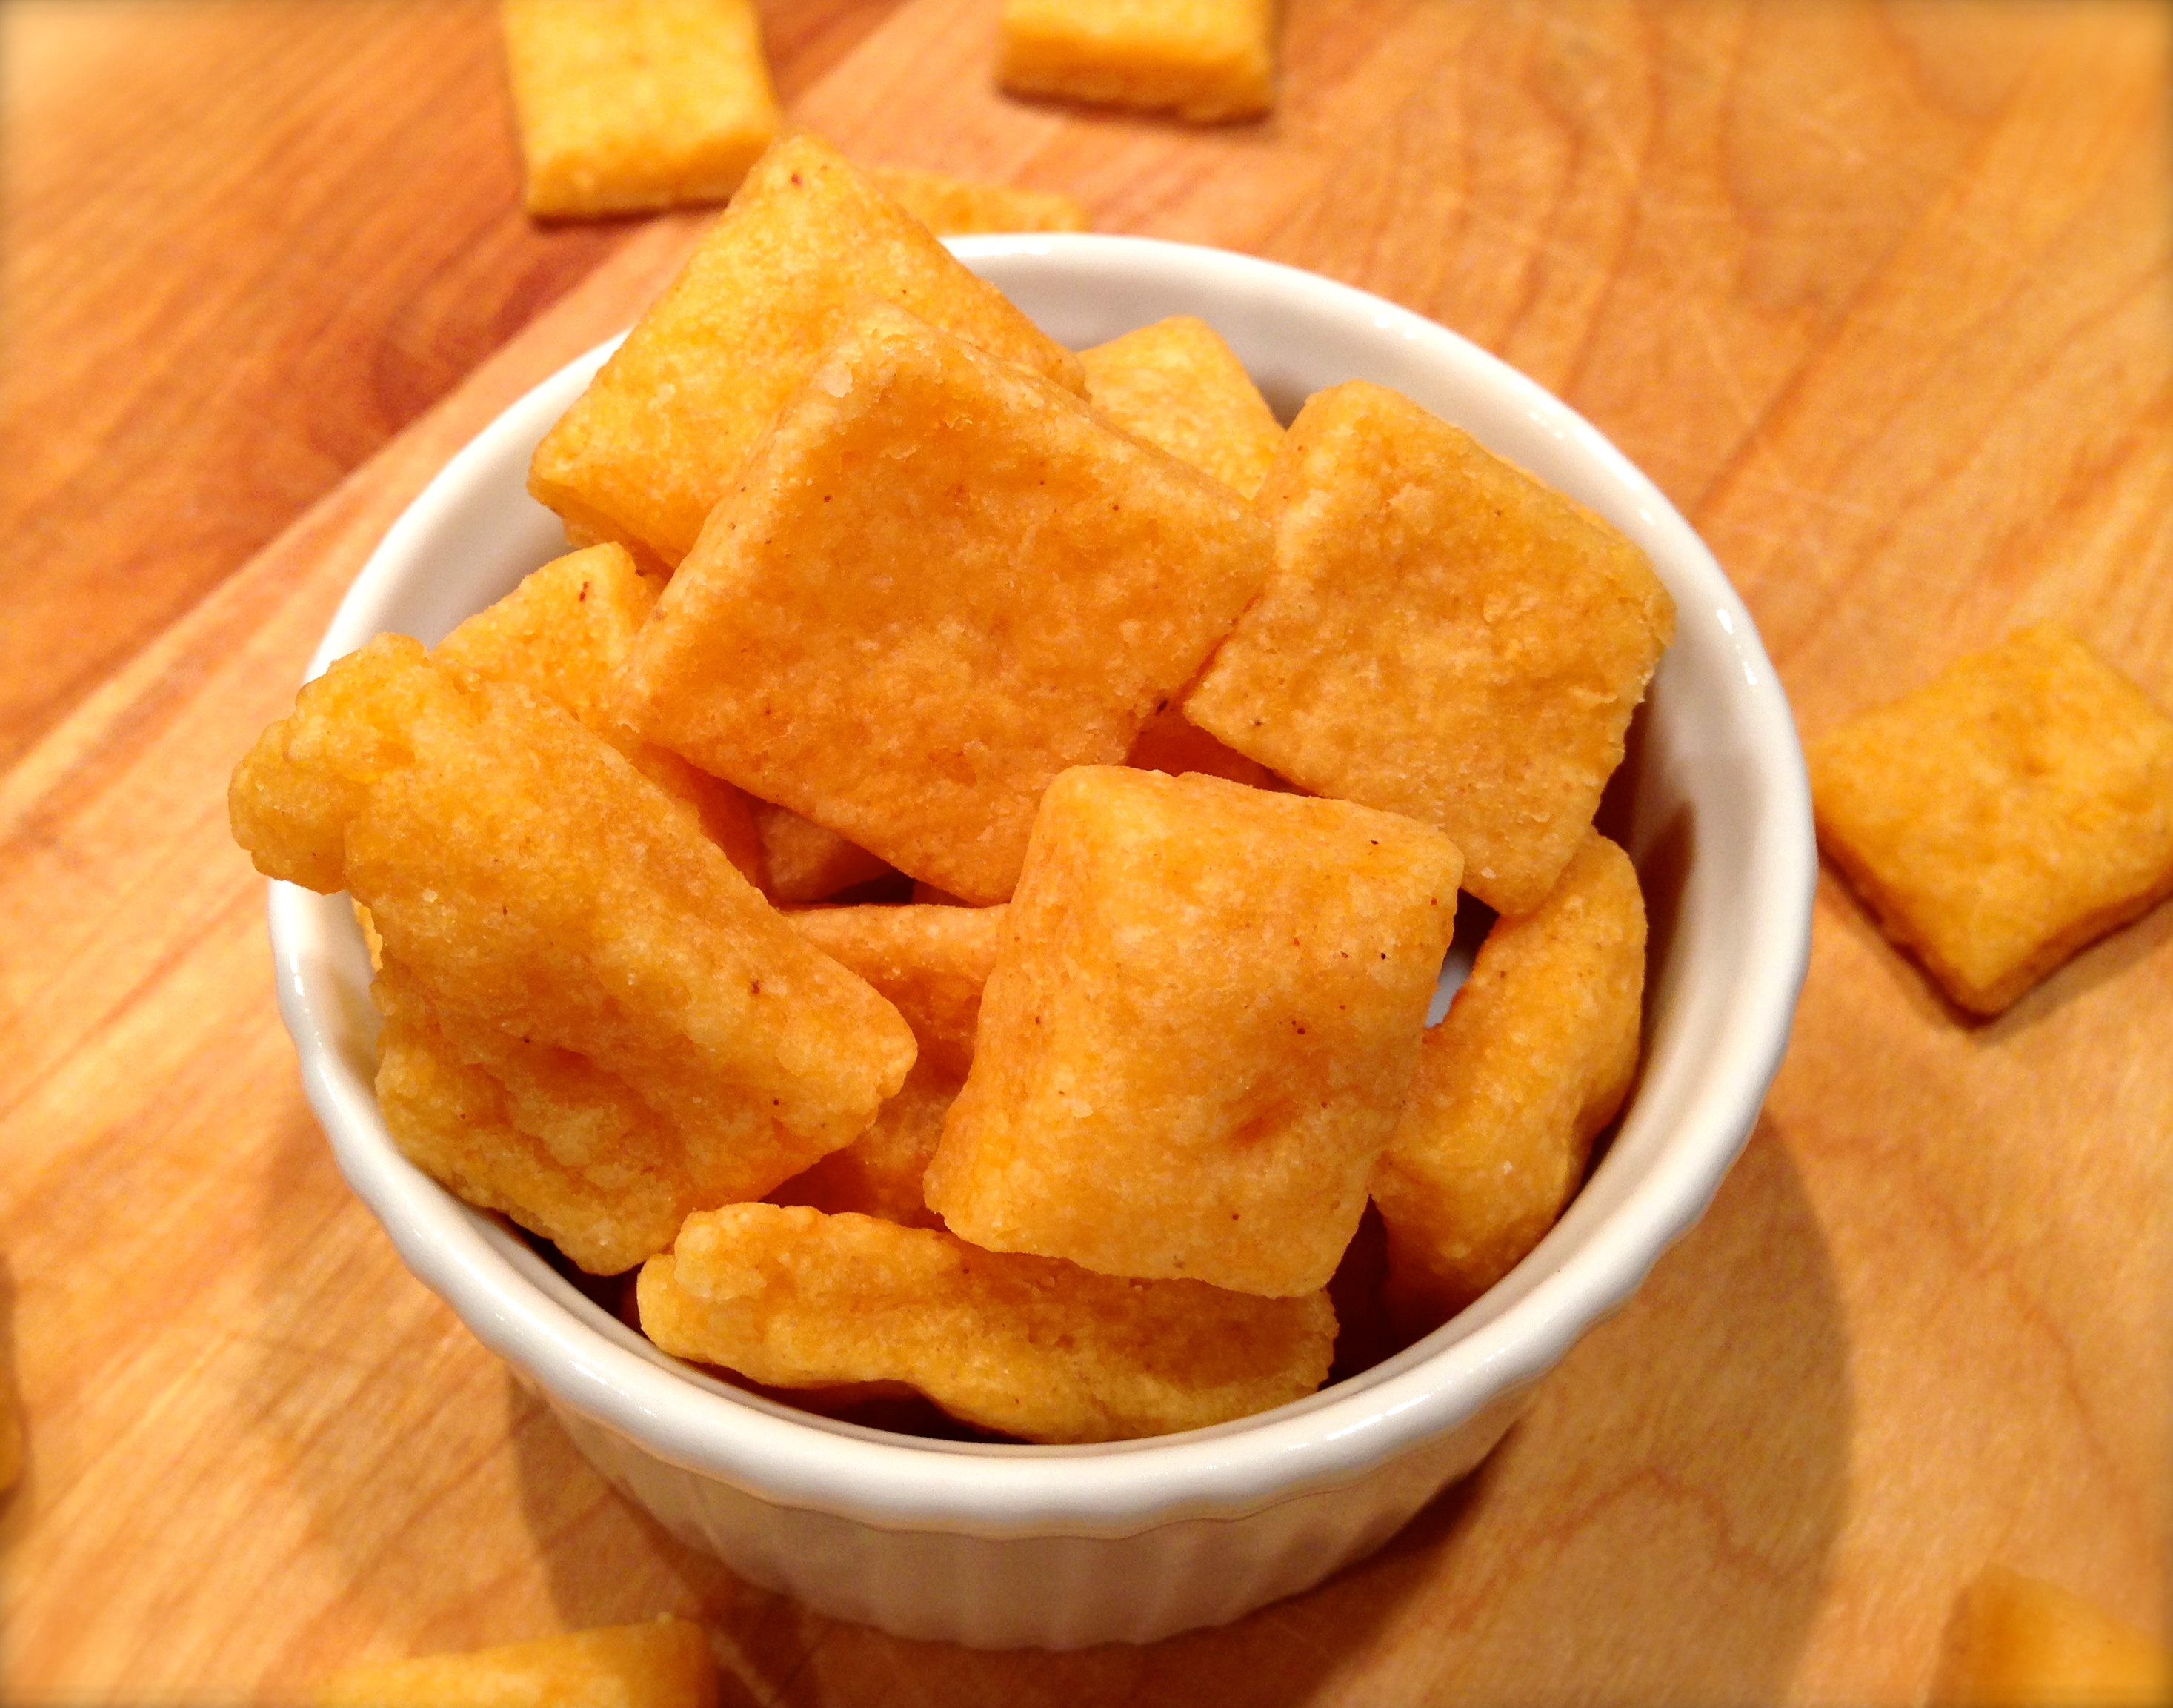
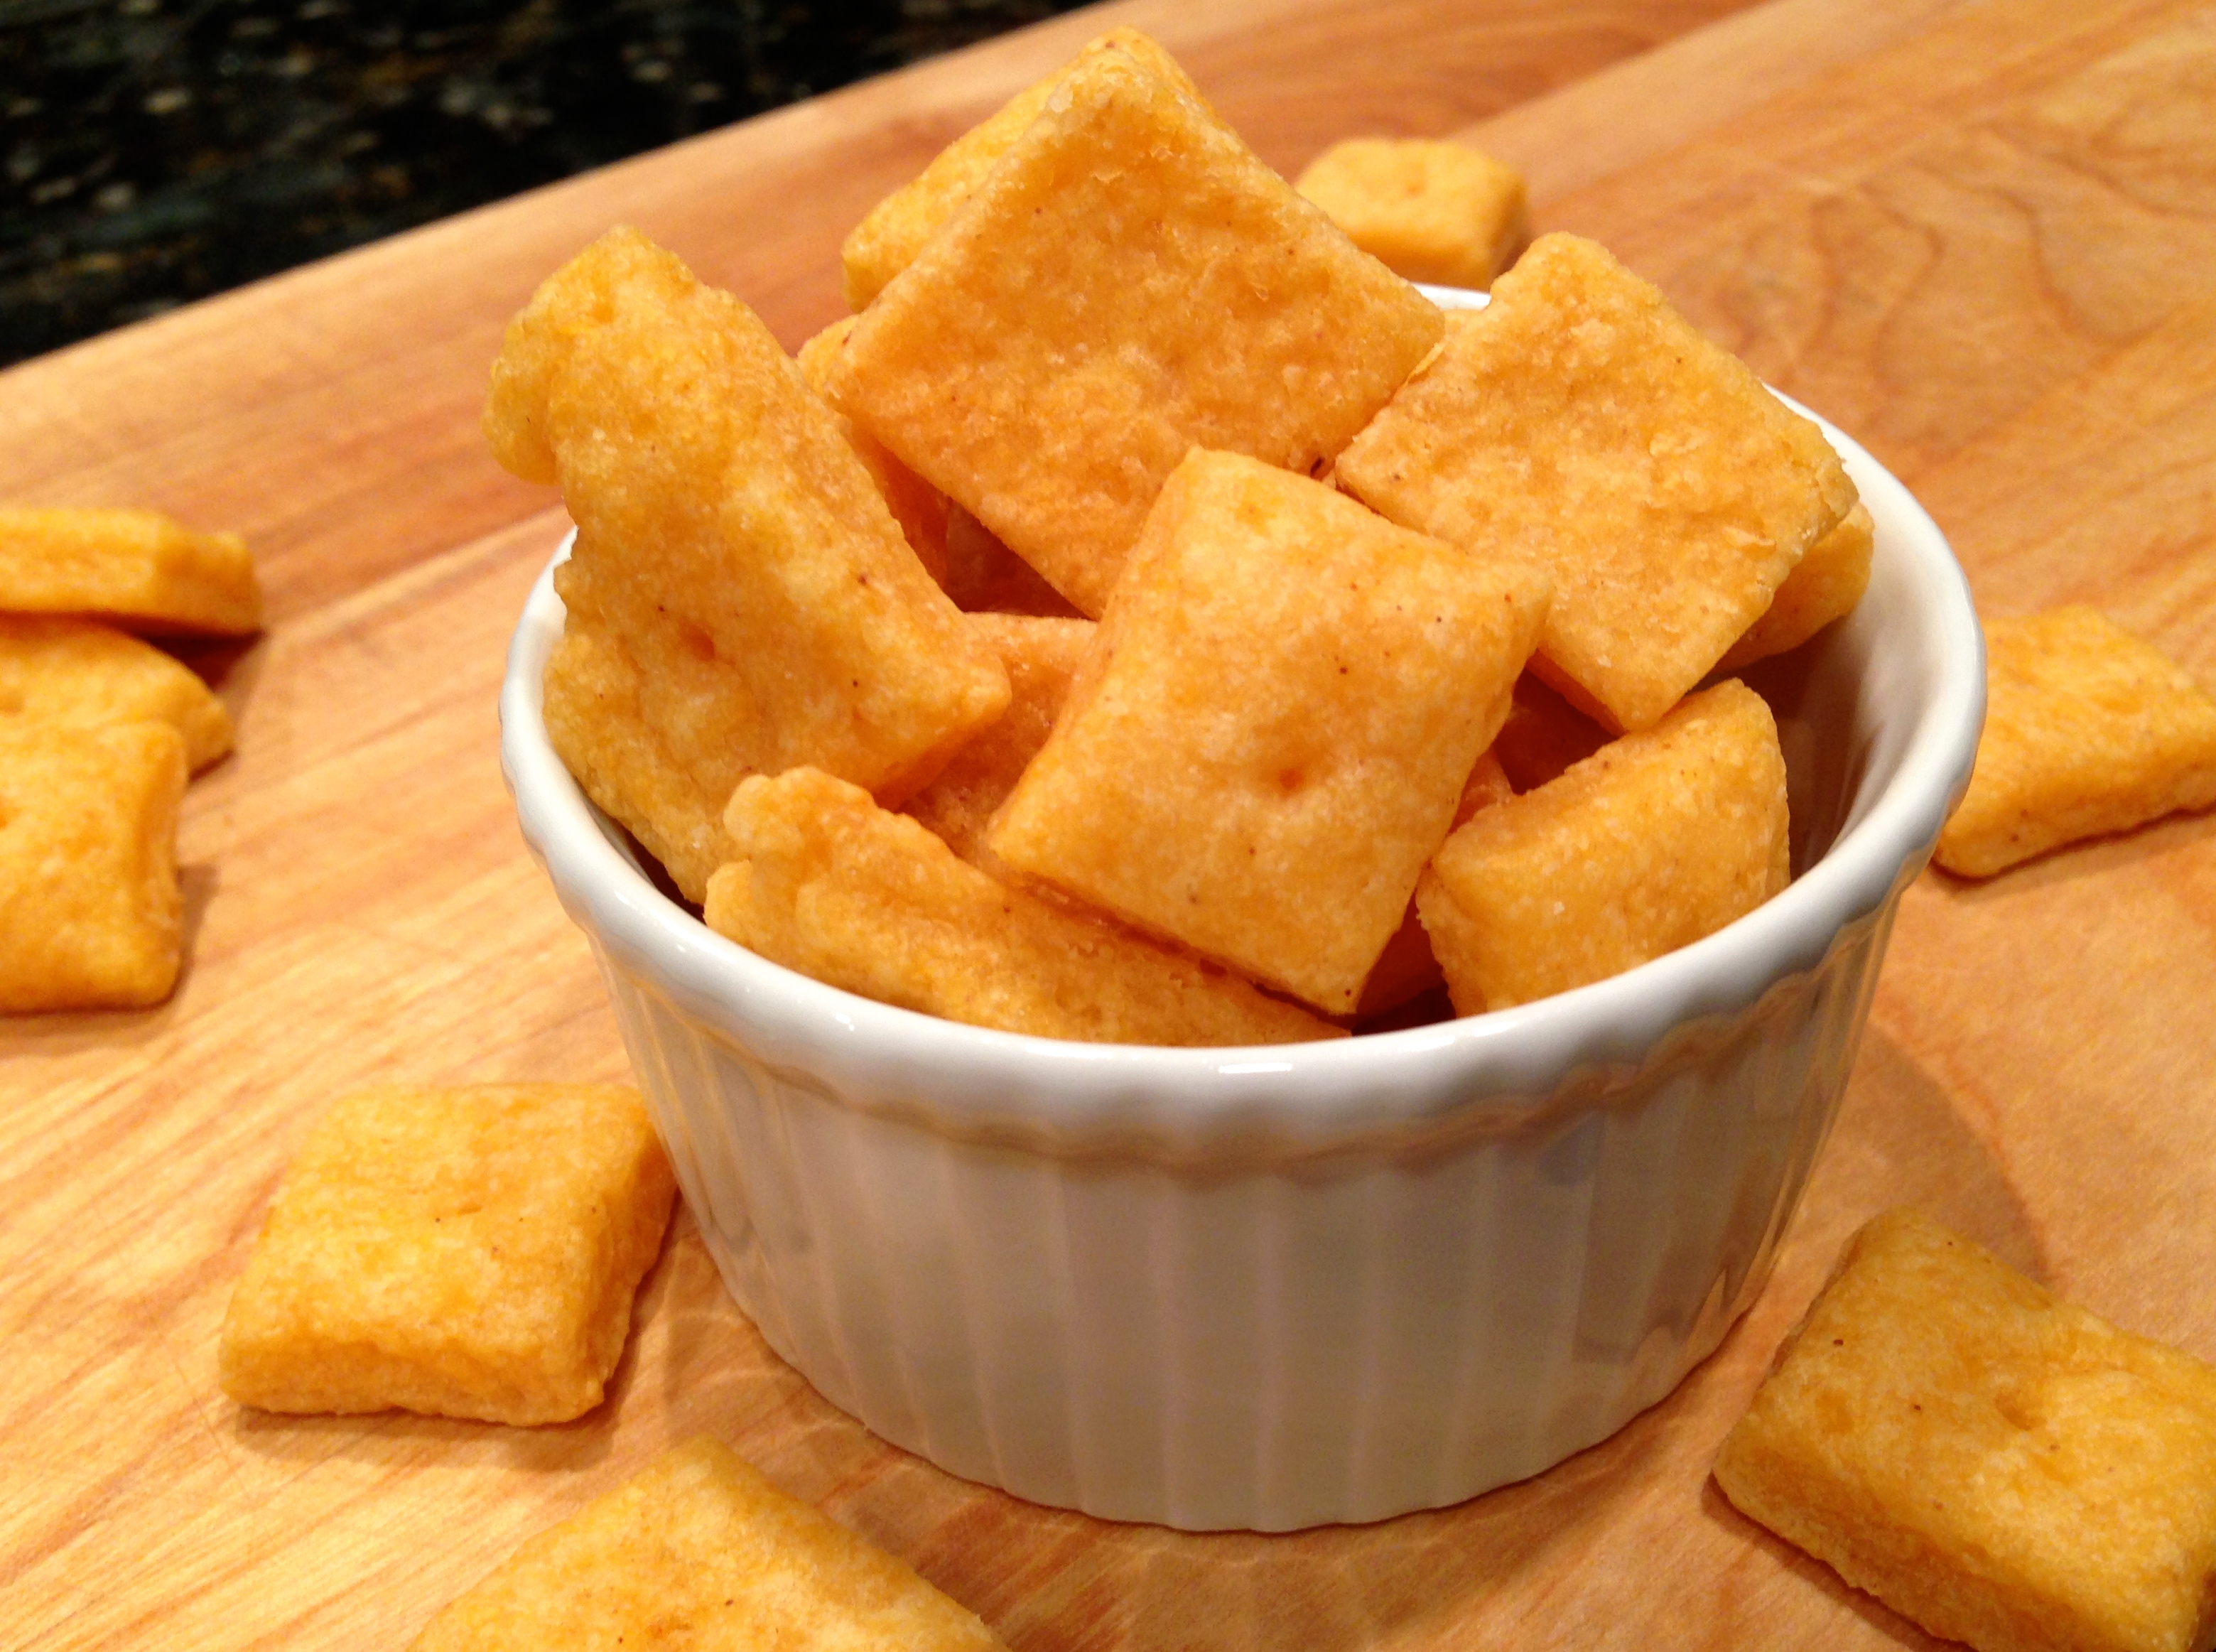
Ever thought of making homemade Cheez-It crackers before?
I hadn’t either….that is, until my mom purchased Jennifer Perillo’s cookbook called Homemade with Love.
In the cookbook, Perillo talks about how her girls loved those cheesy crackers shaped like a fish (Goldfish), but that she wasn’t crazy about the ingredients. Talk about processed food!
Thus, Perillo decided to make her own homemade Cheez-It crackers. While Perillo’s recipe looks delicious, we made significant alterations, and thus created a homemade cheese cracker recipe on her own.
As kids, my sister Brittany was the one who was obsessed with cheddar Goldfish and Cheez-Its. Come 4 pm, my sister and I would be glued in front of the television watching our favorite afternoon shows like Arthur and Zoom.
I liked Cheez-It, but not as much as Brittany did. I was more of a pretzel fan.
I will tell you, this recipe of homemade cheese crackers will blow the doors off of the Cheez-It brand. As Brittany describes, “Cheez-Its have a slightly burnt flavor”. That’s not the case with these crackers.
There’s something about the fresh, non-processed, and extra cheesy taste that Cheez-It just can’t duplicate. It’s kind of like eating homemade mac and cheese as opposed to the boxed version… homemade is ten times better!
Plus, if you can please a bunch of 5-year olds, you’ve got a winning recipe!
Mom mom teaches Sunday morning Bible class to a group of kindergarteners. For snack time, they always get a cup of regular ole Cheez-It crackers. On mom’s last Sunday of the quarter, she brought in her homemade cheese crackers and the kids loved them!! (As do I).
The crackers are pretty simple, to make, so don’t be too intimidated by the instruction…they are just very detailed.
Enjoy!!!
Homemade Cheese Crackers
Ingredients
3/4 cup all-purpose flour, plus more for sprinkling
1/2 tsp. (3 grams) salt
1/4 tsp. (1 gram) sweet paprika
1/4 tsp. (1 gram) dry mustard powder
6 ounces sharp cheddar cheese, shredded
1/4 cup very cold unsalted butter, shredded using a box grater
1 Tbsp. milk
Instructions
Preheat over to 400 degrees F. Line two 9 x 13-inch baking sheets with parchment paper.
Add the flour, salt, paprika, and mustard powder to the bowl of a food processor. Pulse once or twice until the mixture forms a sandy texture. Pour in the milk and pulse a few more times, just until a ball of dough forms.
Divide the dough into two equal pieces. Place half between two sheets of parchment paper and set the other half aside. Roll out to an 1/8-inch thickness. Lift one side of the parchment, and sprinkle it with a bit of flour. Place the parchment back on top.
Flip the dough over, still keeping it between the parchment sheets, and peel off the top layer of paper.
Use a pastry wheel or sharp pairing knife to trim the sides to form a square (save the scraps to re-roll). Cut the dough into 1-inch squares.
Transfer the cutouts to the prepared baking sheets (they can be placed pretty close to each other since they won’t spread). Use the tip of a metal skewer or toothpick to pierce a hold in the center of each cracker.
Bake 9-10 minutes until fragrant and the edges are golden. Keep a close eye on them, as they go from done to burnt pretty quickly.
Let the crackers cool on the sheet for 2 minutes, then use a small offset spatula to transfer them to a wire rack to finish cooling completely.
Store crackers in an airtight container for up to 3 days.
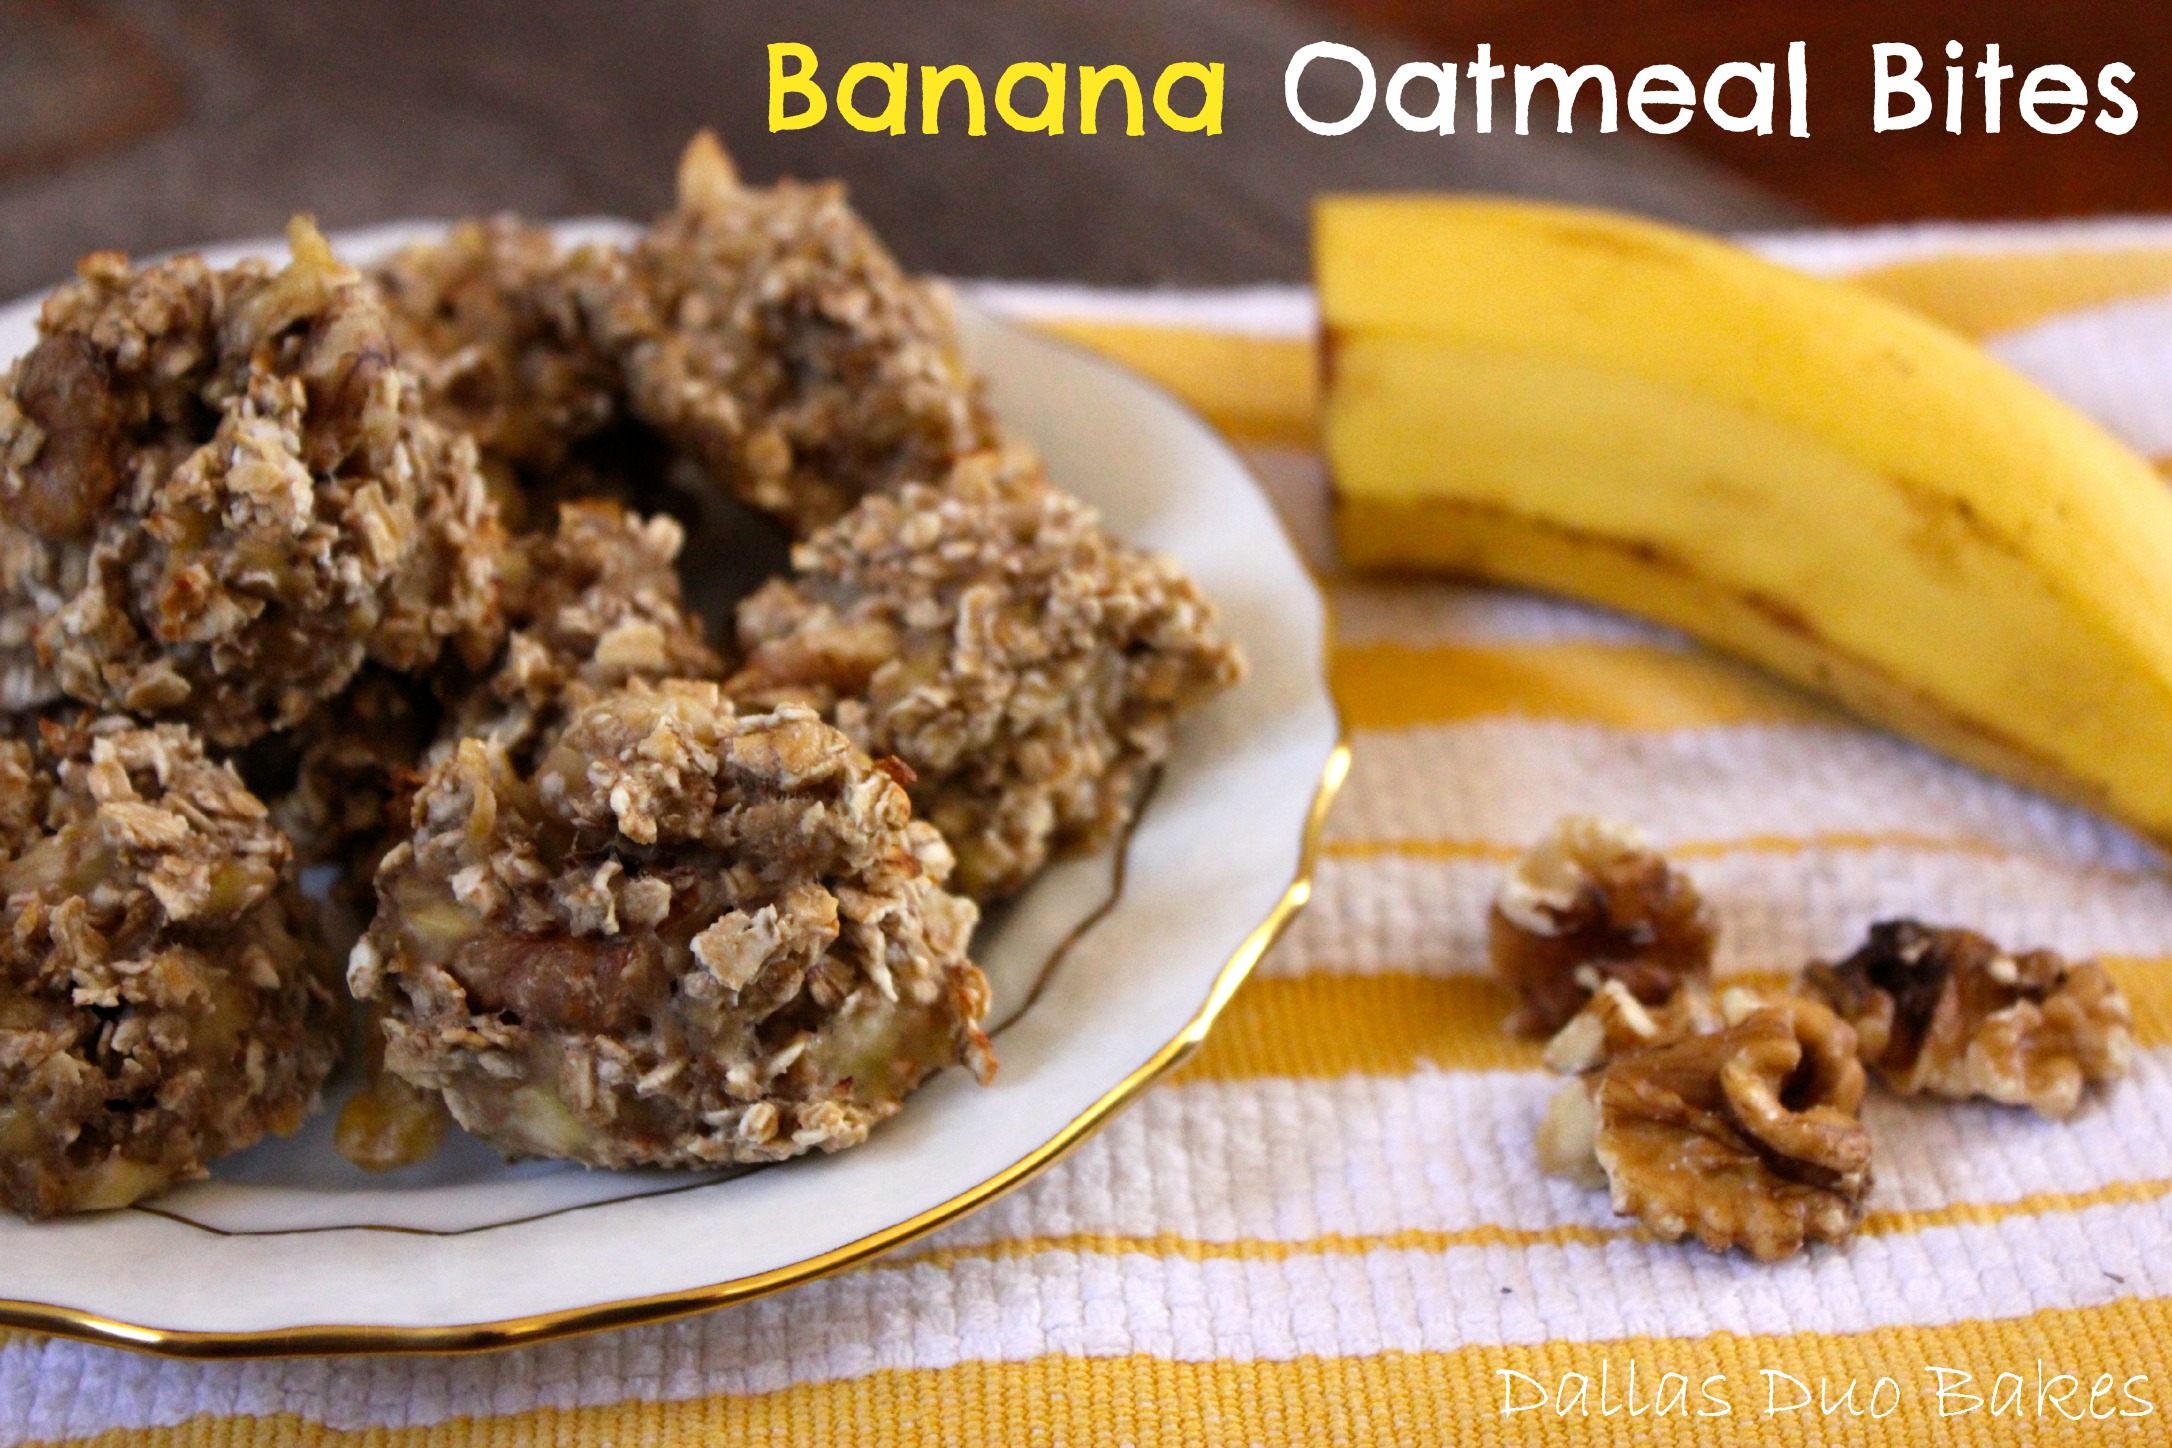
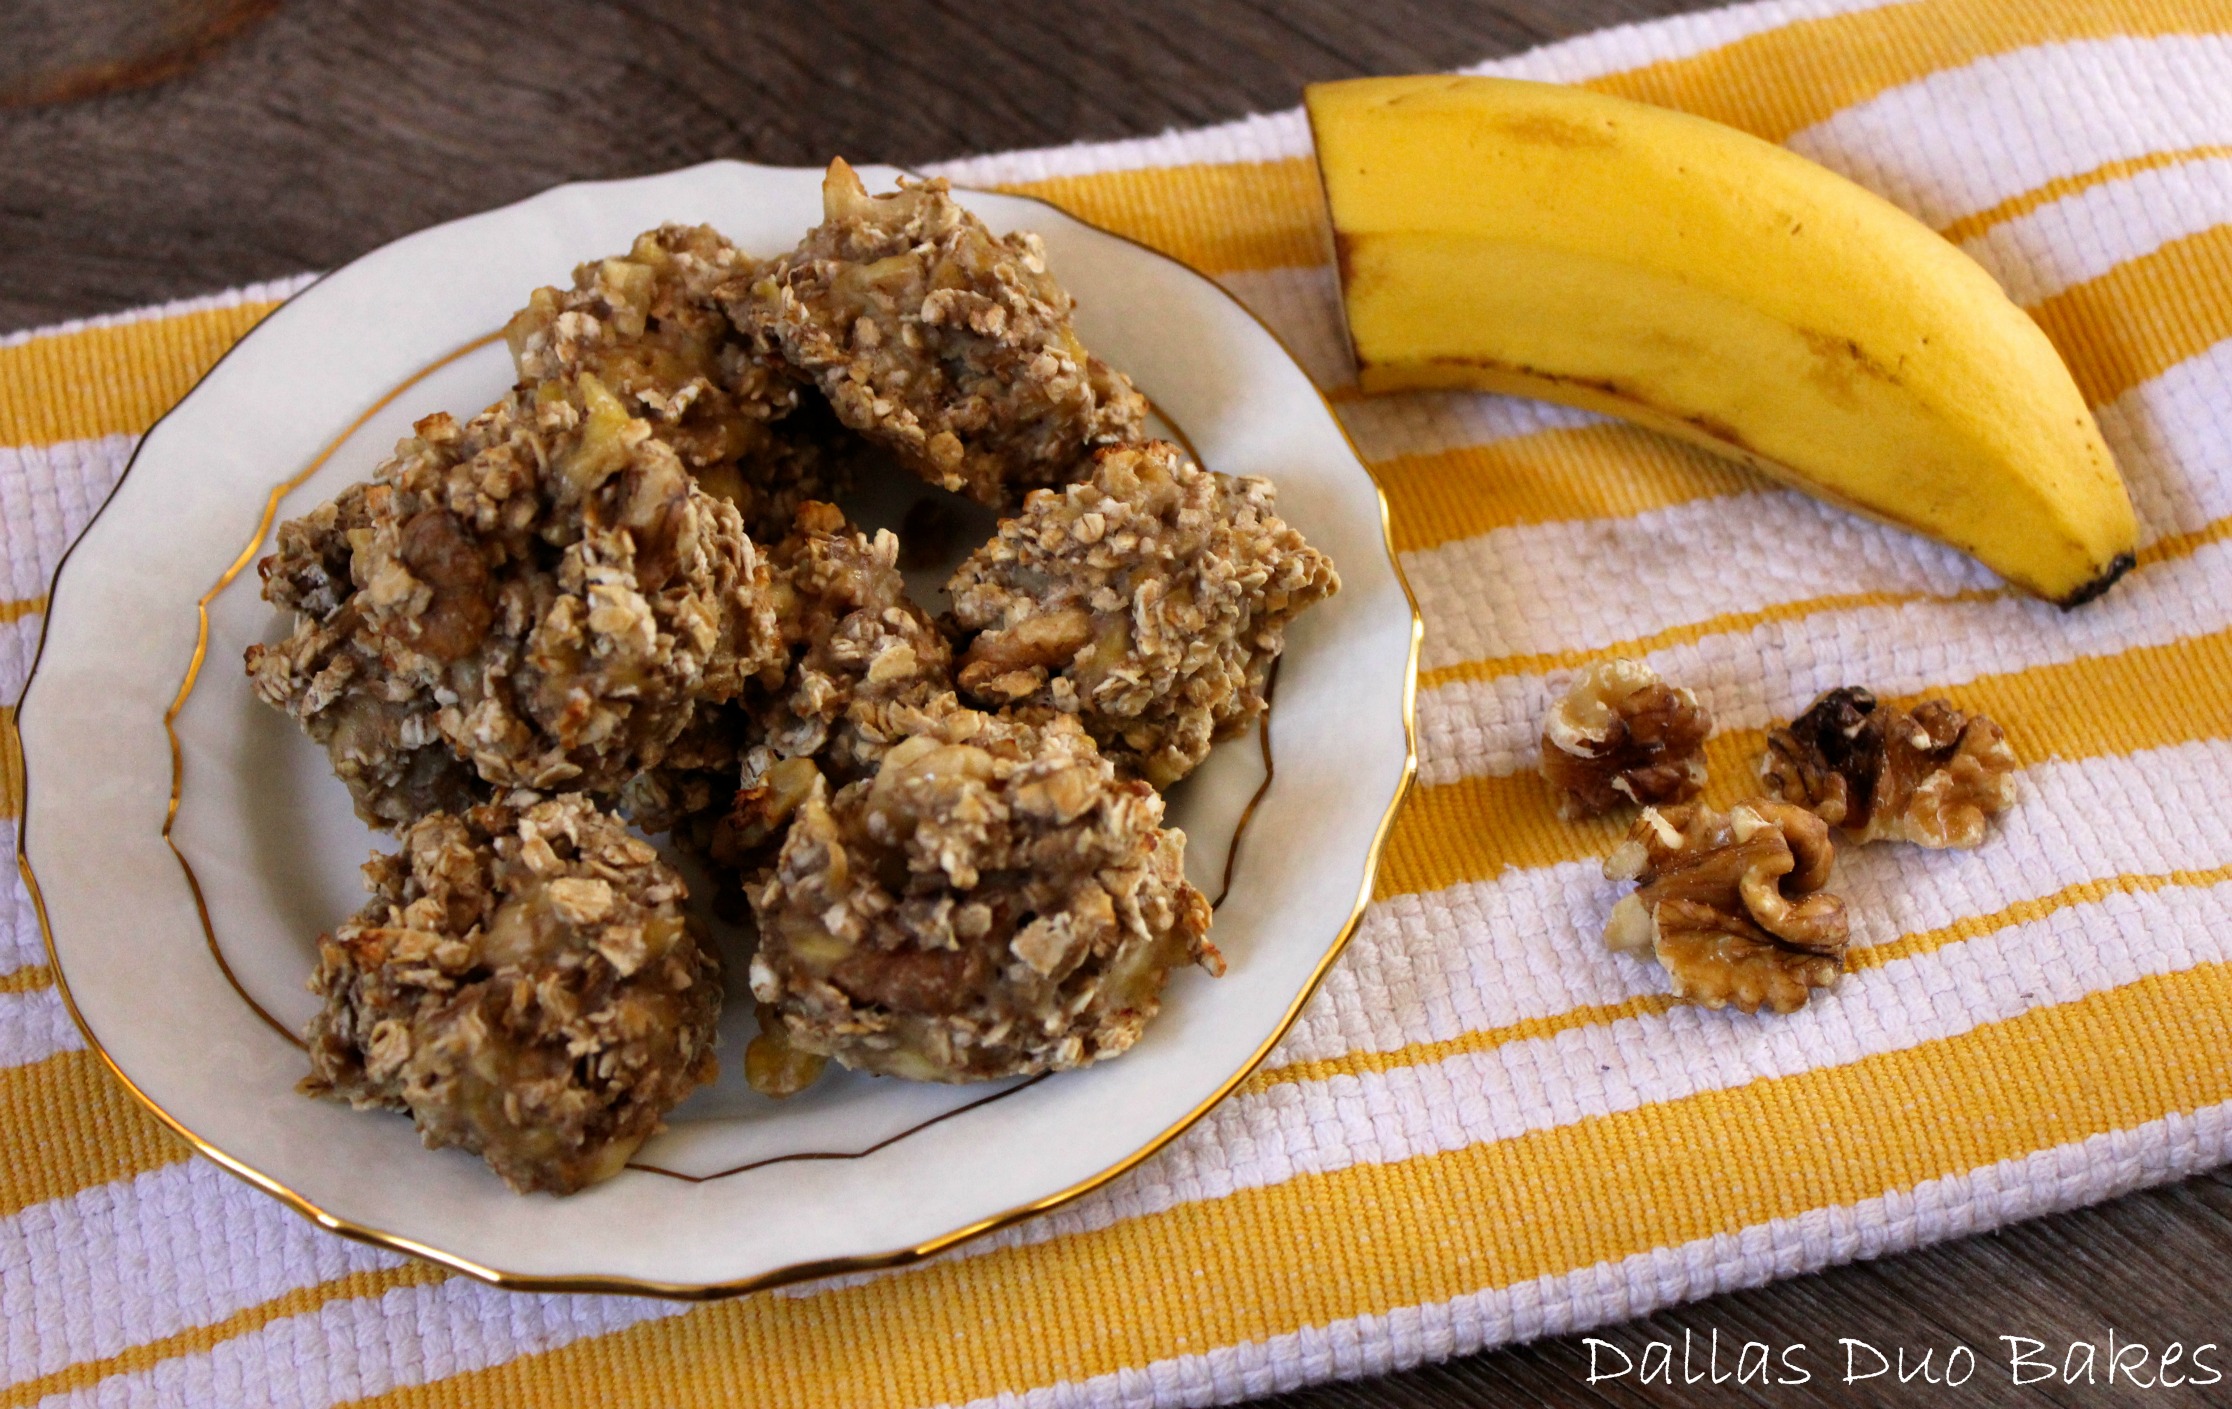
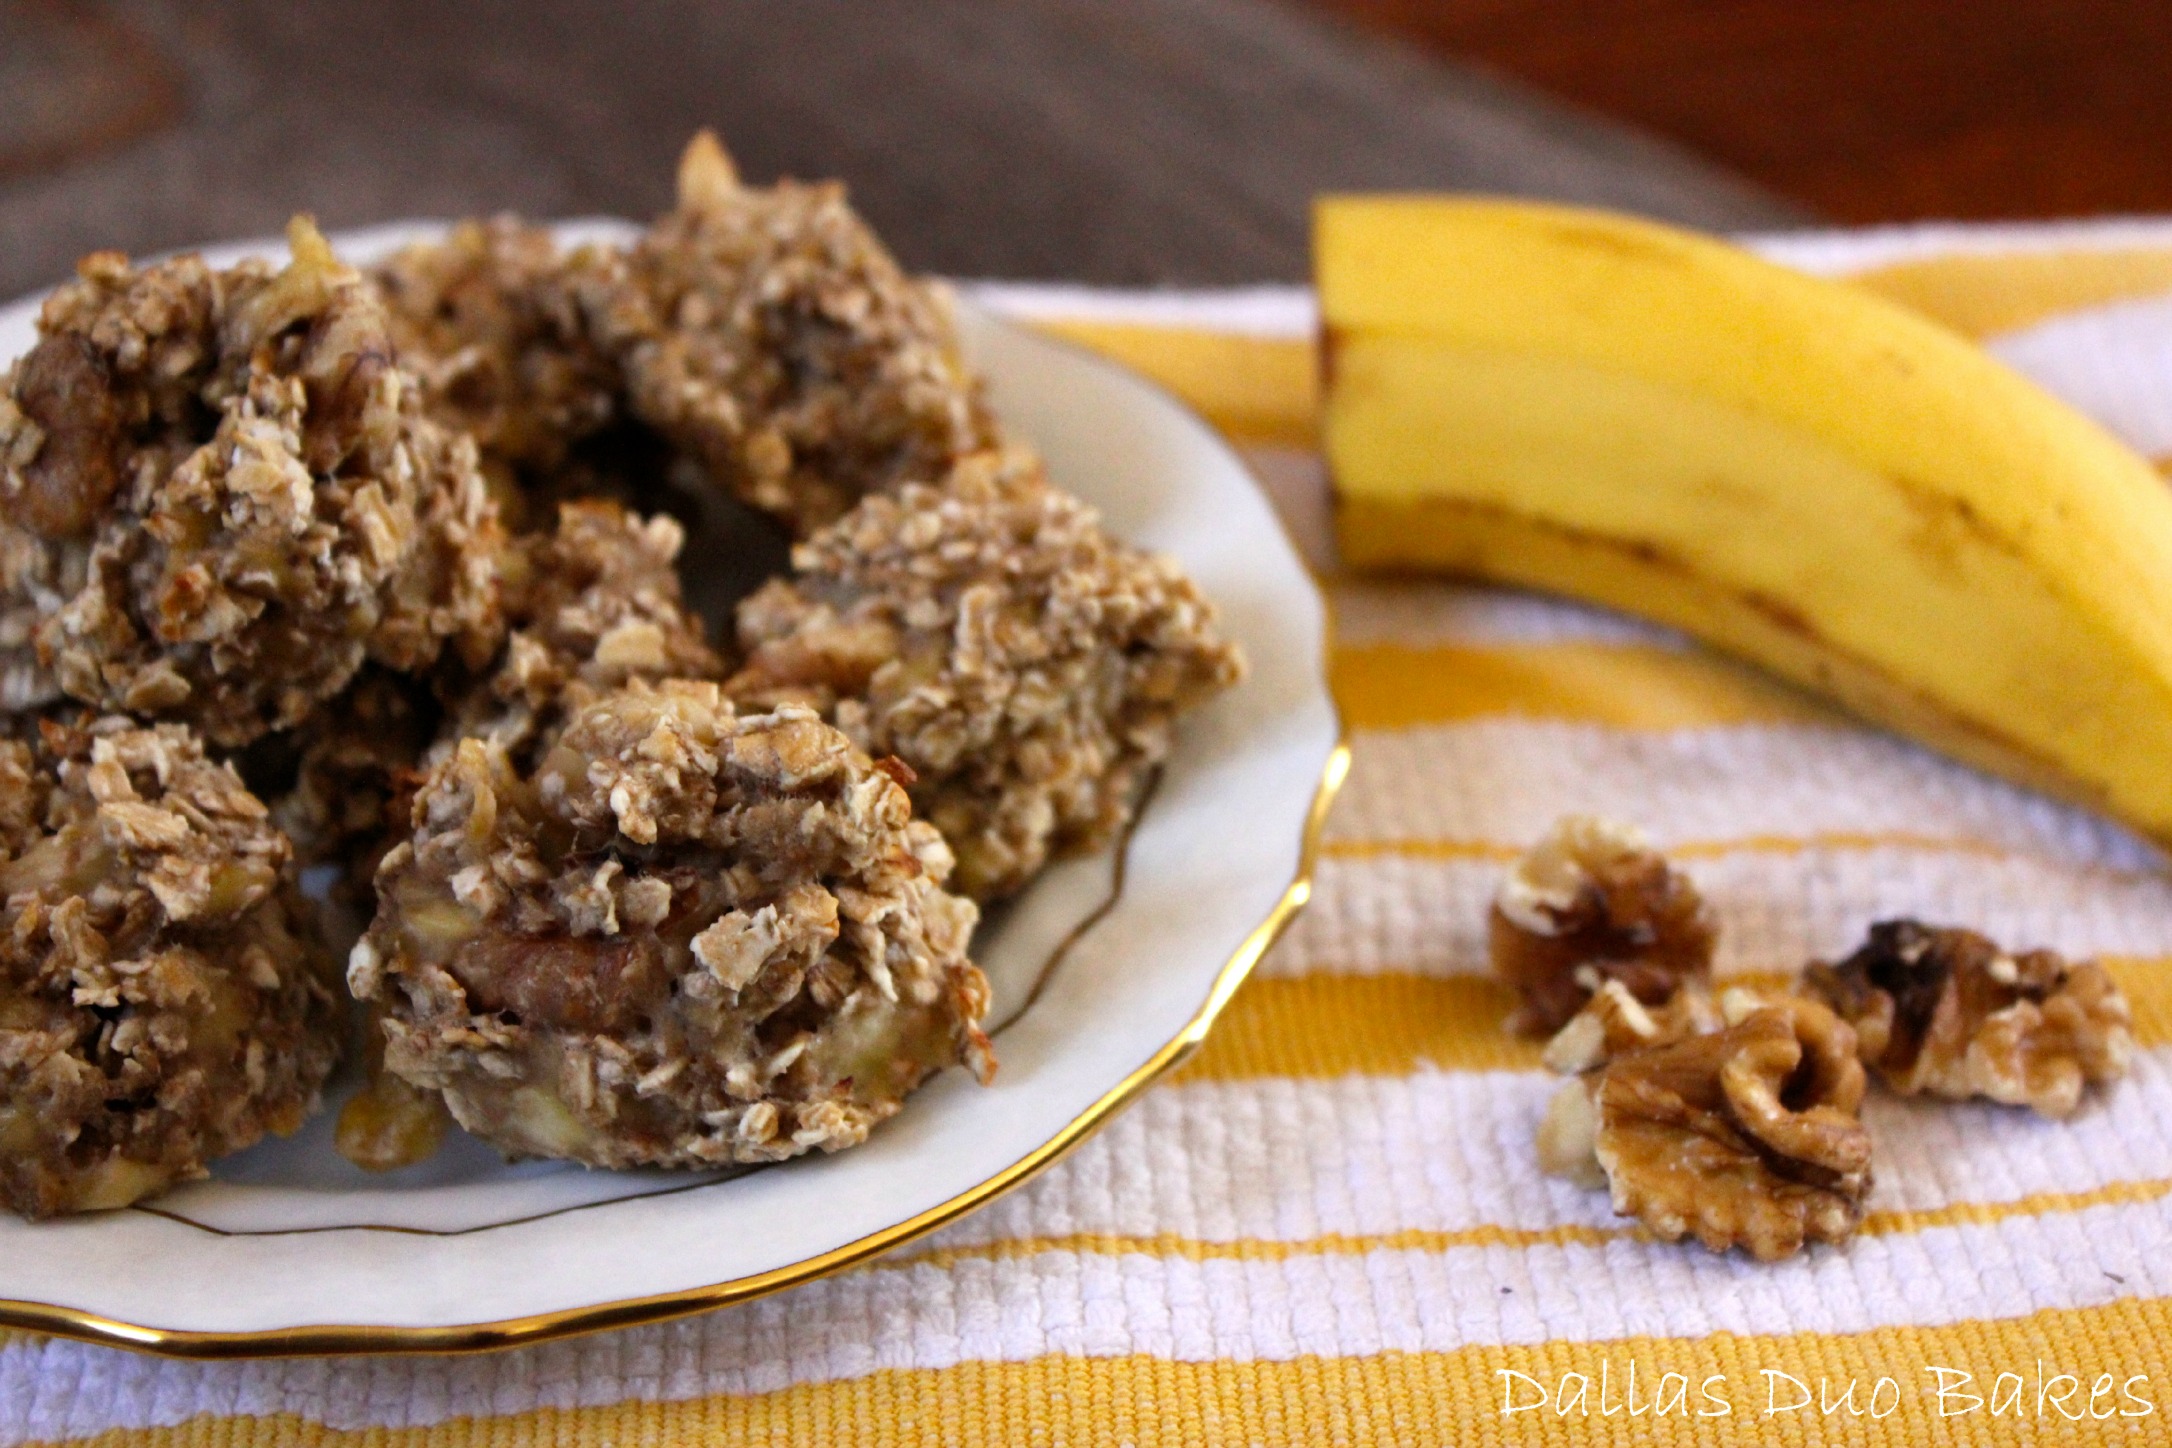
Bananas. Walnuts. Oats. Yep, that’s right; only three ingredients!
I love snack food. Probably my biggest weakness is snacking, almost to the point of ruining my dinner. You don’t have to feel bad about snacking on these banana oatmeal bites, though… they are super healthy.
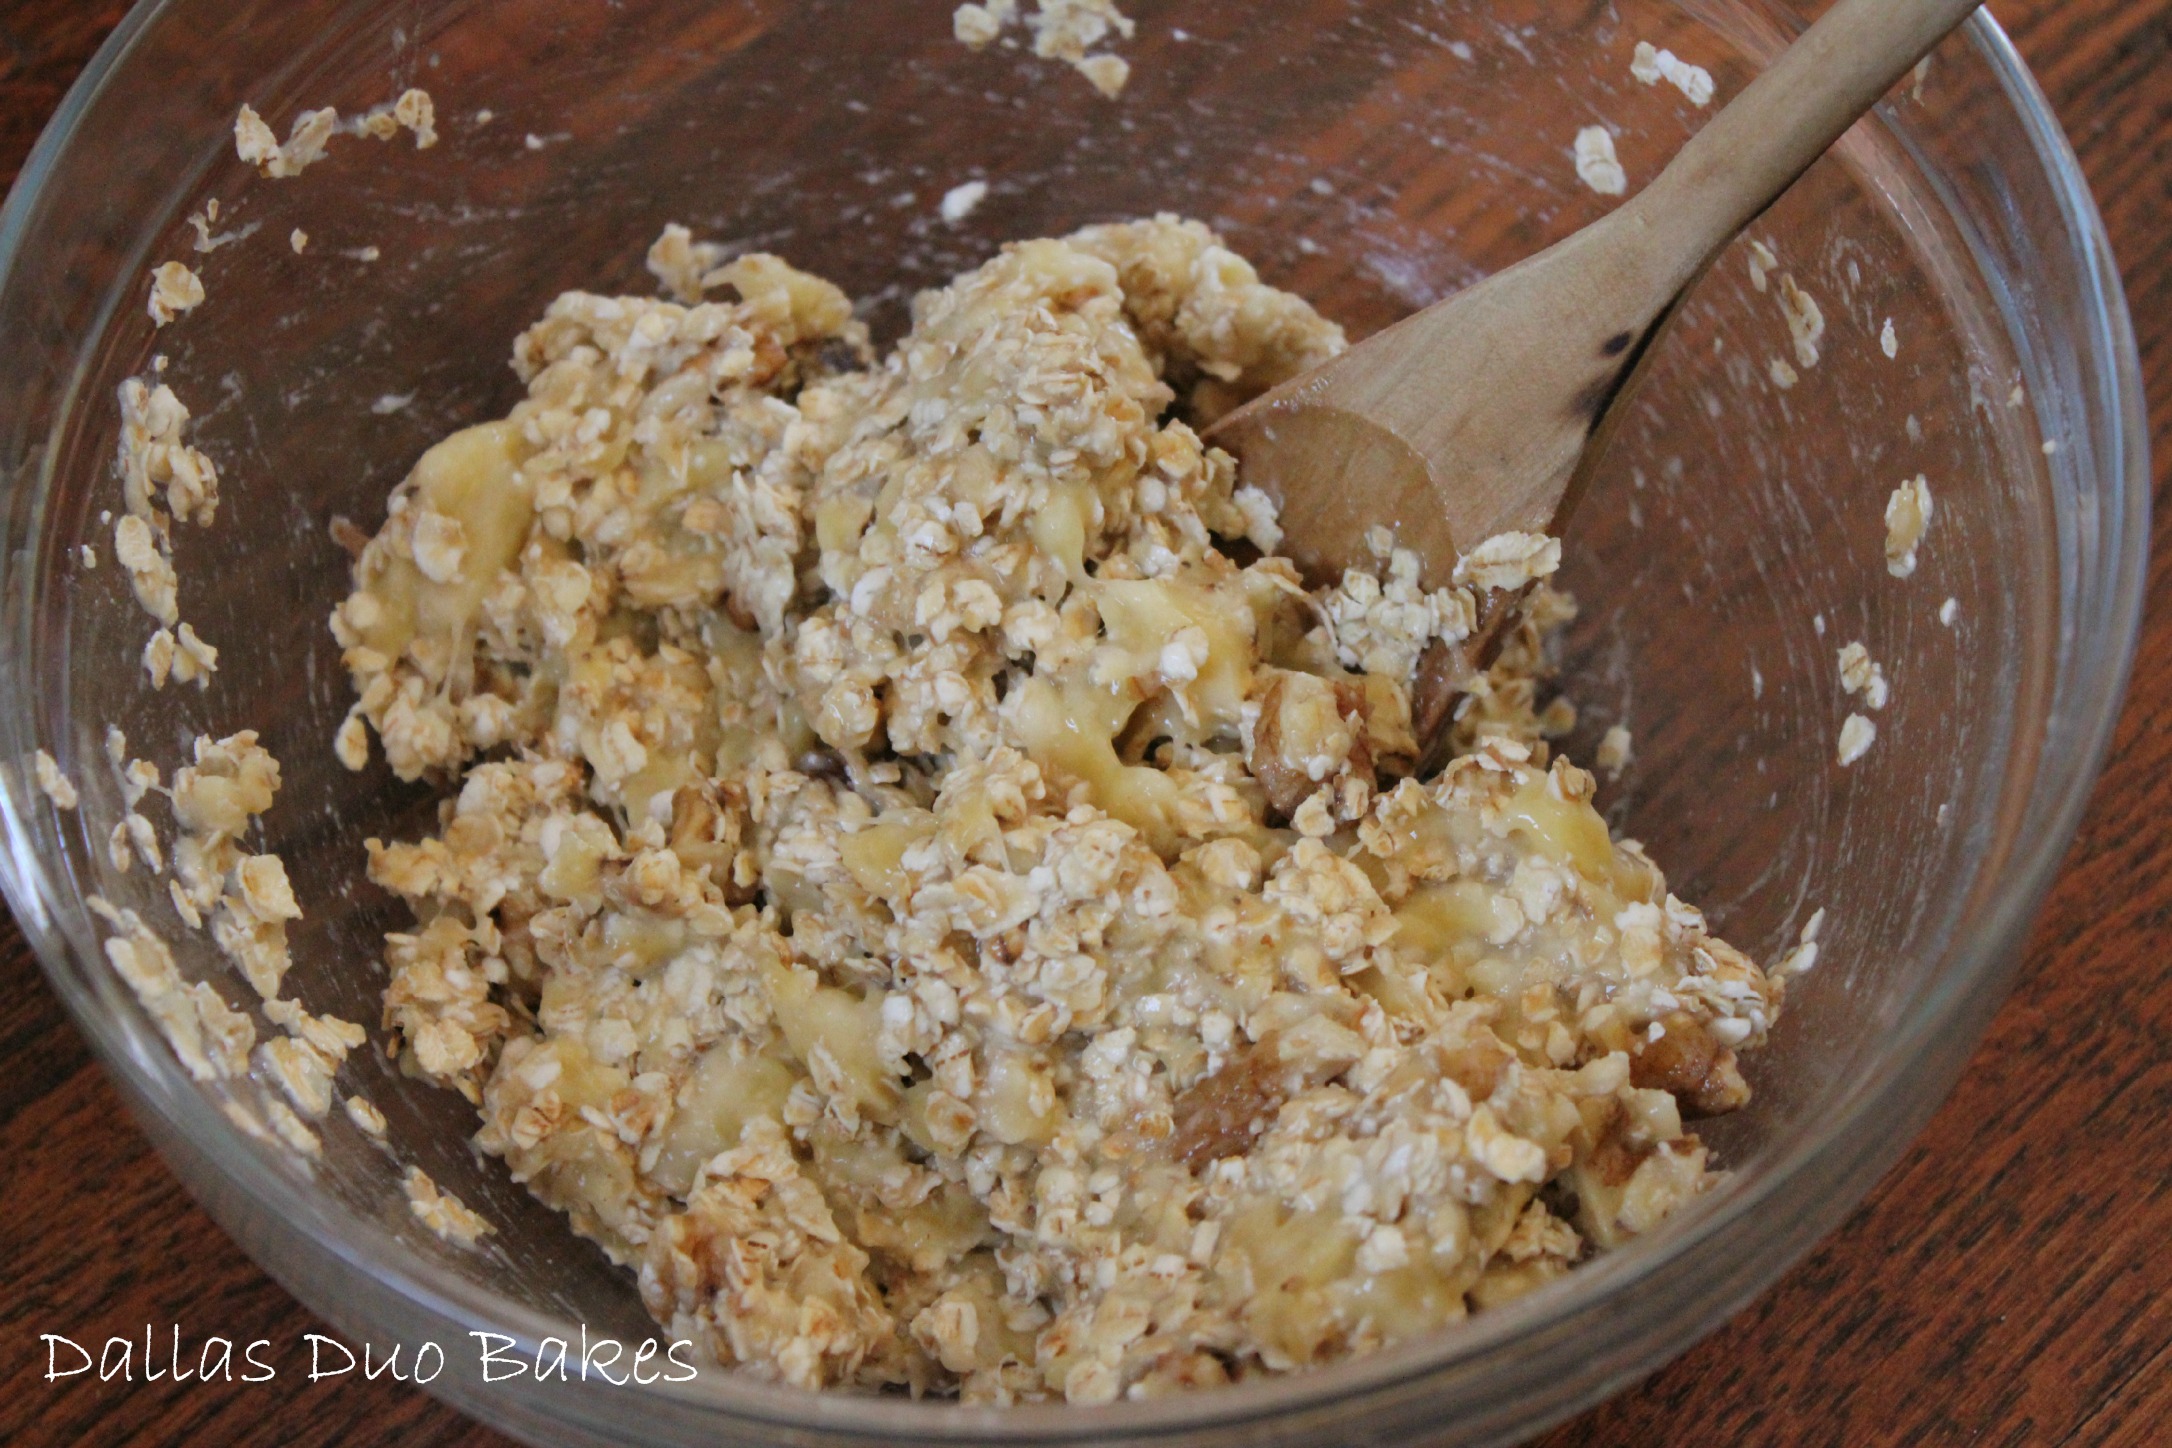
Whipping up a batch of these healthy snack bites is quick and easy too. One bowl, one spoon, and one baking sheet is all you need.
Potassium from the bananas, healthy whole grains from the oats, protein and healthy fat from the nuts. What else could you ask for in a healthy snack bite!
Roll them into balls and place on a cookie sheet. The only hard part is waiting 10-15 minutes for them to bake. I’m getting hungry already!
Combination between a cookie, snack bite and banana bread. Soft, chewy, perfection! Thanks to Gina @ Skinnytaste for this recipe. I am seriously going to make these again.
Did I mention drizzling these with a touch of honey? Sooo good. Enjoy!
Banana Oatmeal Bites
INGREDIENTS 2 medium ripe bananas, mashed
1 cup uncooked quick oats
1/4 cup crushed walnuts or pecans
DIRECTIONS
1. Preheat oven to 350 degrees F. (I used a convection oven and thus set the temperature to 325 degrees F). Spray a non-stick cookie sheet with cooking spray or use a Silpat.
2. Combine the mashed bananas and oats in a bowl. Fold in the walnuts and place a tablespoons of each on the cookie sheet.
3. Bake for 12-15 minutes. (I baked the cookies for 10 minutes in the convection oven).