Lisa’s Oatmeal Bars

IMG_2999

As mentioned, I write a Resident Recipe column for our monthly neighborhood magazine. This month’s article features Lisa, a personal trainer who made these wonderful oatmeal bars – a healthy version of chocolate chip oatmeal cookies. An excerpt from the article is below:

As a personal trainer and class instructor at the Frisco Athletic Center, Lisa understands the importance of eating healthy.

While living in Fort Lauderdale and working for a cooking show at the time, Lisa was determined to find a healthier alternative to chocolate chip oatmeal cookies that her kids could enjoy. After experimenting on her own, she perfected this recipe for oatmeal bars. Unlike a traditional cookie, these bars contain neither butter not eggs. Instead, they are loaded with whole grain oats and skim milk. Lisa’s cookie alternative is a tasty and good-for-you recipe that you don’t have to feel guilty about eating.

Fortunately for my husband and me, we were able to try some of Lisa’s oatmeal bars and absolutely LOVED them! Lisa used to sell her bars when she lived in Florida and I can see why people would buy them … they are delicious! Enjoy.

IMG_2998

IMG_2996

Lisa’s Oatmeal Bars
Serves: 20-24 bars
Ingredients
  • 4 cups old-fashioned oats
  • 2 cups packed light brown sugar
  • 1 1/4 cups flour
  • 1 tsp. baking soda
  • 3/4 tsp. salt
  • 1/2 cup chocolate chips
  • 1/2 cup skim milk
  • 3/4 cup canola oil
  • 1 tsp. vanilla
  • 1 1/2 tsp. lemon juice
Instructions
  1. Preheat the oven to 350 degrees F.
  2. Mix dry ingredients together. Add liquid to dry ingredients with wooden spoon.
  3. Spread mixture into a 9×13-inch greased baking pan. Bake for about 24 minutes.
Notes
*Substitutions for chocolate chips: Golden raisins Dried cranberries and white chocolate chips Butterscotch chips

Chocolate Melting Cakes: West Texas Edition

I hope everyone had a wonderful Christmas. Matt and I missed out on a white Christmas here in Dallas, but had a great time visiting our aunt, uncle and cousins in Midland.
My aunt Renee is an awesome cook. If you don’t believe me, just take a look at these chocolate melting cakes. The cakes are super easy to prepare and a great recipe if you want to make these the day before your guests arrive. We doubled this recipe and had more than enough to serve the 10 of us for our day after Christmas dinner.
I don’t think I have to convince you that these chocolate melting cakes make for a gorgeous presentation…. they are a crowd pleaser for sure. Enjoy and Happy New Years Eve!!
Chop chocolate into small pieces.
Heat cream until bubbles appear around the edge. Add chocolate. Let stand several minutes.
Stir until chocolate has melted.
Beat the egg yolks, sugar and vanilla until slightly thickened and pale yellow.
Melt buter and remaining chocolate. Add to egg yolk mixture.
Fold in almonds and egg whites.
Spoon half the batter in prepared muffin cups. Place a frozen ganache cube in center of each.
Top with remaining chocolate batter. Freeze until solid, at least 1 hour.
Bake for 20-25 minutes in a 375 degree F oven (decrease baking time if using standard 12-cup muffin pan).
Dust with confectioners’ sugar.
Garnish with berries and Reddi-wip.
Cut into the cake and watch as the chocolate melts out!
Chocolate Melting Cakes
Ingredients
14 ounces bittersweet chocolate, divided into 2 ounces and 12 ounces
6 Tbsp. heavy cream
6 Tbsp. unsalted butter
5 large eggs, separated
10 Tbsp. sugar, divided into 6 tablespoons and 4 tablespoons
1/2 tsp. vanilla extract
3/4 cup ground almonds
Confectioners’ sugar for dusting
Strawberries or raspberries for garnish
Directions
1. Chop 2 ounces chocolate into small pieces. Heat cream in a small saucepan until bubbles appear around the edge. Drop chocolate pieces into cream, let stand several minutes, and stir until smooth. Pour ganache into squares of a plastic ice cube tray. Free until solid.
2. Grease an extra large, 6-cup muffin pan (we used a standard 12-cup  muffin pan). Melt butter and remaining chocolate in double boiler. Stir until smooth, and let cool slightly. In a medium bowl, combine egg yolks, 6 tablespoons sugar, and vanilla. Beat with an electric mixer until slightly thickened and pale yellow (5 to 8 minutes).
3. Add chocolate-butter mixture and combine. Fold in almonds. In a separate bowl, beat remaining sugar with egg whites until stiff; fold into the egg yolk-chocolate mixture. Spoon 3 tablespoons (1 1/2 Tbsp. if using a standard muffin pan) of batter into each cup of the muffin pan. Place a frozen ganache cube in the center of each. Spoon remaining batter over tops, making sure ganache cubes remain centered and are completely covered. Freeze until solid, at least 1 hour.
4. When ready to bake, preheat oven to 375 degrees F. Bake for 20 to 25 minutes (decrease the baking time if using a 12-cup muffin pan). Let cool 5 to 10 minutes. Carefully invert the muffin pan over a clean towel and remove cakes with a spatula.
5. To serve, dust with confectioners’ sugar. Garnish with berries.
*Note: If frozen ganache cubes are difficult to remove from the ice cube tray, dip the bottom of the tray in hot water.
Yield: 6 extra-large cakes or 12 standard-sized cakes

Chocolate York Peppermint Pattie Cookies

My Dad is a HUGE York Peppermint Pattie fan. When he fills his car up with gas, he’ll run into the gas station to buy a peppermint patty. It’s also a tradition for him to buy a York Peppermint Pattie at the grocery store when he’s checking out at the register.  If you sit in his car, you may even see a few leftover wrappers. 🙂
So, when I saw that Two Peas and Their Pod had a recipe for chocolate cookies stuffed with peppermint patties, I couldn’t wait to try them! Lucky for me, it’s been a lovely, lazy Sunday afternoon with Matt on the couch watching football and me in the kitchen cooking. I’m already preparing for our Christmas Eve dinner so I don’t have to do everything tomorrow… much less stressful!
At tomorrow’s dinner in addition to these yummy, creamy peppermint patty-filled cookies, we’ll be having ham, garlic mashed potatoes, green beans, citrus salad with orange vinaigrette, parker house rolls, strawberry Santas, crock pot mac and cheese, chocolate icebox pie, AND beans and cornbread – Matt’s favorite and a Douglas family favorite. Guess I better get back in the kitchen because my list is pretty long!
Enjoy the chocolate York peppermint patty cookies, the holiday season, and spending time with your family! 
Cream butter and sugars. Add eggs and vanilla.
Whisk together flour, baking soda, salt and cocoa. 
Gradually add flour mixture and beat until flour disappears.
Unwrap York Peppermint Patties.
Flatten cookie dough and place a peppermint patty in the center.
Wrap excess dough around the patty.
Bake for 8-10 minutes in a 350 degree F oven.
Cool completely. 
Dust with powdered sugar.

Chocolate York Peppermint Patty Cookies
Ingredients
2 1/2 cups all-purpose Gold Medal flour
1 tsp. baking soda
1/4 tsp. salt
3/4 cup Dutch processed cocoa
1 cup unsalted butter, at room temperature
1 cup granulated sugar
1 cup light brown sugar
2 large eggs
1 tsp. vanilla extract
30 peppermint patties
Powdered sugar, for decorating the cookies

Directions
1. Preheat oven to 350 degrees F. Line baking sheet with parchment paper or Silpat baking mat. Set aside.
2. In a medium bowl, whisk together flour, baking soda, salt and cocoa. Set aside.
3. With a mixer, cream butter and sugars together until smooth. Add in eggs, one at at time. Next, add in vanilla and mix until combined.
4. Gradually add flour mixture and beat until flour disappears. Take a golf ball sized ball of dough, roll into a ball, and flattened it into a disc. Place a peppermint patty in the center and wrap the excess dough up and around the patty (you may want to grease your hands). Make sure the entire patty is covered. Repeat with remaining dough and place on prepared baking sheet, about 2 inches apart.
5. Bake cookies for 8-10 minutes, or until cookies are set, but still soft in the center. Remove from oven and let sit on baking sheet for 3 minutes. Move to a cooking rack and cool completely.  Dust the cookies with powdered sugar.

Yield: 30 cookies
Recipe from: Two Peas and Their Pod

Tiffany Blue Chocolate Cupcakes

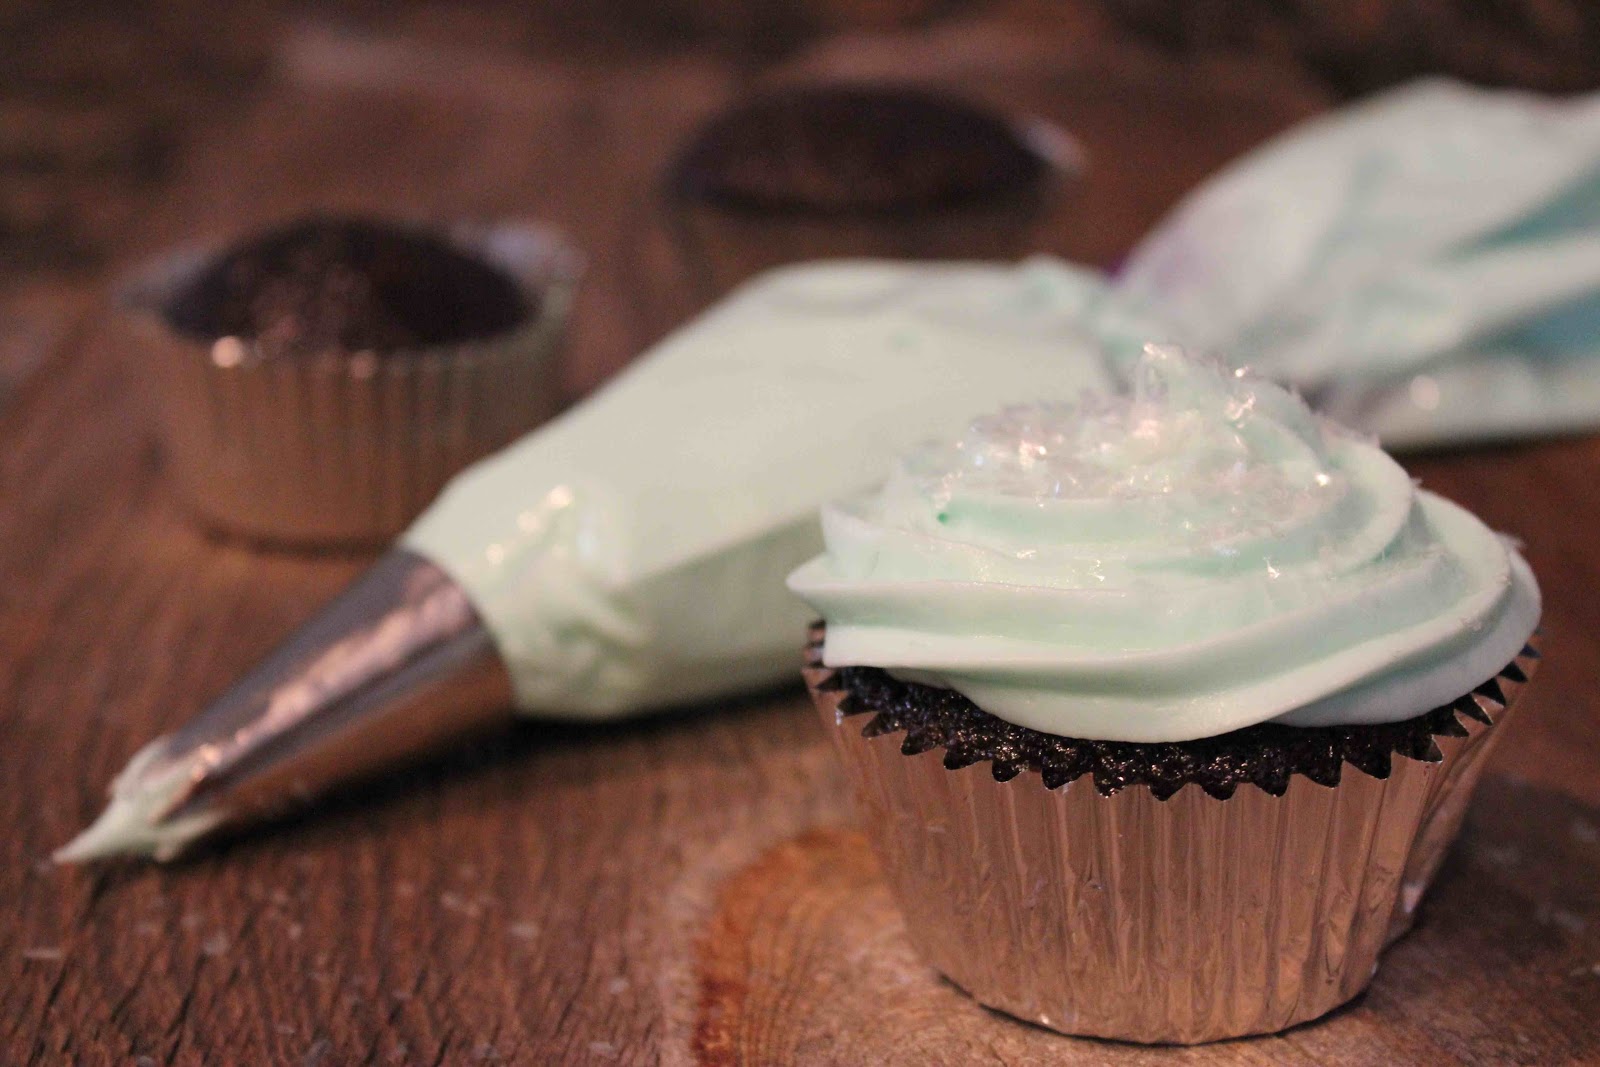
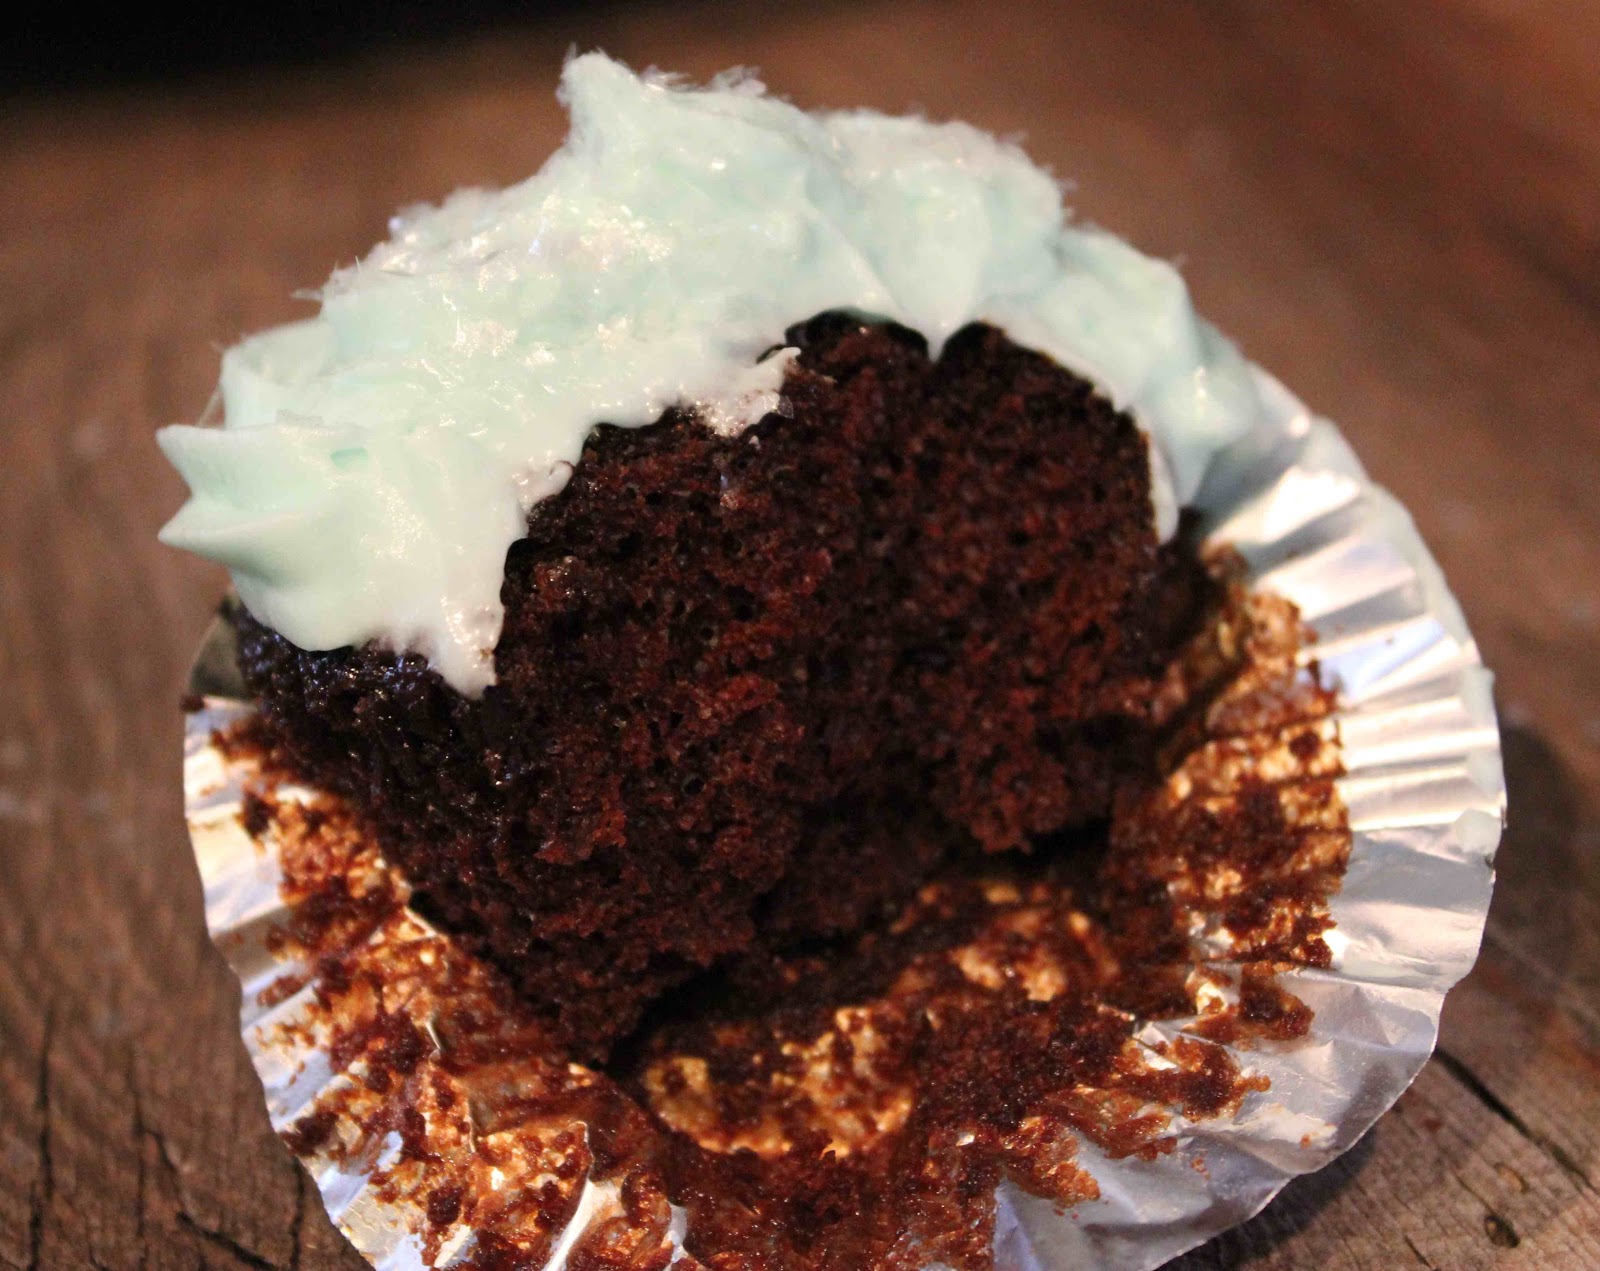
With the name “Tiffany Blue Cupcakes” you would think I was making these for an engagement shower. Instead it was a lovely baby boy shower for my friend Courtney. I was hoping the blue food coloring would yield a pretty sky blue, but instead I got Tiffany blue… nonetheless they were gorgeous!
The story behind these cupcakes is actually quite funny. In preparation for Saturday’s baby shower, I made the cake part of the cupcakes on Friday night. Check… one less thing to do on Saturday morning. The morning of the shower I thought I would make the frosting, bring it with me to the shower, and ice the cupcakes before all the guests arrived.
Anticipating that I was running late, I gathered the cupcakes, my Wilton decorating kit, my purse and a whisk and rushed out the door. What was missing on that list?  The frosting!!!
By the time I realized I left the frosting in my refrigerator, Matt had just arrived home after lifting weights, hungry and ready to eat his Jersey Mike’s sub. Lucky for me, he was home…but to his frustration, I requested that he meet me halfway to my friend’s house with the frosting I left behind.
I won’t go into details, but Matt was pretty mad…. he was hungry and just wanted to eat his sandwich and watch football. My favorite excuse of his: “Just let the guests eat the cupcakes without icing.” Really? Cupcakes without frosting…. that would not cut it. Matt then suggested that I go to Wal-Mart and buy some $.99 icing from a can. Again, not going to cut it when I went through all the trouble to make the frosting this morning. Plus frosting from a can is terrible and I have to keep my reputation!
Long story short, Matt met me with the icing, I frosted the cupcakes and everyone loved them! Matt later sent me a text saying he was sorry for complaining and also wrote “those cupcakes are the best cupcakes I have ever had!”
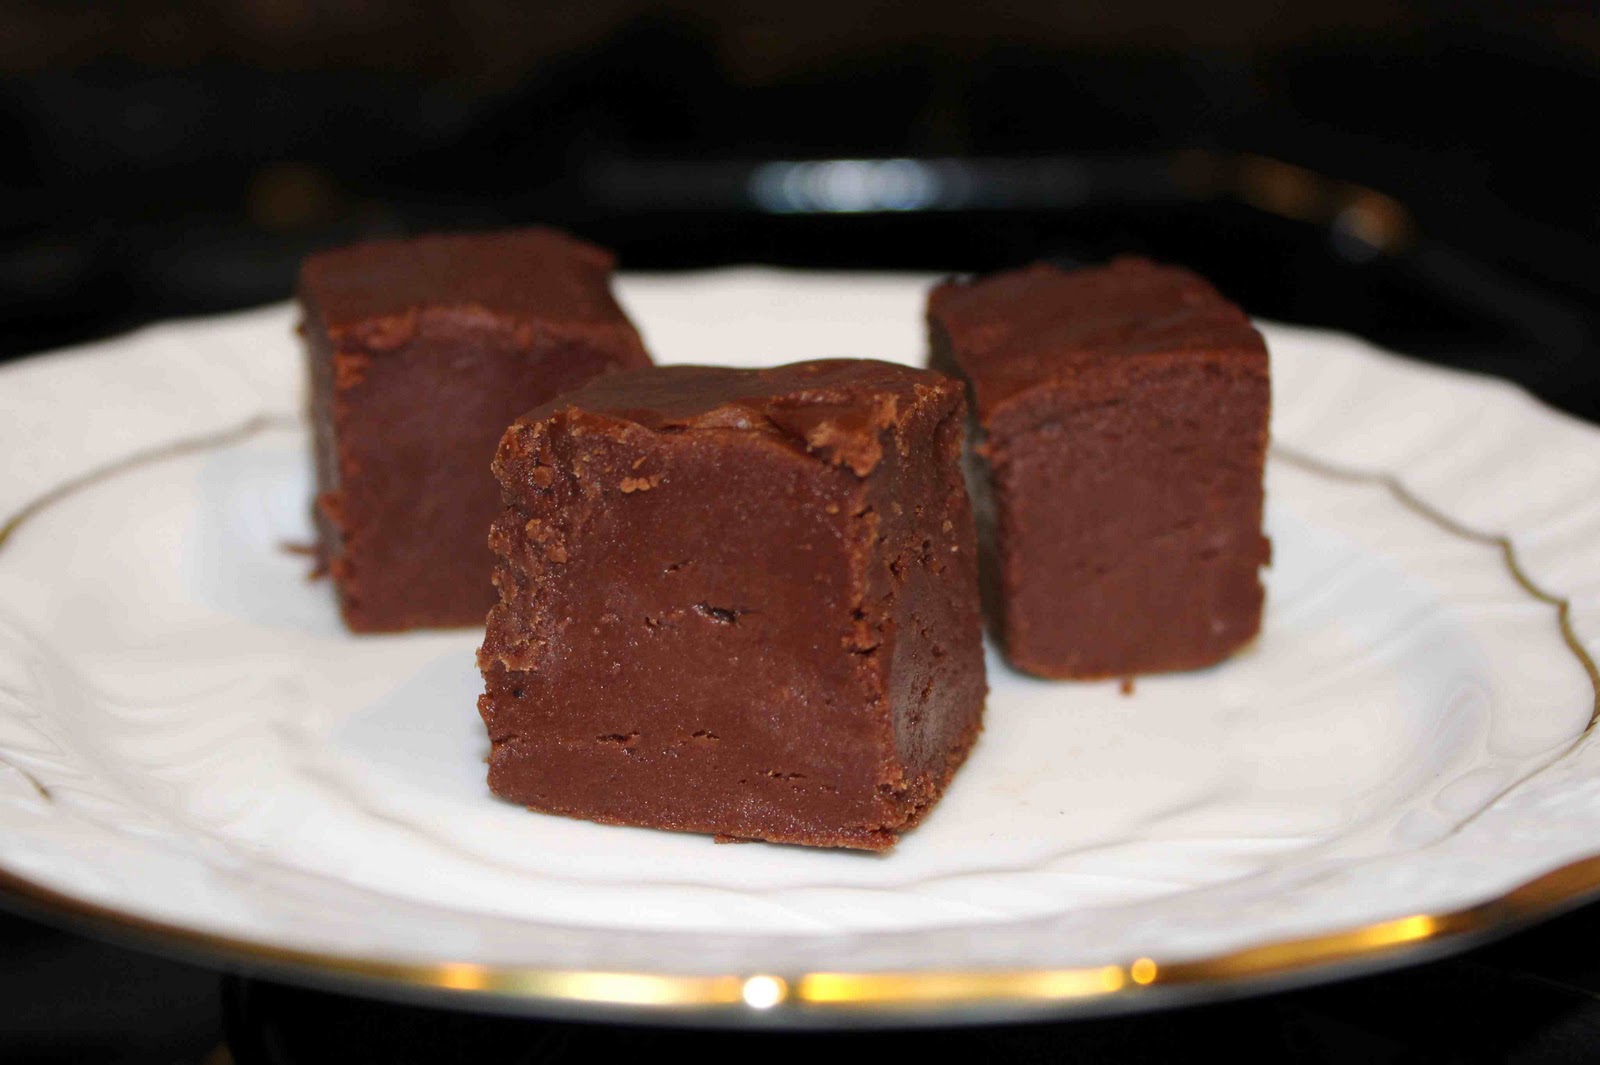
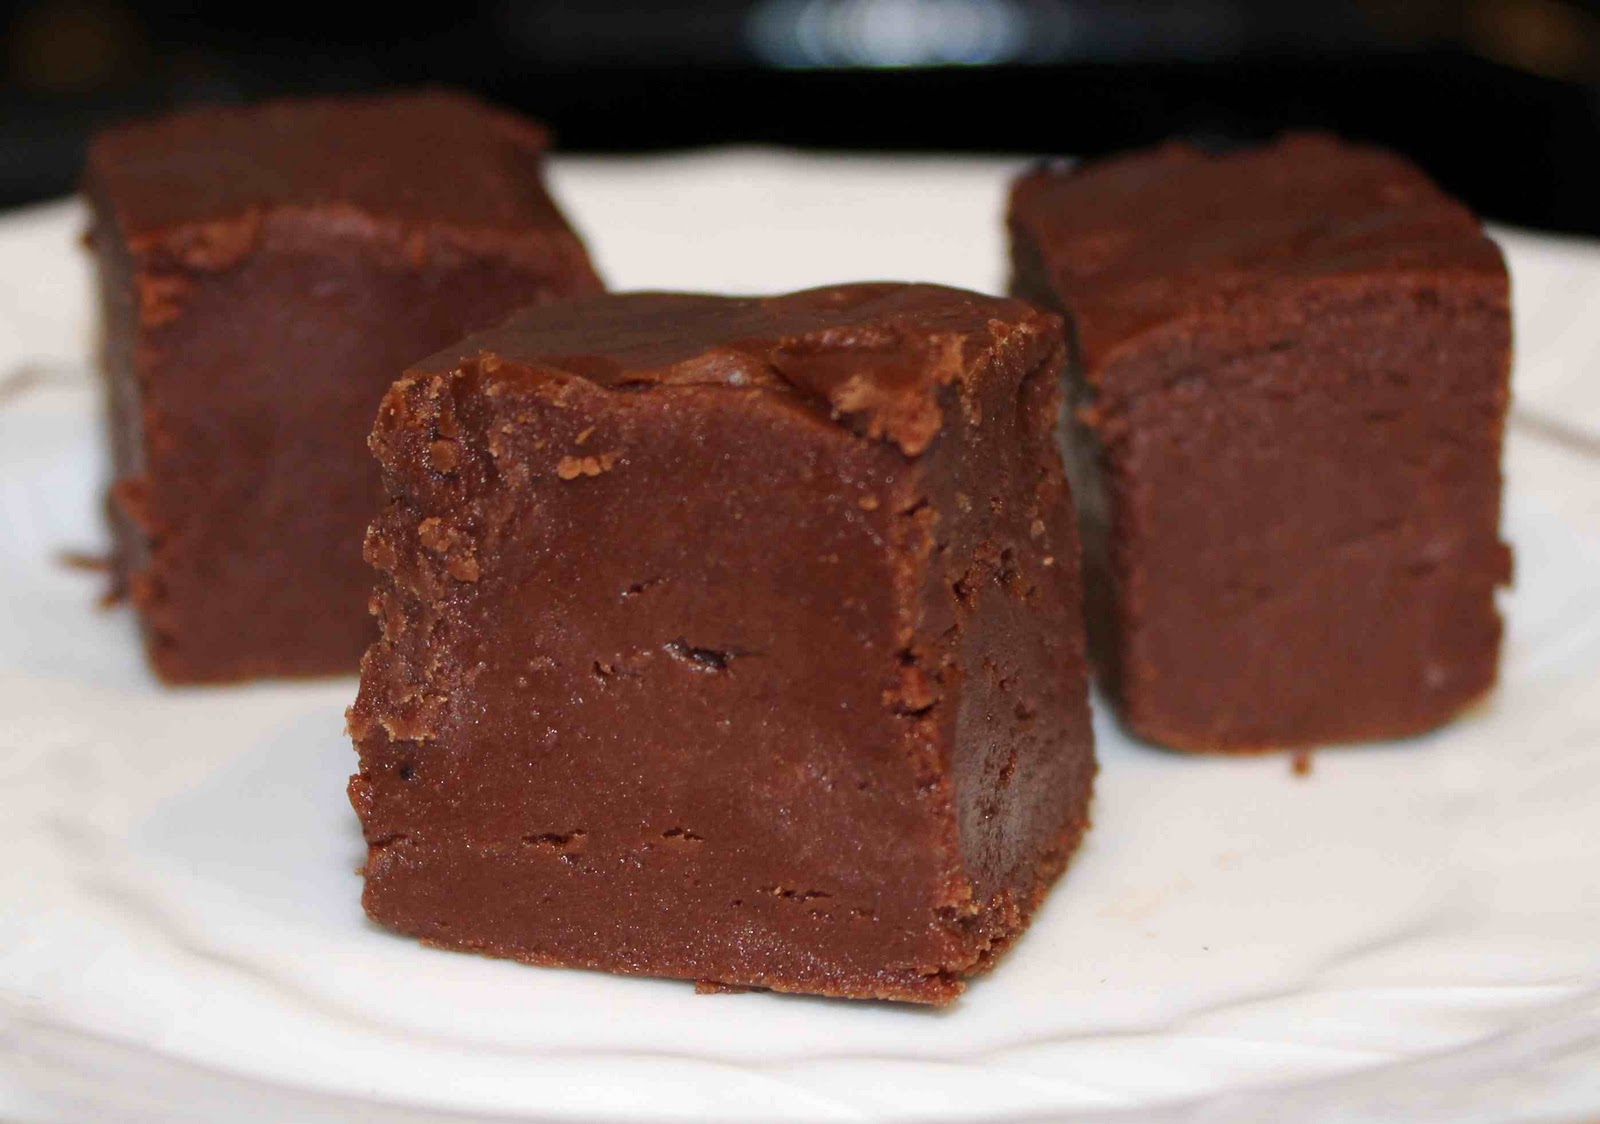
Guests at the party raved over the icing and how moist the cupcakes were. Even those that don’t like chocolate cupcakes LOVED these, including me! Here’s a great recipe that I’ll be sure to make again and again…
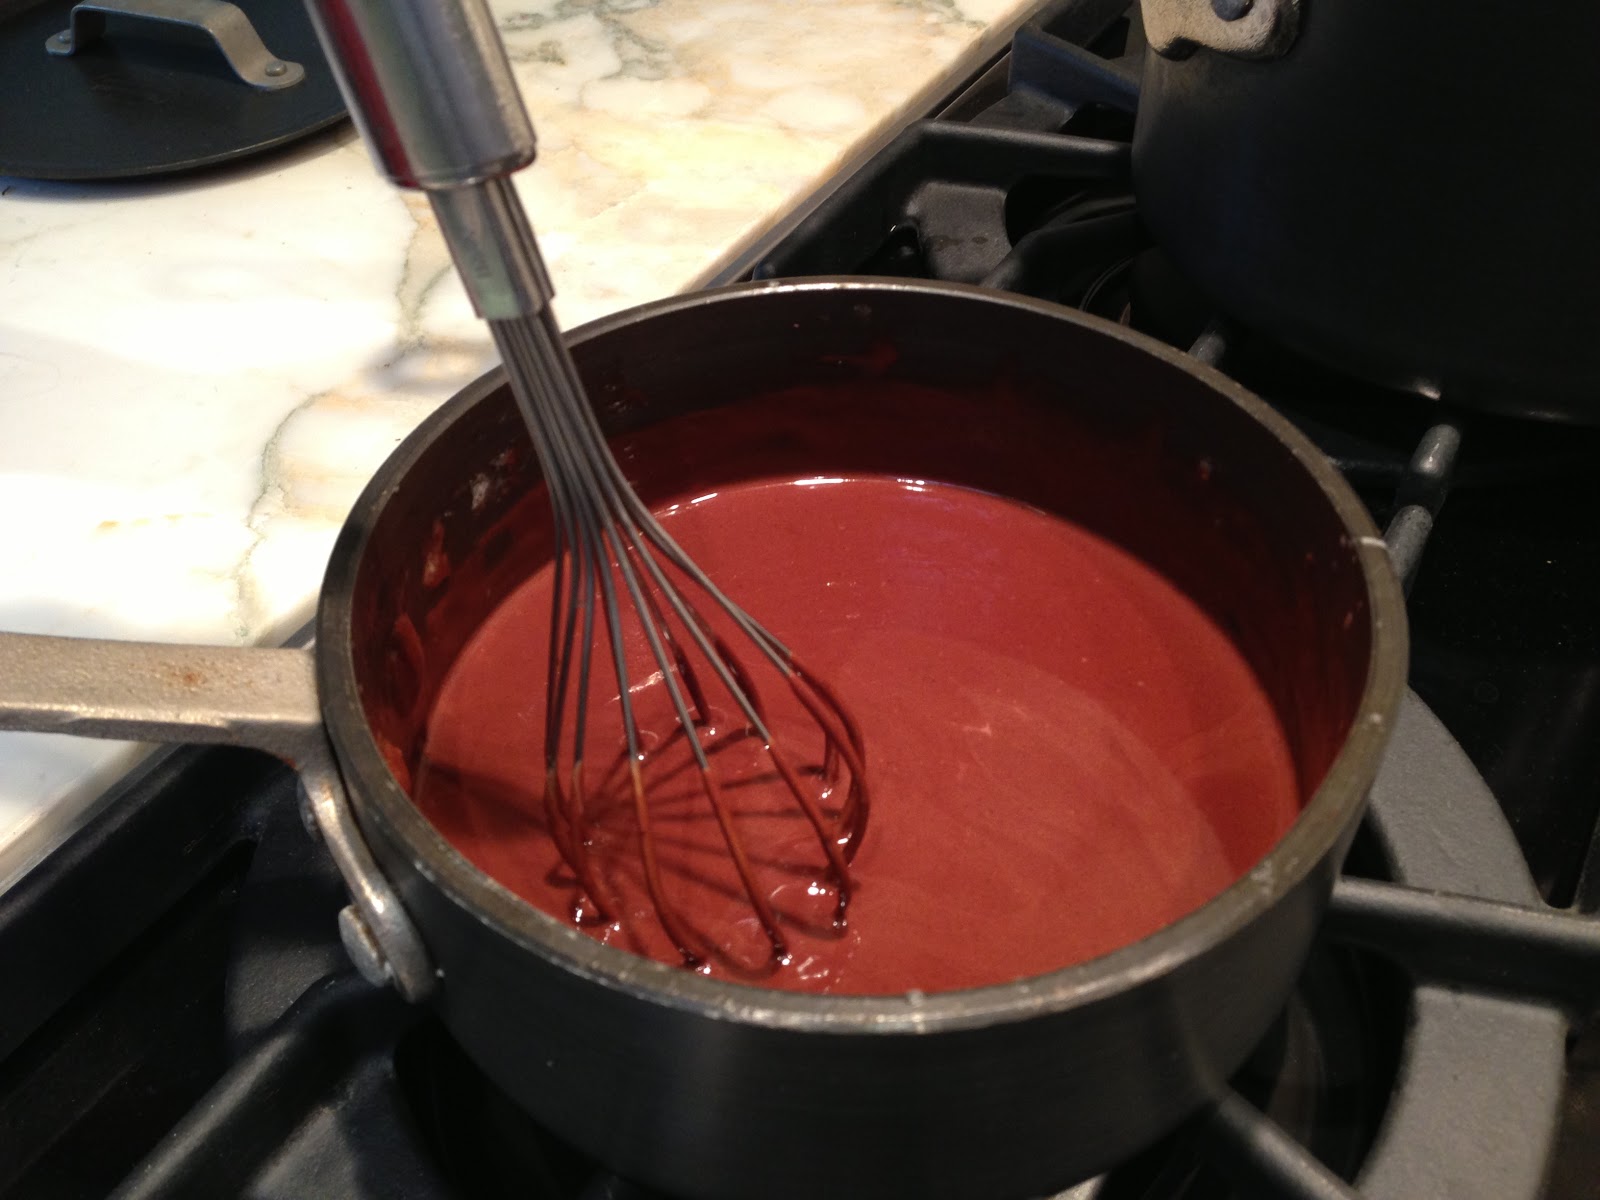
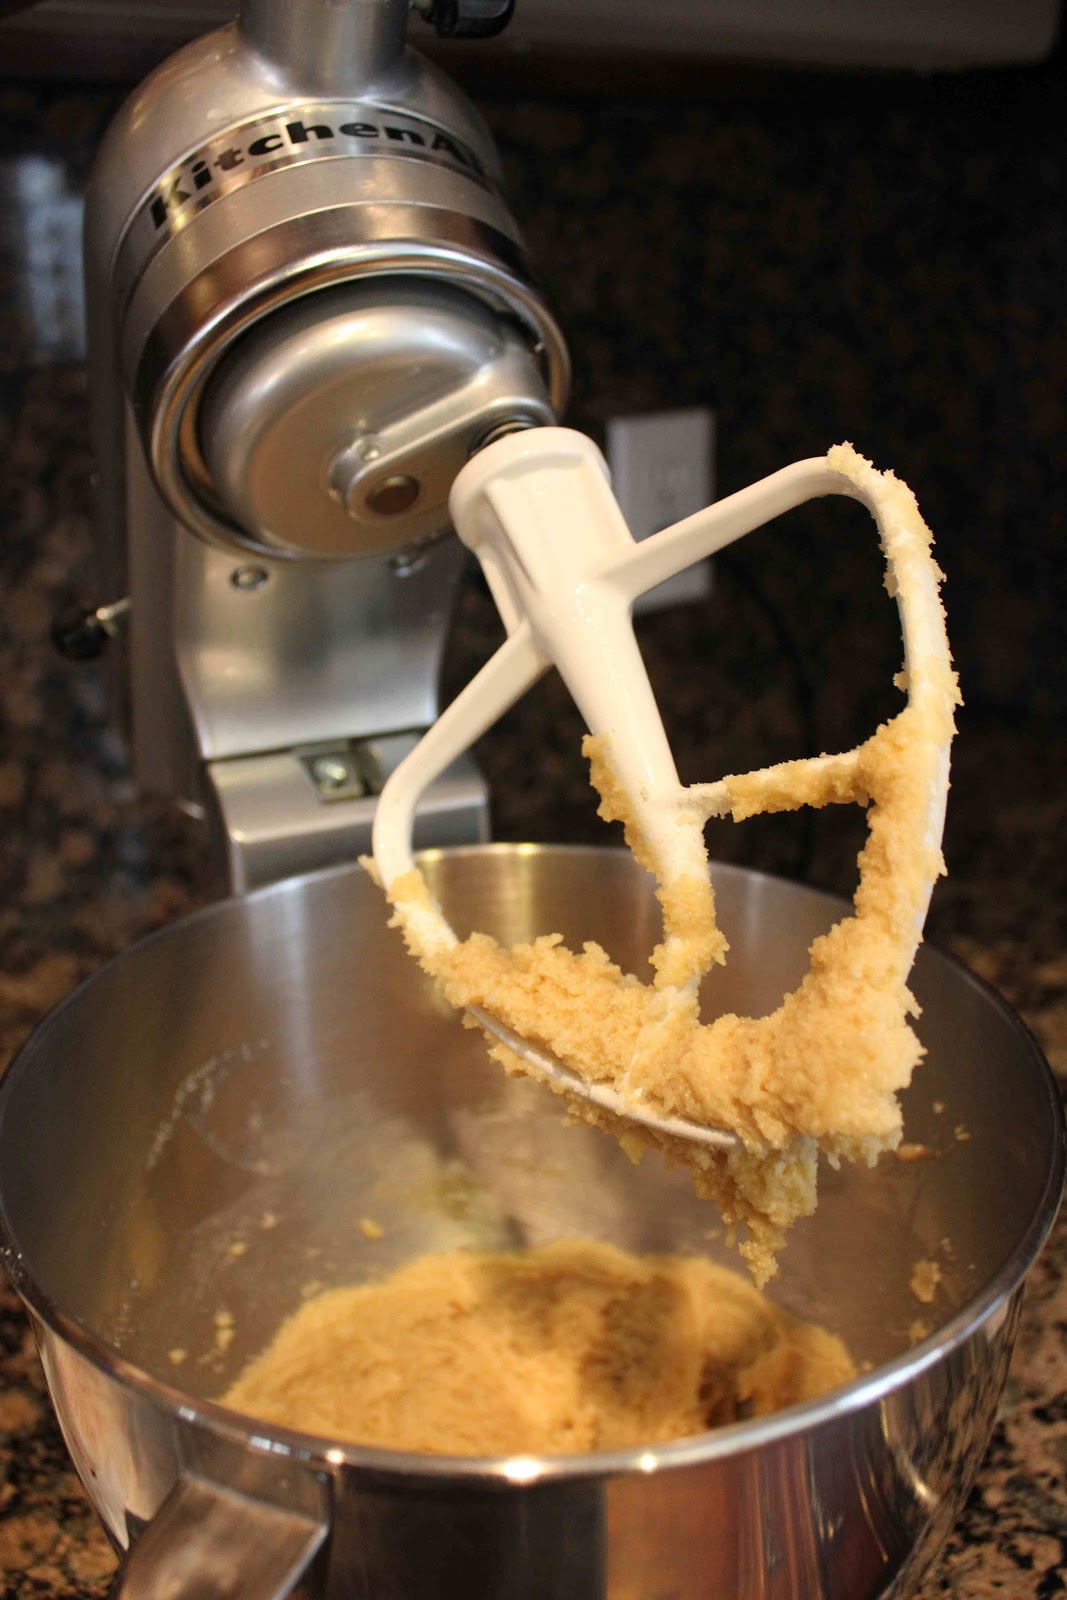
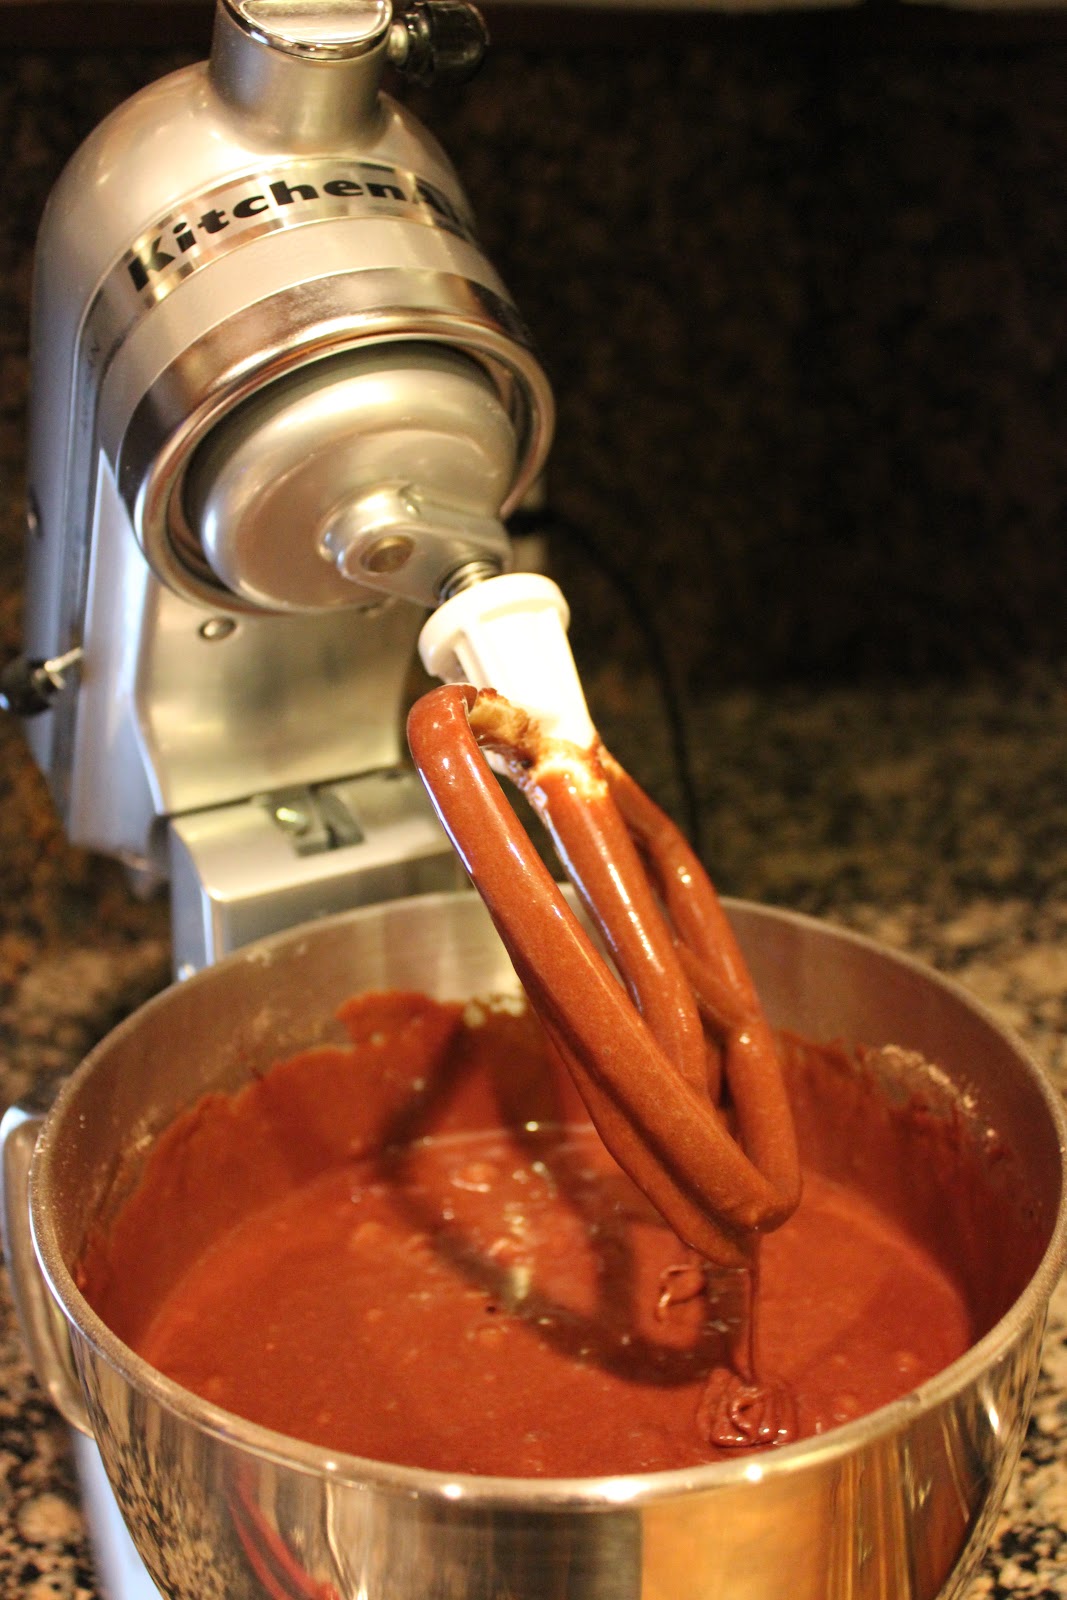
Using a stand mixer, make the batter.
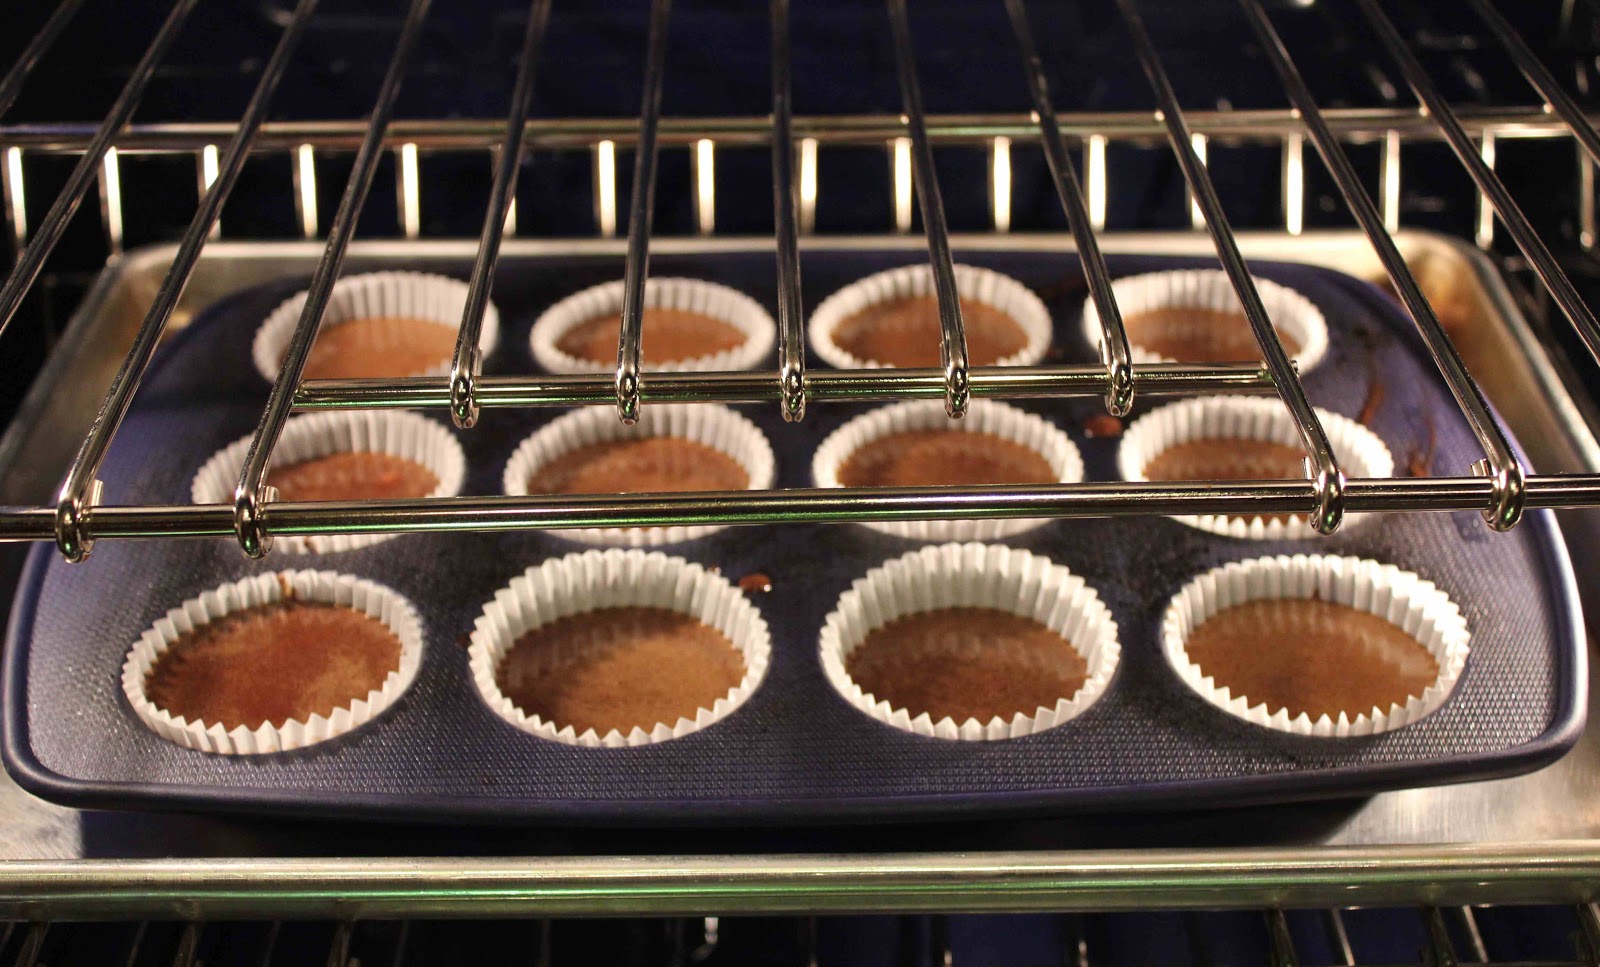
Bake for 18-22 minutes in a 350 degree F oven.
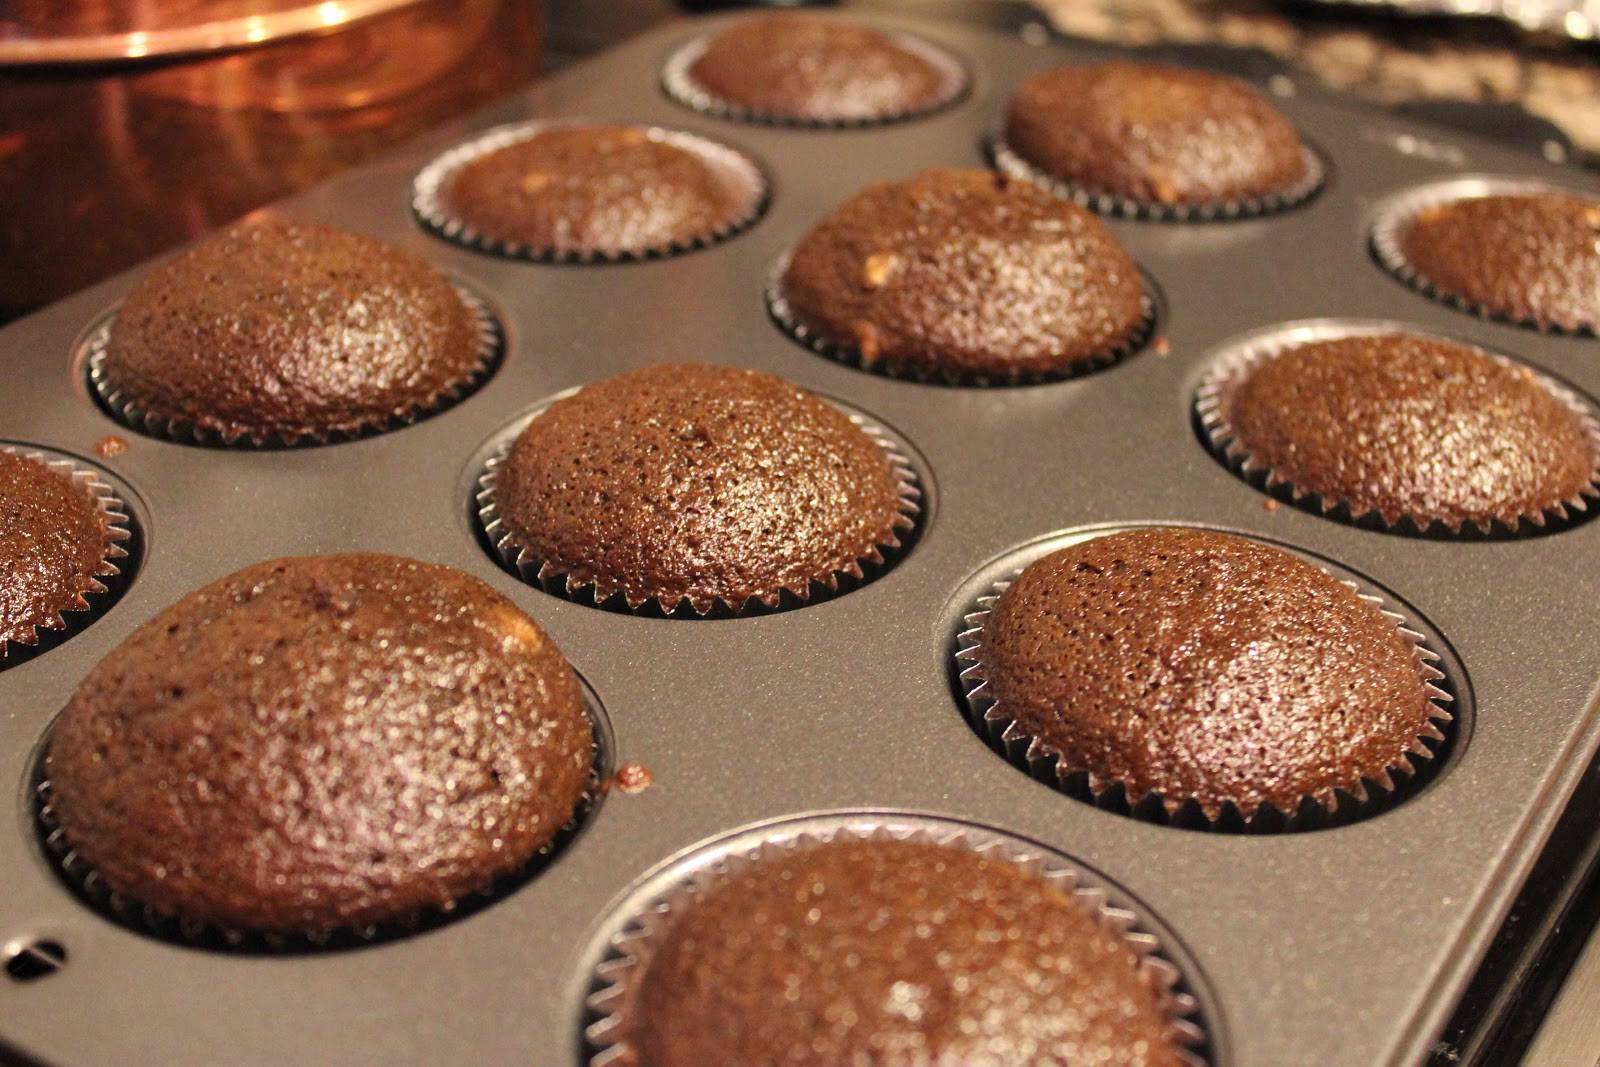
Remove from oven.
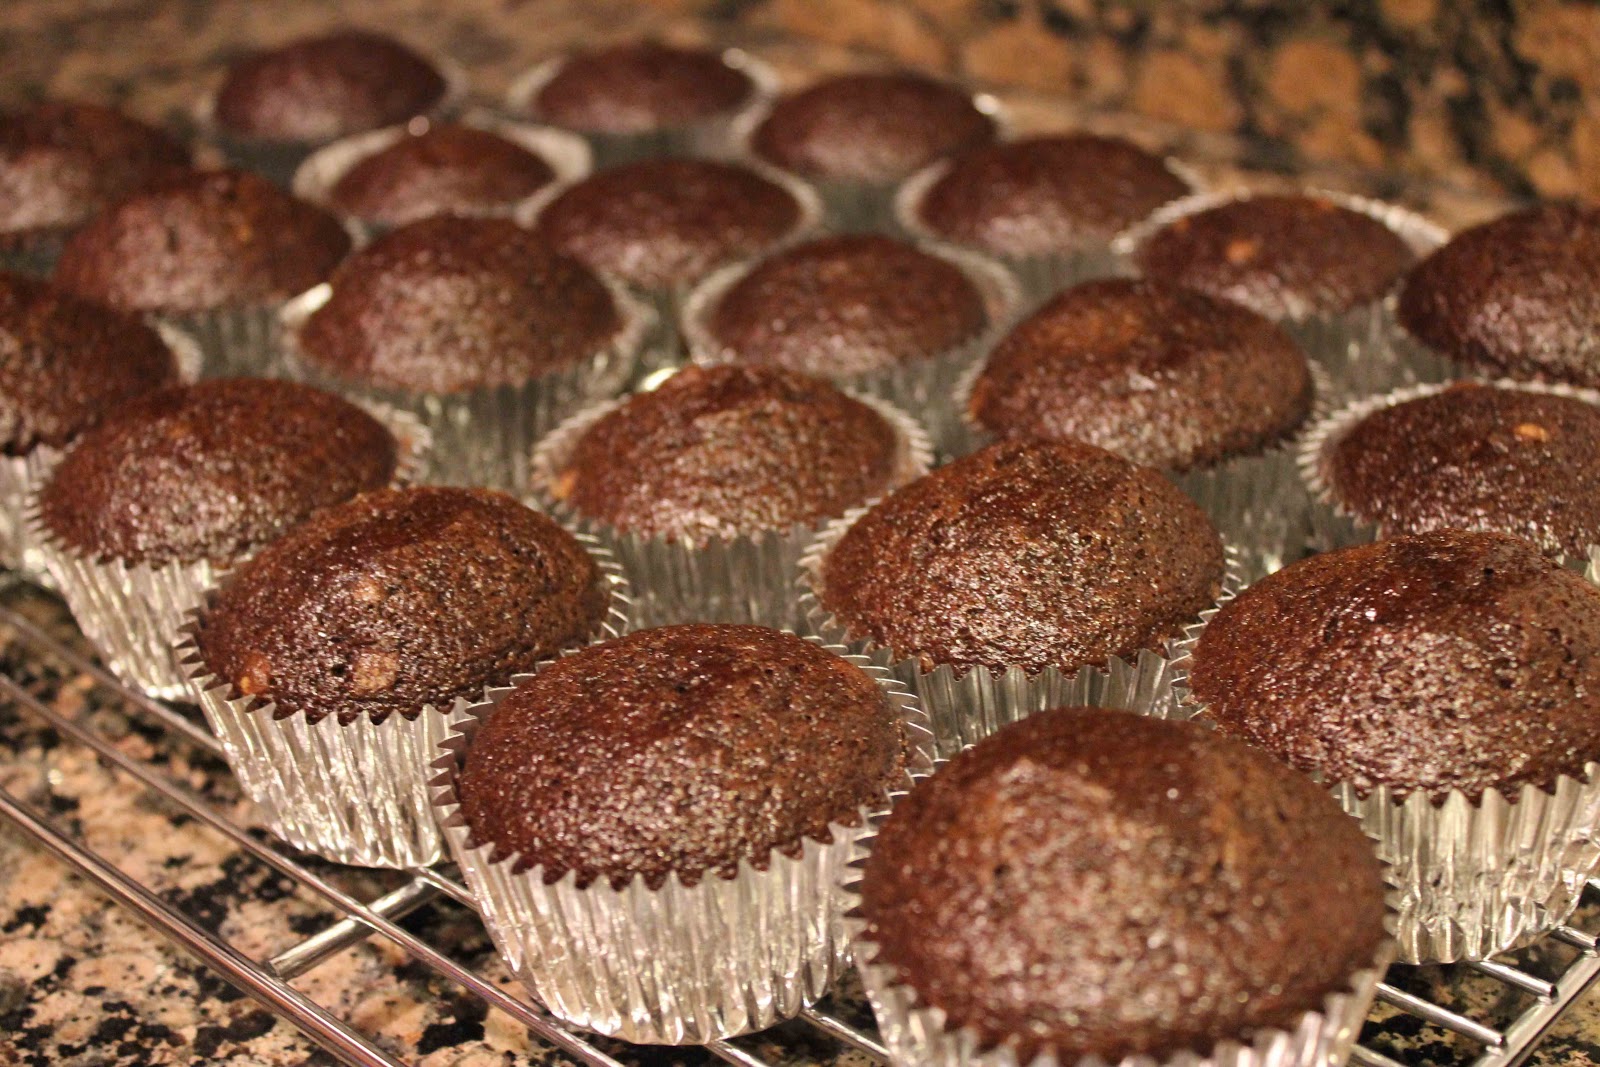
Let cool completely on a wire rack.
Pipe frosting on each cupcake. Garnish with sprinkles.
Take a big bite, or two!

Chocolate Cupcakes
Ingredients
2 cups sugar
1 3/4 cups all-purpose flour
3/4 cup unsweetened cocoa (best quality available)
1 1/2 tsp. baking powder
1 1/2 tsp. baking soda
1 tsp. salt
2 eggs
1 cup whole milk
1/2 cup vegetable oil
2 tsp. vanilla extract
1 cup boiling water

Directions
1. Line muffin tin with paper lines. Heat oven to 350 degrees F.
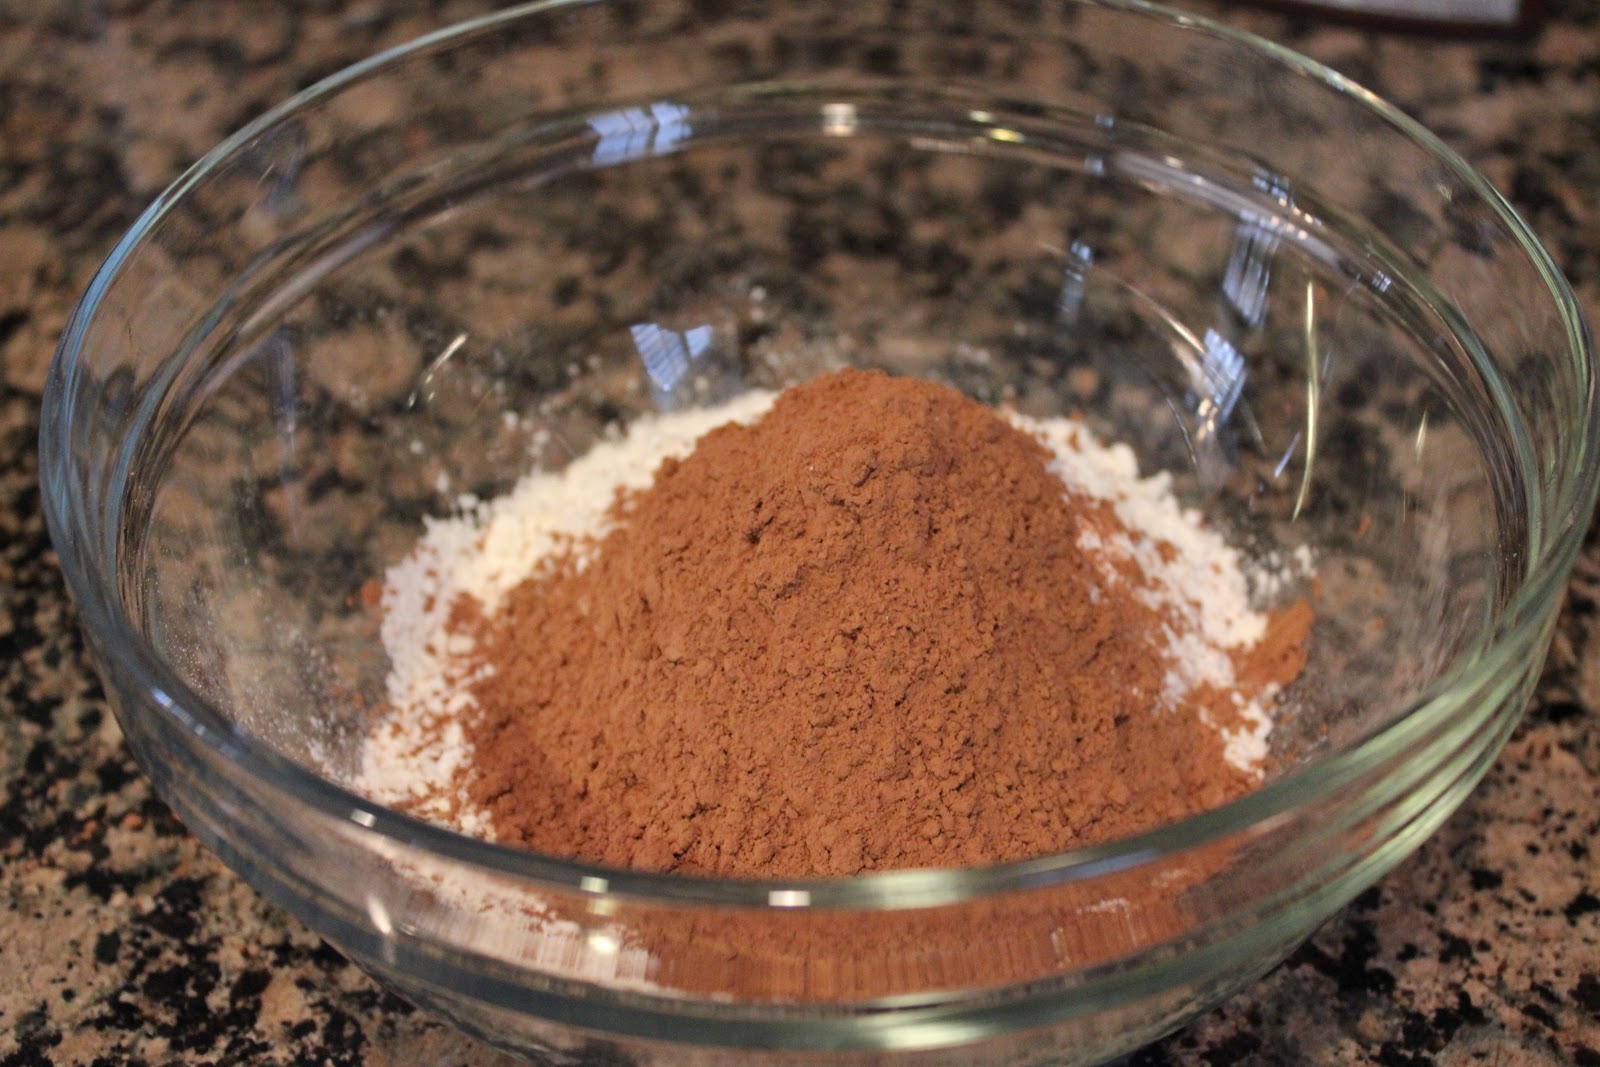
2. In a large mixing bowl, stir together sugar, flour, cocoa, baking powder, soda and salt. Add eggs, milk, oil and vanilla. Beat on medium speed for one minute.
3. Stir in boiling water (the batter will be thin, don’t worry, this is right).
4. Fill liners 2/3 full with batter. Bake cupcakes for approximately 18-22 minutes or until toothpick inserted in center of cupcake comes out clean or with just a few crumbs.
5. Cool completely on wire rack before frosting.

Yield: 24 standard sized cupcakes
Recipe from: Glorious Treats

Vanilla Cream Cheese Frosting
Ingredients
1/2 cup (1 stick) butter, set at room temperature about 10 minutes, but should still be cool
8 ounces cream cheese, directly from fridge
1 tsp. vanilla extract
4 cups confectioners’ sugar
1-2 Tbsp. skim milk

Directions
1. Place butter in a large mixing bowl and blend slightly. Add cream cheese and blend until combined, about 30 seconds.
2. Add vanilla and powdered sugar and blend on low speed until combined. Increase to medium speed and beat until it begins to get fluffy. Slowly add the milk, a little bit at a time until desired consistency is met. (Don’t add too much if you want the frosting to stay in place when piped on cupcakes).
3. Beat until fluffy, about 1 minute. Use at once or keep refrigerated. (This frosting will keep well in the refrigerator for several days, but you may need to re-beat it for the best texture.)

Yield: Enough to frost 2 dozen cupcakes if you are piping a nice swirl. (Will also frost and fill a two layer 9″ cake)
Recipe adapted from: Glorious Treats

Oreo Cheesecake Truffles

Who doesn’t love truffles during the holidays? Last year I made the oh so popular White Chocolate Oreo Truffles that were eaten in a matter of days. They are actually pretty healthy…the filling was comprised of instant chocolate Jell-O pudding, Oreos and skim milk (the healthy part), while the outside was a white chocolate candy coating drizzled in semisweet chocolate.
Why change something that’s already so good? If you know me well, you know that I love trying NEW recipes, so while I loved the above white chocolate Oreo truffles, I was ready to give Brown Eyed Baker’s Oreo Cheesecake Truffles a try!
The name “cheesecake” ought to give the ingredient list away in these truffles. The filling is comprised of just two ingredients: Oreos and cream cheese, while the outside is melted semisweet chocolate, sprinkles and crushed Oreos.
The truffles were very tasty, but also very rich due to the cream cheese filling. I’m a white chocolate person, so next time I make these I’ll probably use the white instead of semisweet chocolate. Matt also like these, so they pass the husband test.
Enjoy the Christmas season of baking and eating sweets, try not to gain too much weight, and let me know what you think of these!
Crush Oreos.
In a stand mixer, add cream cheese and mix until thoroughly combined.
Roll into balls, about 2 teaspoons in size.
Dip in chocolate and garnish with sprinkles and crushed Oreos.


Oreo Cheesecake Truffles
Ingredients
1 (18-ounce) package Oreo cookies
8 ounces cream cheese, at room temperature
2 cups  semisweet chocolate chips
2 tablespoons vegetable shortening

Directions
1. Crush the Oreos until finely ground. A food processor does the best job, but if you don’t have one, throw the cookies in a ziplock bag and crush them using a rolling pin.
2. Transfer 3 cups of the Oreo crumbs to a bowl and add the cream cheese. In a stand mixer, beat until cream cheese is completely mixed into the Oreo crumbs and you have a soft, homogenous mixture. Using a small cookie scoop (or the equivalent of 2 teaspoons), scoop/roll balls of the Oreo/cream cheese mixture and place on wax paper-lined baking sheet. Once you have scooped out all of the filling, refrigerate the baking sheet for at least 30 minutes, until firm.
3. In a small bowl, microwave the chocolate chips and shortening in 30 second increments at 50% power, stirring after each, until completely melted and smooth. Working with one Oreo ball at a time, dip it into the melted chocolate, roll it around to cover completely, then use a fork to remove it from the chocolate, letting an excess drip off. Place the dipped truffle back on the wax paper-lined sheet. Repeat with all truffles; once finished, return the baking sheet to the refrigerator for another 30 minutes.
4. Serve the truffles, or garnish with sprinkles and leftover crushed Oreos. Store in an airtight container in the refrigerator for up to 2 weeks.

Yield: 4 dozen truffles
Recipe adapted from: Brown Eyed Baker

Mrs. Kelm’s Chocolate Cake

Mrs. Kelm’s Chocolate Cake is not just a birthday cake…. it’s THE birthday cake! As you can tell by the photos below, my sister Brittany and I were and still are, big fans.

The cake has been in our family for years. The recipe dates by to my aunt Jolene’s mother-in-law, Mrs. Kelm… hence the name of the cake.

Each year Brittany and I (and my Dad, when it was his birthday), would request this cake. Brittany and I both have birthdays in March, so my mom would have to make it twice in one month! While the base of the cake is a standard chocolate cake with chocolate frosting, my mom would jazz it up by decorating it each year in the design and colors of our choice.
When I was little, I loved Barney & Friends, and thus mom made the purple friendly dinosaur for me! Brittany loved to dance and thus requested ballerina cakes. 
When we got older, Brittany and I would accompany my mom to the grocery store and pick out two or three of our favorite icing colors to frost the cake with. Mom would then decorate the cake by writing “Happy [__th] Birthday Lauren (or Brittany)” while piping a pretty border around the edge. Brittany always picked pink, while I picked the blue and green colors. 
Another funny and kind of weird tradition with this cake are the pictures that go along with it. Each year my dad would make my sister and I lie down on the floor or tile right next to the cake. While the photos are awkward-looking, my dad had a good point – he didn’t want to risk us dropping the cake while we posed for a picture. Quite clever if you ask me…. As we got older, I guess my dad trusted us enough to hold the cake without dropping it, thus no more lying on the floor pictures!

Barney cake for my 5th birthday (1993)

Pink ballerina cake for Brittany’s 3rd birthday (1993)
My 7th birthday (1995)
Purple ballerina cake for Brittany’s 5th birthday (1995)
Brittany’s 6th birthday (1996)
My 9th birthday (1997)
Sweet 16!! (2004)
My 17th birthday (2005)
The history of this cake must go on!! When my sister-in-law Leah asked for a chocolate cake recipe so that she could make an Elmo cake for her son Bear’s 2nd birthday, I quickly told her about Mrs. Kelm’s chocolate cake. Looks impressive don’t you think? 
Just a few months ago I made Mrs. Kelm’s chocolate cake for my father-in-law Tony. When I have kids, I’ll be sure to carry on my mom’s tradition. Until then, birthday cake anyone?
Leah (my sister-in-law) and I are cake decorating for my nephew’s 2 year old birthday cake!  (2010)


Mrs. Kelm’s Chocolate Cake
Ingredients
CAKE
2 cups flour
2 cups sugar
1 1/2 tsp. salt
1 cup (2 sticks) unsalted butter
1 cup water
3 Tbsp. cocoa
2 eggs, well beaten
1 tsp. baking soda
1/2 cup buttermilk
1 tsp. vanilla
1 tsp. cinnamon

FROSTING
1/2 cup (1 stick) unsalted butter
3 Tbsp. cocoa
5 Tbsp. milk
1 box (1 lb.) powdered sugar
1 tsp. vanilla
1/2 cup nuts, optional (as a kid I hated nuts, so we’ve never used them in the frosting)

Directions
FOR CAKE:
1. Preheat oven to 350 degrees F.
2. Sift flour, add sugar and salt and resift.
3. Bring to a boil butter, water, and cocoa. Pour over flour and sugar mixture. Add remaining ingredients and mix well.
4. Bake in a greased and floured 9 x 13-inch pan for 35-40 minutes or until toothpick inserted in center of cake comes out clean.

FOR FROSTING (Make during the last 5 minutes of cake baking time.)
5. Place 1 stick of butter, 3 tablespoons of cocoa, and 5 tablespoons of milk in a saucepan. Mix and heat over low heat; do not boil.
6.  Remove from heat and add one box of powdered sugar, 1 teaspoon of vanilla. Mix well and frost cake.

Yield: 1 (9 x 13-inch) cake or 12 servings
Family recipe

Homemade Ice-Cream Sandwiches

Happy Labor Day! I hope your day was as relaxing as mine! This weekend I spent time at the lake visiting with friends and family, and then headed over to my parents’ house for some pizza and dessert.

As a huge fan of Blue Bell Cookies ‘n Cream ice-cream and Neiman Marcus chocolate chip cookies, I was in dessert heaven today!

My sister is an awesome baker. The monster cookie bars she made last week before her wedding were amazing, and the ice-cream sandwiches she made this week were just as good!

While Brittany was on her Hawaiian honeymoon last week, she and her husband Colby were laying out by the pool, when they saw a cooler that had a picture of an ice-cream sandwich on it. Unfortunately when they lifted the lid of the cooler, there were only drumsticks. 😦 Colby was disappointed, so when they returned to Dallas, Brittany decided to make homemade ice-cream sandwiches for him to enjoy!

Lucky for me, when I came to visit this weekend, there were leftovers! What’s great about homemade ice-cream sandwiches is that you can customize them any way you’d like. Mix and match your cookies (sugar, snickerdoodle, chocolate chip oatmeal raisin, white chocolate cranberry, double chocolate chip, white chocolate macadamia nut, etc.) with your favorite ice-cream flavor (vanilla, cookies ‘n cream, chocolate, strawberry, birthday cake, cookie dough, mint chocolate chip, coffee, butter pecan, the list goes on.)

  • A little side note…. Pokey O’s of Dallas supposedly has the best ice-cream sandwiches around. I’ve never tried one, but that’s about to change soon!
My favorite combination is definitely a chocolate chip cookie with cookies ‘n cream ice-cream! But I won’t eat any ‘ole chocolate chip cookie…. it must be the Neiman Marcus recipe – they are my absolute favorite!
Let me know what combination you try. Enjoy!

Homemade Ice-Cream Sandwiches
Ingredients
1 batch of your favorite cookie recipe (I recommend Neiman Marcus chocolate chip cookies)
2 pints of your favorite ice-cream (I recommend Blue Bell Cookies ‘n Cream)

Directions
1. Bake cookies according to recipe directions. Let cool completely.
2. Place one scoop of ice-cream on the cookie. Place second cookie on top.
3. Eat immediately or wrap individually in plastic wrap and freeze. If frozen, remove from freezer about 5 minutes just prior to eating.

“Dirt” Cups

Have you ever eaten dirt? No, I’m not talking about dirt from your backyard, I mean Oreo “dirt” pudding cups.
As a kid, I would help my mom make dirt pudding since it was so easy. My sister helped too. She would go out in the backyard to dig up real dirt! I can’t remember if Brittany was serious or being funny. Haha.
Last weekend I was craving something sweet, something that contained Oreos, and something that was semi “healthy”. Well, these dirt pudding cups satisfied that craving! I used skim milk paired with non-fat instant Jell-O and bought fat-free Cool Whip to “lighten” things up.
Like I mentioned, “dirt” is super-simple to make! Instant pudding speeds up the process, and from start to finish, you can probably be eating these in about 10 minutes. Kids will also enjoying eating and making these!
Combine milk and instant pudding mix until thick. Let stand 5 minutes.
Add Cool Whip and crushed Oreos.
Stir until combined.
Pour pudding mixture into individual mason jars.
Top with crushed Oreos.
Don’t forget to add the gummy worm!

“Dirt” Cups
Ingredients
2 cups cold milk (we used Skim milk)
1 (4 oz.) package instant chocolate pudding
8 oz. frozen whipped topping (Cool Whip), thawed
1 1/2 cups crushed Oreos
10 gummy worms

Directions
1.  Whisk together the milk and instant pudding for two minutes, until pudding is completely dissolved. Let stand for 5 minutes.
2. Stir in frozen whipped topping and 1/2 cups of the crushed Oreos
3. Spoon into 10 individual cups or mason jars. (If you’re feeling creative, use mini terra cotta pots).
4. Sprinkle remaining crushed Oreos over the pudding mixture. Top with gummy worms.
5. Chill until ready to serve.

Yield: 10 servings
Recipe from: about.com

Monster Cookie Bars

These are the BEST monster cookie bars in the entire world! Literally 1-inch in thickness, these bars are chewy, gooey, moist and 10x better than regular ‘ole monster cookies.
The combination of peanut butter, chocolate chips, M&M’s, and oats creates the most decadent cookie bar you’ll ever put in your mouth!
For the past 4 years, my sister Brittany, was like the “team mom” for the Oklahoma State cross country team. She loves to bake and would make sweets for her boyfriend Colby and his teammates before each race.
If you didn’t know, Brit and Colby got married last weekend. As you could guess, many of Colby’s cross country teammates were his groomsmen. To keep the baking tradition alive, Brittany decided to make these monster cookies bars for Colby and the groomsmen as a “pre-race”, aka pre-wedding treat!
Right before the wedding, I mentioned to Brit that she should try to make monster cookie bars. She did some searching on her own and found this recipe through Marina’s blog over at Domesticated Duchess. What sold her on these bars was how thick they were!
Lucky for me, Brittany was thoughtful (perhaps because I pleaded…Lol) and saved 3-4 monster cookie bars for me to snack on. Thank goodness, because as I said earlier, they were AWESOME!
Enjoy!
Spread dough into a greased 9 x 13-inch pan.
Bake for 15-20 minutes in a 350 degree F oven.
Let cool. Then cut into bars.

Monster Cookie Bars
Ingredients
1 stick unsalted butter
1 cup granulated sugar
1 cup brown sugar
1 1/2 cups creamy peanut butter
3 eggs
2 tsp. baking soda
4 1/2 cups quick cooking oatmeal
1 package (12 oz.) chocolate chips
1 package (12 oz.) milk chocolate M&M’s

Directions
1. Preheat oven to 350 degrees F.
2. In an electric mixer, cream the butter and sugars until smooth. Beat in the eggs and baking soda. Then ddd the peanut butter and beat until smooth.
3. Mix by hand the oatmeal, one cup at a time. Slowly add in the M&M’s and chocolate chips.
4. Spread mixture into a well greased 9 x 13-inch pan and bake for 15-20 minutes. Do not over bake! (They will taste better just a little on the soft side.) Store in an airtight container.

Recipe from: Domesticated Duchess
Yield: about 20 bars

Fantasy Fudge

This “fantasy” fudge sure lives up to its name! My husband says it’s the best fudge he’s had in his entire life! I would have to agree, nothing compares. The fudge literally melts in your mouth…it is perfect!

Making fudge is a recent tradition that came about because of Southlake Carroll Dragon football. For those of you who don’t know, Southlake is a powerhouse in Texas high school football. During my entire four years at Carroll, we only lost 1 game….by one point (14-15) to Katy at the State Championship game back in 2004!

photo courtesy of MySouthlakeNews.com

Getting back to the fudge, my mom would make this delicious treat for us to snack on at the Carroll football games based on these two factors:

  1. When it’s cold outside (the Dragons used to play at the old Texas Stadium….and it since it was a pile of concrete, it got extremely cold!)
  2. When the Dragons made the playoffs (which no doubt happens during the colder weather!)
In addition, my sister, who was an Emerald Belle, had to make homemade treats/gifts for her football player. (Each belle is paired with a football player and is in charge of making them a little “good luck” gift before each game.) My sister would decorate green and white cupcakes, make brownies, cookies, and of course make this delicious fudge for her football player.
This past weekend my dad, and my husband and I attended the state semi-final game at SMU’s Ford Stadium to watch Carroll play Dallas Skyline. It was an amazing game, and we pulled out a spectacular win in the last two minutes of the game! Of course, as tradition has it, my mom made fudge and we thoroughly enjoyed it!
My mom sent two more bags of fudge, in which the first went to Sunday’s Life Group at church, and the second went with to work on Monday for our first annual eCommerce potluck.
Our own Southlake playoff tradition as spectators may not compare to the tradition of bleached blonde hair as a football player, but it sure is a tasty one! (Yes, the football players bleach their hair if they make it to playoffs…”Blondes have more fun!”)  Enjoy!
Fantasy Fudge
Ingredients
  • 3 cups sugar
  • 3/4 cup ( 1 1/2 sticks) butter or margarine
  • 1 can ( 5 oz.) evaporated milk
  • 12 oz. Baker’s semi-sweet chocolate, chopped
  • 1 jar (7 oz.) Jet-Puffed Marshmallow Creme
  • 1 tsp. vanilla
Instructions
  1. Line a 9-inch square pan with aluminum foil. Spray foil with nonstick spray.
  2. Bring sugar, butter and milk to a rolling boil in a large saucepan on medium heat, stirring constantly. Boil for 4 minutes, or until 234 degrees F on candy thermometer, stirring constantly.
  3. Remove from heat. Add chocolate and marshmallow creme; stir until melted. Stir in vanilla.
  4. Pour into pan and cool completely.

Fantasy Fudge
Ingredients
3 cups sugar
3/4 cup ( 1 1/2 sticks) butter or margarine
1 can ( 5 oz.) evaporated milk
12 oz. Baker’s semi-sweet chocolate, chopped
1 jar (7 oz.) Jet-Puffed Marshmallow Creme
1 tsp. vanilla

Directions
1. Line a 9-inch square pan with foil.
2. Bring sugar, butter and milk to a rolling boil in a large saucepan on medium heat, stirring constantly. Boil 4 minutes, or until 234 degrees F on candy thermometer, stirring constantly.
3. Remove from heat. Add chocolate and marshmallow creme; stir until melted. Stir in nuts and vanilla.
4. Pour into pan. Cool.

Yield: 3 pounds or 40 servings, about 2 squares each