Classic French Toast

classic french toast

This is now my official my go-to French toast recipe. It is sooooo good! I guess I forgot about eating French toast for breakfast, because I haven’t had it in several years. Pancakes and waffles seem to always overshadow french toast, and they shouldn’t.

This recipe, from Tastes Better From Scratch is super easy, and takes just minutes to whip up. It’s so easy, you can do it holding a baby in your arms (just Harper lol).

classic french toast
Whisk together eggs, milk, flour, sugar, cinnamon and vanilla.
classic french toast
Dip both sides of the bread in the egg mixture.

classic french toast

classic french toast
In a skillet or griddle set over medium heat, cook the french toast on both sides until it is golden brown.
classic french toast
Dust with powdered sugar.
classic french toast
Don’t forget the maple syrup and fresh fruit!

Mmmmm. Sooo good! I seriously may eat this for breakfast every day of the week, especially if Harper has a vote.

She absolutely loved it. I think we all get in a rut of eating the same foods over and over, and both Harper and I enjoyed a delicious change.

classic french toast

At her age, I still chop up her foods in pea-sized bites, but she was so excited, she reached across and grabbed a slice and stuffed it in her mouth! I had to pull it out because she looked like she was attempting the chubby bunny (stuffing as many marshmallows as you can in your mouth!) haha.

classic french toast

Love that little french toast, blackberry-covered face!

Enjoy!

Classic French Toast
Prep time:
Cook time:
Total time:
Serves: 4
Source: Tastes Better from Scratch blog
Ingredients
  • 4 eggs
  • 2/3 cup milk
  • 1/4 cup flour
  • 1/4 cup granulated sugar
  • 1/4 tsp. salt
  • 3/4 tsp. cinnamon
  • 1 tsp. vanilla
  • 8 thick slices of bread
Instructions
  1. Preheat griddle or skillet over medium heat. Grease well with butter or nonstick spray.
  2. Add all ingredients, except the bread, to a shallow dish and whisk well to combine. Dip bread slices into the egg mixture, coating both sides, and place on the hot griddle.
  3. Cook for a few minutes on both sides, until golden brown.
  4. Serve warm, sprinkled with powdered sugar, pure maple syrup, and fresh fruit if desired.


Sausage Breakfast Casserole

Sausage breakfast casserole

Happy Sunday!  I don’t know about you, but I love brunch/breakfast food. I could eat breakfast for breakfast, lunch, AND dinner. lol. In addition to “brunch”, we should also label it as “brinner” (breakfast/dinner).

Oatmeal, eggs, bacon, sausage, fruit, toast, omelettes, english muffins, pancakes, waffles, blueberry muffins, scones…. the list of breakfast foods I love can go on and on.

Today my parents had us over for brunch after church. My mom made this sausage breakfast casserole the night before and simply put it in the oven as soon as we got home from service.

sausage breakfast casserole

Sausage breakfast casserole

This is probably the best breakfast casserole I’ve had lately. The cubed french bread was soft in the middle yet crisp on the edges. The egg-custard mixture had wonderful flavor from the dry mustard and onion powder, and the sausage and cheese combination is a classic that can’t be beat. Yum!

Church must have really tired Harper out this morning, because she could barely make it awake through our brunch. She eats scrambled eggs for breakfast most mornings, so I’m sure she would have loved this casserole too; she just was too tired to eat. 😦

Harper is now 10 months, and is going from 2 to 1 naps a day. The saying is true… as soon as you get in a routine with a baby, they decide to change it up and do something different. Story of our lives for the past 10 months! haha.

Sausage breakfast casserole

Enjoy the rest of your lovely weekend. Can you believe football season is here? There will be lots of Aggie football going on at our house!

Baby


Sausage Breakfast Casserole
Prep time:
Cook time:
Total time:
Serves: 6-8
Ingredients
  • 8 (1-inch thick) slices French bread
  • 1 pound cooked sausage
  • 1 cup shredded Monterey Jack and Cheddar cheese
  • 1 1/2 cups milk
  • 3/4 cup half-and-half
  • 1 tsp. Worcestershire sauce
  • 1 tsp. dry mustard
  • 1/2 tsp. onion powder
  • 5 eggs, beaten
  • salt and pepper to taste
Instructions
  1. Preheat oven to 350 degrees F.
  2. Cut bread into 1-inch cubes, removing crusts if desired. Lightly grease an 8x10x2-inch glass pan.
  3. Place bread cubes in the bottom of the pan. Top with sausage and cheese.
  4. Mix the milk, half-and-half, Worcestershire sauce, dry mustard, onion powder, and eggs together. Pour over the top of the bread mixture. Cover and chill overnight.
  5. Bake, uncovered, for 35-40 minutes, or until done. To check for doneness, insert a knife in the center of the casserole. It should come out clean. Serve hot.


Chocolate Peanut Butter Overnight Oats

chocolate peanut butter overnight oats

I LOVE LOVE overnight oats otherwise known as swiss oatmeal. I first discovered swiss oatmeal in Switzerland on a study abroad trip, and then found that Corner Bakery had it on their breakfast menu. I could eat Corner Bakery’s swiss oatmeal for breakfast every morning if I had the chance, but since that’s a little unpractical, I discovered how to make my own recipe HERE.

Anyone can make swiss oatmeal/overnight oats, because it is so EASY and so versatile. You can change just 2-3 ingredients and create a whole new recipe.

chocolate pb2

This chocolate peanut butter overnight oats recipe is a spinoff of my original one. The basic ratio to use in overnight oats is equal parts milk: yogurt: oats (1:1:1). In this recipe I used unsweetened almond milk (you can use skim milk, whole milk, coconut milk, chocolate milk, etc.), greek yogurt (you can use plain yogurt, vanilla flavored, etc.), and rolled oats (this is the one ingredient I don’t ever change up).

I added PB2, which gives it a nice peanut butter/chocolate flavor without the added calories and fat. Just 1 tablespoon is 22.5 calories. 🙂 You can use regular PB2, but I like the chocolate version. I also added 1 teaspoon unsweetened cocoa powder and 1 teaspoon of pure maple syrup to sweeten it up naturally. What goes better with peanut butter and chocolate than banana? I added banana and a little chopped peanuts for some crunch. Yum!!

Again, the flavors are unlimited for overnight oats. You can add dried fruits, any kind of nut (walnuts, pecans, pepitas, etc.), chia seeds, flaxseeds, fresh fruit, and honey. Have fun experimenting…. just remember the 1:1:1 ratio of milk: yogurt: oats.

Enjoy!!

chocolate peanut butter overnight oats chocolate peanut butter overnight oats chocolate peanut butter overnight oats

chocolate peanut butter overnight oats

Can’t forget to post a baby picture!! This little one turned 6 months old this week. Time sure flies by!!!  She’s still a petite thing… 3 percentile in weight and 2 percentile in height. Been in the less than 3 percentile since she was in the womb. Looks like we got a horse jockey or gymnast in our midst! lol  🙂

baby


Chocolate Peanut Butter Overnight Oats
Prep time:
Cook time:
Total time:
Serves: 1
Ingredients
  • 8 ounce mason jar
  • 1/4 cup rolled oats
  • 1/4 cup plain greek yogurt
  • 1/4 cup unsweetened vanilla almond milk
  • 1 Tbsp. chocolate PB2
  • 1 tsp. unsweetened cocoa
  • 1 tsp. pure maple syrup
  • 1 tsp. chia seeds
  • pinch of cinnamon (optional)
  • 1 tsp. mini chocolate chips
  • 1 tsp. unsalted peanuts
  • 1/4 chopped banana
Instructions
  1. In a mason jar mix together almond milk, greek yogurt, chocolate PB2, and unsweetened cocoa. This takes about 30 seconds or a minute. Then whisk in maple syrup and chia seeds.
  2. Stir in rolled oats until all ingredients are combined. Add a pinch of cinnamon, if desired.
  3. Place lid securely on and store overnight in the refrigerator.
  4. In the morning, give it a stir, and add a little more almond milk to loose it up and give it the consistency you want. Sprinkle chocolate chips, peanuts and bananas on top.


Quiche

Quiche Lorraine

This is just about the easiest quiche you can make, especially if you buy a pre-made refrigerated pie crust. I made this when I was 2 weeks postpartum, and my mother-in-law Paula laughed and said, “You’re the one who just had a baby, and are offering me food to eat. It ought to be the other way around!”

Yep, it’s that easy!

My mom had originally made this quiche for me within a week of me coming home from the hospital. It was so good, I had to make it again!

Most of the ingredients you should have on hand, which adds to the simplicity of this dish. The original recipe called for bacon, but I love mushrooms, so I added about 3/4 cup. You could even include both mushrooms and bacon if you wish.

Depending on which kind of pan you use, you may need to alter the baking time. My baking dish was the deep dish kind from Williams-Sonoma, so I probably cooked the quiche an extra 20 minutes because it was no where close to being done. It still tasted great, and browned up perfectly.

Enjoy!

Quiche Lorraine Quiche Lorraine Quiche Lorraine Quiche Lorraine

Baby picture of the day: Can you find us? All dressed in camo!

camo

Quiche
Prep time:
Cook time:
Total time:
Serves: 12
Ingredients
  • Pastry for 9-inch one-crust pie
  • 3/4 cup mushrooms, finely chopped (can substitute 12 slices cooked and crumbled bacon)
  • 1 cup shredded natural Swiss cheese (about 4 ounces)
  • 1/3 cup minced onion
  • 4 eggs
  • 2 cups half and half
  • 3/4 tsp. salt
  • 1/4 tsp. sugar
  • 1/8 tsp. cayenne red pepper
Instructions
  1. Preheat oven to 425 degrees F. Prepare pasty.
  2. Sprinkle mushrooms (or bacon), cheese and onion in a pastry-lined pie pan.
  3. Beat eggs slightly; beat in remaining ingredients. Pour cream mixture into pie pan.
  4. Bake 15 minutes.
  5. Reduce oven temperature to 300 degrees F and bake 30 minutes longer or until a knife inserted 1 inch from edge comes out clean. Let stand 10 minutes before cutting.
  6. Serve in wedges.


Yogurt Pancakes

Yogurt Pancakes

Breakfast is one of my favorite meals of the day, especially when pancakes and bacon are involved. If you’re looking for a simple, homemade pancake recipe, this one is for you.

Instead of buttermilk or milk, we used plain Greek yogurt, which adds a ton of protein and makes these pancakes extra thick, and healthy-ish. There’s no whole wheat flour or oats, so that’s why I added the “-ish”.

Plus, when you add butter to them, you are adding some serious calories. Even though we used Smart Balance and 100% pure maple syrup, these actually kind of taste like McDonald’s hotcakes.

Yogurt Pancakes

At least, that’s what my sister and I think. Brittany and I used to go to McDonalds for breakfast with my grandfather Poppy every time we visited him. Don’t worry, he lived 2.5 hours away, so it’s not like we were eating McDonalds for breakfast every day! 🙂 Brittany and I would get a sausage biscuit and orange juice, while Poppy would order the big breakfast with hotcakes.

Brit and I would each try a bite of Poppy’s pancakes, who wasn’t shy about topping them with butter and syrup.

Yogurt Pancakes

Weird as it may sound, I actually never eat pancakes with butter on top, but for the photos in this post, I thought I’d add some. I think I could have added butter and syrup on top of anything, and it would have tasted like those hotcakes just because I wasn’t used to it. I can definitely see why people add butter…. but I probably shouldn’t start that bad habit up!!! Haha.

For now, I’ll continue to simply add fresh fruit to my pancakes and a little wheat germ, and we can continue to call these pancakes “healthy”. lol

Enjoy!!

Yogurt Pancakes Yogurt Pancakes

Yogurt Pancakes
Prep time:
Cook time:
Total time:
Serves: 6
Ingredients
  • 2 cups all-purpose flour
  • 2 Tbsp. sugar
  • 2 tsp. baking powder
  • 1 tsp. baking soda
  • 2 eggs, lightly beaten
  • 2 cups (16 oz) plain yogurt (we used 0% fat Fage Greek yogurt)
  • 1/4 cup water
Instructions
  1. In a small bowl, combine the flour, sugar, baking powder and baking soda.
  2. In another bowl, whisk the eggs, yogurt and water. Stir into dry ingredients until just moistened.
  3. Pour batter by 1/4 cupfuls onto a hot griddle coated with cooking spray. Turn when bubbles form on top. Cook until the second side is golden brown.
Notes
Source: Taste of Home


Classic Waffles

Classic Waffles

Surprisingly easy, but with an elegant presentation, waffles are one of my favorite breakfast foods I look forward to on the weekends.

While I’ve always slightly favored waffles over pancakes, I think I burned myself out on the former and have not eaten or made waffles in probably over 2 years!!

Friday night before going to bed, I had it in my mind I was going to make waffles on Saturday morning. Pinterest to the rescue because I didn’t have a homemade recipe on hand. Many times we’ll use a mix, but in reality, its almost just as easy to whip up fresh, homemade batter as opposed to the prepackaged stuff.

Classic Waffles

This recipe is extremely simple, and I can almost guarantee you’ll already have all the ingredients. Compliments to Happy Hour Projects blog, these waffles will definitely be made on future Saturday mornings. Matt loved them as did I.

With just 7 simple ingredients (eggs, milk, butter, sugar, vanilla, flour, and baking powder), you can whip up the batter in less than five minutes.

One word to the wise, the first waffle is usually a dud, so pour just a little batter in your waffle iron to test it out before pouring in the full amount. My first waffle was much softer and soggier than the subsequent waffles. The third waffle was perfect. It was golden brown, slightly crispy and had perfect edges. The same happens with I make pancakes. The first one is not usually as pretty as the rest of them. I guess you really have to get your iron hot.

Classic Waffles

Enjoy the rest of your weekend. If you’re waking up just now, maybe these waffles are worthy enough for a Sunday brunch!

Classic Waffles
Prep time:
Total time:
Serves: 4
Ingredients
  • 2 eggs
  • 1 cup milk (I used skim)
  • 2 Tbsp. softened butter
  • 1 Tbsp. sugar
  • 1/2 tsp. vanilla
  • 1 cup flour
  • 1 tsp. baking powder
Instructions
  1. Preheat your waffle iron and spray with nonstick cooking spray.
  2. Blend together eggs, milk, butter, sugar and vanilla.
  3. Sift together flour and baking powder, then stir into egg mixture.
  4. Pour onto the waffle iron and bake until done – this will vary depending on your iron. In our house, the green light starts to beep when the waffle is done. When the waffle is golden, slightly crisp, and lifts easily with a fork, it’s ready.


Neil’s Pancakes

Neil's pancakes

We had our family Christmas dinner on Christmas Eve instead this year, so when we woke up on Christmas Day, there was absolutely no pressure of cooking a large meal. Instead, we woke and had a delicious and savory brunch with leftover ham, fruit, coffee, orange juice and these amazing pancakes!!!

Don’t get confused by the name because Neil is neither a relative nor family friend. Neil Kleinberg is actually the owner of Clinton Street Baking Co & Restaurant, in which his pancakes were voted best in New York.

This pancake recipe is from the “Clinton St. Baking Company Cookbook: Breakfast, Brunch & Beyond from New York’s Favorite Neighborhood Restaurant” by DeDe Lahman, Neil Kleinberg and Michael Harlan Turkell; and if you don’t have the book, it’s definitely worth looking in to.

I honestly thought these were the best homemade pancakes I’ve ever tasted. The batter was light, airy, and buttery. The recipe called for whole milk, but we didn’t have any and thus used skim milk. The pancakes were already outstanding, but I can only imagine how they would taste had we used whole milk!!!

Neil's pancake batter
Fold the dry ingredients into the wet. Whip the egg whites and mix them in with the batter.


One secret is that the egg whites are folded into the batter. By applying French techniques – that is, you make a cake lighter by folding in whites (almost like a soufflé) – Neil was able to make the batter lighter, but have it retain its springy resiliency that yields one perfect pancake.

The other secret is to avoid over mixing, which creates gluten in the flour and makes them tough.

Neil's pancake batter
Drop 1/4 of batter onto a hot griddle. When you see bubbles start to form, you’re ready to flip the pancake.


One common mistake among many cooks is that they don’t heat the griddle long enough, which is why the first pancake is usually a dud. Make sure the griddle is very hot, then put the butter on. A teaspoon or tablespoon is just fine, but make sure you use enough so the pancakes don’t stick.

Neil's blueberry pancake batter
Optional: add 1 tablespoon of blueberries or sliced bananas and 1 teaspoon walnuts before turning the pancakes. Never add the fruit to the batter; always add the fruit to the pancakes once they’re on the griddle.
Neil's pancakes
When the pancake is golden brown on both sides, remove with a spatula. Repeat with remaining pancake batter.
Neil's pancakes
A nice tall stack of pancakes, drizzled with a touch of pure maple syrup. Yum!
Neil's pancakes
Garnish pancakes with fresh fruit. Confectioners’ sugar goes great with the blueberry pancakes while cinnamon-sugar goes great with the banana-walnut pancakes.
Neil's pancakes
Sooo good!
Neil's pancakes
We also pan-fried some ham to go with the pancakes for protein!

These pancakes don’t just have to be served on Christmas Day. We definitely plan on making these next weekend and Saturday mornings to come. Enjoy!!

Neil’s Pancakes
Serves: 18-20 (3-inch) pancakes
Ingredients
  • 4 cups all-purpose flour
  • 1 Tbsp. plus 1 tsp. baking powder
  • 1 tsp. salt
  • 1/4 cup sugar
  • 6 large eggs, separated
  • 3 cups whole milk
  • 3/4 cup (12 Tbsp.) unsalted butter, melted, plus 2 tsp. unmelted for the griddle
  • 1 tsp. vanilla extract
  • 2 1/2 cups blueberries or sliced bananas and 1 cup chopped walnuts (optional)
  • 1/2 cup confectioners’ sugar or cinnamon sugar for dusting (optional)
  • Pure maple syrup
Instructions
  1. Sift flour, baking powder, sugar and salt in large bowl.
  2. In a medium bowl, whisk together the yolks, milk, melted butter and vanilla until combined. Whisk yolk mixture into flour mixture until just combined; the batter will be slightly lumpy.
  3. Place egg whites in the bowl of an electric mixer fitted with the whisk attachment, or whisk by hand, until *medium peaks form. Gently mix half the egg whites into batter with a rubber spatula. Gently fold in remaining whites. The egg whites should not be fully incorporated into the batter.
  4. Heat a griddle until hot, about 350-375 degrees. Add remaining unmelted butter to hot griddle. Add 1/4 cup pancake batter and let set. Sprinkle 1 tablespoon blueberries or sliced bananas and 1 teaspoon chopped walnuts, if using, over pancakes. When bubbles begin to form, lift pancake; if golden brown, turn. Cook until golden brown on remaining side.
  5. Transfer cooked pancake to a plate and keep warm. Repeat process with remaining batter, fruit and nuts. Garnish with confectioners’ sugar for blueberry pancakes and cinnamon sugar for banana-walnut. Serve warm with pure maple syrup.
Notes
*Peaks are “soft” when you put your finger in the whites and they fall over. Peaks are “medium” when you put your finger in and they drip over a bit and stand up. “Stiff” peaks develop when you whip the whites longer and they stay up.


Whole Wheat Waffles

waffles6

Getting to sleep in as late as you want is one of the best things about the weekends!  Today I slept in until about 10: 30 am, which was much later than I thought, and woke up to a wonderfully sweet aroma of my my mom cooking in the kitchen.

I had no clue what she was making, but the smell was so sweet and inviting, first thing that came to my mind was “why is she making cookies at 10:30 in the morning”?

Instead, I was pleasantly surprised to find that she had just finished cooking up a batch of whole wheat waffles. (Funny story…my sister Brittany made these exact same waffles for her and Colby for breakfast this morning all the way up in Michigan! Great minds think alike!!!)

waffle ingredients
All the ingredients you will need…

The recipe for these waffles is adapted from 100 Days of Real Food, in which Lisa, the blogger, cuts out processed foods and replace it with REAL food. Processed food is terribly bad for you, so the less of it you can eat, the better.

The ingredient list is simple for this healthy waffle recipe, and makes for a quick and easy breakfast. The original recipe calls for 1 3/4 cups of milk, but my mom didn’t have enough, so she used half buttermilk and half skim milk. We love the addition of buttermilk, as it gives the waffles a richer taste.

Once you gather your ingredients, simply whisk them together in a large bowl and ladle the batter into a hot waffle iron.

waffle batter
Mix together the eggs, milk, honey, oil, honey, cinnamon and baking soda. Add in flour, baking powder and salt.

I like using a Belgian waffle iron (it has deeper and wider pockets) better than a traditional waffle iron. For some reason, Belgian waffles just taste better….kind of like how ice cream tastes better in a pretty bowl, or yogurt tastes better eaten with a plastic spoon instead of a metal spoon.

Anyways, within 10 minutes you’ve got a hot, fresh, healthy and NON-PROCESSED breakfast ready to enjoy.

whole wheat waffles

whole wheat waffles
Top with a pat of butter, fresh fruit and maple syrup.

Top these with a pat of butter, maple syrup and fresh berries for a hearty meal.

I must say, these are the BEST waffles I’ve ever eaten! They taste better than any hotel breakfast or diner that I’ve ever been to.

waffles6

waffles

Whole Wheat Waffles
Serves: 8 (4-inch square) waffles
Adapted from: 100 Days of Real Food
Ingredients
  • 2 large eggs
  • 1 cup buttermilk (or you can use all skim milk)
  • 3/4 cup skim milk
  • 1/4 cup coconut oil, melted
  • 1 Tbsp. honey
  • 1/2 tsp. ground cinnamon
  • 1/4 tsp. baking soda
  • 1 1/2 cups white whole-wheat flour (King Arthur)
  • 2 tsp. baking powder
  • 1/8 tsp. salt
  • 100% pure maple syrup, for serving
  • Fresh cut strawberries and blueberries, for serving
Instructions
  1. Preheat your waffle iron.
  2. In a large mixing bowl whisk together the eggs, milks, oil, honey, cinnamon and baking soda until well combined.
  3. Add in the flour, baking powder, and salt and whisk together until the large lumps disappear.
  4. When the waffle iron is hot, dab it with a little butter and then ladle a scant 1/2 cup of batter (depending on the size of your waffle iron) onto the center of the iron. Follow the instructions that came with your waffle maker to know how long it should be cooked (ours takes about 3-4 minutes each).
  5. Keep waffles warm until you finish cooking all of them. Top with pure maple syrup and fresh fruit.

Mother’s Day Peppered Eggs Benedict

Eggs Benedict

Mother’s Day is a time for pampering Mom — and what better way to pamper her than to make a meal with her favorite recipe?

My neighbors have the most perfect tradition that I just couldn’t resist sharing with you. If you remember, each month I write a Resident Recipe column for our neighborhood magazine. This month, I featured this wonderful family and their Peppered Eggs Benedict recipe for Mother’s Day. Keep reading for an excerpt of the article below:

IMG_3339

While my neighbor Tracy loves to cook for her family, Mother’s Day is the special day where her family cooks for her!

Husband Chris and children Grace, Abbie, and Christopher make quite a team in the kitchen as they prepare eggs benedict for Mom. But this isn’t your typical eggs benedict…

Crispy-edged fried eggs replace the old poached standby as Chris uses good extra-virgin olive oil – just the way his mother taught him! Canadian bacon is replaced by using thick-cut peppered bacon, and freshly chopped tarragon is an addition of a uniquely flavored herb that makes this eggs benedict have a distinct finish!

“No words can describe the perfection of Dad’s eggs benedict,” say the girls. But actions speak louder than words, especially with plates that are perfectly polished clean, ready for round two, and accompanied by four big grins that say, “I love you too!”

“Eggs Benedict is one of those dishes that is simply always a favorite,” says Tracy. “With this recipe you make a little mess, or should I say a BIG mess, but it’s all worth it when you make the first cut into that runny egg yolk. Delish!” Here’s to wishing everyone a Happy Mother’s Day!

IMG_3251

IMG_3268

IMG_3362

IMG_3366

IMG_3324

IMG_3344

IMG_3318

IMG_3333

IMG_3349

IMG_3353 IMG_3375 Eggs Benedict

Mother’s Day Peppered Eggs Benedict
Serves: 6
Ingredients
  • 1 lb. thick cut peppered bacon (shop at Central Market or use Boars Head)
  • ½ cup sour cream
  • ½ cup good mayonnaise (Helman’s)
  • 1 tsp. yellow mustard
  • 2 tsp. freshly squeezed lemon juice
  • Pinch of garlic salt
  • Dash of tarragon vinegar (optional) and/or 1 tsp. freshly chopped tarragon
  • 6 eggs
  • 3 English Muffins (halved)
  • 3 Tbsp. butter
  • Sea salt/Pepper
  • Good extra virgin olive oil
  • Chopped chives
Instructions
  1. TO MAKE THE BACON: Prepare bacon to desired consistency using a cast iron skillet. Place prepared bacon on paper towel-lined plate and set aside.
  2. TO MAKE THE HOLLANDAISE SAUCE: Mix sour cream, mayonnaise, yellow mustard, lemon juice, garlic salt, and tarragon/tarragon vinegar in a small saucepan on medium-low heat. Make sure not to heat too high because the sauce can separate. Once warmed, turn off heat.
  3. TO MAKE THE EGGS: Heat a small frying pan with enough oil to cover the bottom by rolling it around. Be prepared to make a mess! (at least that’s what Chris does). Fry two eggs at a time side-by-side and generously give them a sprinkling dose of fresh ground sea salt and pepper. The eggs will get nice and crispy on the edges and the center will stay wiggly. If it is too soft for you in the middle, throw a lid on the pan for half a minute or so.
  4. Meanwhile, toast the English muffins and have them ready for the freshly fried eggs. Assemble the English muffins with a spread of butter and layered peppered bacon. Gently slide the egg on top (try not to let the yolk break). Gently spoon the hollandaise sauce on top and sprinkle with the chopped chives or tarragon.


Cream Cheese Cinnamon Rolls

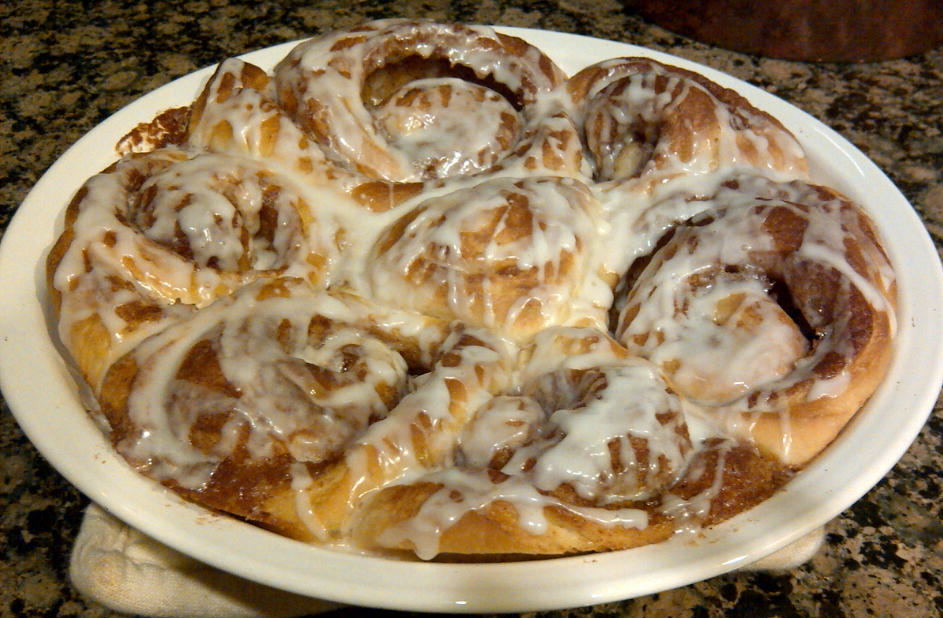
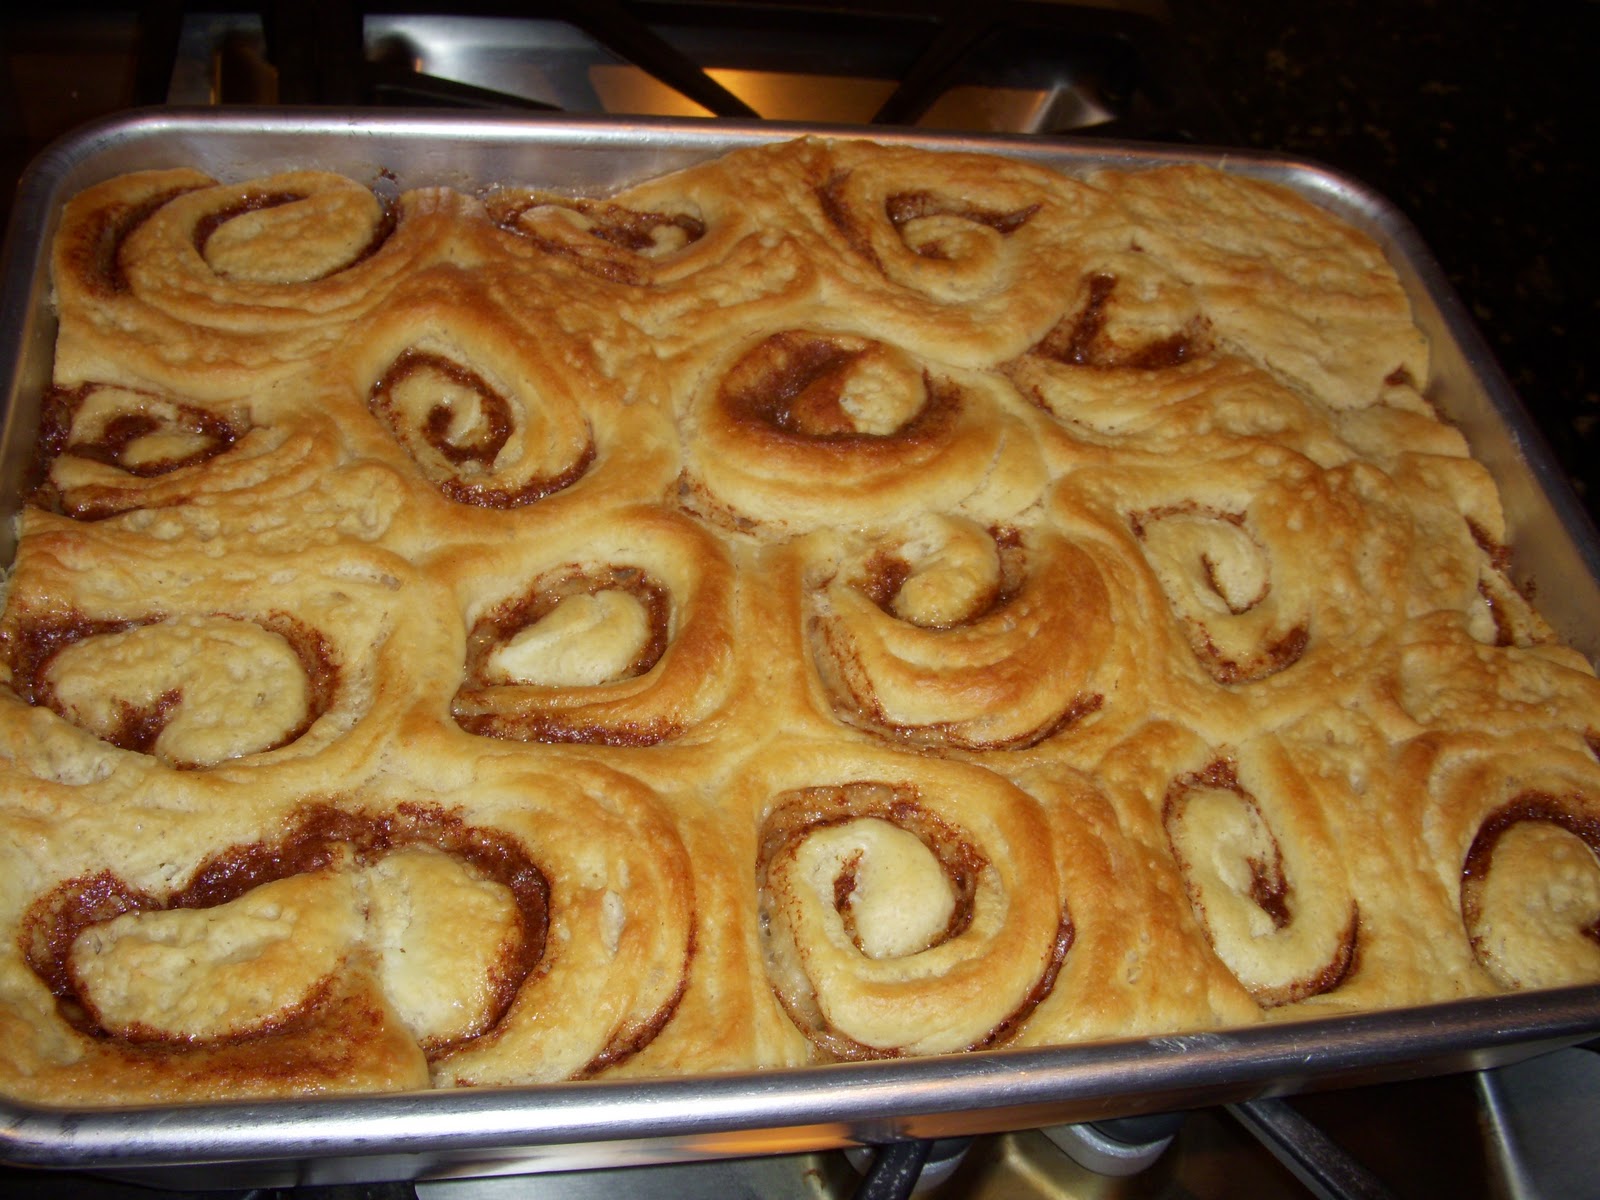
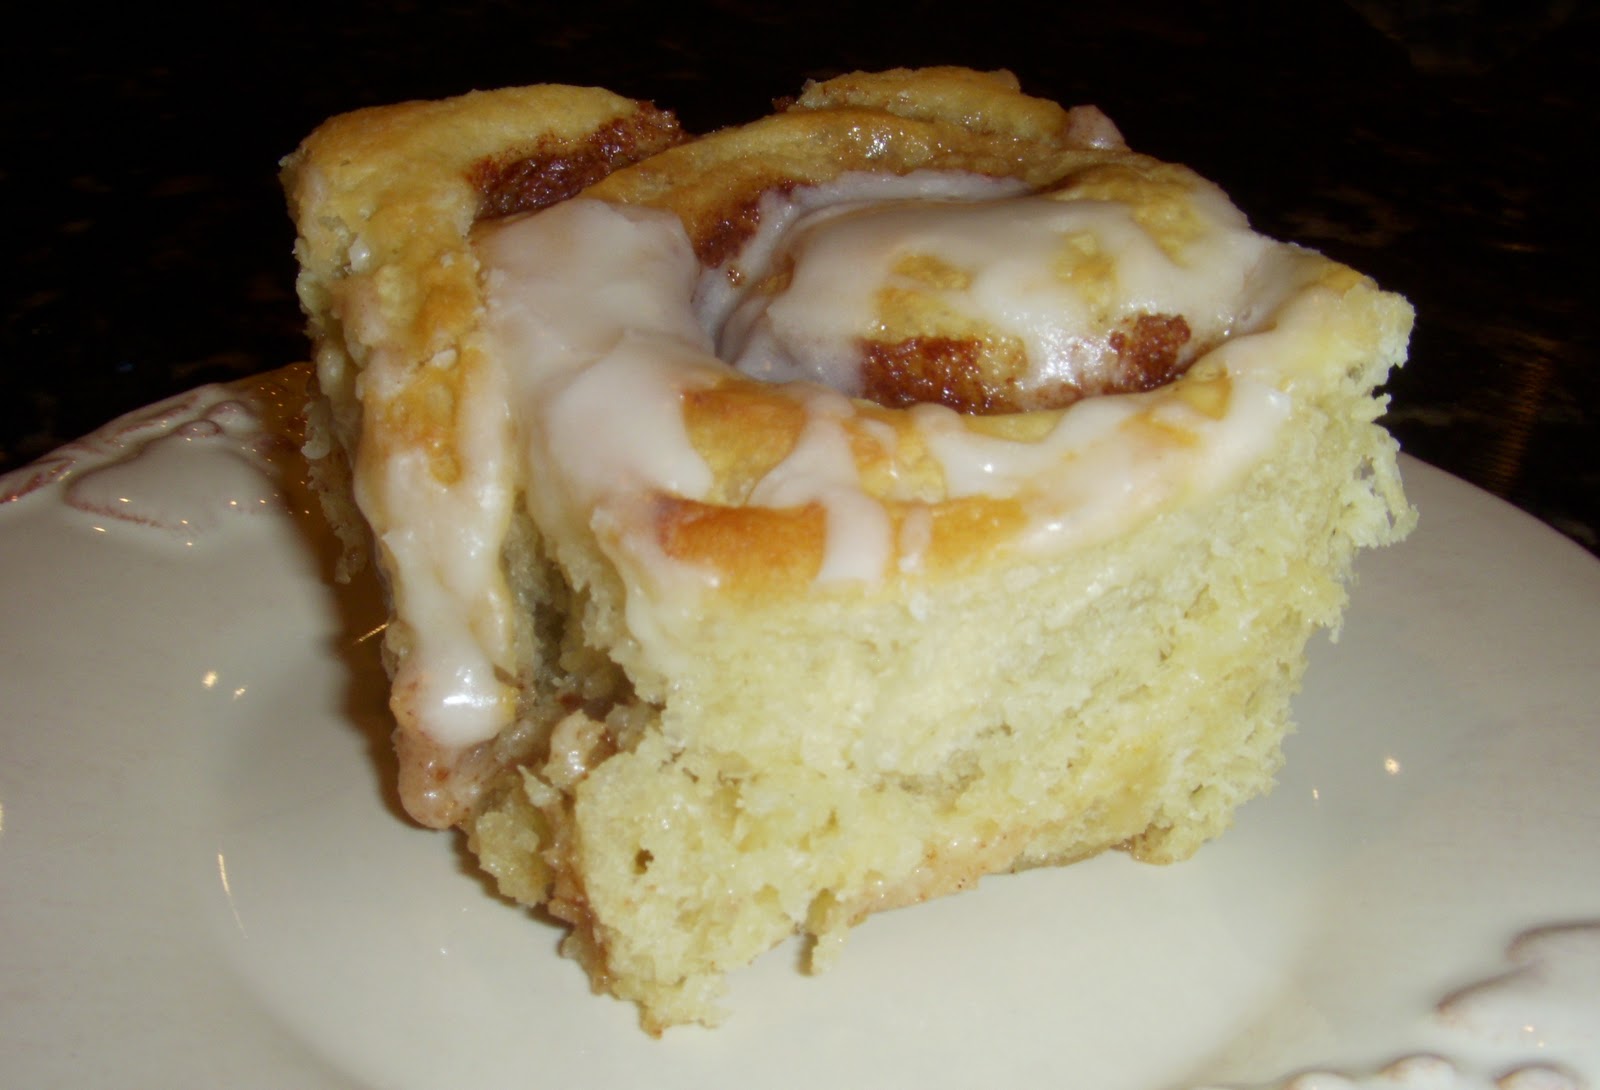
THESE ARE THE BEST CINNAMON ROLLS IN THE ENTIRE WORLD!!!  The recipe comes from Saveur.com.  I think they beat out any specialty bakery store out there!  The cream cheese part in these cinnamon rolls is not in the icing, like you may be expecting…. it’s actually kneaded into the dough!  Spreading cream cheese into the layers of dough enhances the richness and moistness of these rolls.  As you can see from the picture above, the gooey, buttery, cinnamon-sugar inside is one of the best parts of the cinnamon roll, and this recipe will not disappoint.

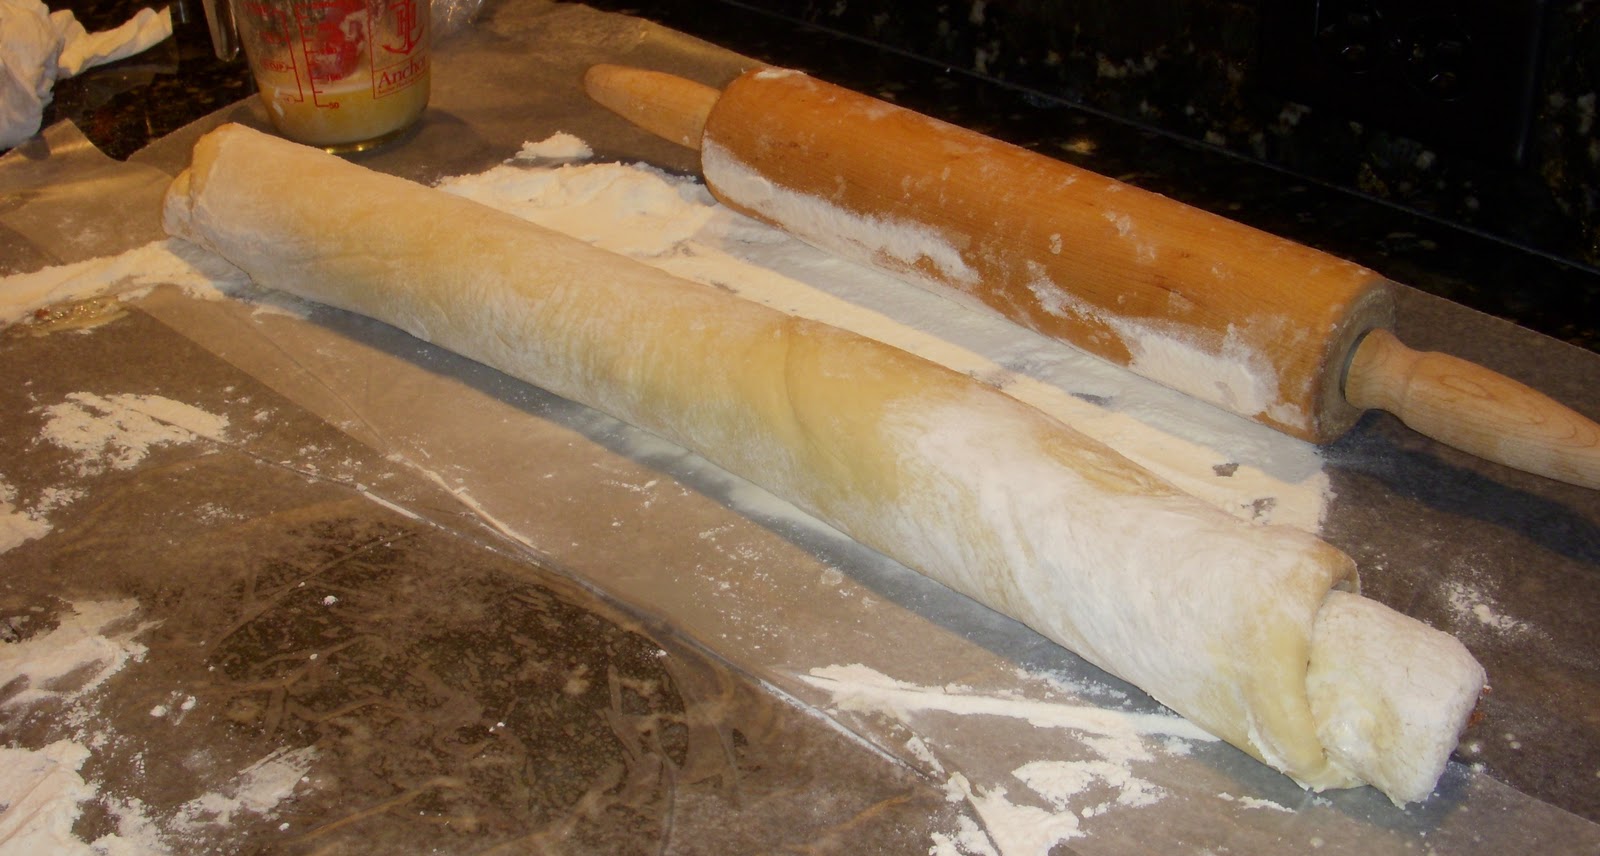
When you roll these out, you have two options depending on how big you want your cinnamon rolls.  With the first option, you can tightly roll the dough logs “hamburger style” where the short-side of the rectangle is being rolled.   This will yield 8 GIGANTIC cinnamon rolls (see the picture on Saveur.com).   The second option is to roll the dough log “hot dog style” or long-ways, (what we did) to create “normal-sized” cinnamon rolls, yielding about 18 rolls.

The original recipe calls for a buttermilk icing, but since we did not have any buttermilk, and because we love our icing recipe so much, we just used ours.  Our icing is your traditional cinnamon roll icing with powdered sugar, milk, and vanilla.

This dough may be prepared a day in advance and left to rise in the refrigerator overnight.   Enjoy and let me know what you think!

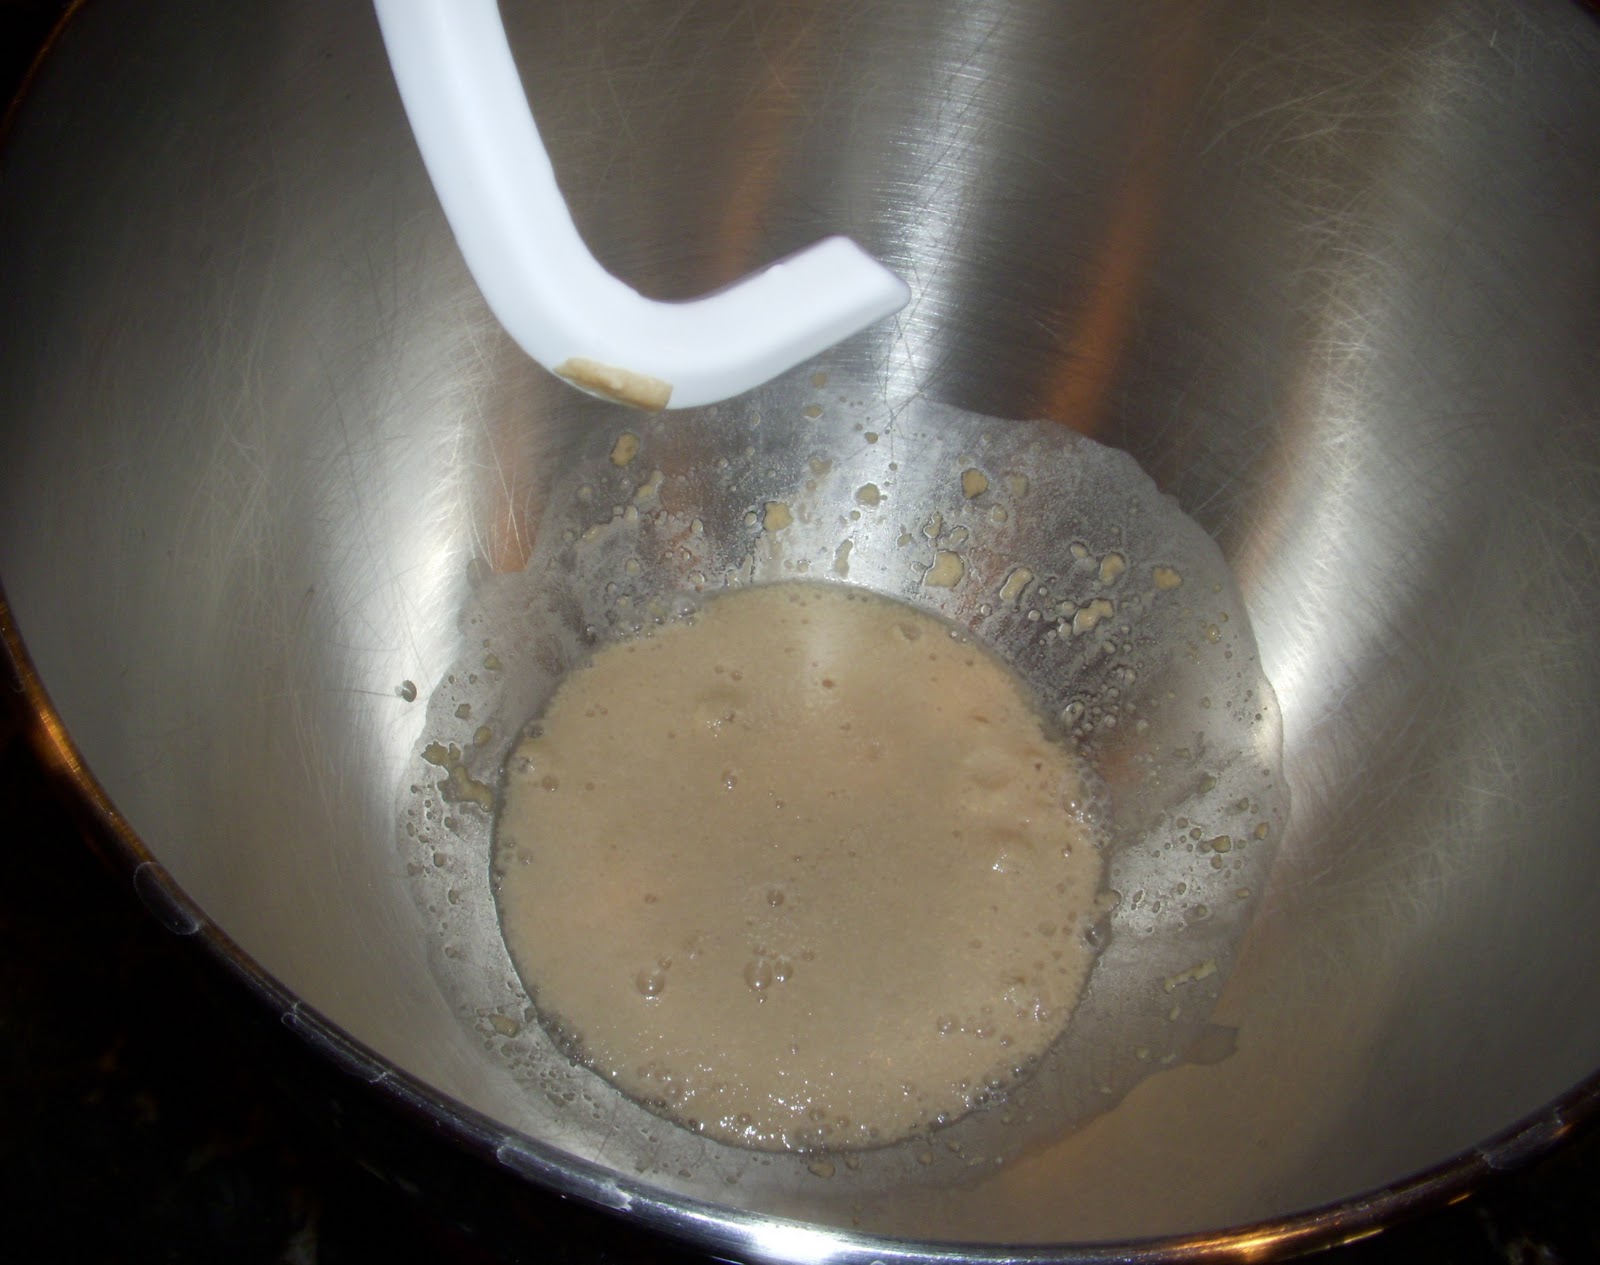
Combine yeast, 1/2 tsp. sugar, and 1/4 cup water heated to 115 degrees F in an electric mixer fitted with a dough hook.  Stir to combine and let sit until foamy, about 10 minutes.

Add the remaining sugar, milk, brown sugar, vanilla, egg, and egg yolk.  Beat on low speed for about 1 minute.  Turn mixer off and add the flour and salt.  Beat on medium speed until dough just comes together.  Then knead on high speed for 4 minutes.  Add butter, then return to high speed for 6 minutes.  The dough will be smooth and pull away from the side of the bowl.  Cover and let dough rise for 1 1/2-2 hours, or until doubled in size.

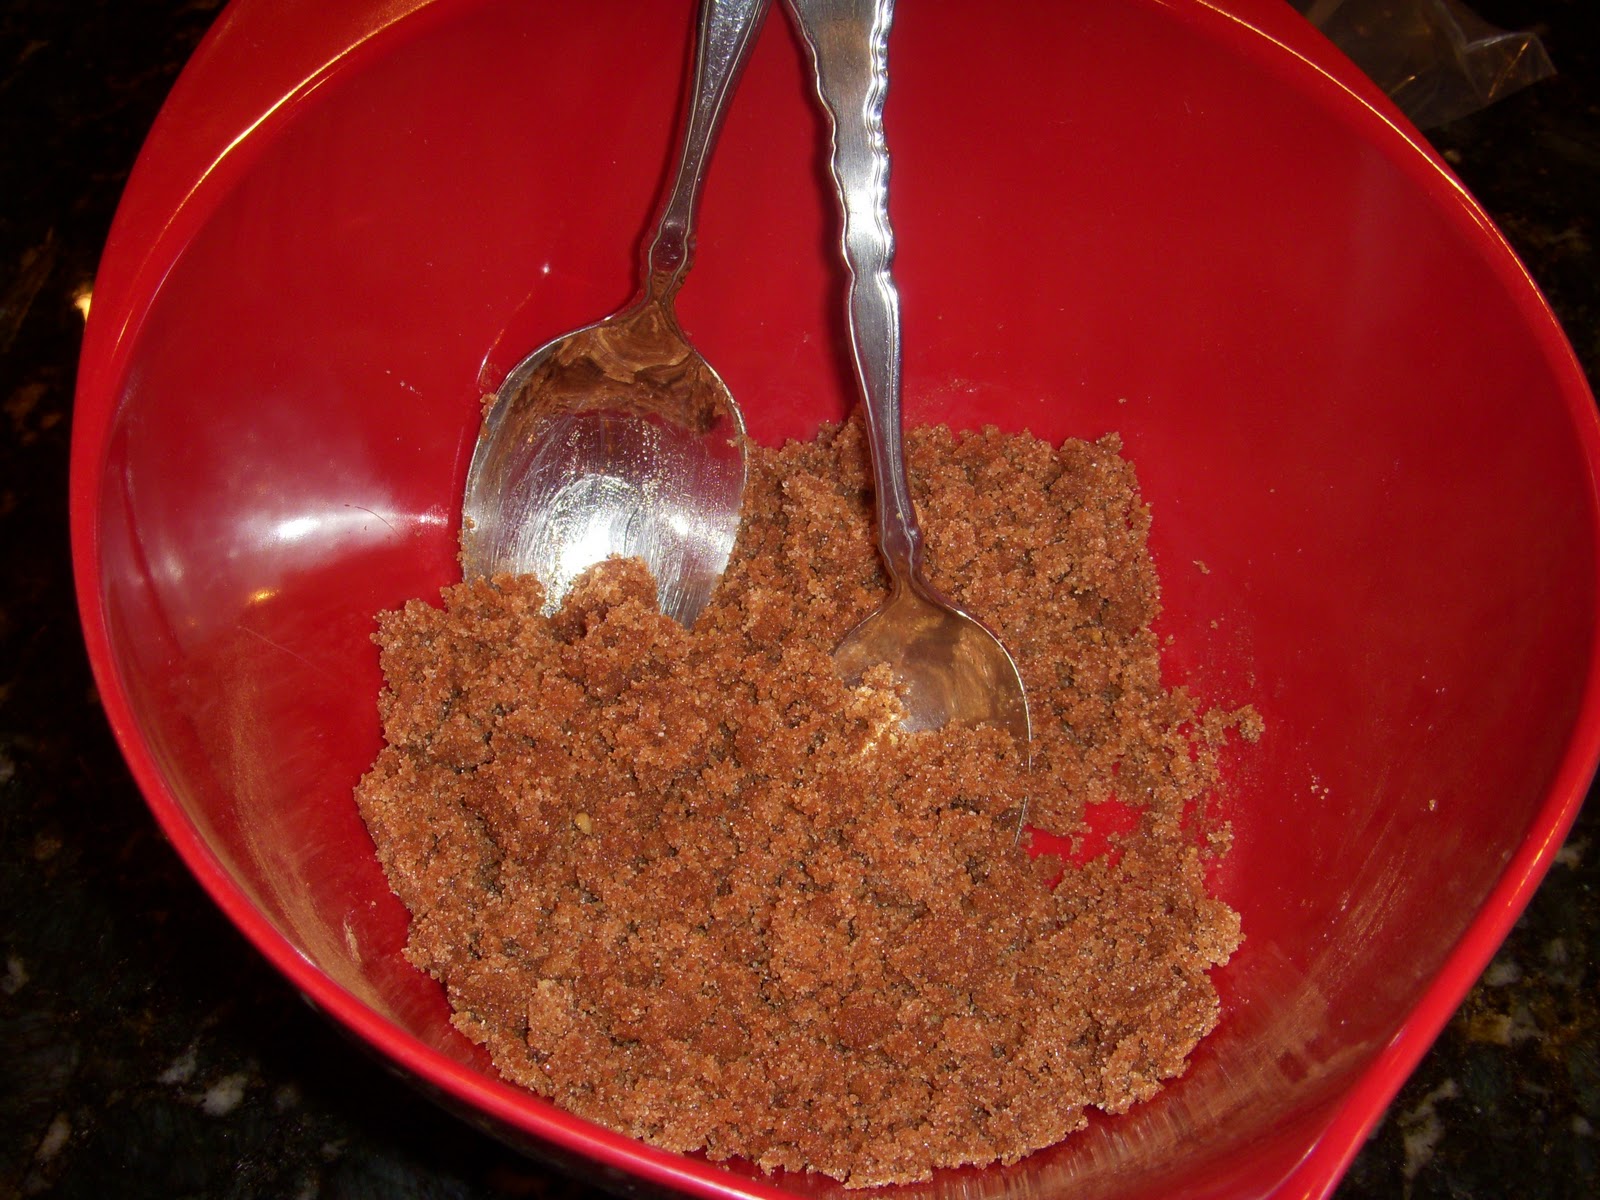
While the dough rises, make the filling:  combine the sugar, brown sugar, pecans (optional), walnuts (optional), raisins (optional), cinnamon, salt, and cloves in a large bow; stir to combine.  Stir in the maple syrup.

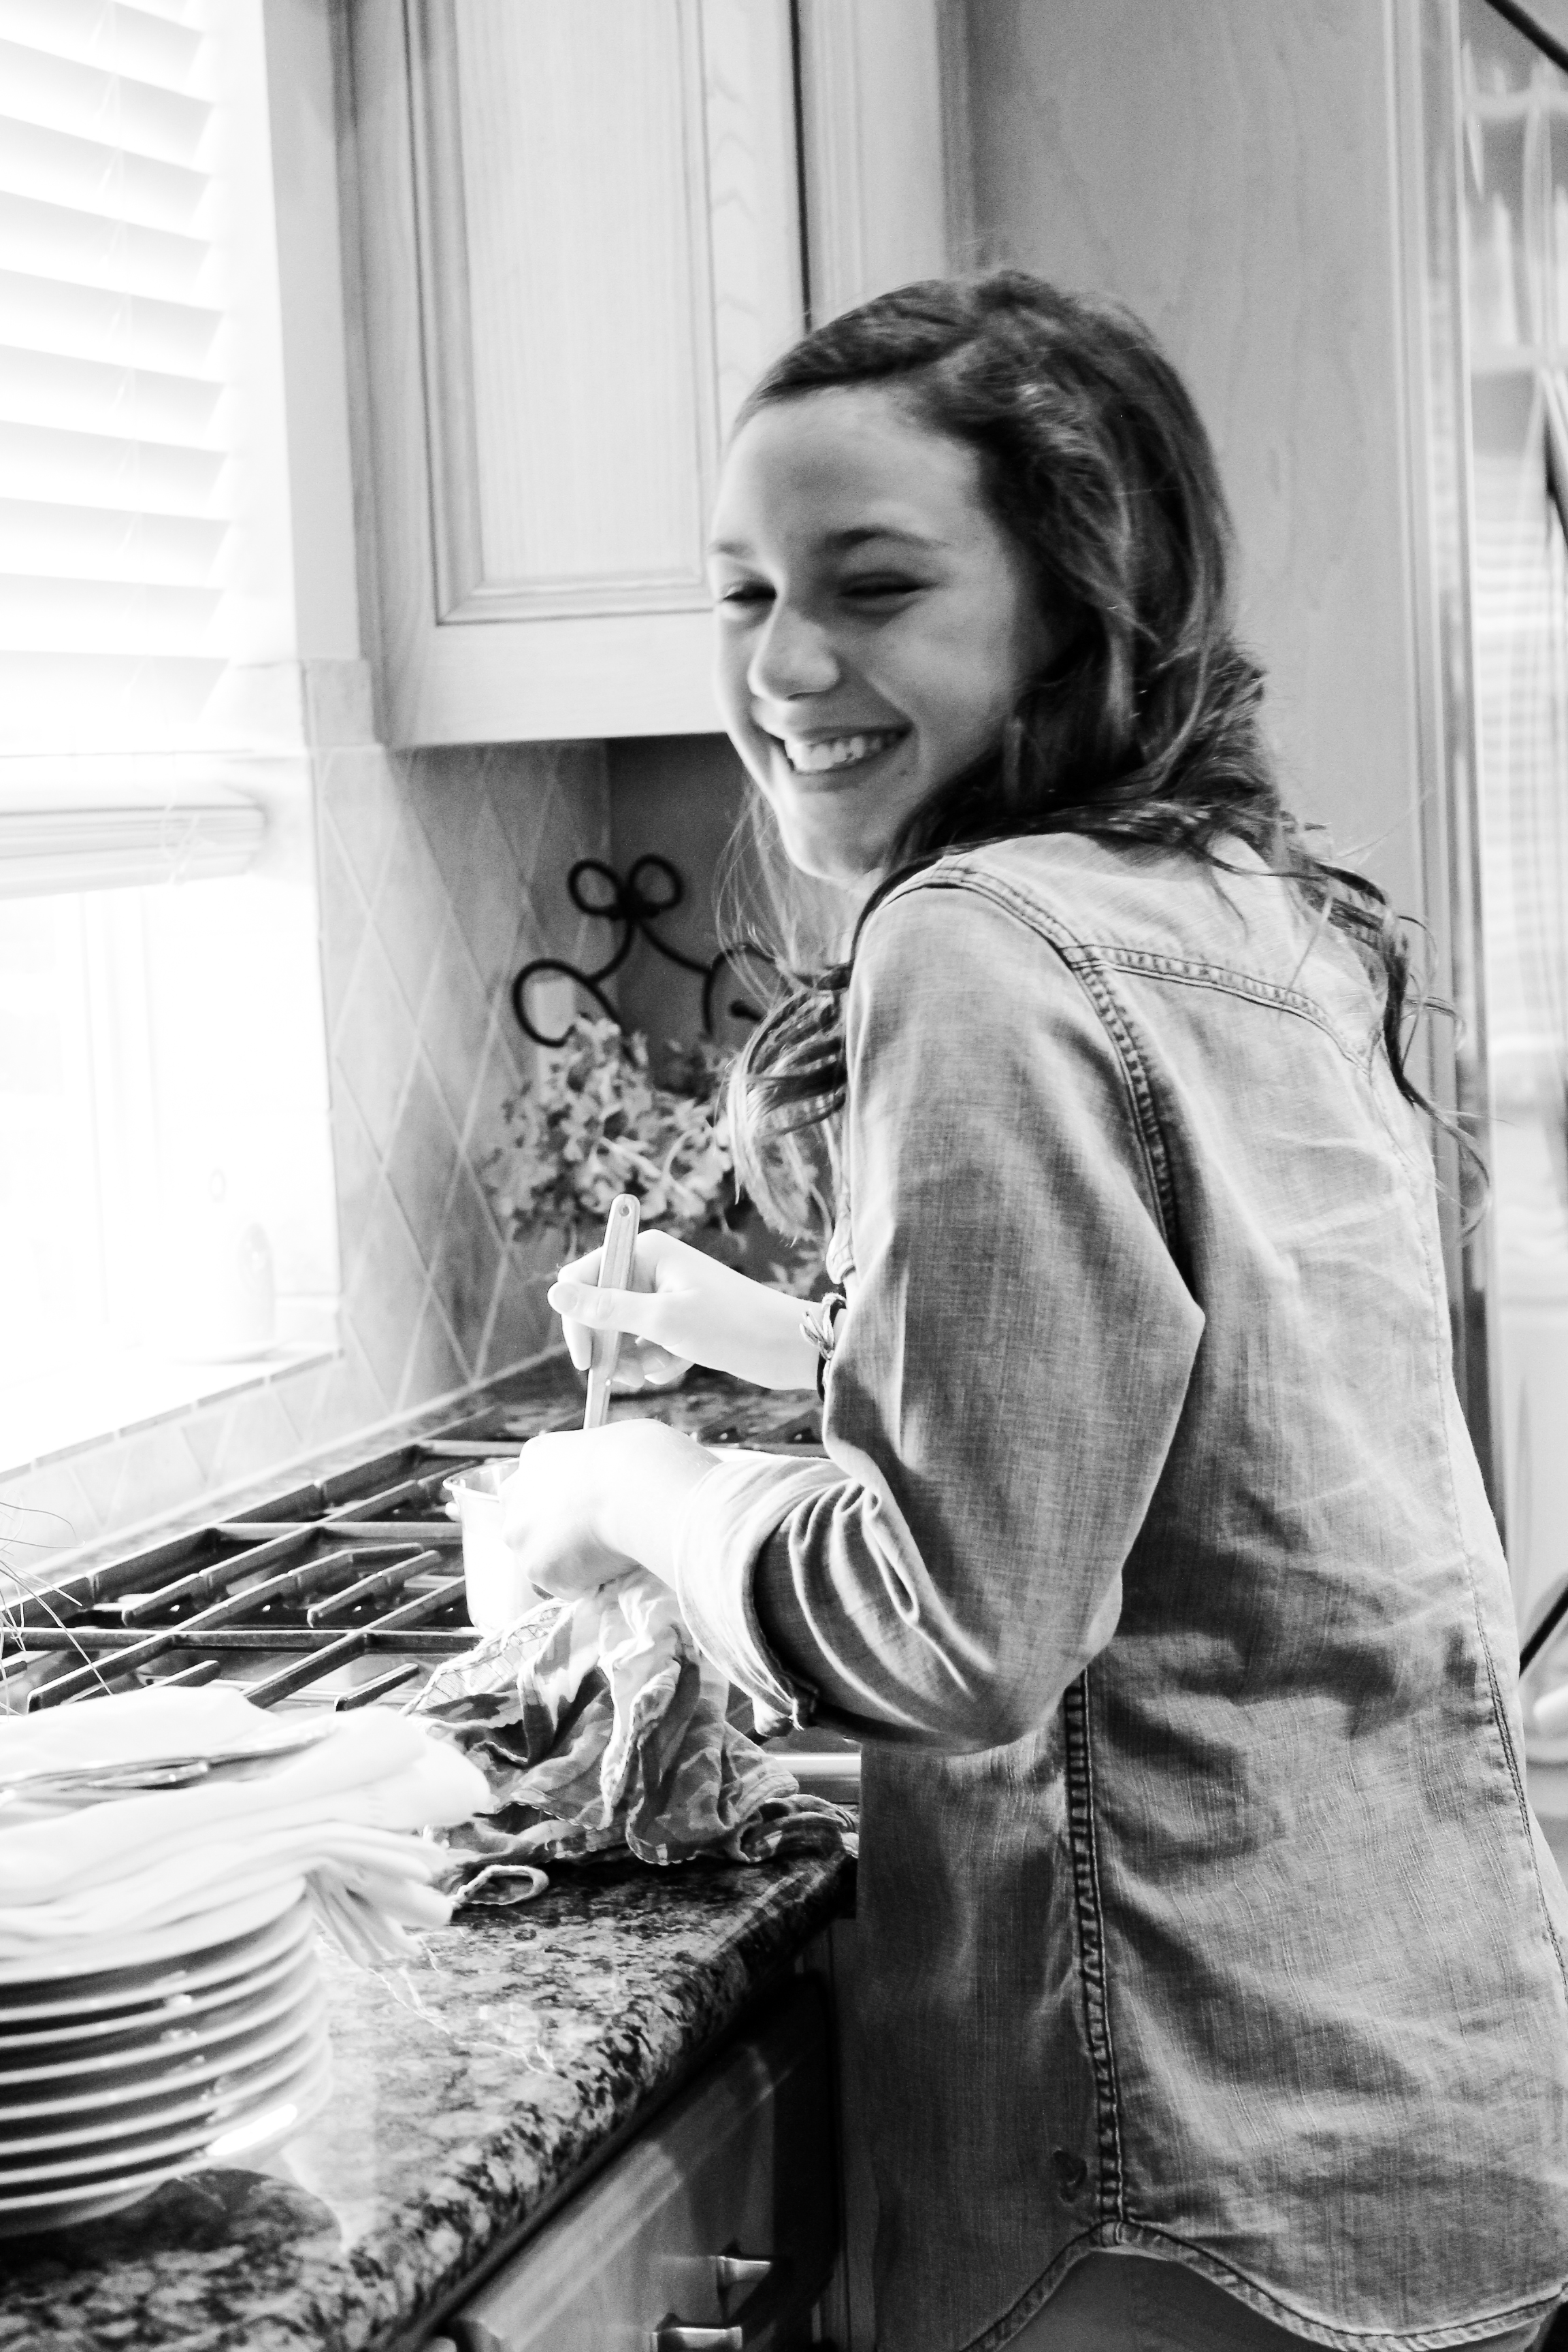
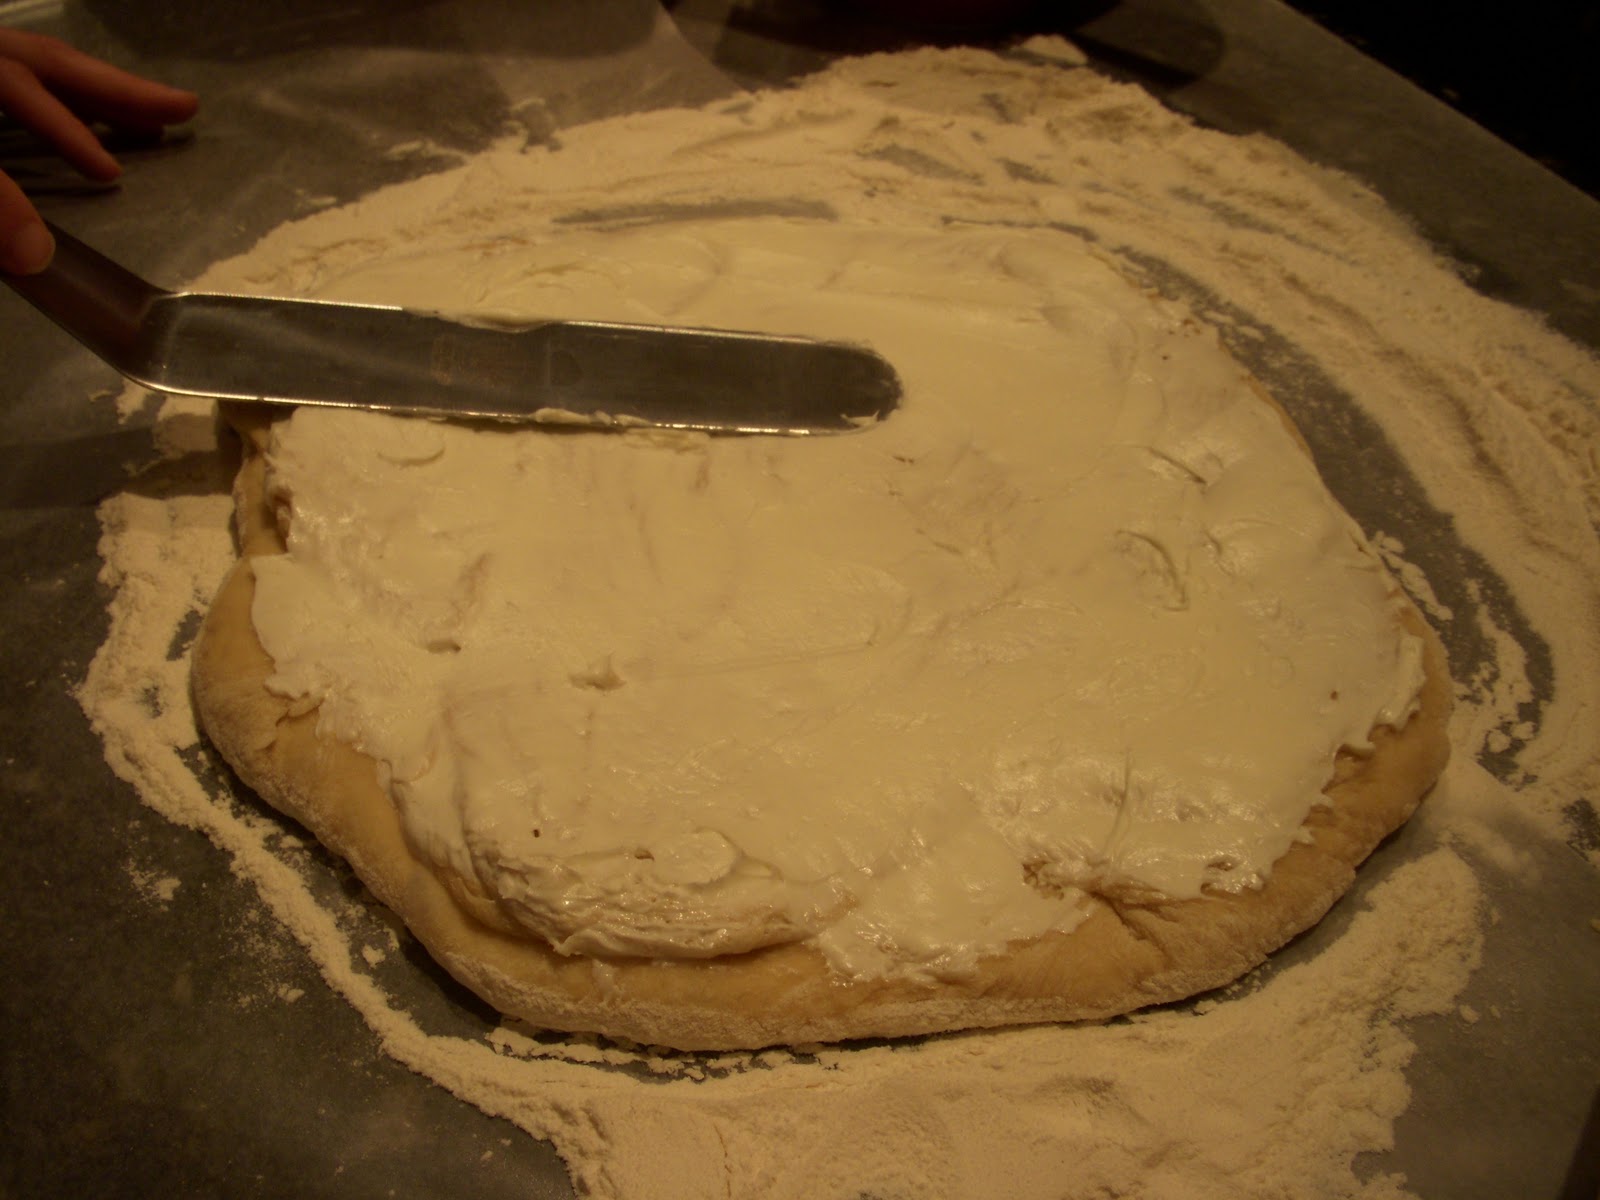
Beat cream cheese, and spread over the dough square.

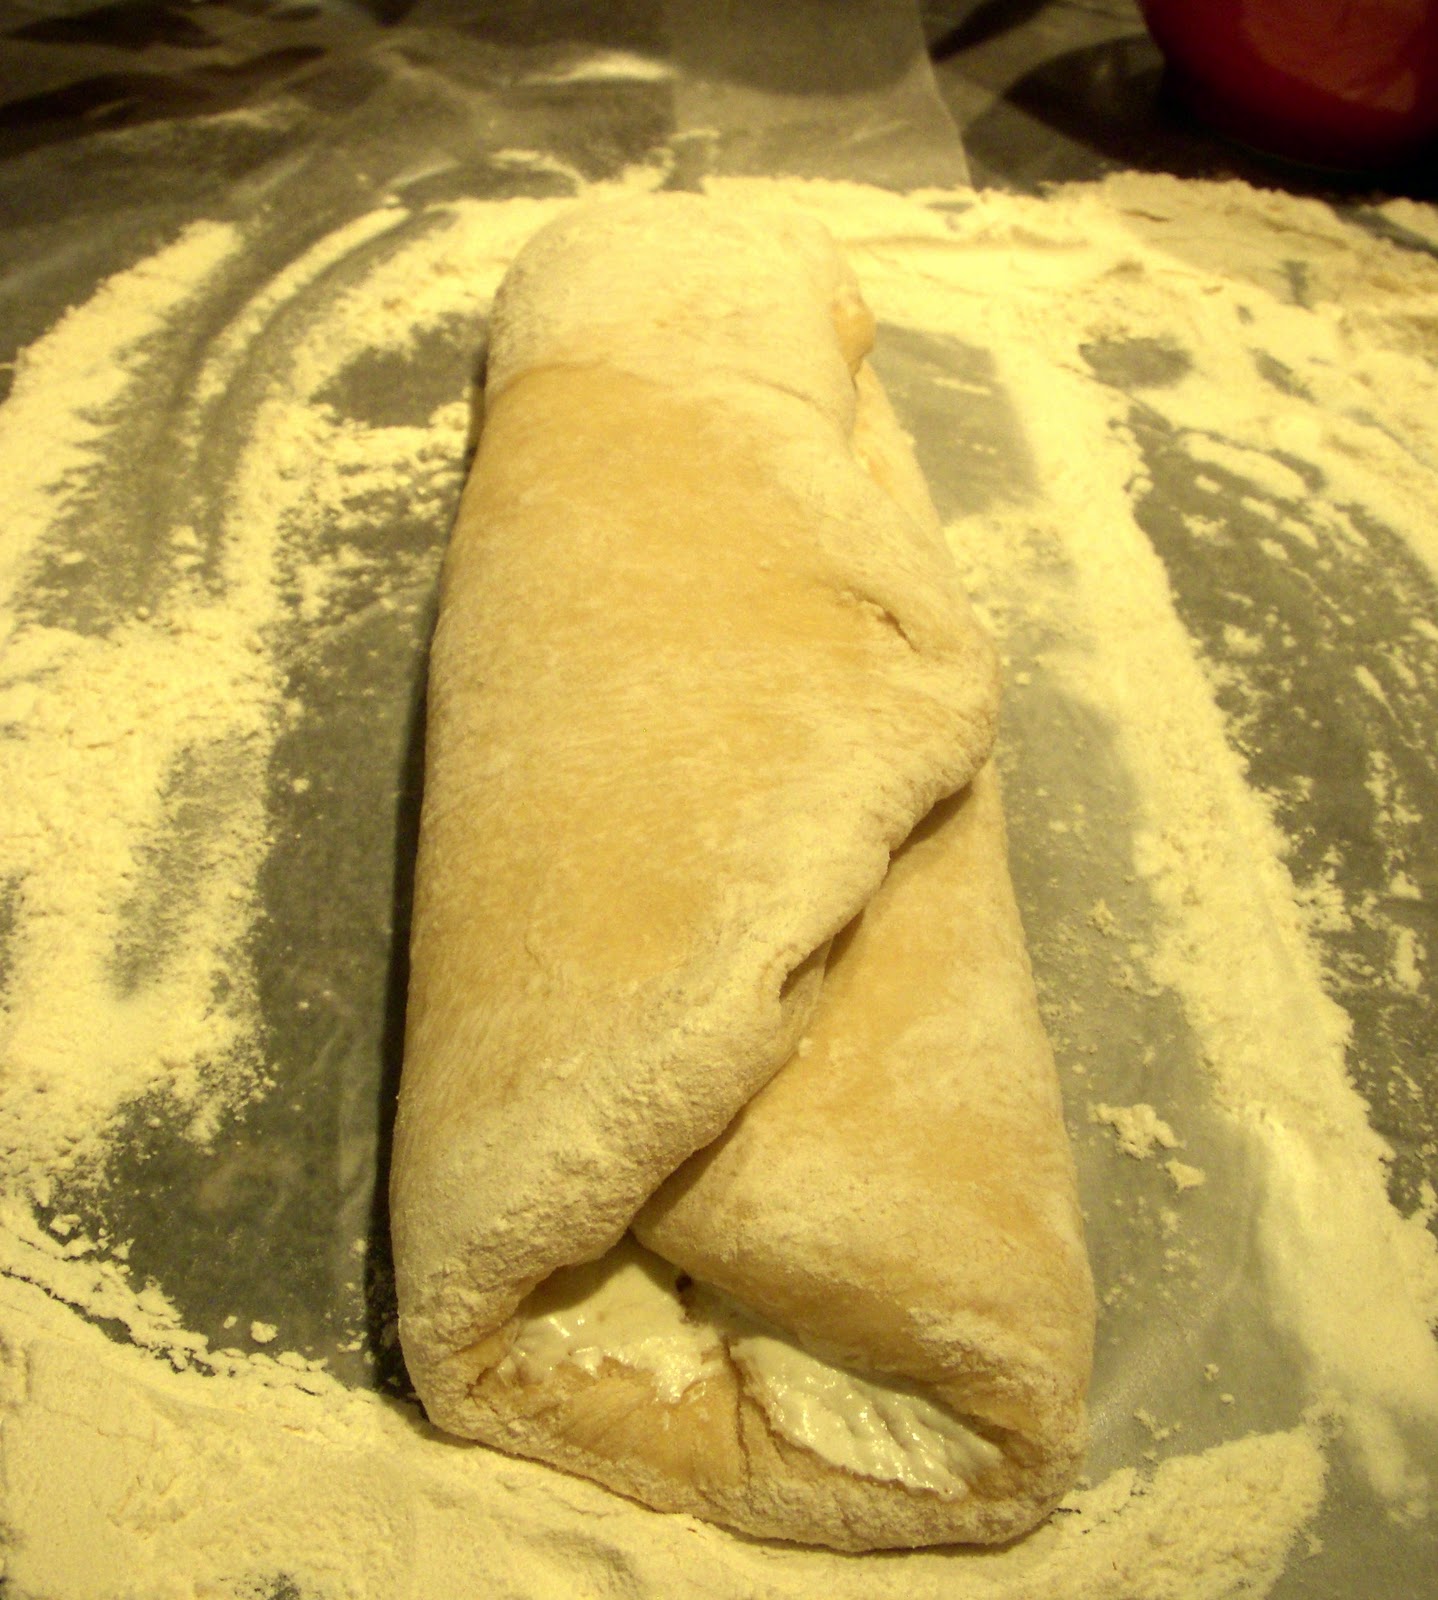
Fold the dough into thirds.

Then fold the dough into thirds again!

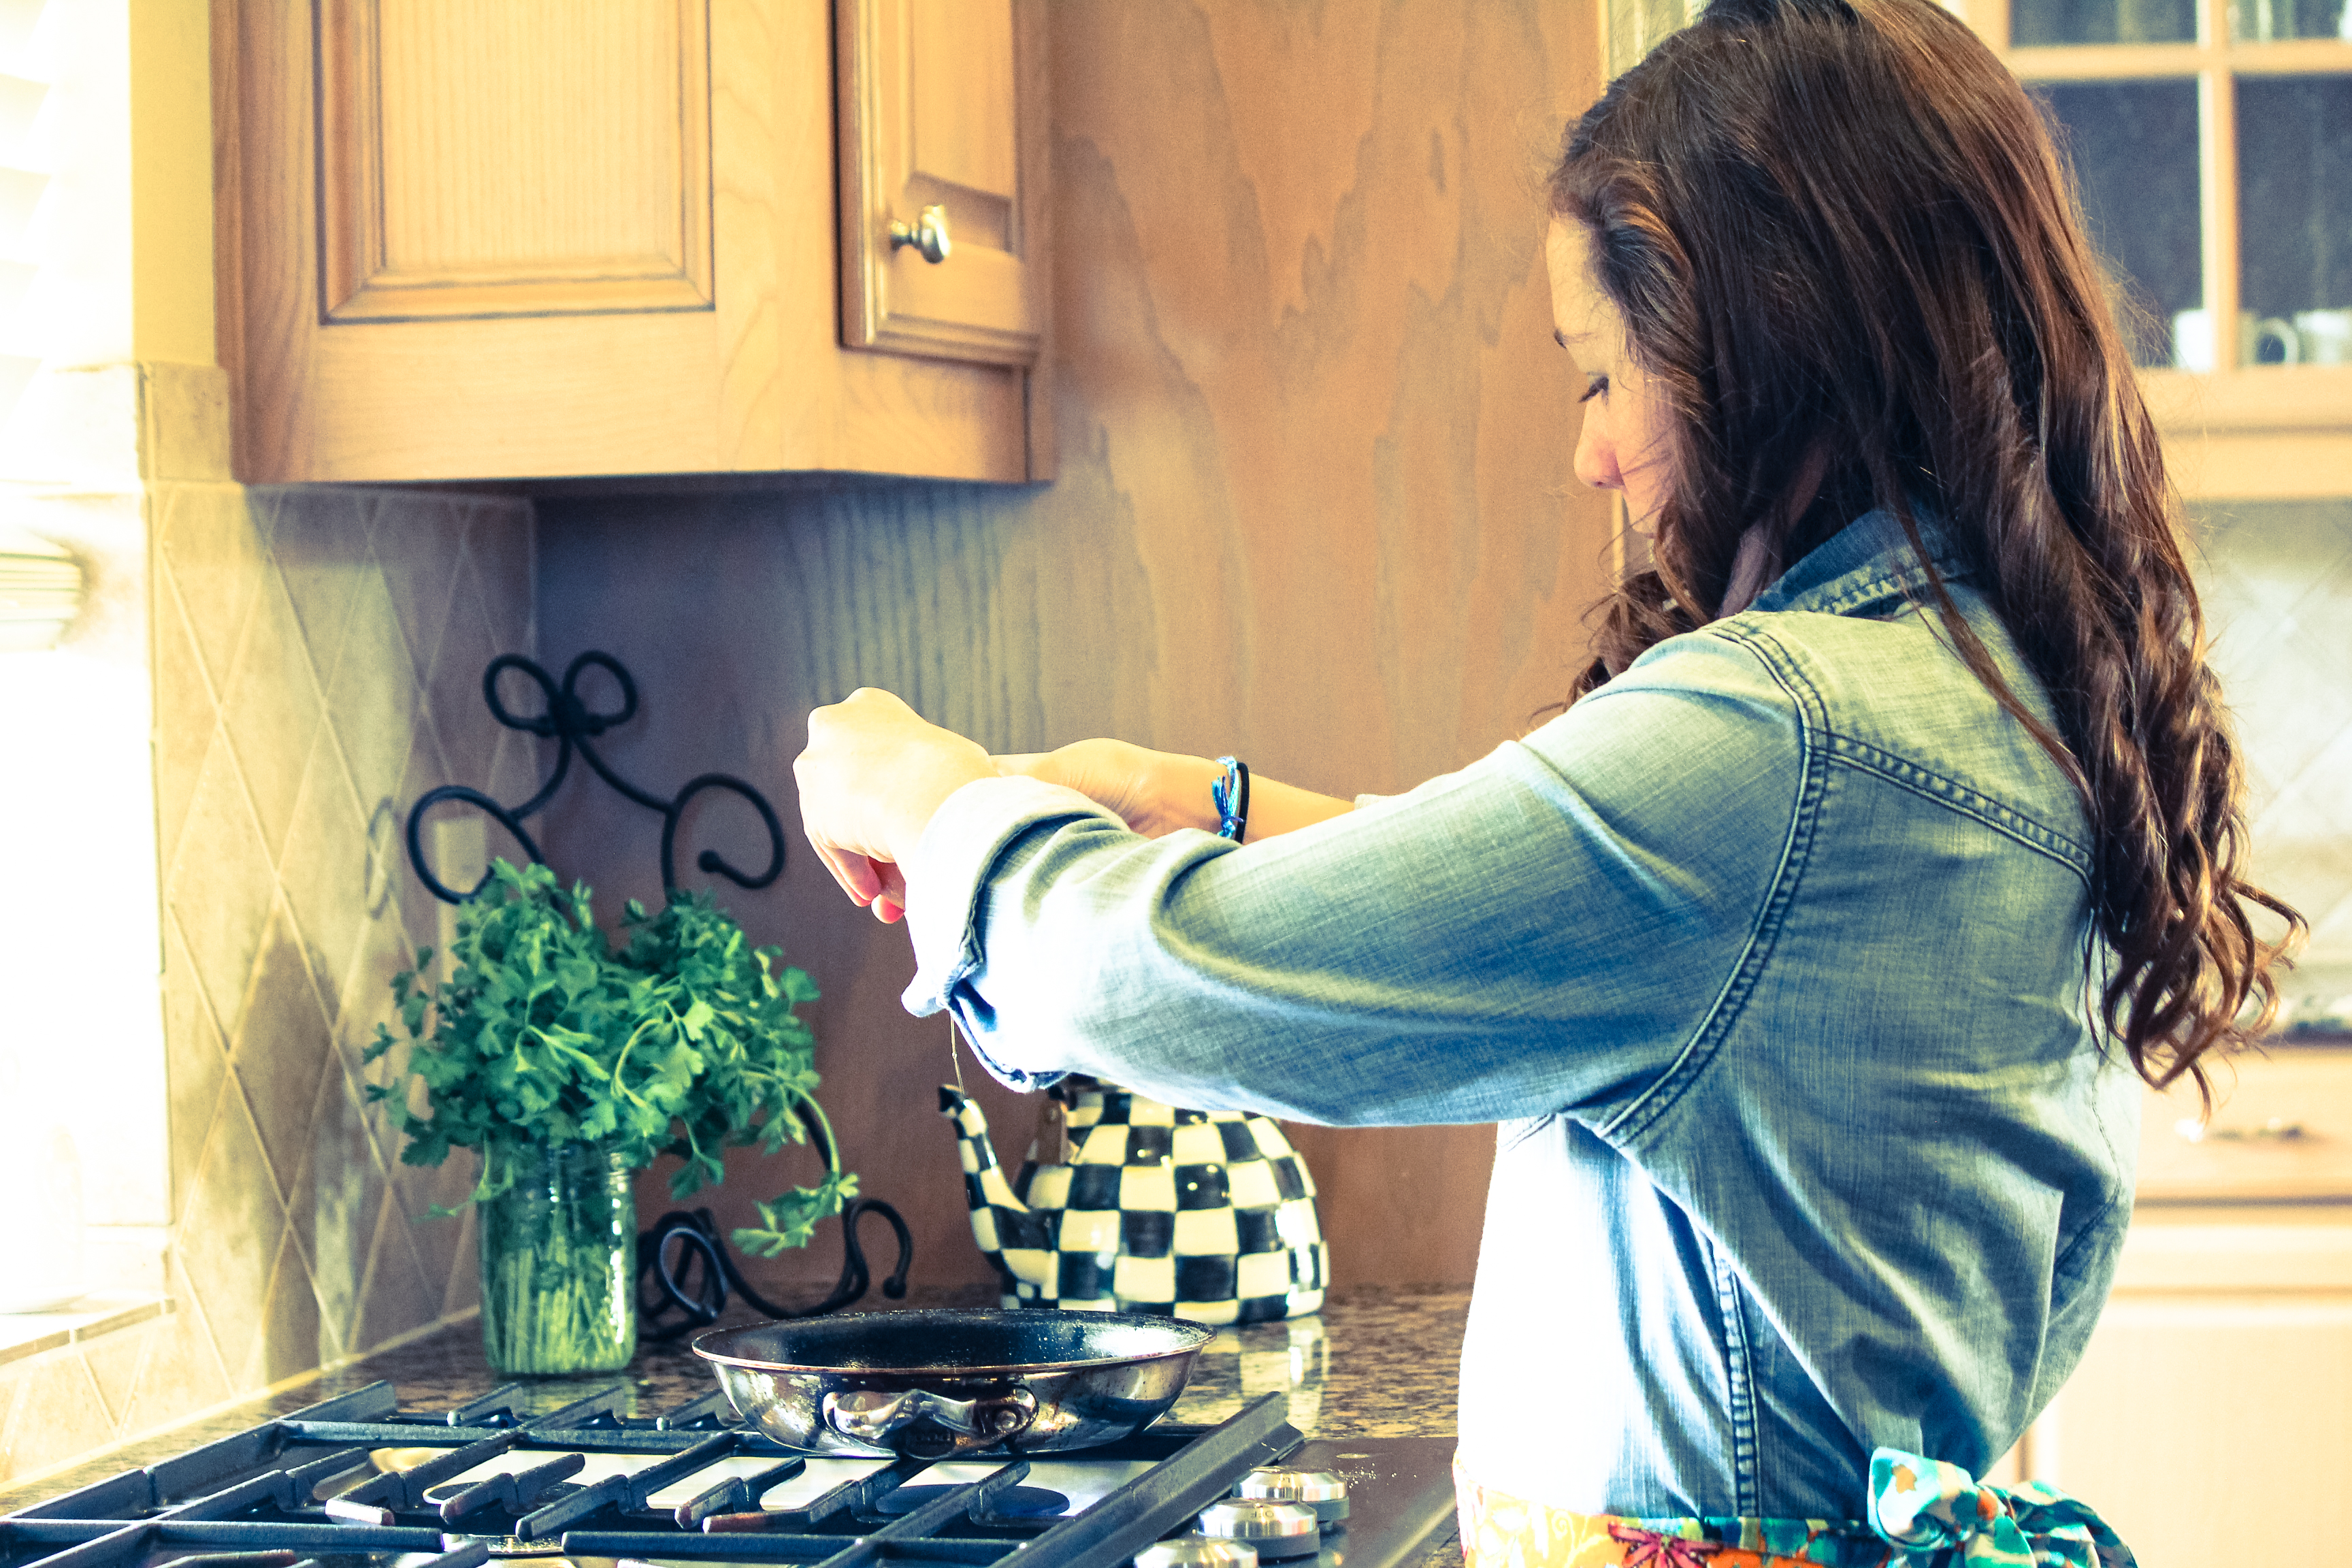
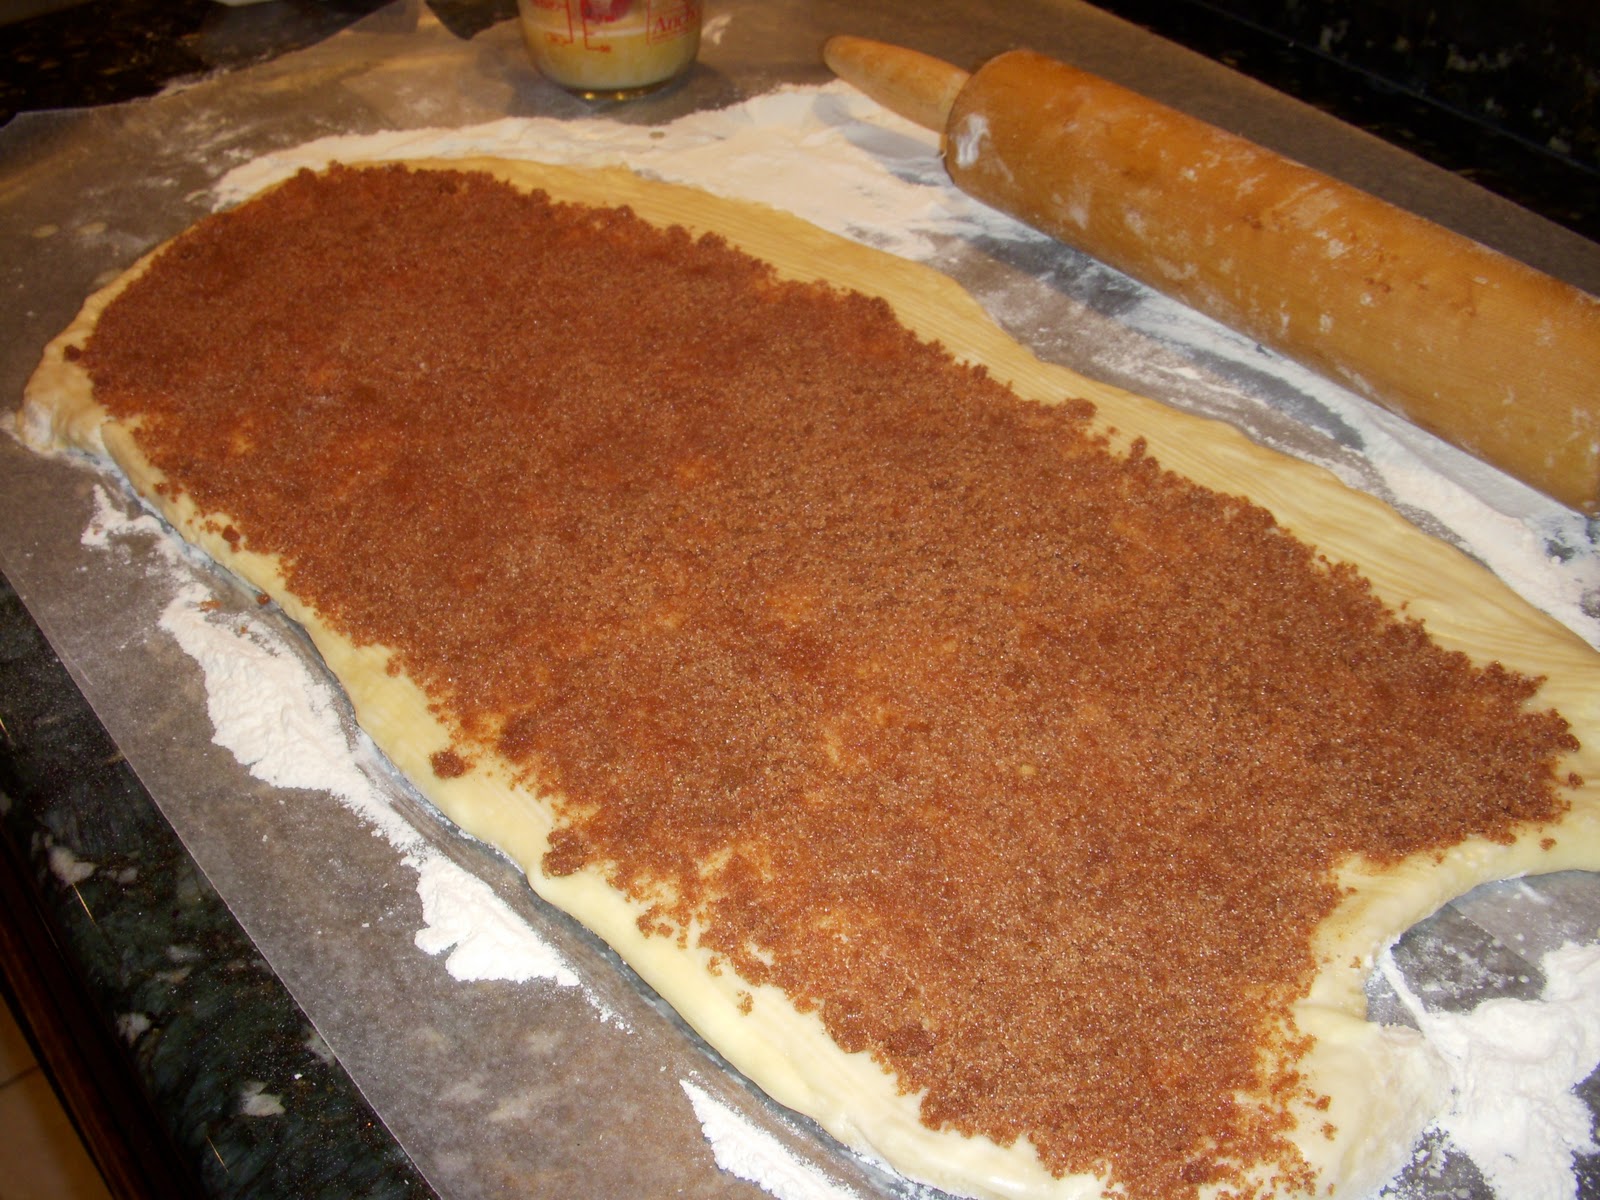
Roll dough into a 10 x 20-inch rectangle.  Brush the top with half of the butter, then top with the cinnamon mixture.

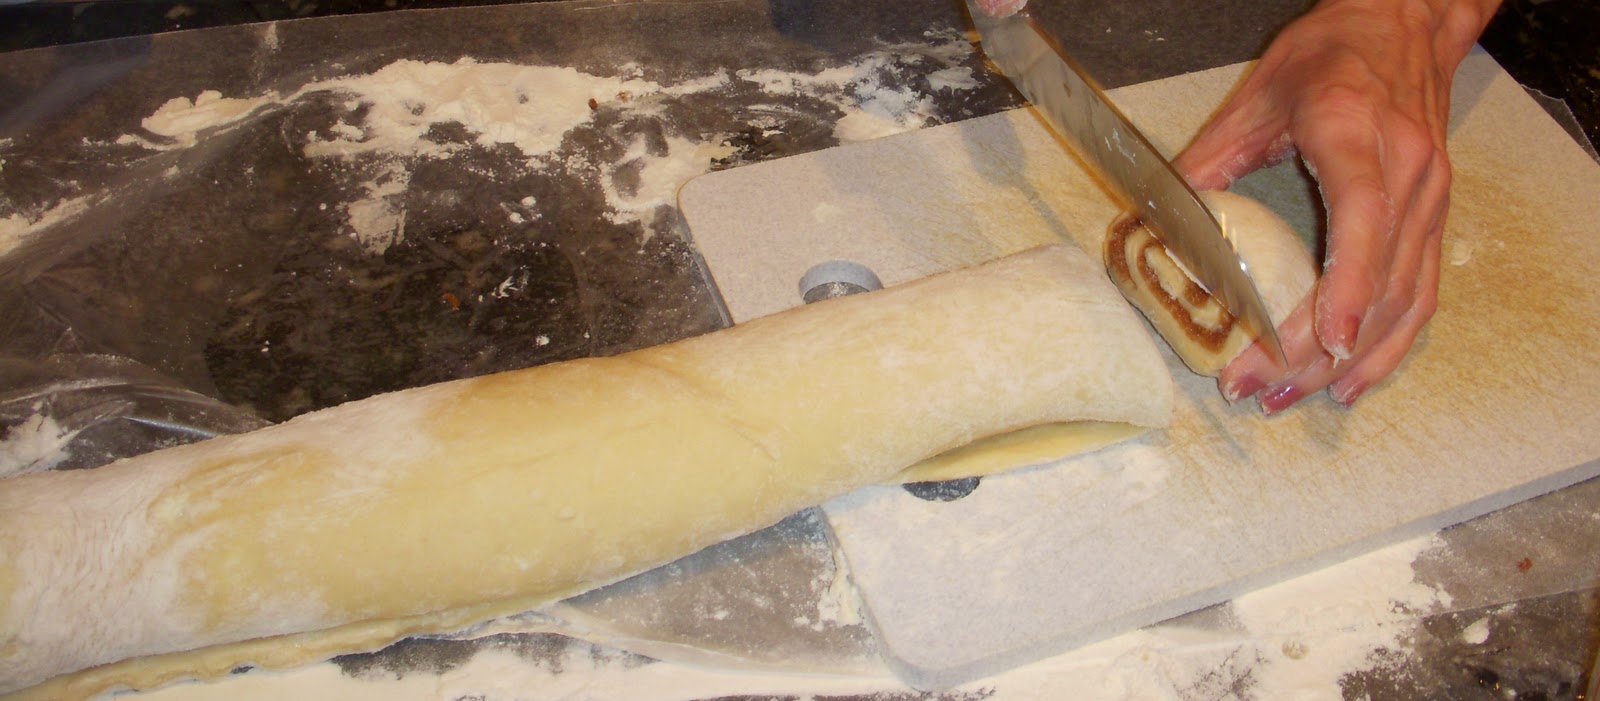
Tightly roll dough into a log.  We rolled it long-ways to make about 18 rolls.  If you want cinnamon rolls the size you would buy at a gourmet bakery, roll the dough short-ways and it will yield 8 HUGE rolls!

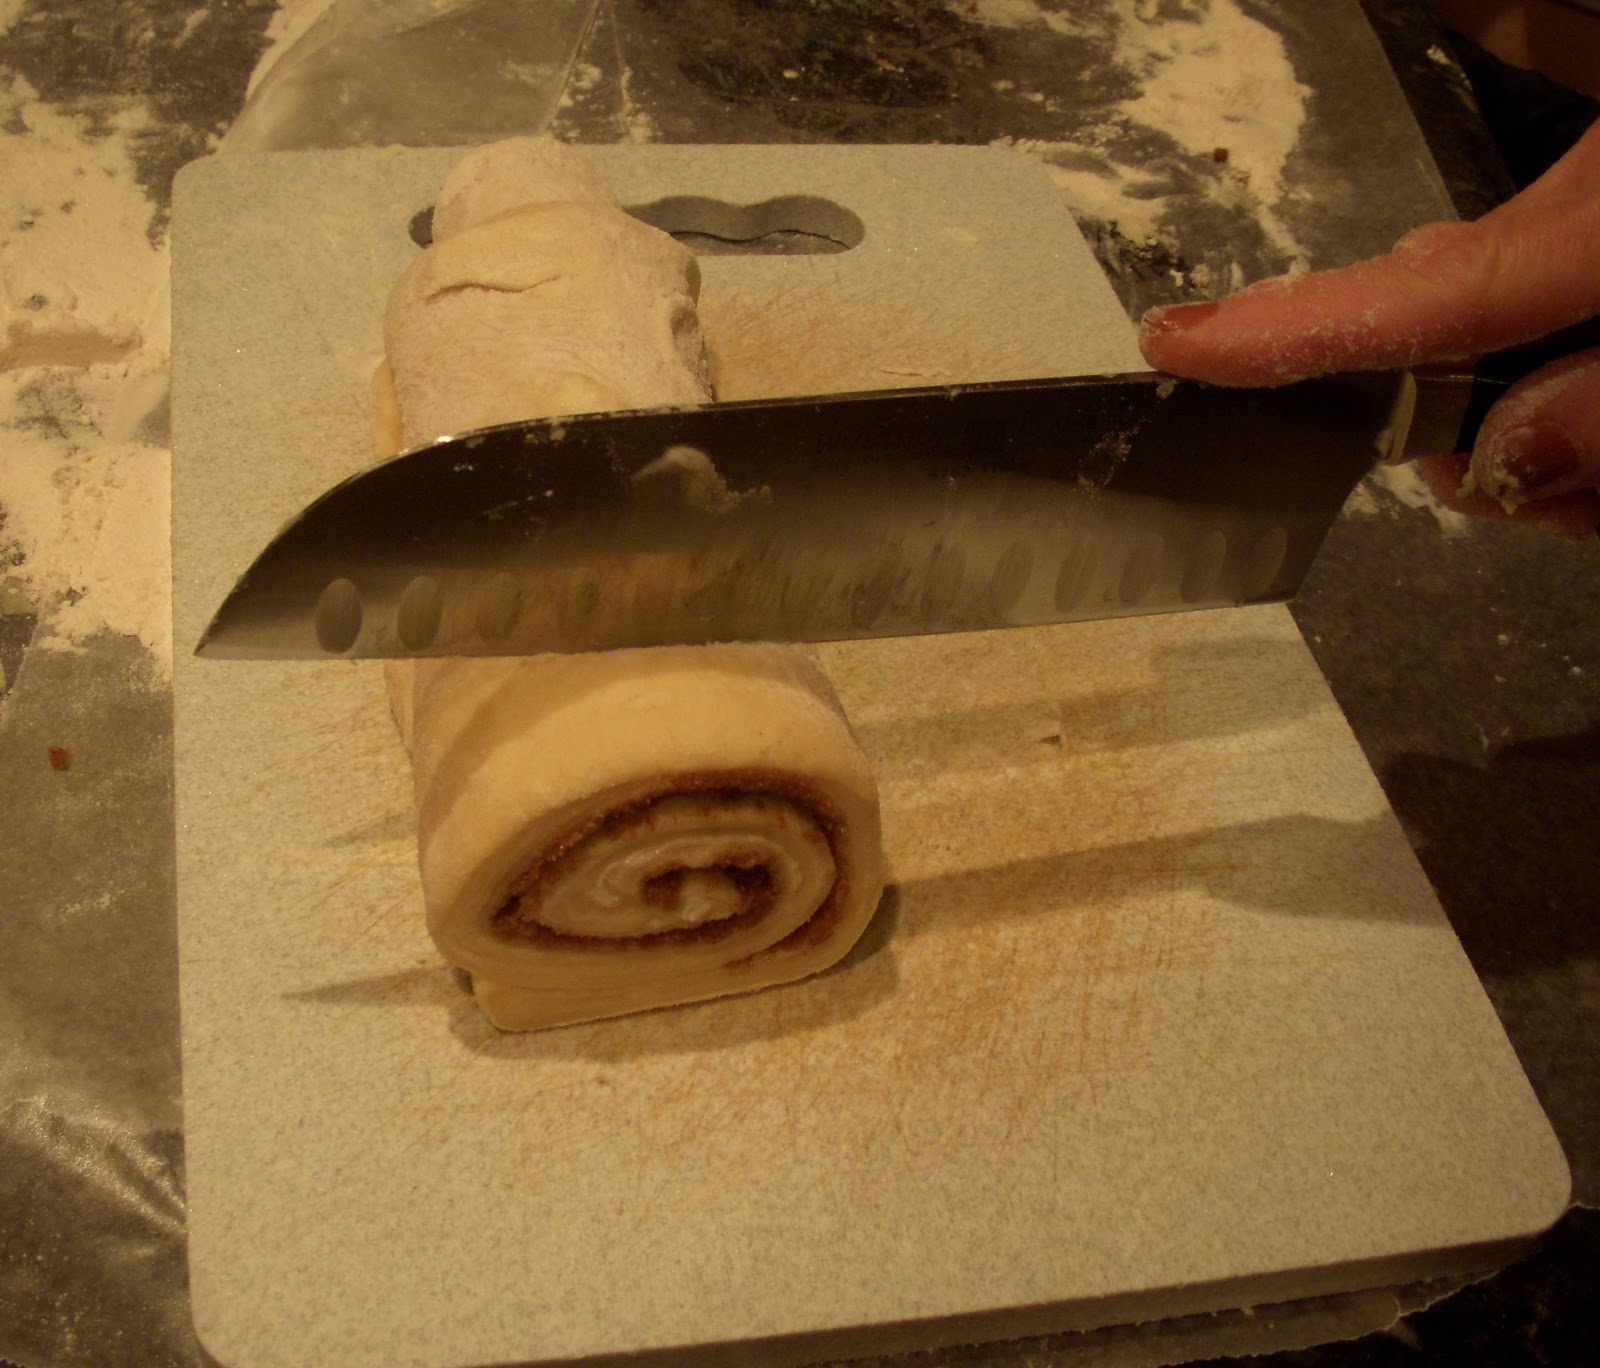
Slice rolls with a sharp knife, about 1 inch thick.

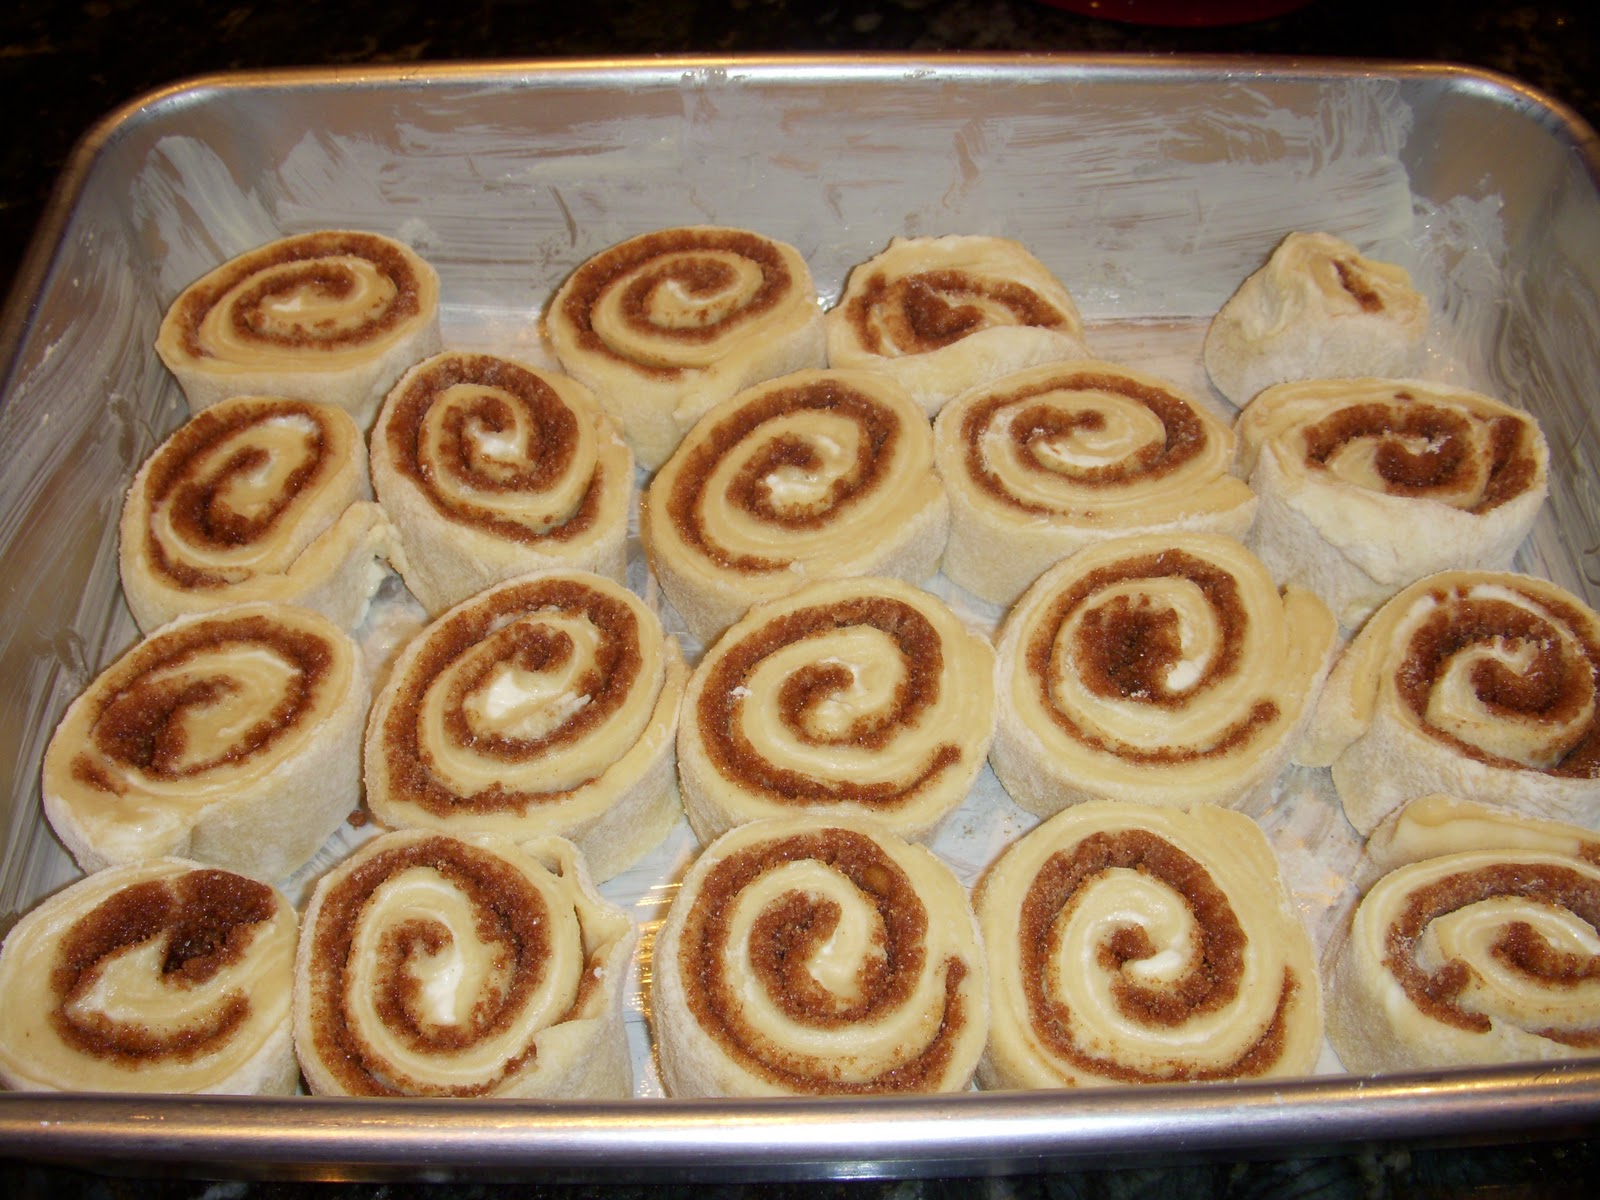
Slice and place into a buttered 9 x 13-inch pan.

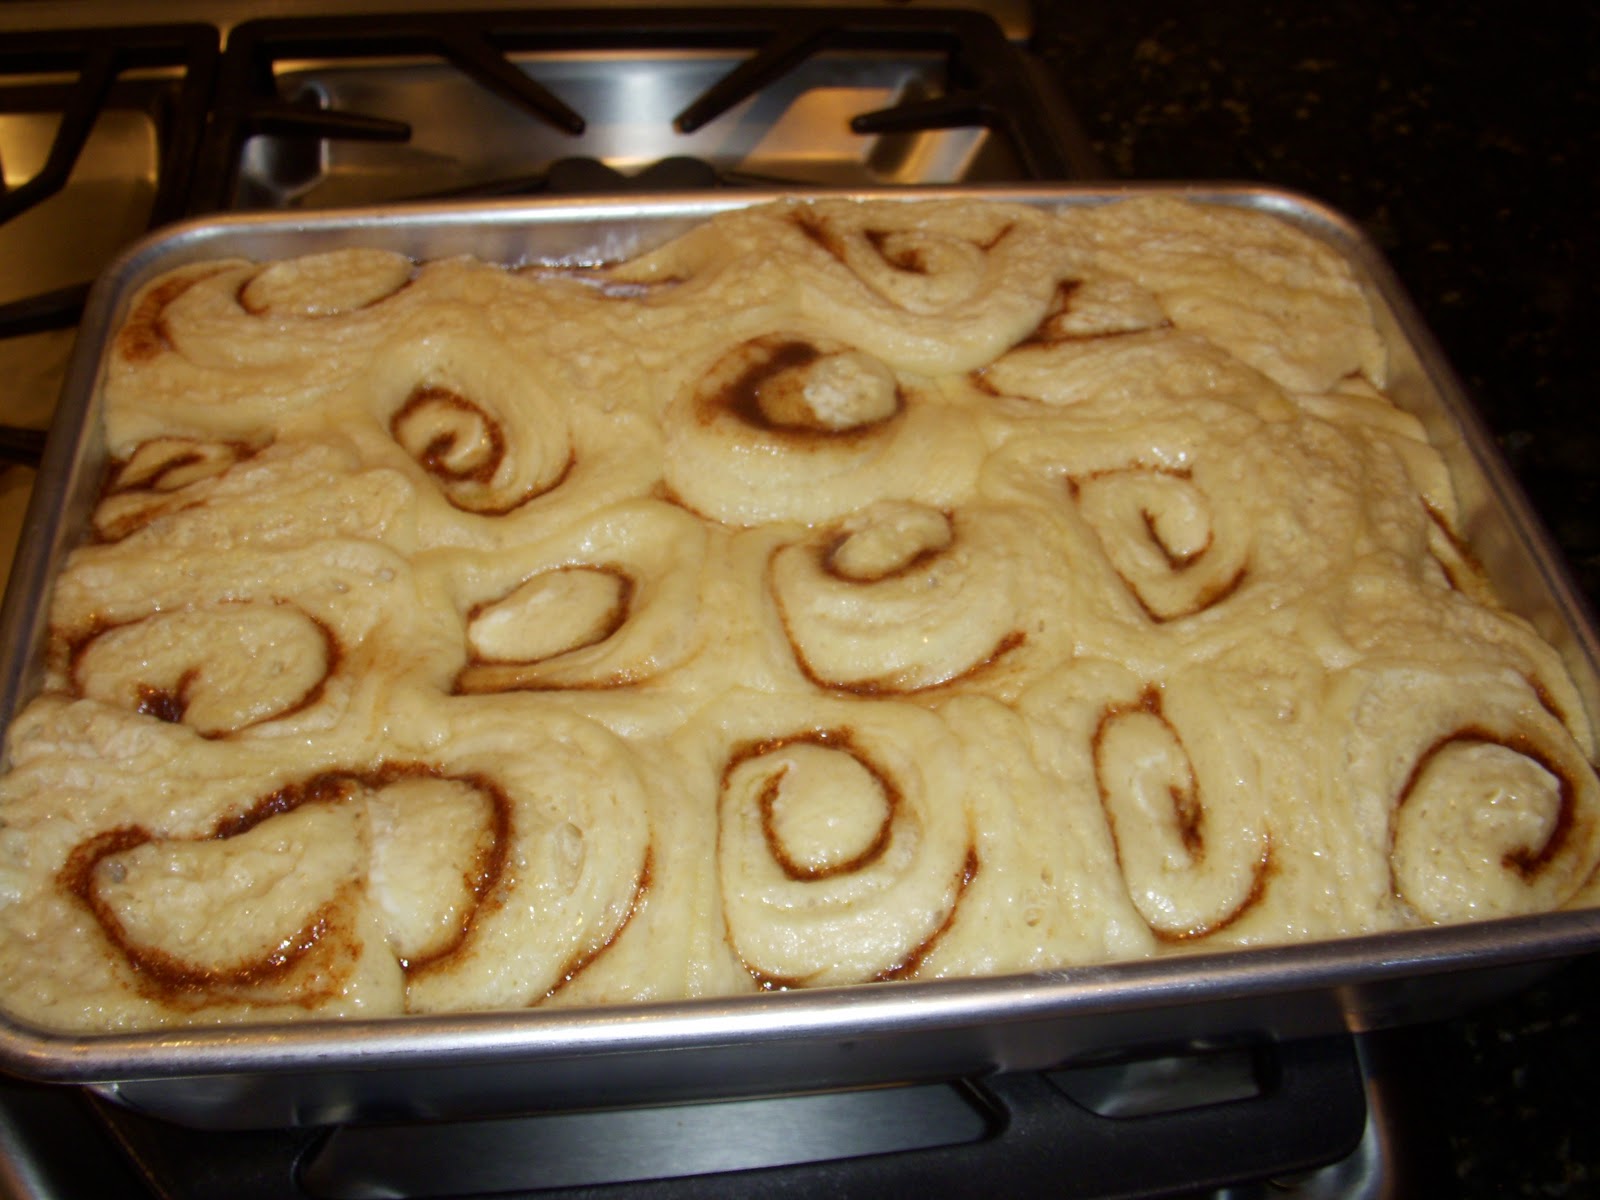
Let rolls rise another 2 hours.  Look at them!  They almost puffed up over the pan!

Bake in a 375 degree oven for 30 minutes.  They should be golden brown, and a toothpick inserted in the center should come out clean.

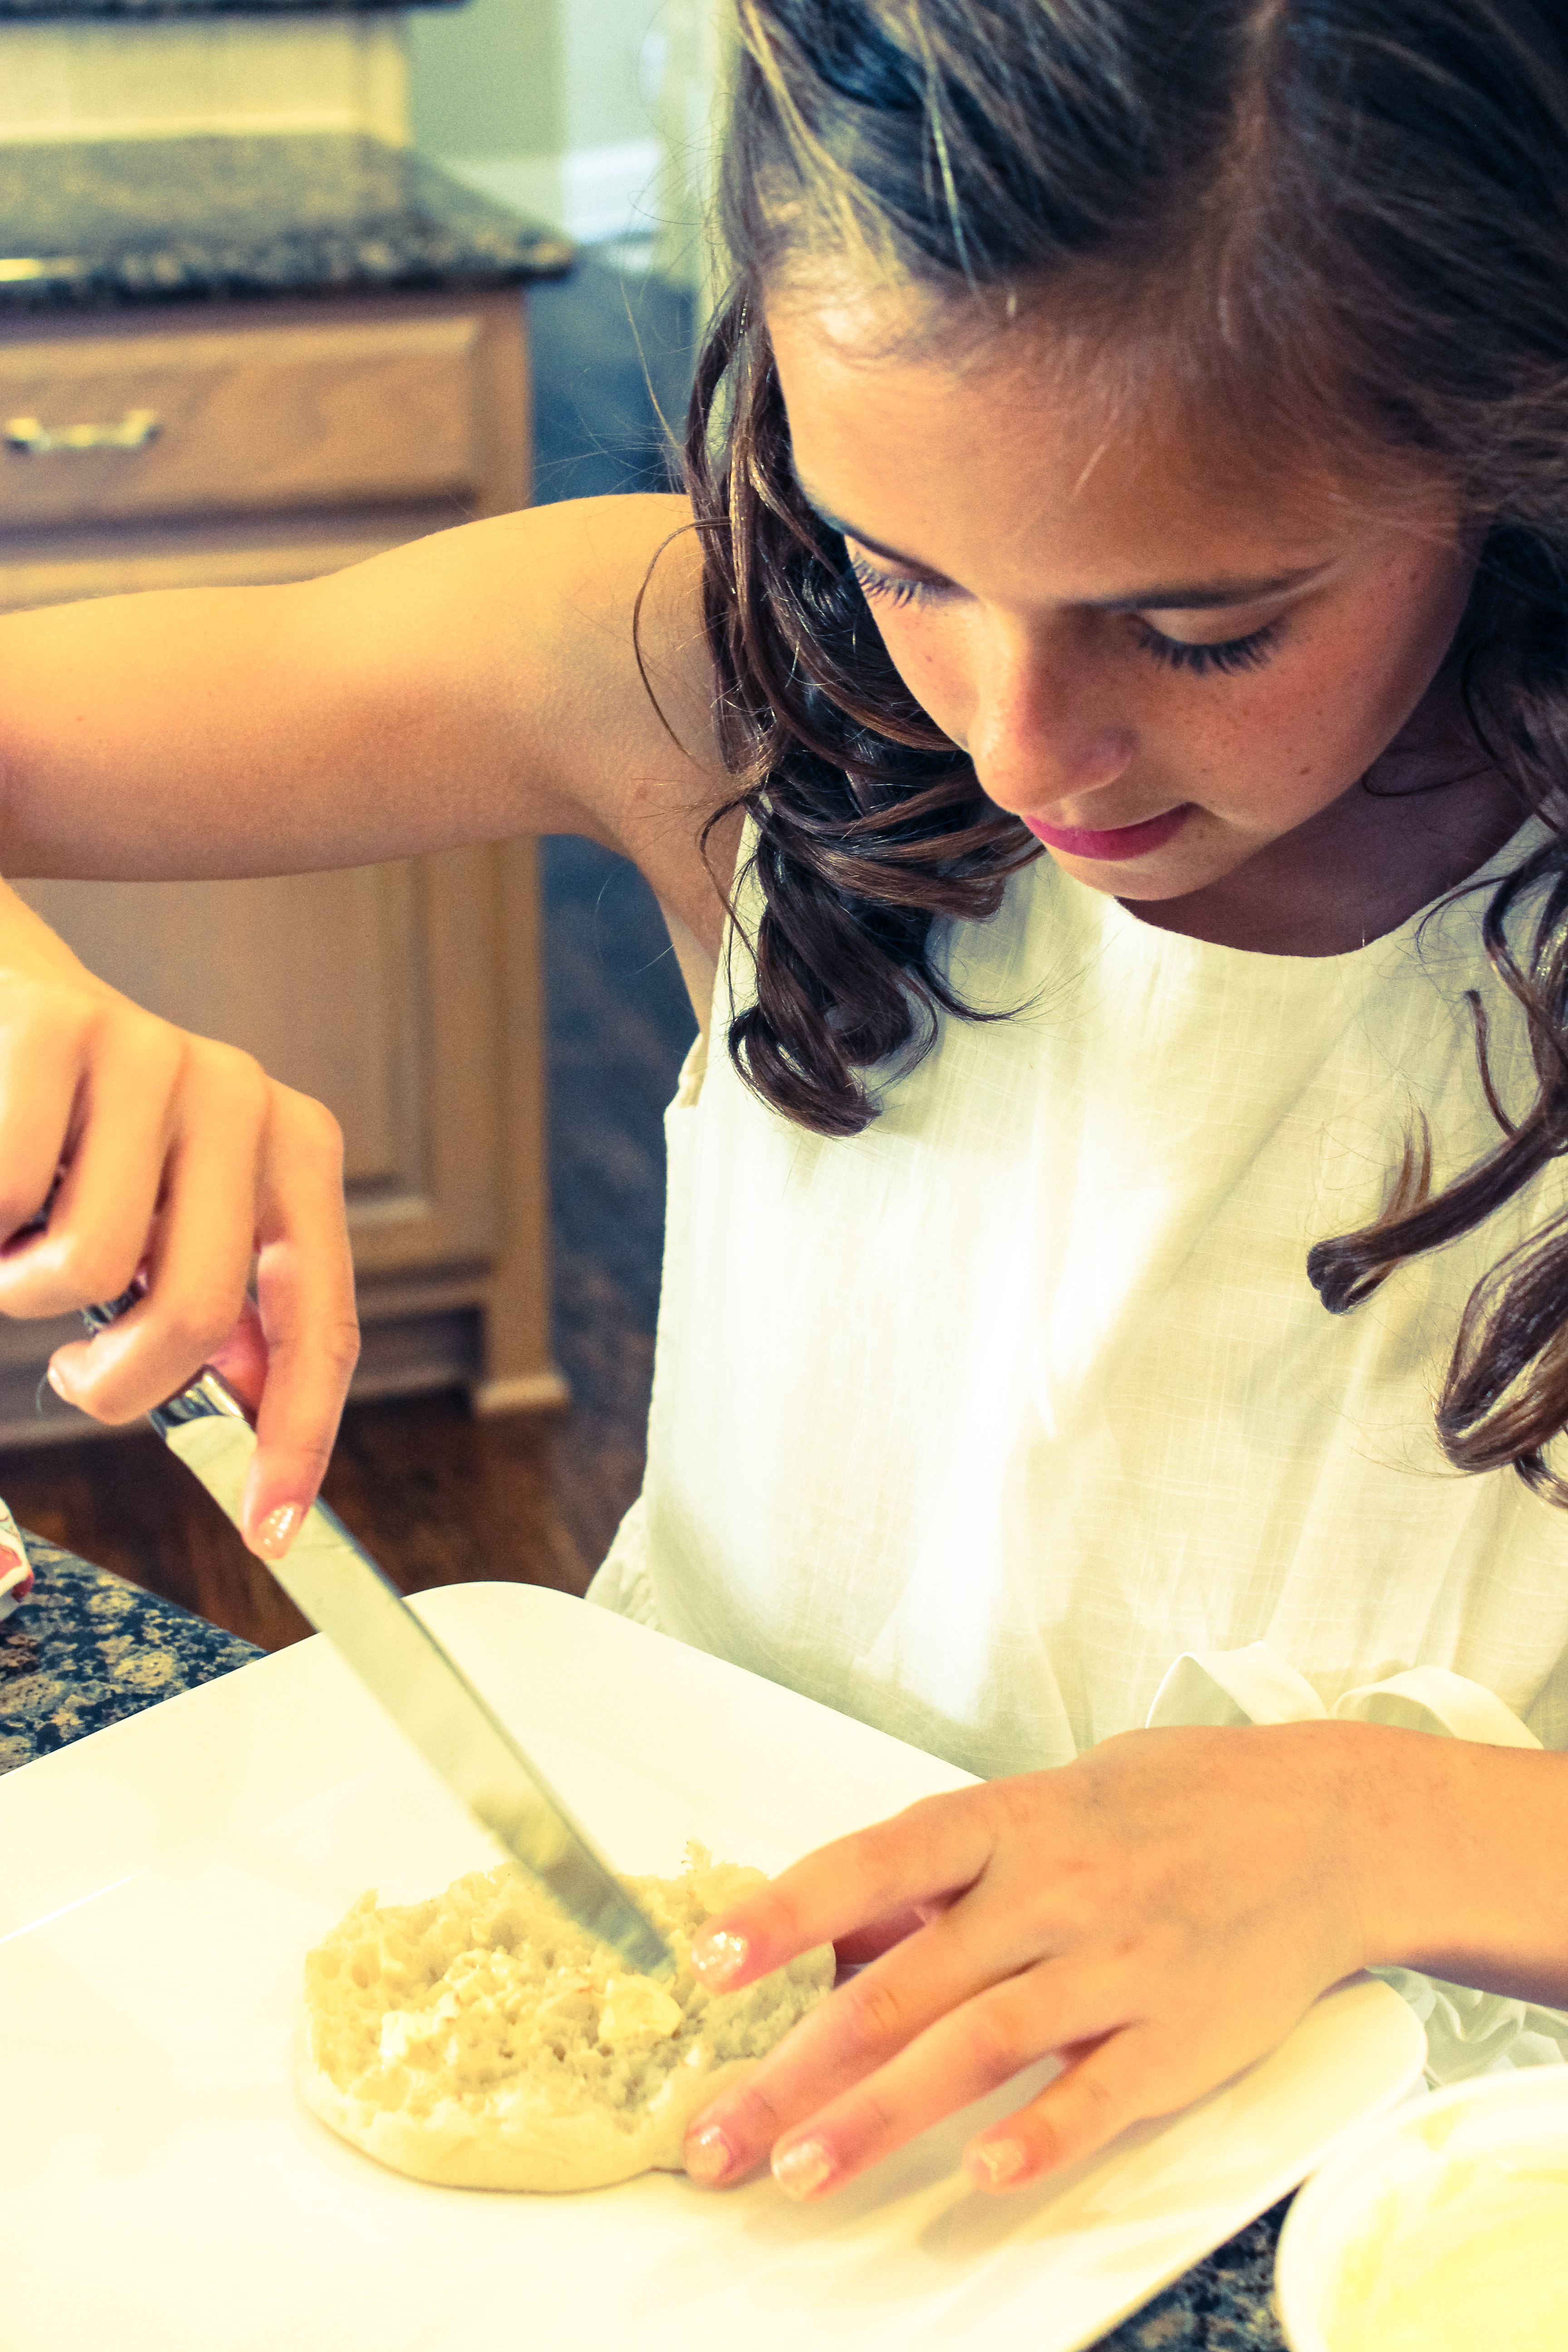
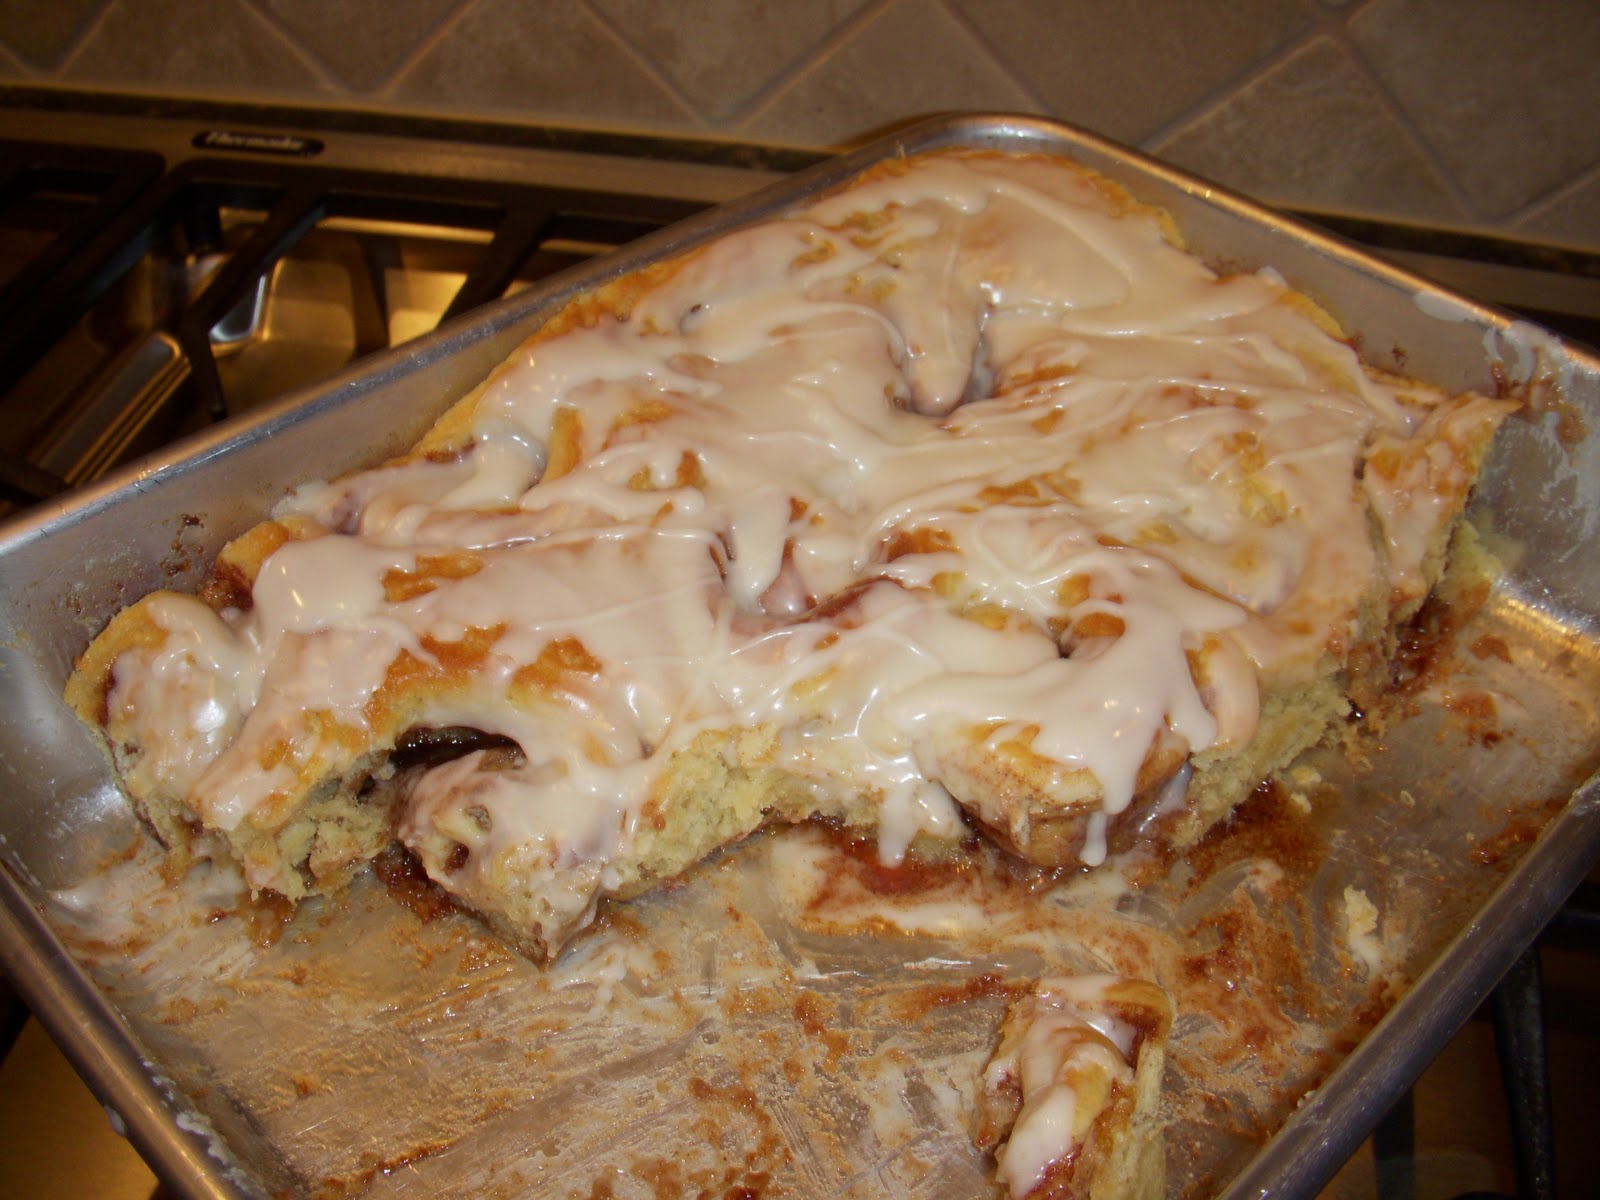
Make icing, and drizzle over the top of the rolls.

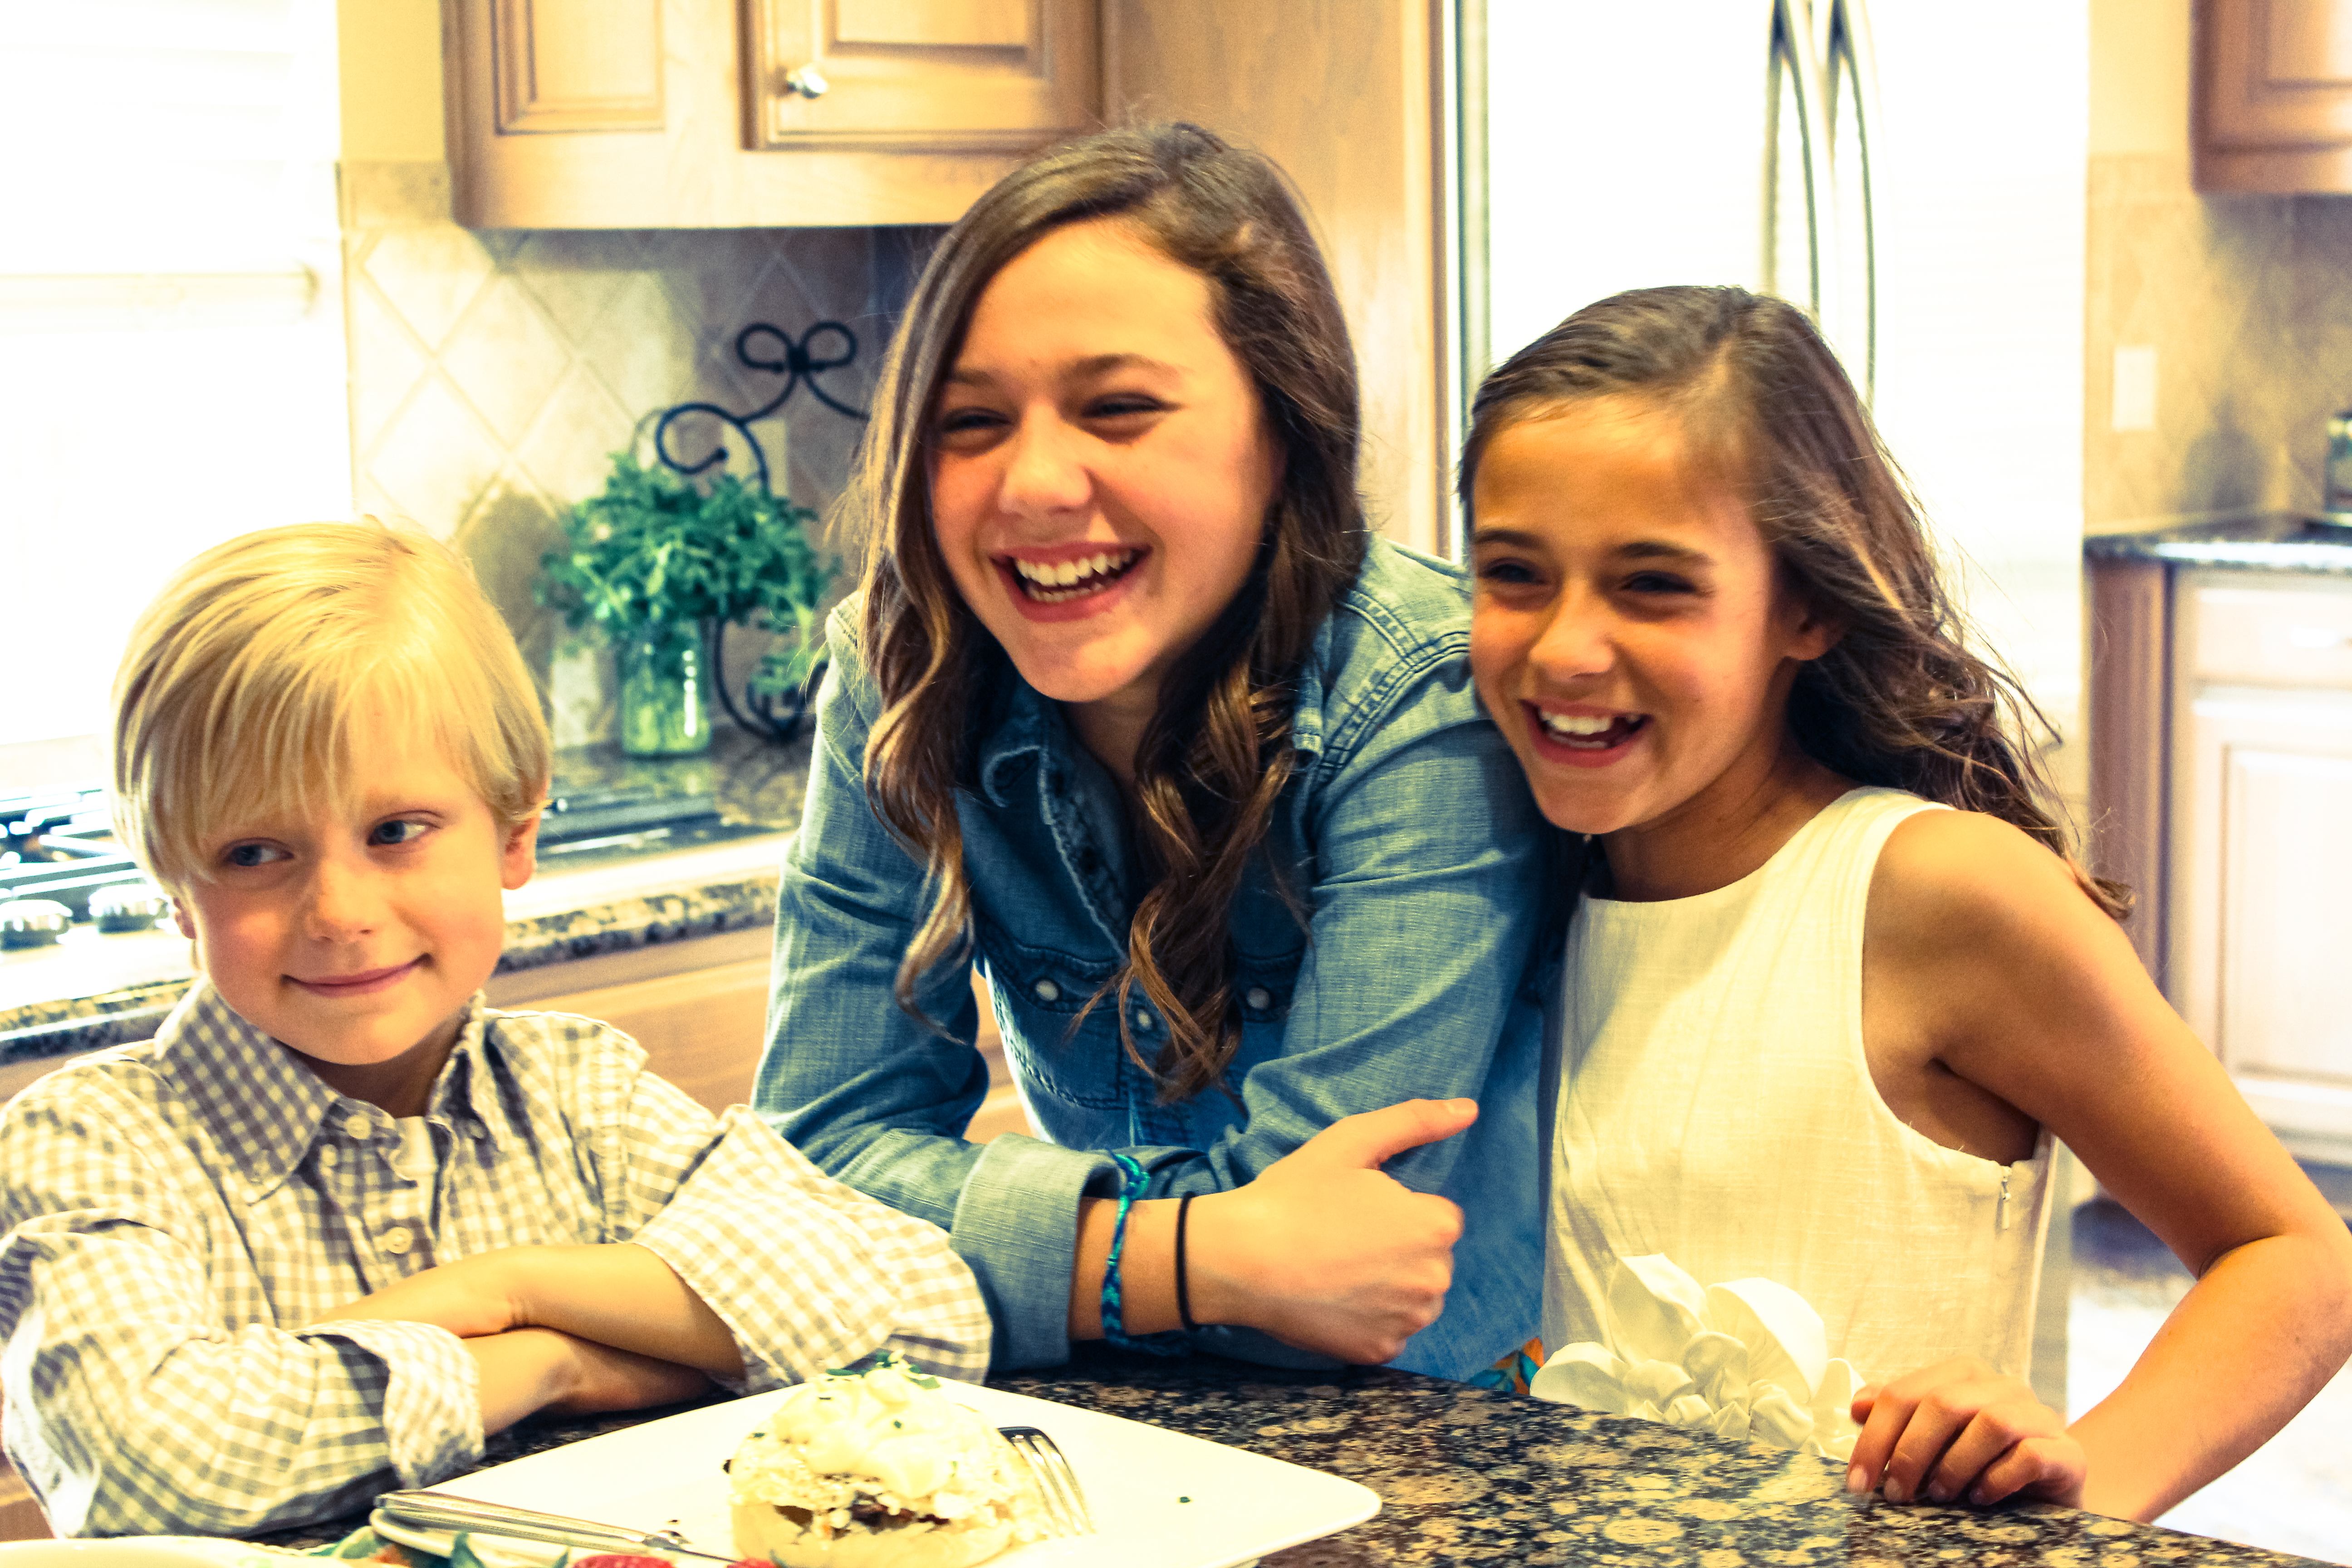
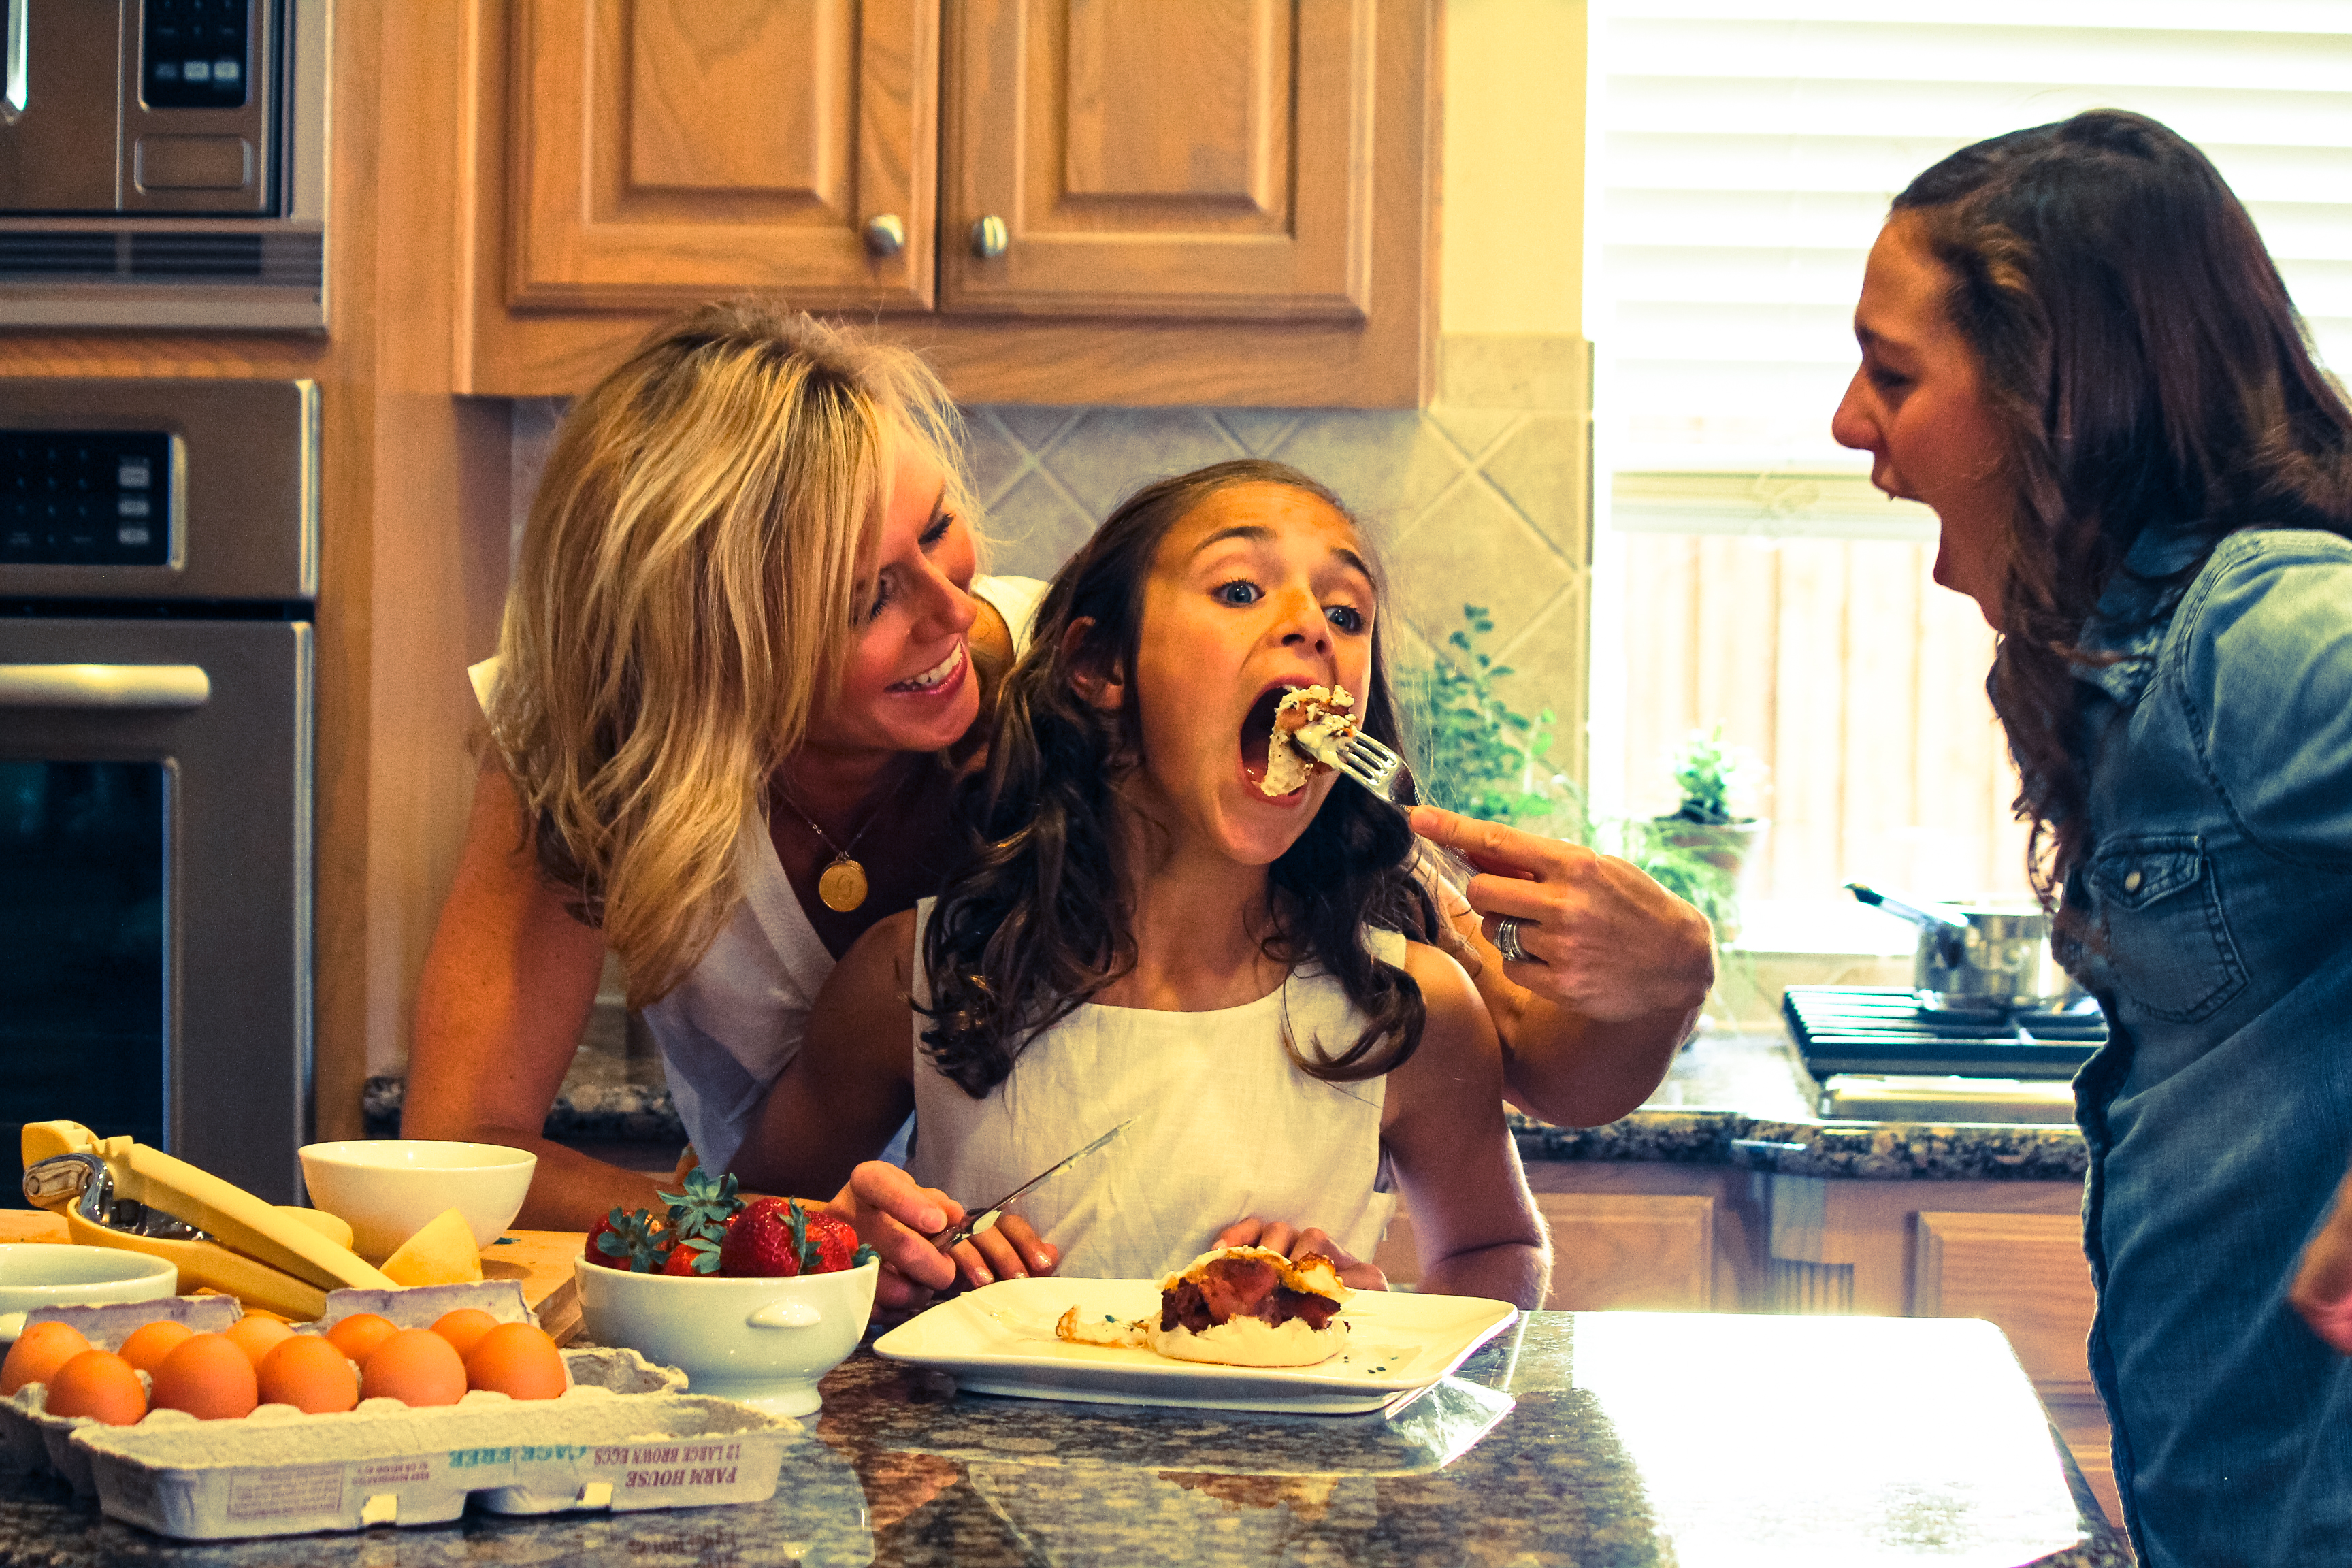
This is what was left after 10 minutes between the four of us (mom, dad, sis, and me!)

Mmmm…look at that gooey, cinnamon and icing center!


Cream Cheese Cinnamon Rolls
Ingredients
FOR THE DOUGH:
1 1/4-oz. package active dry yeast
1/2 tsp. plus 1/4 cup sugar
1/2 cup milk, at room temperature
2 tbsp. light brown sugar
1/2 tsp. vanilla extract
1 egg
1 egg yolk
2 3/4 cups flour, sifted plus more for kneading
3/4 tsp. fine salt
8 tbsp. unsalted butter, at room temperature, plus more for the pan

FOR THE FILLING:
1/2 cup sugar
1/4 cup dark brown sugar (we used light brown)
1/4 cup finely chopped pecans (we omitted)
1/4 cup finely chopped walnuts (we omitted)
1/4 cup raisins (we omitted)
1 tbsp. ground cinnamon
1/2 tsp. fine salt
1/8 tsp. ground cloves
2 tbsp. maple syrup
4 oz. cream cheese, at room temperature
8 tbsp. unsalted butter, melted

FOR THE ICING:
2 cups confectioners’ sugar
1/4 cup buttermilk

(We mixed together 2 cups powdered sugar, 2 tbsp. milk, 1 tsp. vanilla, and a dash of salt for our icing).

Directions
1. Make the dough:  In a bowl of a stand mixer fitted with a hook, combine yeast, 1/2 tsp. sugar, and 1/4 cup water heated to 115 degrees F.  Stir to combine and let sit until foamy, about 10 minutes.  Add remaining sugar, milk, light brown sugar, vanilla, egg, and egg yolk.  Beat on low speed until thoroughly combined, 1 minute.  Turn mixer off and add the flour and salt.  Mix on medium speed until the dough just comes together.  Turn mixer speed to high and knead dough for 4 minutes.  Add the butter and continue kneading until dough is smooth and pulls away from the side of the bowl, about 6 minutes.  Remove bowl from the mixer, cover with plastic wrap, and set aside in a warm place.  Let the dough rise for 1 1/2-2 hours, until it has doubled in size.

2.  Meanwhile, make the filling:  Combine the sugar, dark brown sugar, pecans (optional), walnuts (optional), raisins (optional), cinnamon, salt, and cloves in a large bow; stir to combine.  Stir in the maple syrup.  Set filling aside.

3.  Punch the dough down and turn it out onto a heavily floured surface.  Gently knead the dough until it’s no longer sticky, adding more flour as necessary, about 1 minute.  Using a floured rolling pin, roll the dough into a 10 x 10 – inch square.  In a small bowl, beat the cream cheese with a rubber spatula until it’s smooth and spreadable.  Spread the cream cheese evenly over the dough square; then fold square into thirds as you would fold a letter to fit it into an envelope.  Take the open ends of the resulting rectangle and fold into thirds again, to make a smaller dough square.  Invert the dough so that the seam is face down, and using the rolling pin, gently roll into a 10 x 20 – inch rectangle.

4.  Turn the dough so that the short sides are parallel to you.  Brush the top of the dough with half of the melted butter.  Drizzle the reserved filling over the dough, leaving a 1-inch border at the edge farthest away from you.  Lightly press the filling into the dough.  Using your hands, lift up the bottom edge of the dough and roll it forward into a tight cylinder.  Place dough cylinder, seam side down, on a cutting board and, using a thin, sharp knife, trim off the ends; cut cylinder crosswise into 8 equal-size slices.  Nestle the slices, cut sides up and evenly spaced from one another, into a buttered 9 x 13 – inch light colored metal baking pan.  Cover the pan with plastic wrap and set aside in a warm place to let rise for 2 hours.  (Alternatively, the rolls may be refrigerated overnight.)

5.  Heat the oven to 375 degrees F.  Uncover the rolls.  (If refrigerated, let them sit at room temperature for 15 minutes.  Bake until golden brown and a toothpick inserted in the center of the rolls comes out clean, about 30 minutes.

6.  Make the icing:  While the rolls are baking, whisk together the sugar and buttermilk in a small bowl until smooth.

7.  Transfer the pan of cinnamon rolls to a cooling rack; brush with remaining melted butter.  Let cool for 5 minutes.  Dip the tines (prongs) of a fork into the icing and drizzle over the rolls.  Serve immediately.

Yield:  one 9 x 13 – inch pan (8 or 18 rolls depending on how large you roll them)
Saveur.com