Playground Granola Bars

Playground granola barsI guess what they say is true about picky toddlers. One day Harper will eat something, and the next day she won’t touch it. Her tastes and what she likes and doesn’t like changes on a daily basis.

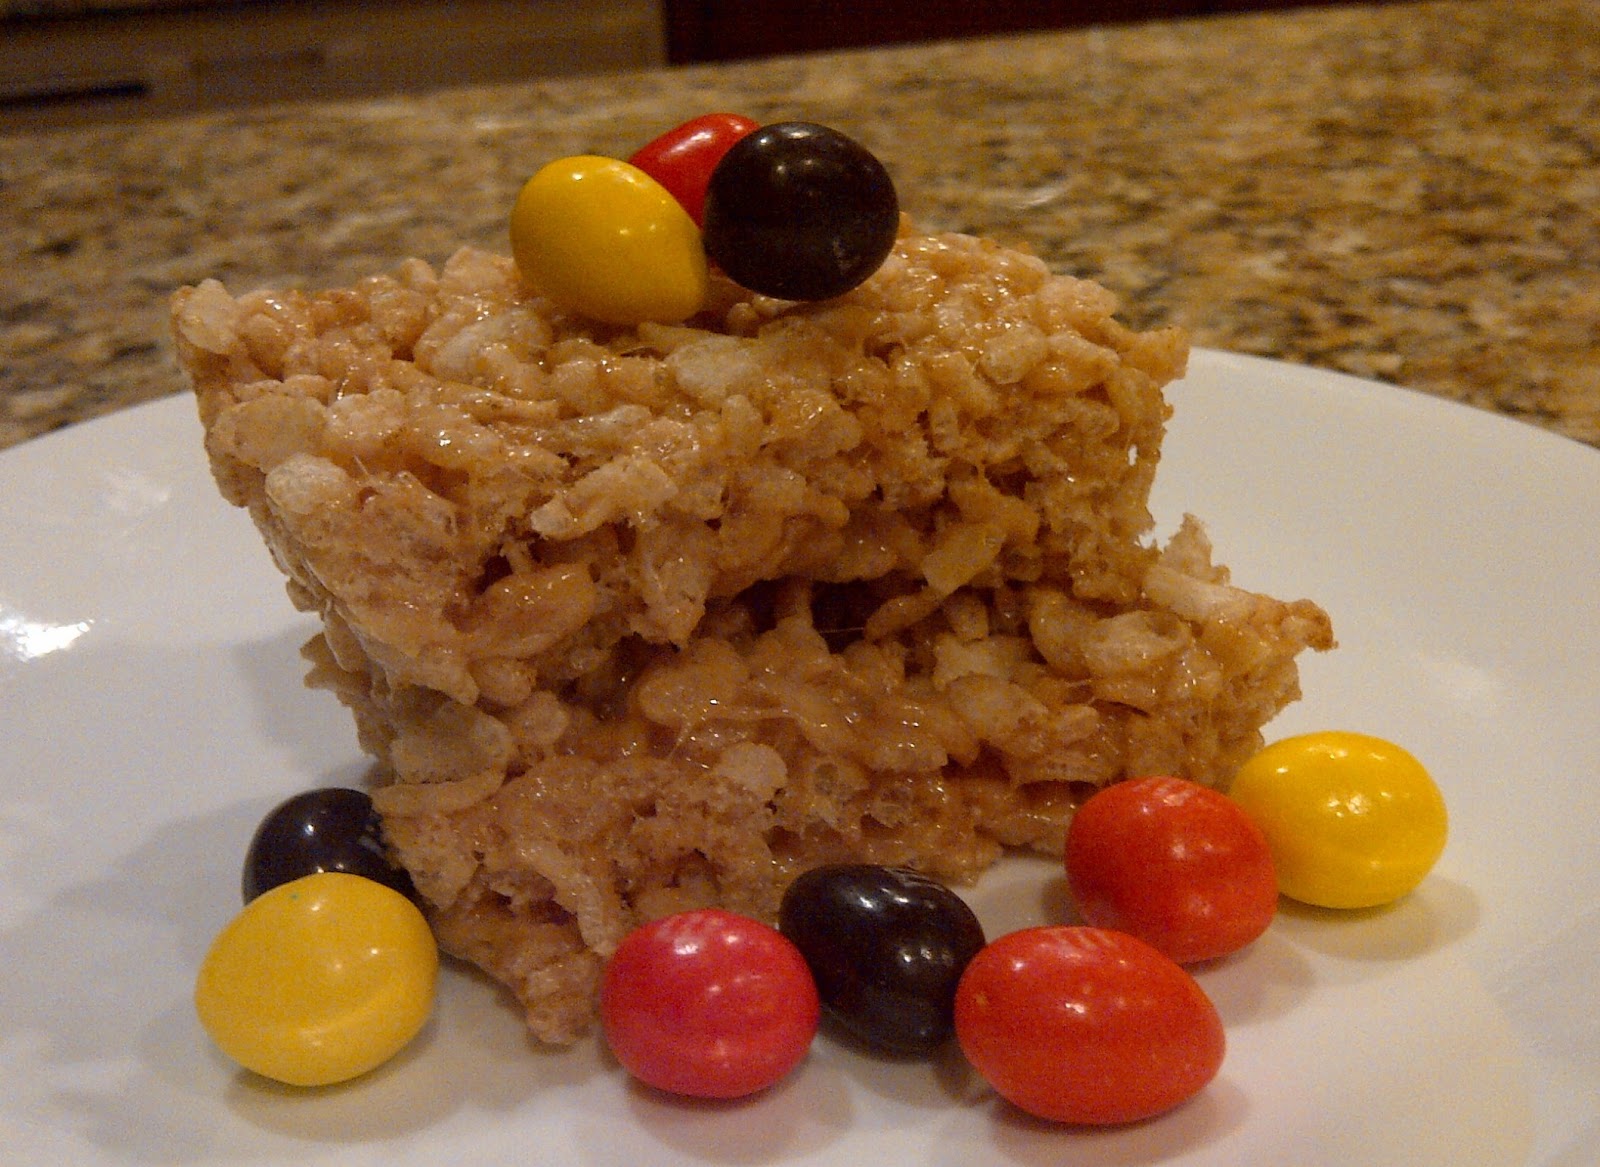
One thing is for sure, and that is Harper LOVES sweets! Uh-oh!!!

I also feel like she loves processed foods, but who doesn’t? As a general rule, I try to give Harper fresh fruit, veggies, and home-cooked meals that Matt and I will eat. However, that’s not to say that she hasn’t been slipped a bite of donut or processed granola bar or cracker on occasion.

For snack time, I usually spoon-feed Harper some greek yogurt and give her fresh berries that she can pick up herself. While I was giving her a snack yesterday, I was eating a kids Clif Zbar (I know I’m not a kid, but they are good!) Harper pointed and grunted to the bar, saying “Give me some Mom!” (if she could talk). I ended up sharing some of my Zbar and Harper loved it.

Playground granola bars
Mix ingredients together with your hands.

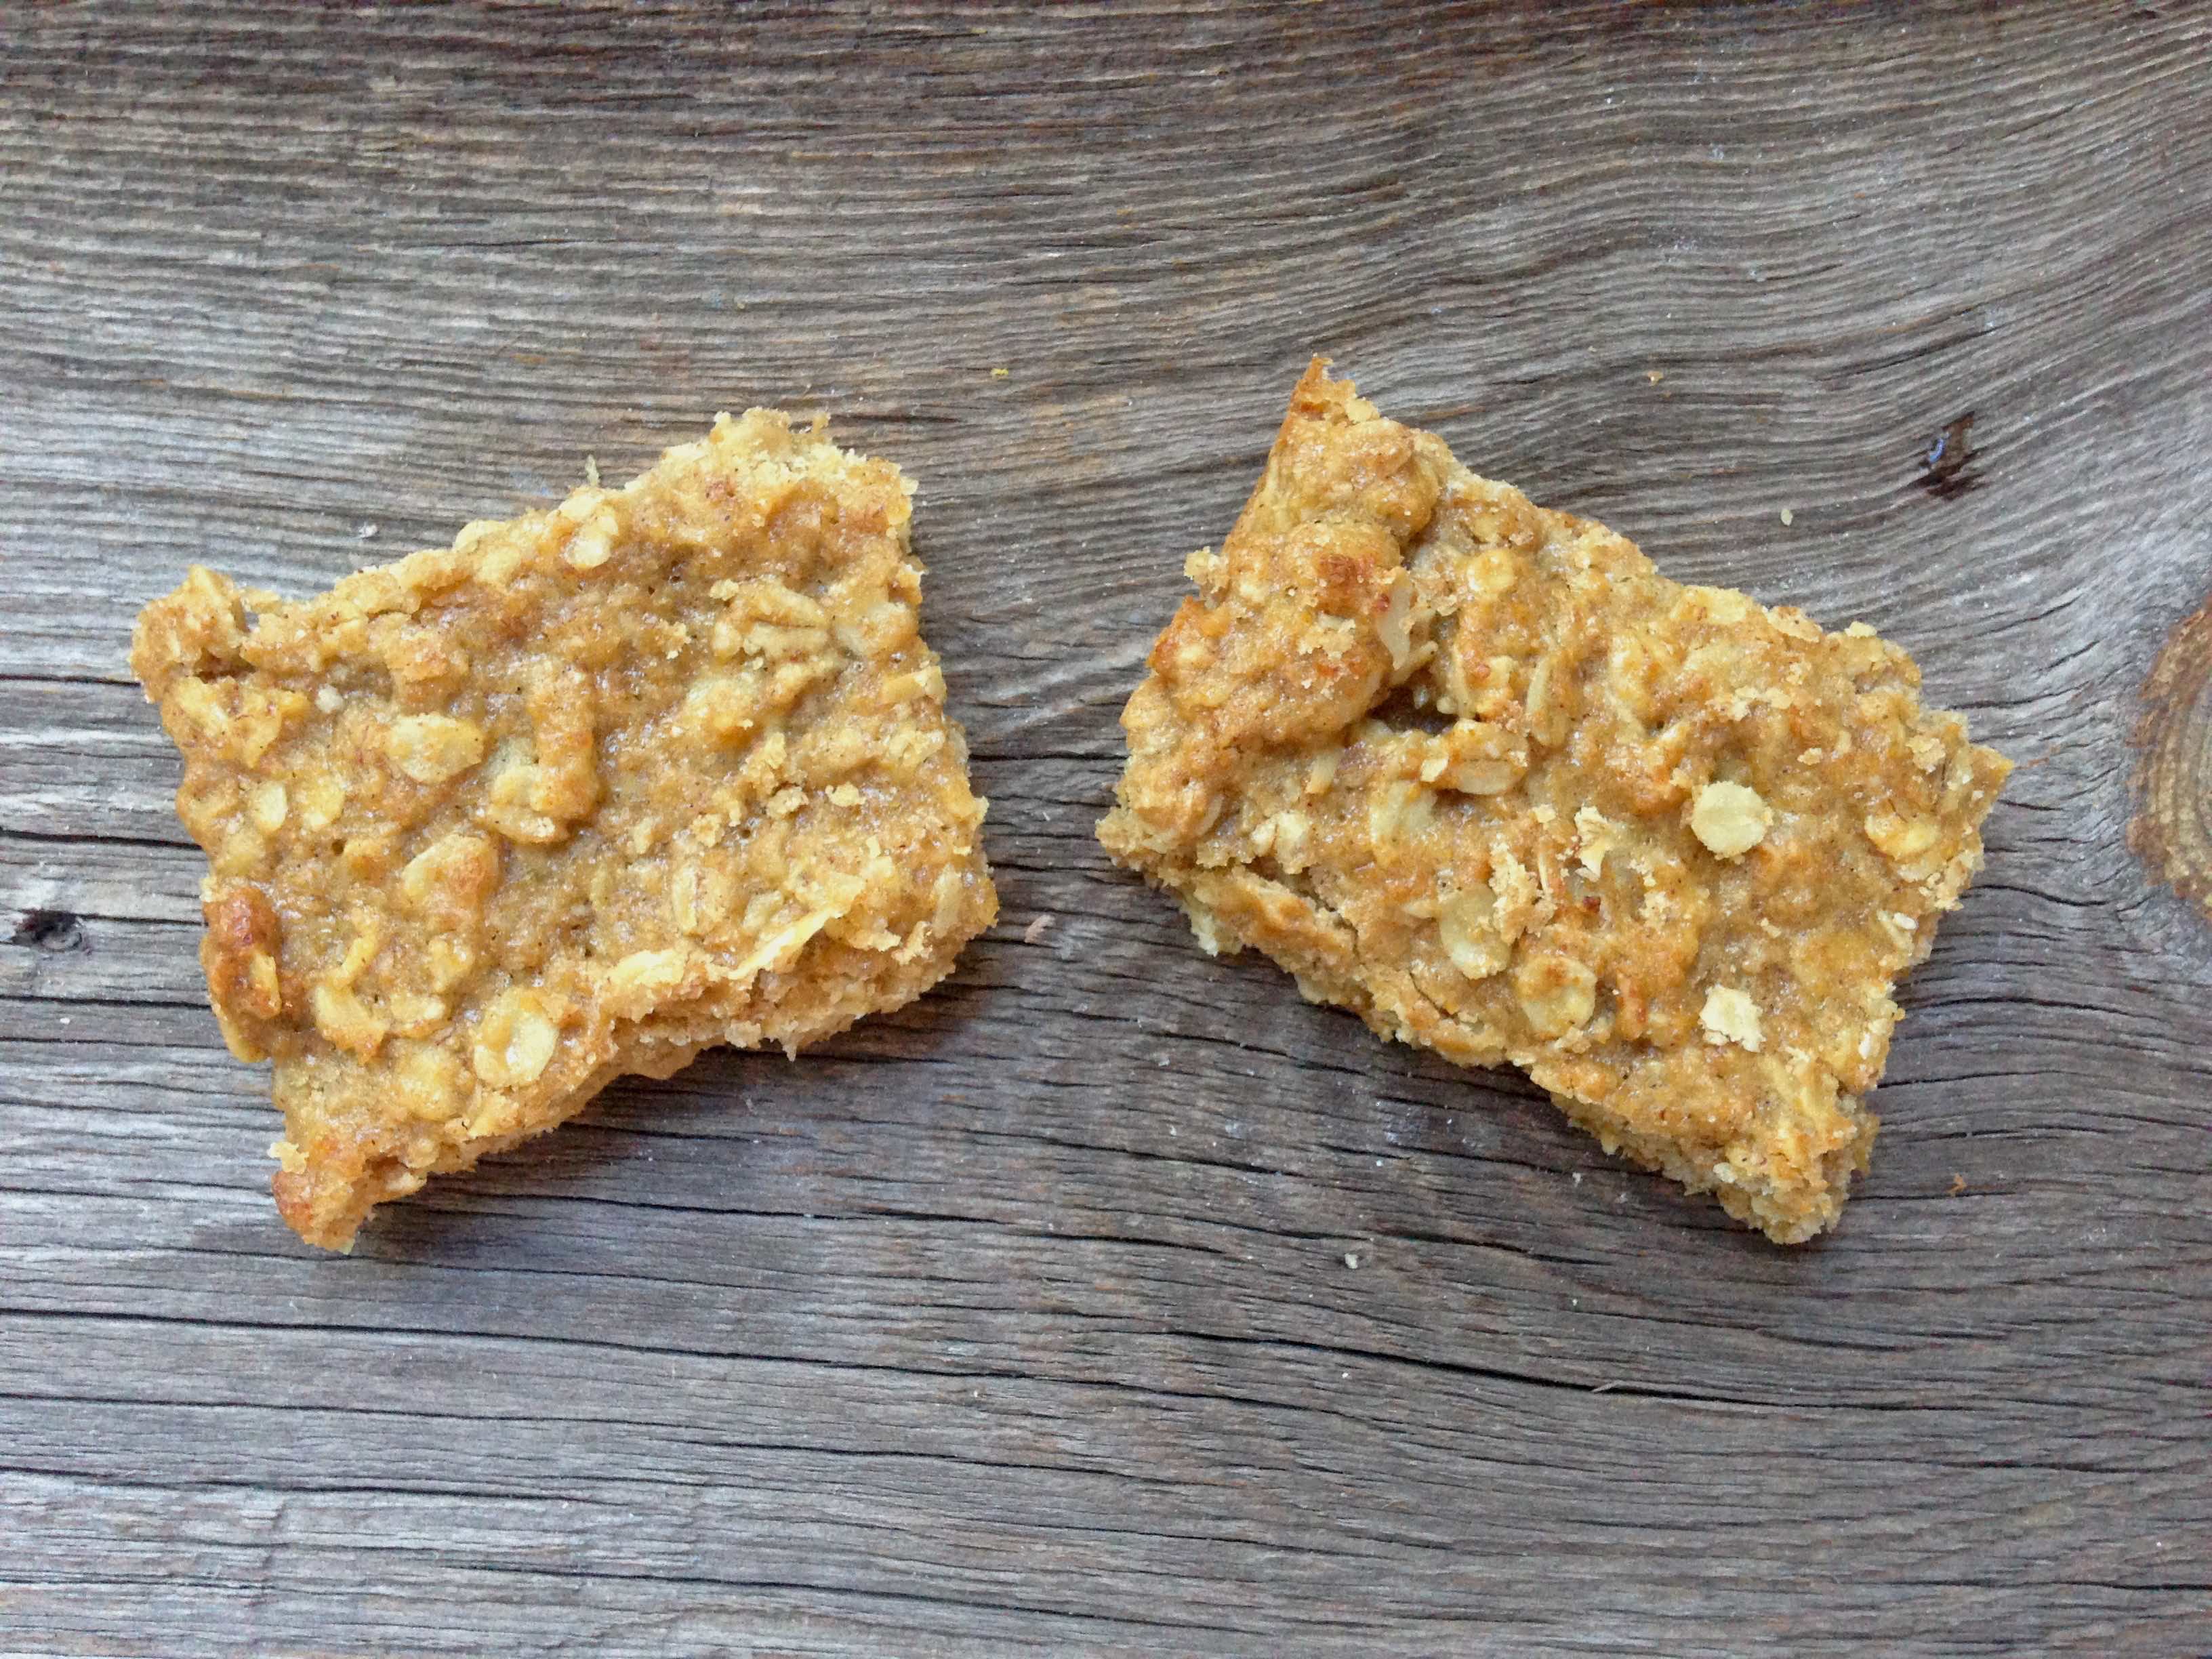
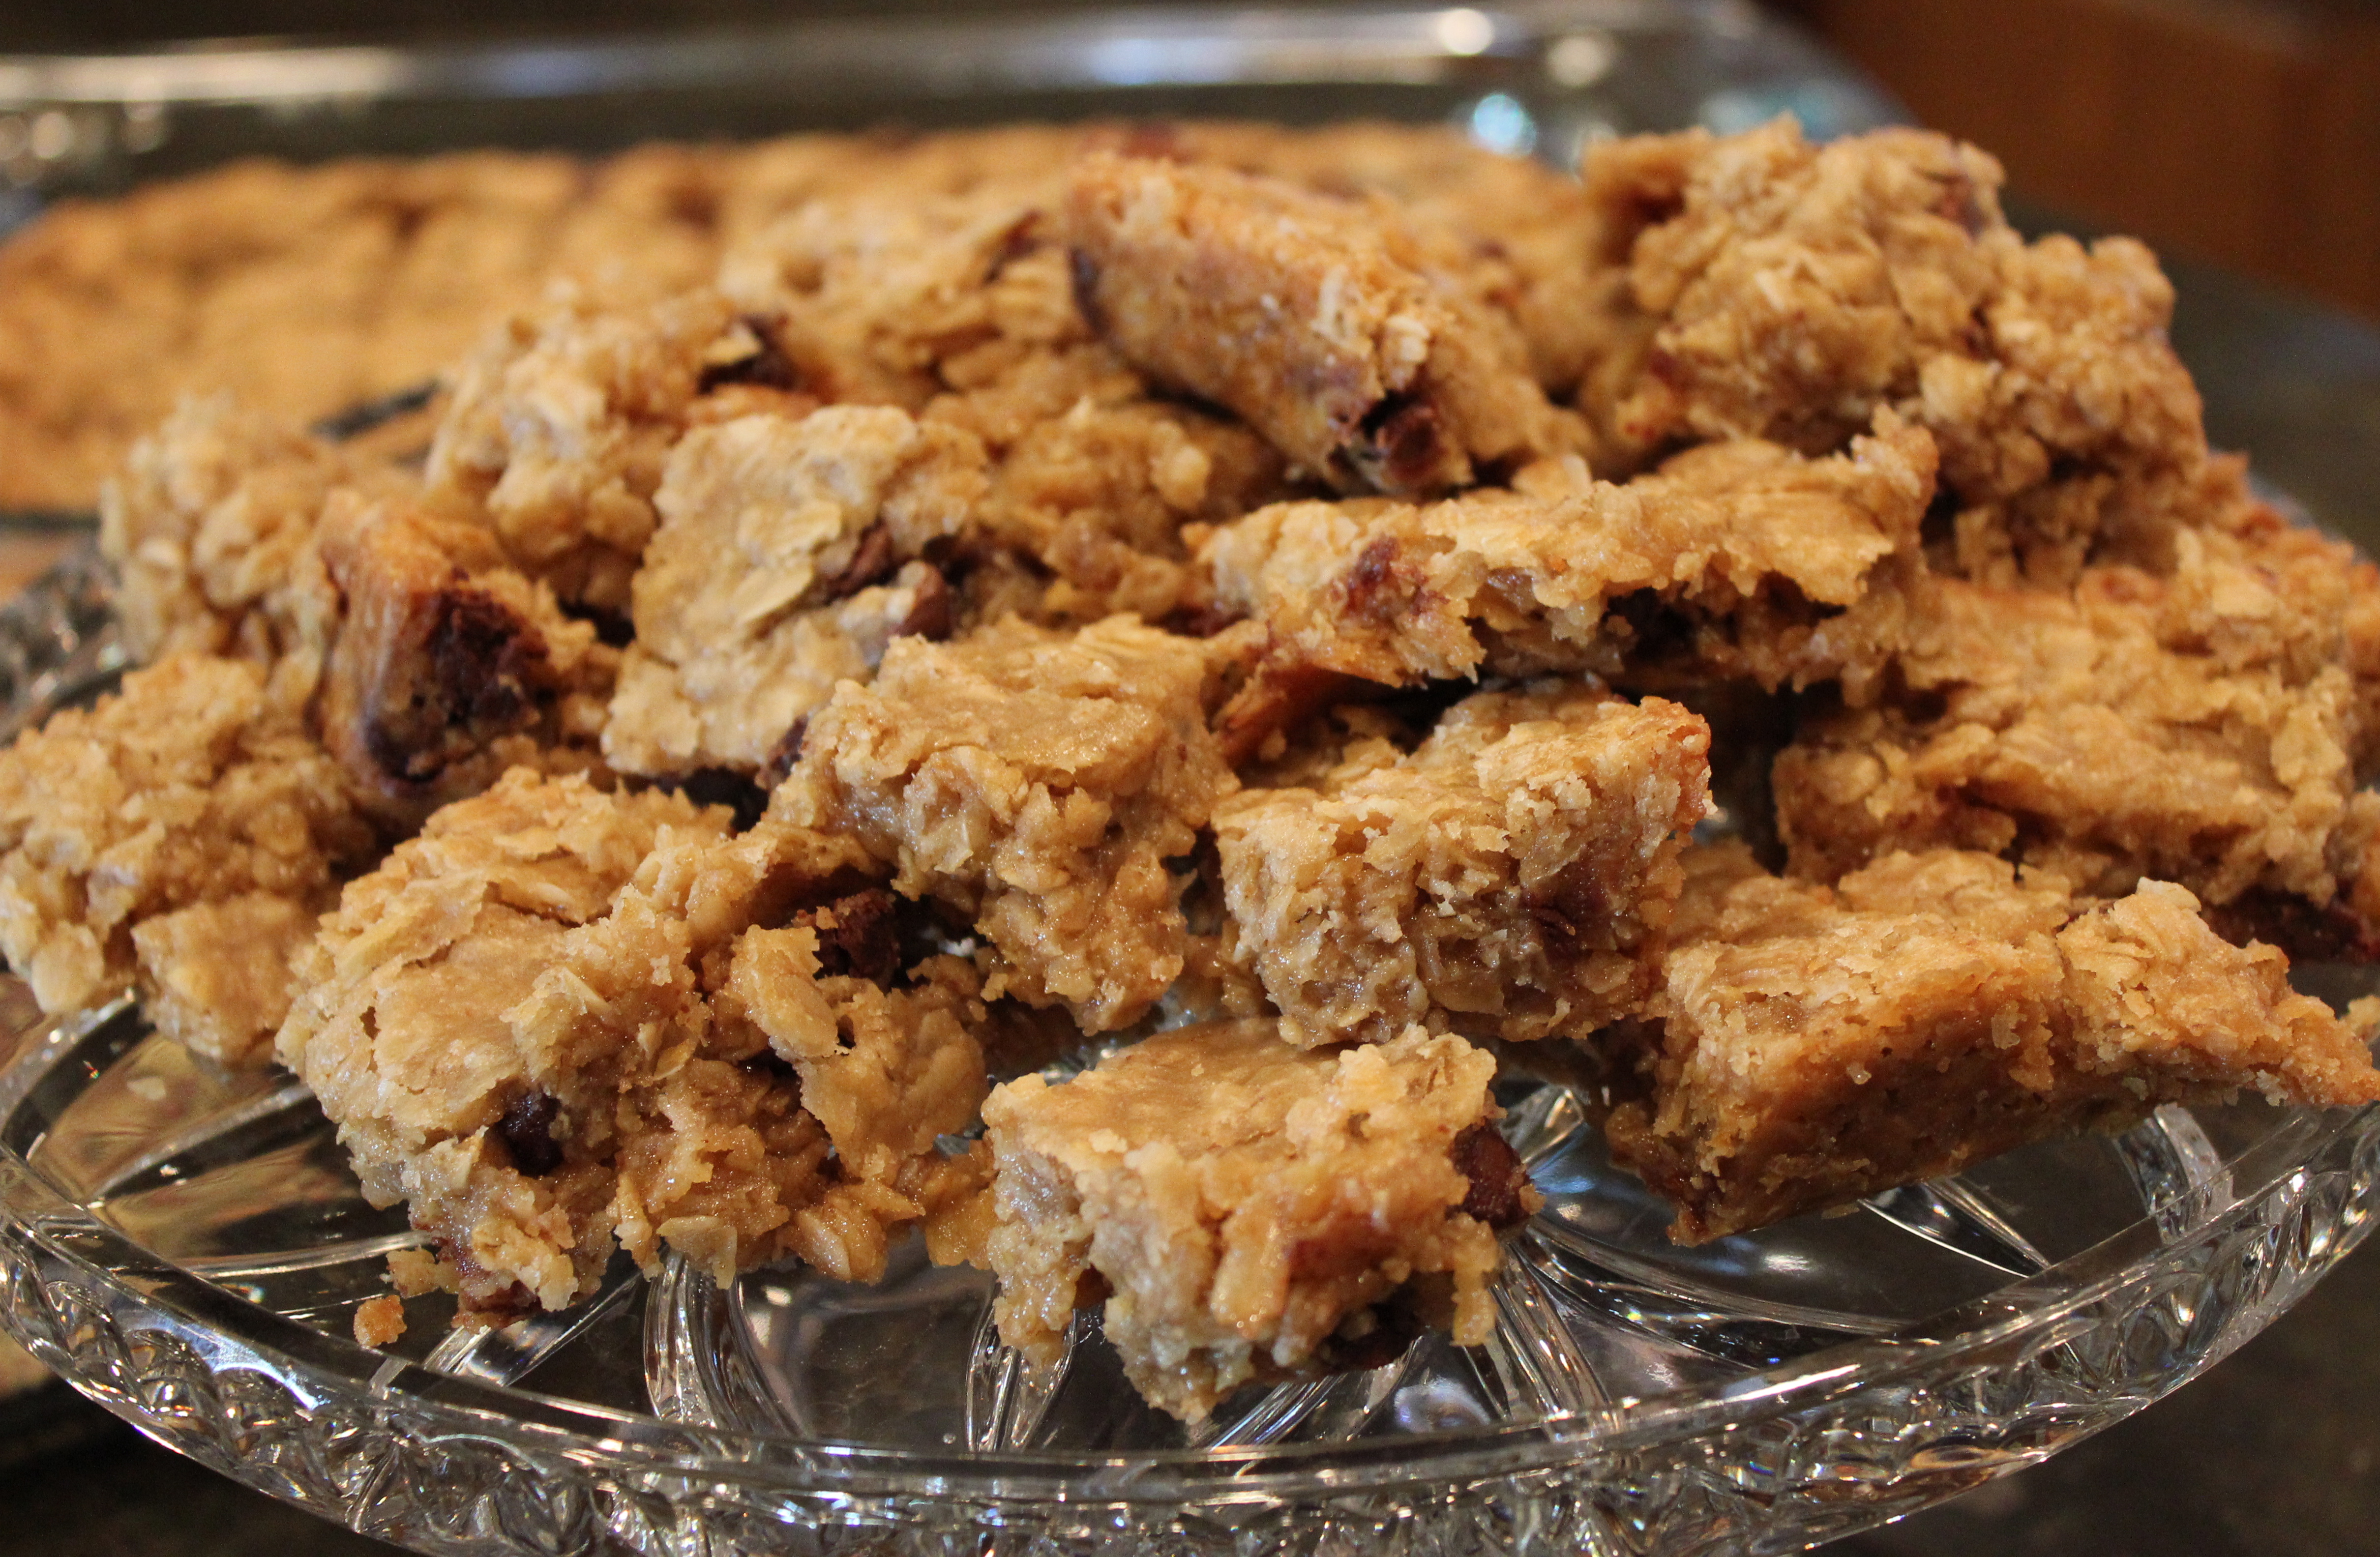
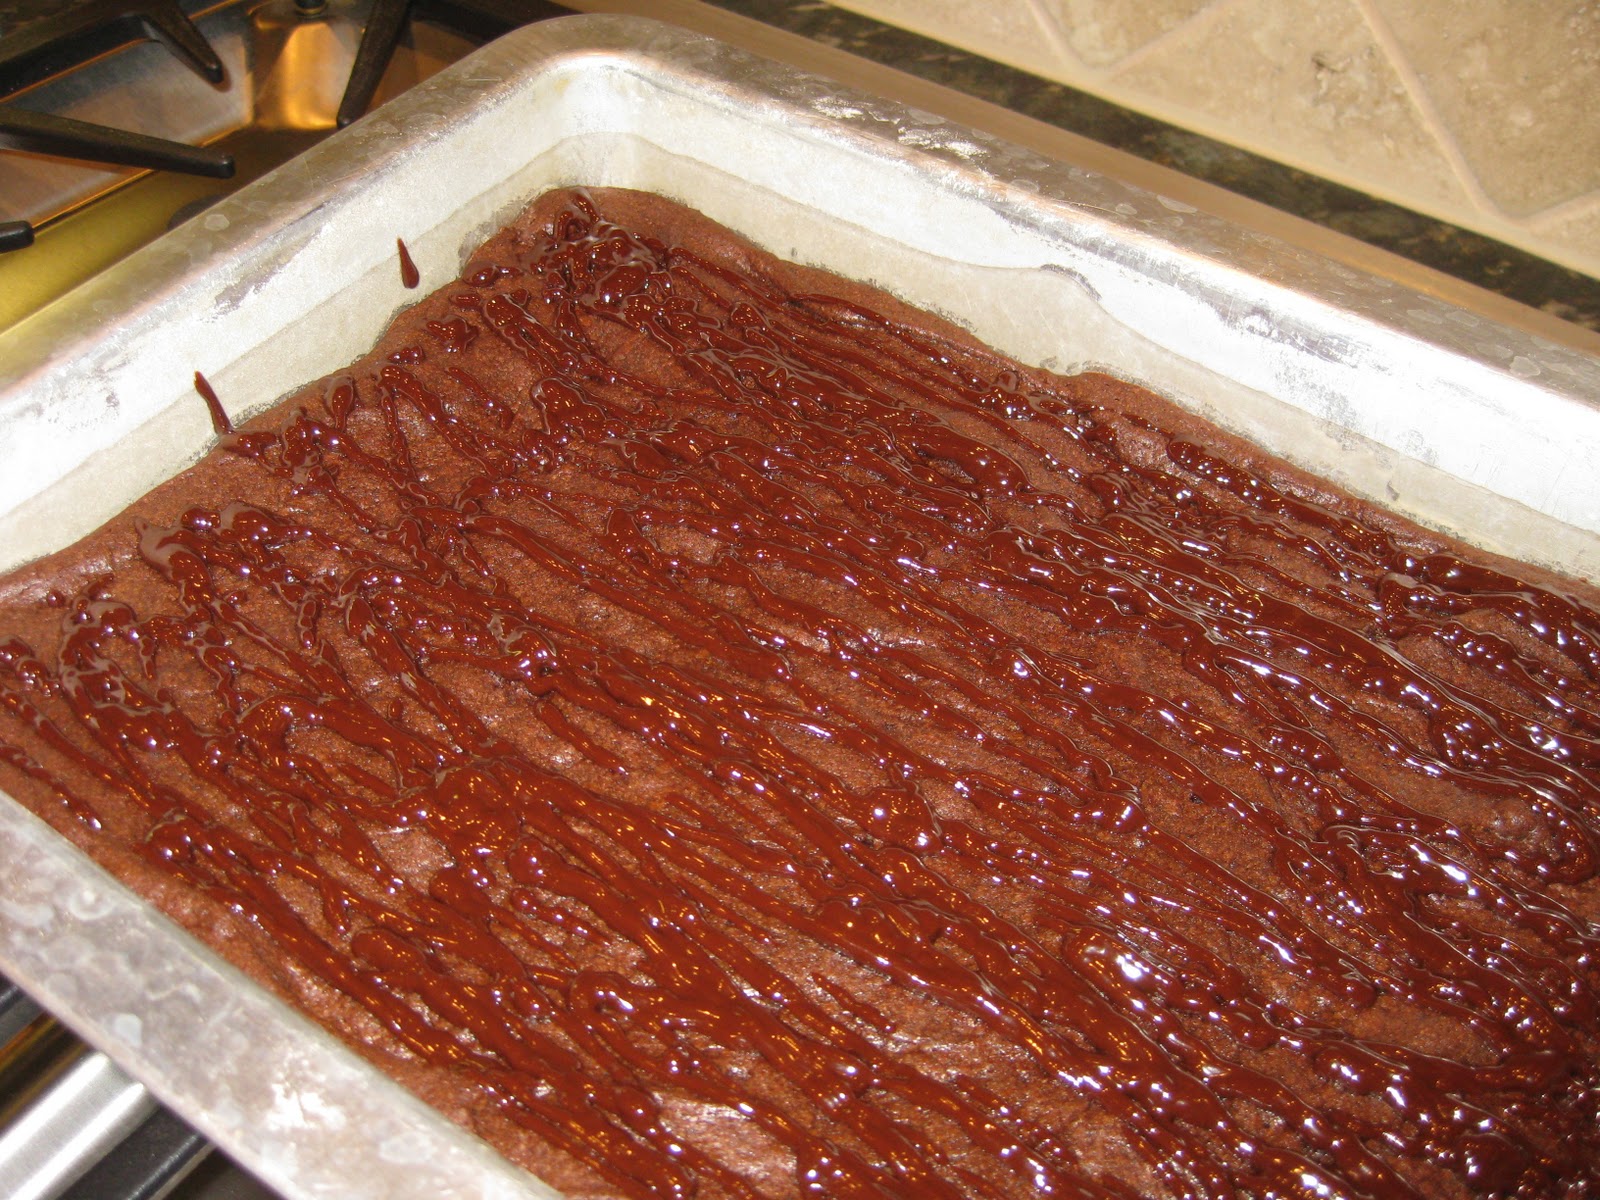
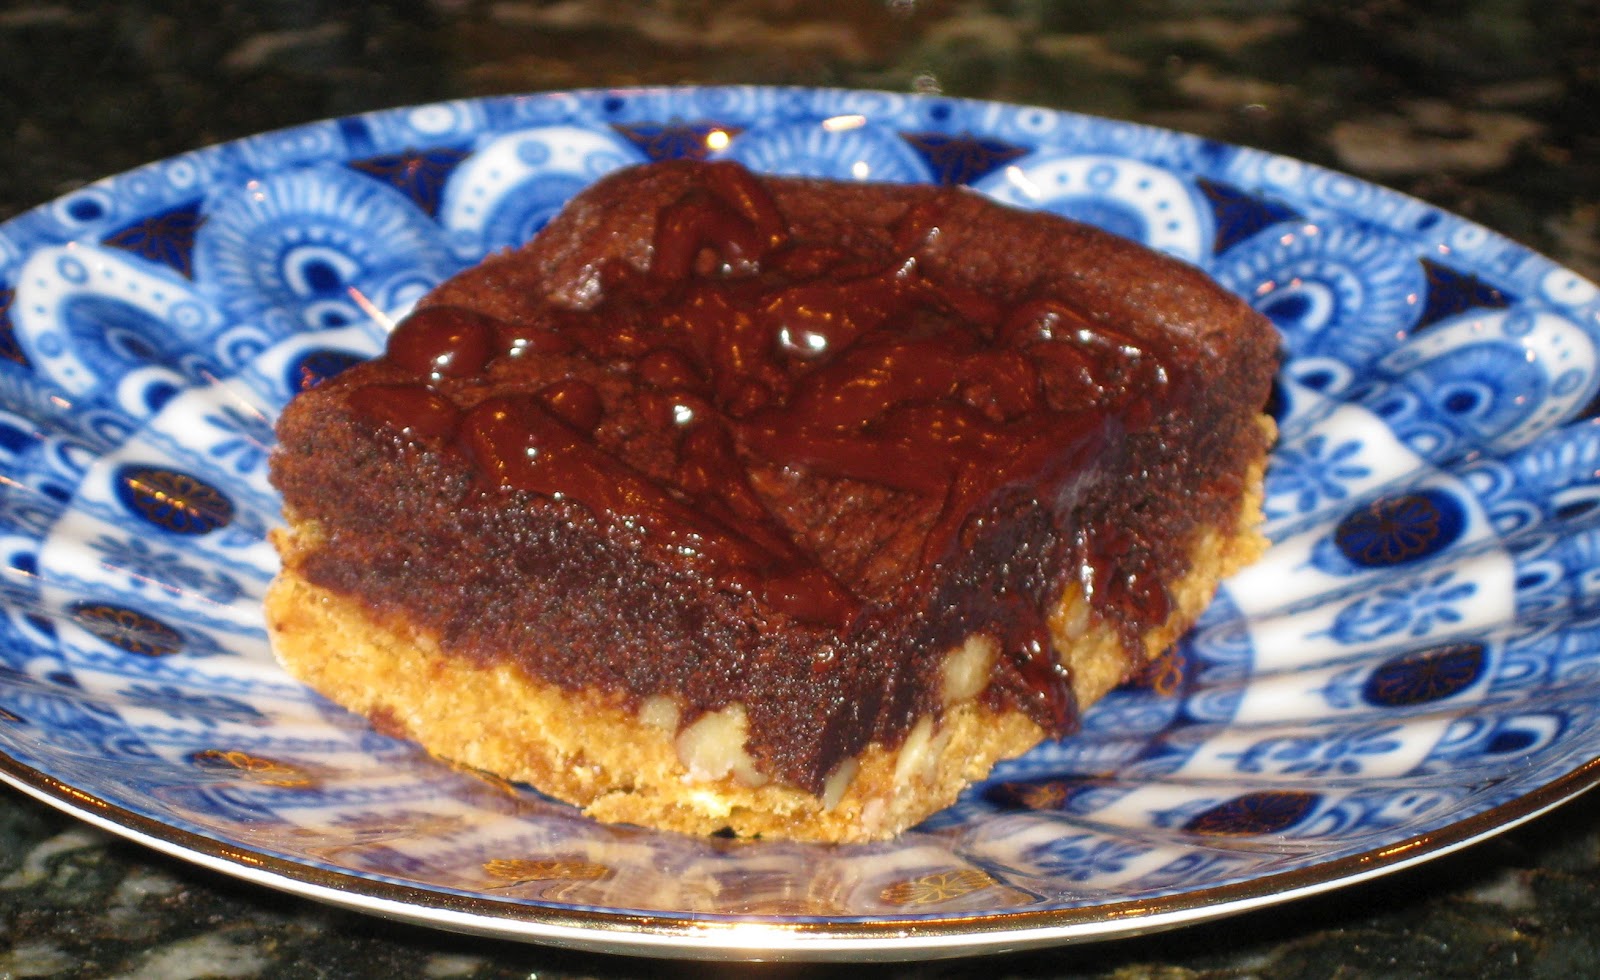
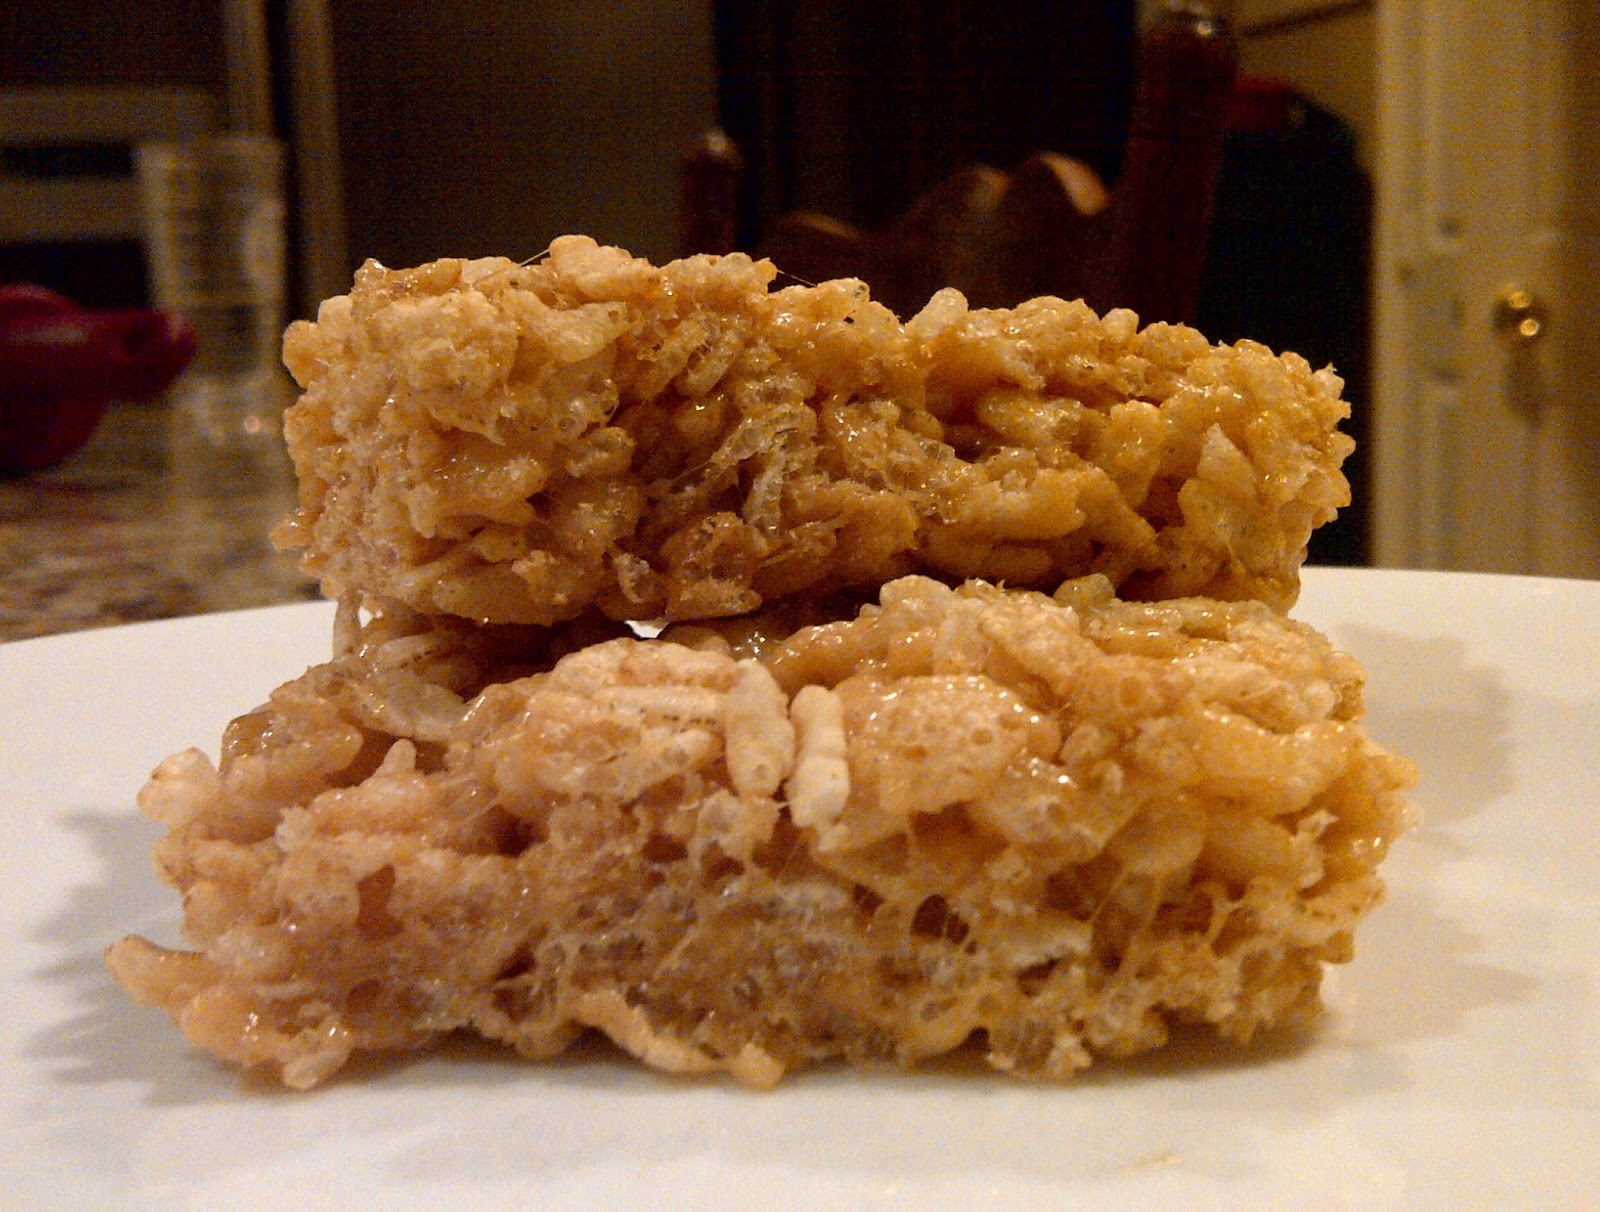
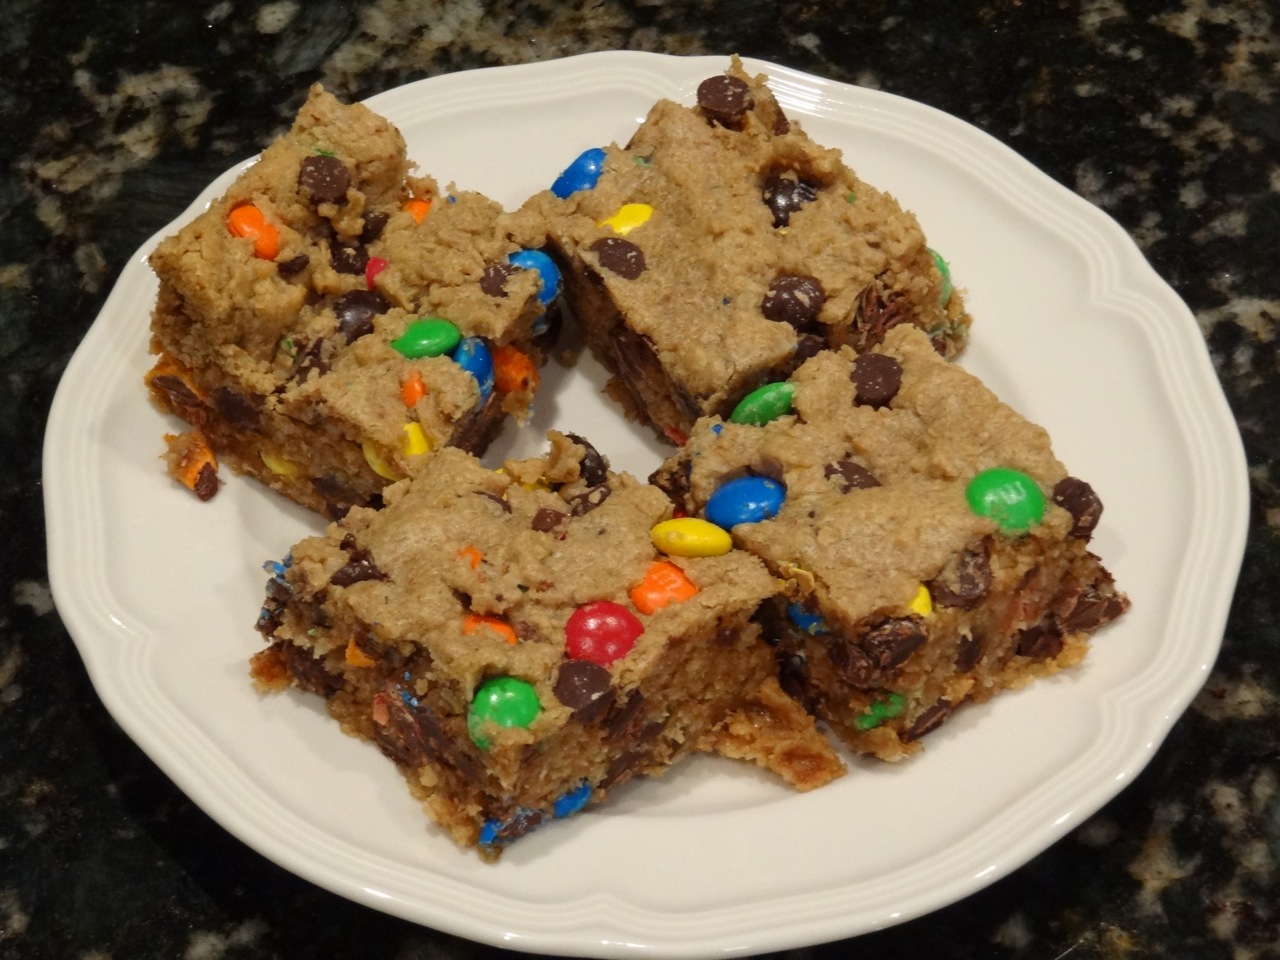
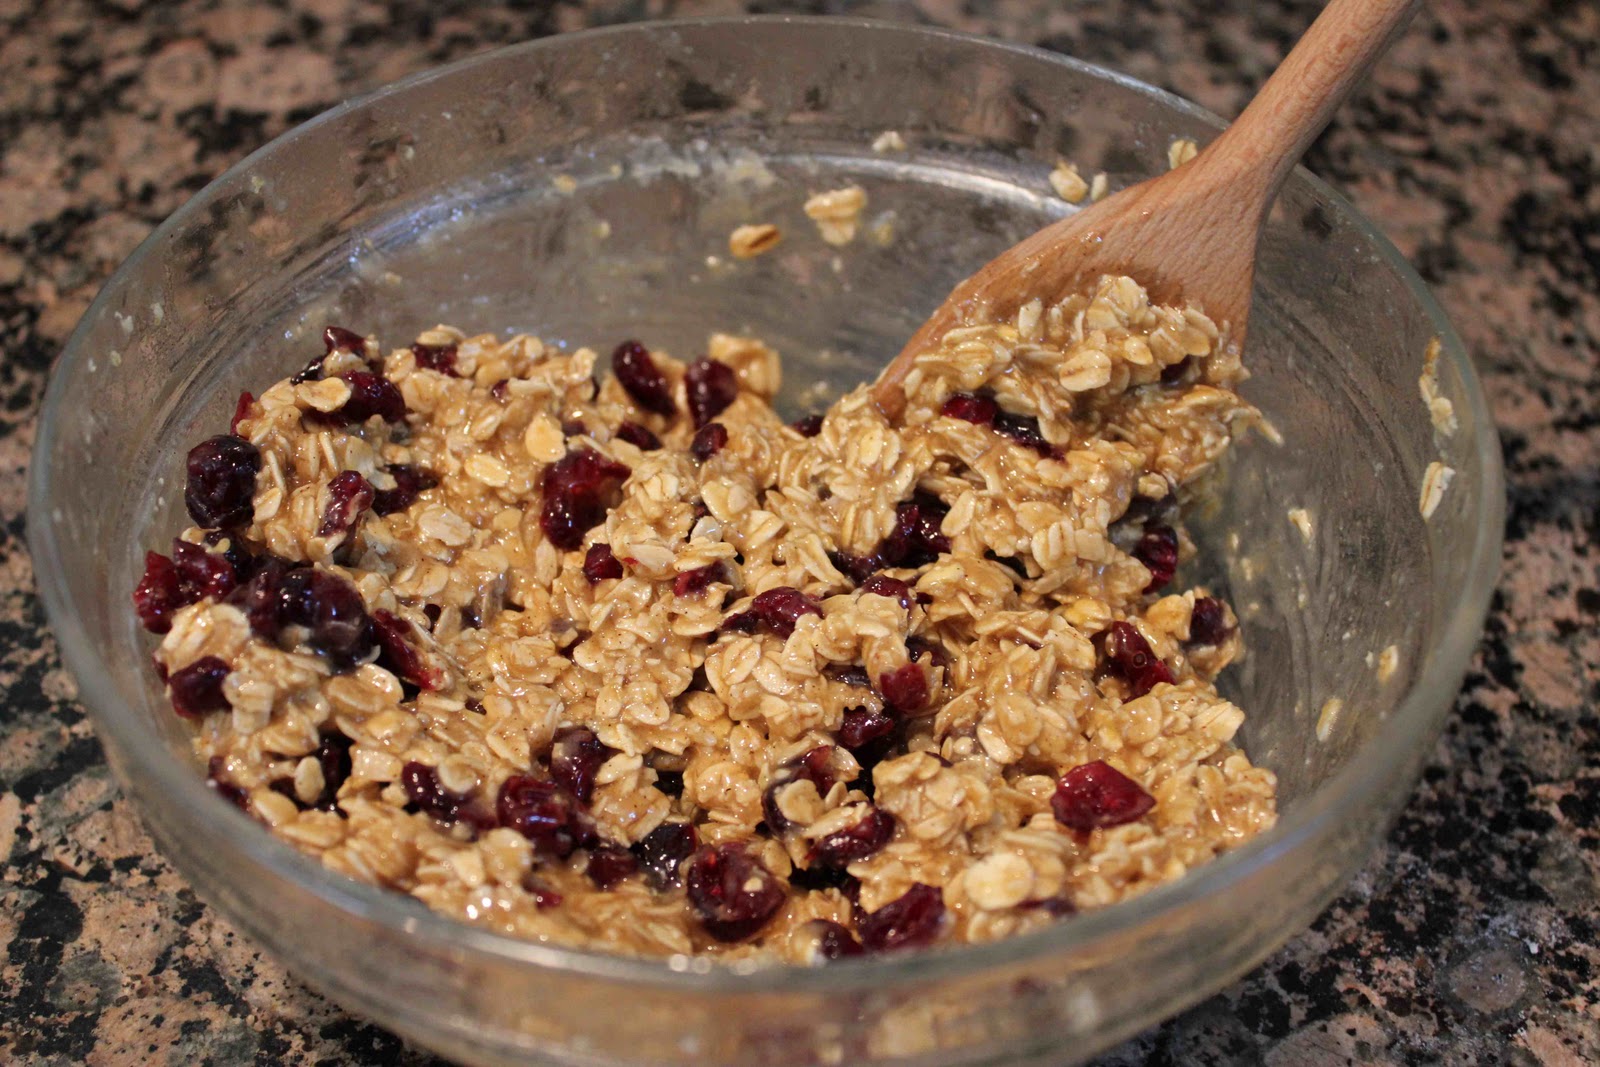
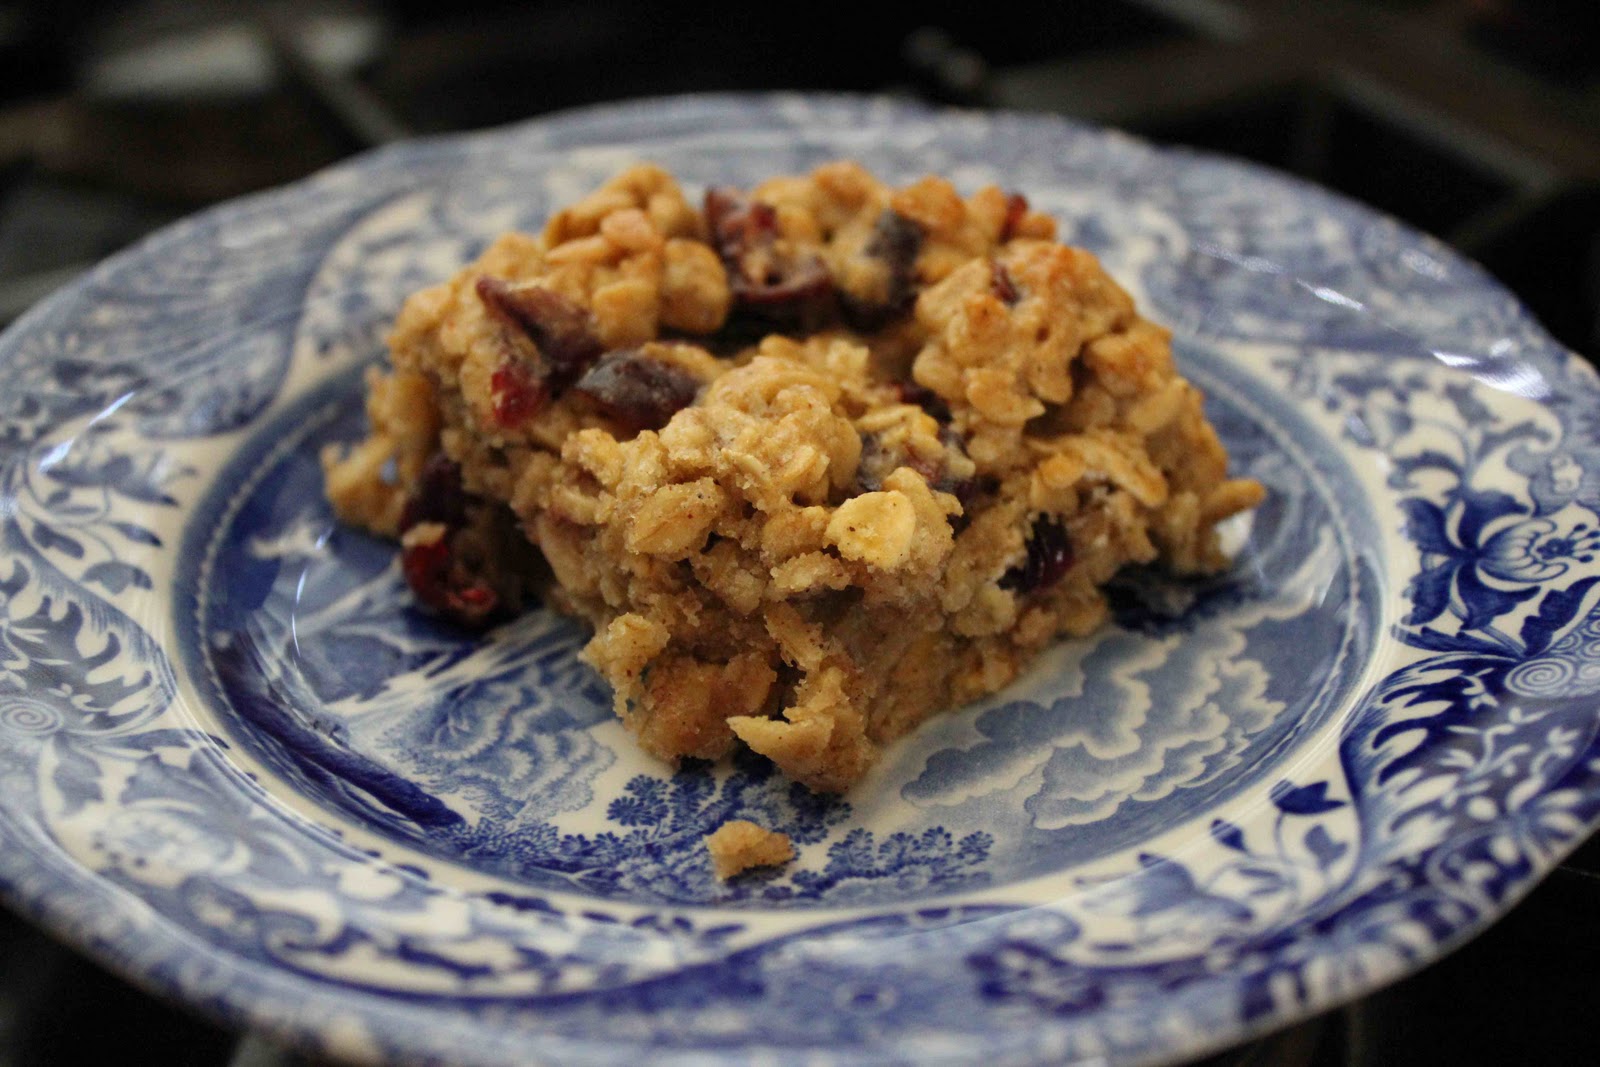
With that said, I want to limit processed foods with her as much as possible, so that’s why I created these playground granola bars. It’s a recipe I came up with 100 percent on my own, and they are really tasty!

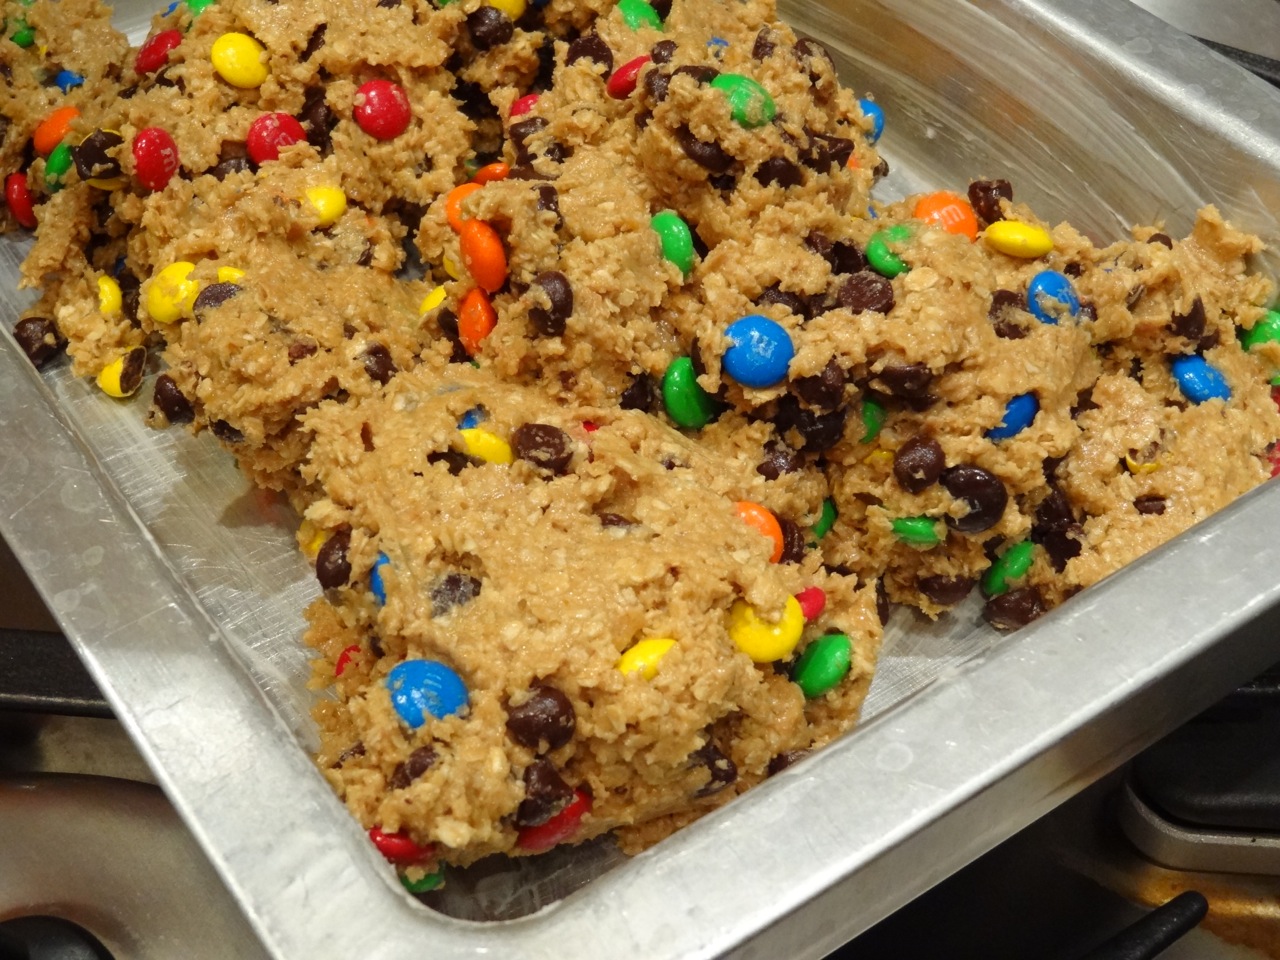
They are great because they are freshly made, and have 2 whole cups of rolled oats, 1/2 cup wheat germ, whole wheat flour, and unsweetened applesauce.

I may experiment with cutting out the brown sugar next time and substituting maple syrup. Or I might cut sugar completely and maybe use some cinnamon applesauce. The possibilities are endless!

Feel free to also add in raisins or chocolate chips. For a fall treat, add some pumpkin puree and pumpkin spice instead of cinnamon. Be creative!

Playground granola bars
Pat into an aluminum foil-lined 9×13-inch pan.
Playground granola bars
Bake for 20 minutes at 350 degrees. Let cool and cut into bars.

Playground granola bars playground
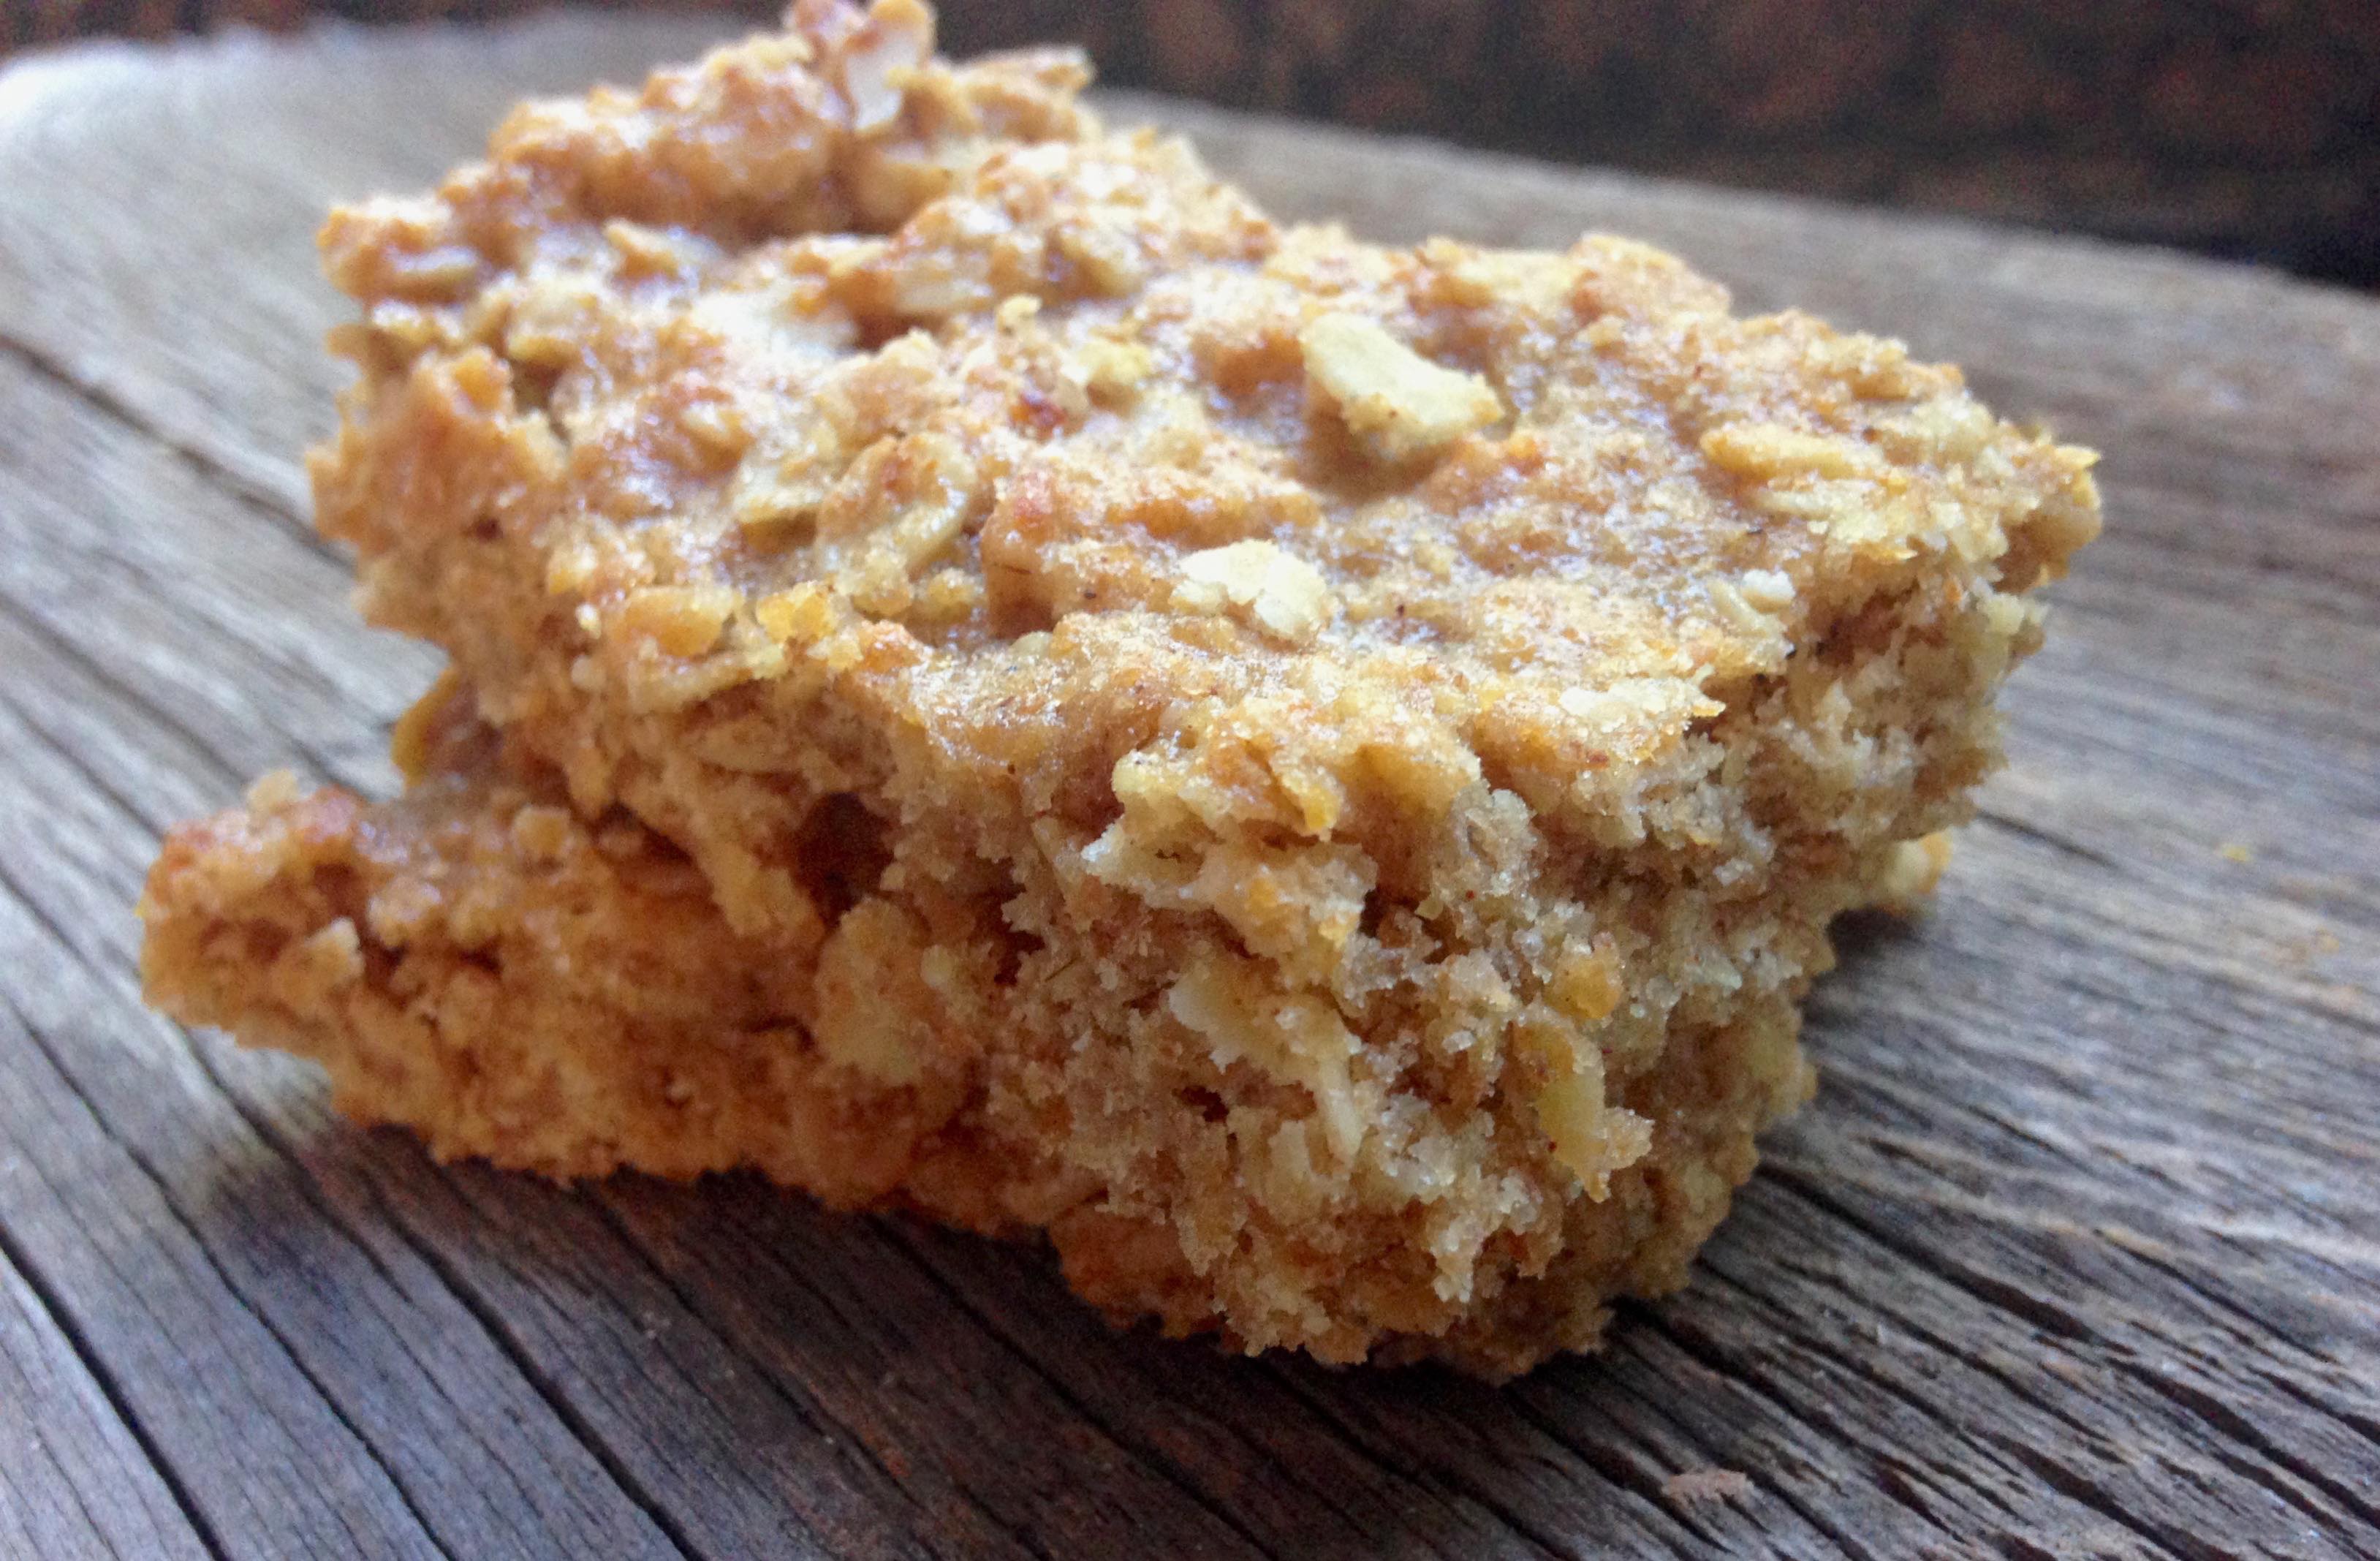
While Harper hasn’t shared any of these granola bars with her playground friends, we plan on doing so in the future!

Enjoy.

Playground Granola Bars
Prep time:
Cook time:
Total time:
Serves: 12
Ingredients
  • 2 cups rolled oats
  • 1/2 cup packed brown sugar
  • 1/2 cup wheat germ
  • 1 cup whole wheat pastry flour
  • 3/4 tsp. ground cinnamon
  • 3/4 tsp. salt
  • 1/2 cup honey
  • 1/2 cup plain, unsweetened applesauce
  • 1 egg, beaten
  • 1/2 cup vegetable oil
  • 1 tsp. vanilla extract
Instructions
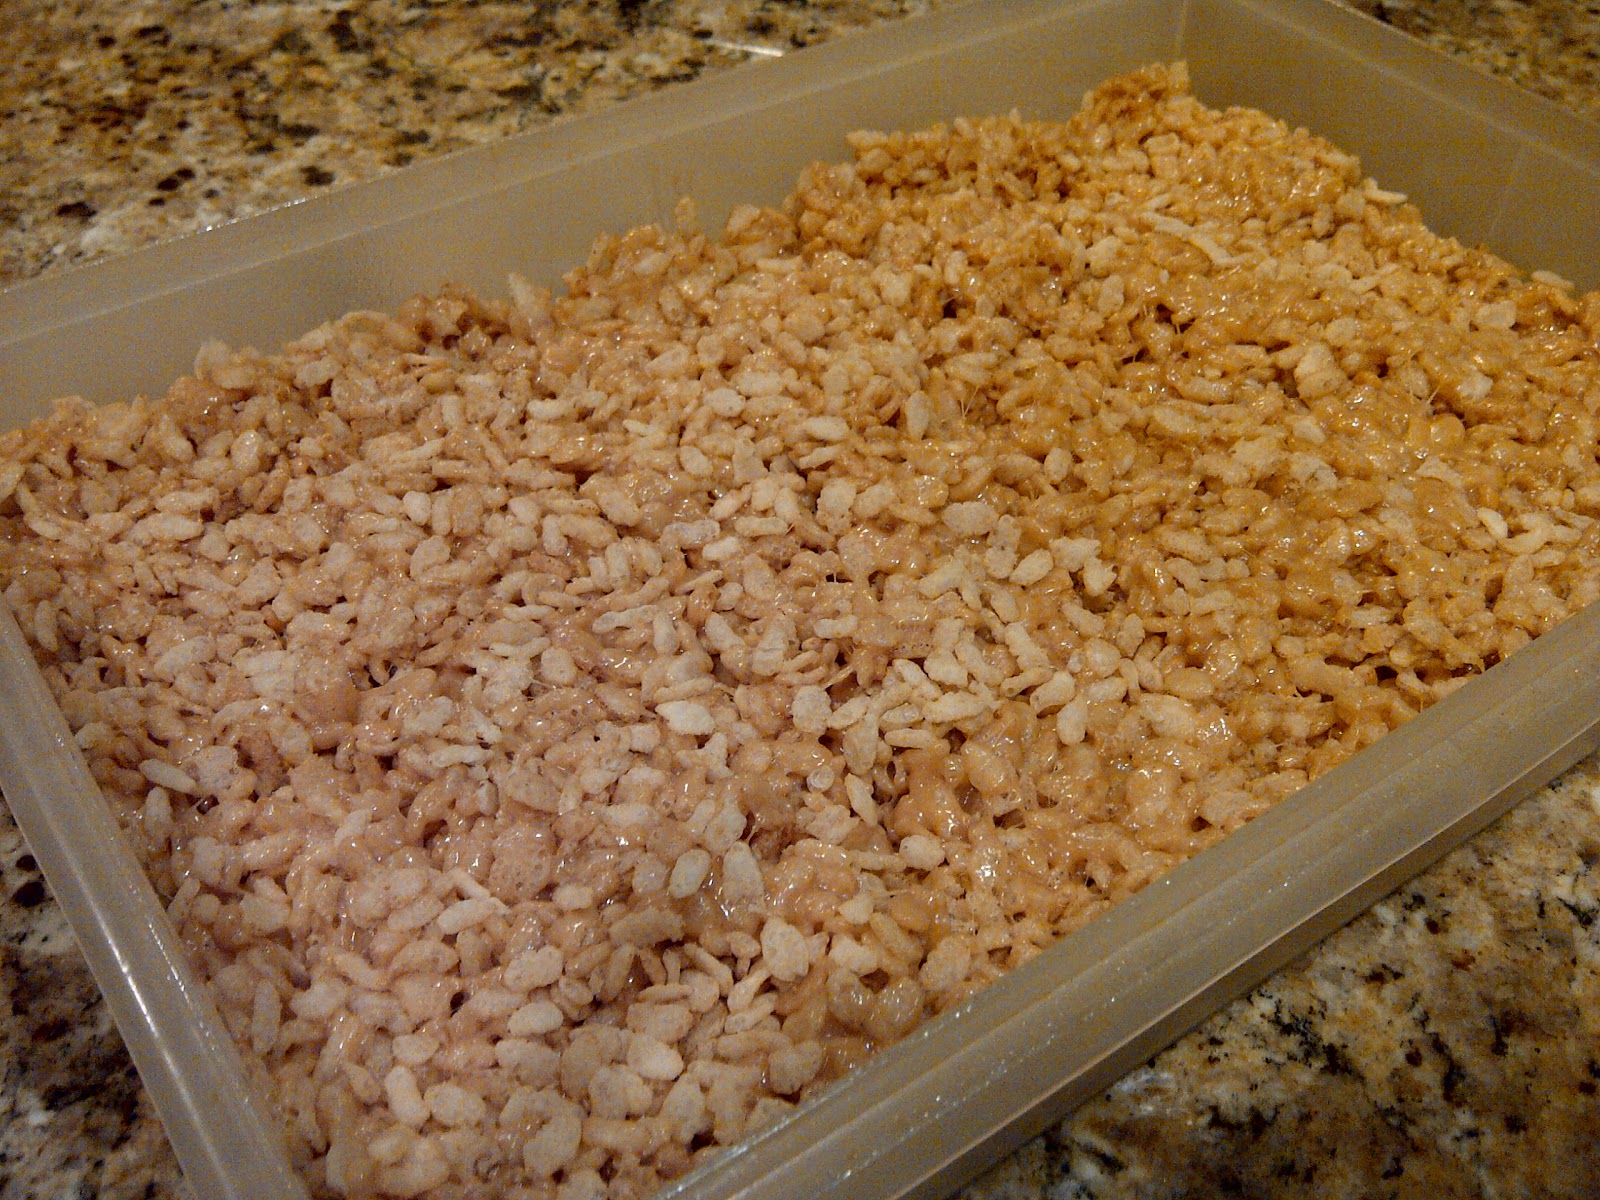
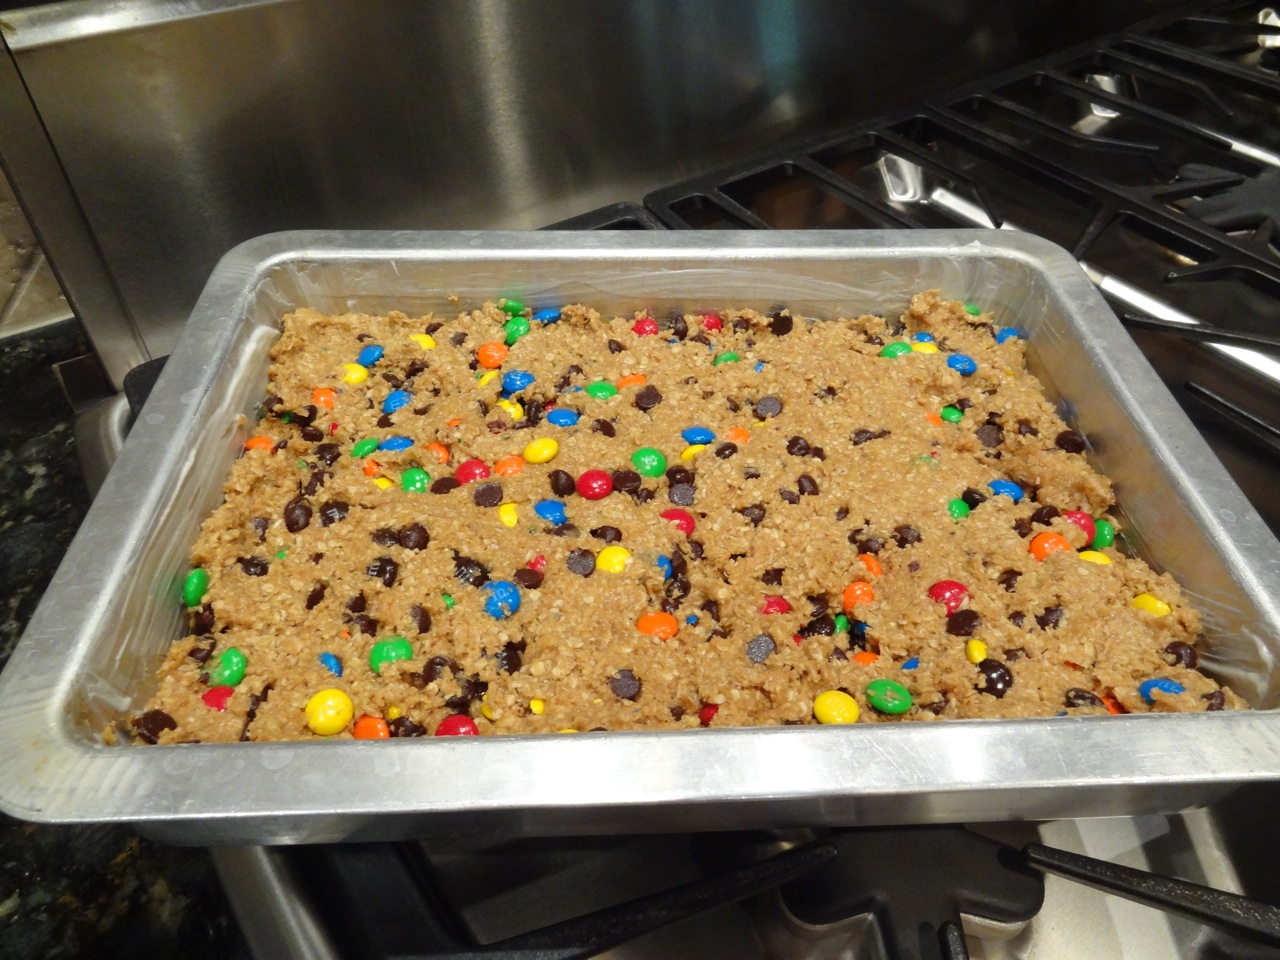
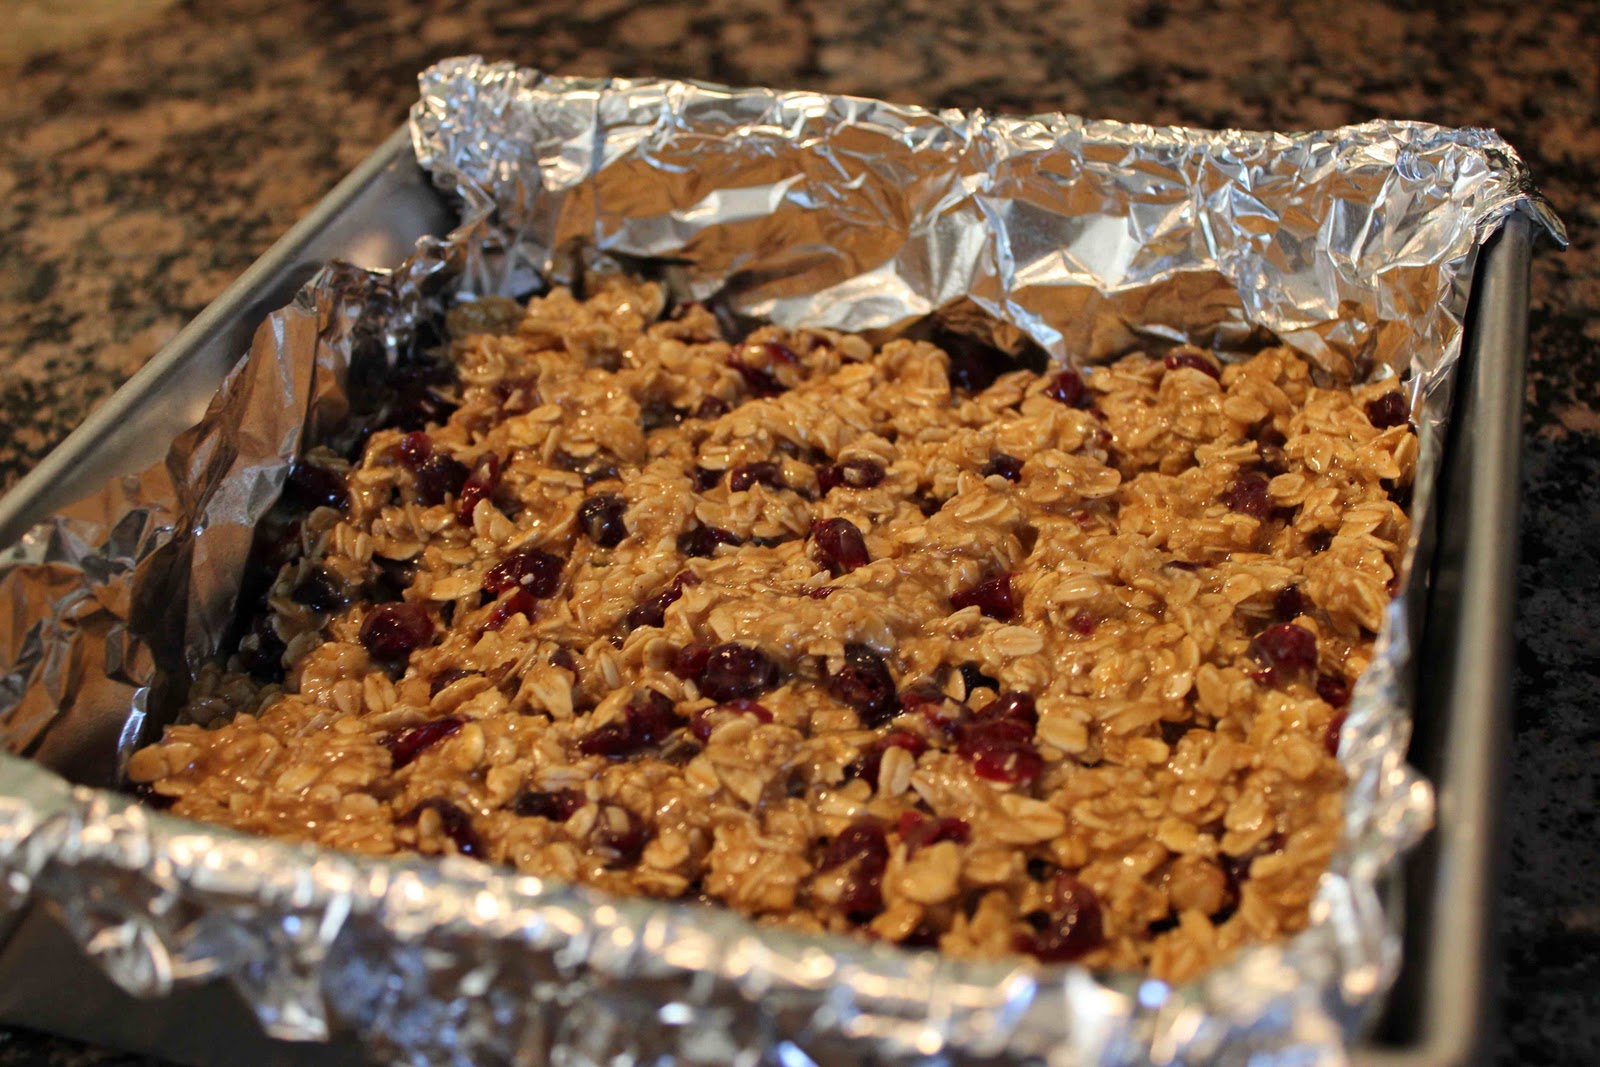
  1. Preheat oven to 350 degrees F. (If using convection oven, decrease the temperature to 325 degrees F.) Line a 9×13 in pan with aluminum foil and spray with nonstick spray.
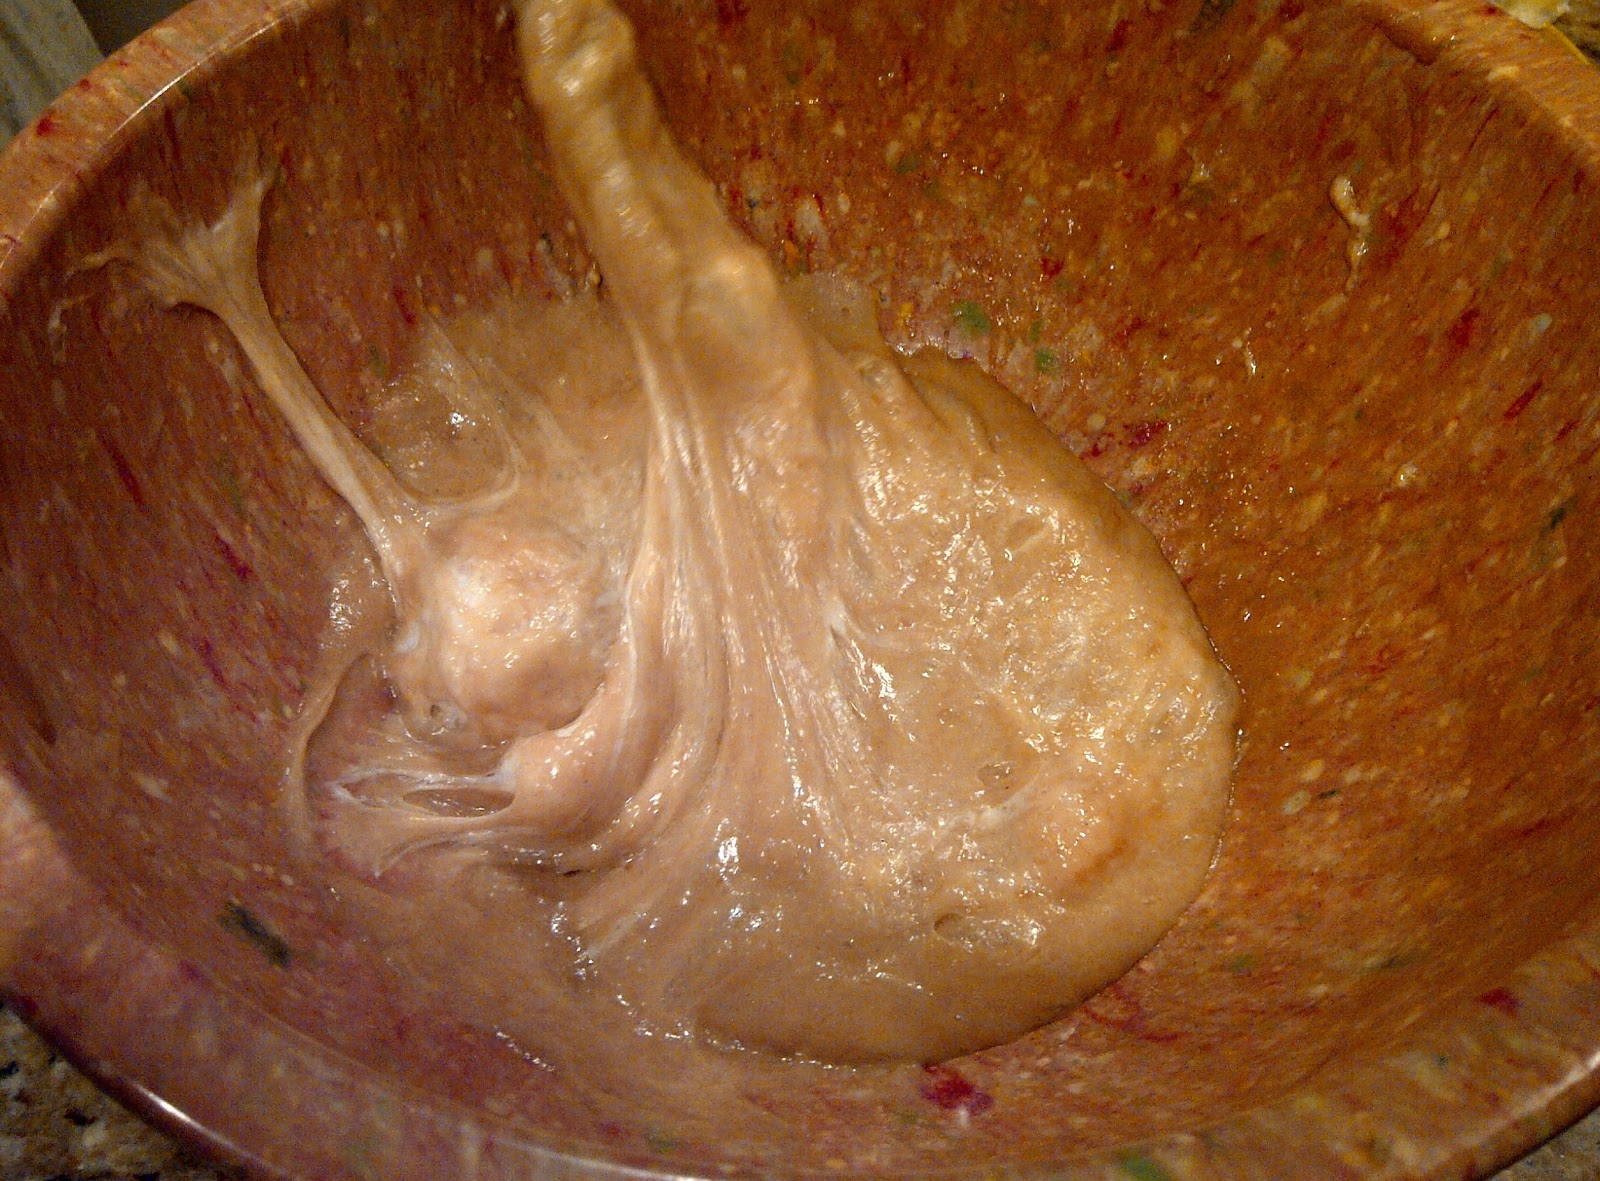
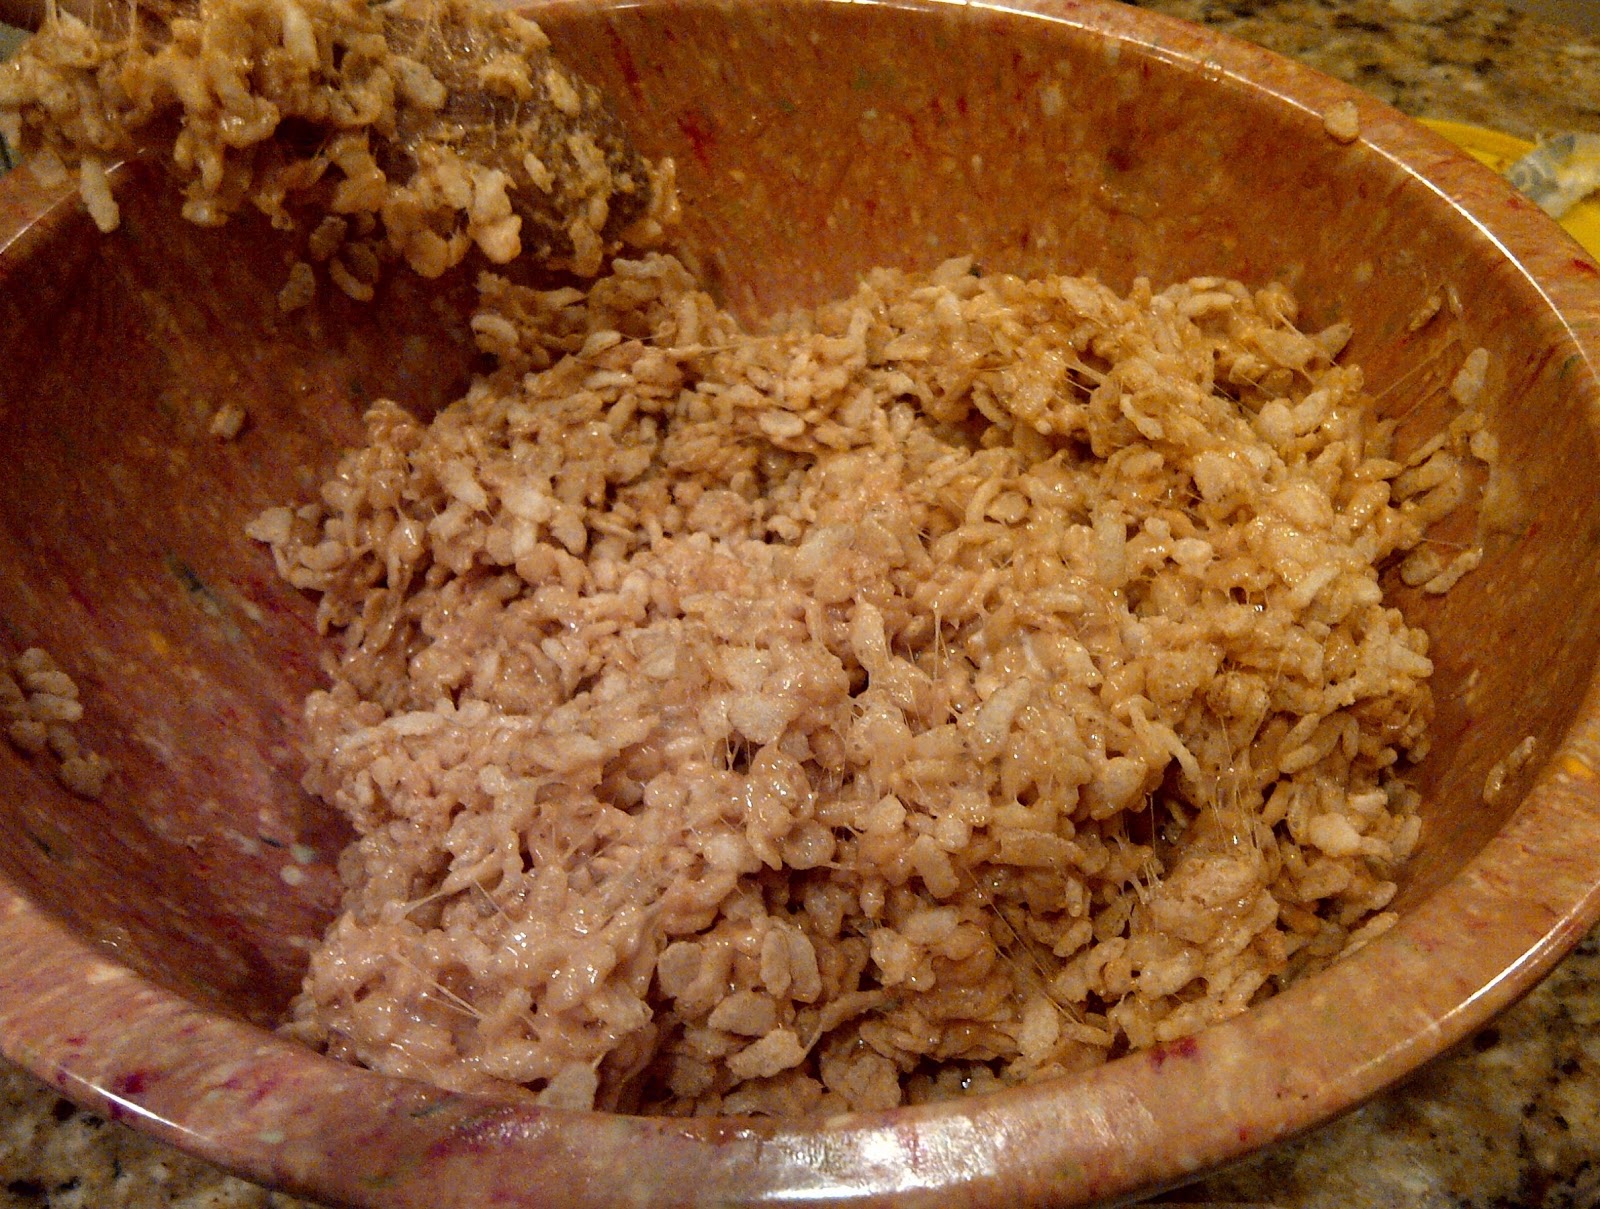
  2. In a large bowl, mix together the oats, brown sugar, wheat germ, flour, cinnamon and salt. Make a well in the center and pour in the honey, applesauce, egg, oil, and vanilla. Mix well using your hands.
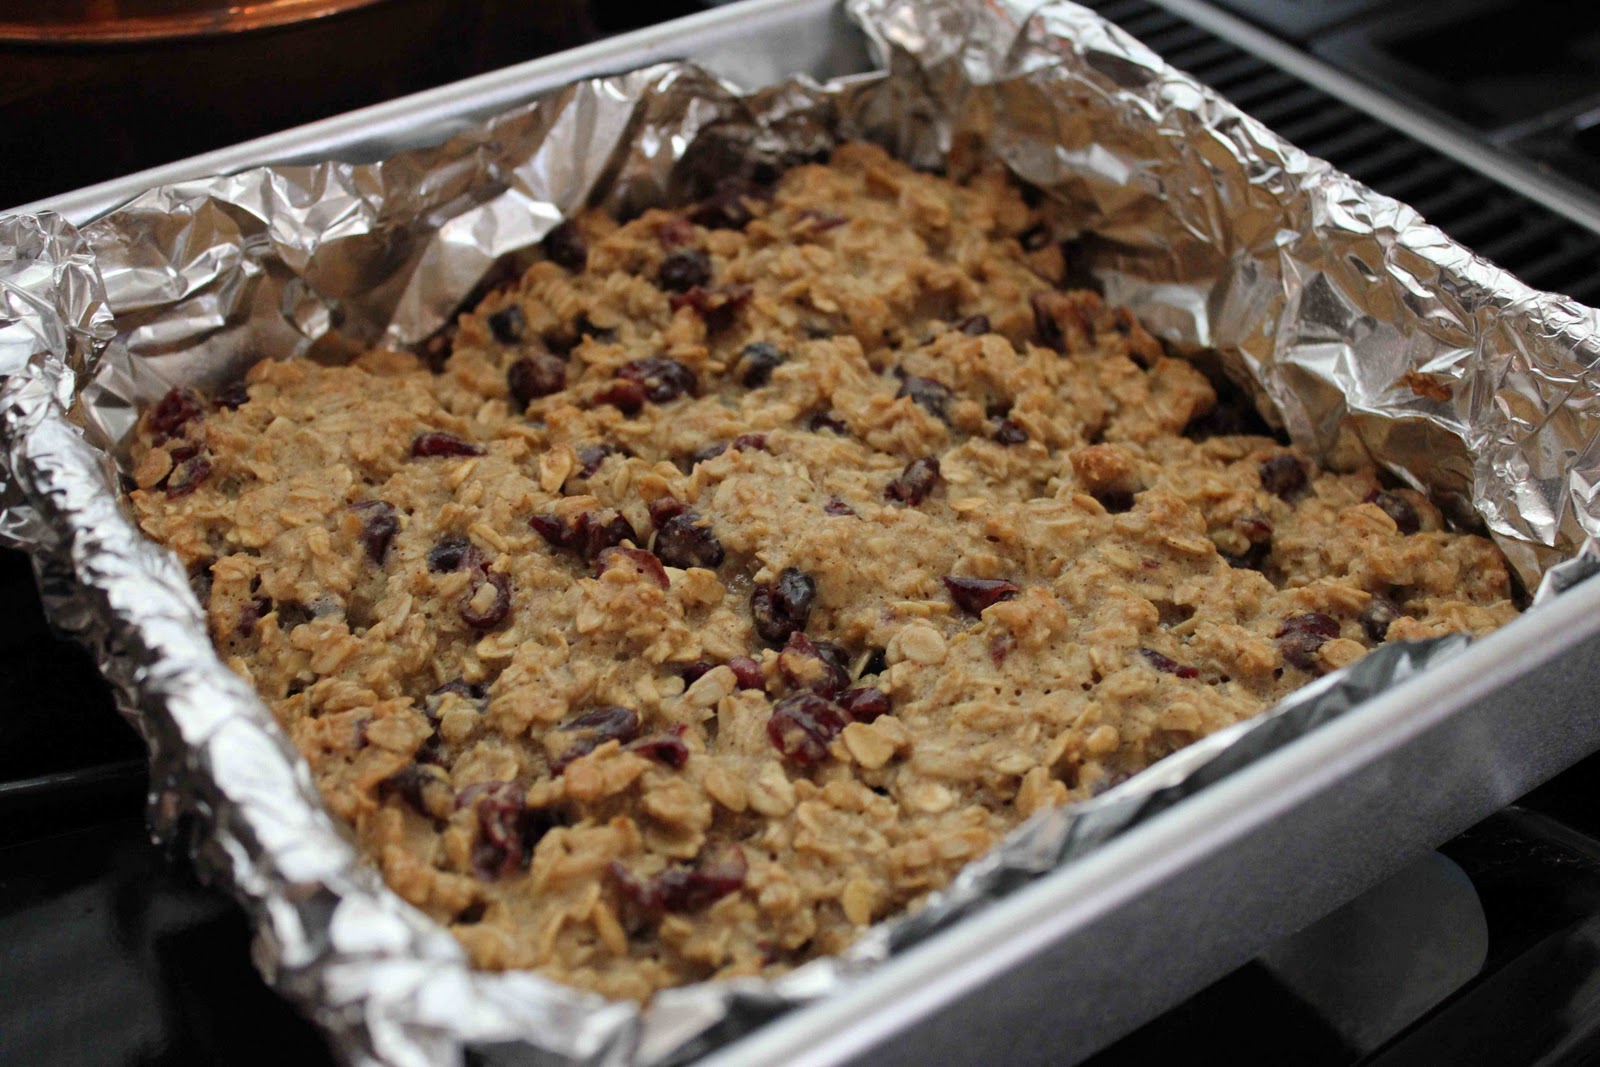
  3. Pat the mixture evenly into the prepared pan. Bake for 20 minutes or until the bars begin to turn golden at the edges. Cool for 5 minutes, then cut into bars.


Strawberry Pretzel Dessert

Strawberry Pretzel Dessert

Strawberry Pretzel Dessert is one of my all-time favorites! If you want to trick yourself into thinking you’re eating something healthy, then you can also call this Strawberry Pretzel “Salad”.

My mom’s birthday was this Thursday, and since her birthday is in June, she usually requests a lighter, non-chocolatey dessert. For previous occasions we’ve made her strawberry layer cake, tres leches cake, a hot milk sponge cake, etc. Notice a trend? If you clicked on all of the recipes, they all had strawberries on top! She’s a big fan, as am I!

Strawberry Pretzel Dessert

For those that like the sweet-salty combination, this dessert is for you. It’s got a slightly salty crust from the pretzels, a cool, creamy cool whip and cream cheese center, and a light and refreshing topping with strawberry Jell-O and fresh strawberries. Yum!

Matt is actually not a pretzel fan (he actually doesn’t like ANY crust to any dessert…pies, you name it), so he doesn’t eat the pretzel bottom of this dessert. One time I made it for him and substituted crushed graham crackers for the pretzels. It was still a good combination, but it of course was not as salty, and the graham cracker crust got slightly more soggy as it sat in the fridge as compared to the pretzel crust.

My mom had a great birthday and as you can guess, as not much is left of this dessert (or salad, if you wish to call it). Enjoy!
Strawberry Pretzel Dessert

Strawberry Pretzel Dessert

Strawberry Pretzel Dessert
Prep time:
Cook time:
Total time:
Serves: 24
Ingredients
  • 3/4 cup butter, melted
  • 2 1/2 cups pretzels, crushed
  • 3 Tbsp. sugar
  • 8 oz. cream cheese, softened
  • 1 cup sugar
  • 8 oz. frozen whipped topping, thawed
  • 2 cups boiling water
  • 6 oz. strawberry gelatin
  • 20 oz. frozen strawberries, partially thawed
Instructions
  1. Preheat oven to 375 degrees F.
  2. FOR THE CRUST: Mix butter, pretzels, and 3 tablespoons of sugar. Press the mixture into the bottom of a 9 x 13-inch pan. Bake for 7-10 minutes. Cool.
  3. FOR THE CREAM LAYER: Mix the cream cheese, 1 cup of sugar, and whipped topping. Spread over the cooled pretzel layer.
  4. FOR THE STRAWBERRY LAYER: Dissolve gelatin in boiling water. Add strawberries and stir until partially thickened. Pour over whipped topping layer.
  5. Chill overnight before serving


Lisa’s Oatmeal Bars

IMG_2999

As mentioned, I write a Resident Recipe column for our monthly neighborhood magazine. This month’s article features Lisa, a personal trainer who made these wonderful oatmeal bars – a healthy version of chocolate chip oatmeal cookies. An excerpt from the article is below:

As a personal trainer and class instructor at the Frisco Athletic Center, Lisa understands the importance of eating healthy.

While living in Fort Lauderdale and working for a cooking show at the time, Lisa was determined to find a healthier alternative to chocolate chip oatmeal cookies that her kids could enjoy. After experimenting on her own, she perfected this recipe for oatmeal bars. Unlike a traditional cookie, these bars contain neither butter not eggs. Instead, they are loaded with whole grain oats and skim milk. Lisa’s cookie alternative is a tasty and good-for-you recipe that you don’t have to feel guilty about eating.

Fortunately for my husband and me, we were able to try some of Lisa’s oatmeal bars and absolutely LOVED them! Lisa used to sell her bars when she lived in Florida and I can see why people would buy them … they are delicious! Enjoy.

IMG_2998

IMG_2996

Lisa’s Oatmeal Bars
Serves: 20-24 bars
Ingredients
  • 4 cups old-fashioned oats
  • 2 cups packed light brown sugar
  • 1 1/4 cups flour
  • 1 tsp. baking soda
  • 3/4 tsp. salt
  • 1/2 cup chocolate chips
  • 1/2 cup skim milk
  • 3/4 cup canola oil
  • 1 tsp. vanilla
  • 1 1/2 tsp. lemon juice
Instructions
  1. Preheat the oven to 350 degrees F.
  2. Mix dry ingredients together. Add liquid to dry ingredients with wooden spoon.
  3. Spread mixture into a 9×13-inch greased baking pan. Bake for about 24 minutes.
Notes
*Substitutions for chocolate chips: Golden raisins Dried cranberries and white chocolate chips Butterscotch chips

Congo Bars

Can’t decide between a brownie, blondie or cookie? If you want something sweet that combines the flavors of all three of your favorite sweets, they you’ve got to give these these dessert bars at try.  
While officially named “Congo Bars”, you could call them cookies…or brownies….or even brookies! Whatever the name you choose, they are good. My sister and mom made these a while ago for the mens cross country team at Oklahoma State. I don’t remember even getting to try one because the pan was empty. At least they didn’t go to waste. 🙂
Anyways, happy cooking and enjoy your Saturday!
Make the congo layer. Let cool completely.
Make the brownie layer. Cool completely.
Make the chocolate glaze and drizzle over cooled brownie layer.
Let the glaze set, then cut into squares.

Congo Bars
Ingredients
CONGO LAYER
1 1/3 cups (6 1/4 oz.) all-purpose flour
1 1/4 tsp. baking powder
1/4 tsp. salt
3 oz. (3/4 stick) unsalted butter, melted and cooled
1 1/4 cups firmly packed (8 oz.) light brown sugar
1 large egg
1 large egg white
1 tsp. pure vanilla extract
1 cup (4 oz.) chopped walnuts

BROWNIE LAYER
1 cup plus 2 Tbsp. (5 oz.) all-purpose flour
1/4 cup (3/4 oz.) unsweetened dutch processed cocoa powder
1/8 tsp. baking powder
1/4 tsp. salt
4 oz. (1 stick) unsalted butter
4 oz. unsweetened chocolate, coarsely chopped
1 1/3 cups (9 1/4 oz.) granulated sugar
2 large eggs, lightly beaten
1 large egg yolk
2 tsp. pure vanilla extract

CHOCOLATE GLAZE
3 oz. semisweet or bittersweet chocolate, finely chopped
3 Tbsp. heavy cream

Directions
1. Preheat oven to 350 degrees F. Lightly butter and flour a 9 x 13-inch baking pan. Tap out the excess flour.
2. To make Congo Layer: Sift together the flour, baking powder, and salt onto a sheet of waxed paper; set aside. In a large bowl, stir together the butter, brown sugar, egg, egg white, and vanilla just until blended. Stir in the flour mixture just until the batter is smooth.
3. Scoop the thick, sticky batter onto 8 or 9 different areas on the bottom of the prepared pan. With an offset spatula, spread the batter to cover the pan as evenly as possible. Sprinkle the walnuts evenly on top and gently press them into the batter.
4. Partially bake the layer until it is no longer shiny on top and is beginning to come away from the sides of the pan, about 20 minutes. Transfer the pan to a wire rack to cool while you prepare the Brownie layer.
5. To make the Brownie Layer: Sift together the flour, cocoa powder, baking powder and salt onto a sheet of waxed paper; set aside. In a small, heavy saucepan, melt the butter and chocolate over very low heat, stirring with a silicone spatula until smooth. Or, combine in a medium microwave-safe bowl and melt in a microwave oven at 50% power for 30 second bursts, stirring after each burst, until melted, 1 to 1 1/2 minutes. Transfer to a medium bowl and let cool for 5 minutes.
6. Stir the sugar into the chocolate mixture until incorporated. Add the eggs, egg yolk, and vanilla and stir until well blended. Stir in the flour mixture just until the batter is smooth. Scoop the thick, sticky batter onto 8 or 9 different areas of the still warm Congo Layer. With the offset spatula, spread the batter as evenly as possible.
7. Bake the brownie until the top is no longer shiny; appears set; feels firm, rather than soft; and a round wooden toothpick inserted in the center comes out with moist chocolate crumbs attached, about 25 minutes. Transfer the pan to a wire rack and let cool completely.
8. To make the Chocolate Glaze: Place the chocolate in a medium bowl. In a small saucepan, bring the cream just to a boil over medium-low heat. Pour the cream over the chocolate and let it stand for 30 seconds. Whisk together until smooth and creamy. Set the mixture aside at room temperature just until it cools a bit and begins to thicken slightly.
9. Fashion a small cone out of parchment paper and half fill it with the liquid glaze. Snip a small opening at the end of the paper cone to allow a thin flow of glaze. Pipe thin lines of chocolate in a zigzag pattern over the cooled surface of the brownie. Set aside at room temperature until the glaze is set, 1 to 1 1/2 hours.

Yield: 2 to 4 dozen bars, depending on the size
Recipe from: Baking for All Occasions: A Treasury of Recipes for Everyday Celebrations by Flo Braker.

Pumpkin Butter Bars

Can you believe it… already November 1st! Since it’s the first of the month, our monthly neighbor magazine gets published and I can finally reveal what recipe I wrote about in my Resident Recipe column. Below is my article:
Thanksgiving is a time to reflect on what you are thankful for. I am grateful for my friends and family, but after eating far too many pumpkin butter bars from my neighbor Betty, I have to say that I am extremely thankful for pumpkin desserts!

Betty’s favorite time of the year is Thanksgiving. Accordingly, her favorite store to visit is Williams-Sonoma. If you’re a foodie or simply like to cook, you’ve probably stopped by a WS store and seen their vast selection of cookware, baking goods, recipes and fine linens used to set a gorgeous dinner table. In addition, you’ve probably had a chance to sample some freshly baked goods from their in-store kitchenette.

A few years ago, Betty walked into Williams-Sonoma and was greeted with a batch of Pecan Pumpkin Butter Bars. “They were amazing,” Betty exclaimed, and now makes these bars every year during the holiday season. Her friends and family love them – including me! In addition these tasty bars yield a warm and festive aroma that will make you never want to leave your kitchen. Enjoy and Happy Thanksgiving!
Pumpkin Butter Bars
Ingredients
1 package yellow cake mix; set aside 1 cup
1/2 cup butter, melted
3 eggs
1/8 cup milk
1 Tbsp. flour
1/4 cup butter, softened
1 tsp. cinnamon
Directions
1. Preheat oven to 350 degrees F.
2. Divide yellow cake mix, placing all but one cup in a mixing bowl. Stir the melted butter and one egg into the cake mix. Press the mixture into the bottom of a 9″ x 13″ inch pan. 
3. Mix the jar of Muirhead Pecan Pumpkin Butter with two eggs and milk. Pour this result over the cake mix.
4. Stir the reserved cup of cake mix with the flour, sugar, softened butter, and cinnamon. Mix together until crumbly. Sprinkle over top of pumpkin layer.
5. Bake for 35 to 40 minutes or until golden brown. Cut into 2-inch squares.
Serves: 24
Recipe from: Williams-Sonoma

Peanut Butter Rice Krispies Treats and Aggie Football


If you’re an Aggie, you bleed maroon, especially my husband Matt! He is a die-hard Aggie, and when it comes to A&M football, you better not cross him!

Last Saturday the Aggies played Louisiana Tech. At the half, you would have thought we had the game in the bag, and so did the players…. we were up by 27 or 28 points! Well, that wasn’t the case. LA Tech must have had a great pep talk in the locker room because they came back strong. While they were never ahead, they came close, and you should have seen Matt! He was so nervous he could have given himself a heart attack. Matt played football for Texas A&M back in the early 2000s. He was the cornerback and was FAST!  4.27 second 40m fast. I guess you can see that he’s pretty invested in Aggie football.

Texas A&M upsets no. 1 OU in 2002.
Matt is the short one in the middle 🙂

Me on the other hand, I get bored pretty easy. My mother-in-law, Paula is kind of like me, so we decided to cook up something sweet: Chocolate Oatmeal “Dawg” Cookies and these Peanut Butter Rice Krispies Treats. I’ve never made the homemade treats before, so I was super excited.

They are super easy and and only use four ingredients. I think it took us only 5 minute to prepare them. Paula told me a story about how a she had to make Rice Krispies Treats for all of Matt’s sixth grade class. She said the other moms would complain about getting their hands all sticky. Paula had no complaints and no messy hands because of her method of making these. Enjoy and until the next A&M football game – “Gig ‘Em Aggies!”

*FYI – I did not have my trustworthy Canon Rebel at the time, and was forced to use my ghetto Blackberry Torch phone instead. 🙂

Just four ingredients: Rice Krispies, marshmallows, peanut butter and butter.
Microwave peanut butter, butter and two marshmallows (to get the excess peanut butter off the spoon)  for 30 seconds. 
Add the rest of the marshmallows and microwave for 1 minute. Stir, then microwave for another 30 seconds.
Stir marshmallow mixture until well combined.
Pour in the Rice Krispies cereal.
Stir until well combined.
Press into greased 9 x 13-inch pan.
Cool completely and cut into squares.
Add peanut butter M&Ms, if desired!

Peanut Butter Rice Krispies Treats
Ingredients
1/2 cup peanut butter
1 package (10 oz.) marshmallows
3 Tbsp. butter
6 cups Rice Krispies cereal

Directions
1. Microwave butter and peanut butter for 30 seconds. Microwave marshmallows for 1 minute. Stir. Microwave for another 30 seconds.  Stir until well combined.
2. Stir in Rice Krispies cereal.
3. Press cereal mixture into greased 9 x 13-inch pan. Let cool completely and cut into squares.

Monster Cookie Bars

These are the BEST monster cookie bars in the entire world! Literally 1-inch in thickness, these bars are chewy, gooey, moist and 10x better than regular ‘ole monster cookies.
The combination of peanut butter, chocolate chips, M&M’s, and oats creates the most decadent cookie bar you’ll ever put in your mouth!
For the past 4 years, my sister Brittany, was like the “team mom” for the Oklahoma State cross country team. She loves to bake and would make sweets for her boyfriend Colby and his teammates before each race.
If you didn’t know, Brit and Colby got married last weekend. As you could guess, many of Colby’s cross country teammates were his groomsmen. To keep the baking tradition alive, Brittany decided to make these monster cookies bars for Colby and the groomsmen as a “pre-race”, aka pre-wedding treat!
Right before the wedding, I mentioned to Brit that she should try to make monster cookie bars. She did some searching on her own and found this recipe through Marina’s blog over at Domesticated Duchess. What sold her on these bars was how thick they were!
Lucky for me, Brittany was thoughtful (perhaps because I pleaded…Lol) and saved 3-4 monster cookie bars for me to snack on. Thank goodness, because as I said earlier, they were AWESOME!
Enjoy!
Spread dough into a greased 9 x 13-inch pan.
Bake for 15-20 minutes in a 350 degree F oven.
Let cool. Then cut into bars.

Monster Cookie Bars
Ingredients
1 stick unsalted butter
1 cup granulated sugar
1 cup brown sugar
1 1/2 cups creamy peanut butter
3 eggs
2 tsp. baking soda
4 1/2 cups quick cooking oatmeal
1 package (12 oz.) chocolate chips
1 package (12 oz.) milk chocolate M&M’s

Directions
1. Preheat oven to 350 degrees F.
2. In an electric mixer, cream the butter and sugars until smooth. Beat in the eggs and baking soda. Then ddd the peanut butter and beat until smooth.
3. Mix by hand the oatmeal, one cup at a time. Slowly add in the M&M’s and chocolate chips.
4. Spread mixture into a well greased 9 x 13-inch pan and bake for 15-20 minutes. Do not over bake! (They will taste better just a little on the soft side.) Store in an airtight container.

Recipe from: Domesticated Duchess
Yield: about 20 bars

Homemade Granola Bars


Earlier this week, my sister made these healthy homemade granola bars for her and her fiancé. I have not had the chance to bake these bars yet, but I have full intentions of doing so this weekend.
 
My sister said these granola bars were delicious. The rolled oats, whole wheat flour, and wheat germ make them healthy, while the brown sugar, honey, and chocolate & peanut butter chips make them sweet.  What an excellent snack I look forward to eating soon!

Homemade Granola Bars

Ingredients
2 cups rolled oats
1 cup whole wheat flour
1/2 cup chocolate chips (can substitute dried fruits for the chocolate and peanut butter chips)
1/2 cup peanut butter chips
1/2 cup brown sugar
1/2 cup wheat germ
1 tsp. cinnamon
1/2 tsp. salt
1 egg, beaten
1/2 cup honey
1/2 cup canola oil
2 tsp. vanilla extract
Directions
1. Preheat oven to 350 degrees F. Line a 9 x 13-inch baking pan with foil and spray with cooking spray.
2. Mix the dry ingredients in a large bowl. In a small bowl, mix together the wet ingredients. Pour the wet mixture into the dry and mix well (it’s easiest to just use your hands). Pat the mixture out into the foil-lined pan.
3. Bake for about 15-20 minutes if you want chewy granola bars or for 20-25 minutes for crunchy granola bars. When the edges start to brown, remove from the oven and let cool for a couple of minutes. Use a pizza roller to slice bars. Finish cooling completely before removing from the pan or they will break apart.
Recipe from Buns in My Oven

Oatmeal Craisin Bars

I thought these Oatmeal Craisin Bars were very very good. Just a tad dry on the inside, but for a “healthy” bar, I thought they were delicious. The flavors were excellent….cinnamon, combined with oatmeal, brown sugar, and craisins made for a delectable, fall treat. The best part…no butter, thus no guilt! I took these to work with me as my mid-morning snack all last week.
The thought of substituting chocolate chips for craisins crossed my mind since my husband, Matt hates dried fruit, but I wasn’t sure about mixing the chocolate and cinnamon together…weird flavors in my opinion.
Enjoy these healthy Oatmeal Craisin Bars and let me know what you think!
In a large mixing bowl, combine all ingredients until smooth.

Pour into a greased 8 x 8-inch square pan coated with non-stick cooking spray.

Bake for 25-30 minutes in a 350 degree F oven or until bars are cooked all the way through.

Let cool completely, then cut into bars.


Oatmeal Craisin Bars
Ingredients
2 cups old-fashioned oats
1/2 cup all-purpose flour
1/2 cup packed light brown sugar
1/2 cup canola oil
2 eggs
1/4 tsp salt
1/2 tsp cinnamon
1 cup craisins

Directions
1. Preheat oven to 350 degrees F.
2. Spray 8″x 8″ inch baking pan with non-stick cooking spray. (I placed an aluminum foil overhang in the baking pan and sprayed the foil with non-stick cooking spray…keeps the pan clean, and makes the bars easier to cut.)
3. In a large mixing bowl, combine ingredients until smooth.
4. Spread batter in prepared baking pan and bake for approximately 25 minutes until bars are cooked all the way through.
5. Let bars cool completely in pan before cutting.

Yield: 9 bars
Where Women Cook | Autumn 2011 issue

Key Lime Bars

For those of you who know me, I am a big fan of key lime desserts:  Key Lime Pie, Limeade Pie, Key Lime Frozen Yogurt, Yoplait’s Key Lime yogurt, etc.  My grandfather, Poppy, was the only other person I knew who loved key lime as much as I did.  I think we had similar tastes when it came to desserts!  He would always buy me a Key Lime Pie from Chez Bazan Bakery in Tyler, Texas whenever I would visit him.  Chez Bazan would always drizzle lime green swirled lines over the whipped cream portion of the pie.  Super tart and super good!
These Key Lime Bars I made are some of the easiest and best tasting lime bars you can make.  The recipe is from Martha Stewart and they are fool-proof.  The crust is simply sugar, butter, and graham cracker crumbs pressed into a glass baking dish and baked in a 350 degree F oven for 10 minutes.   While that cools, you make the filling, which consists of egg yolks, lime zest, key lime juice, and sweetened condensed milk. Yes, there are only four ingredients in the filling!  I would eat these key lime bars over a traditional key lime pie almost any day of the week (however, I’ve never made a homemade key lime pie before, so I may be a little biased on these super easy bars.)  If you have heavy cream on hand, I would recommend making the whipped cream to spoon on top of the key lime bars.  The whipped cream is so much richer and has a sweeter taste than plain old Reddi-wip.  That’s not to say I don’t like Reddi-wip… with only 15 calories a squirt, I squirted a very generous amount on these bars!  Enjoy.
Combine sugar, butter, and graham cracker crumbs.

Bake in a 350 degree F oven for 10 minutes.

Beat egg yolks and lime zest on high until thick, about 5 minutes.  Use a wire whisk attachment with your stand mixer.


Beat in sweetened condensed milk and key lime juice.

Pour onto cooled graham cracker crust and bake for 10 minutes in 350 degree F oven.

Cool completely, and refrigerate at least 4 hours or overnight.  Slice.

Serve with homemade whipped cream or the simple Reddi-wip topping.


Key Lime Bars
Ingredients
1 cup finely ground graham cracker crumbs
2 1/2 tbsp finely ground graham cracker crumbs
1/3 cup sugar
5 tbsp unsalted butter, melted
3 large egg yolks
1 1/2 tsp finely grated lime zest
2/3 cup fresh Key lime juice, (about 23 limes total)
1 cup sweetened condensed milk, (14 ounces)
1/4 cup heavy cream
2 Key limes, thinly sliced into half moons

Directions
1.  Make crust:  Preheat oven to 350 degrees F.  Stir together graham cracker crumbs, sugar, and butter in a small bowl.  Press evenly onto bottom of an 8-inch square glass baking dish.  Bake until dry and golden brown, about 10 minutes.  Let cool completely on a wire rack.  (Leave oven on.)
2.  Make filling:  Put egg yolk and lime zest in the bowl of an electric mixer fitted with whisk attachment.  Mix on high speed until very thick, about 5 minutes.  Reduce speed to medium.  Add condensed milk in a slow, steady stream, mixing constantly.  Raise speed to high; mix until thick, about 3 minutes.  Reduce speed to low.  Add lime juice; mix until just combined.
3.  Spread filling evenly over crust using a spatula.  Bake, rotating dish halfway through, until filling is just set, about 10 minutes.  Let cool completely on a wire rack.  Refrigerate at least 4 hours (or overnight).
4.  Cut into 2-by-2 inch bars.  Put cream in a clean bowl of an electric mixer fitted with the clean whisk attachment.  Mix on medium-high speed until stiff peaks form.  Garnish bars with whipped cream and a slice of lime.  Ungarnished bars can be refrigerated in an airtight container up to 3 days.

Yield: 16 bars
Martha Stewart