Unleavened Bread from Ski Trip

unleavened bread

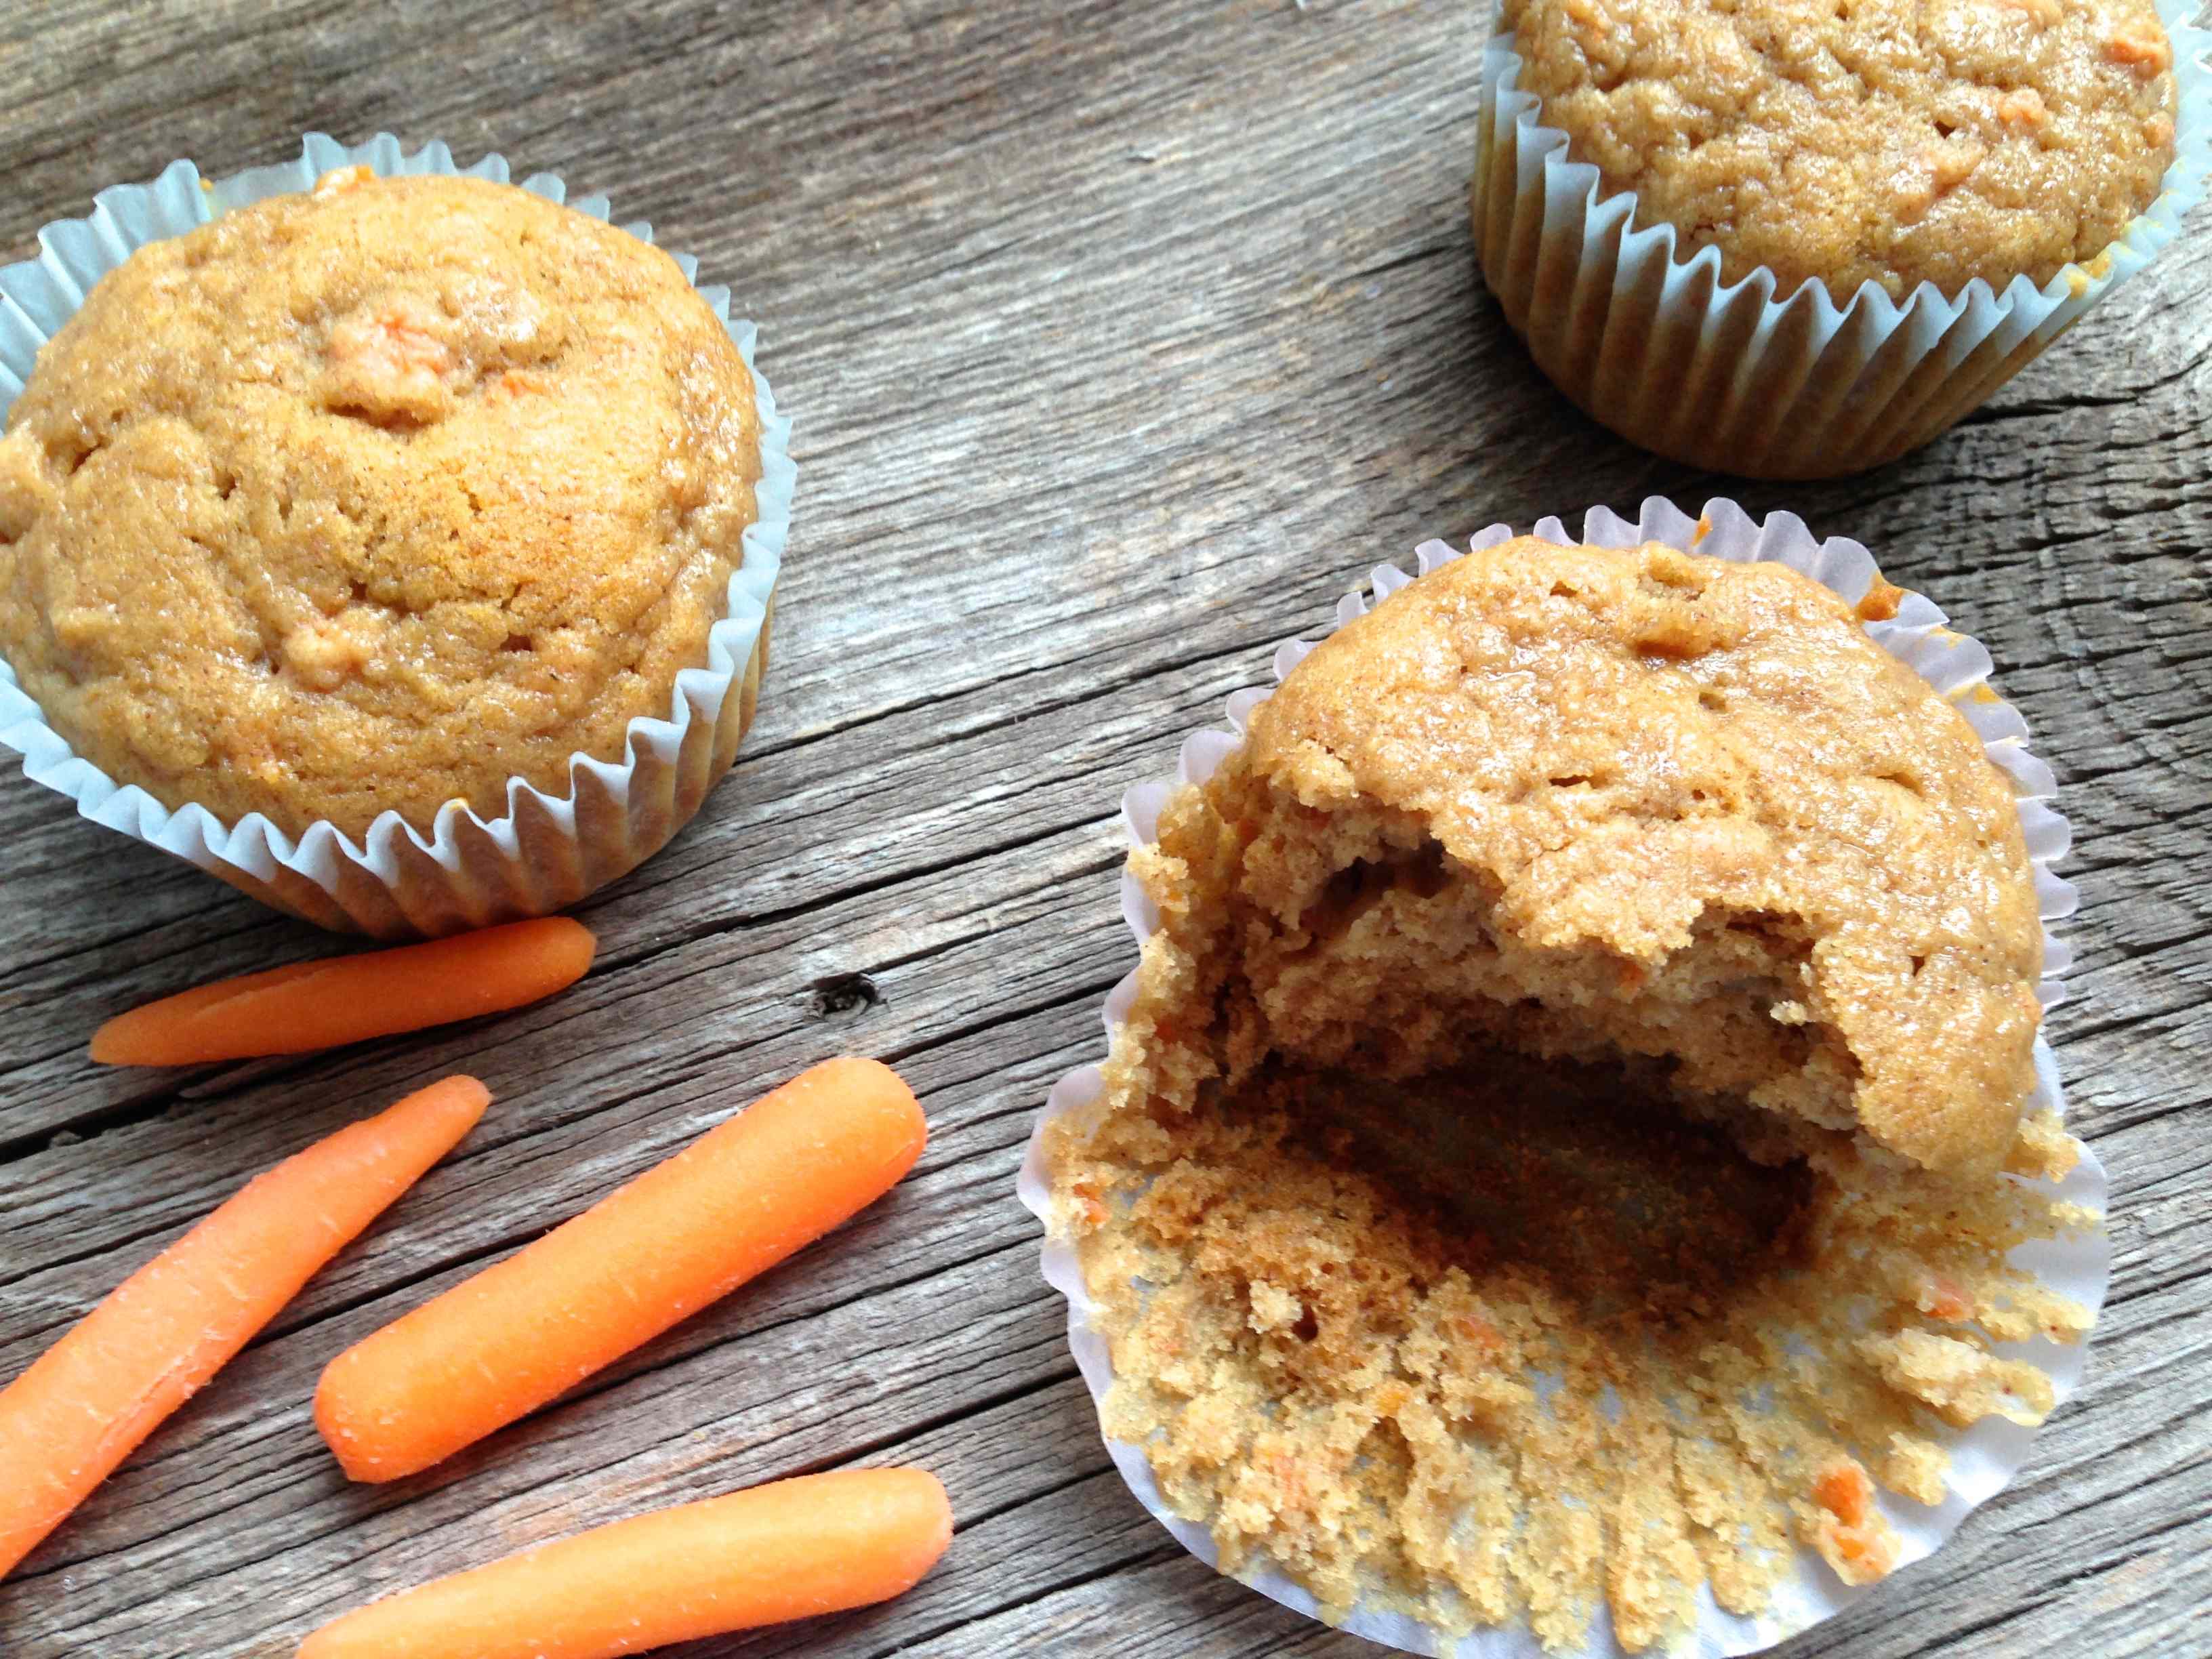
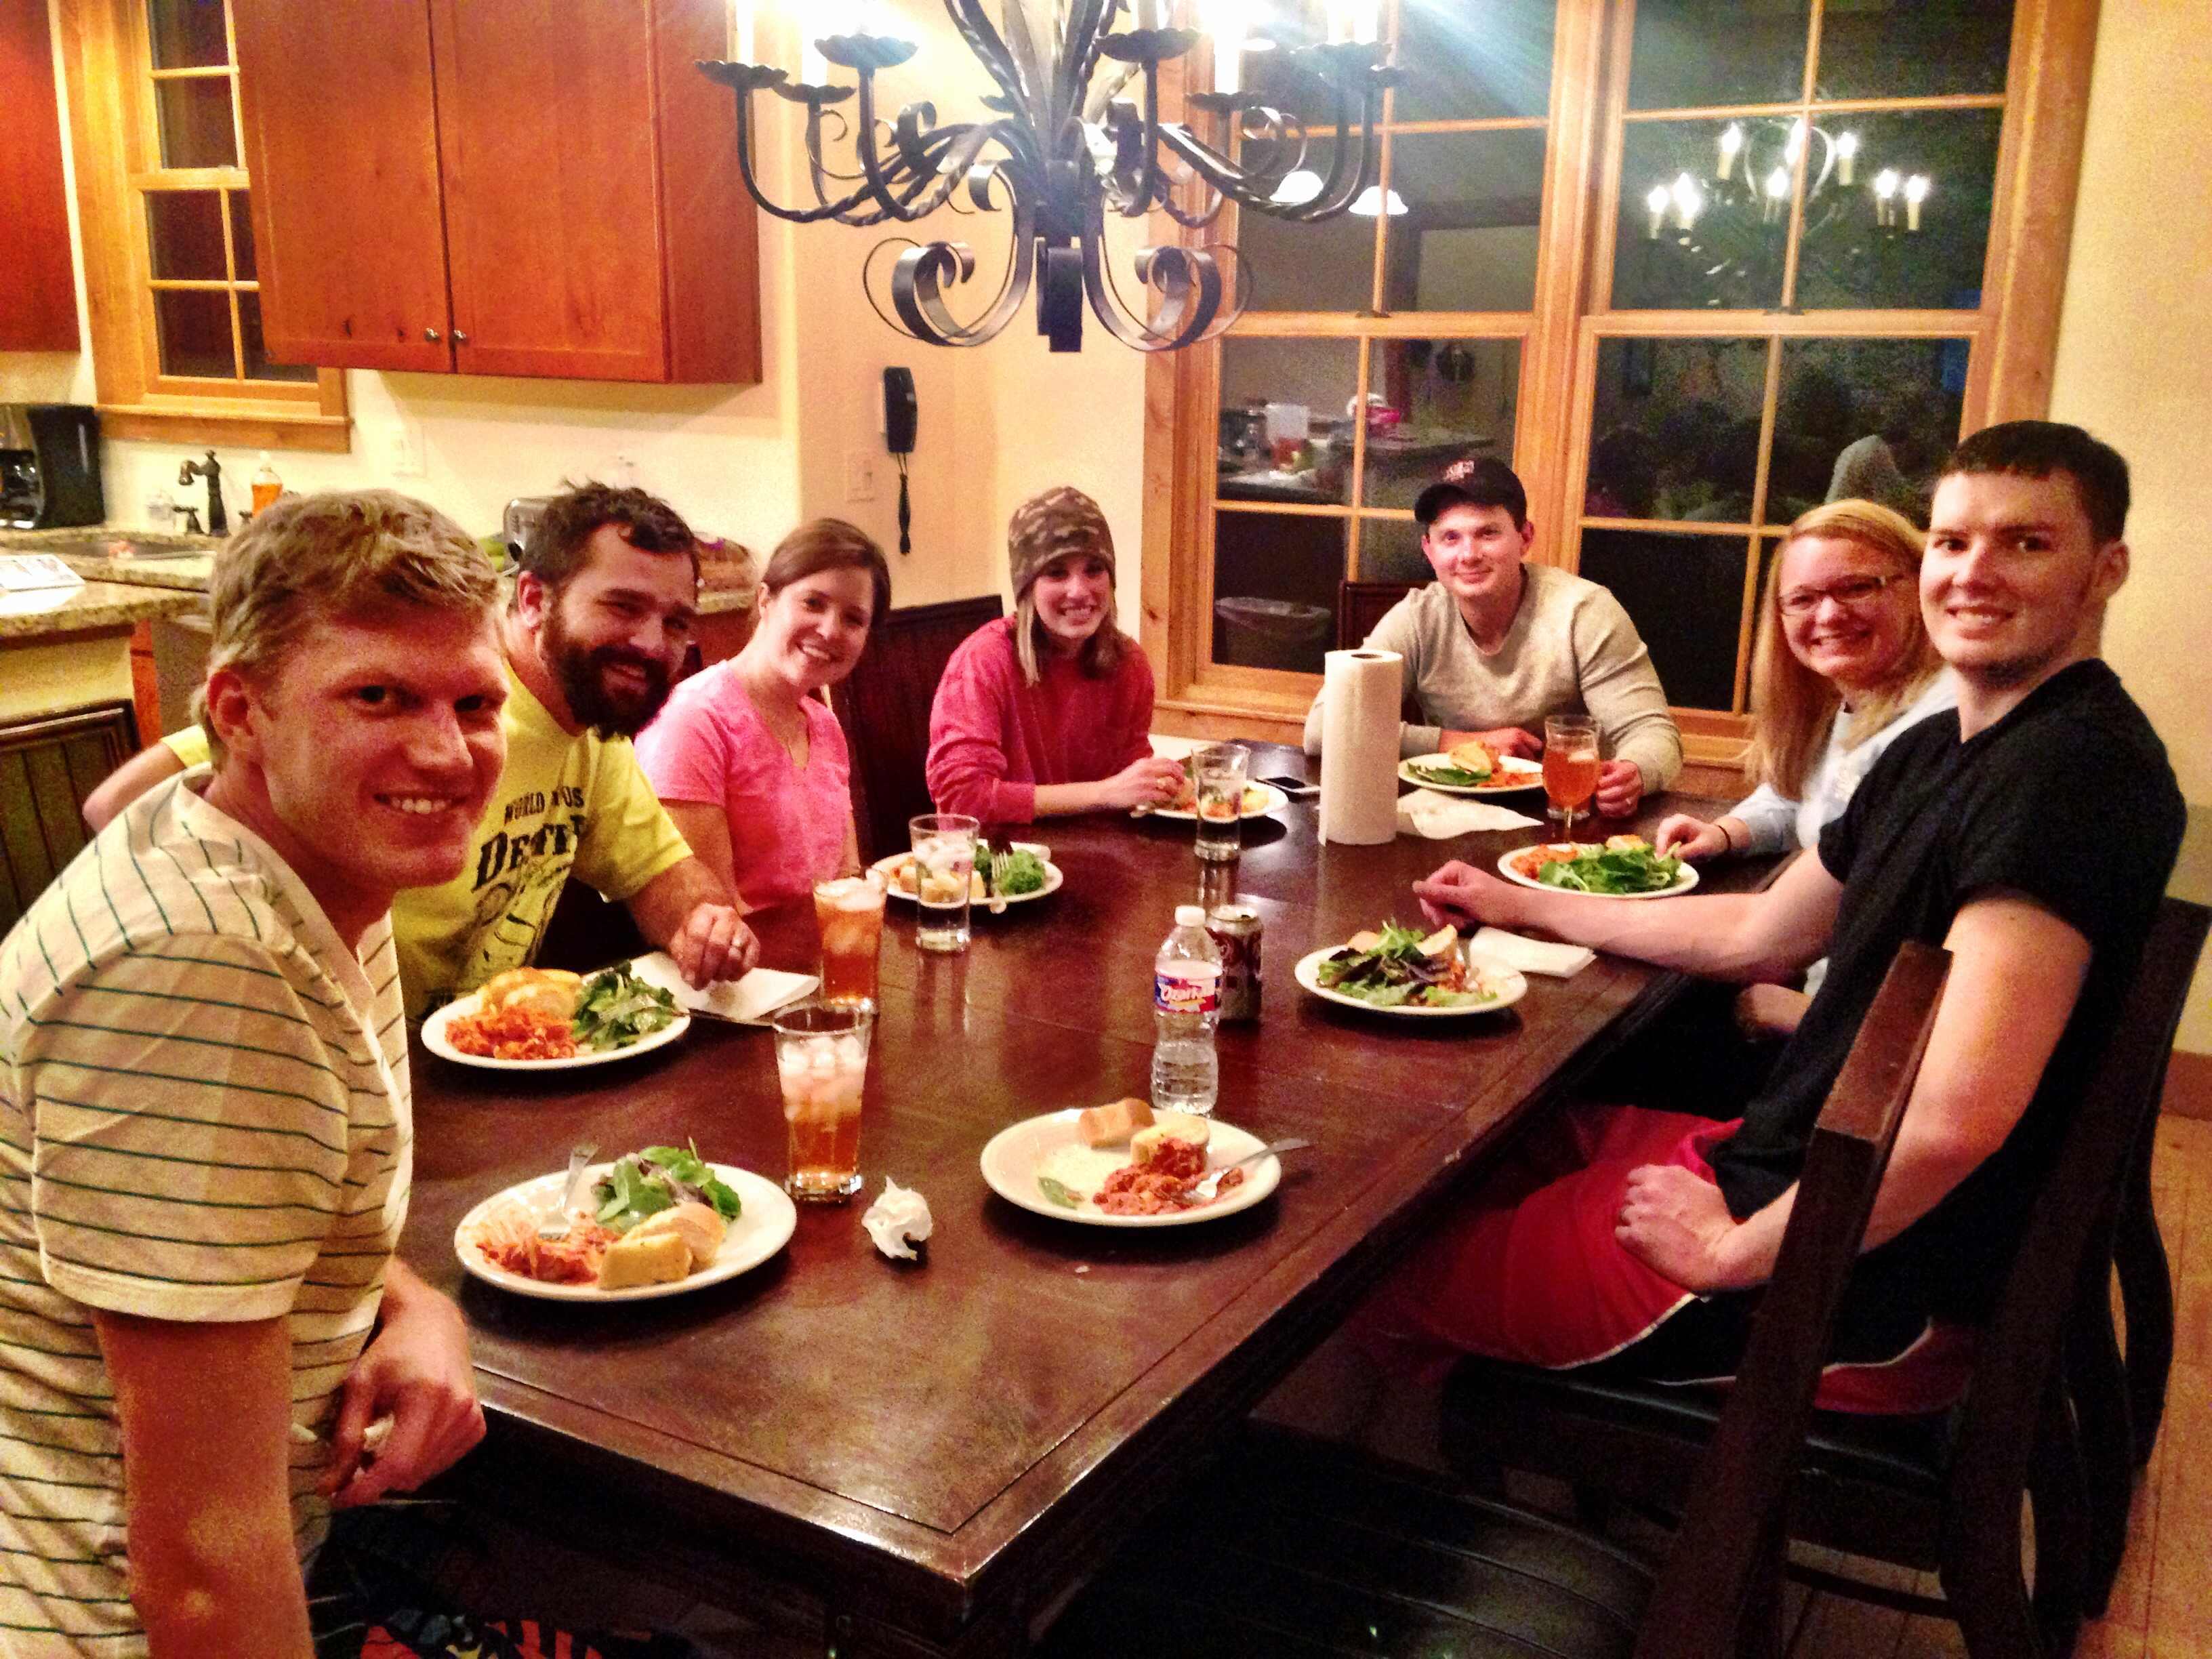
Take me back!!! Such good memories were made on our ski trip to Breckenridge, Colorado just five months ago, especially the food!

Not only did we have a blast skiing, we also sat down to every meal together, just like a big family would. It was a group of us from church, and since we arrived to Breckenridge on a Sunday afternoon, we had all missed church that morning due to travels, so needed to take communion.

Breckenridge ski trip
Breckenridge, Colorado

My friend Robin brought homemade unleavened bread that she cooked up in Dallas before we left for Colorado (recipe below). All we needed was to trek to the grocery store…. boy was that an experience!  Jeff’s truck got stuck in the snow for 2 hours and a larger truck had to tow us out! We learned our lesson and us Texan’s bought our first pair of chains to wrap around the tires.

At the store, we bought some grape juice to go along with the unleavened bread for communion, as well as lasagna, mixed greens, garlic bread for dinner, and a few other breakfast and dinner items to last us for the next week of our trip.

While the frozen lasagna was cooking, we did a short devotional and then took communion: unleavened bread and grape juice.

first meal
Our first meal together in Colorado…. lasagna, tossed salad, and garlic bread

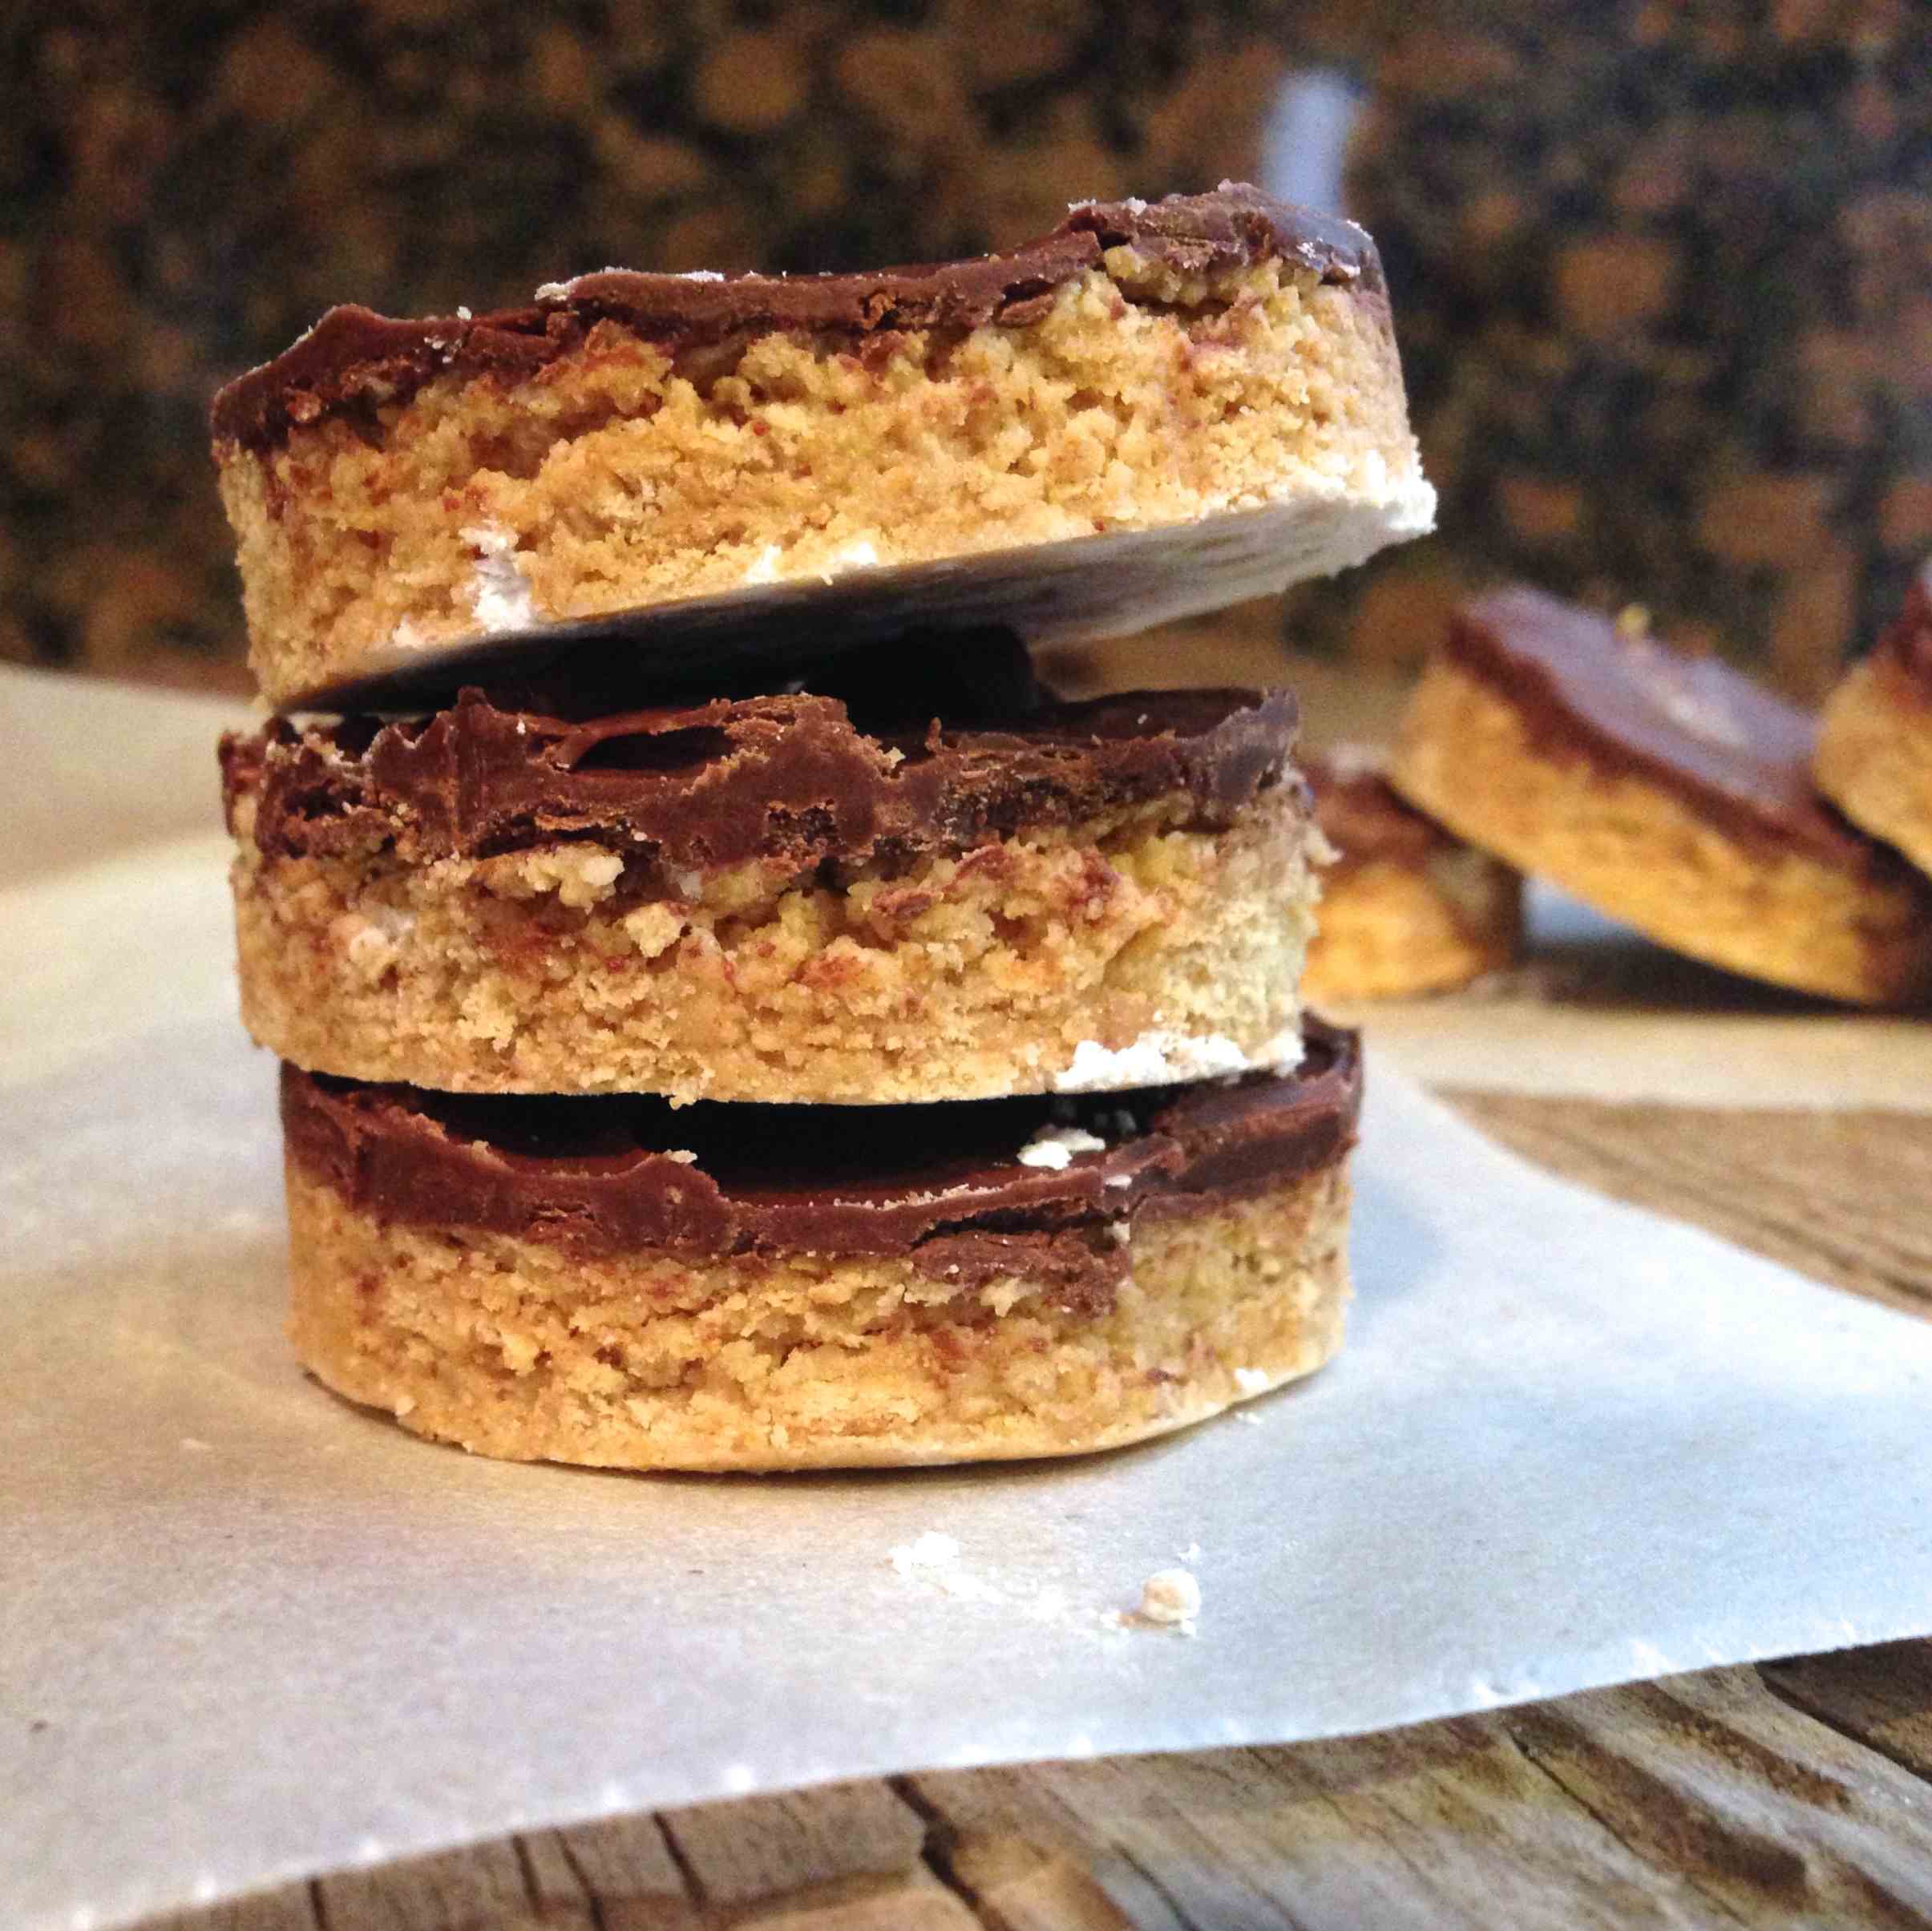
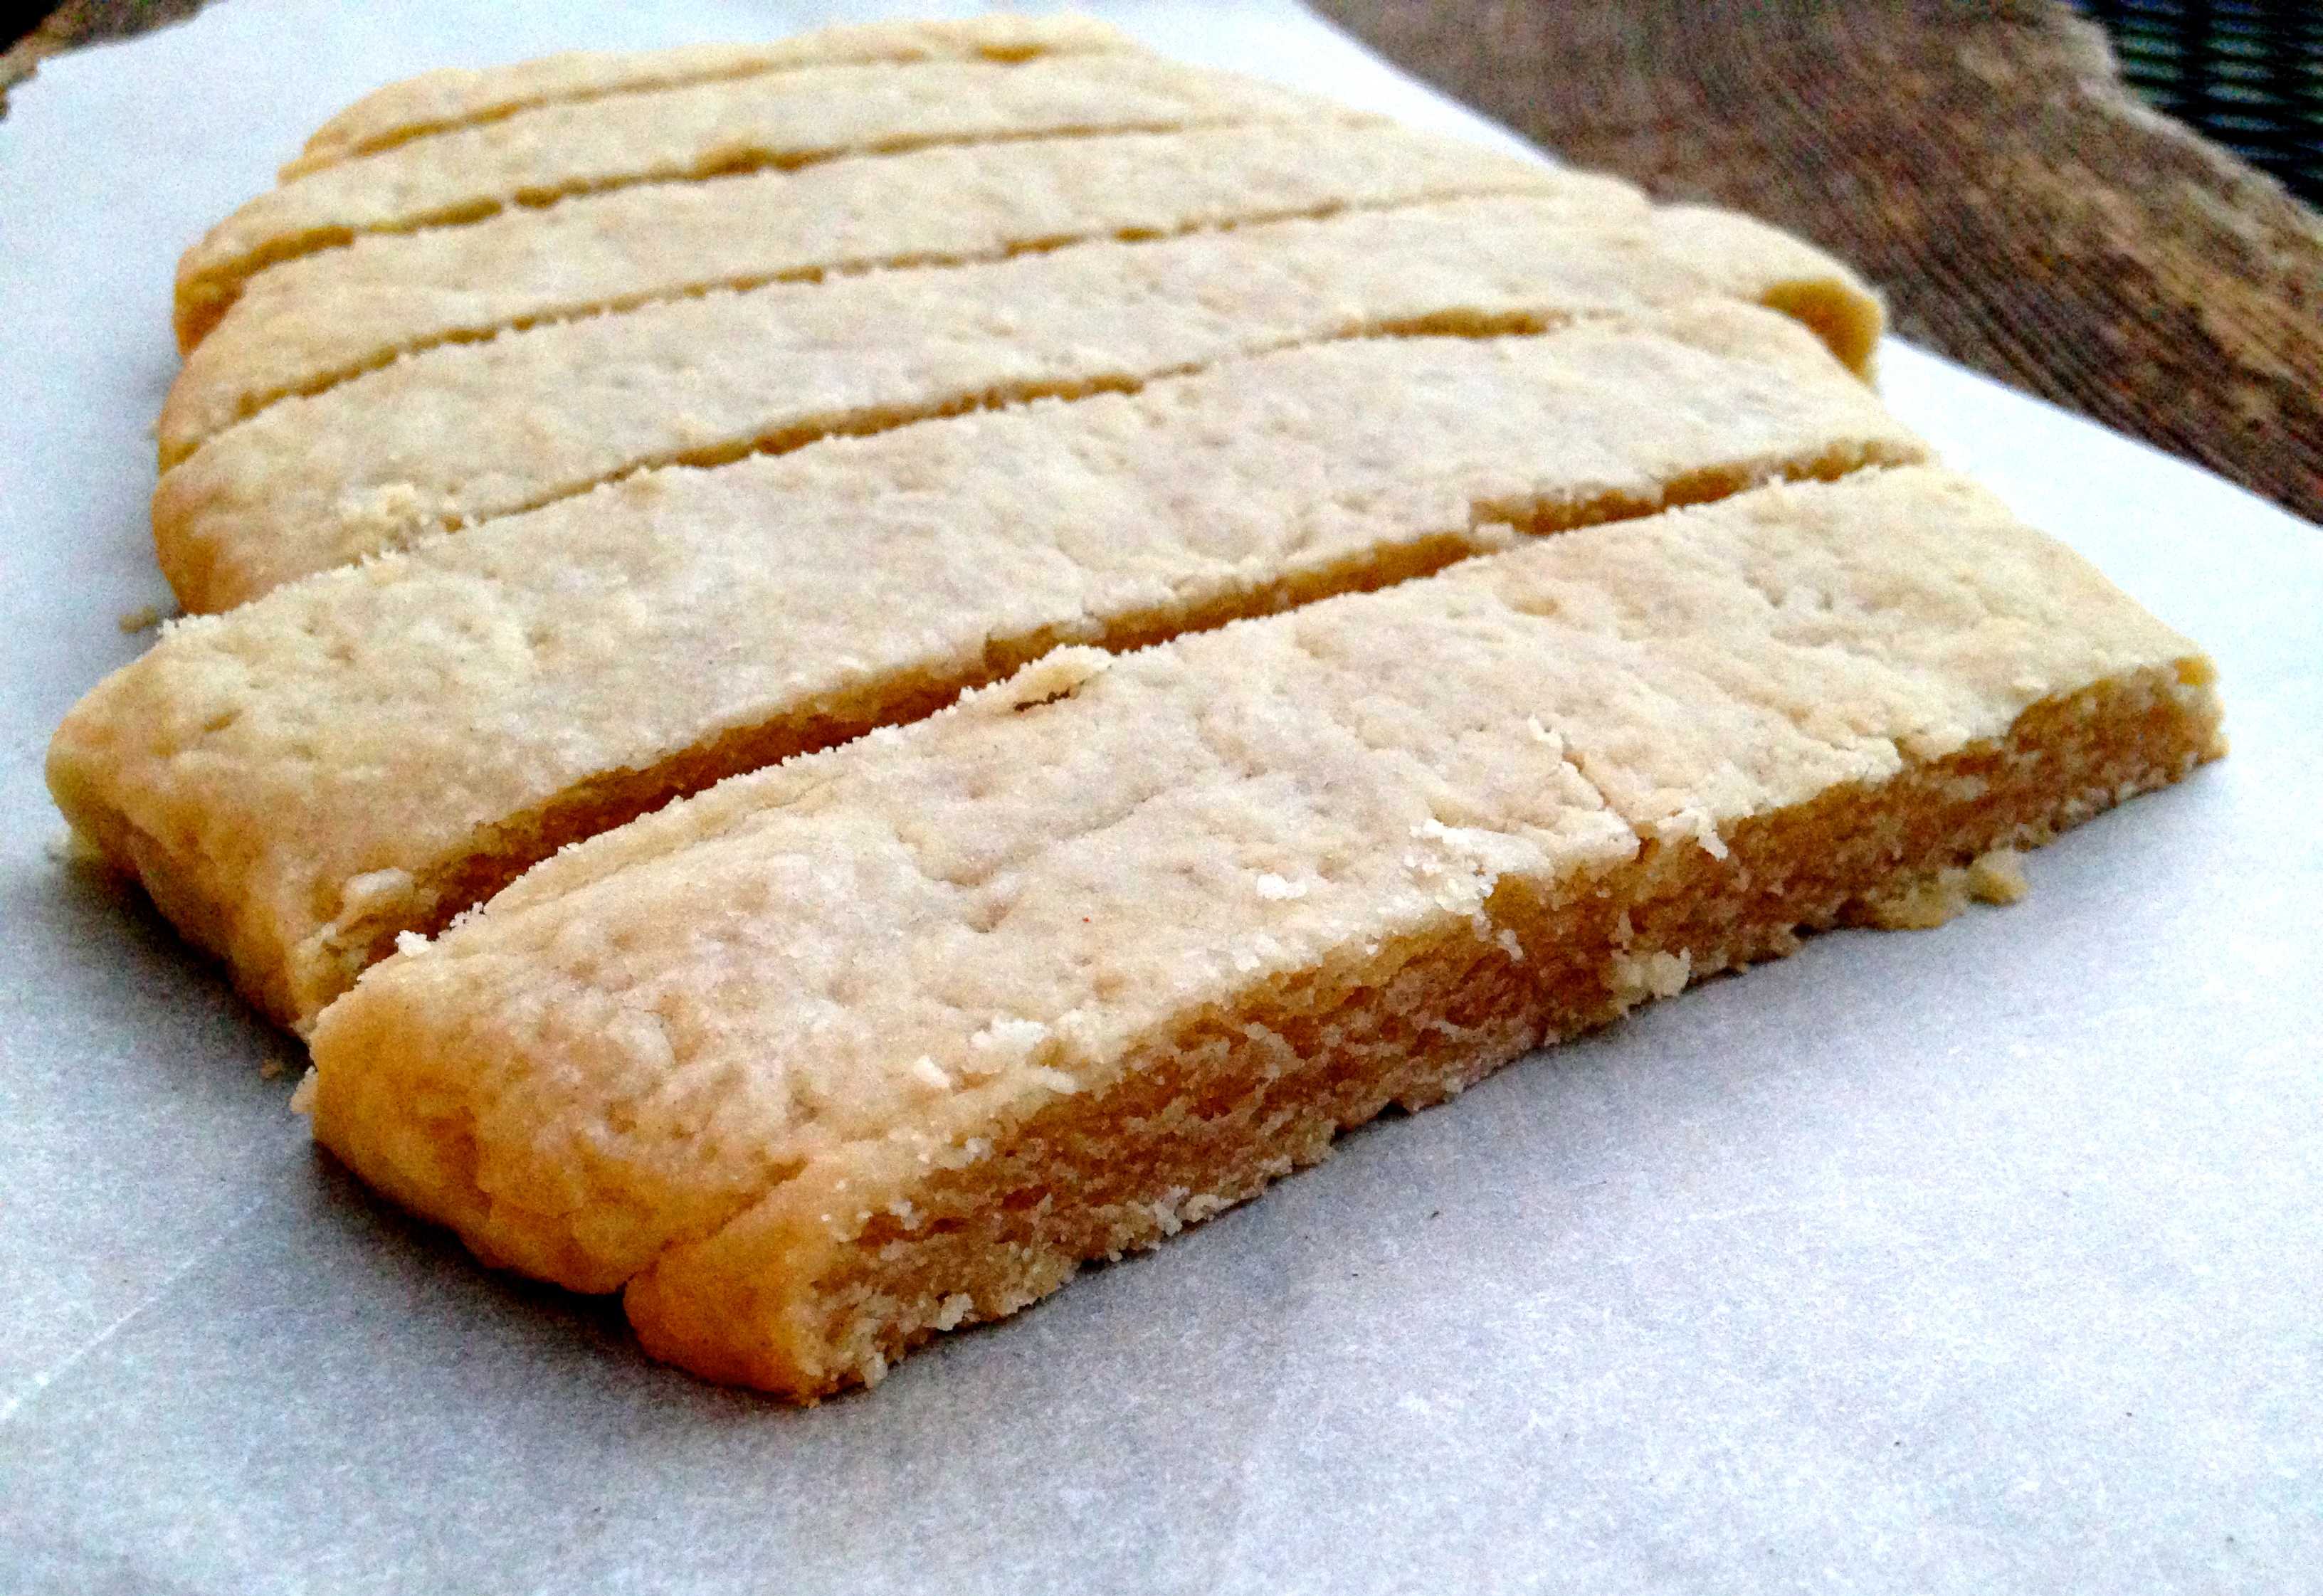
I don’t how to describe the unleavened bread as it was unlike anything I’ve ever tasted before. The unleavened bread we take in church reminds me more of a crispy, unsalted cracker, very different than what we had that Sunday evening in Colorado.

Robin actually got this recipe from her friend named Cassandra, when they were living in Searcy, Arkansas at Harding University. The bread has a sweet taste to it from the honey and brown sugar, in addition to a nice, chewy texture.

unleavened bread

Unleavened bread can be made in a wide variety of ways, but the commonality across all of the breads is that they are not prepared with leavening agents. (Leavening agents are used in dough and batters that lighten and soften the finished product. It works by incorporating gas bubbles into the dough. Agents include baker’s yeast, beer that is unpasteurized, buttermilk, ginger beer, kefir and sourdough starters.

unleavened bread

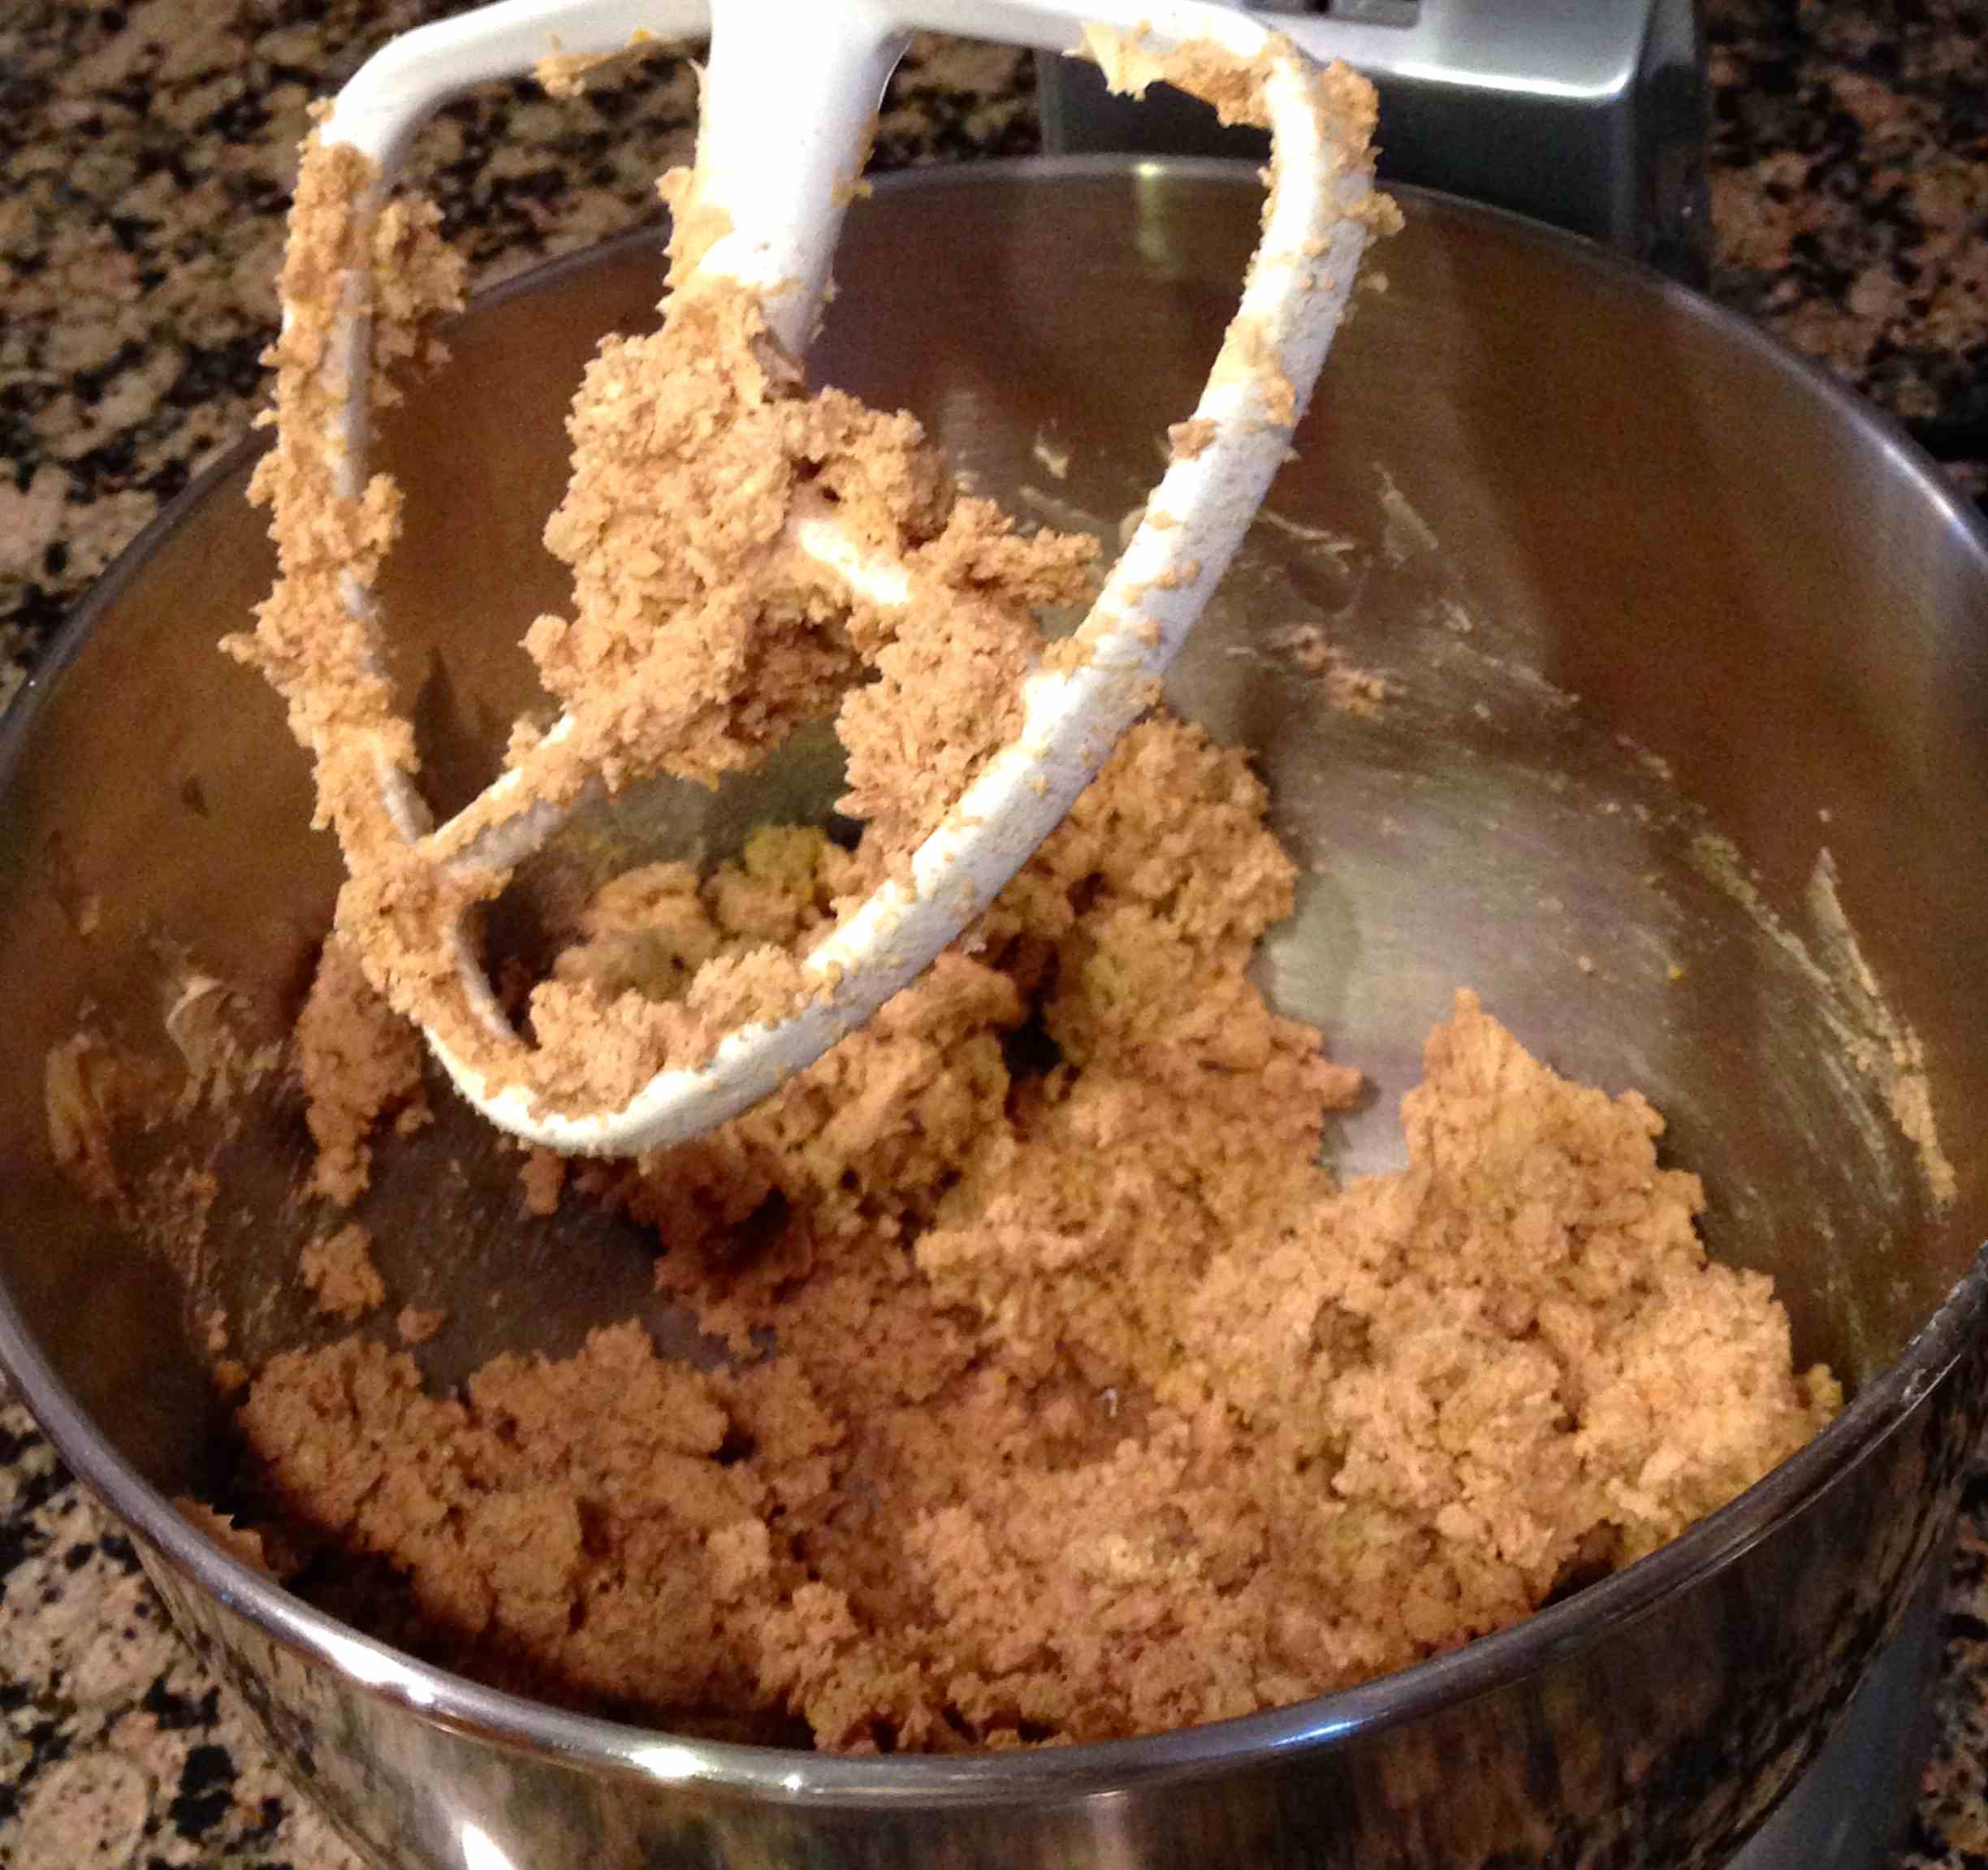
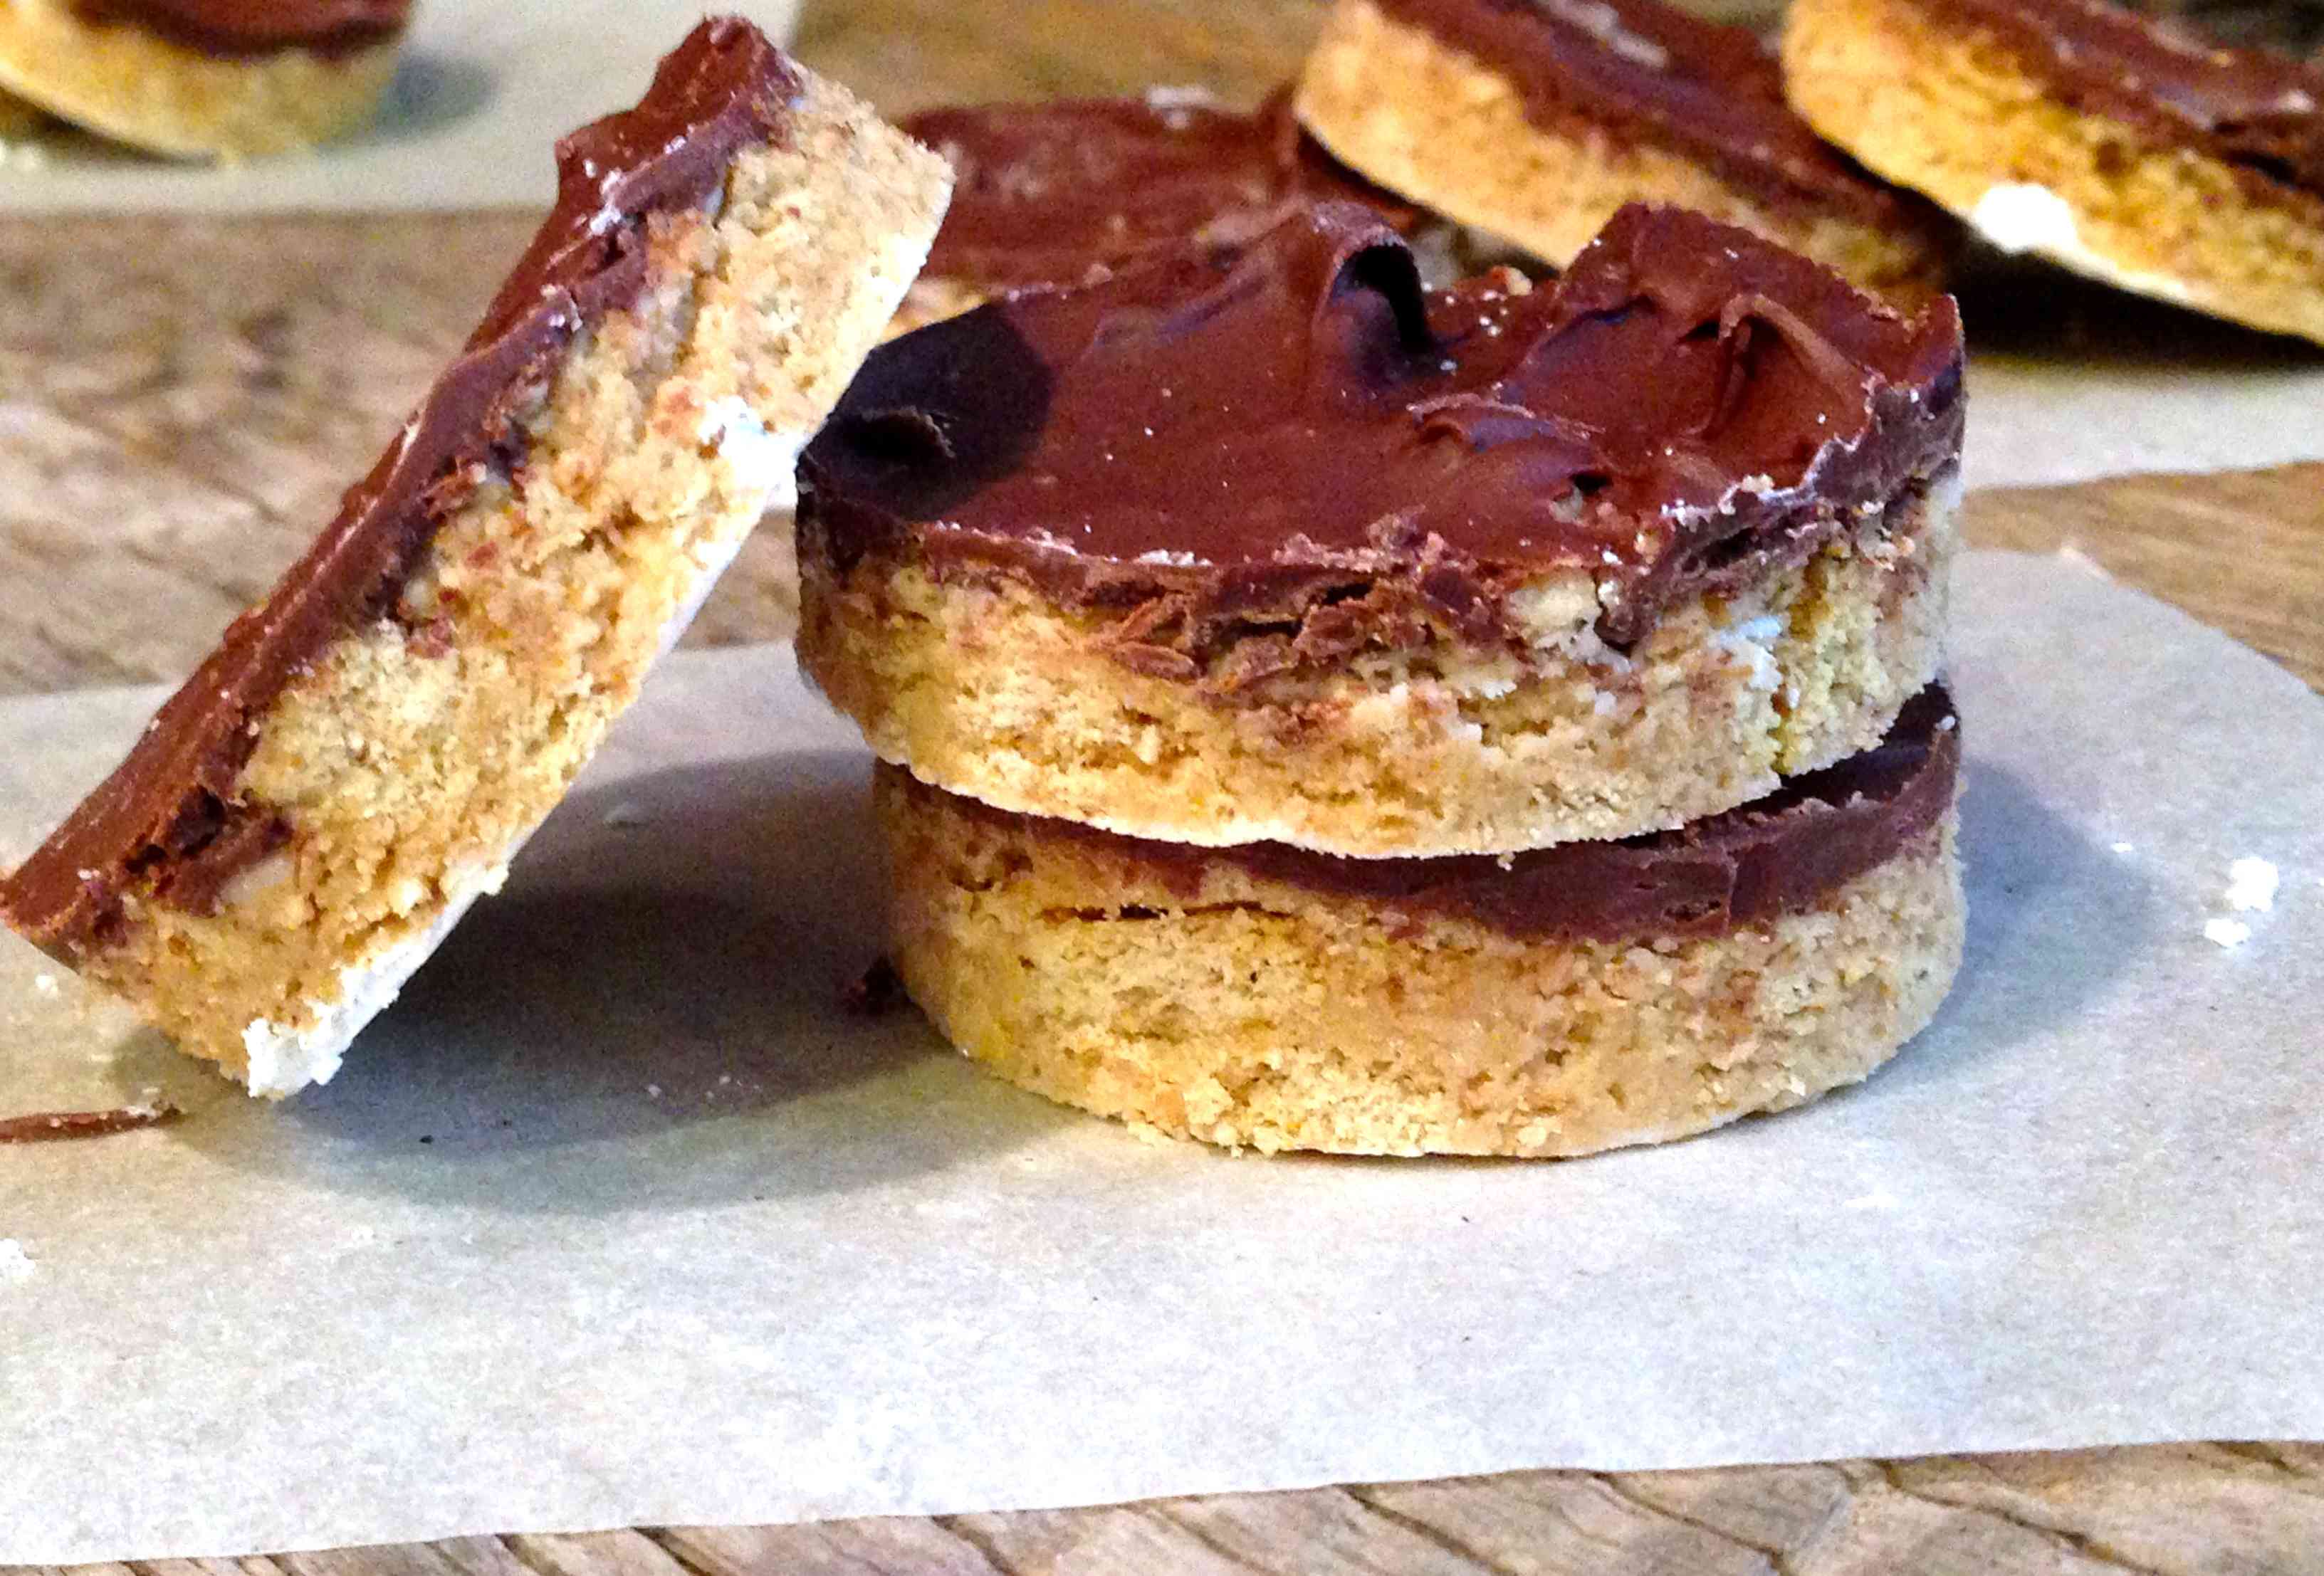
This bread obviously does not have any leavening agents present, and includes just five ingredients: flour, butter, brown sugar, honey, and water.

Requiring only 5 minutes of preparation, and 17 minutes of bake time, this is super simple to make and gives you no excuse next time you’re on vacation, or away from church and can’t take communion.

unleavened bread

Thanks again to Robin and her friend Cassandra, I’ll be making this when I know I’m going to miss church, or simply make it as a snack since it tastes soooo good!

Enjoy.

unleavened bread

Unleavened Bread
Prep time:
Cook time:
Total time:
Serves: 8-12
Source: Robin’s friend Cassandra from Searcy, Arkansas
Ingredients
  • 2 cups flour
  • 1/4 cup brown sugar
  • 3/4 cup (12 Tbsp.) melted unsalted butter
  • 1/4 cup water
  • 2 Tbsp. honey
Instructions
  1. Preheat oven to 350 degrees F.
  2. Mix all ingredients together. No electric mixer necessary.
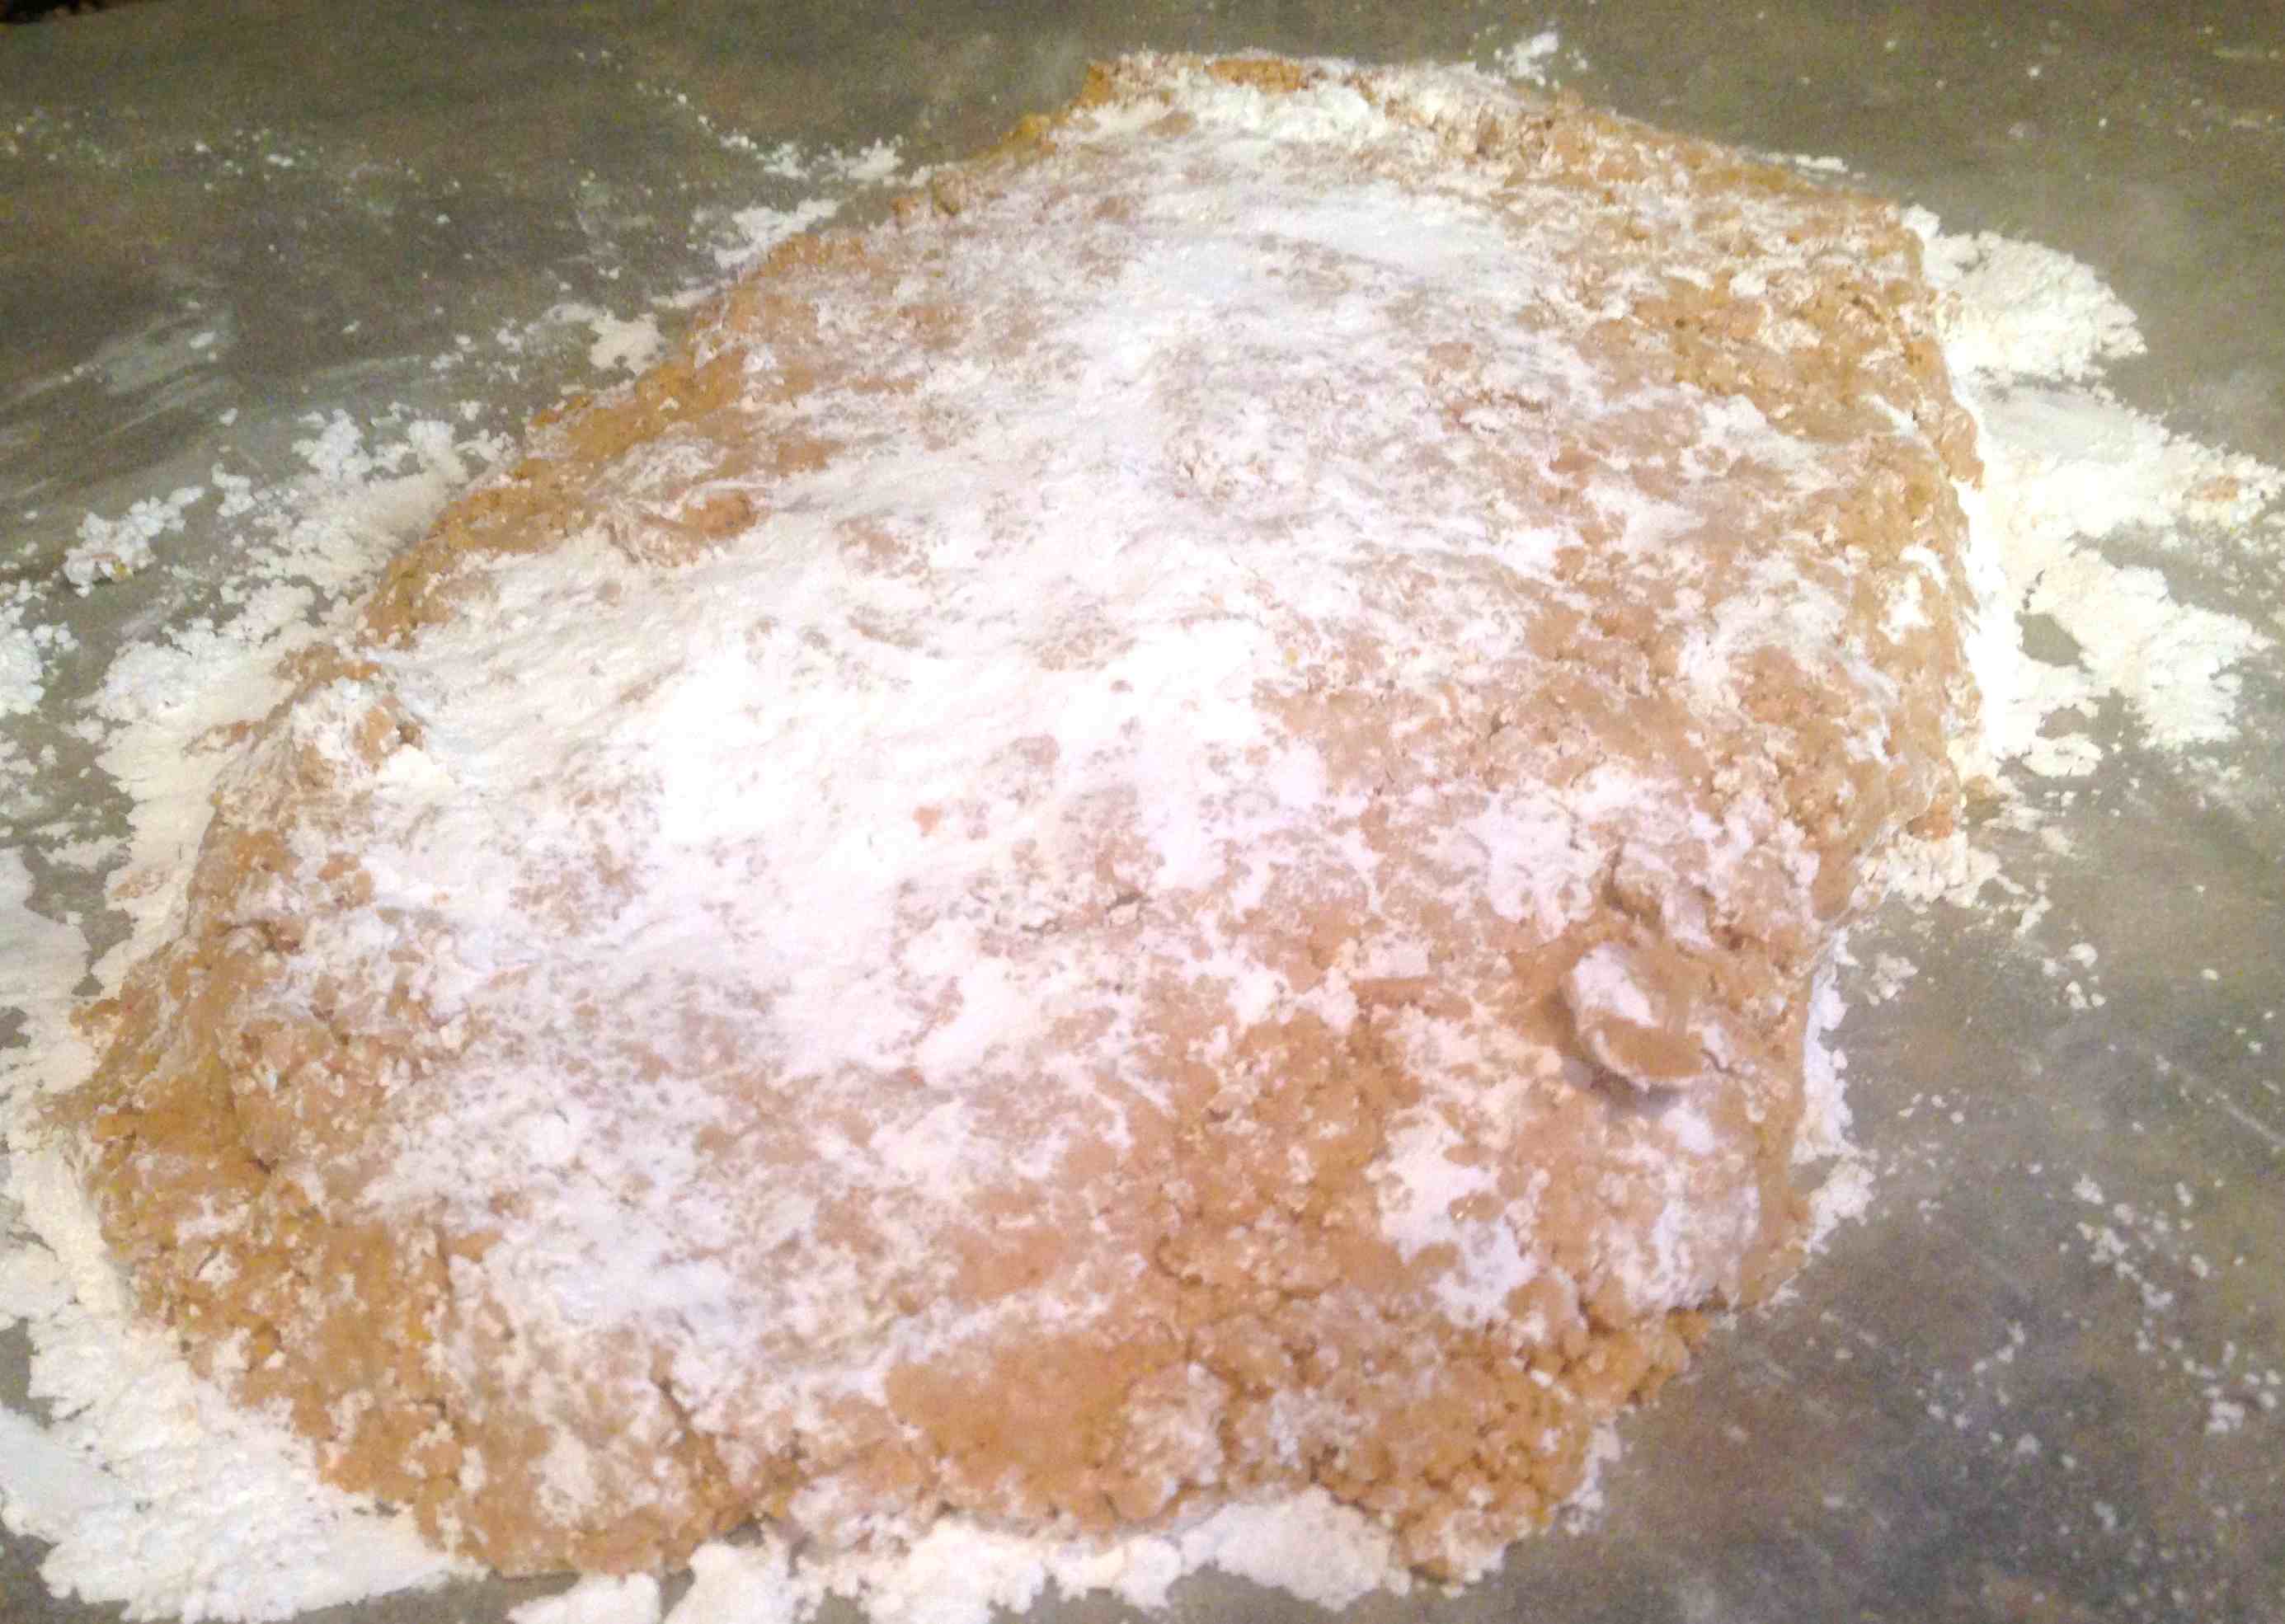
  3. Prepare a flour-lined space to knead and roll out dough until it is 1/2-inch thick.
  4. Place dough onto a greased cookie sheet and bake for 17 minutes at 350 degrees F.
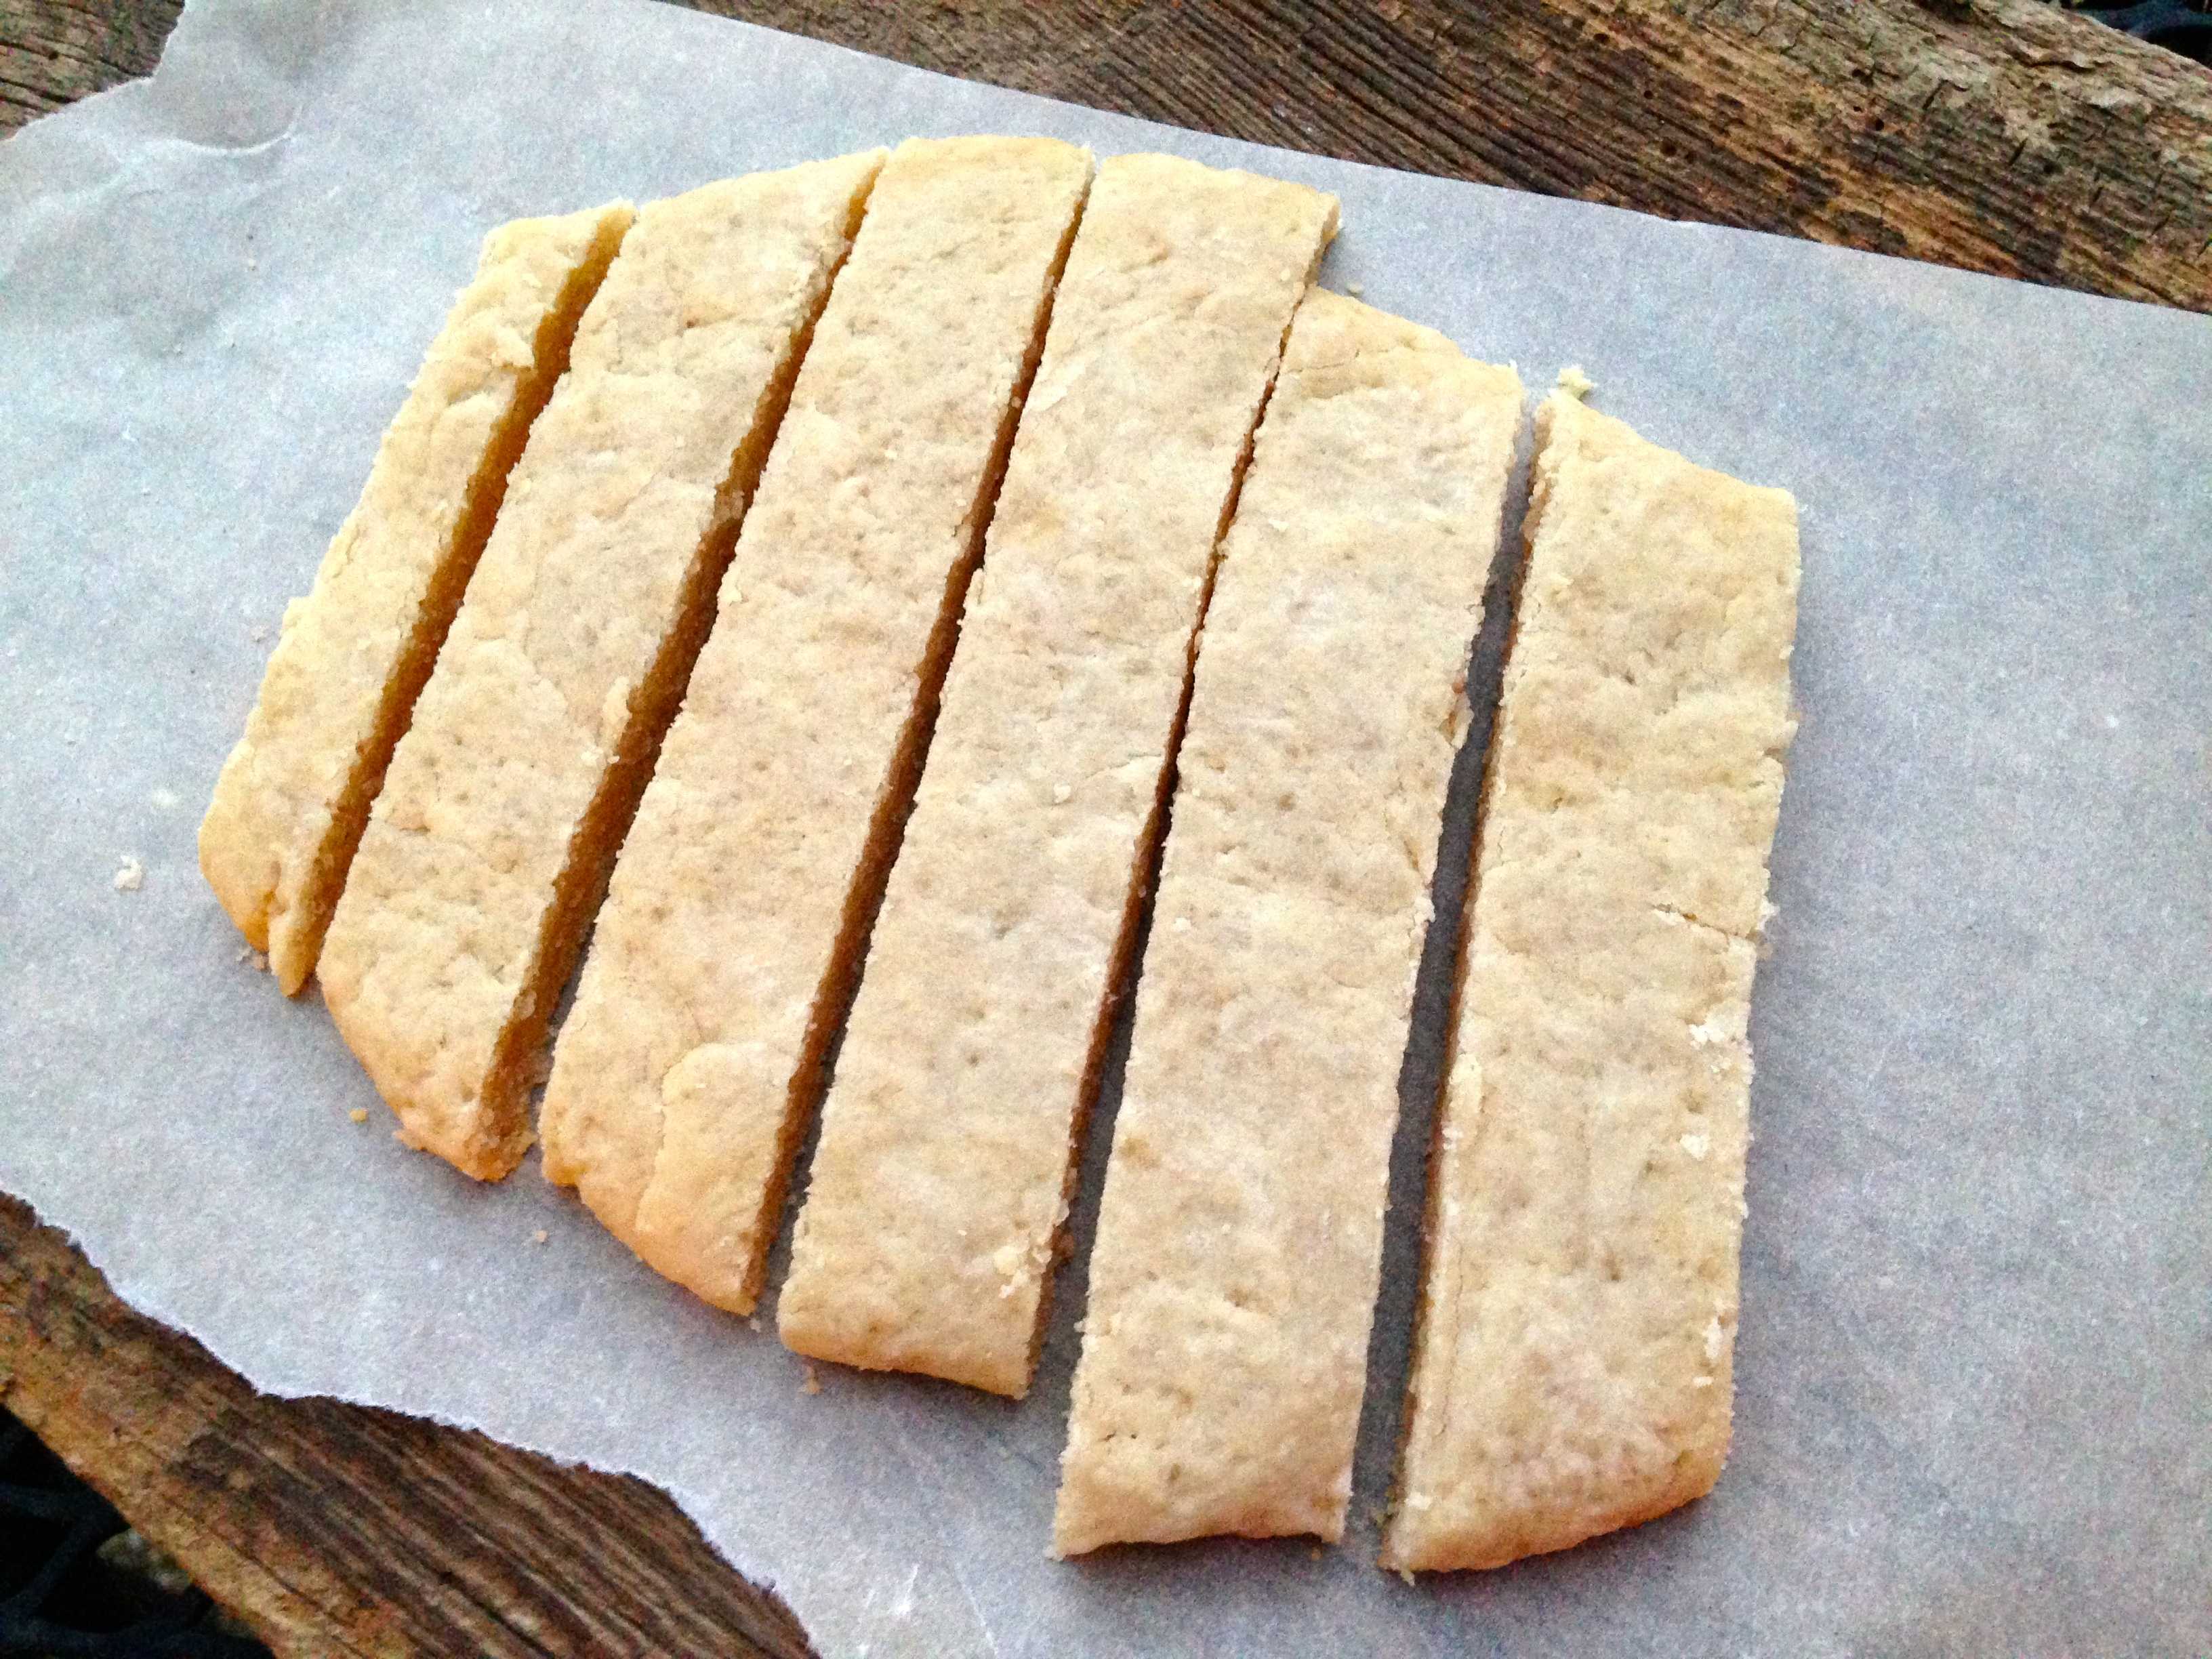
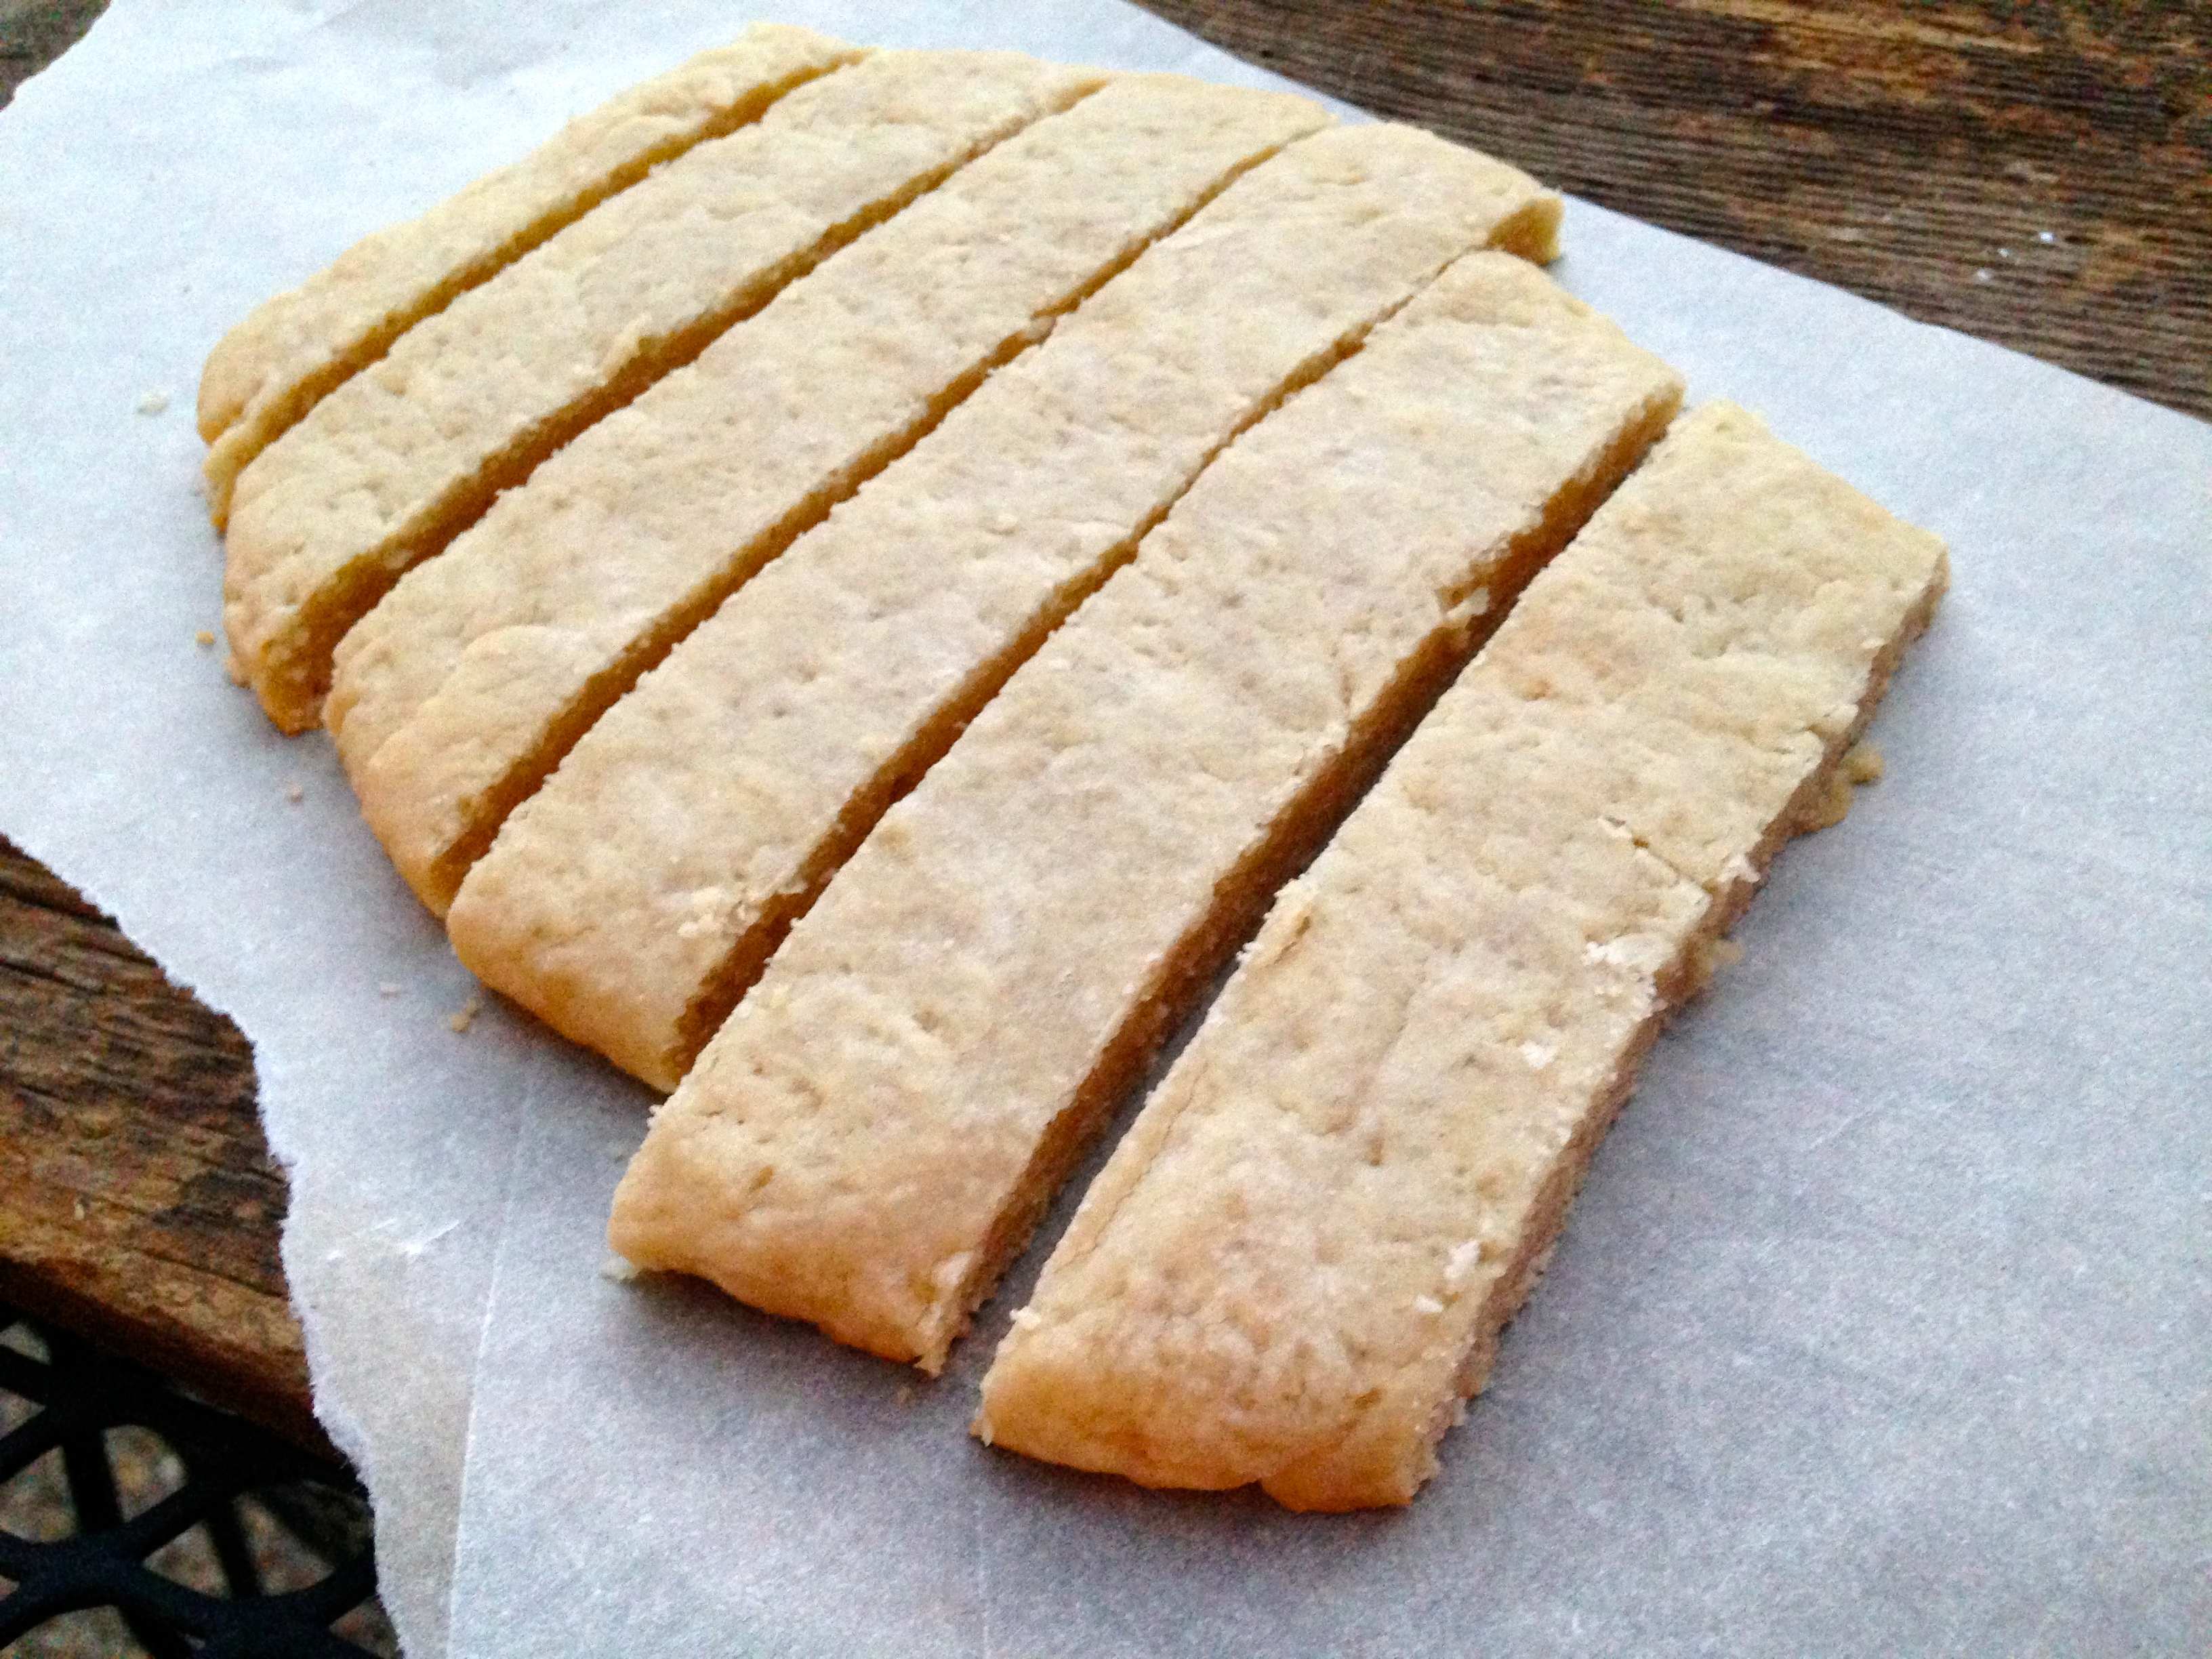
  5. Let cool, and slice into strips.


Nitrogen + Smoke = iCream Cafe!

iCream Frisco

Since July is National Ice Cream Monthly, you’re obliged to eat ice cream for 31 days! I’m kidding, but it sure is tempting!

If you’ve lived in and/or visited Chicago, IL or Frisco, TX (25 minutes north of Dallas), then you’re in for a special treat because these two cities are home of the only two U.S. locations for iCream Cafe.

A neighbor of mine actually recommended we try it, and as soon as I watched the video below explaining the awesome process of how they make their ice cream, I was sold!

Chicago
iCream Cafe location: Chicago, Illinois
Frisco, Tx water tower
2nd iCream Cafe location: Frisco, Texas (source: Flickr)

Since I’m a native Dallas resident, I didn’t have to travel very far! My sister Brittany and her husband Colby actually joined me on my quest for ice cream made with liquid nitrogen and smoke, as the thought of making ice cream from scratch, right in front of our eyes was too good to pass up!

iCream Frisco

It was quite busy on a Friday night!

When you first walk in, you’re greeted by a huge silver cylinder labeled “nitrogen + smoke = creamy consistency” sign. Ice cream of the future if you ask me!

iCream Frisco

Then you see all of the white mixers hooked up to some crazy silver contraption, containing the liquid nitrogen used to make ice cream in front of your very eyes!

What’s cool about the entire process is that your frozen treat is made right there on the spot. The menu is just three easy steps, but for someone as indecisive as I am, it took me about 10 minutes to finally figure out the combination I wanted!

iCream Frisco

The menu was as follows:

  1. Choose to make ice cream, yogurt, sorbet, a shake, or hot pudding.
  2. Select your dessert base: regular, light, organic, soy, regular, or non-fat.
  3. Pick one or (two flavors max), and then the fruit or candy mix-ins to add.

Sounds easy right? Wrong! Look at what I had to pick from:

Flavors: apple, banana, blueberry, cake, caramel, cherry, chocolate, cinnamon, coffee, cream soda, curry, green tea, hazelnut, lemon, lime, mango, mint, orange, peach, pistachio, pomegranate, raspberry, red velvet, strawberry, toasted marshmallow, vanilla, white chocolate

Toppings: bananas, blueberries, blackberries, raspberries, strawberries, butterfinger, chocolate chips, heath bar, jelly bellys, m&ms, peanut butter cups, gum balls, gummi bears, reese’s pieces, snickers, cookie dough, cream cheese, granola, nuts, nutella, peanut butter, pistachios, oreos, white chocolate

iCream Frisco

So what did I choose????

Well, if you know me, I HAD to choose Oreo’s as my topping…. it’s my favorite!! I was debating what else to add, but thought I’d keep it simple.

Now for the base. I went with a “light” base (thought I’d save on some calories since I was ordering Oreos).

Finally, the flavor is what took me the longest. I didn’t know if I should go wild and pick something crazy like orange-vanilla or if I should keep it simple. I ended up going with cake and vanilla as my flavors to get an extra sweet taste. 🙂

iCream Frisco

The ice cream tasted pretty good. It had a different texture, probably because I got the “light” version. Colby got the “regular” base, and his was a bit creamier than mine.

While I’d still say that Double Dip Frozen Custard and Paciugo Gelato are my two favorite places for frozen treats, iCream Cafe was a really unique ice cream store where your combinations are virtually unlimited!

iCream Frisco

It was an awesome experience and atmosphere, and next time you’re in Chicago or in the Dallas area, go check it out. If not for ice cream, but for their crazy liquid nitrogen mixers!!!

iCream Cafe: http://www.icreamcafe.com

Old Time Vanilla Ice Cream

Old Time Vanilla Ice Cream

Did you know that July is National Ice Cream month? Makes since, right; especially during one of the hottest months of the year! According to the International Dairy Foods Association or IDFA, in 1984 President Ronald Reagan designated July as National Ice Cream Month, and the third Sunday as National Ice Cream Day.

President Reagan recognized ice cream as a fun and nutritious food (question mark on my side), that is enjoyed by a full 90 percent of the nation’s population. That’s a lot of folks! He called for the people of the United States to observe these events with “appropriated ceremonies and activities.” (Source: www.idfa.org)

Old Time Vanilla Ice Cream

This year, July 20, 2014 is National Ice Cream Month, so get your ice cream makers ready!!!

If you’re looking for a quick and easy recipe, then look no further than this Old Time Vanilla Ice Cream, courtesy of Emeril Lagasse via the Food Network.

With only 5 ingredients and less than 5 minutes of prep time, you can have the homemade version in less than 30 minutes! After prepping, you simply pour the ice cream mixture into your ice cream machine, and let it run! My machine took about 25 minutes to get thick, and then you pull it out (feel free to eat some if you like soft-serve style ice cream), or immediately put the ice cream in a container to freeze until firm.

Not shown in these pictures, but I like to add crushed double-stuff Oreos, and if I have any on hand, I’ll put some Reddi-wip on top!

Old Time Vanilla Ice Cream

Did you also know that this ice cream is “Philadelphia-style/American” ice cream? There’s actually two basic types in which David Lebovitz talks about in his book, The Perfect Scoop: Ice Creams, Sorbets, Granita’s, and Sweet Accompaniments.

  1. French-style ice cream is a cooked custard made with egg yolks. This style of ice cream tends to be smoother and silkier, due to the emulsifying power of the egg yolks, which get cooked on the stovetop, requiring a bit more time and effort.
  2. Philadelphia-style ice cream is made with cream or a combination of cream and milk, but without eggs. This style can simply be mixed or pureed together, chilled thoroughly, and then frozen. Since there are no egg yolks, Philadelphia-style ice creams tend to be a bit firmer, freeze harder, and have a somewhat chewier tester. One advantage is that they’re a little lighter in taste and easier to make.

For a French-style vanilla ice cream recipe, click HERE. Compliments of Alton Brown, it uses 8 large egg yolks, so it’s extremely smooth, and despite all the work, it’s the best homemade ice cream recipe I’ve ever made!

Old Time Vanilla Ice Cream

Otherwise, if you’re in bind, try this Philadelphia-style vanilla ice cream and enjoy on a hot summer day!

Old Time Vanilla Ice Cream
Prep time:
Cook time:
Total time:
Serves: 1 quart
Source: Emeril Lagasse
Ingredients
  • 2 cups heavy cream
  • 2 cups whole milk
  • 3/4 cup sugar
  • 2 tsp. vanilla
  • Pinch of salt
Instructions
  1. Whisk all ingredients together until sugar dissolves.
  2. Pour into the bowl of an ice cream machine. Freeze according to the manufacturer’s instructions.
  3. After the ice cream is made, transfer to an airtight container. Cover tightly and freeze until ready to serve. When ready to serve, garnish with toppings of your choice, example: crushed Oreos, chocolate curls, chocolate syrup, sprinkles, etc.


Boog’s Pecan Pie and the Lake

Boog's Pecan Pie

I hope everyone had a fun and relaxing 4th of July weekend. We stayed the weekend at Tony and Paula’s lake house and of course, that always means LOTS OF DESSERTS!!

We had my Neiman Marcus chocolate chip cookies, blueberry cake donuts from Texarkana, a white cake topped with strawberries, Paula’s creamy coconut cake, Boog’s chocolate chip cake, last but not least Boog’s pecan pie (recipe below). We weren’t short of sweets by any means!

What’s crazy is nearly all of those desserts were gone by Sunday afternoon as we were leaving to go home!

4th of July

As you can see below, lots of fun was had on the jet ski, and unfortunately I was a bystander since I’m 23 weeks pregnant and it’s not exactly safe for me to be riding on one.

What’s really upsetting is the jet ski has not been ridden in over a year and a half! The lake levels were so low that we we were unable to pull the boat or the jet ski out of the boat dock in 2013, and now that 2014 is here, I’m pregnant and can’t ride it. How ironic! 🙂

Matt and his sister Leah, and her kids had a blast though. Leah’s kids are at that age where they are getting old enough to start having a little fun. 🙂 Both kids had a great time riding with Matt and Leah on the jet ski, and I’m glad they got to enjoy it.

jet ski

jet ski jet ski

Back to Boog’s pecan pie. Boog is Matt’s grandmother, and every time we go to the lake she makes either a pecan pie or a chocolate chip cake or in this case, BOTH!

Her pie recipe is super simple to make, and extremely delicious. When Matt was younger, Boog once made this pie and Matt ate the WHOLE PIE in one day (one sitting actually). Haha.

His appetite has changed a bit, but Boog’s pecan pie was gone in less than 2 days!

Enjoy!!

Boog's Pecan Pie Boog's Pecan Pie


Boog’s Pecan Pie
Prep time:
Cook time:
Total time:
Serves: 8
Ingredients
  • 1 unbaked pie shell
  • 3 eggs
  • 1/2 cup sugar
  • 1 cup corn syrup
  • 1/8 tsp. salt
  • 1 tsp. vanilla
  • 1/4 cup melted butter
  • 1 cup pecans
Instructions
  1. Preheat oven to 350 degrees F.
  2. Beat the eggs with a fork. Add the sugar, syrup, then the salt and vanilla. Lastly, pour in the melted butter.
  3. Place the chopped pecans in the bottom of an unbaked pie shell. Pour the filling over the pecans, and bake for 45-50 minutes. The nuts will rise to the top of the filling and form a nice, crusty layer


Strawberry Pretzel Dessert

Strawberry Pretzel Dessert

Strawberry Pretzel Dessert is one of my all-time favorites! If you want to trick yourself into thinking you’re eating something healthy, then you can also call this Strawberry Pretzel “Salad”.

My mom’s birthday was this Thursday, and since her birthday is in June, she usually requests a lighter, non-chocolatey dessert. For previous occasions we’ve made her strawberry layer cake, tres leches cake, a hot milk sponge cake, etc. Notice a trend? If you clicked on all of the recipes, they all had strawberries on top! She’s a big fan, as am I!

Strawberry Pretzel Dessert

For those that like the sweet-salty combination, this dessert is for you. It’s got a slightly salty crust from the pretzels, a cool, creamy cool whip and cream cheese center, and a light and refreshing topping with strawberry Jell-O and fresh strawberries. Yum!

Matt is actually not a pretzel fan (he actually doesn’t like ANY crust to any dessert…pies, you name it), so he doesn’t eat the pretzel bottom of this dessert. One time I made it for him and substituted crushed graham crackers for the pretzels. It was still a good combination, but it of course was not as salty, and the graham cracker crust got slightly more soggy as it sat in the fridge as compared to the pretzel crust.

My mom had a great birthday and as you can guess, as not much is left of this dessert (or salad, if you wish to call it). Enjoy!
Strawberry Pretzel Dessert

Strawberry Pretzel Dessert

Strawberry Pretzel Dessert
Prep time:
Cook time:
Total time:
Serves: 24
Ingredients
  • 3/4 cup butter, melted
  • 2 1/2 cups pretzels, crushed
  • 3 Tbsp. sugar
  • 8 oz. cream cheese, softened
  • 1 cup sugar
  • 8 oz. frozen whipped topping, thawed
  • 2 cups boiling water
  • 6 oz. strawberry gelatin
  • 20 oz. frozen strawberries, partially thawed
Instructions
  1. Preheat oven to 375 degrees F.
  2. FOR THE CRUST: Mix butter, pretzels, and 3 tablespoons of sugar. Press the mixture into the bottom of a 9 x 13-inch pan. Bake for 7-10 minutes. Cool.
  3. FOR THE CREAM LAYER: Mix the cream cheese, 1 cup of sugar, and whipped topping. Spread over the cooled pretzel layer.
  4. FOR THE STRAWBERRY LAYER: Dissolve gelatin in boiling water. Add strawberries and stir until partially thickened. Pour over whipped topping layer.
  5. Chill overnight before serving


Whole Wheat Carrot Applesauce Muffins

Whole wheat carrot applesauce muffins

I actually haven’t been in the mood to blog and this may give you a hint why…… 🙂

Aggie baby

Yep, we’re (I’m) due November 1st… the day A&M plays Louisiana-Monroe at Kyle Field!!  Secretly I think it would be hilarious if she (yes, it’s a girl!) was born on October 18th…. the day A&M plays Alabama. Man I’d love to see Matt’s face on that one. We’d definitely have to have the game on TV in the hospital. Lol.

Whole wheat carrot applesauce muffins

As I said, I haven’t really been in the mood to blog or even cook. You really do sleep a lot when you’re pregnant, and I got no less than 10 hours a day in my first trimester.

A few days ago, I was craving muffins. I wanted to make a healthy kind, and preferably with carrots and/or applesauce in them. Thanks to Google search, I discovered a tasty recipe from 100 Days of Real Food that had nothing but good, wholesome ingredients: whole wheat flour (I used white whole wheat), carrots, applesauce, cinnamon, and honey instead of sugar. Did you get that??? NO SUGAR are in these muffins!!

Whole wheat carrot applesauce muffins

These were super simple to whip up and more than likely, you may already have all the ingredients on hand. Taste-wise, I really liked these. At first, I was expecting my typical banana nut muffin recipe of a sugary, nutty (and unhealthy) muffin, so when I first bit into the carrot applesauce muffin, I was a little disappointed. Truly I think it’s because my brain thought I was about to eat the banana nut muffin.

However, the next day, for some reason the muffins tasted even better! I had one for breakfast  and drizzled it with a little honey. The cinnamon flavor really shines in these muffins and pairs perfectly with the carrots and applesauce.

Matt is not shy to EVER express his opinion, and actually liked these! I half expected him to spit it out, but he said he truly enjoyed them. Shocker since these are so healthy!! 🙂

Whole wheat carrot applesauce muffins

Anyways, these will definitely be on my “favorites” list and I will be making them again in the near future!

Whole wheat carrot applesauce muffins


Whole Wheat Carrot Applesauce Muffins
Prep time:
Cook time:
Total time:
Serves: 12
Adapted from 100 days of Real Food
Ingredients
  • 1 1/2 cups white whole wheat flour
  • 1 tsp. baking soda
  • 1 tsp. ground cinnamon
  • 1/2 tsp. salt
  • 1/2 cup butter (1 stick), melted
  • 1/2 cup honey
  • 1 egg
  • 1 tsp. pure vanilla extract
  • 1 cup unsweetened applesauce
  • 3/4 cup carrot shreds
Instructions
  1. Preheat your oven to 350 degrees F. Line a muffin pan with paper, foil, or silicone liners, and set aside.
  2. In a medium bowl whisk together the flour, baking soda, cinnamon and salt.
  3. In a large bowl vigorously whisk together the butter, honey, egg and vanilla. Slowly add in the flour mixture until well combined. The batter will be fairly thick at this point.
  4. Using a spatula, carefully fold in the applesauce and carrots. Divide the batter evenly among the muffin cups. Bake for 22 to 24 minutes or until a toothpick comes out clean and muffins are beginning to turn golden brown on top.


No-Bake Peanut Butter-Chocolate Icebox Cookies

No Bake Chocolate Peanut Butter Rounds

No baking involved with these fast and easy icebox cookies. I actually made these a few months ago from The Meatball Shop Cookbook by Daniel Holzman & Michael Chernow.

Matt even liked these, but who wouldn’t with an ingredient list with peanut butter, chocolate, butter, confectioners’ sugar, and graham crackers.

For an additional twist, try melting white chocolate in additional to semisweet chocolate. You can drizzle the white chocolate on top of the semisweet or make half the batch with a semisweet chocolate layer, and a second batch with a white chocolate layer. Yum!

IMG_2335
Cream the butter, peanut butter and confectioners’s sugar until light and fluffy. Stir in crushed graham cracker crumbs.
IMG_2338
Dump the dough onto prepared wax paper and roll out to less than 1/4-inch thick.
IMG_2332
Melt the chocolate chips in the top of a double boiler.
IMG_2337
Melted chocolate. 🙂
No Bake Chocolate Peanut Butter Rounds
Spread melted chocolate over sheet of cookie dough.
No Bake Chocolate Peanut Butter Rounds
Cut out cookies with a 2 1/2-inch round cutter.
No Bake Chocolate Peanut Butter Rounds
Refrigerate cookies until ready to serve.
No Bake Chocolate Peanut Butter Rounds
Enjoy!
No-Bake Peanut Butter-Chocolate Icebox Cookies
Source: The Meatball Shop Cookbook by Daniel Holzman & Michael Chernow
Ingredients
  • 12 tablespoons (1 1/2 sticks) unsalted butter, at room temperature
  • 1 cup creamy peanut butter
  • 1 1/2 cups confectioners’ sugar
  • 1 (13.5 oz) box graham cracker crumbs
  • 1 (12 oz) bag semisweet chocolate chips
Instructions
  1. Using a stand mixer, cream the butter, peanut butter, and 1/2 cup of the confectioners’ sugar until light and fluffy about 3 minutes. Stir in the graham cracker crumbs and mix until a stiff, crumbly dough forms.
  2. Lay out two 24-inch lengths of wax paper, overlapping them to produce a large square.
  3. Dust the waxed paper with 1/2 cup of the remaining confectioners’ sugar. Dump the dough onto the prepared surface, patting the dough together into a large, flat sheet. Dust with remaining 1/2 cup confectioners’ sugar and roll out with a rolling pin to slightly less than 1/4 inch thick.
  4. Melt the chocolate chips in the top of a double boiler over medium heat. Spread the melted chocolate over the sheet of cookie dough with a flat metal spatula until evenly coated. Transfer the dough to the refrigerator for 10 minutes. The chocolate should cool and become semi-hardened.
  5. Remove the dough from the refrigerator and cut out cookies with a 2 1/2-inch round cutter. Place the cookies on three wax paper-lined 12 x 17-inch baking sheets and refrigerate until ready to serve, at least 2 hours. The cookies must be completely chilled before serving.
  6. NOTE: the cookies will keep in the refrigerator for 1 week


Classic Waffles

Classic Waffles

Surprisingly easy, but with an elegant presentation, waffles are one of my favorite breakfast foods I look forward to on the weekends.

While I’ve always slightly favored waffles over pancakes, I think I burned myself out on the former and have not eaten or made waffles in probably over 2 years!!

Friday night before going to bed, I had it in my mind I was going to make waffles on Saturday morning. Pinterest to the rescue because I didn’t have a homemade recipe on hand. Many times we’ll use a mix, but in reality, its almost just as easy to whip up fresh, homemade batter as opposed to the prepackaged stuff.

Classic Waffles

This recipe is extremely simple, and I can almost guarantee you’ll already have all the ingredients. Compliments to Happy Hour Projects blog, these waffles will definitely be made on future Saturday mornings. Matt loved them as did I.

With just 7 simple ingredients (eggs, milk, butter, sugar, vanilla, flour, and baking powder), you can whip up the batter in less than five minutes.

One word to the wise, the first waffle is usually a dud, so pour just a little batter in your waffle iron to test it out before pouring in the full amount. My first waffle was much softer and soggier than the subsequent waffles. The third waffle was perfect. It was golden brown, slightly crispy and had perfect edges. The same happens with I make pancakes. The first one is not usually as pretty as the rest of them. I guess you really have to get your iron hot.

Classic Waffles

Enjoy the rest of your weekend. If you’re waking up just now, maybe these waffles are worthy enough for a Sunday brunch!

Classic Waffles
Prep time:
Total time:
Serves: 4
Ingredients
  • 2 eggs
  • 1 cup milk (I used skim)
  • 2 Tbsp. softened butter
  • 1 Tbsp. sugar
  • 1/2 tsp. vanilla
  • 1 cup flour
  • 1 tsp. baking powder
Instructions
  1. Preheat your waffle iron and spray with nonstick cooking spray.
  2. Blend together eggs, milk, butter, sugar and vanilla.
  3. Sift together flour and baking powder, then stir into egg mixture.
  4. Pour onto the waffle iron and bake until done – this will vary depending on your iron. In our house, the green light starts to beep when the waffle is done. When the waffle is golden, slightly crisp, and lifts easily with a fork, it’s ready.


Bacon Wrapped Jalapeño Cream Cheese and Steak Medallions

Bacon Wrapped Jalapeño Cream Cheese and Steak Medallions

There’s no need to wait until summer to fire up the grill!  Our next-door neighbors David and Amy, proved  that you can barbecue all-year long with their savory Bacon Wrapped Jalapeño Cream Cheese and Steak Medallions.

Back in January when A&M played Duke, Amy and David had us over along with a few other friends to watch the game. While it was extremely cold outside, David still heated up the grill and made these amazing bacon-wrapped steak bites along with Amy’s spinach artichoke dip, and all the other football-snacks we all brought over.

Not only did A&M squeak their way to a victory, we had a great time visiting with friends, BBQ-ing in the winter and eating wonderful food.

Bacon Wrapped Jalapeño Cream Cheese and Steak Medallions Bacon Wrapped Jalapeño Cream Cheese and Steak Medallions

Bacon Wrapped Jalapeño Cream Cheese and Steak Medallions

From Texas A&M football games in the fall to March Madness and Memorial Day get-togethers in the spring, these sizzling smoked bacon-wrapped appetizers are sure to make ideal hors d’oeuvres for friends and family.

Plus, how can you resist anything wrapped in bacon? Enjoy!

Bacon Wrapped Jalapeño Cream Cheese and Steak Medallions
Prep time:
Cook time:
Total time:
Serves: 12
Ingredients
  • Lowery’s Seasoned Salt
  • 2 beef tenderloin fillets cut into 1 ½ to 2-inch cubes (you can substitute filet mignon for a well tenderized flat steak cut into 1 ½ to 2-inch pieces)
  • 1 package of Wright Applewood bacon
  • 2 Tbsp. steak sauce or Worcestershire sauce (recommended: Lea and Perrins Steak Sauce)
  • Jalapeño flavored Philadelphia Cream Cheese (optional, for a little kick)
Instructions
  1. Place meat into a shallow pan and cover with steak or Worcestershire sauce and sprinkle Lowery’s seasoned salt generously. For best results, let the meat marinate for at least 3-4 hours.
  2. Prepare a fire on one side in a charcoal grill. Let the grill get very hot.
  3. Cut the long bacon strips in half.
  4. Wrap a half strip of bacon around each steak, securing it with a toothpick or kitchen twine.
  5. If you want to add a little kick, add a dollop of jalapeño cream cheese to the meat before you wrap the bacon around it.
  6. Place the bacon wraps on the grill, but not directly over the fire. Grill with the lid closed, turning every 4-5 minutes until the inside of the meat is cooked to your desired preference.


Poppy Seed Chicken Casserole

IMG_2758

I can’t think of a better, more satisfying comfort meal than this classic poppy seed chicken casserole.  While it is NOT low-calorie, it’s definitely great for feeding a crowd and using up leftover chicken or rotisserie chicken.

My original intent when making this casserole was to go with my mom’s recipe that she got from a friend many years ago called Poppy Seed Chicken (please excuse the pictures. I hadn’t quite mastered my picture-taking skills back in 2010).  My mom’s recipe has egg noodles baked in with the poppy seeds, chicken, soups and Ritz crackers, but I had seen recipes WITHOUT the egg noodles and wanted to give it a try.

“But you have egg noodles included in your pictures!!!”, you say.

Yes, that is true. BUT, I cooked the egg noodles separately for my husband Matt. I ate my poppy seed chicken sans the noodles, and just with fresh veggies. I wasn’t craving all those extra carbs!

Anyways, this recipe was a total hit with Matt…. he LOVED it! I think it reminded him of his mom’s old-fashioned southern cooking. I’m more of a healthy cook and don’t use a lot of butter. This recipe originally called for a whole stick of butter melted in with the crackers, but I just used half a stick. Butter is good, but a whole stick along with the already buttery Ritz crackers is overkill, in my opinion.

Enjoy! I’ve never met a single person who didn’t like this… kids included!

IMG_2739
Add crushed Ritz crackers to a bowl.


IMG_2740
Add in poppy seeds.
IMG_2741
Add melted butter and stir until completely incorporated.
IMG_2738
Mix together chicken, soup and sour cream. Add in Worcestershire sauce, garlic and lemon juice. Spread into a greased 9 x 13-inch pan.
IMG_2743
Sprinkle cracker mixture on top.
IMG_2748
Cover and bake for 15 minutes at 350 degrees. Uncover and bake an additional 15 minutes.
IMG_2756
Serve over cooked egg noodles, if desired.
IMG_2758
Obviously, this pretty picture is Matt’s plate. 🙂
IMG_2761
Close up and served with mixed veggies and Ranch Style beans in the background.


Poppy Seed Chicken Casserole
Prep time:
Cook time:
Total time:
Serves: 8
Ingredients
  • 2 cups chicken, cooked and shredded
  • 2 cups Ritz crackers, crushed
  • 1 Tbsp. poppy seeds
  • 1 (10.75 oz) can cream of chicken and herb soup
  • 8 oz sour cream
  • 1/4 cup butter melted
  • 1 tsp. Worcestershire sauce
  • 1 clove minced garlic
  • 2 tsp. lemon juice
  • Egg noodles, optional – to serve with
Instructions
  1. Preheat oven to 350 degrees F.
  2. Mix together chicken, soup and sour cream in a large bowl. Add in Worcestershire sauce, garlic and lemon juice. In another bowl, mix together crushed crackers, poppy seeds, and melted butter and stir until butter is completely incorporated.
  3. Spray a 9 x 13-inch baking pan with non-stick cooking spray. Spread chicken mixture on the bottom and sprinkle with cracker mixture.
  4. Cover pan with foil and bake for 15 minutes. Remove foil and baker for 15 more minutes.
  5. Serve over egg noodles, if desired.