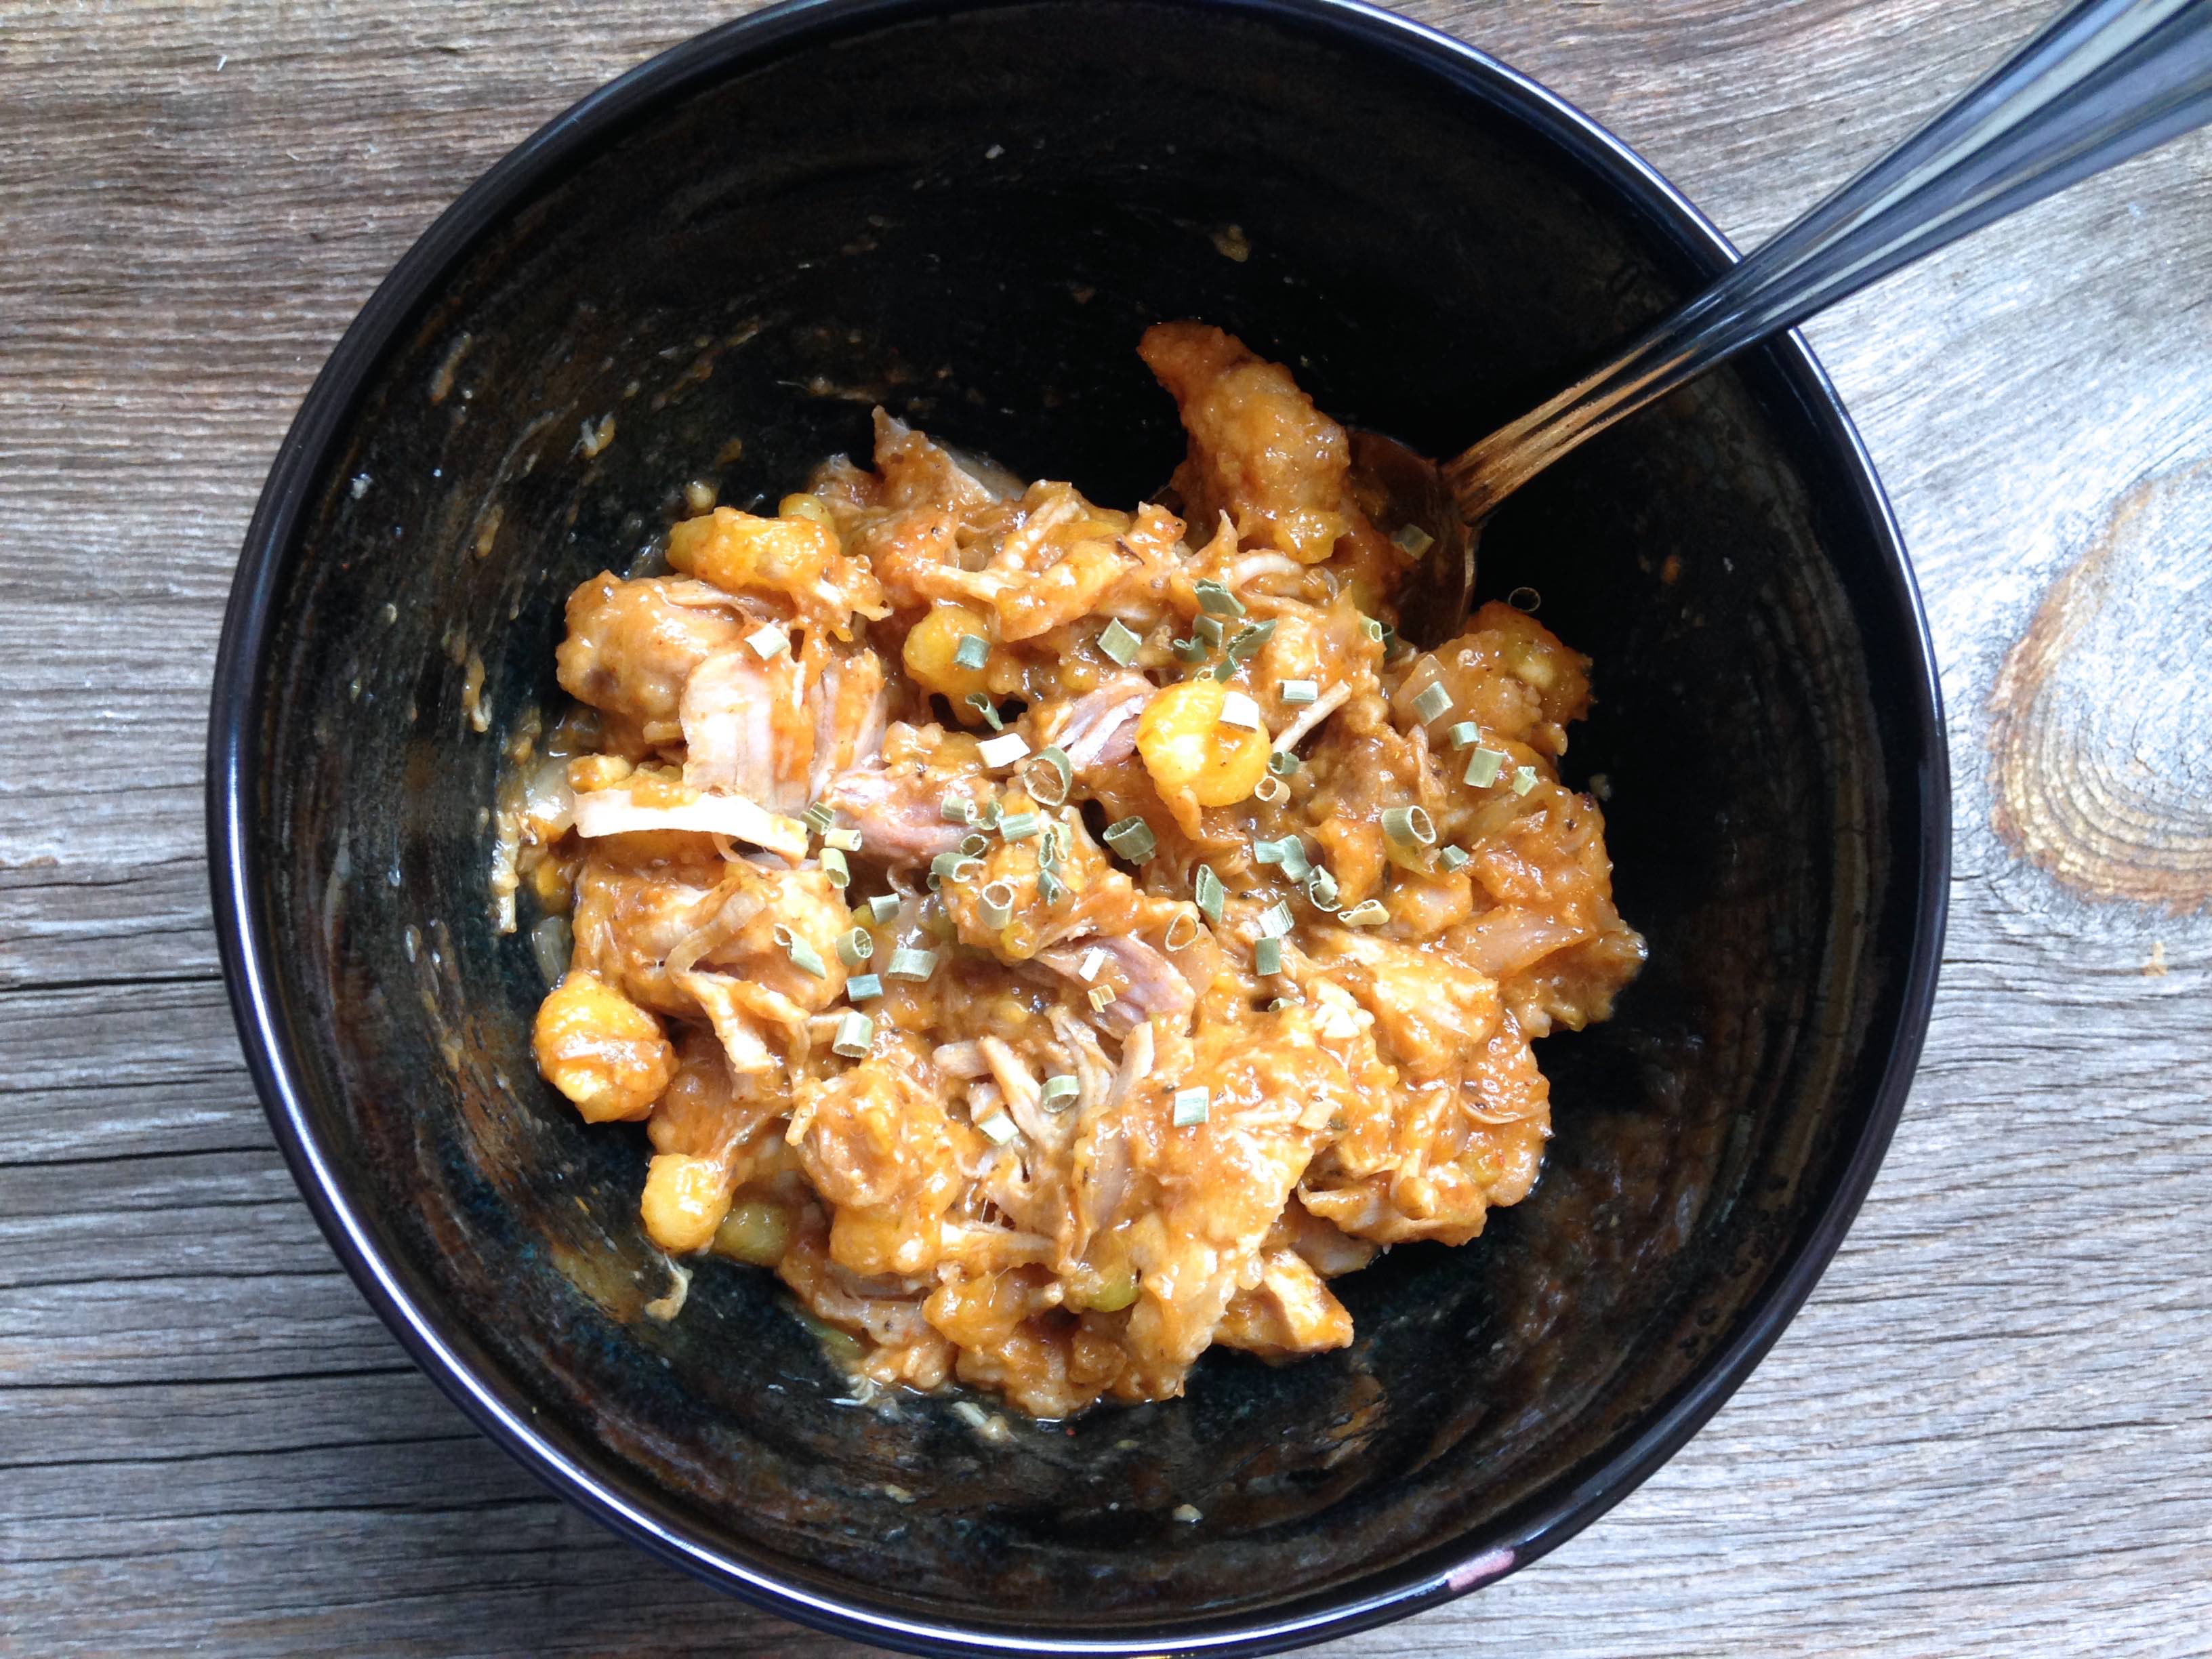
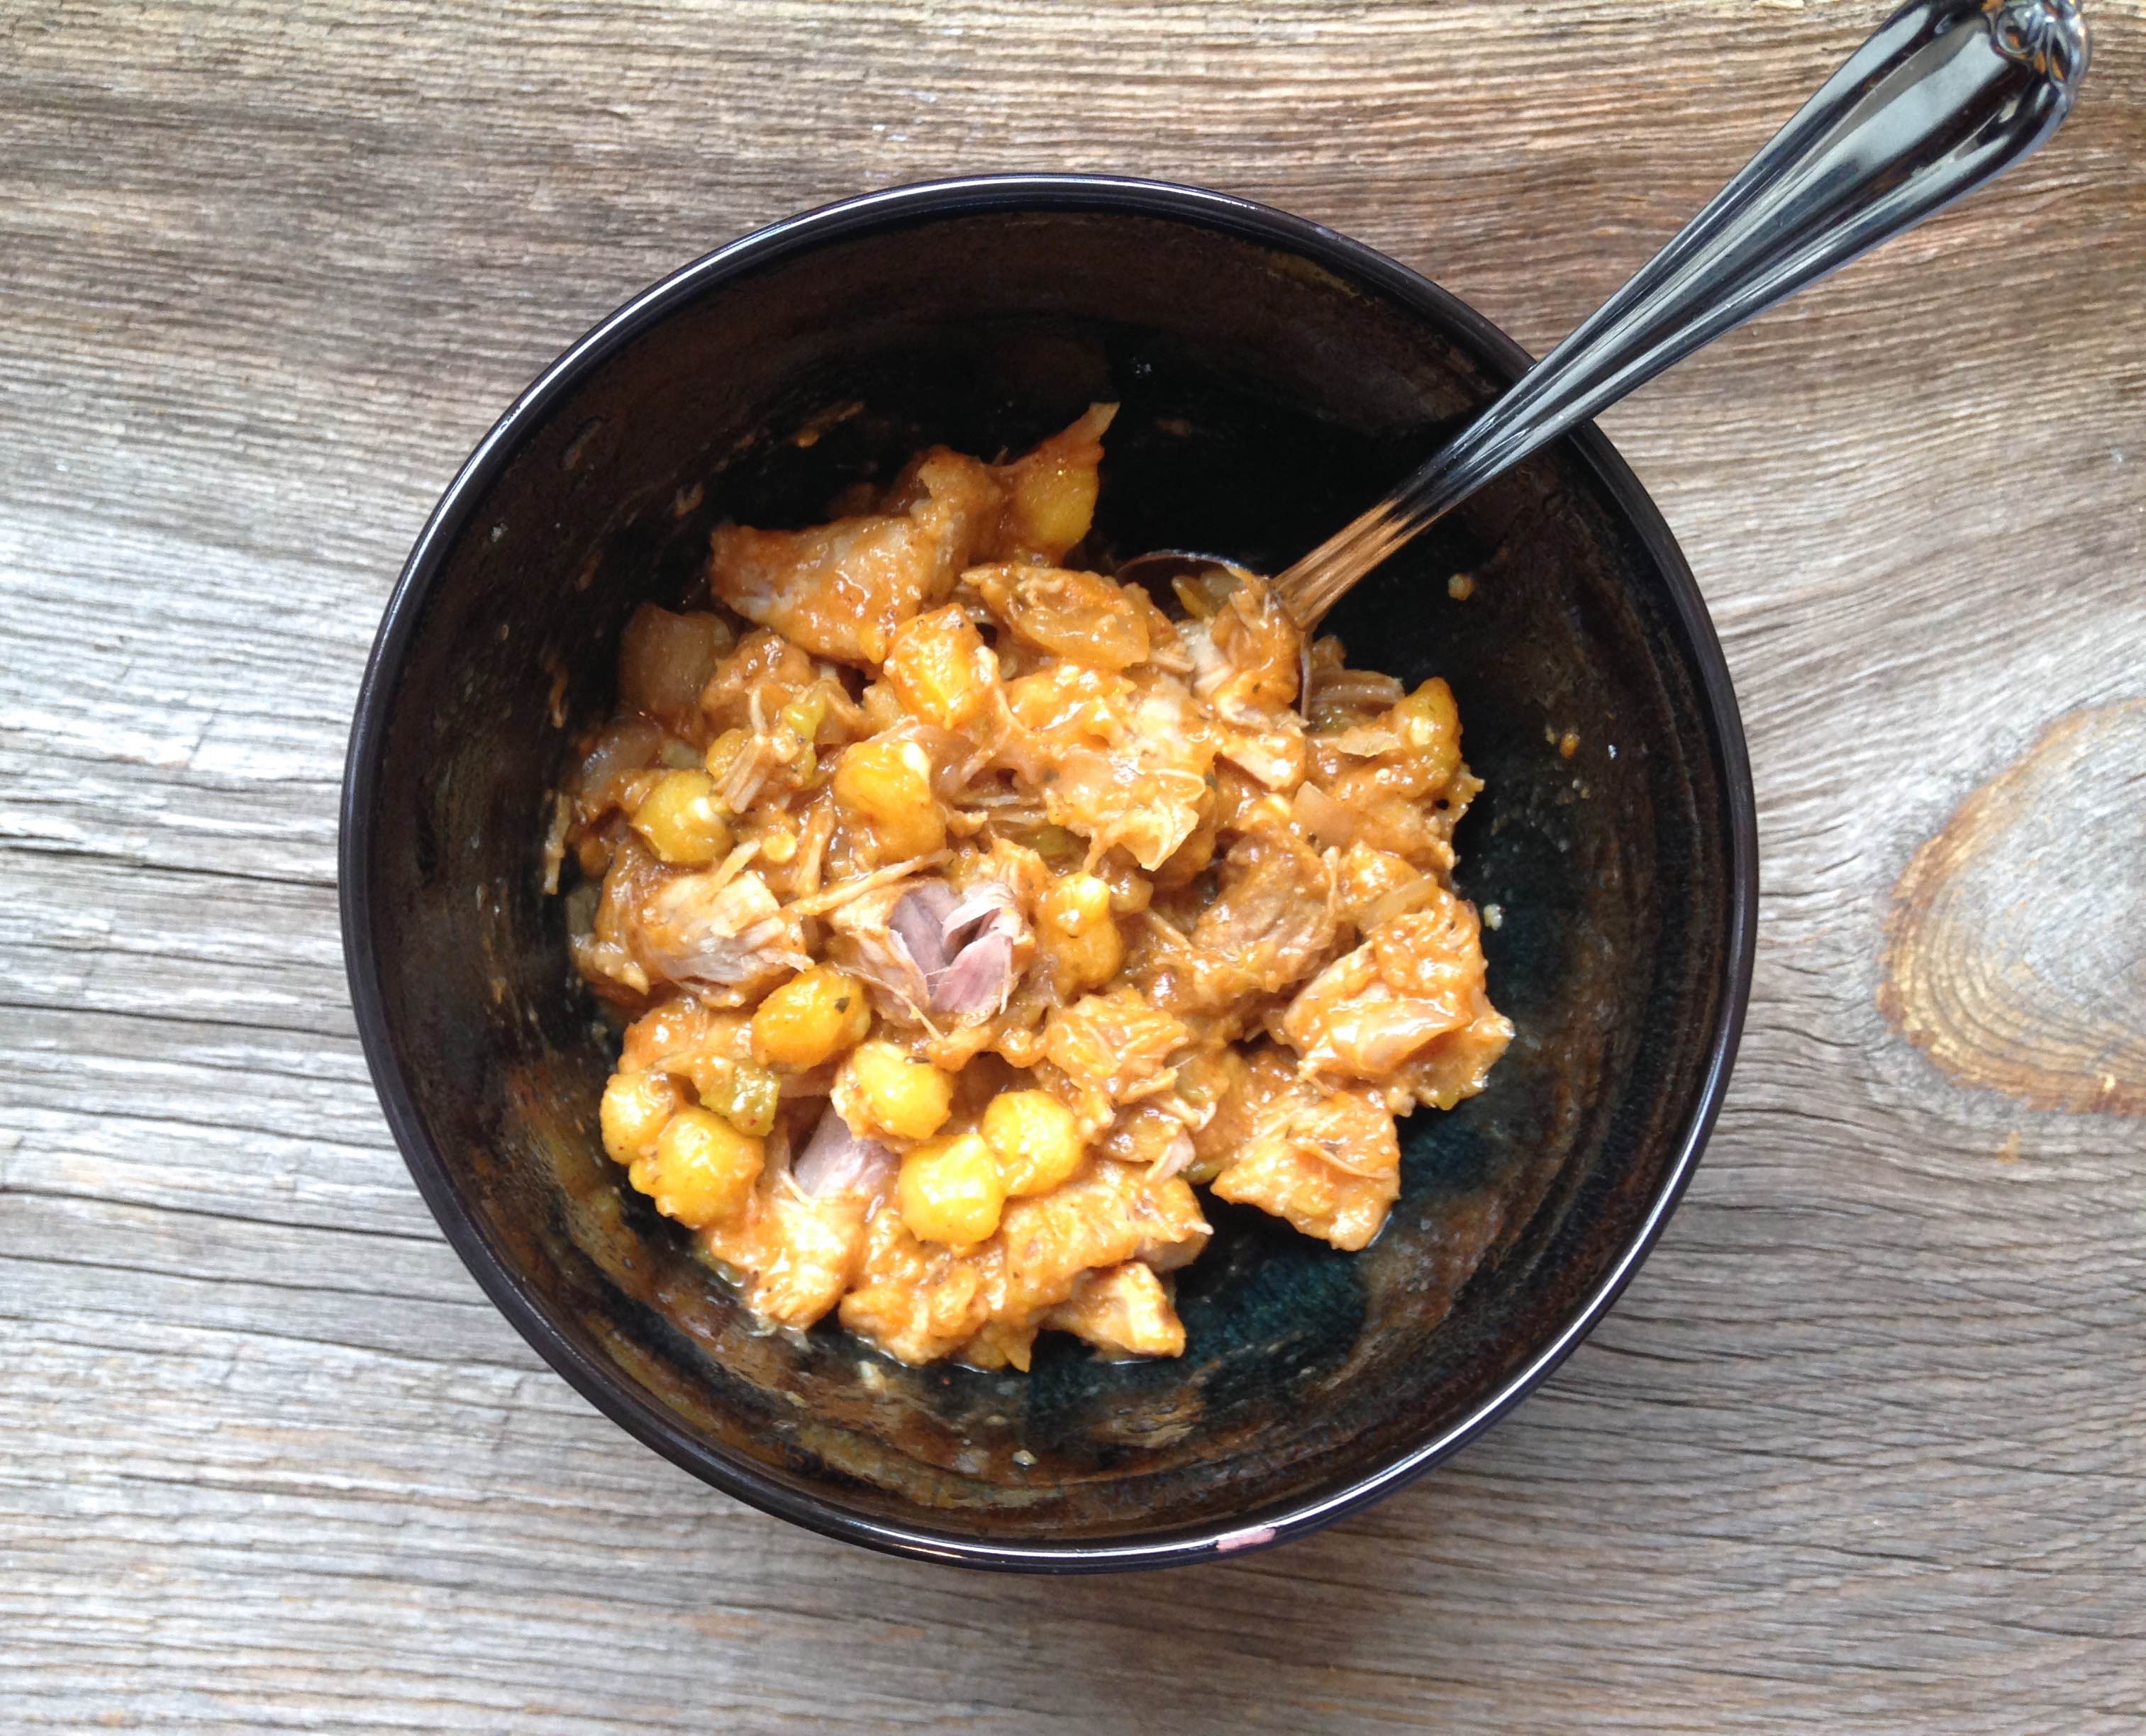
Posole (or pozole) is a traditional Mexican soup made with pork shoulder and lots of hominy. The first time I ever had posole was at a restaurant/hotel in Telluride, Colorado. I can’t remember the name of the restaurant, but it was good. Of course anything in Colorado tastes good when your fingers are numb from the wind and snow, and your hand warmers have worn off!
This was taken back in 2011. Matt’s aunt and uncle took our whole family (24 of us) to go skiing and we had a blast!The whole crew!
Since having posole in Telluride, I have been meaning to find a recipe to try and copy. This is the closest one I found. While the pork wasn’t as good as Telluride, the flavors of this crock pot posole soup were very good.
It’s just about the easiest recipe you can make. With a 3 month old, I’m always looking for simple recipes, and this one can be prepared in less than 30 minutes.
Top with tortilla chips and cheese, and you’ve quite the meal!
Crock Pot Posole
Prep time:
Cook time:
Total time:
Serves: 6-8
Adapted from Big Giant Food Basket
Ingredients
2 Tbsp. vegetable oil
2 lbs. boneless pork loin roast, cut into one-inch cubes
flour for dedging
2 (14.5 oz) cans enchilada sauce
2 (15.5 oz) cans yellow hominy, drained
1 cup chicken broth
1 medium onion, chopped
1/2 cup canned chopped green chilies
4 cloves garlic, minced
3 tsp. oregano
cayenne pepper, to taste
1/3 cup fresh cilantro
Instructions
Dredge meat in flour and place in pan with hot oil. Brown the meat with a good sear and place in a 4-quart crock pot.
Pour the enchilada sauce over the meat and then top with the remainder of the ingredients except for the cilantro.
Cook in the crock pot on high for 6-7 hours. (I cooked on high for 2-3 hours, then on low for 3-4 hours). Add the cilantro and then cook another 30 minutes.
From pumpkin bread, to pumpkin pie, I LOVE pumpkin! I can literally eat it year-round; not just at Thanksgiving.
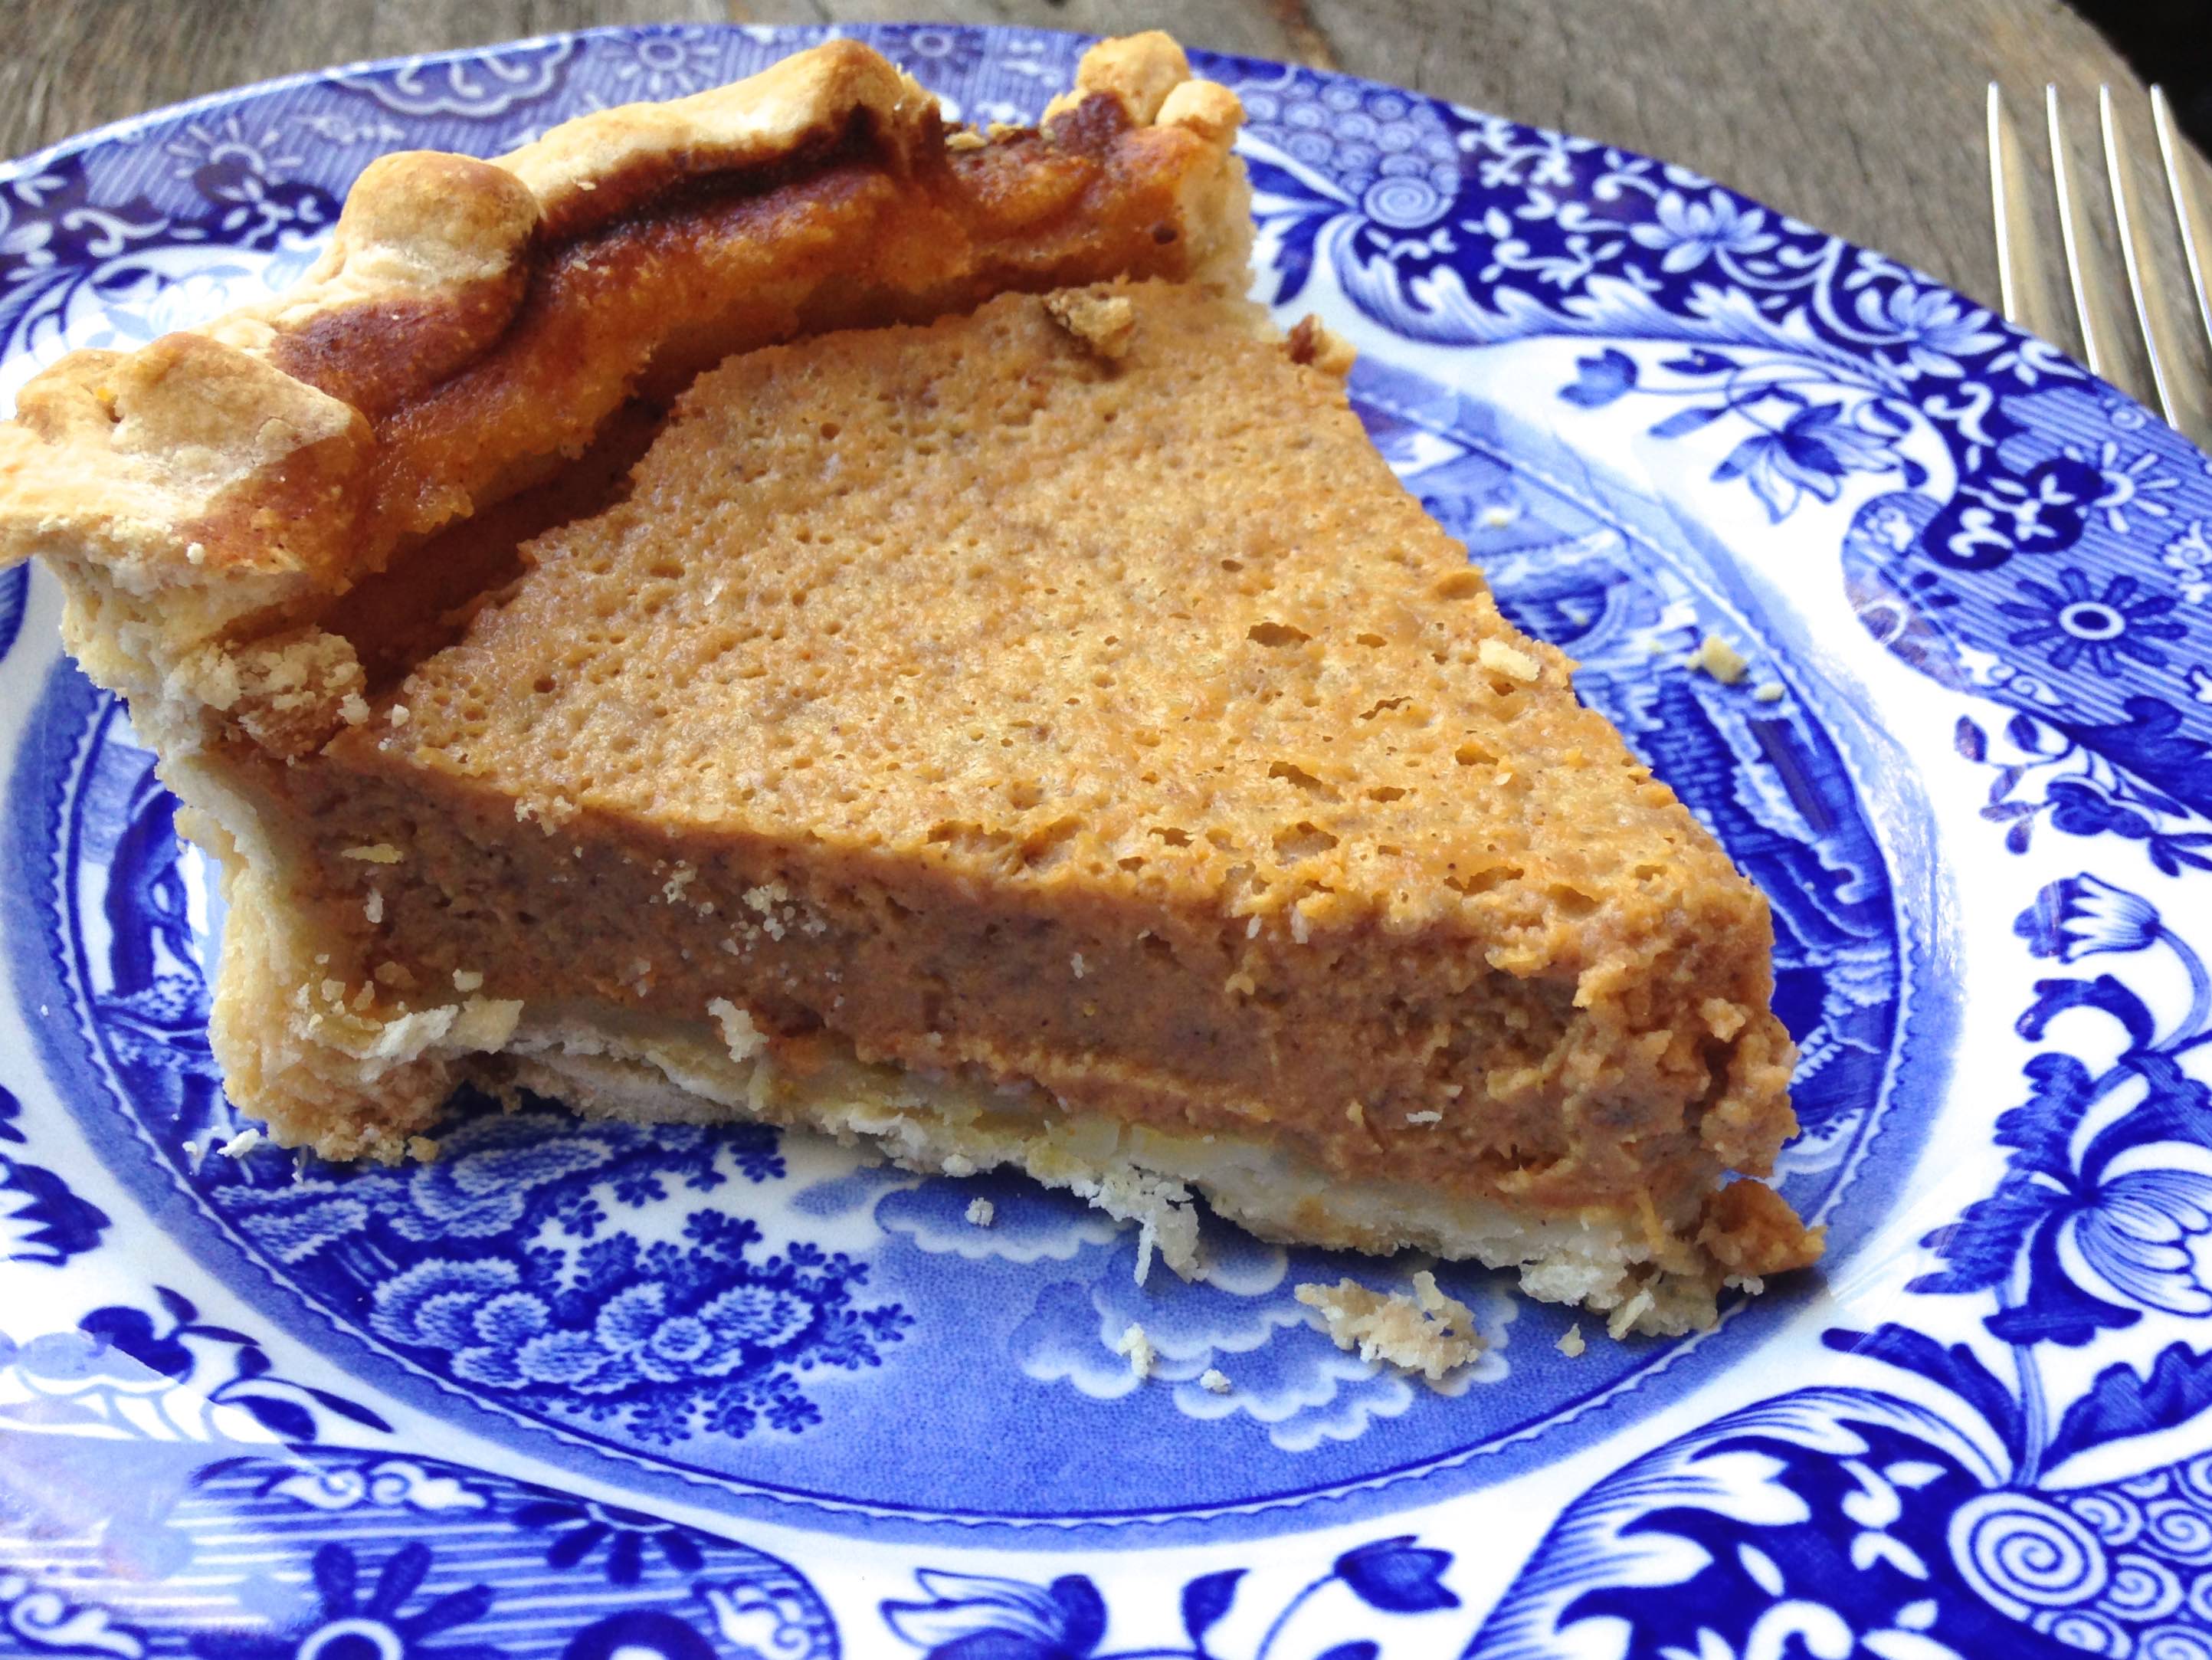
While this past Thanksgiving was wonderful (we had a newborn), it was missing something… pumpkin pie!! Instead we had a regular pecan pie and a chocolate bourbon pecan pie. Both were excellent, but I never got my pumpkin pie fix. Until this week!
I had two cans of pumpkin sitting in my pantry, just calling my name out. While I’m not really a pro at making pies, (I’m more of a cookie/brownie person), I figured the recipe easy enough that I could handle it.
With less than 10 minutes of prep time, the hardest part about this pie is waiting for it to bake and cool so you can eat it. Simply mix all the ingredients together in a bowl, and pour into an unbaked pie shell.
My pie shell isn’t the prettiest, but oh well. Matt doesn’t like crust anyways. He just eats the the filling so it didn’t really matter.
Don’t wait until next Thanksgiving to make this. Pumpkin pie is good anytime during the year. Enjoy!
Libby’s Pumpkin Pie
Prep time:
Cook time:
Total time:
Serves: 8
Ingredients
1 (9-inch) unbaked deep dish pie crust
3/4 cup white sugar
1 tsp. ground cinnamon
1/2 tsp. salt
1/4 tsp. ground cloves
3 eggs
1 (15 oz.) can LIBBY’S 100% Pure Pumpkin
1 (12 fluid oz.) can evaporated milk
Instructions
Preheat oven to 425 degrees F.
Combine sugar, salt, cinnamon, ginger, and cloves in small bowl. Beat eggs lightly in large bowl. Stir in pumpkin and sugar-spice mixture. Gradually stir in evaporated mil. Pour into pie shell.
Bake for 15 minutes. Reduce temperature to 350 degrees F; bake for 40-50 minutes or until knife inserted near center comes out clean. Cool on wire rack for 2 hours. Serve immediately or refrigerate.
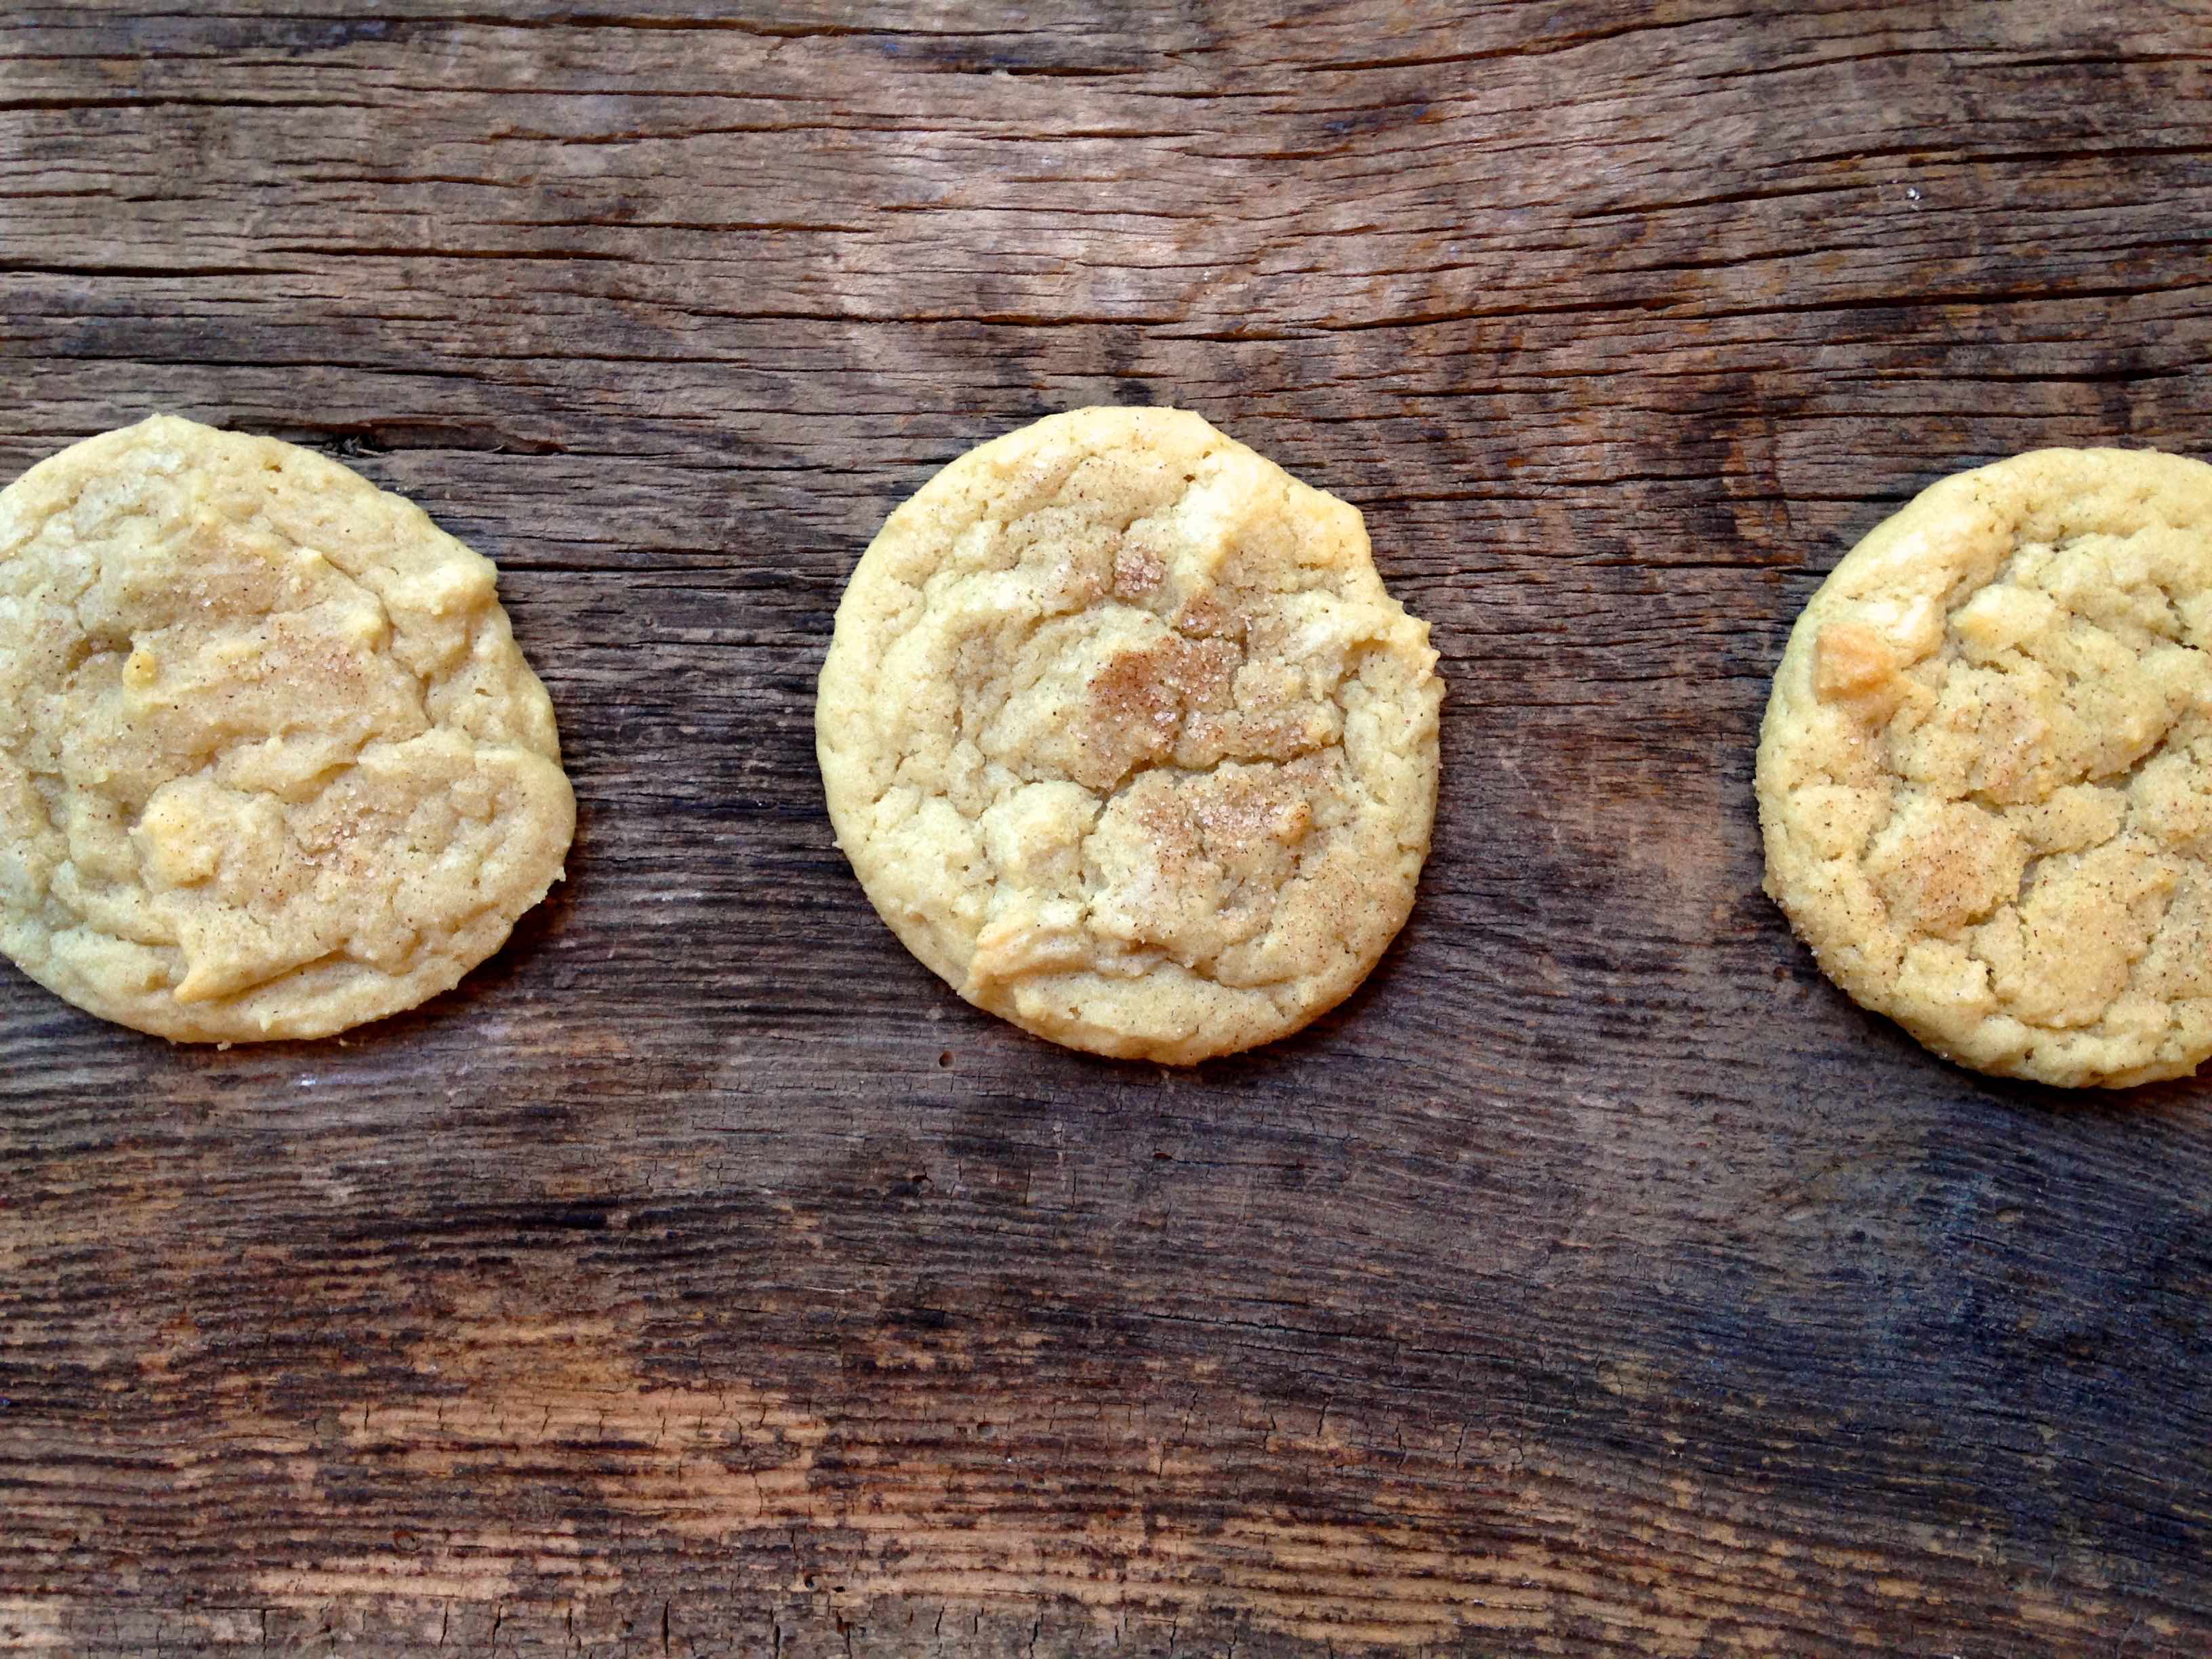
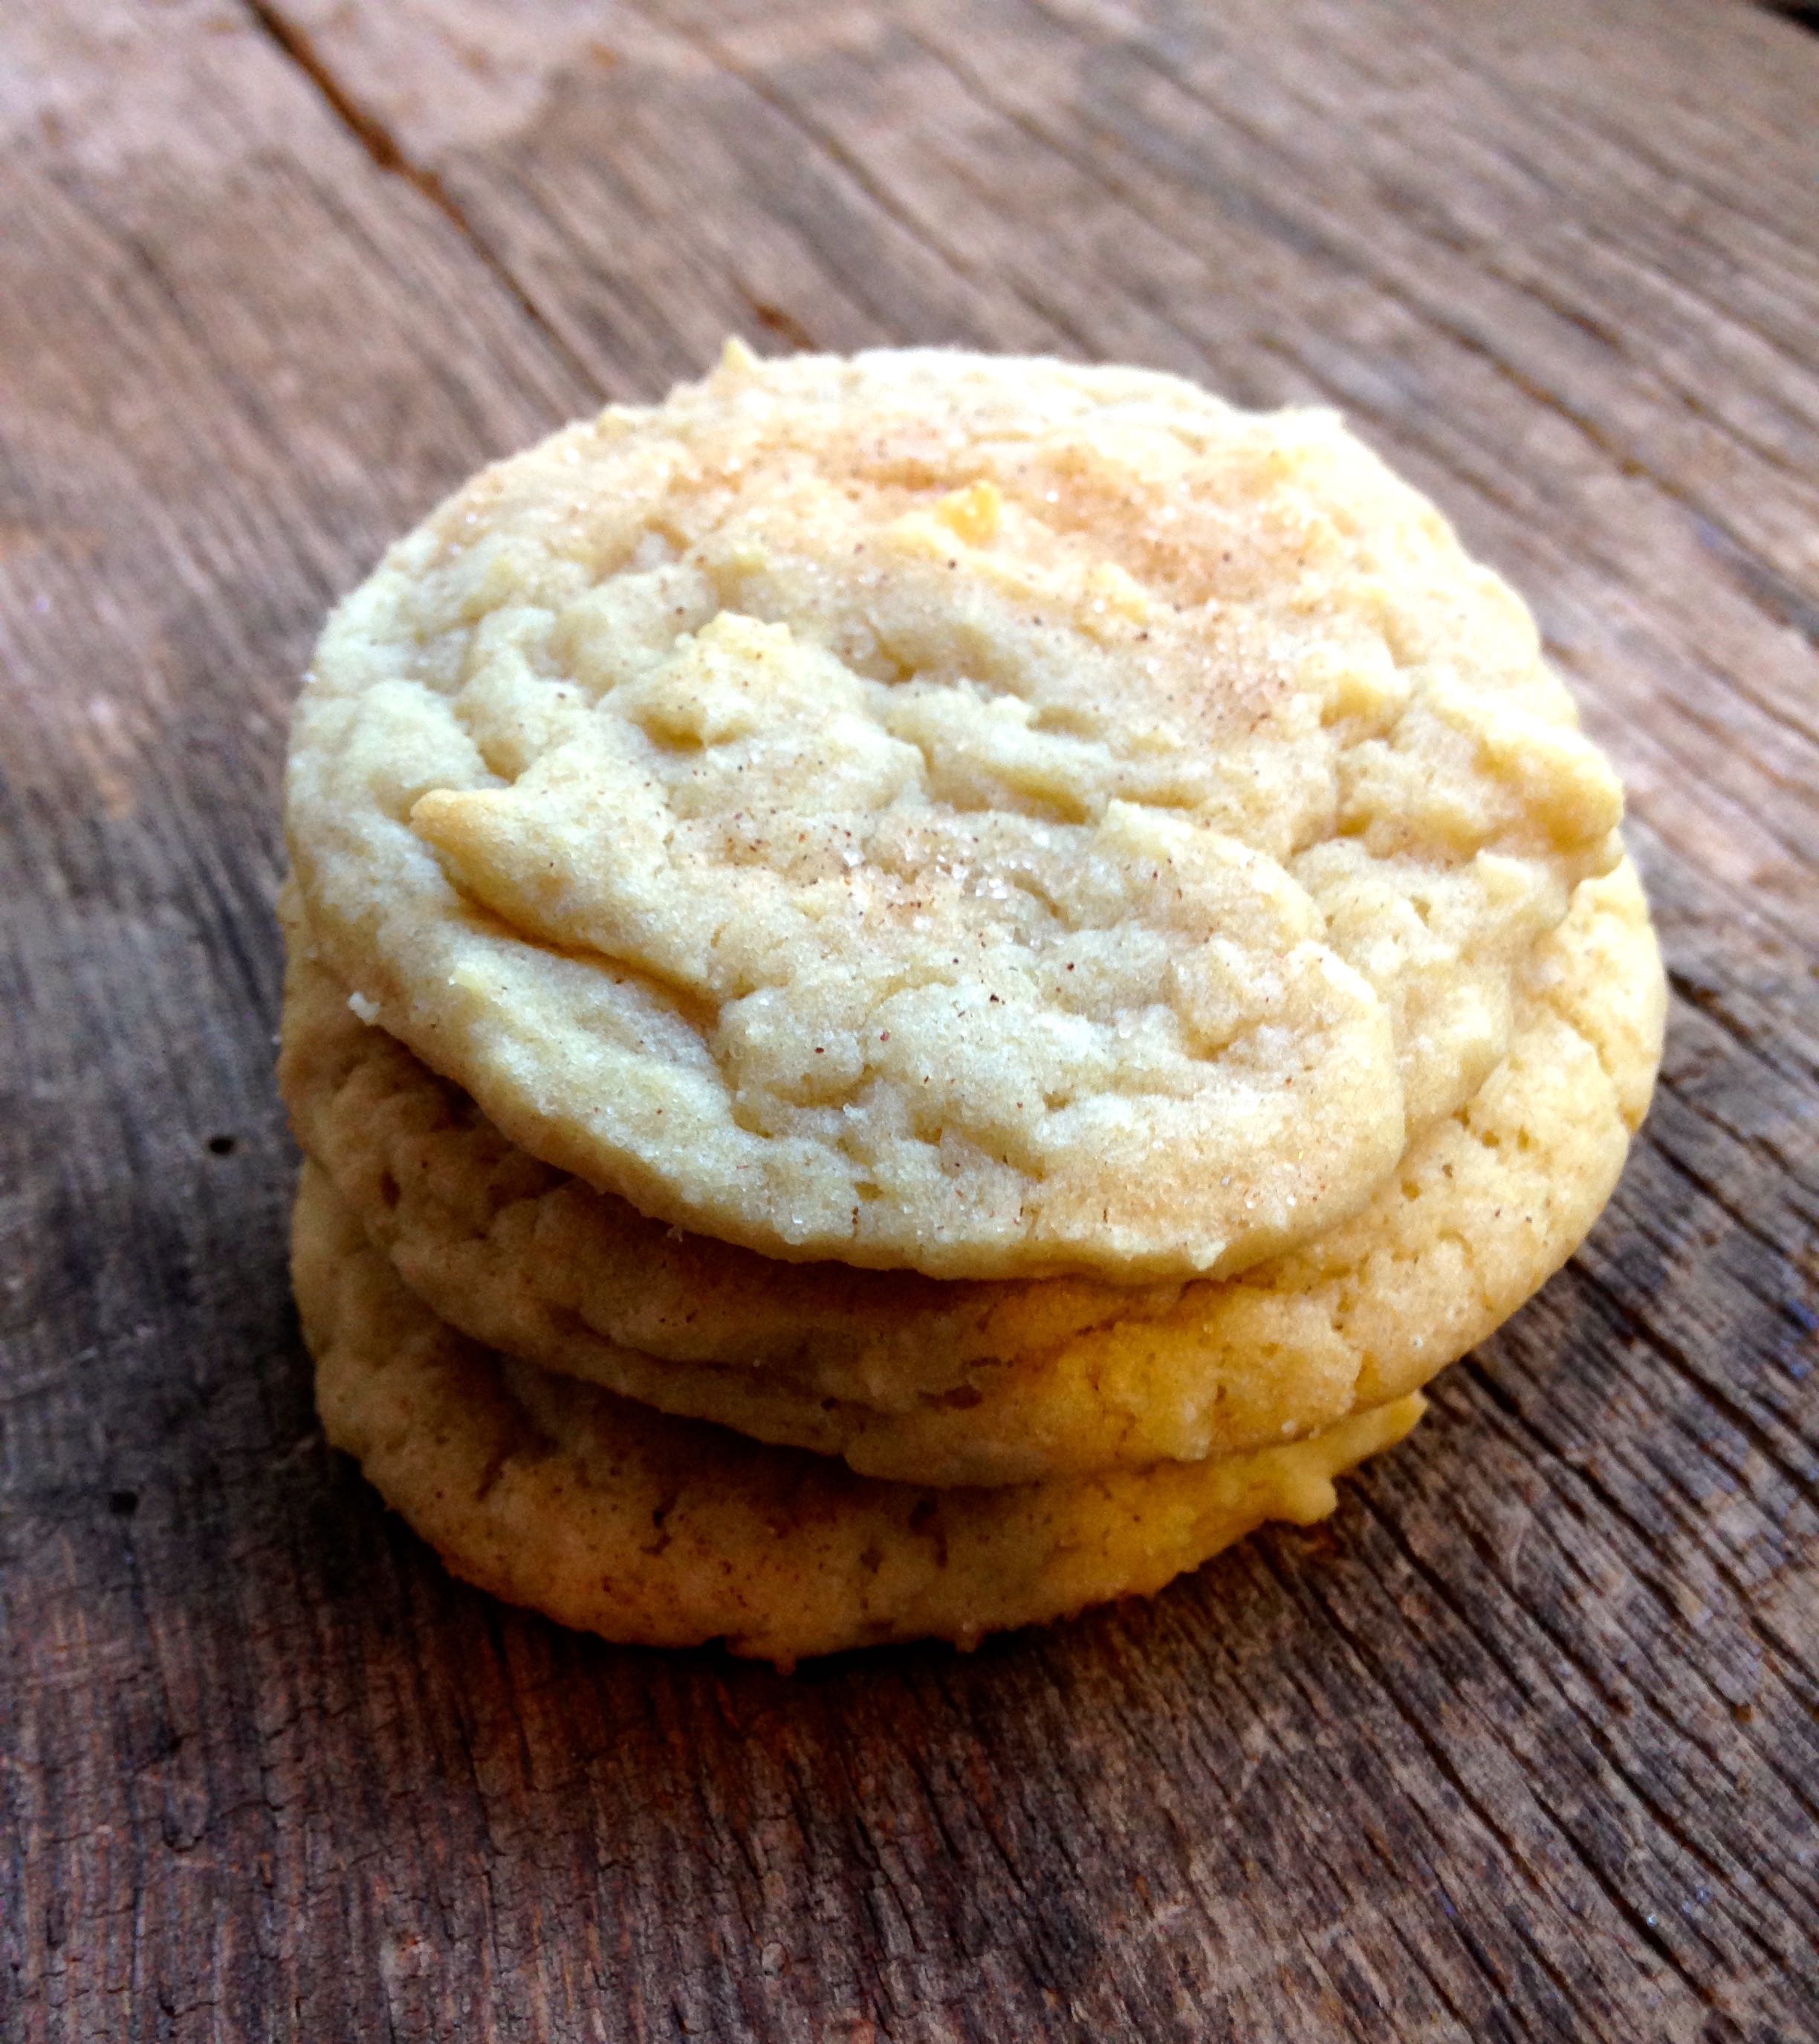
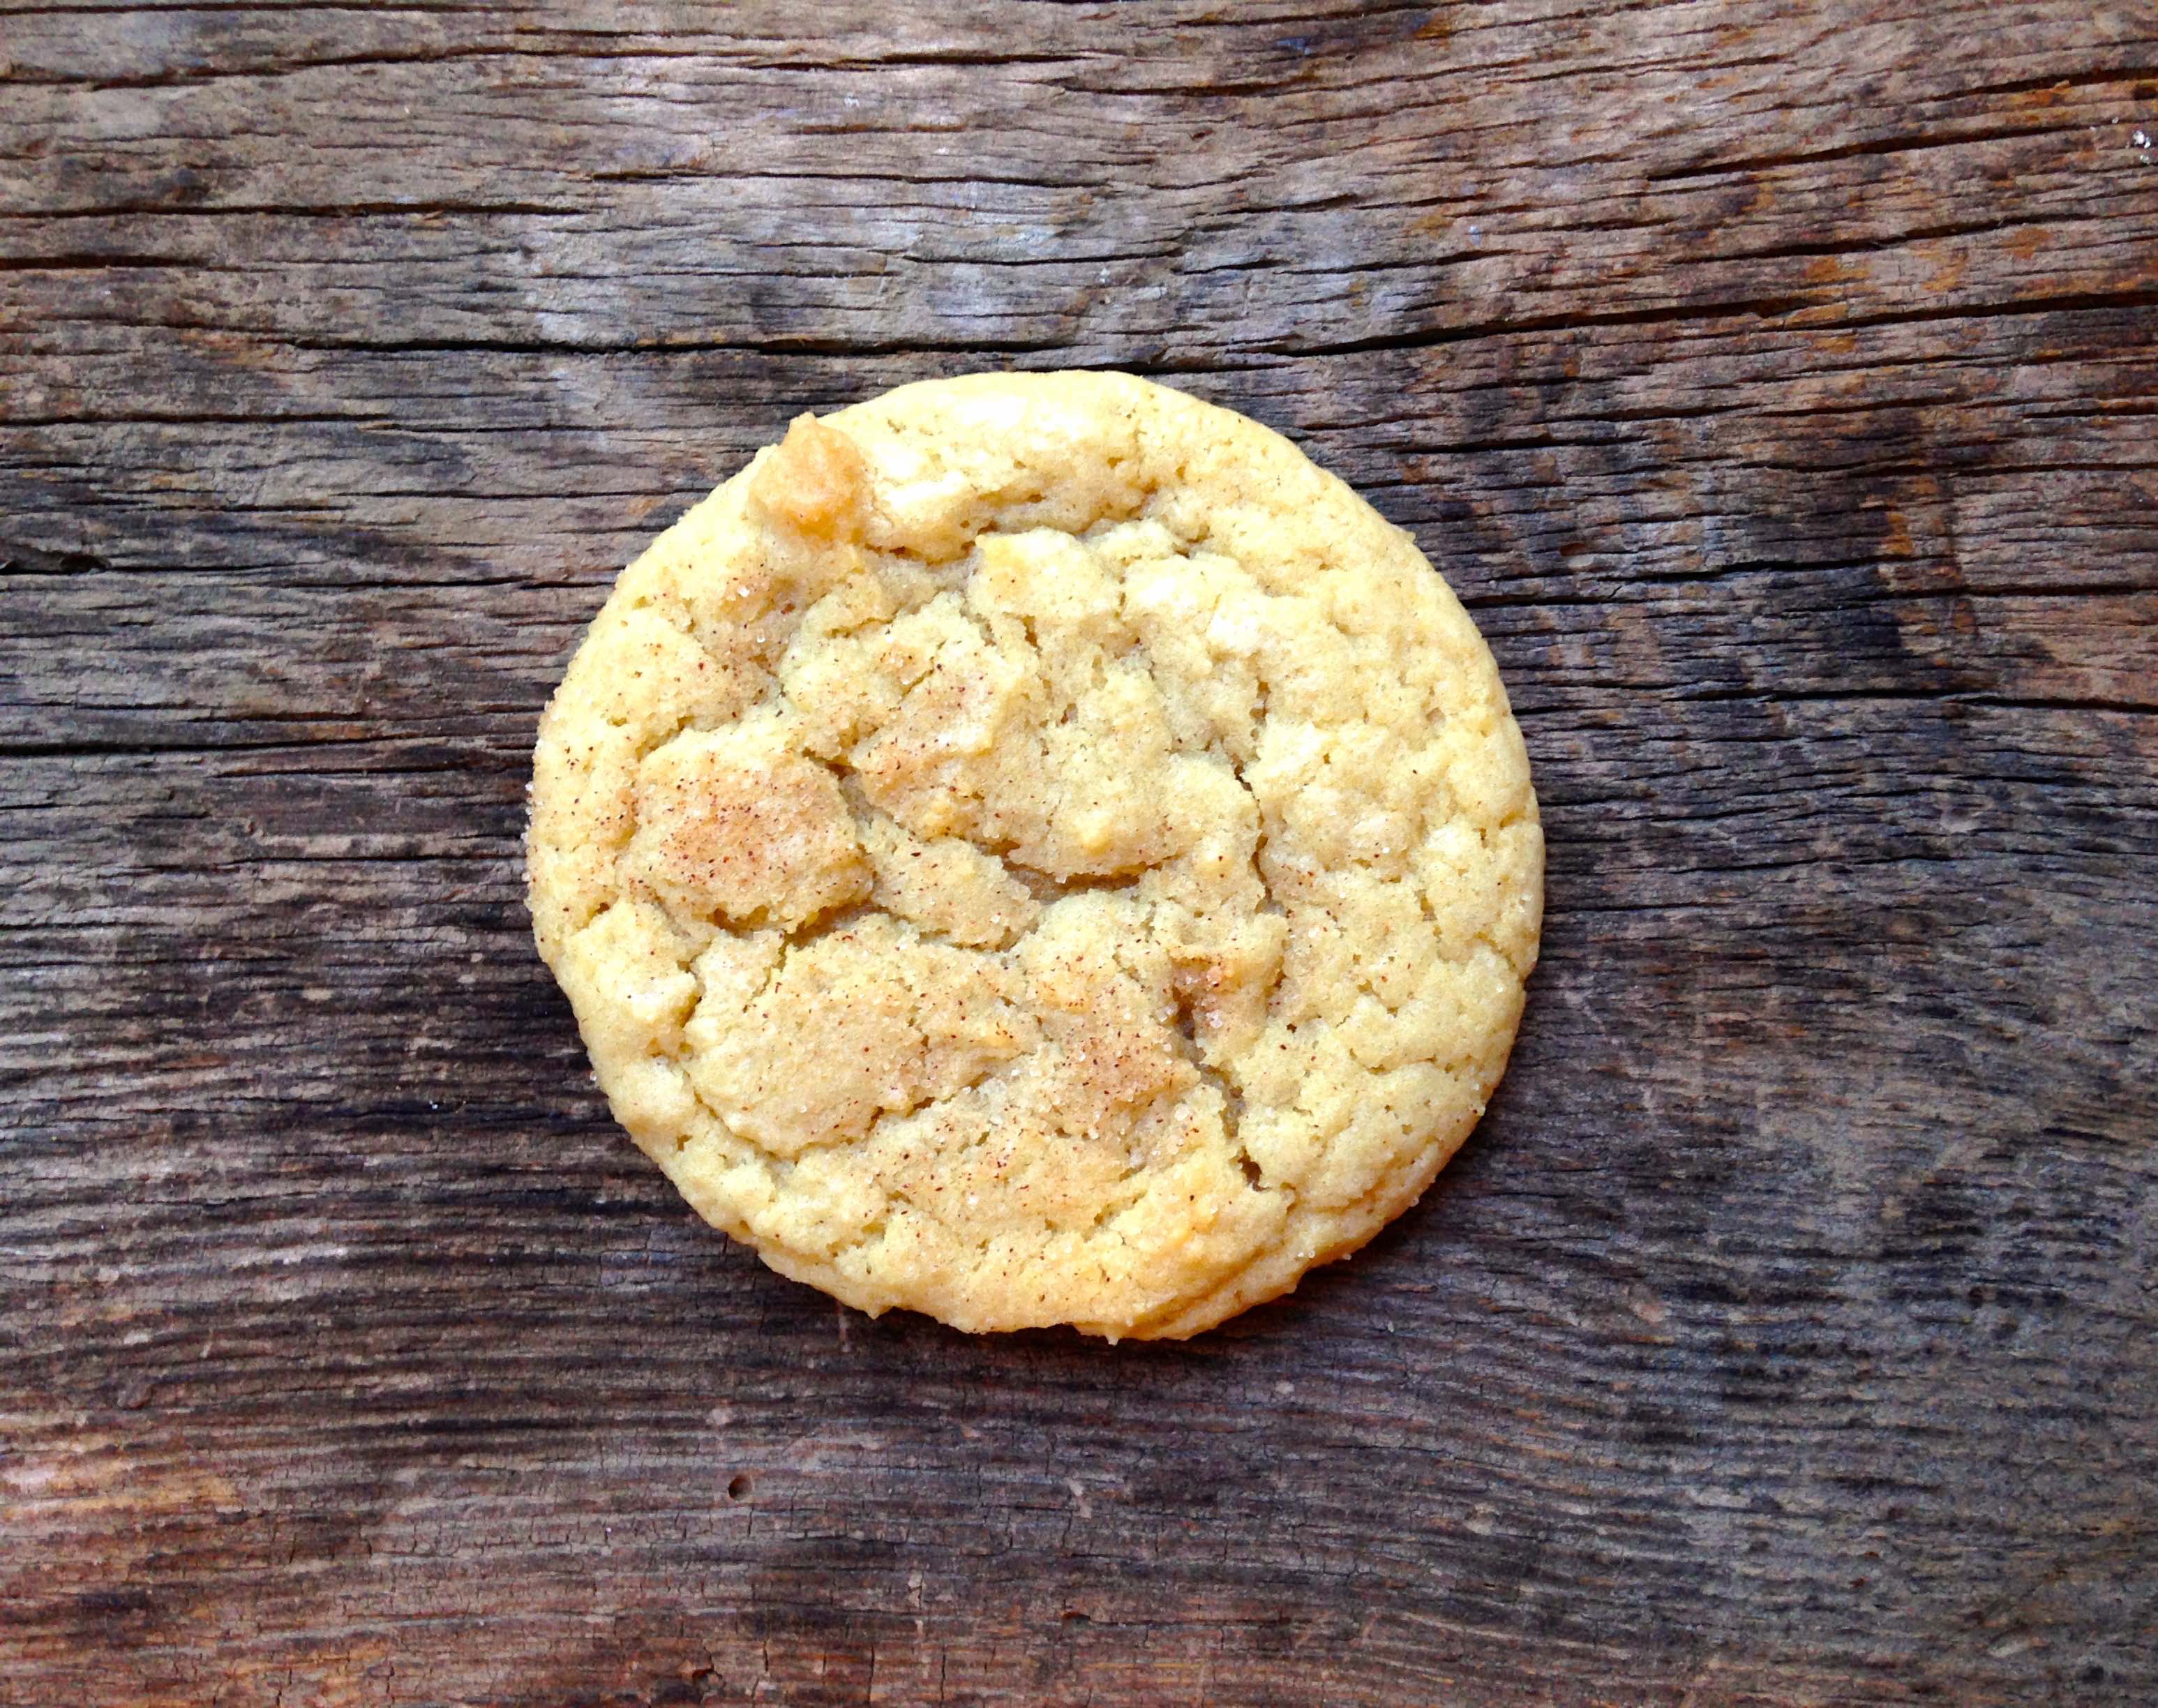
I love sugar cookies. I love snickerdoodle cookies. So why not combine the two? A hybrid between a buttery sugar cookie and a cinnamon-sugar snickerdoodle cookie, these sugar doodles are scented with vanilla, have chewy edges, soft centers, and are sprinkled with cinnamon-sugar mixture.
My biggest complaint with cookies is when they are dry and tough. These are quite the opposite. The literally melt in your mouth, which makes you feel like you could eat about 10!
It’s always implied that for small groups at church I will bring the dessert. More than likely that dessert is in the form a of cookie.
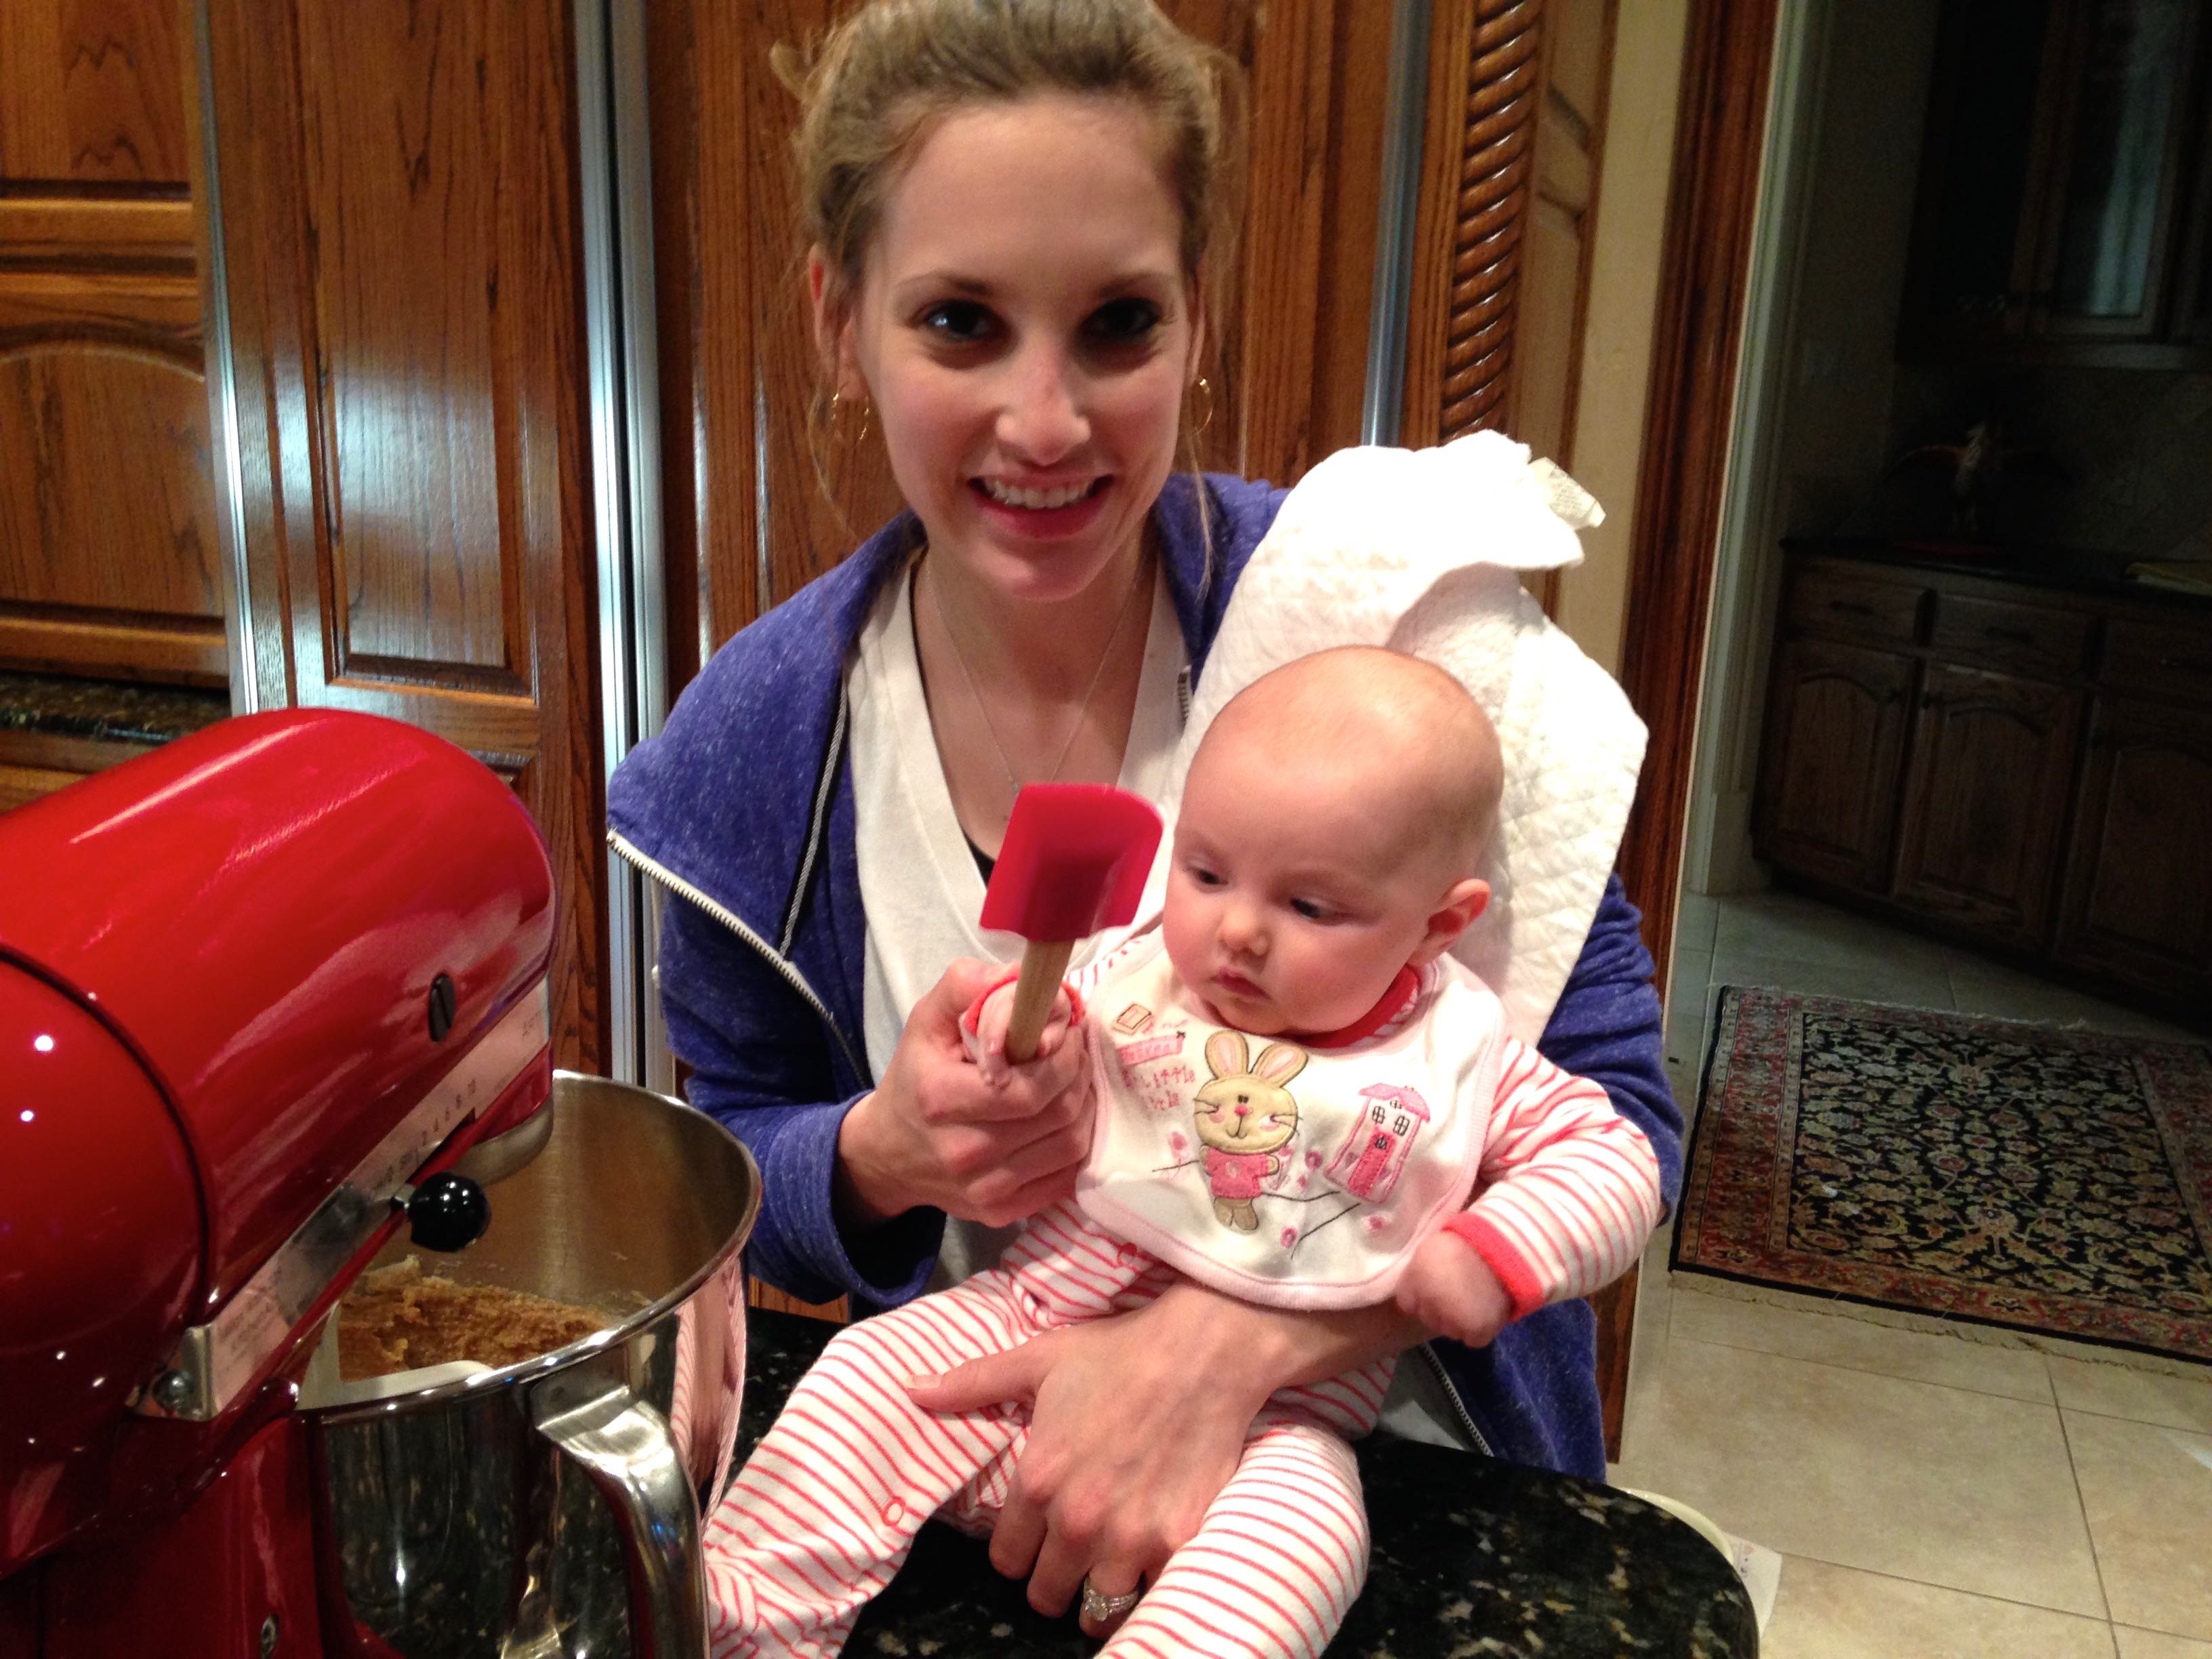
My sister came over to visit the new baby, and we ended up making these while she was here. Literally you can make these while holding a baby… which is what we did. These cookies are that easy!
Sugar-Doodle Cookies
Prep time:
Cook time:
Total time:
Serves: 1 dozen
Adapted from Averie Cooks
Ingredients
1/2 cup unsalted butter, softened (1 stick)
1/2 cup granulated sugar
1/2 cup light brown sugar, packed
1 large egg
2 Tbsp. milk
1 1/2 tsp. vanilla extract
1 3/4 cup all-purpose flour
1 tsp. baking soda
1/4 tsp. salt
cinnamon-sugar, to sprinkle on top
Instructions
To the bowl of a stand mixer fitted with the paddle attachment, beat the butter on low speed until smooth, 1-2 minutes. Add the sugars and beat on medium-high speed until creamed and well combined, 2-3 minutes.
Stop, scrape down sides of the bowl, and add the egg, milk, vanilla, and beat on medium-high speed until light and fluffy, 4 to 5 minutes. Stop, scrape down the side of the bowl, and add the flour, baking soda, salt, and mix until just combined, about 1 minute.
Transfer dough to an airtight container and refrigerate for at least 3 hours, up to 5 days.
Preheat oven to 350 degrees, and line a baking sheet with parchment or a silpat non-stick baking mat.
Using a 2-ounce cookie scoop, form heaping mounds weighing 2 1/4 ounces each and place them on the baking sheet, spaced at least 2 inches apart. Sprinkle with a little cinnamon sugar mixture.
Bake for 8-10 minutes or until pale golden and edges have just set. Even if slightly undercooked in the center, the cookies will firm up as they cool. For crunchier cookies, extend the baking time 1-3 minutes longer.
Allow cookies to cool on the baking sheet for 10 minutes before removing. Store cookies in an airtight container at room temperature of up to 5 days or in the freezer for up to 3 months.
Until I met my husband, I could have cared less about football. Well, that’s not true, I went to almost every A&M football game during college, but I was never really “in to it” or knew what was going on.
Football really sparked my interest just a few years ago as the Aggies went on to the SEC, Johnny Manziel become “Johnny Football”, the Aggies starting winning, and I finally got used to nothing but football on TV every Saturday and Sunday in the fall.
The Super Bowl last night marked the end of football season, and I’m honestly a little sad. I’ve come to love having the game on television as background noise while I cook, and I have even come to just ENJOY watching it on the couch! Something I never would have considered doing a few years ago.
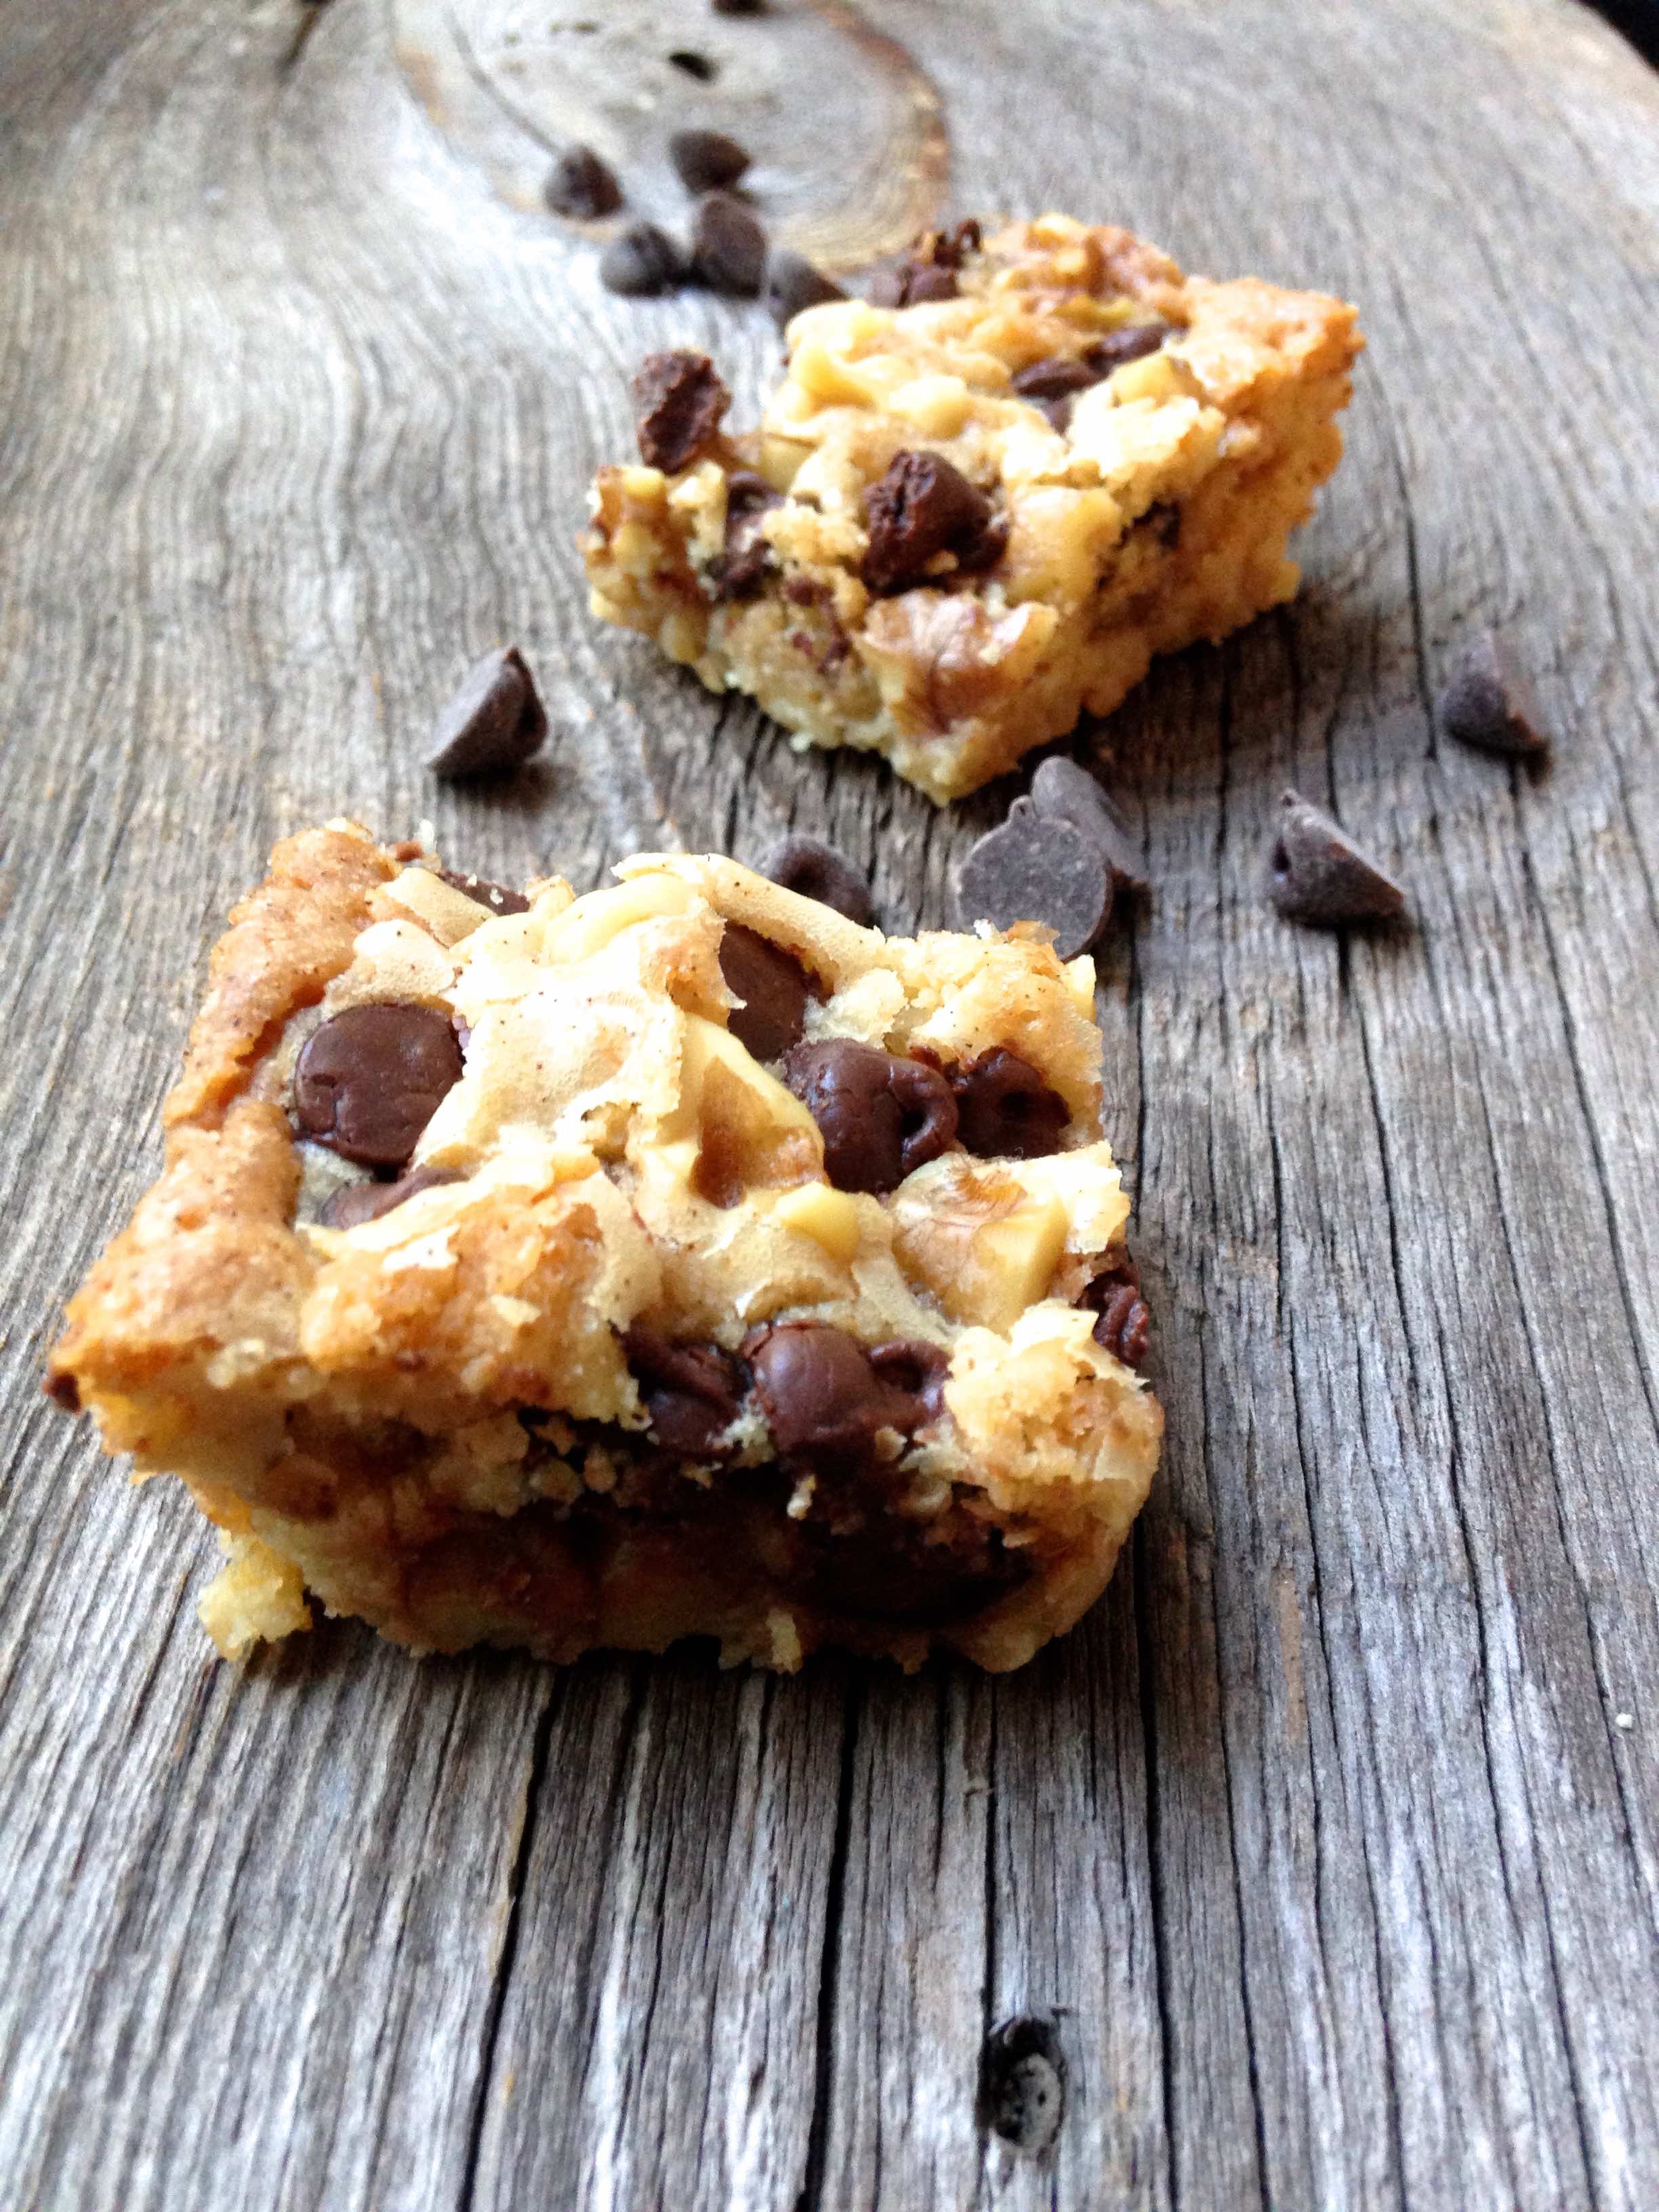
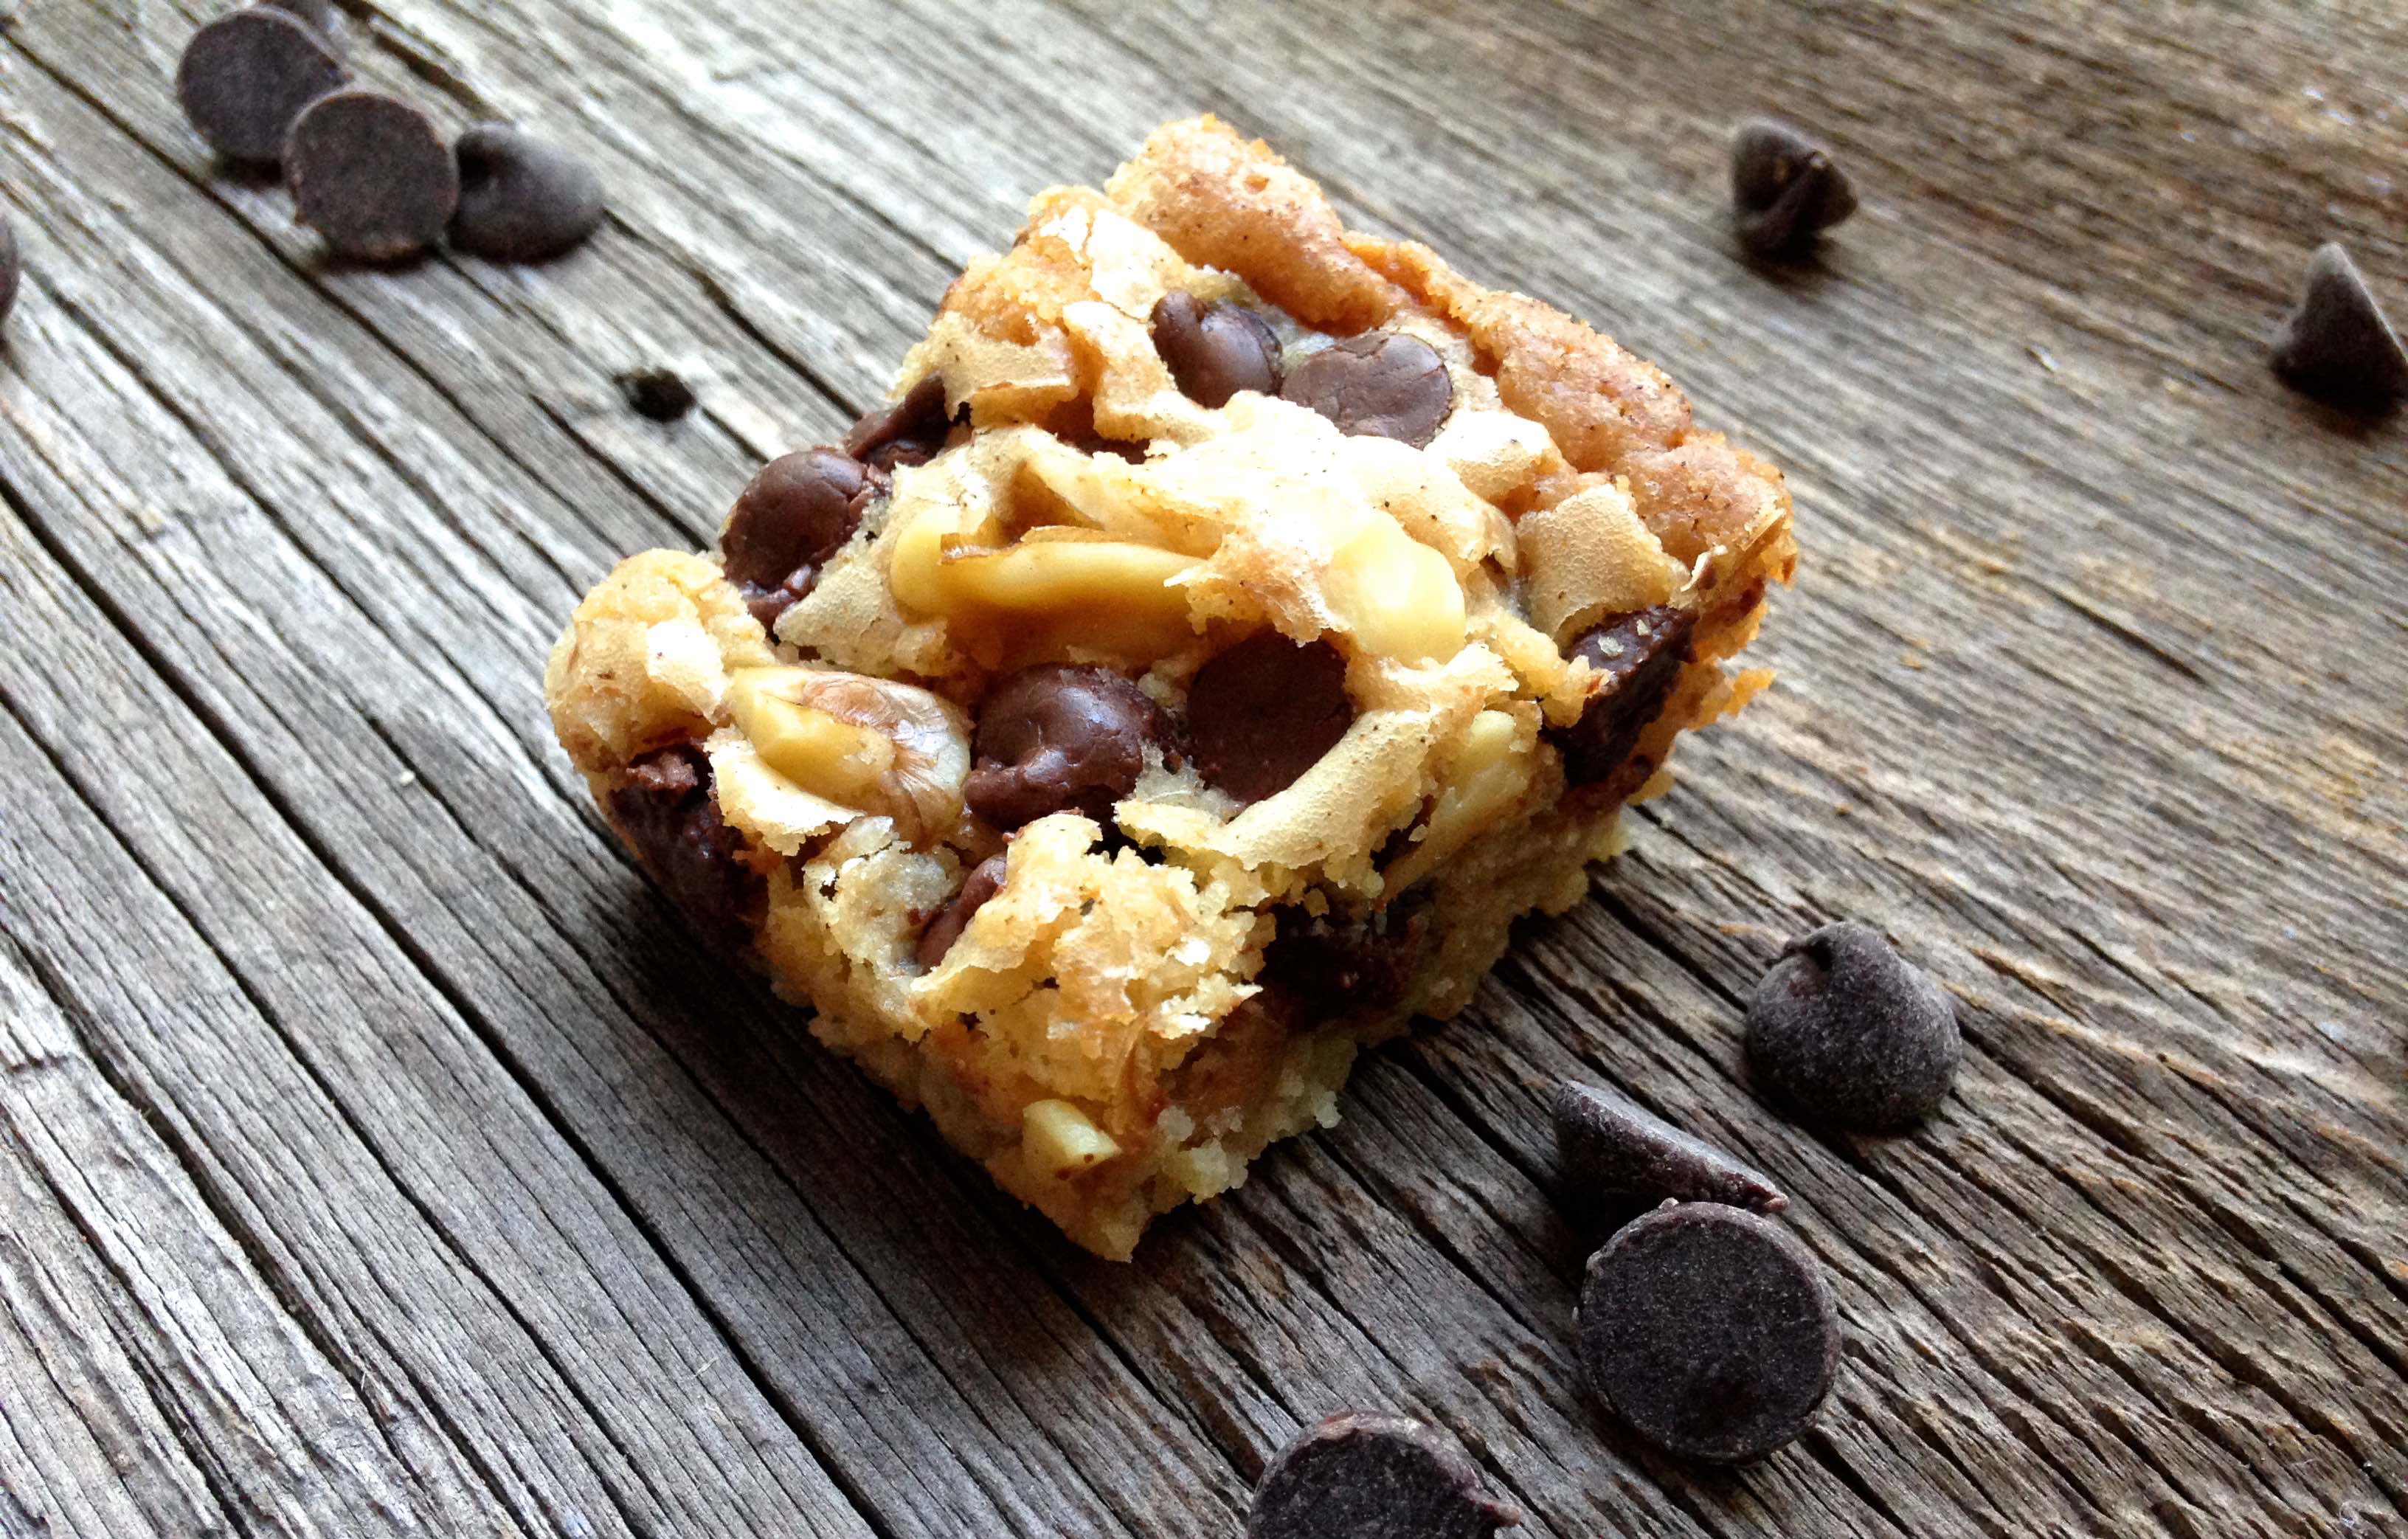
Last night my parents invited us over for hotdogs and hamburgers and to watch the Super Bowl. For dessert, my mom made these super easy blondies. What’s great about them is you will more than likely already have all the items you need in your pantry!
In addition to being super easy, these delicious bars are so buttery and moist. The chocolate just melts in your mouth, and the walnuts add a nice crunch. Its like eating a more buttery chocolate chip walnut cookie in a bar form!
This can’t be a good habit, but our three month old LOVES television; football for that matter. Maybe its because during her first few weeks of life, she lay on her daddy’s chest watching the Aggies play. 🙂
Super Bowl 49 (Seahawks vs. Patriots) was no different, as she thoroughly enjoyed the first quarter of the game laying on the floor on her cozy little pink blanket!
First Super Bowl and she was loving it!!!
Need a good excuse to eat these buttery blondies? It’s called working out, and we’ve already got a personal trainer at Dallas’ Equinox: Aunt Brittany!!! #equinoxmademedoit
Blondie anyone? We’ve got our own Aunt Brittany as a personal trainer to fight off all those calories from the blondies. haha! #equinoxmademedoit
Easy Blondies
Prep time:
Cook time:
Total time:
Serves: 16
Adapted from: “Chewy Gooey Crispy Crunchy Melt-In-Your-Mouth Cookies” by Alice Medrich
Ingredients
1 cup (4.5 oz) unbleached all-purpose flour
1/2 tsp. baking powder
1/4 tsp. salt
8 Tbsp. (1 stick) unsalted butter
3/4 cup plus 2 Tbsp. (6.125 oz) packed light brown sugar
1 large egg
1/2 tsp. pure vanilla extract
2/3 cup (2.33 oz) broken or coarsely chopped walnut pieces
1/2 cup (3 oz) semisweet chocolate chips
Instructions
Preheat oven to 350 degrees F. Position a rack in the lower third of the oven. Line an 8-inch square baking dish with foil.
Combine the flour, baking powder, and salt in a small bowl and mix together thoroughly with a whisk or fork.
Melt the butter in a small saucepan. Remove the pan from the heat and stir in the brown sugar. Use a wooden spoon to beat in the egg and vanilla. Stir in the flour mixture followed by half of the walnuts. Spread the batter into the pan. Sprinkle the remaining walnuts and the chocolate chips evenly over the top.
Bake for 20 to 25 minutes, or until the nuts look toasted, the top is golden brown, and the edges have pulled away from the sides of the pan. Cool in the pan on a rack. Lift the ends of the foil and transfer to a cutting board. Use a long sharp knife to cut into squares. May be kept in an airtight container for 3 to 4 days.
Notes
UPGRADES:[br]NUTMEG OR CINNAMON BLONDIES: Just before serving, grate a little nutmeg or cinnamon stick over the bars.[br]PEANUT BUTTER BLONDIES: Reduce the amount of brown sugar to 2/3 cup. Add 1/2 cup (3 oz) well-stirred natural peanut butter (chunky or smooth) with the brown sugar. Substitute 1/2 cup (2 oz) roasted salted peanuts for the walnuts.[br]PEANUT BUTTER HAZELNUT BLONDIES: Reduce the amount of brown sugar to 2/3 cup. Add 1/3 cup (3 oz) well-stirred peanut butter (chunky or smooth) with the brown sugar. Substitute toasted skinned hazelnuts for the walnuts. Before baking, sprinkle the top very lightly with tiny pinches of flaky sea salt.
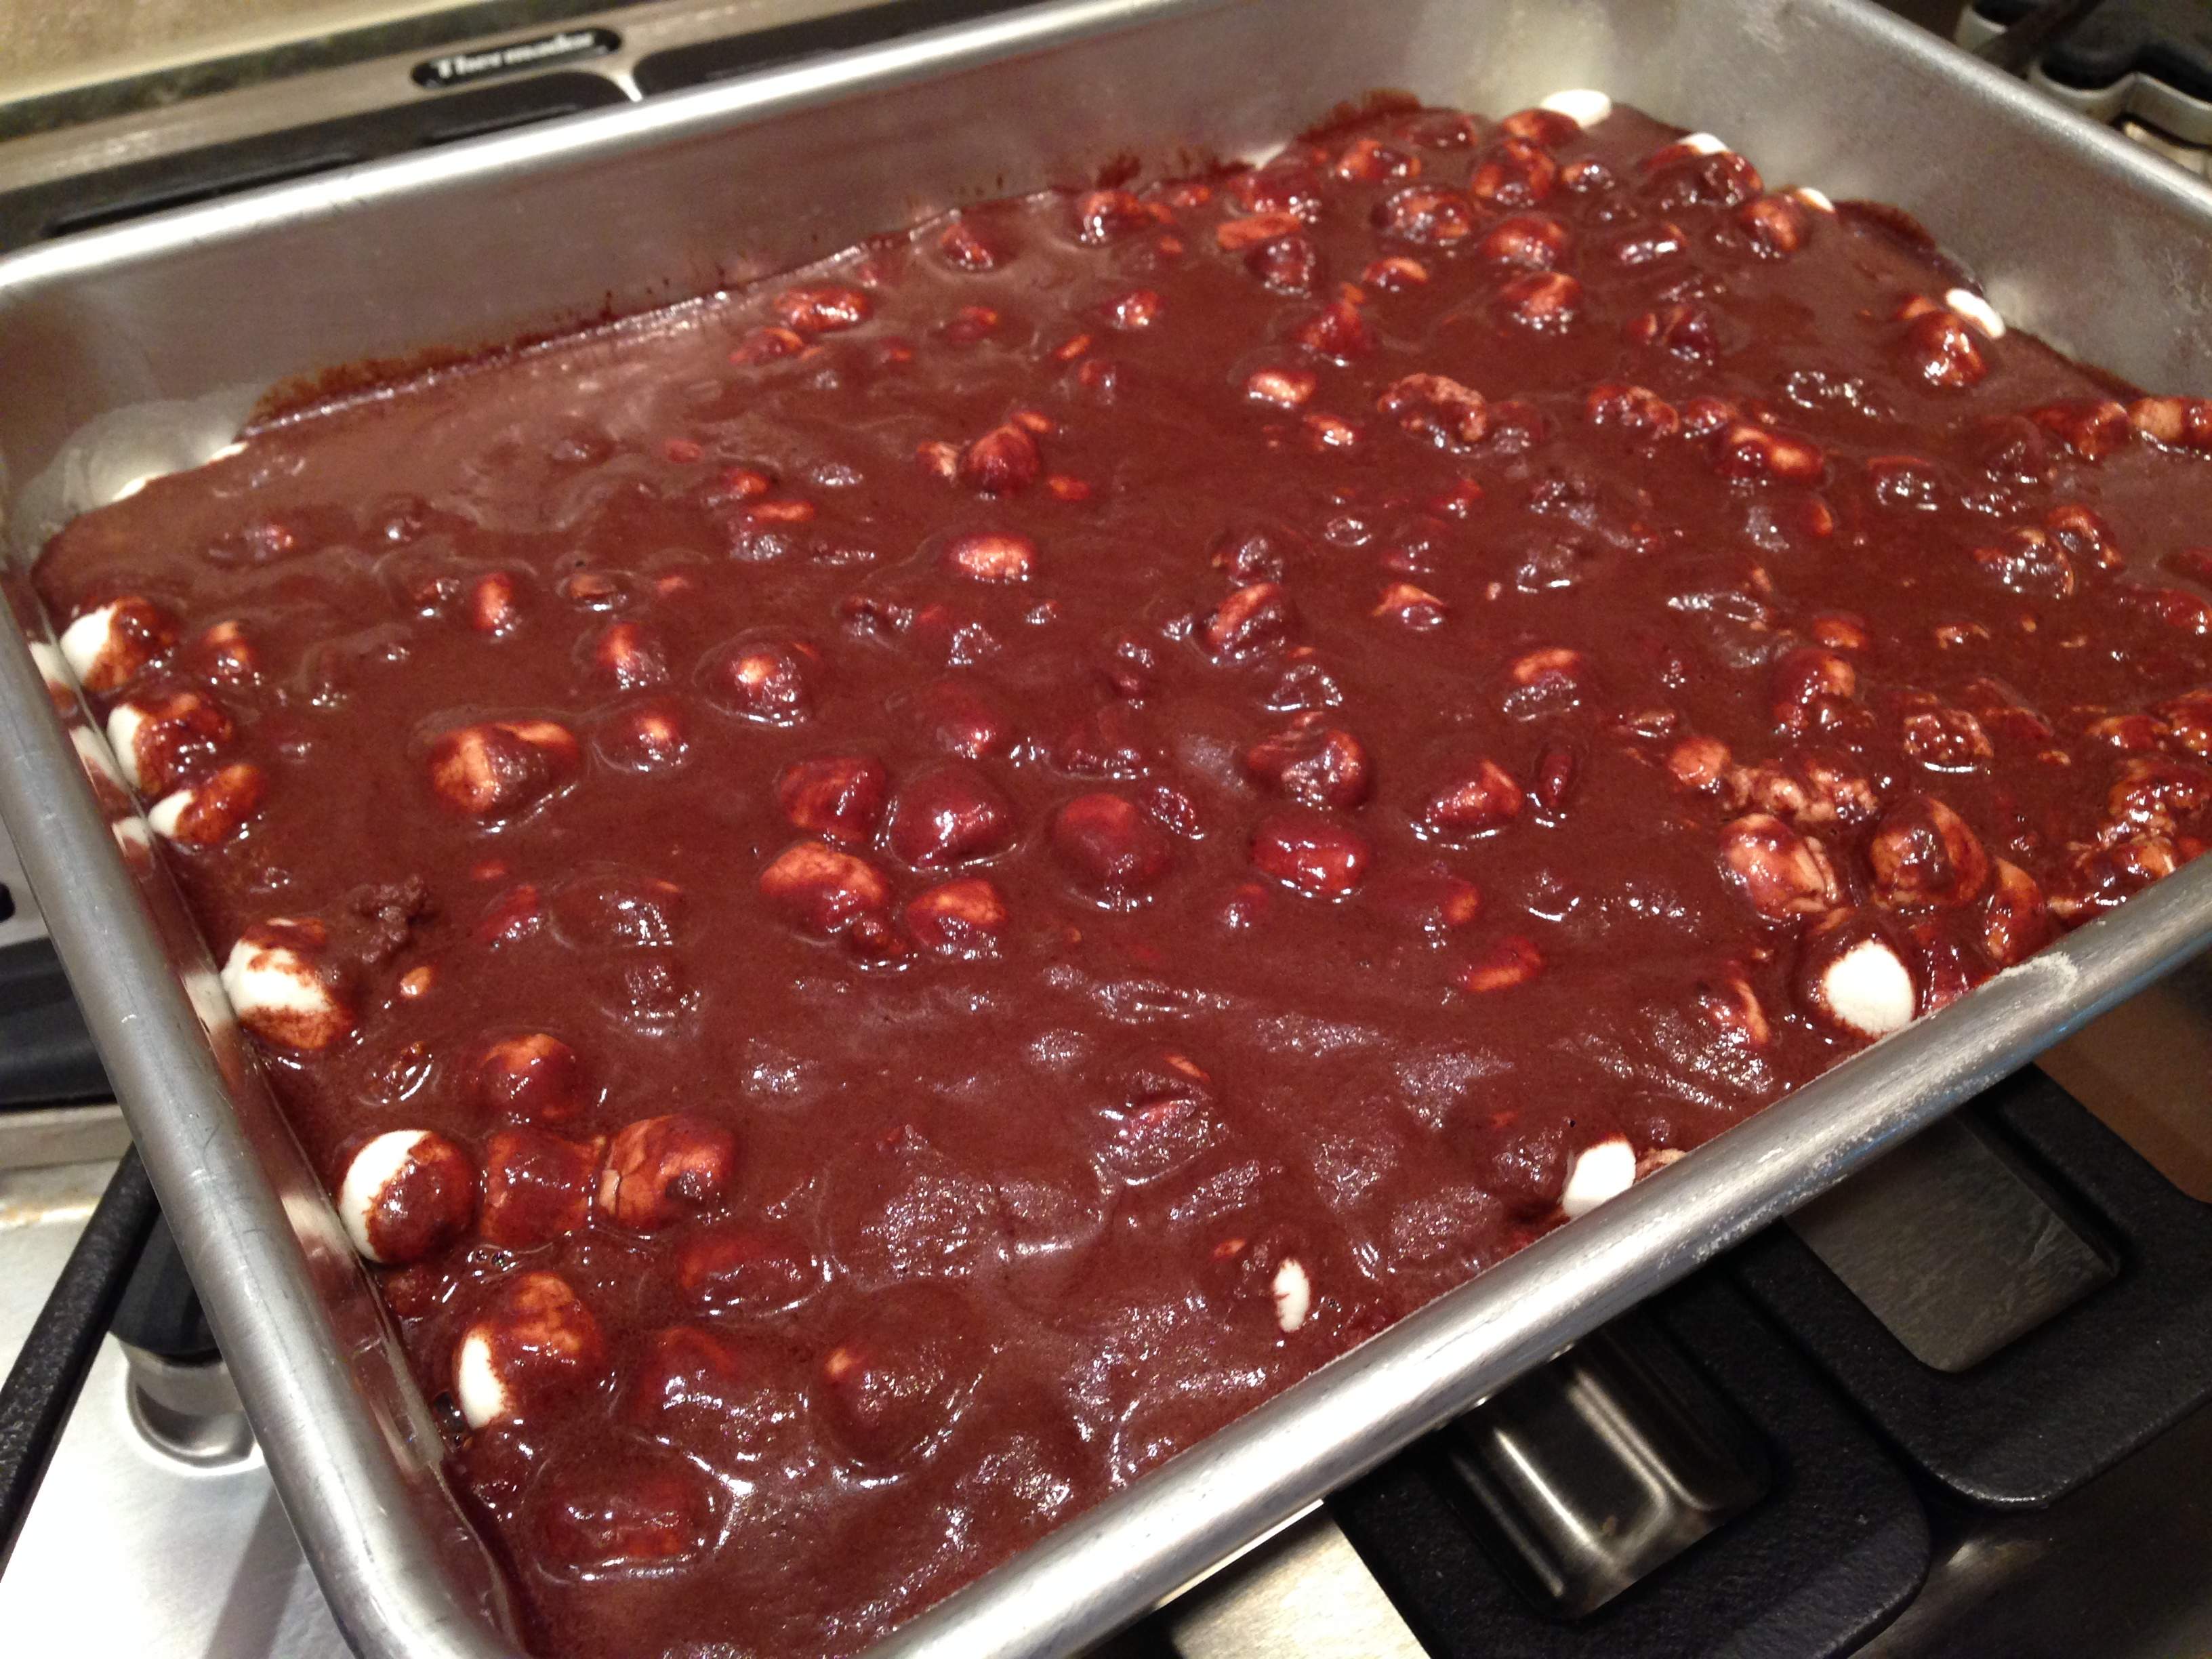
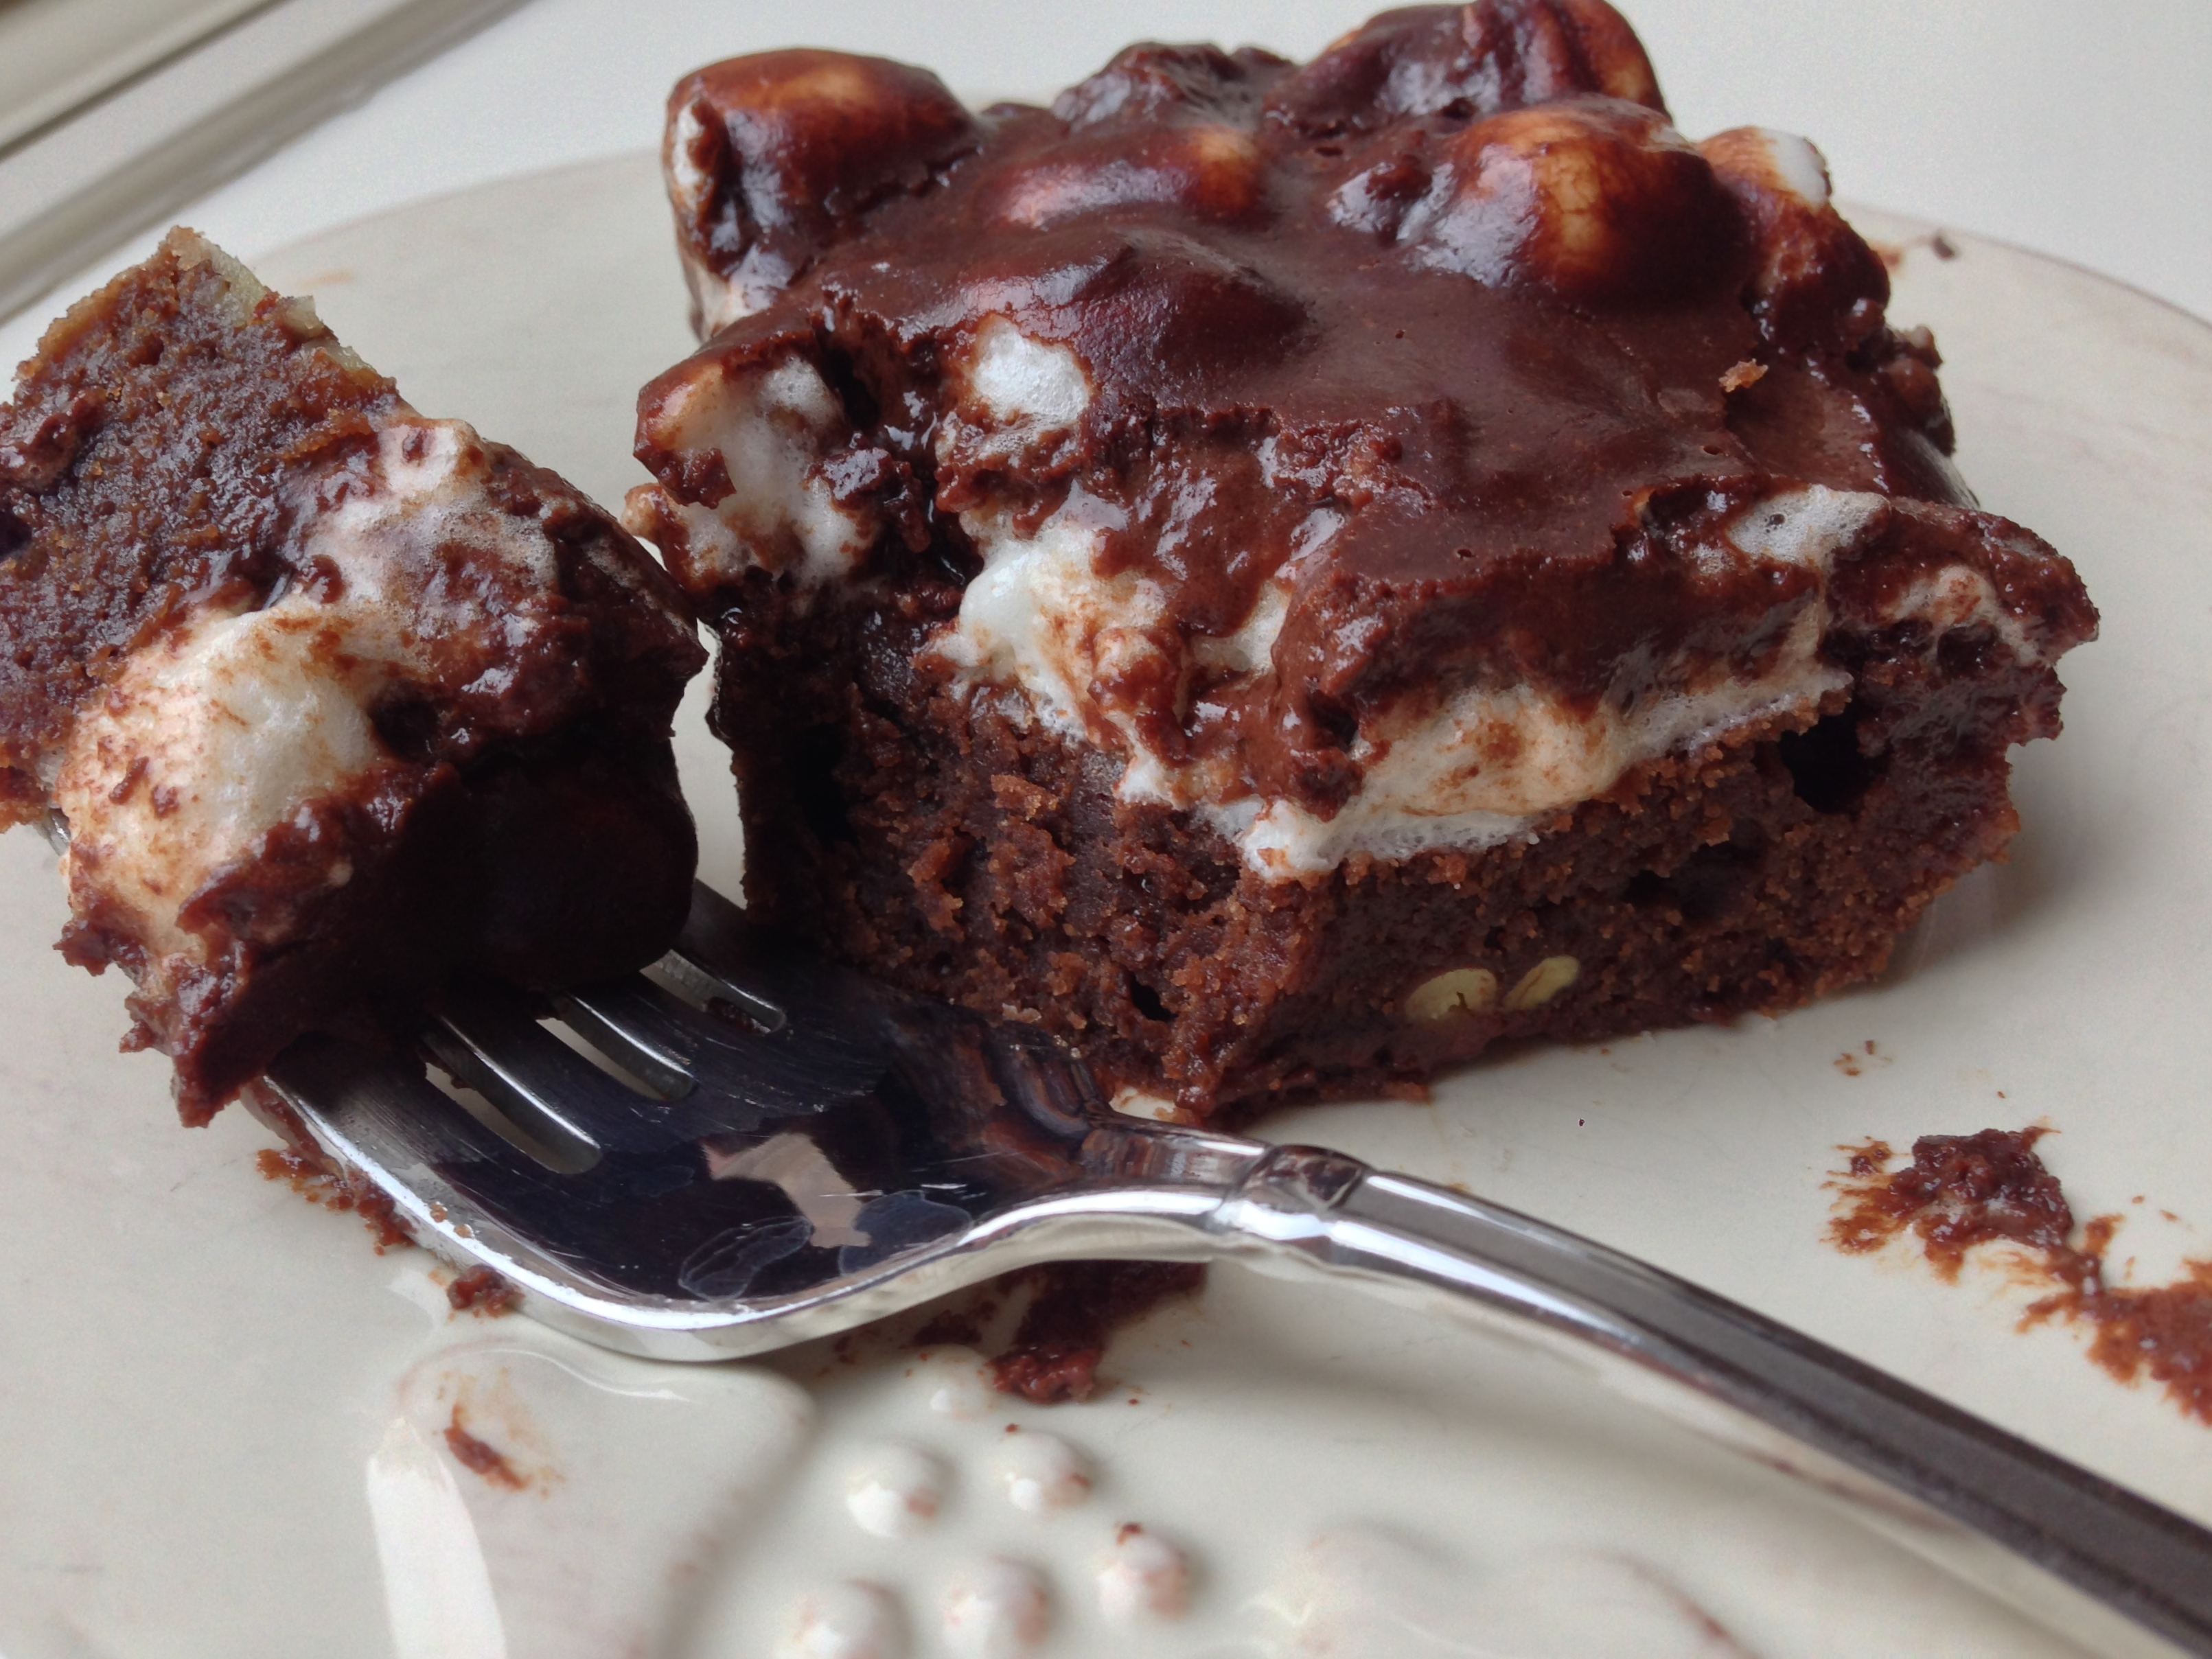
Expecting this cake to taste like Mrs. Kelm’s Chocolate Cake or Mississippi Mud Cake made my first bite a little disappointing. It’s kind of like when you think you are about to take a sip of regular water and come to find out it’s actually sparkling water….you’re in for a shocker! It’s not because you don’t like sparkling water, it’s just you weren’t expecting it.
Well, the same is true for this cake. Unlike the milk chocolatey flavors you get from Mrs. Kelm’s or the Mississippi Mud cake I’ve made in the past, this Rocky Road Cake yields a much darker flavor chocolate. If you look at the ingredients, there is unsweetened cocoa in the cake and frosting, and only 1/3 cup confectioners’ sugar in the frosting. Mrs. Kelm’s by comparison, has a WHOLE pound of confectioners’ sugar! 🙂
With that said, while this cake is not an overly sweet cake, the marshmallows, pecans and unsweetened chocolate make for a delicious rocky road treat. It’s a great make ahead cake for potlucks, tailgating or birthdays. Plus, how much more gorgeous can a cake get?
Enjoy!
Rocky Road Cake
Prep time:
Cook time:
Total time:
Serves: 10-12
Adapted from: Sara Foster’s Southern Kitchen
Ingredients
CAKE
1 1/2 cups sugar
1 1/2 cups all-purpose flour
pinch of kosher salt
1/2 pound (2 sticks) unsalted butter, cut into chunks
1/2 cup unsweetened cocoa
4 large eggs, beaten
1 Tbsp. pure vanilla extract
1 cup chopped pecans
FROSTING
1/2 cup unsweetened cocoa
1/3 cup confectioners’ sugar, sifted
12 Tbsp. (1 1/2 sticks) unsalted butter, melted
1/2 cup milk
2 tsp. pure vanilla extract
3 cups mini marshmallows
1 cup chopped pecans, lightly toasted
Instructions
CAKE: Preheat oven to 350 degrees F. Lightly grease and flour an 11×7-inch pan.
Combine the sugar, flour, and salt in a large bowl and stir to mix.
Melt the butter in a small saucepan and stir in the cocoa until well blended. Remove from the heat, let cool slightly, and stir in the eggs and vanilla. Pour the butter mixture into the flour mixture and stir until well combined. Add the pecans and stir to mix.
Spoon the batter into the prepared pan and spread evenly. Bake for 25 to 30 minutes, or until a wooden skewer inserted in the center comes out clean. Remove the cake from the oven, but do not turn the oven off.
FROSTING: While the cake is baking, combine the cocoa, and confectioners’ sugar in a large bowl and stir to mix. Add the melted butter, milk, and vanilla and stir until combined.
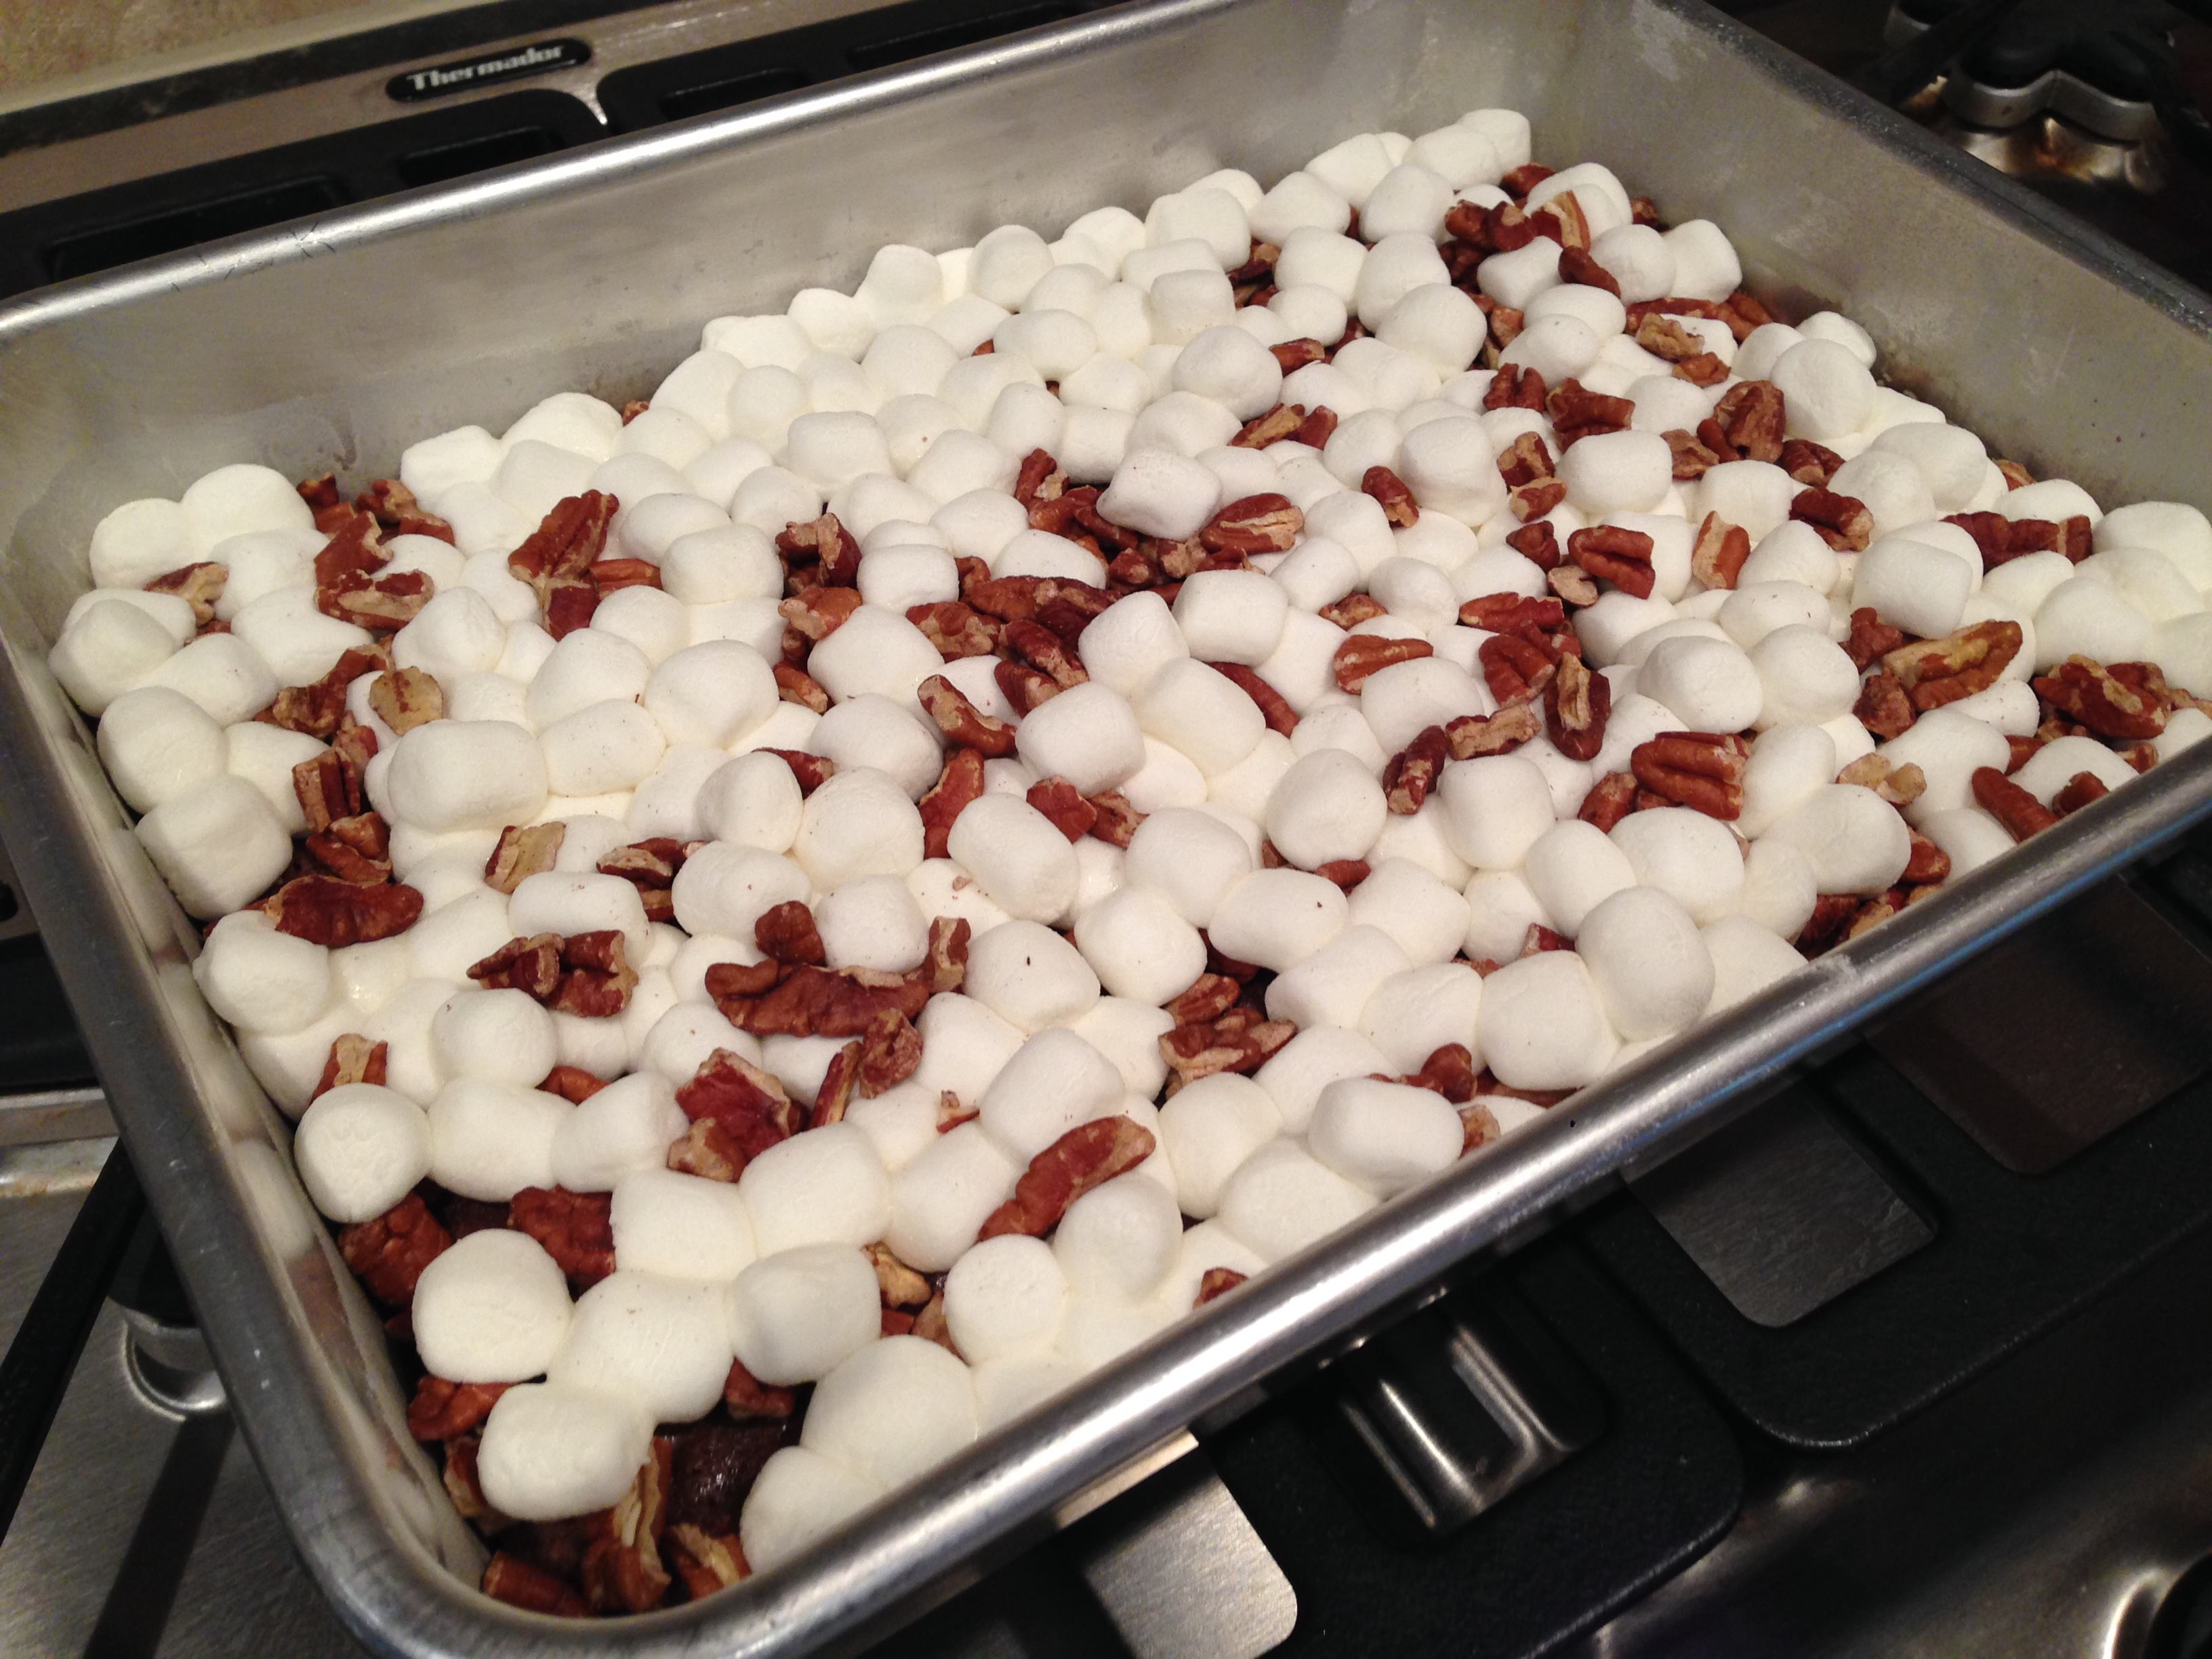
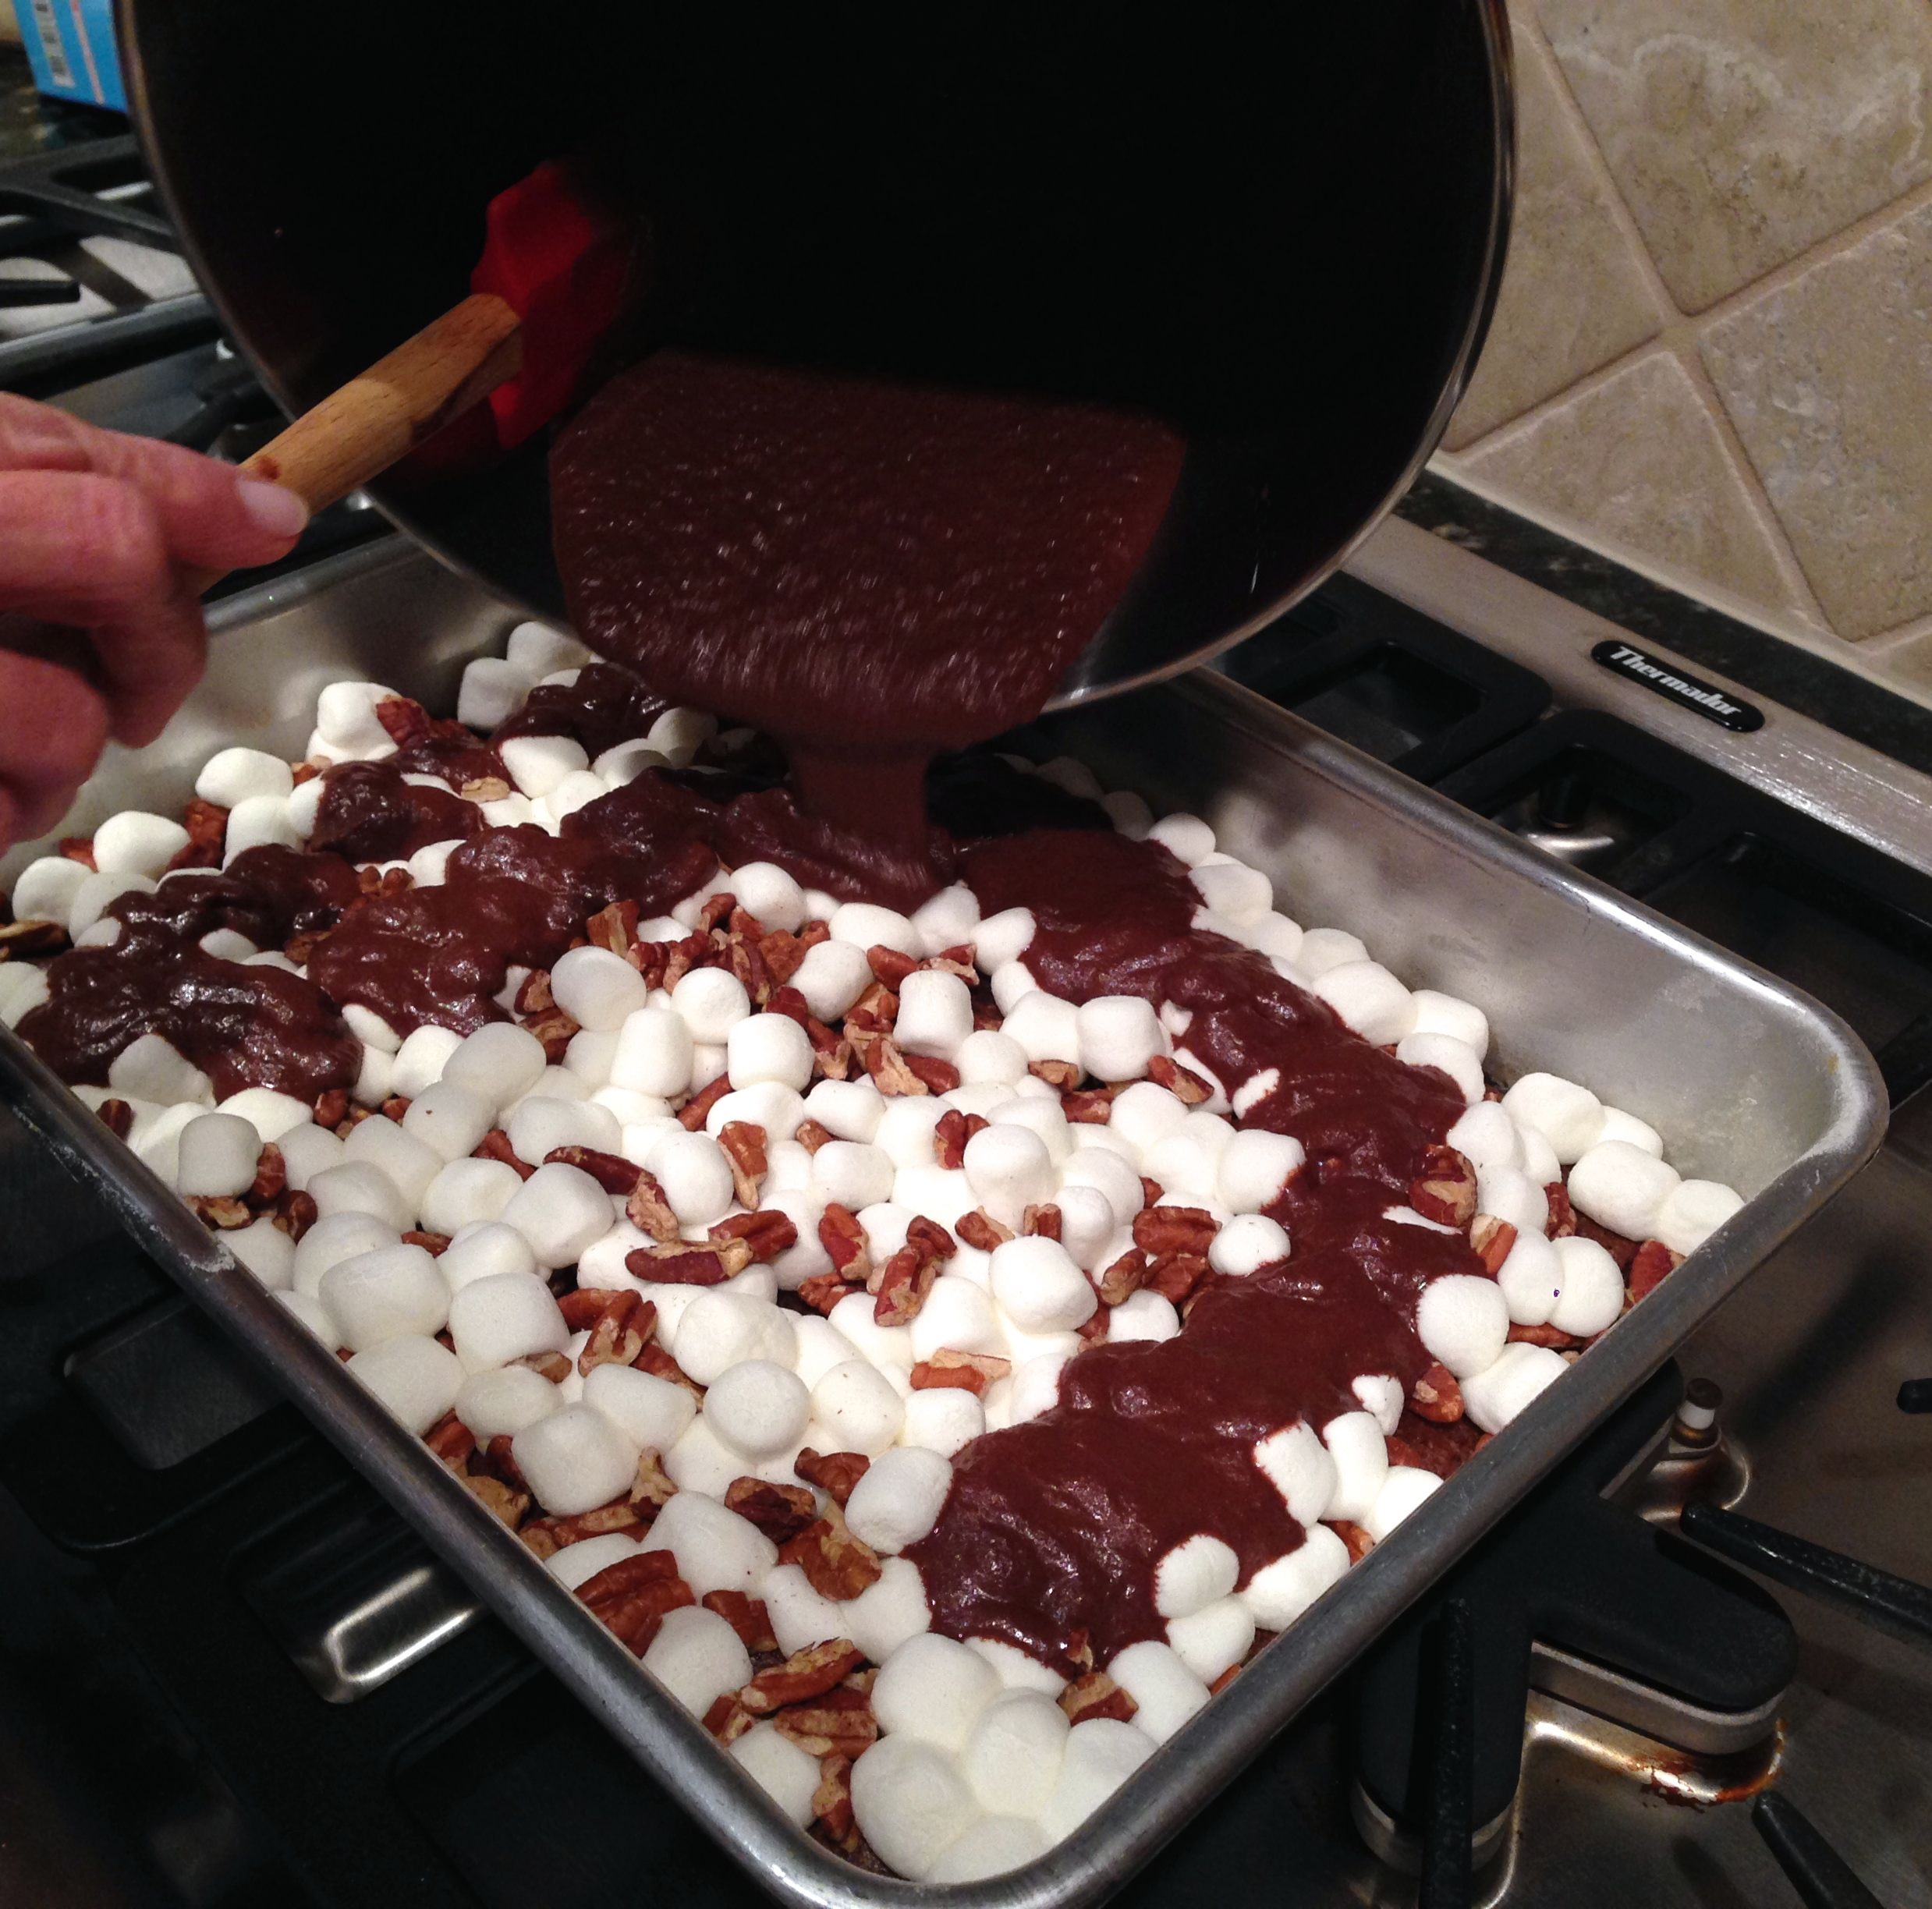
ASSEMBLY: Scatter the marshmallows and pecans over the cake and return to the oven for about 4 minutes, just until the marshmallows are softened and puffy. Remove from the oven and pour the frosting over the marshmallows and pecans to cover, while the cake is warm. Cool completely, cut into squares, and serve.
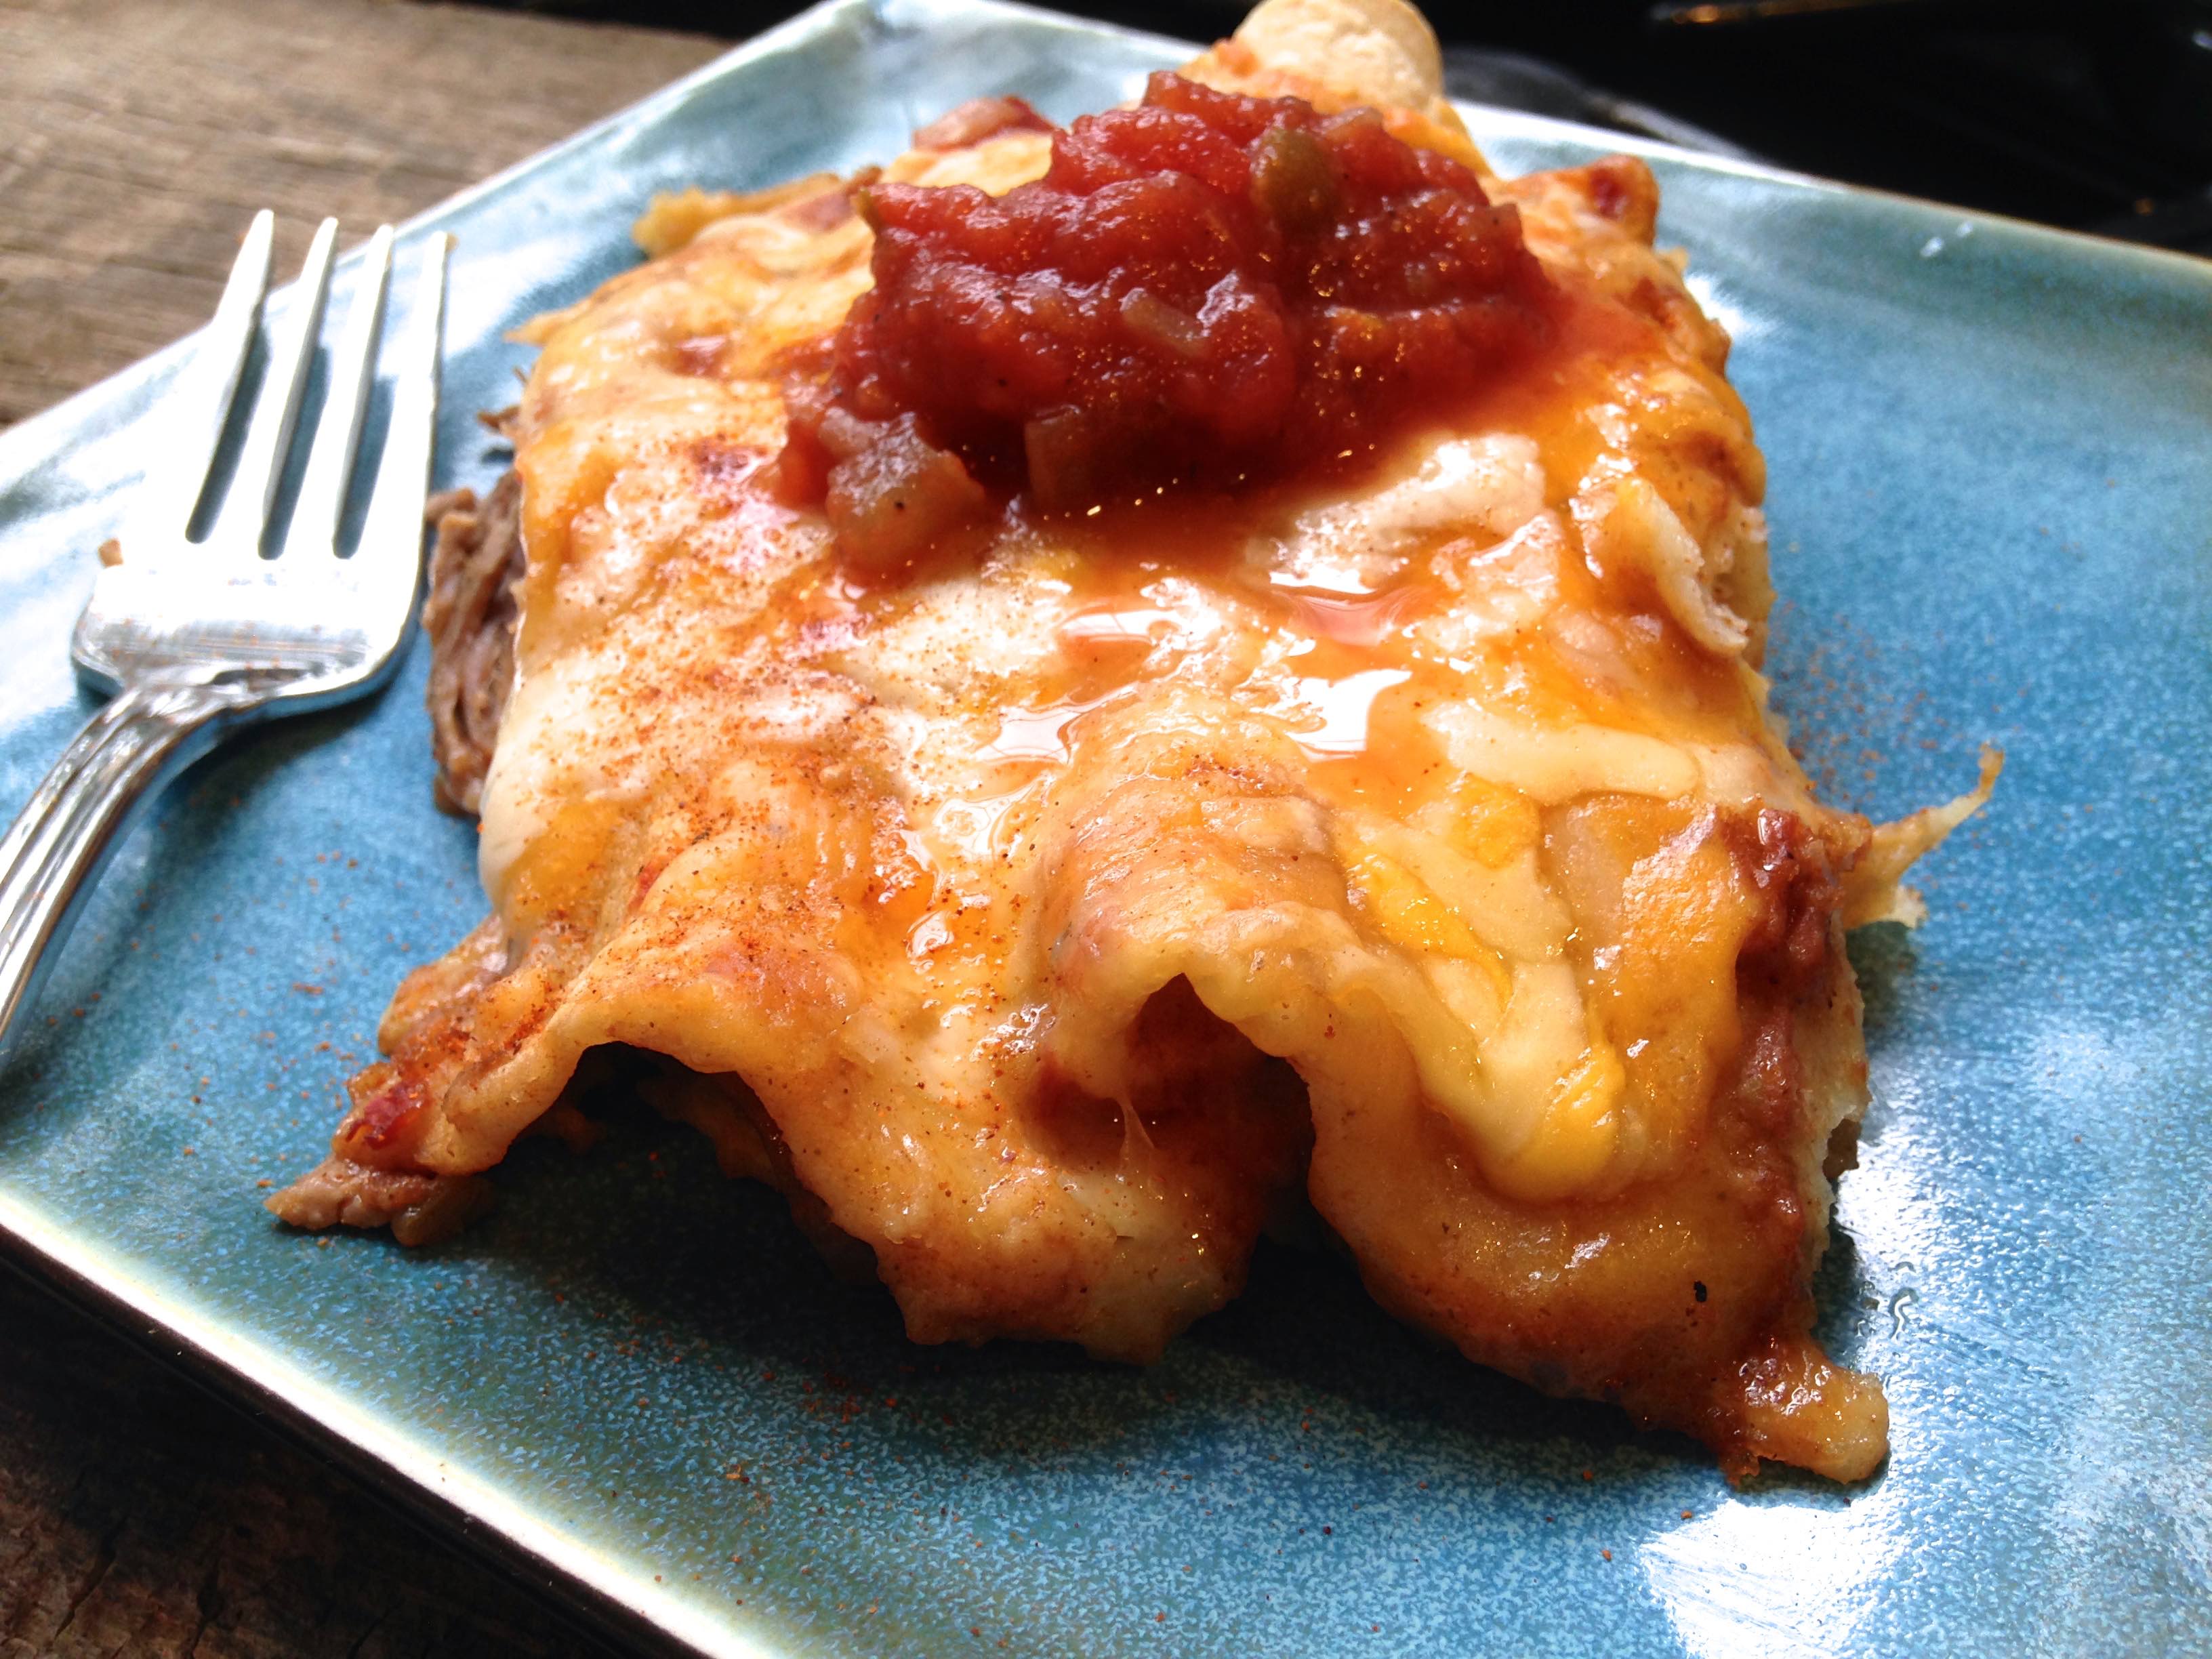
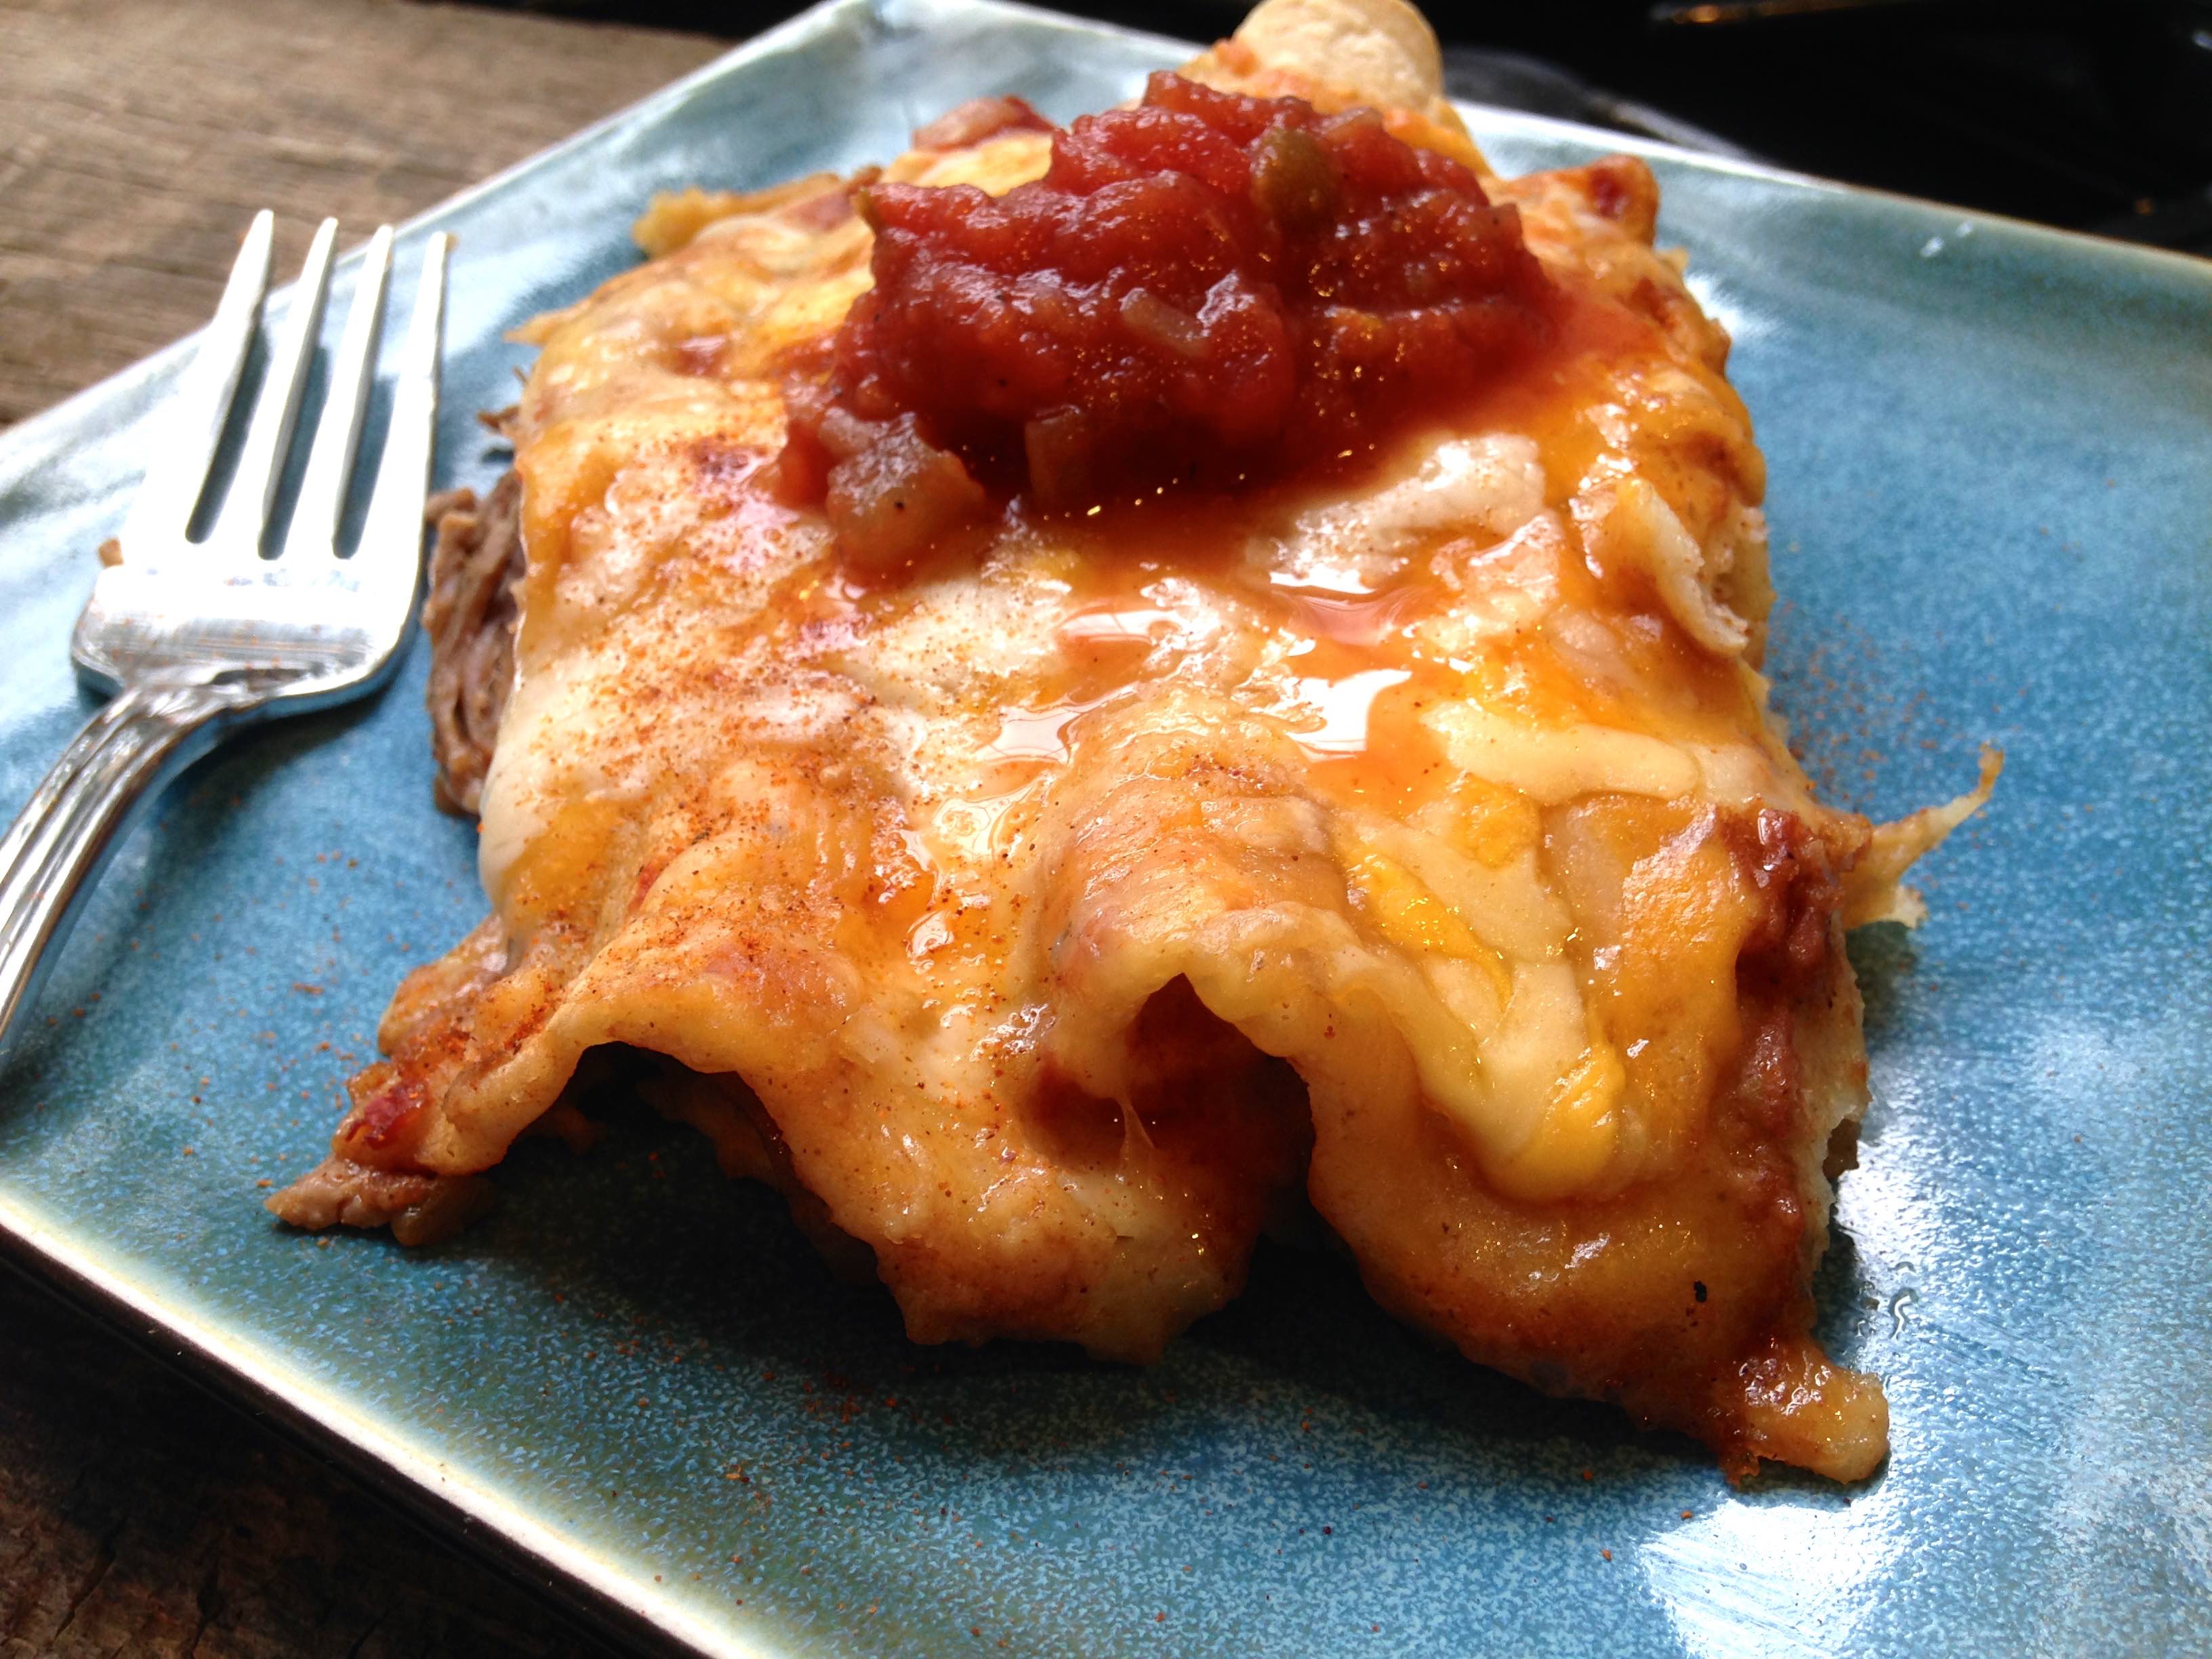
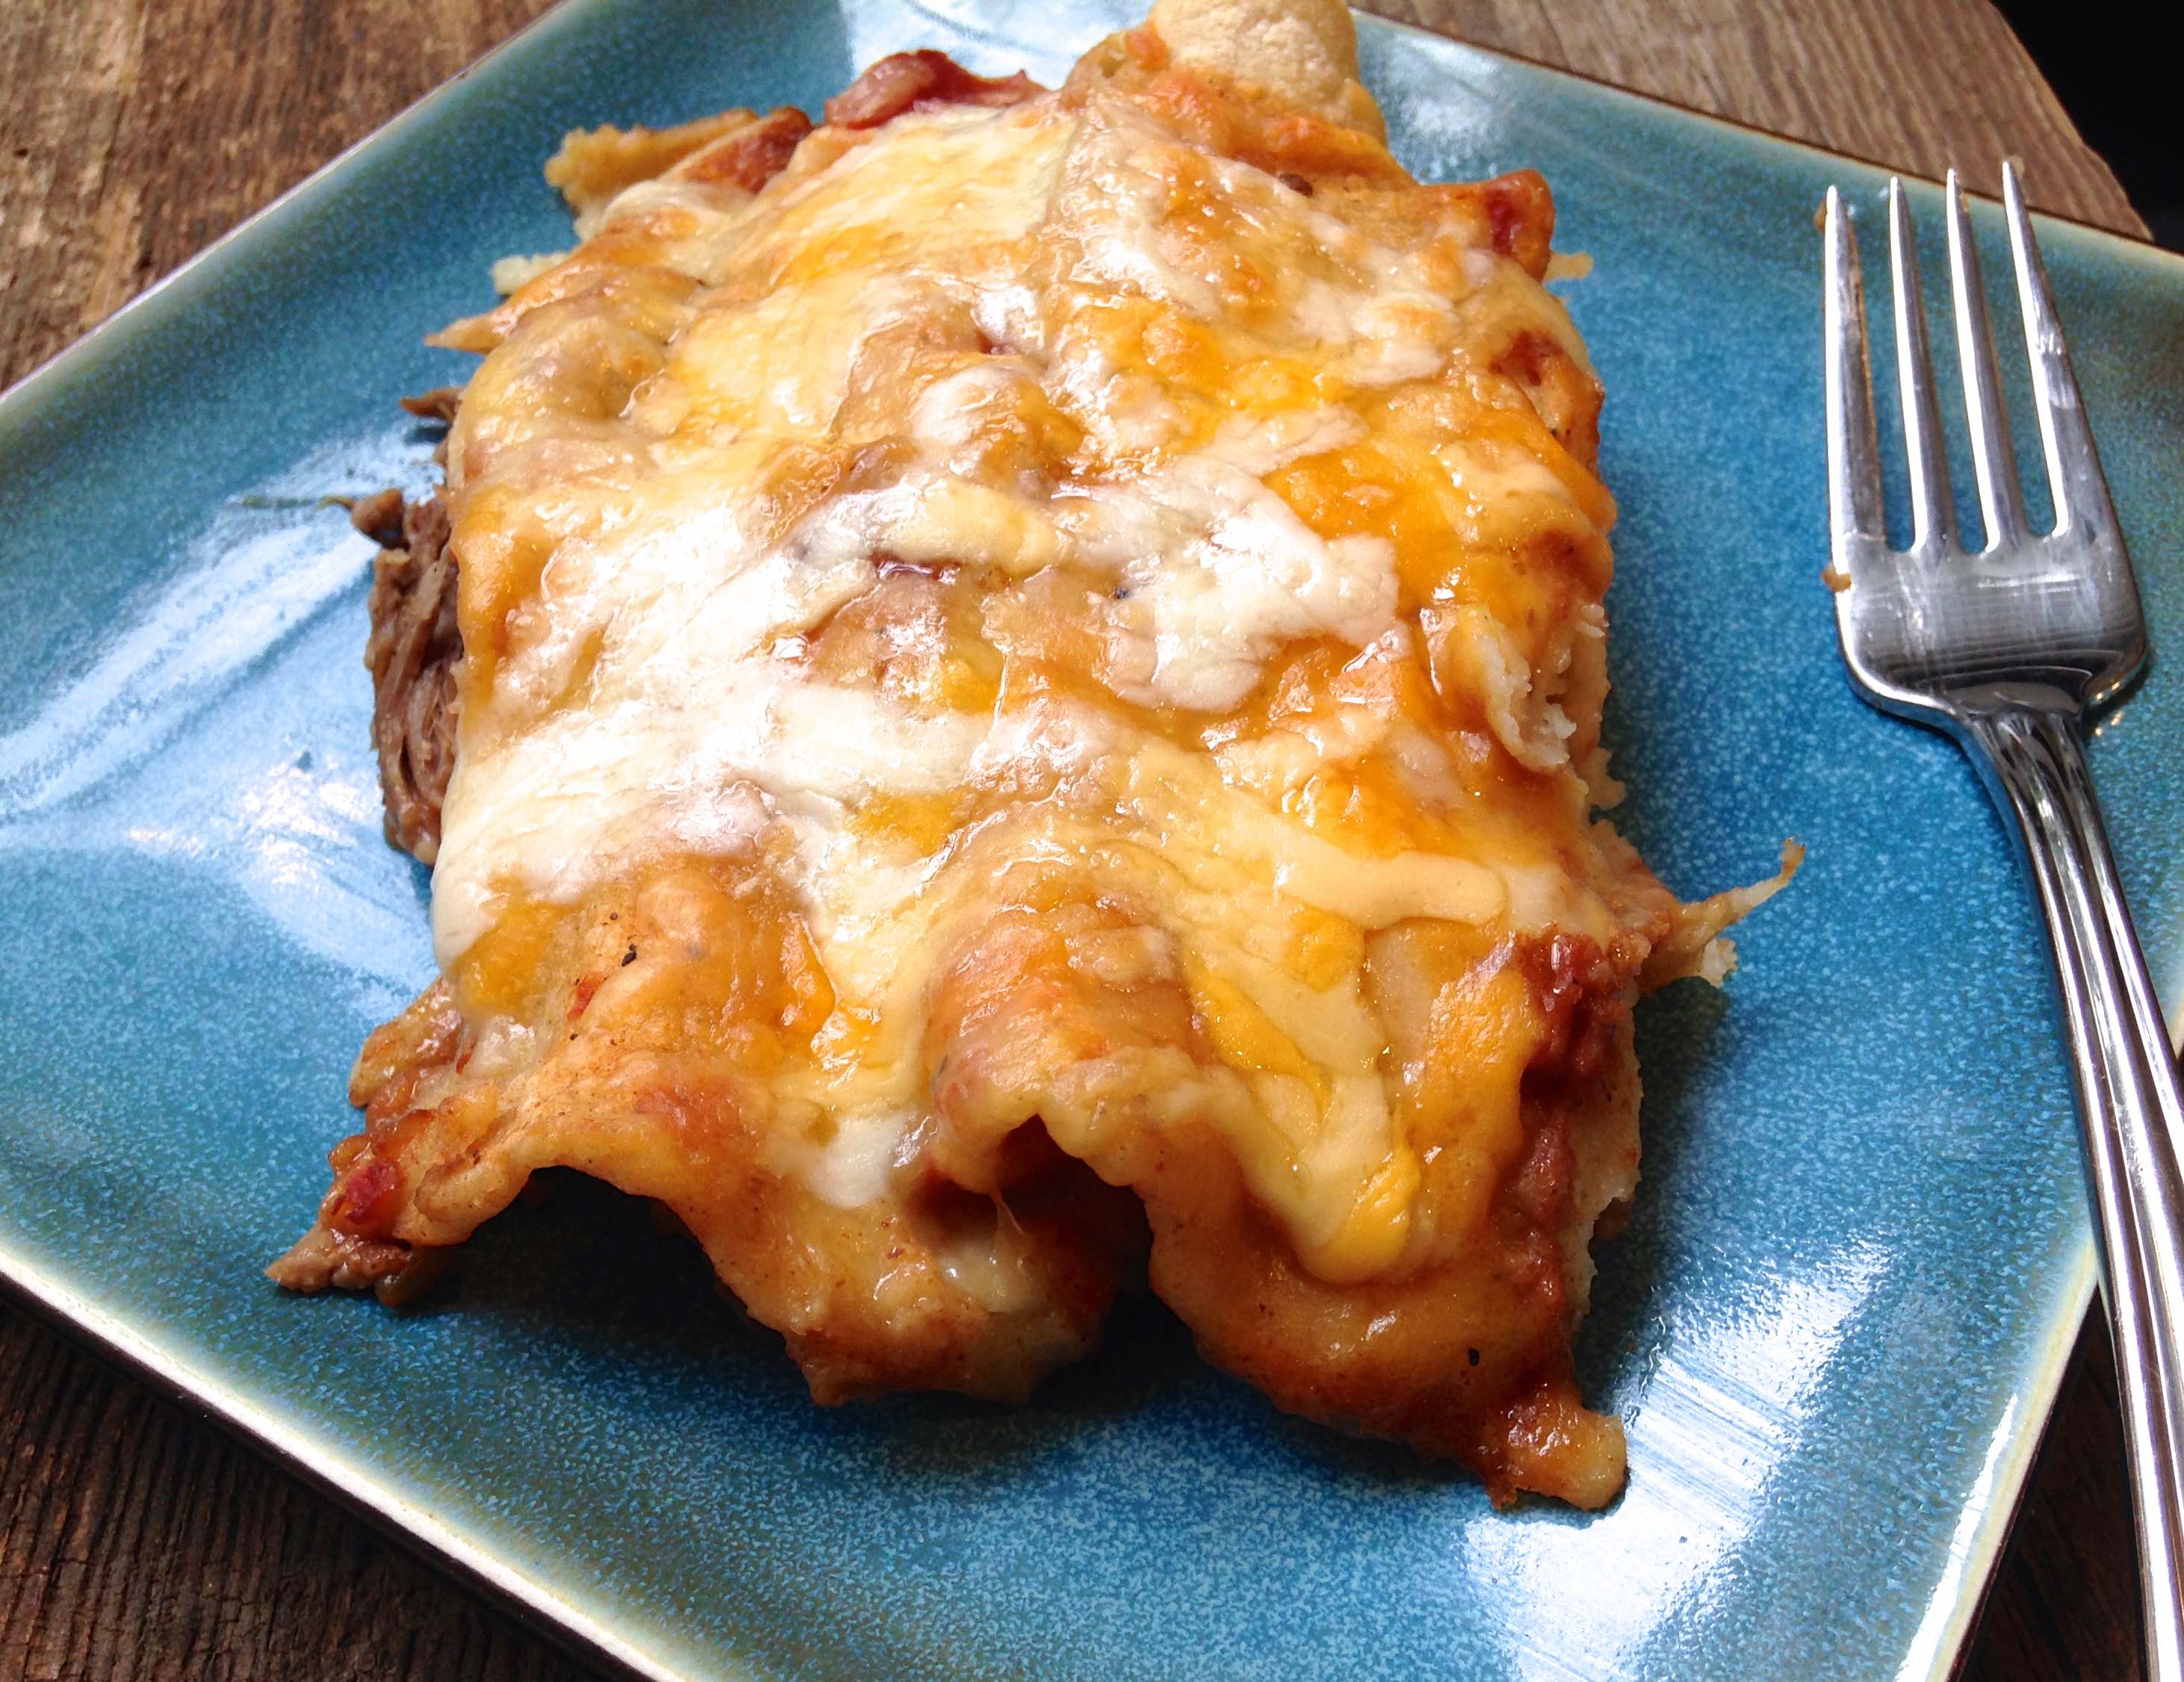
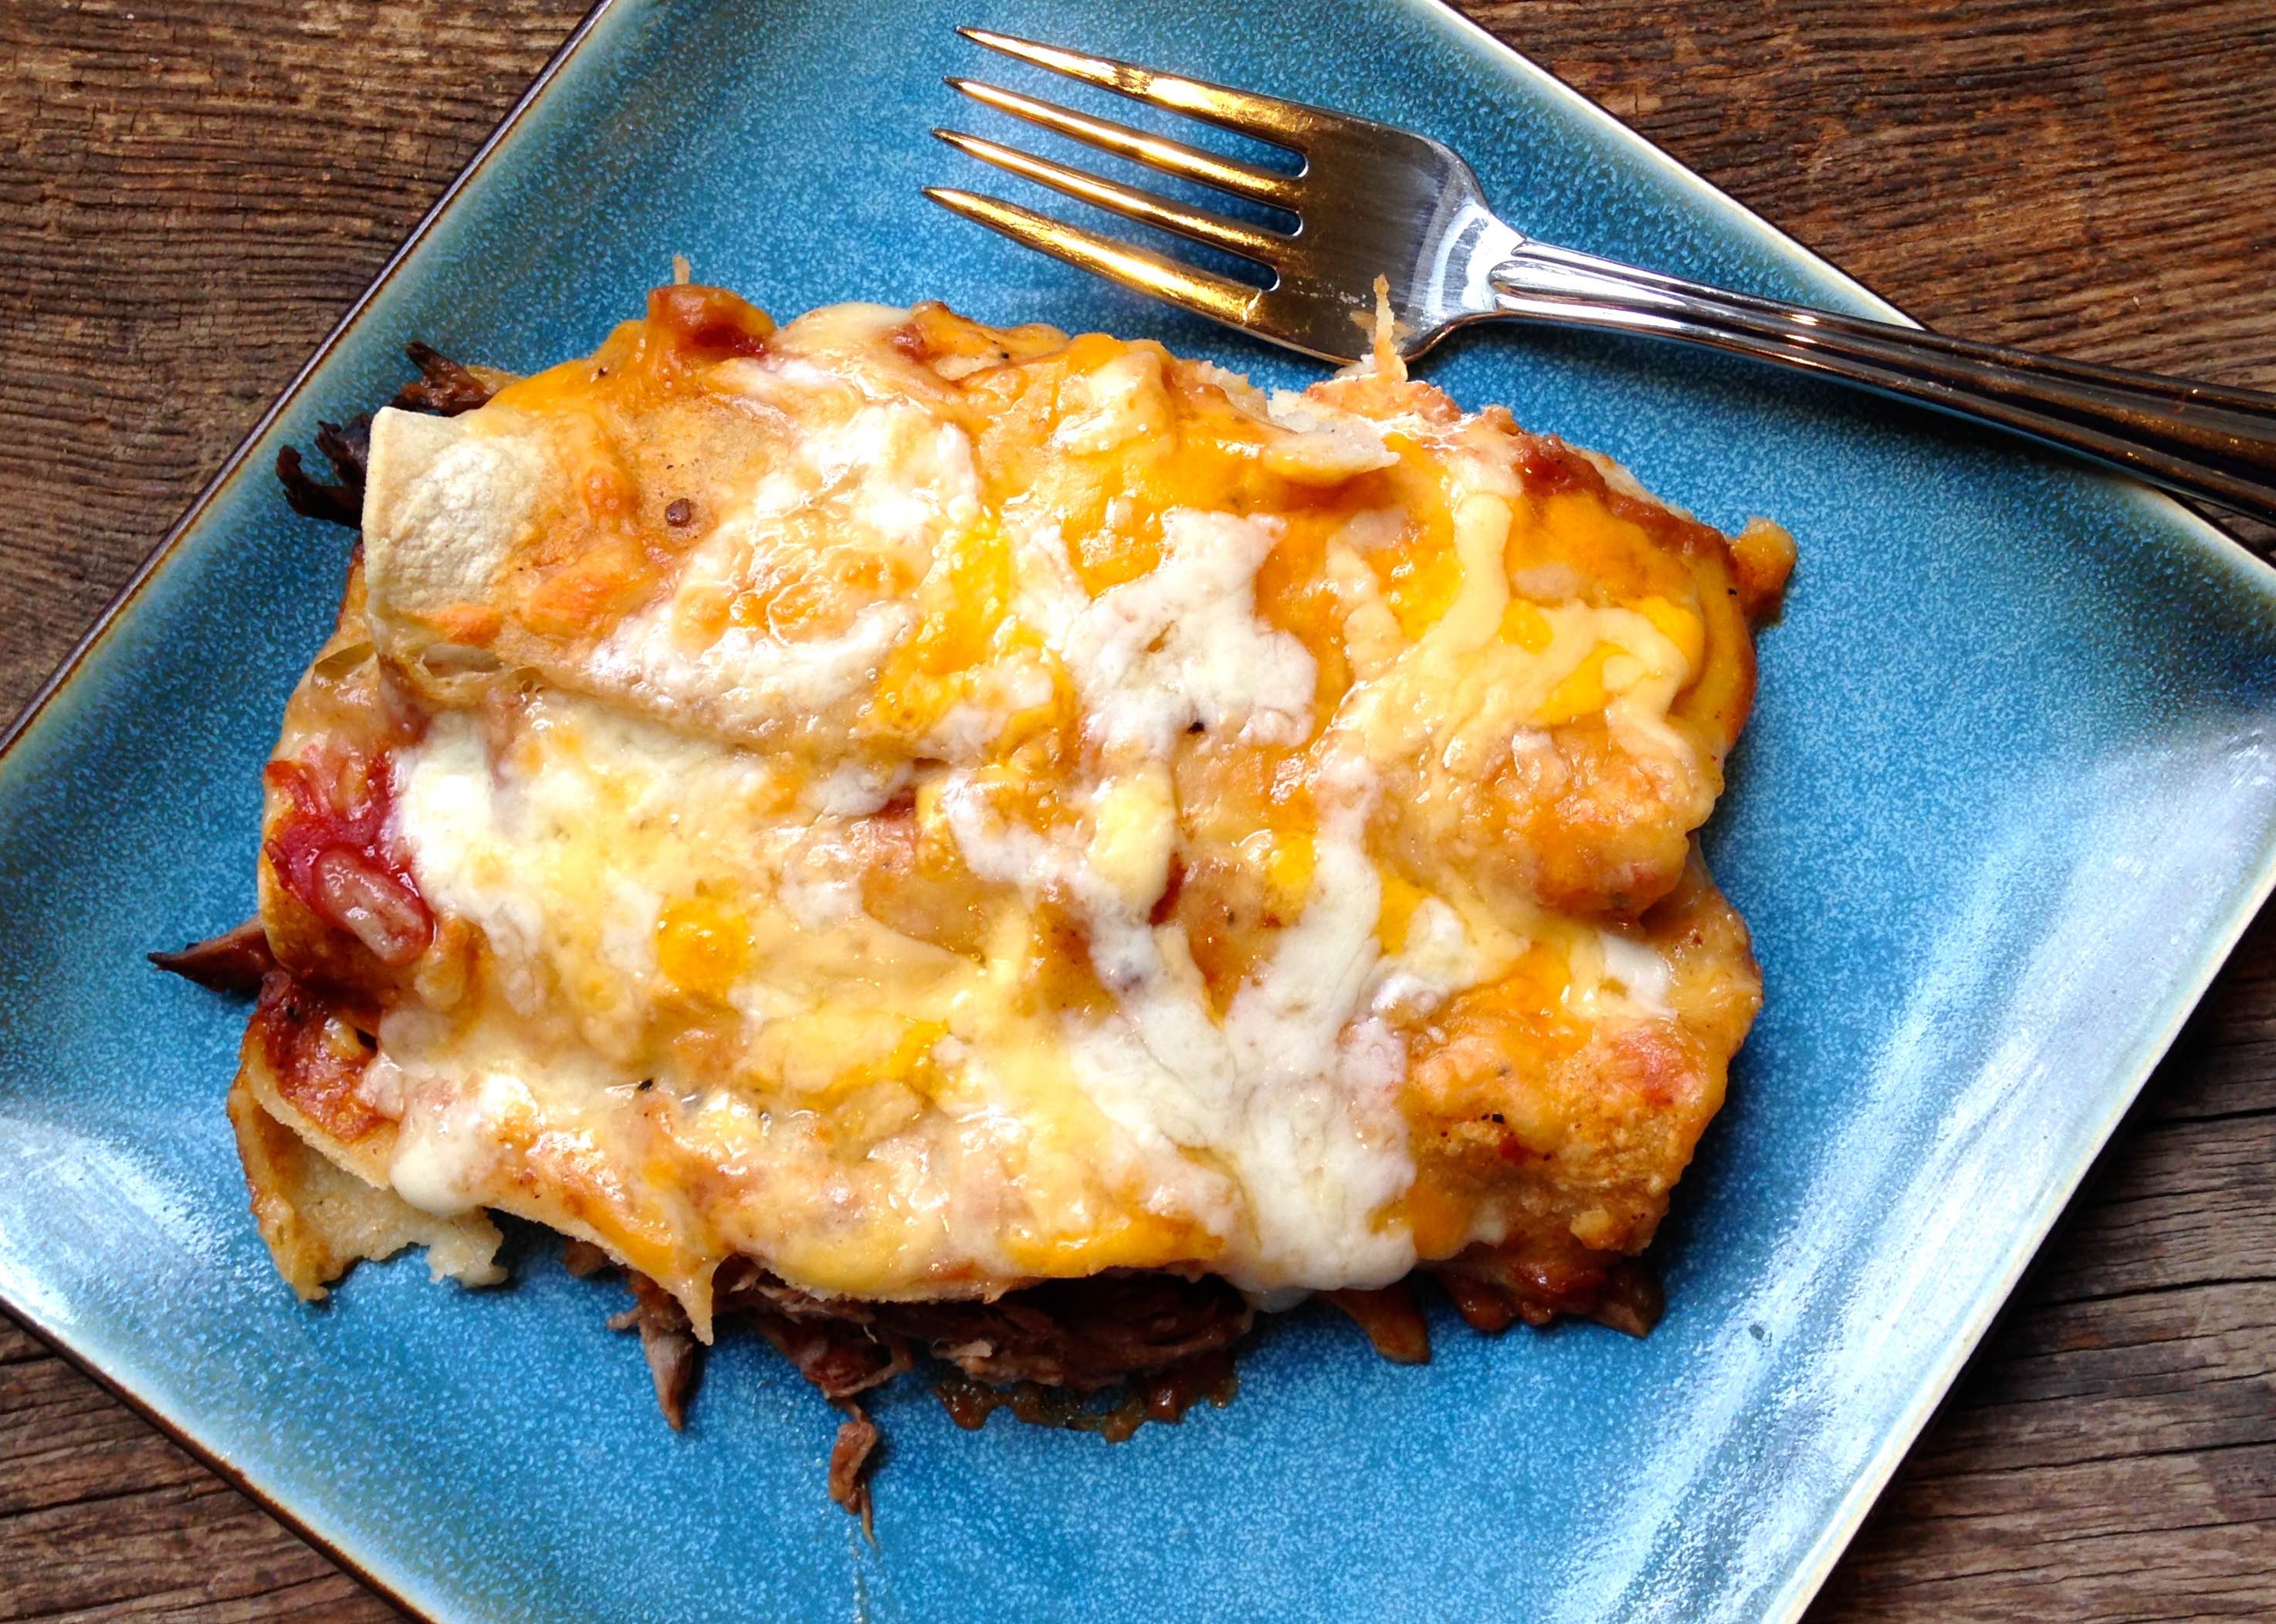
As a kid, I HATED roast! Mom would frequently make it on Monday nights, and I would just despise it. Eventually I got smart and would kill the taste by rolling the meat in a flour tortilla with some salsa.
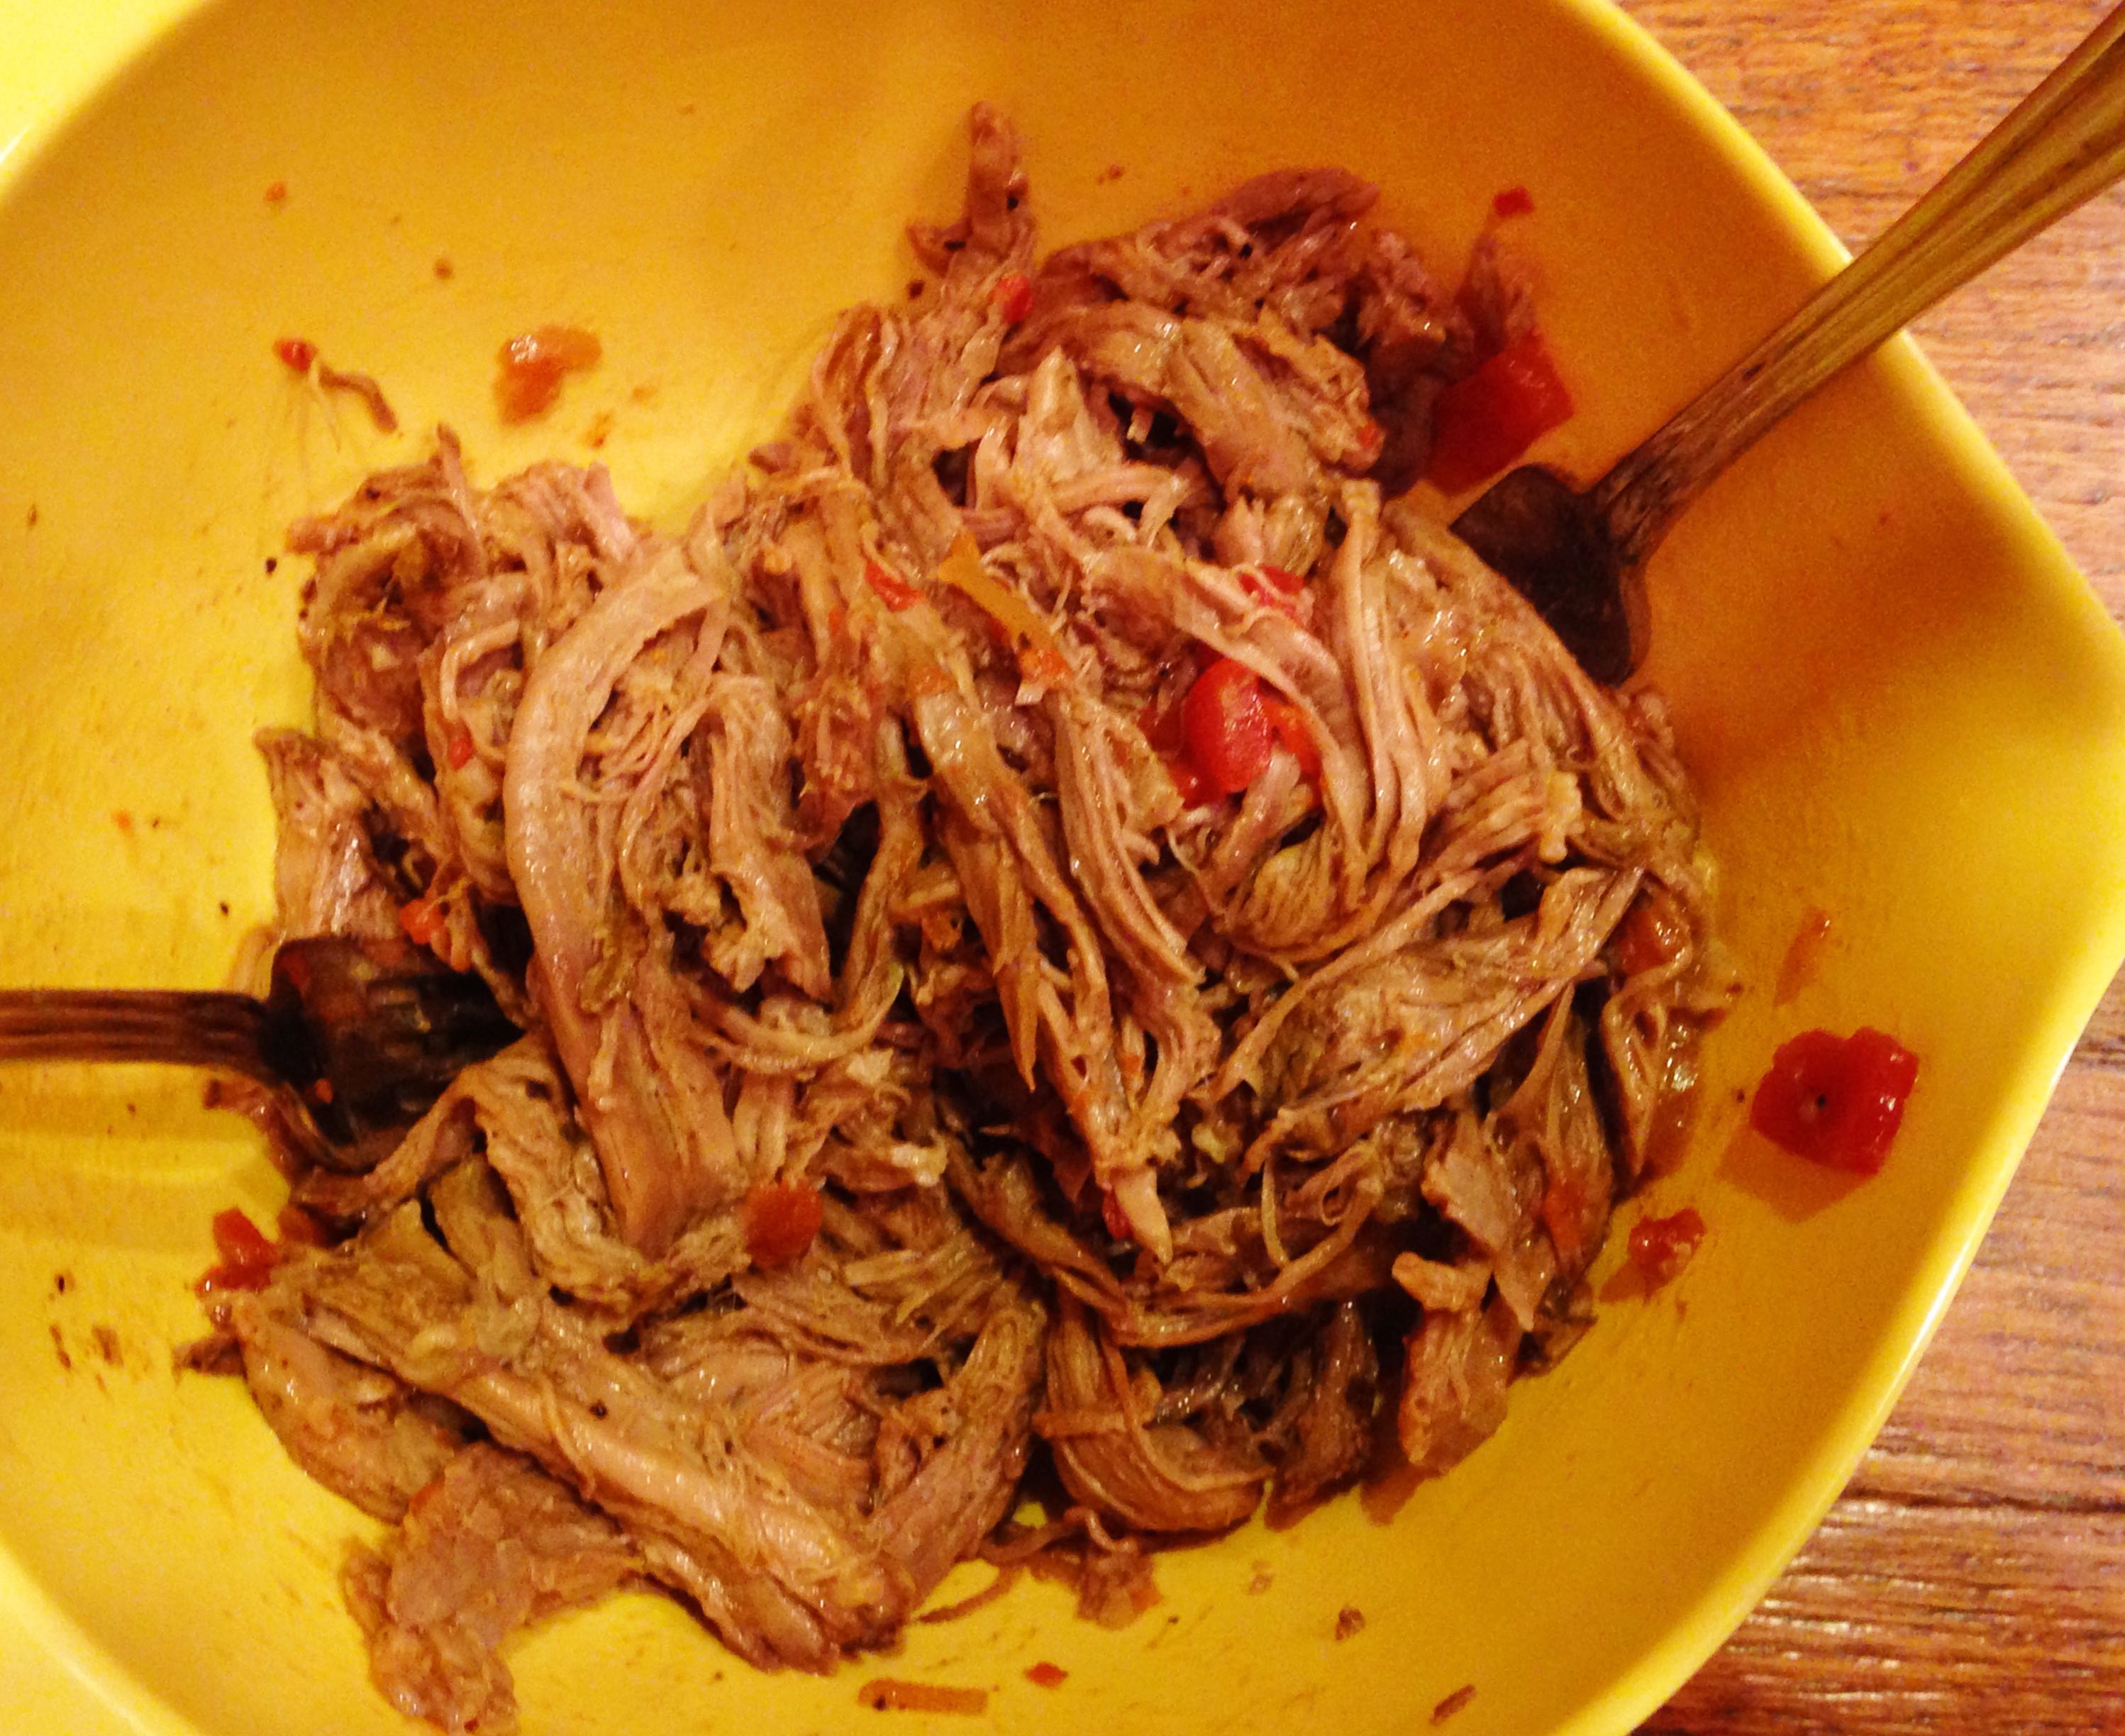
I guess that’s why these beef enchiladas are my new favorite! They remind me of how at an earlier age, I put a Mexican twist on roast. Recently I started using a slow cooker. It makes life soooo much easier when you can literally dump all your ingredients in the crock pot, and have a delicious dinner 6-8 hours later.
Since I’m obsessed with the slow cooker, I’ve been looking for recipes, and found this one via Mel’s Kitchen Cafe. The slow cooker does all the work and makes the beef roast tender and juicy. To my enjoyment, there is a cup of salsa, and a bunch of spices like cumin, chili powder, onion powder, and garlic powder added to the roast to make one delicious sauce.
Once the roast is done about 8-10 hours later, you shred it, and roll it in corn tortillas with a little cheese, and bake with more cheese and more sauce. Just like I did as a kid! LOL. 🙂
In a 4- or 5-quart slow cooker, add beef roast. Whisk together the broth, vinegar, salsa, cumin, chili powder, onion powder, garlic powder, salt and pepper. Pour over the roast, cover the slow cooker, and cook on low for 8-10 hours until the beef is tender and shreds easily.
Remove the roast from the slow cooker and place in a large bowl.
Pour the mixture from the slow cooker into a saucepan and bring to a simmer. In a small bowl, whisk together the flour with about 3 tablespoons of water. Whisk the slurry into the simmering liquid and cook, stirring constantly, until the mixture is thickened slightly, 4-5 minutes.
Pour about 1/2 cup sauce in with the beef and toss. Spread another 1/2 cup sauce on the bottom of a 9×13-inch pan. Toss the cheese together.
Fill each tortilla with some of the beef mixture and a sprinkle of cheese. Roll up and place in the pan.
Pour the remaining sauce over the enchiladas. Top with remaining cheese and bake at 350 degrees F for 25-30 minutes.
Let enchiladas rest for 5-10 minutes before serving. Sprinkle with fresh cilantro, salsa, or sour cream if desired.
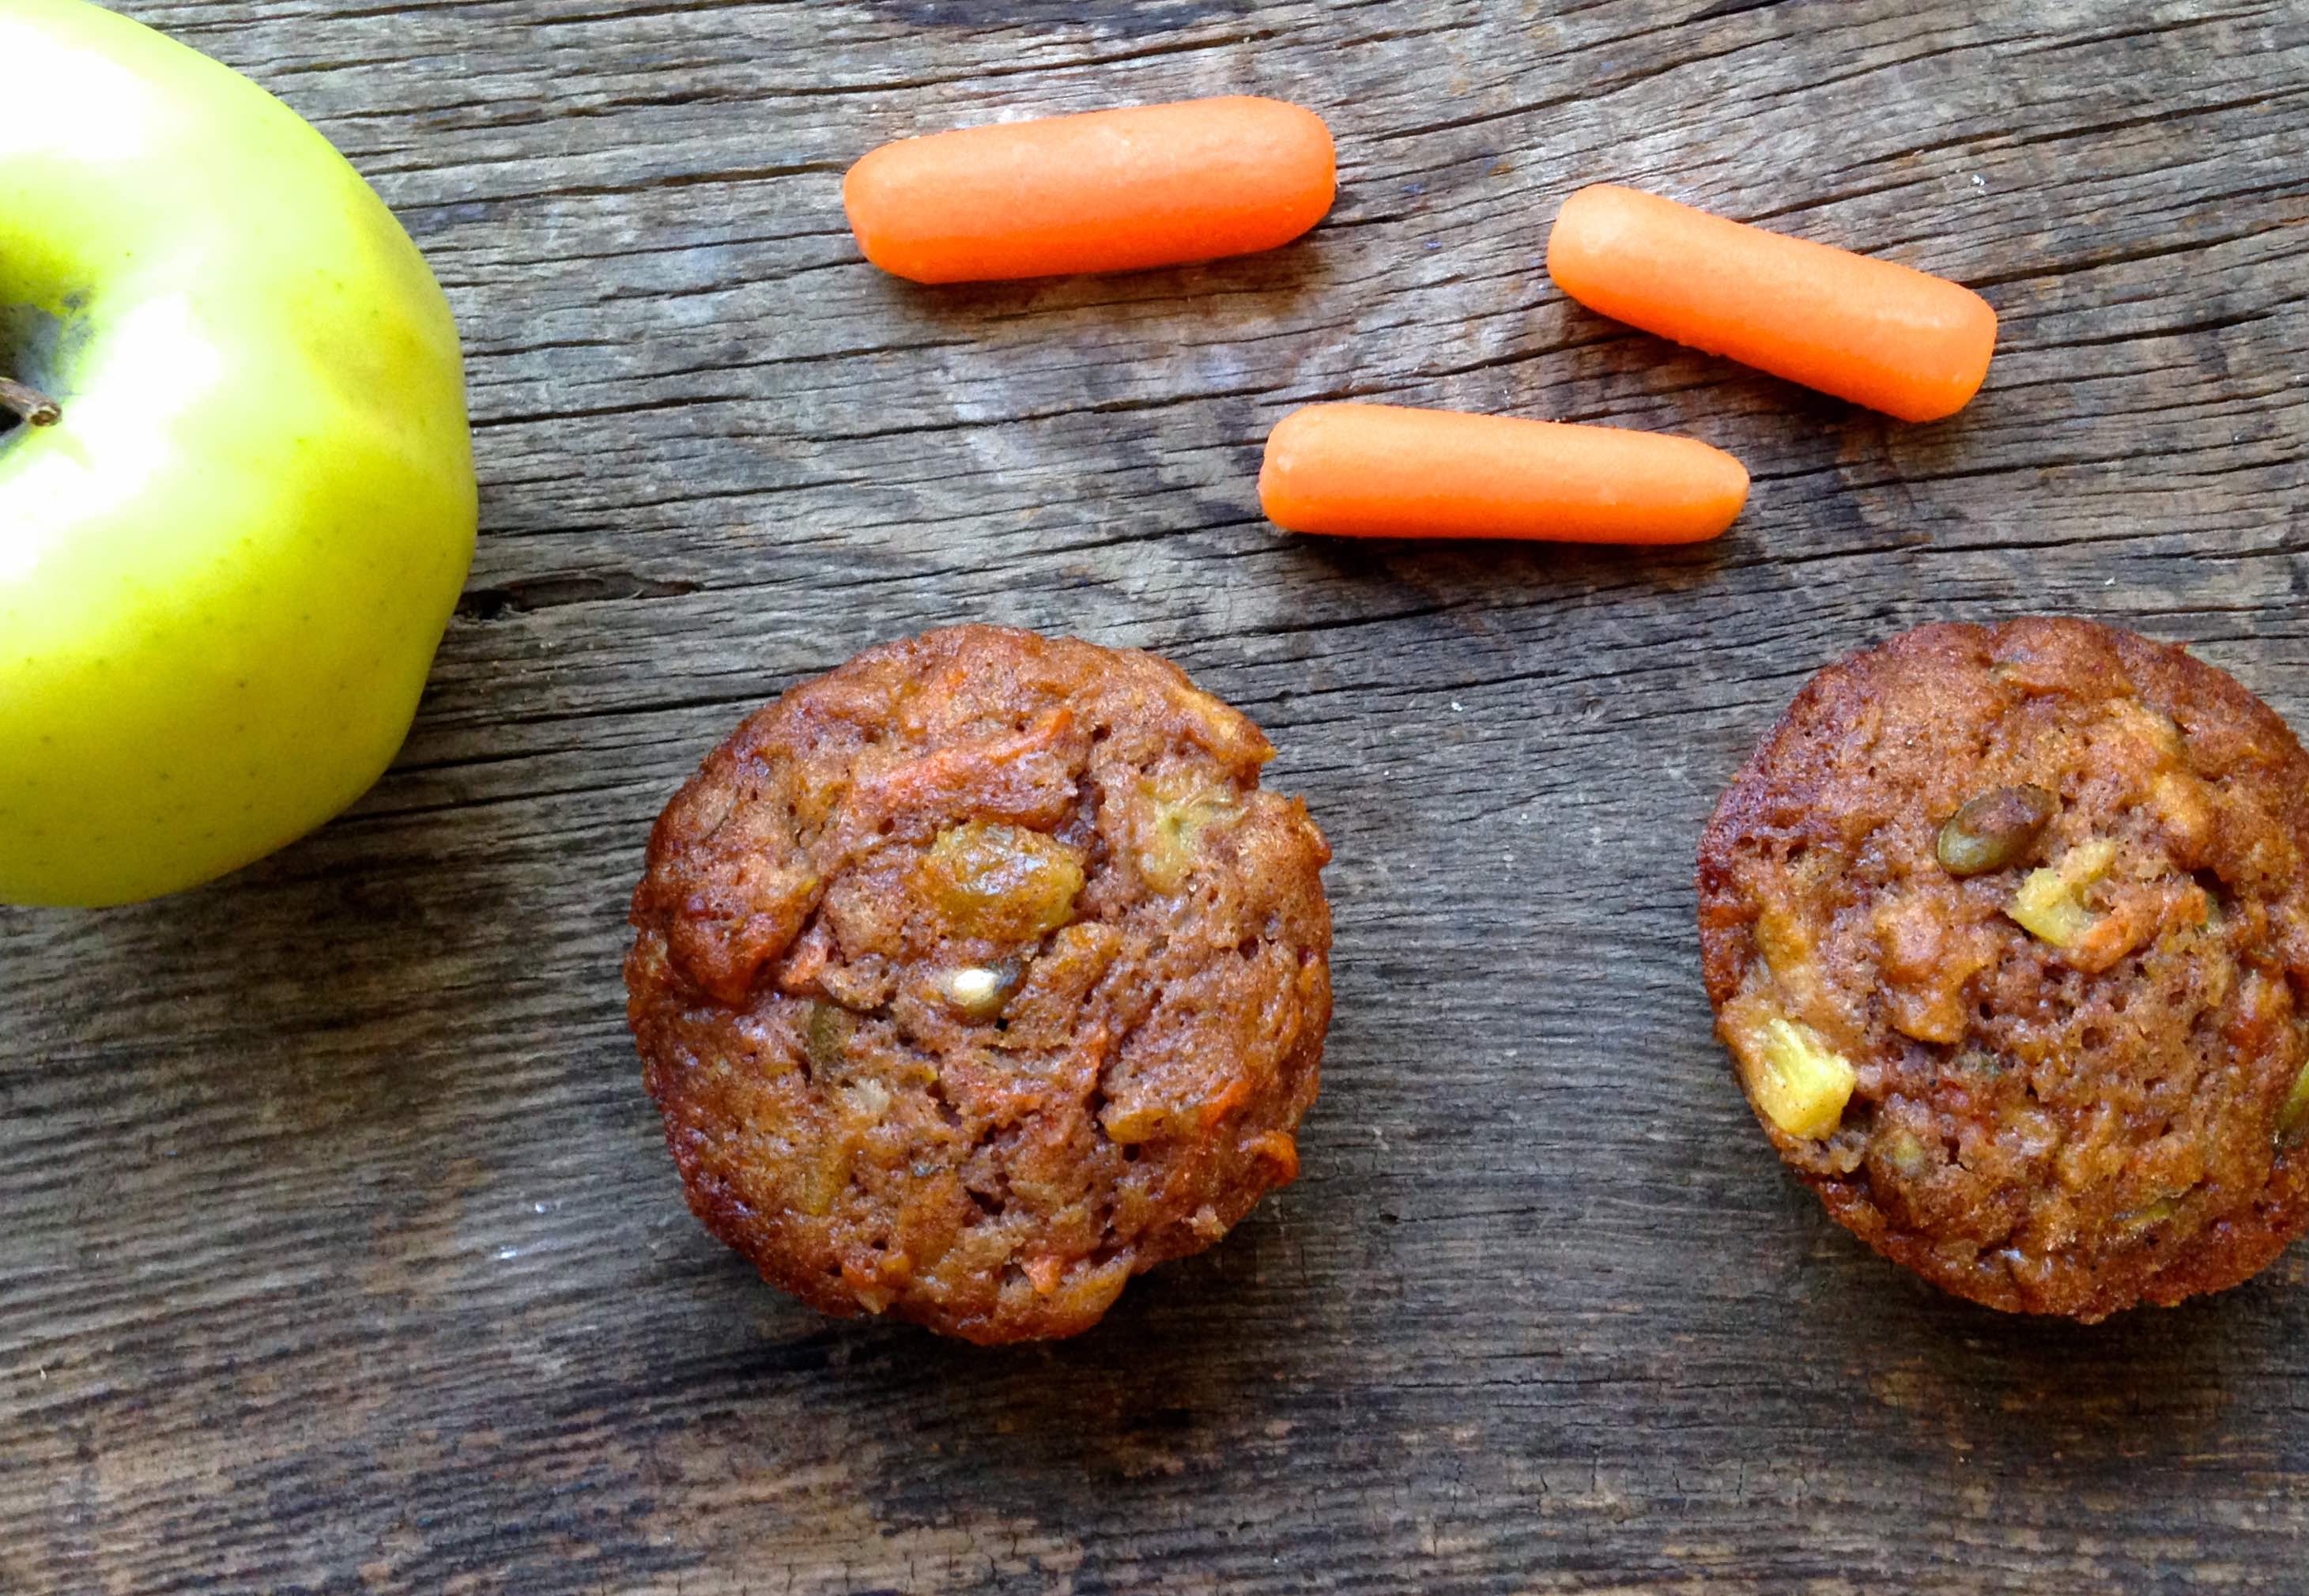
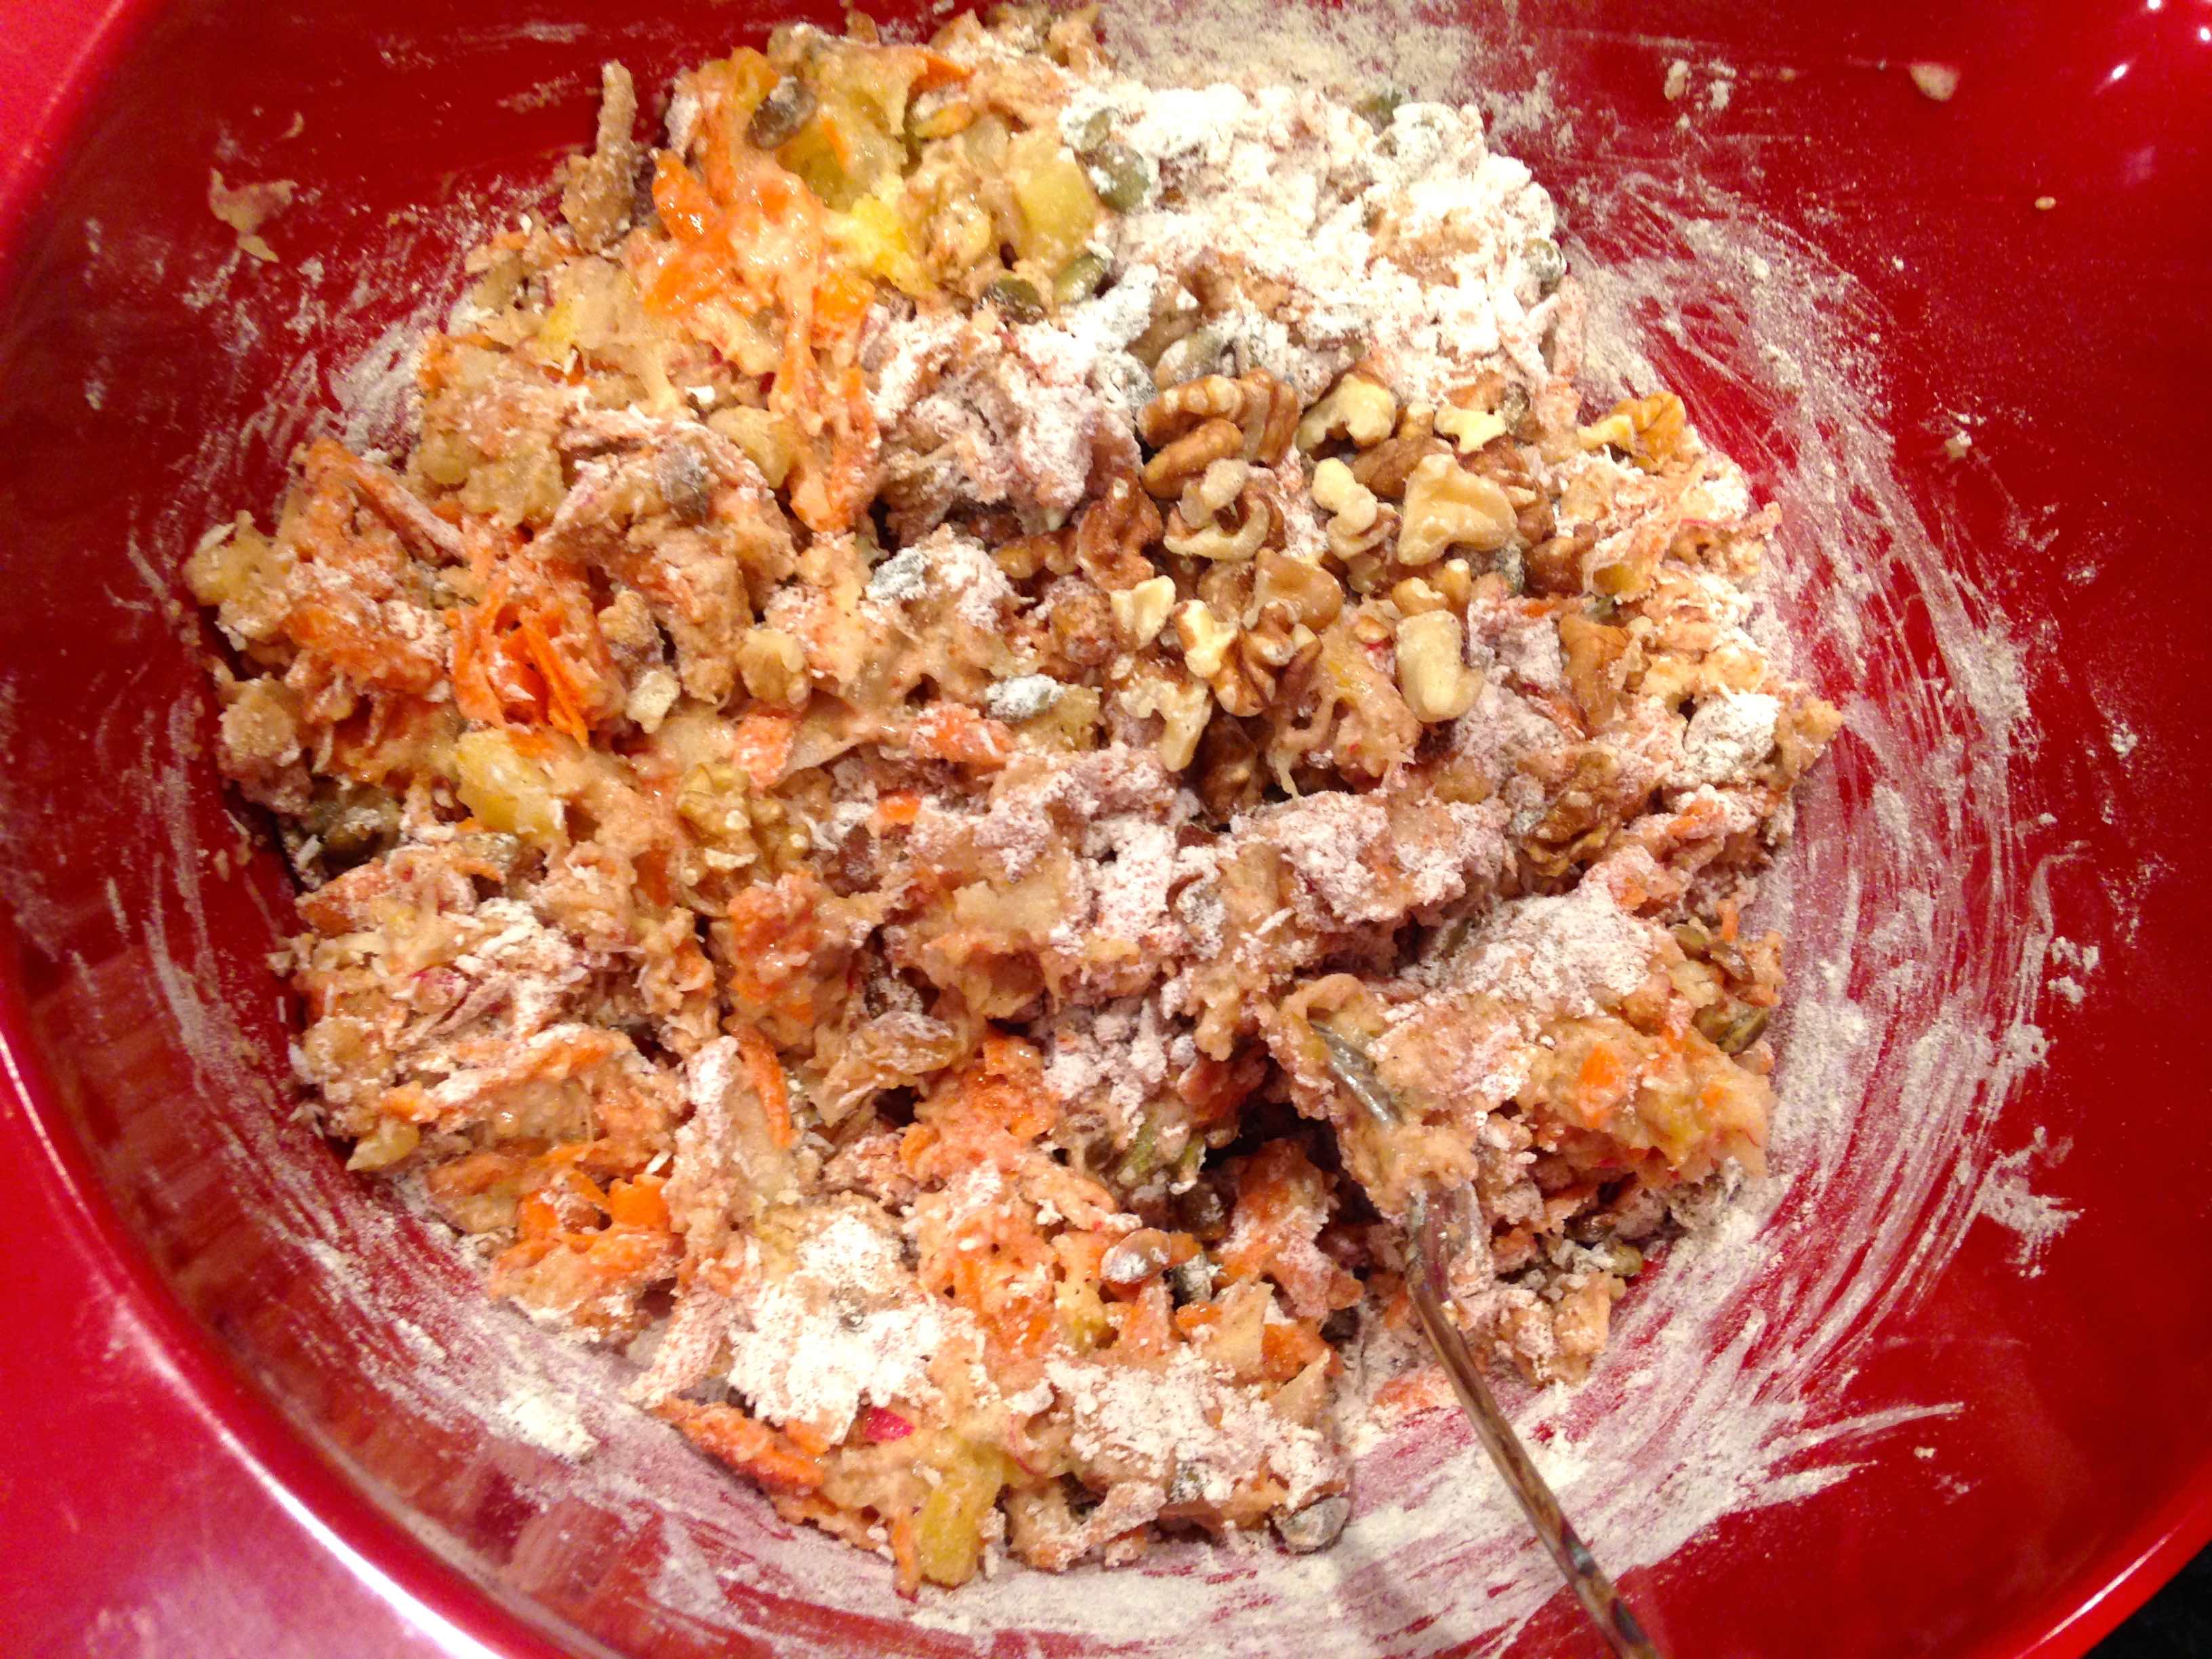
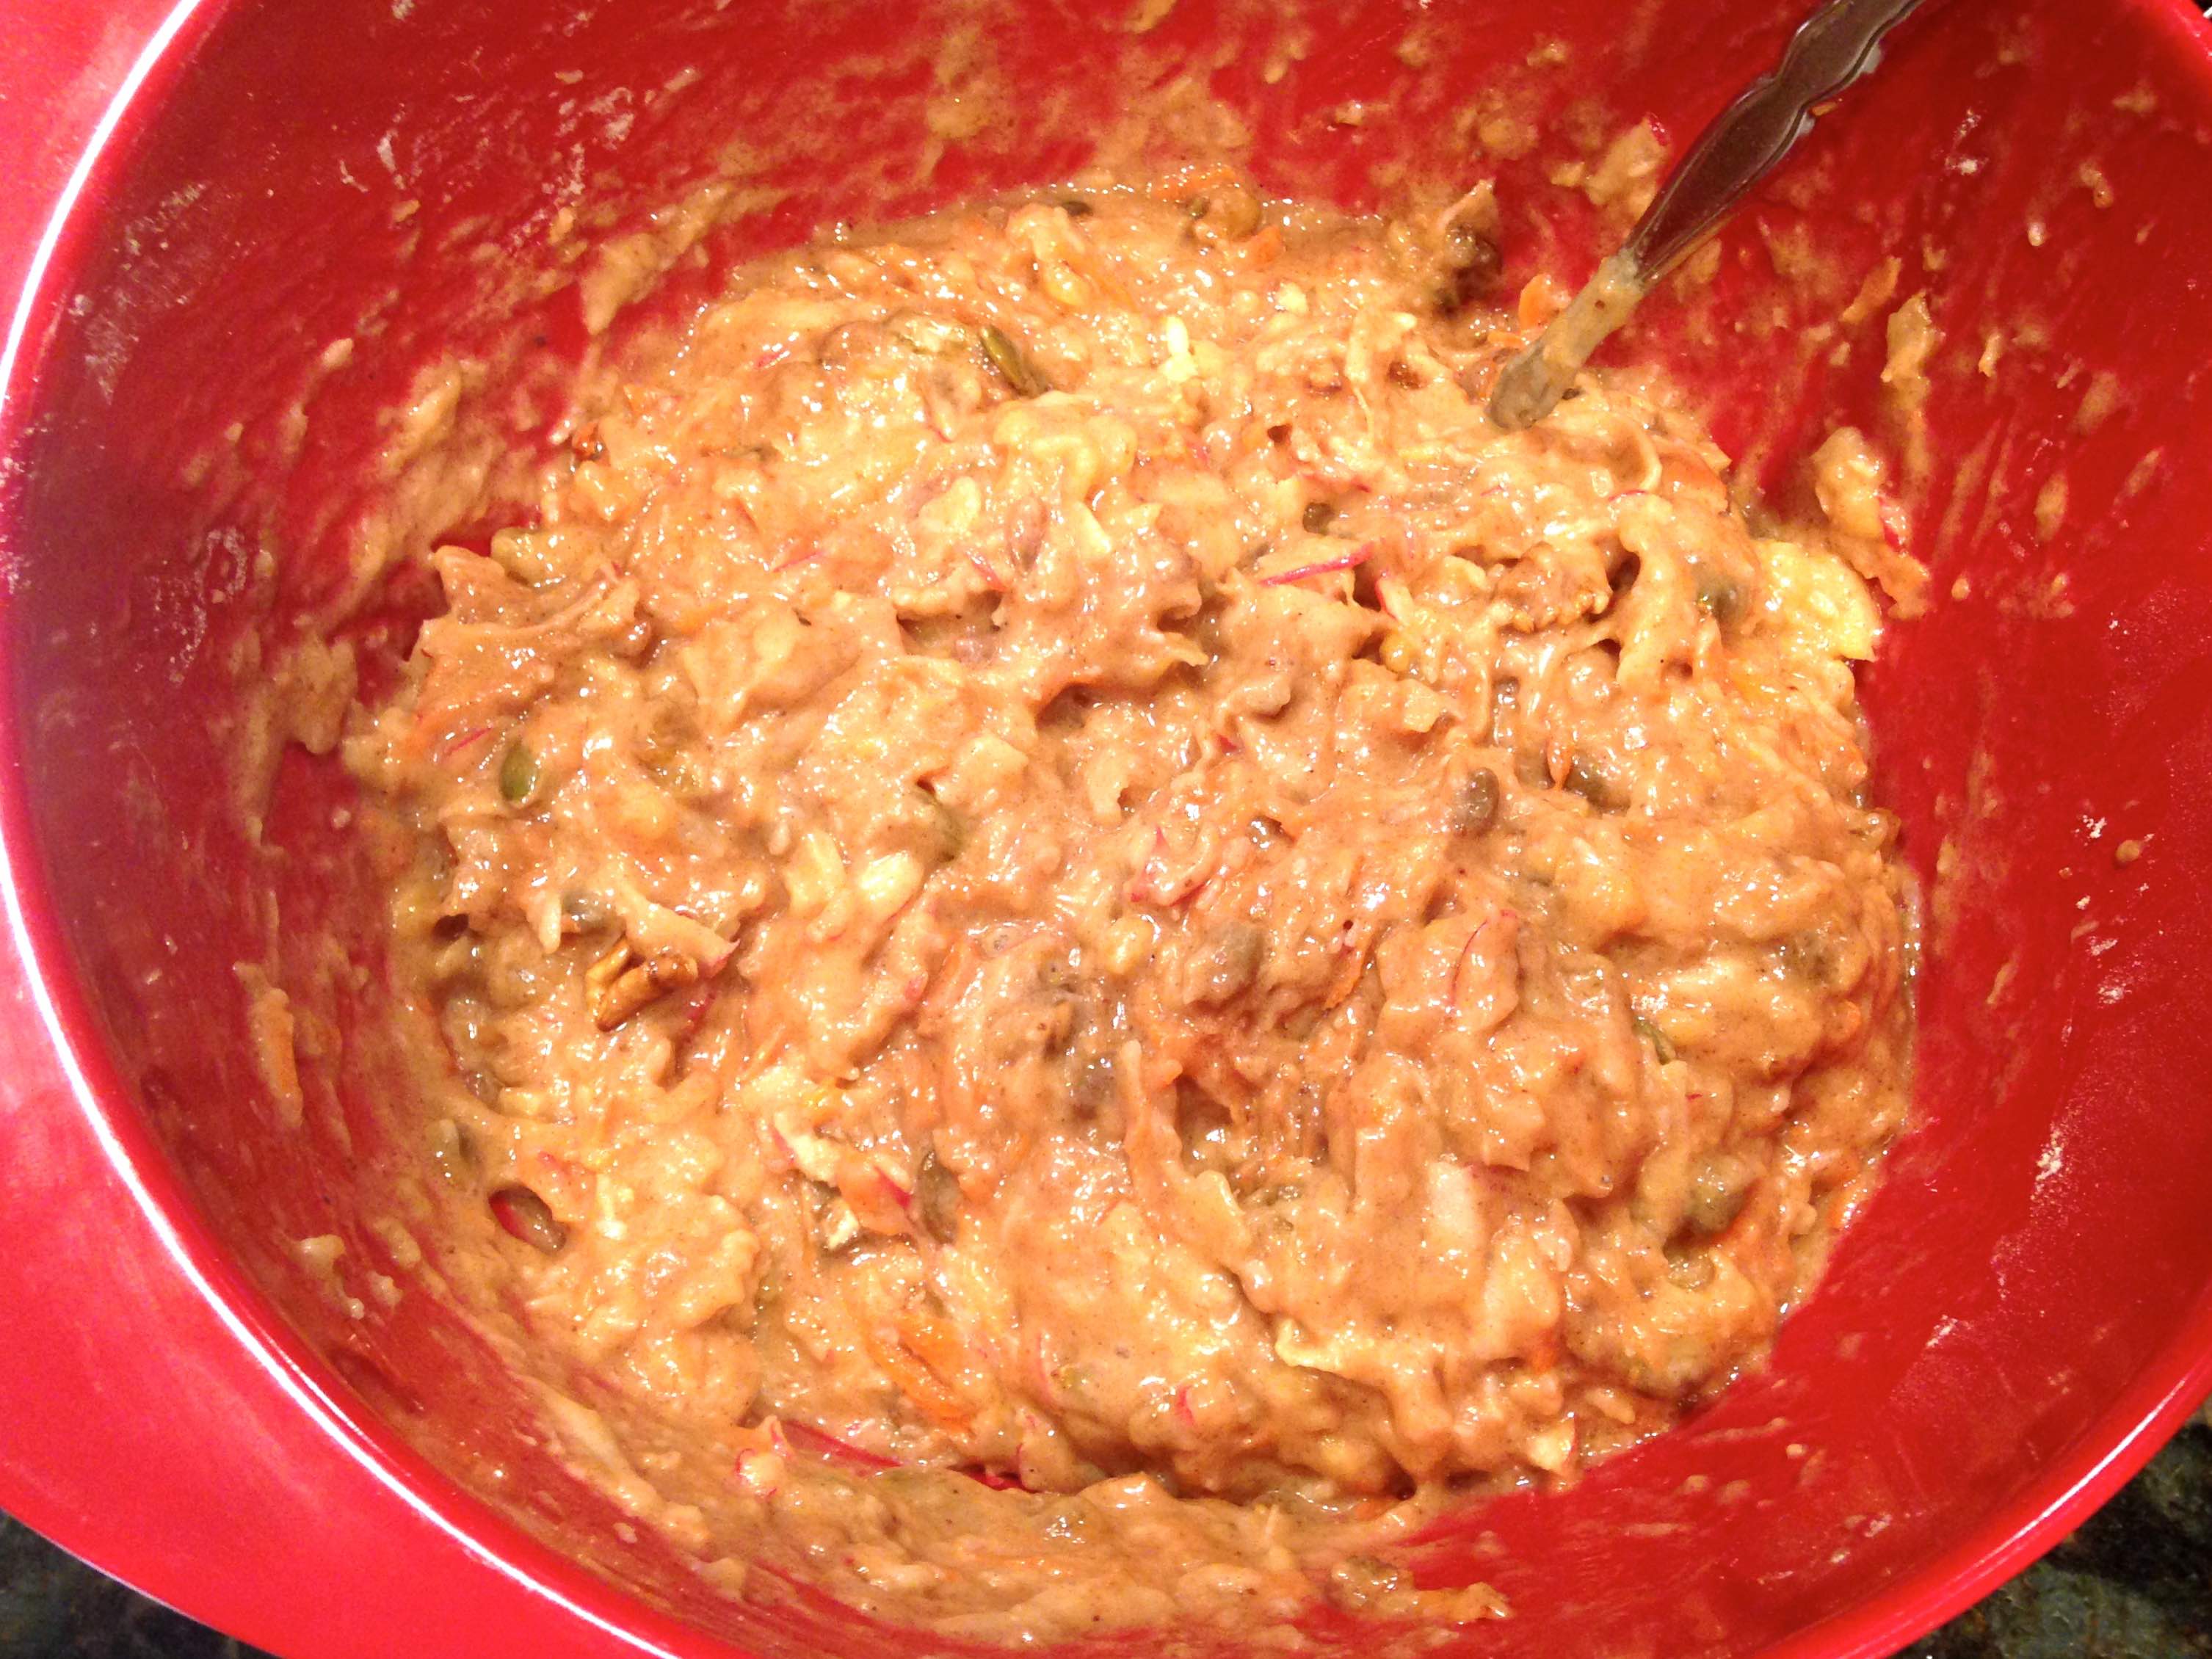
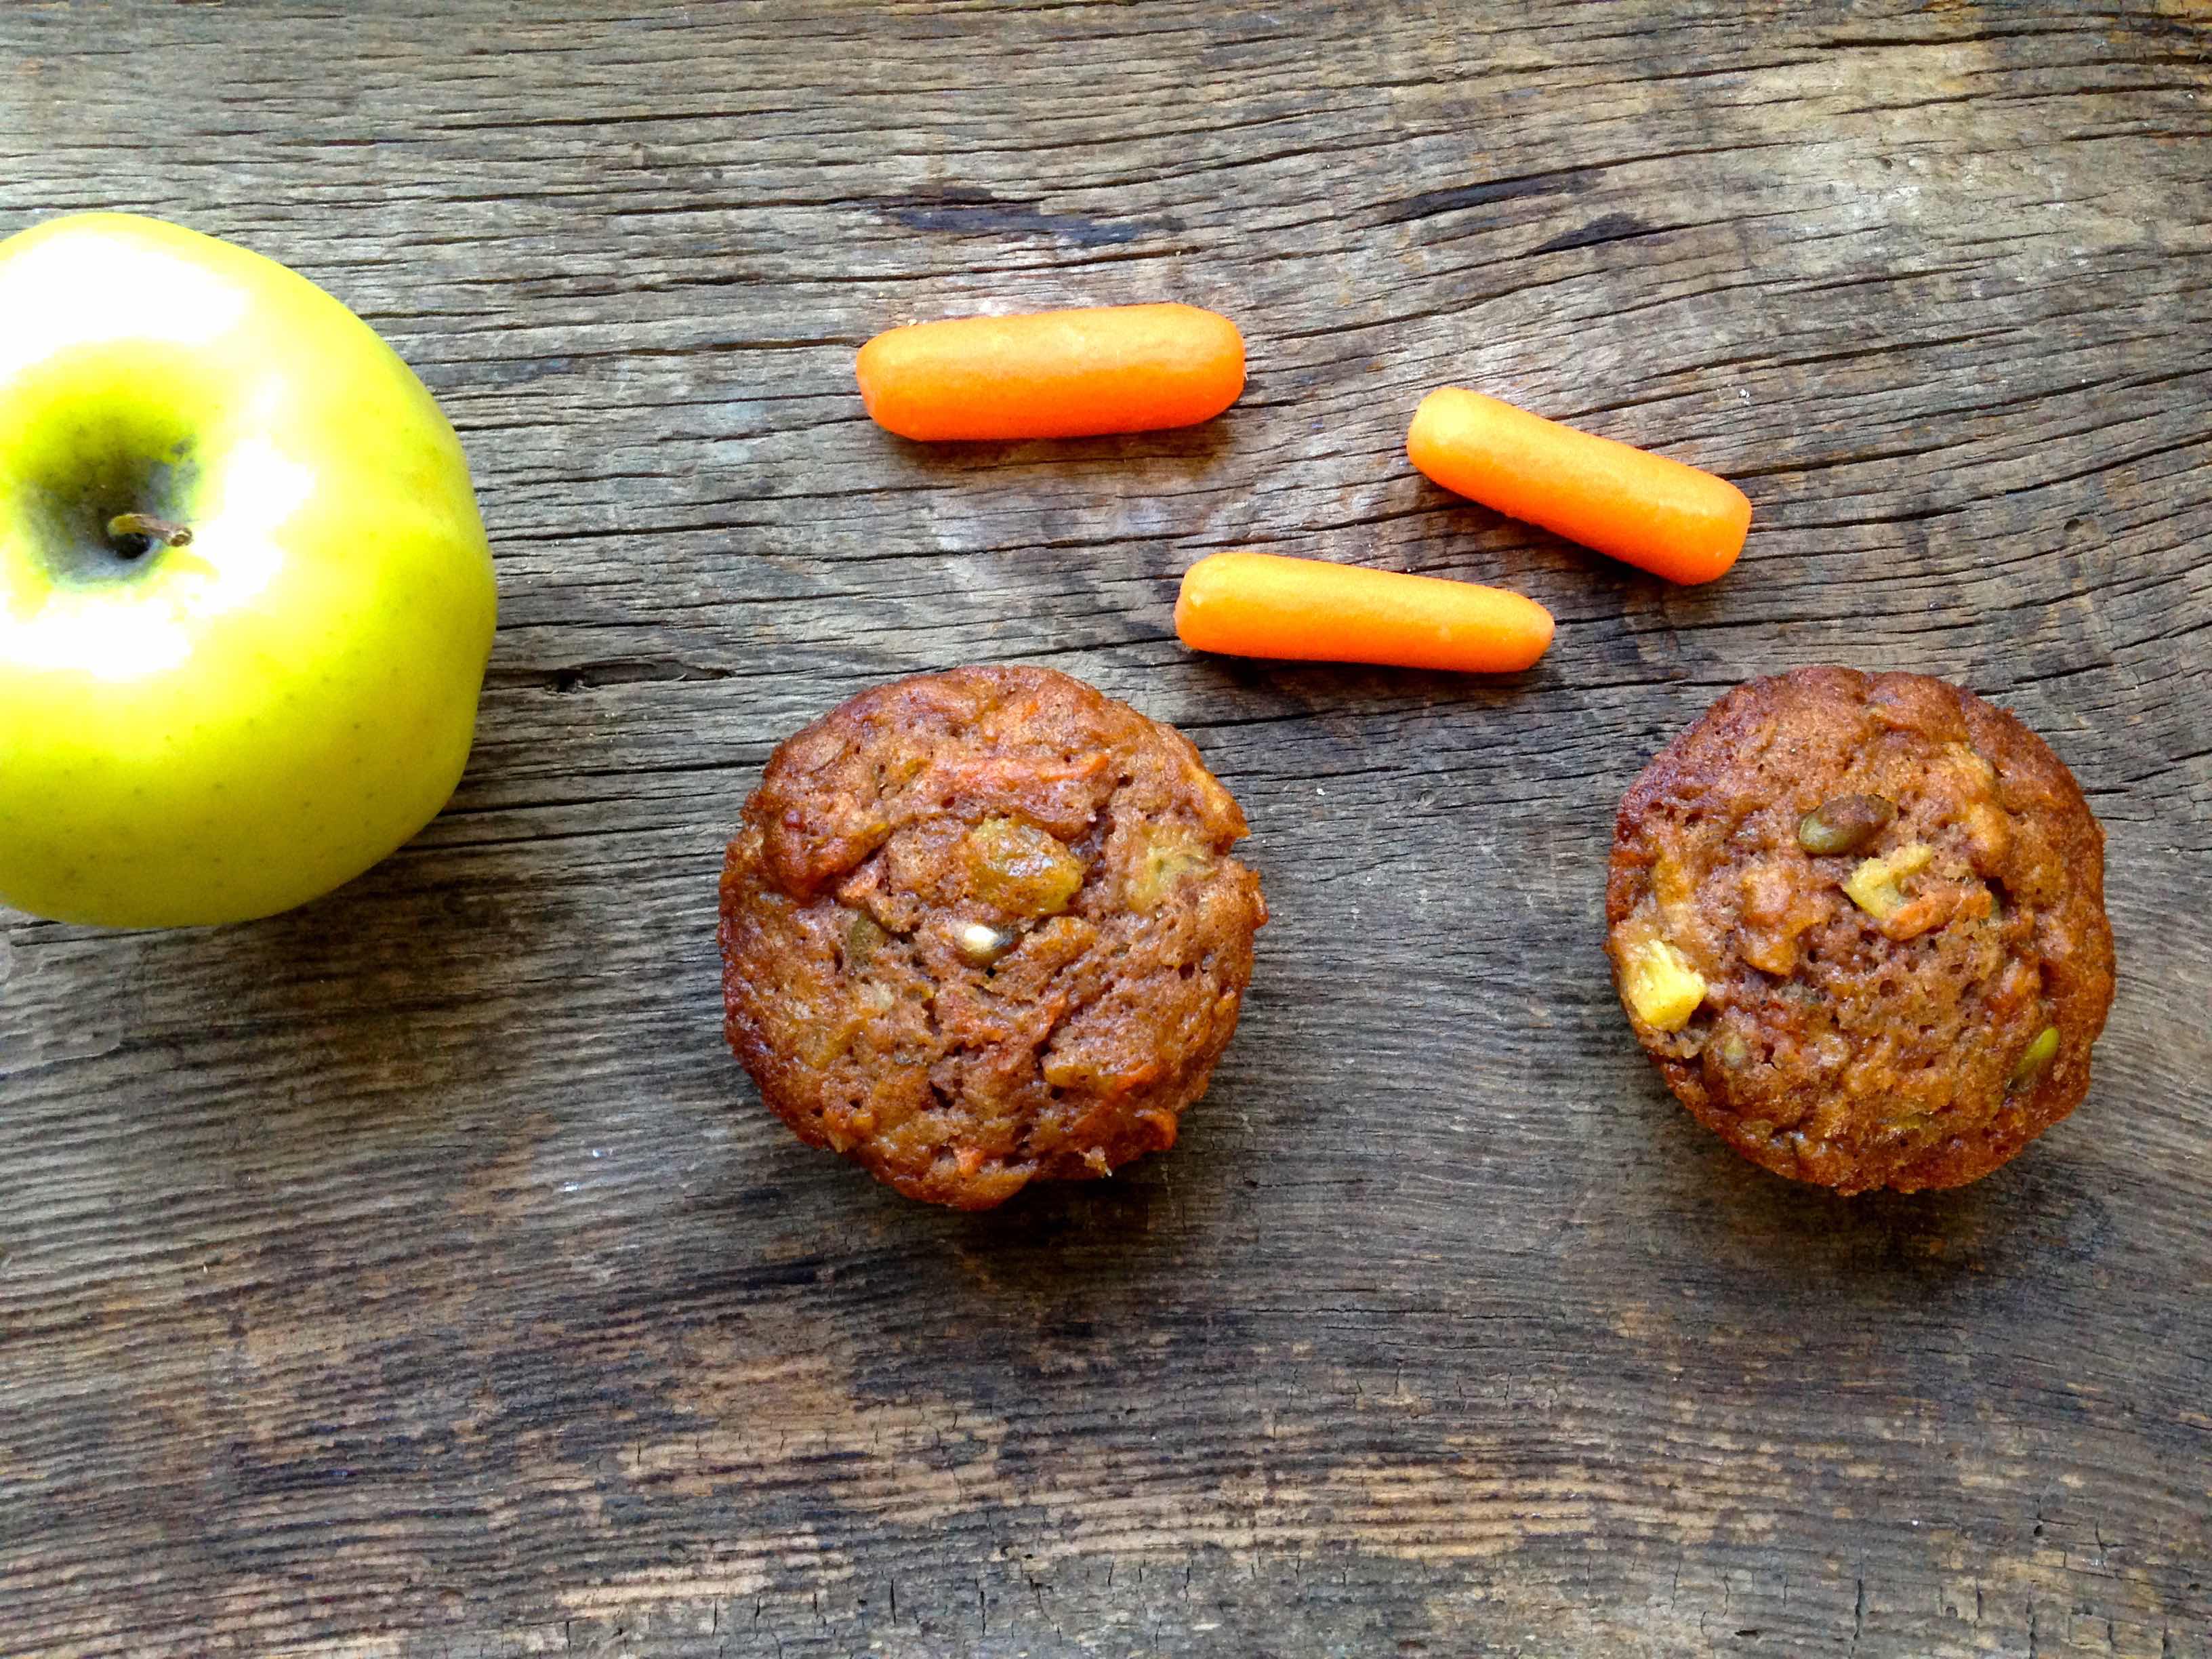
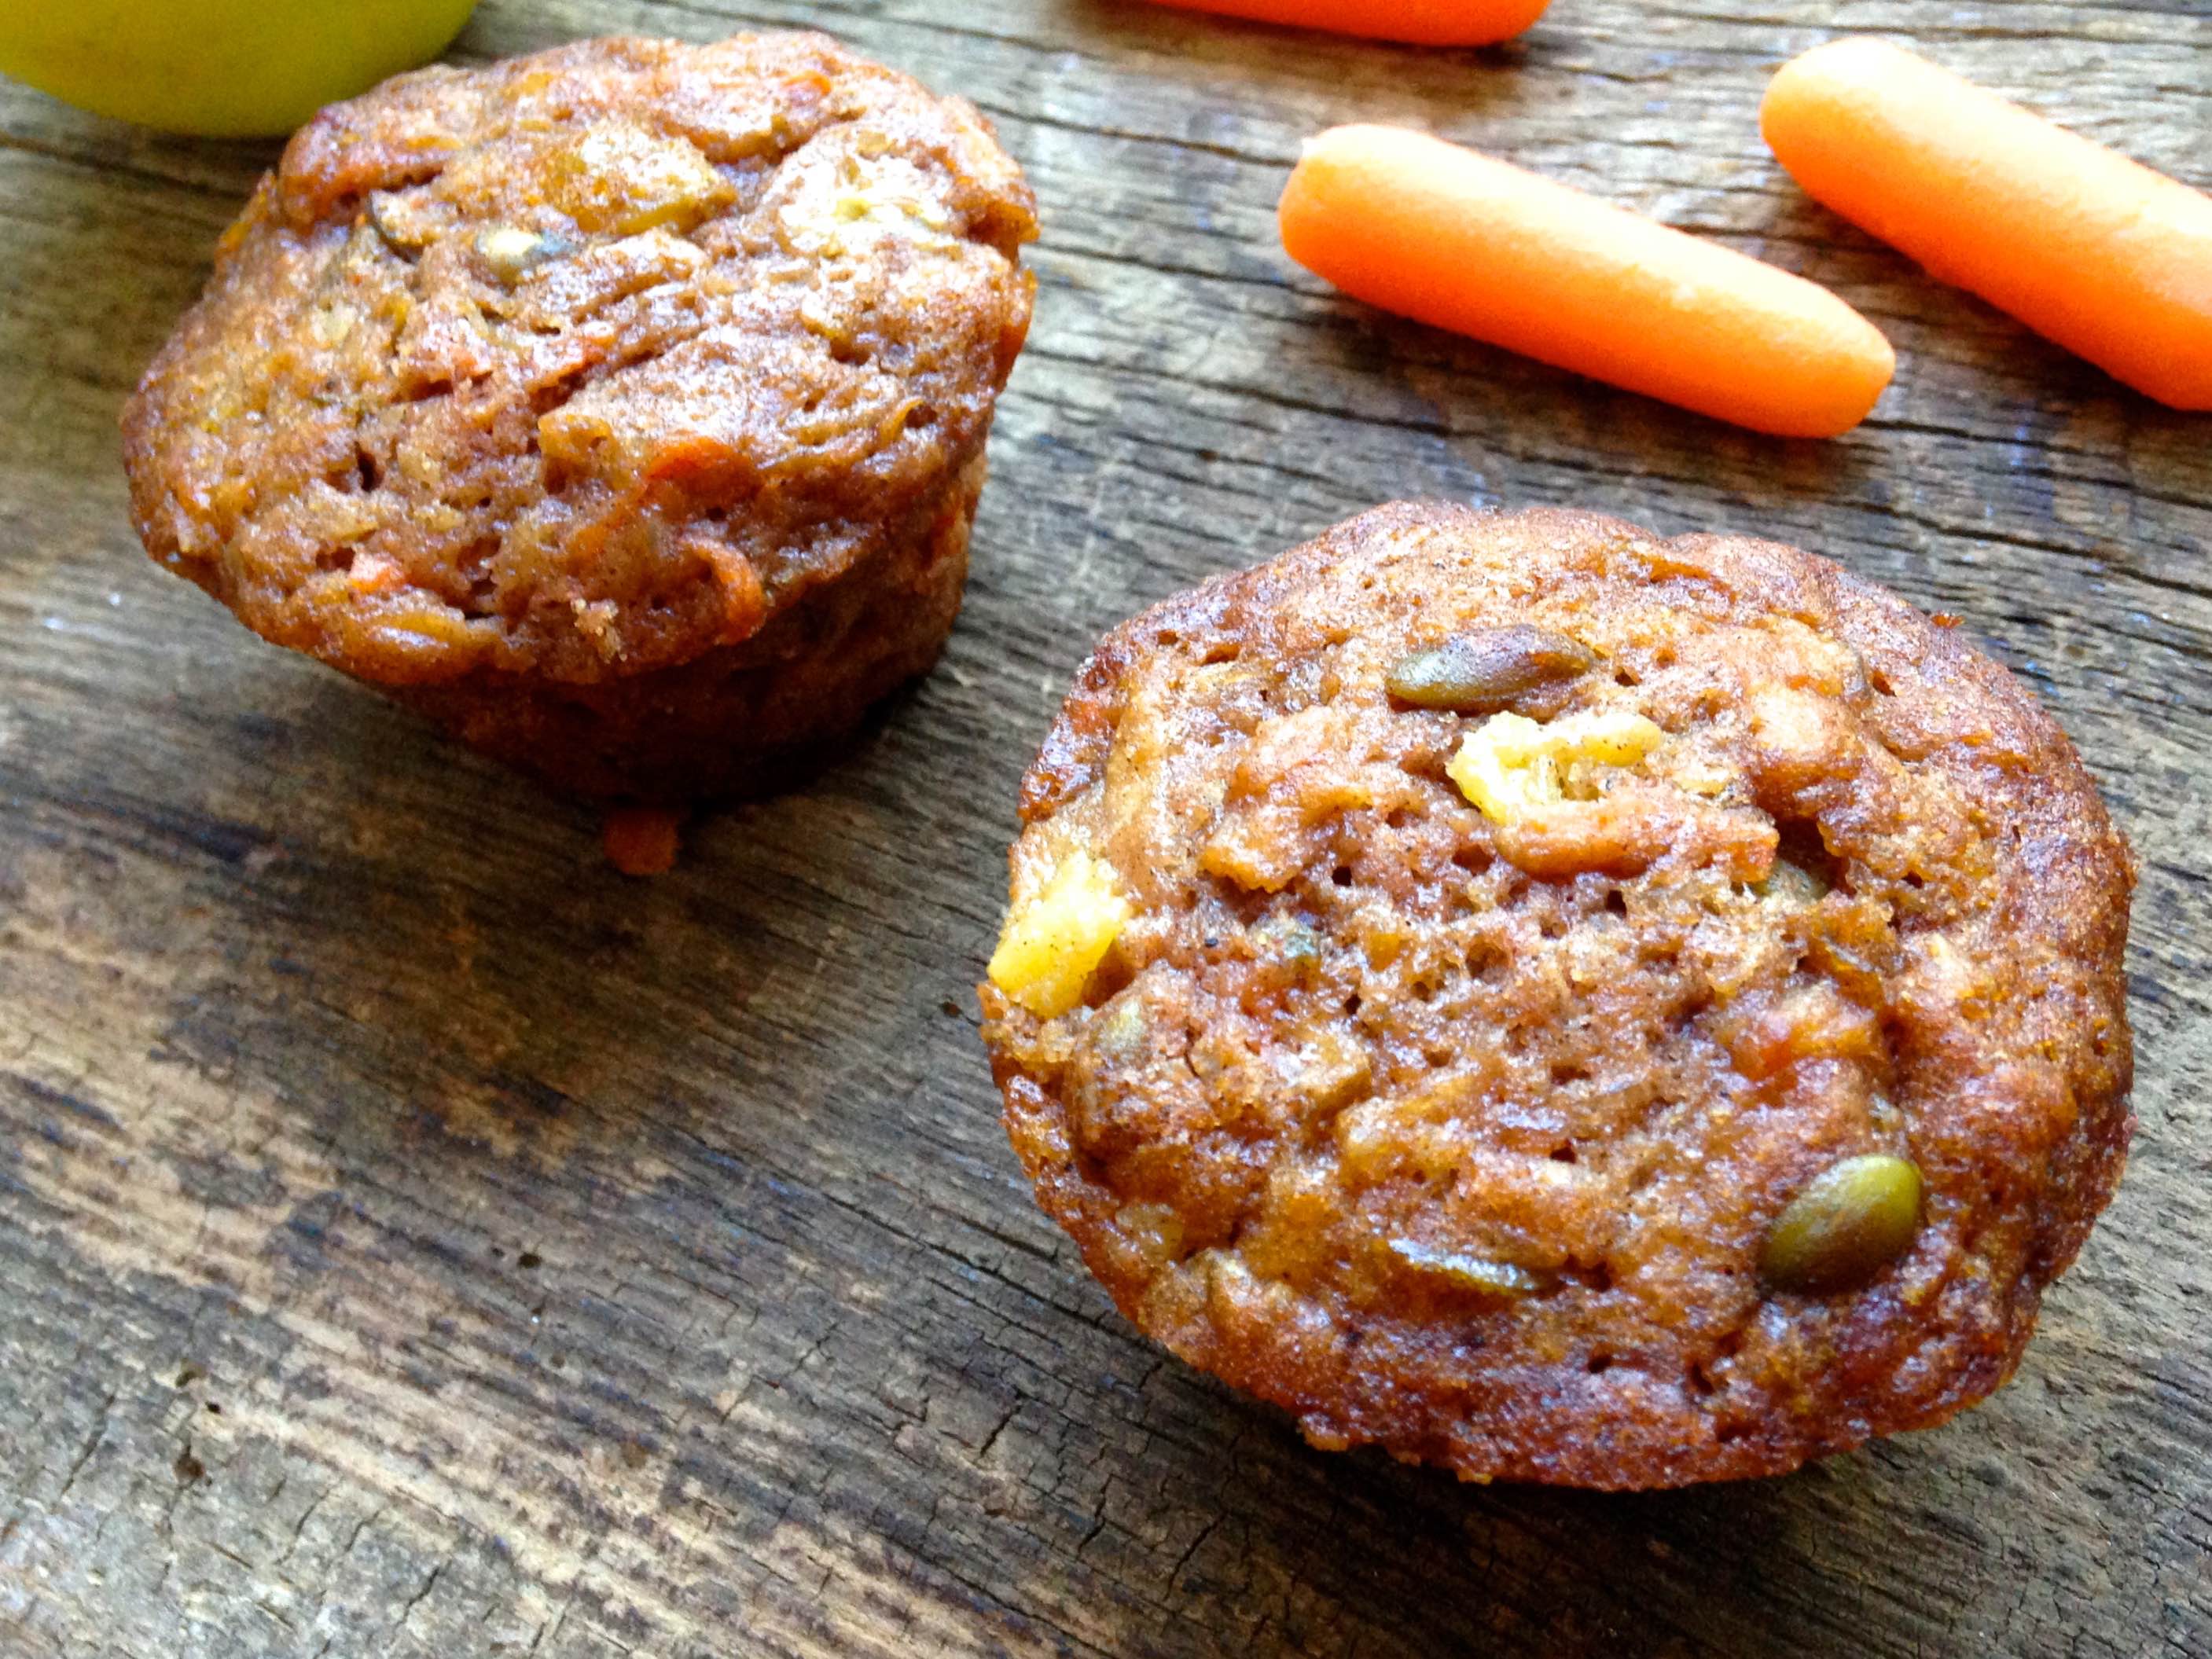
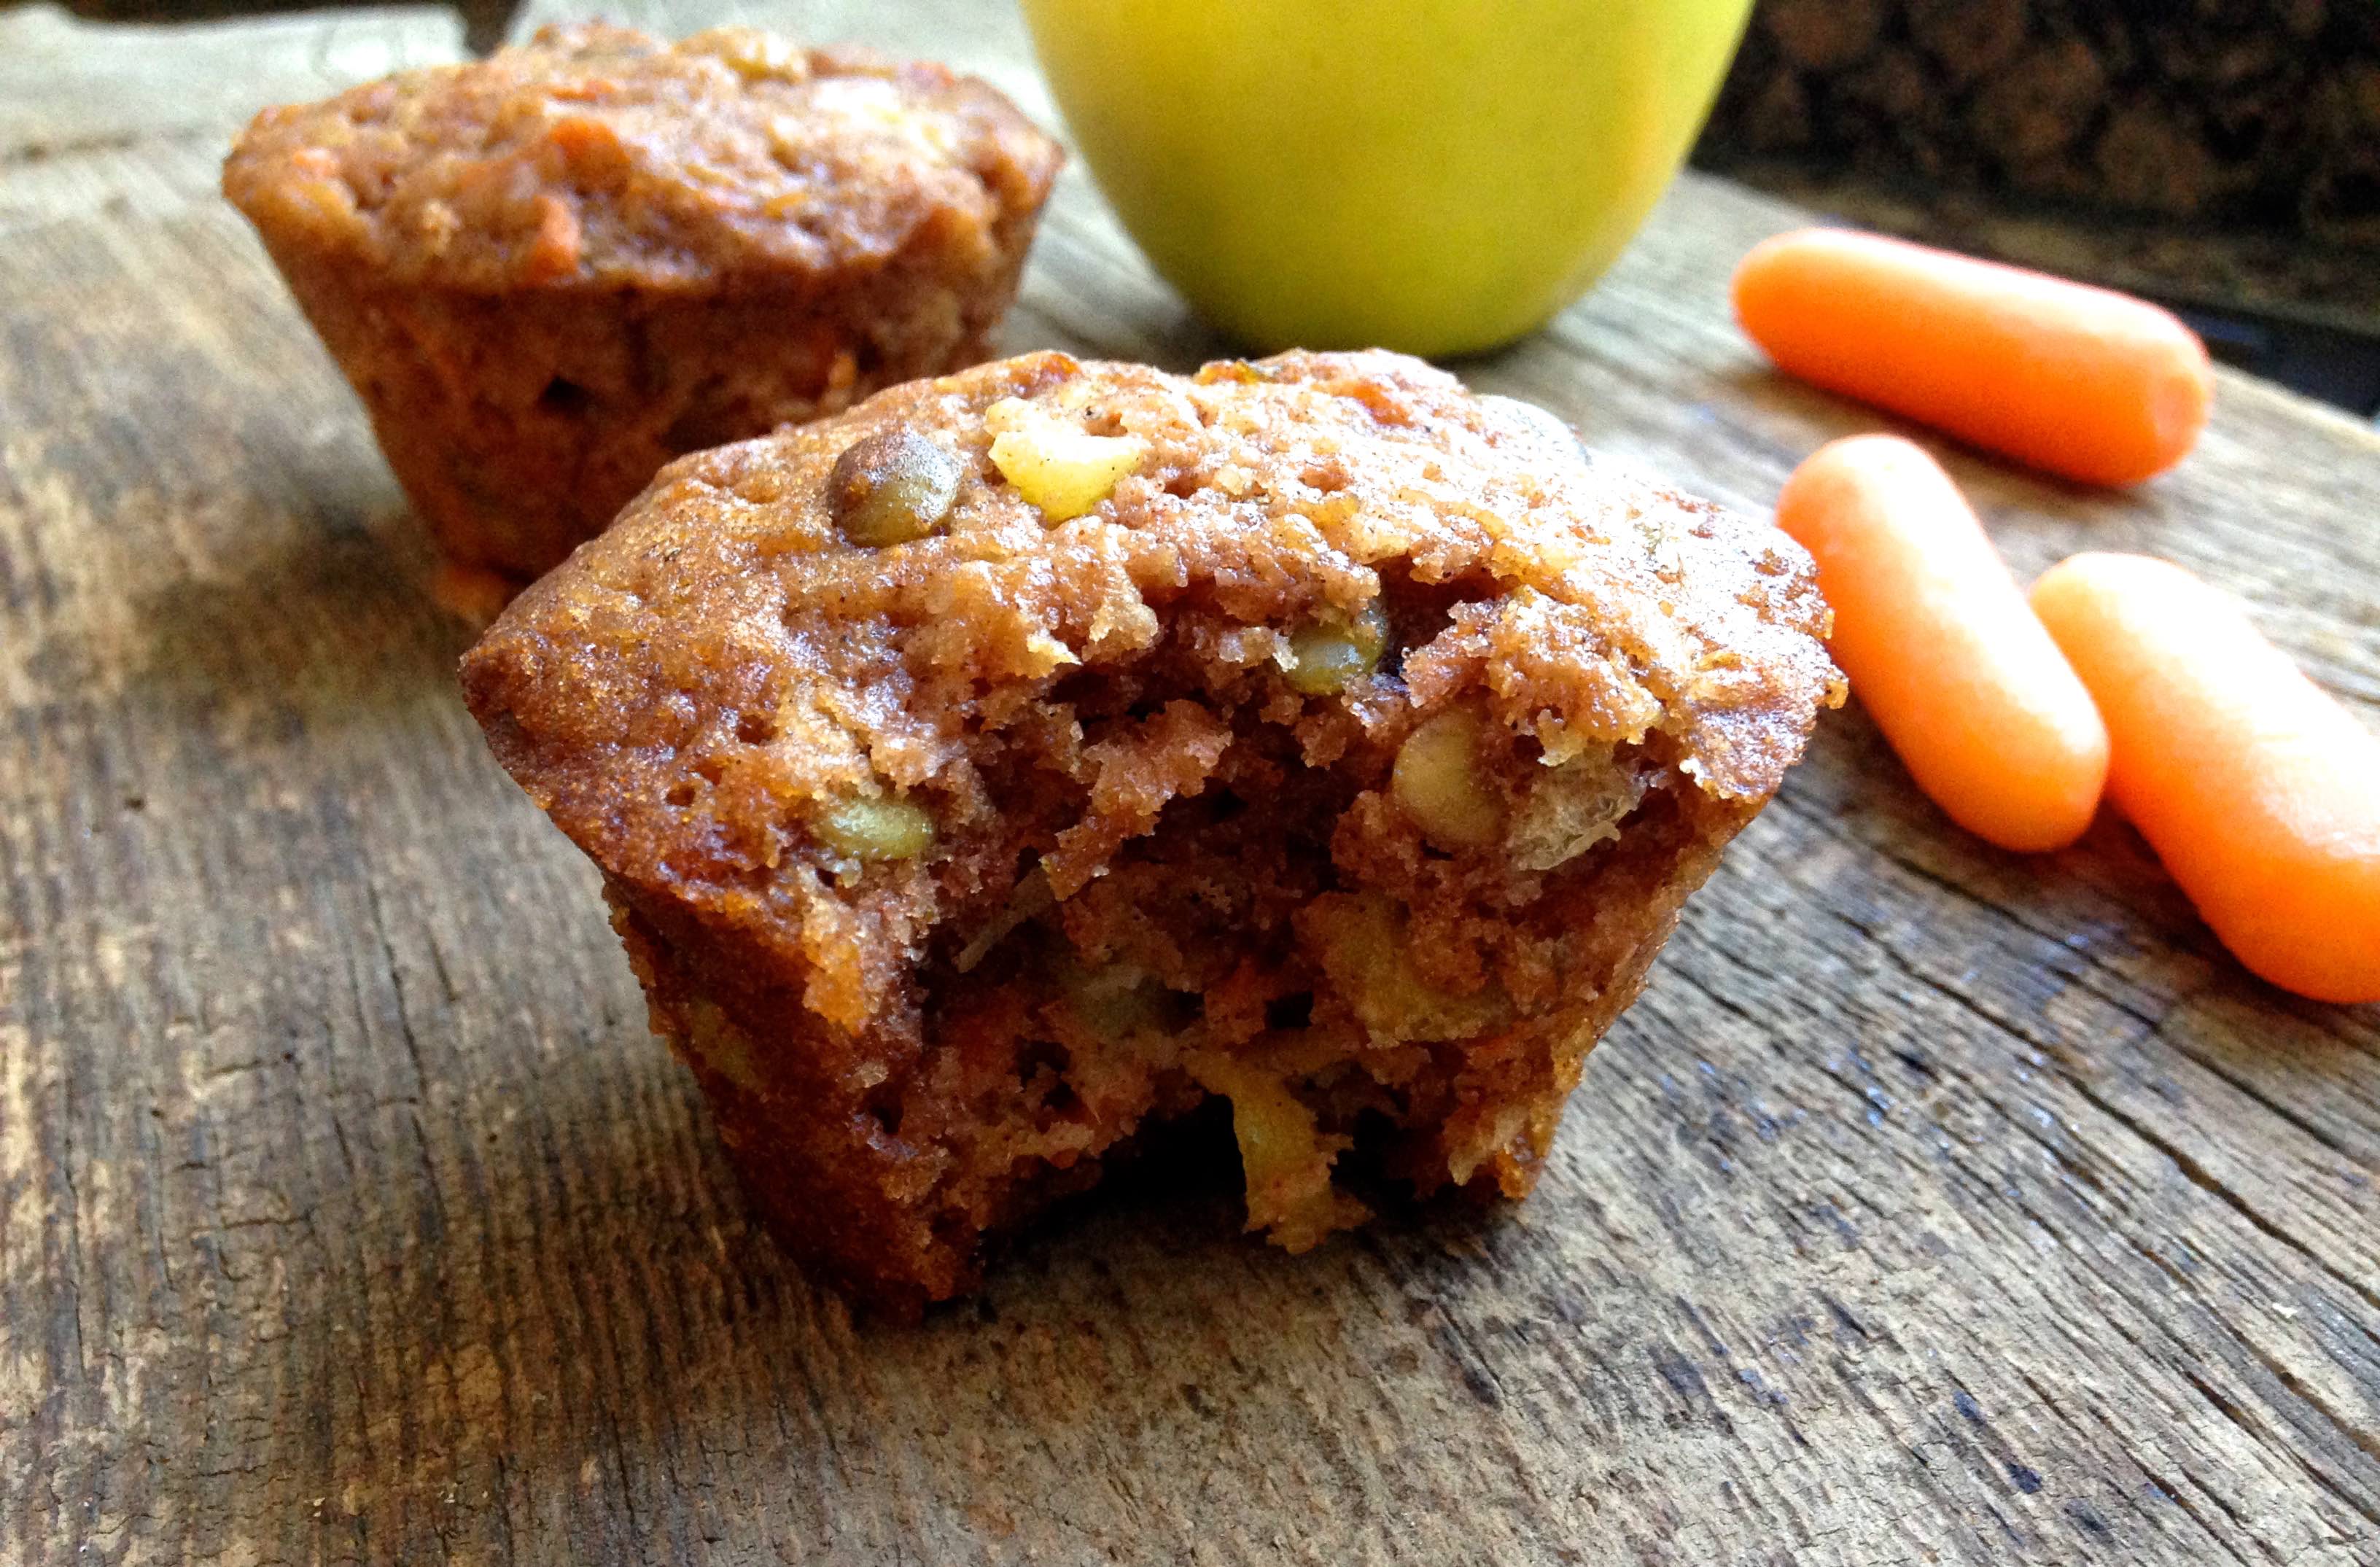
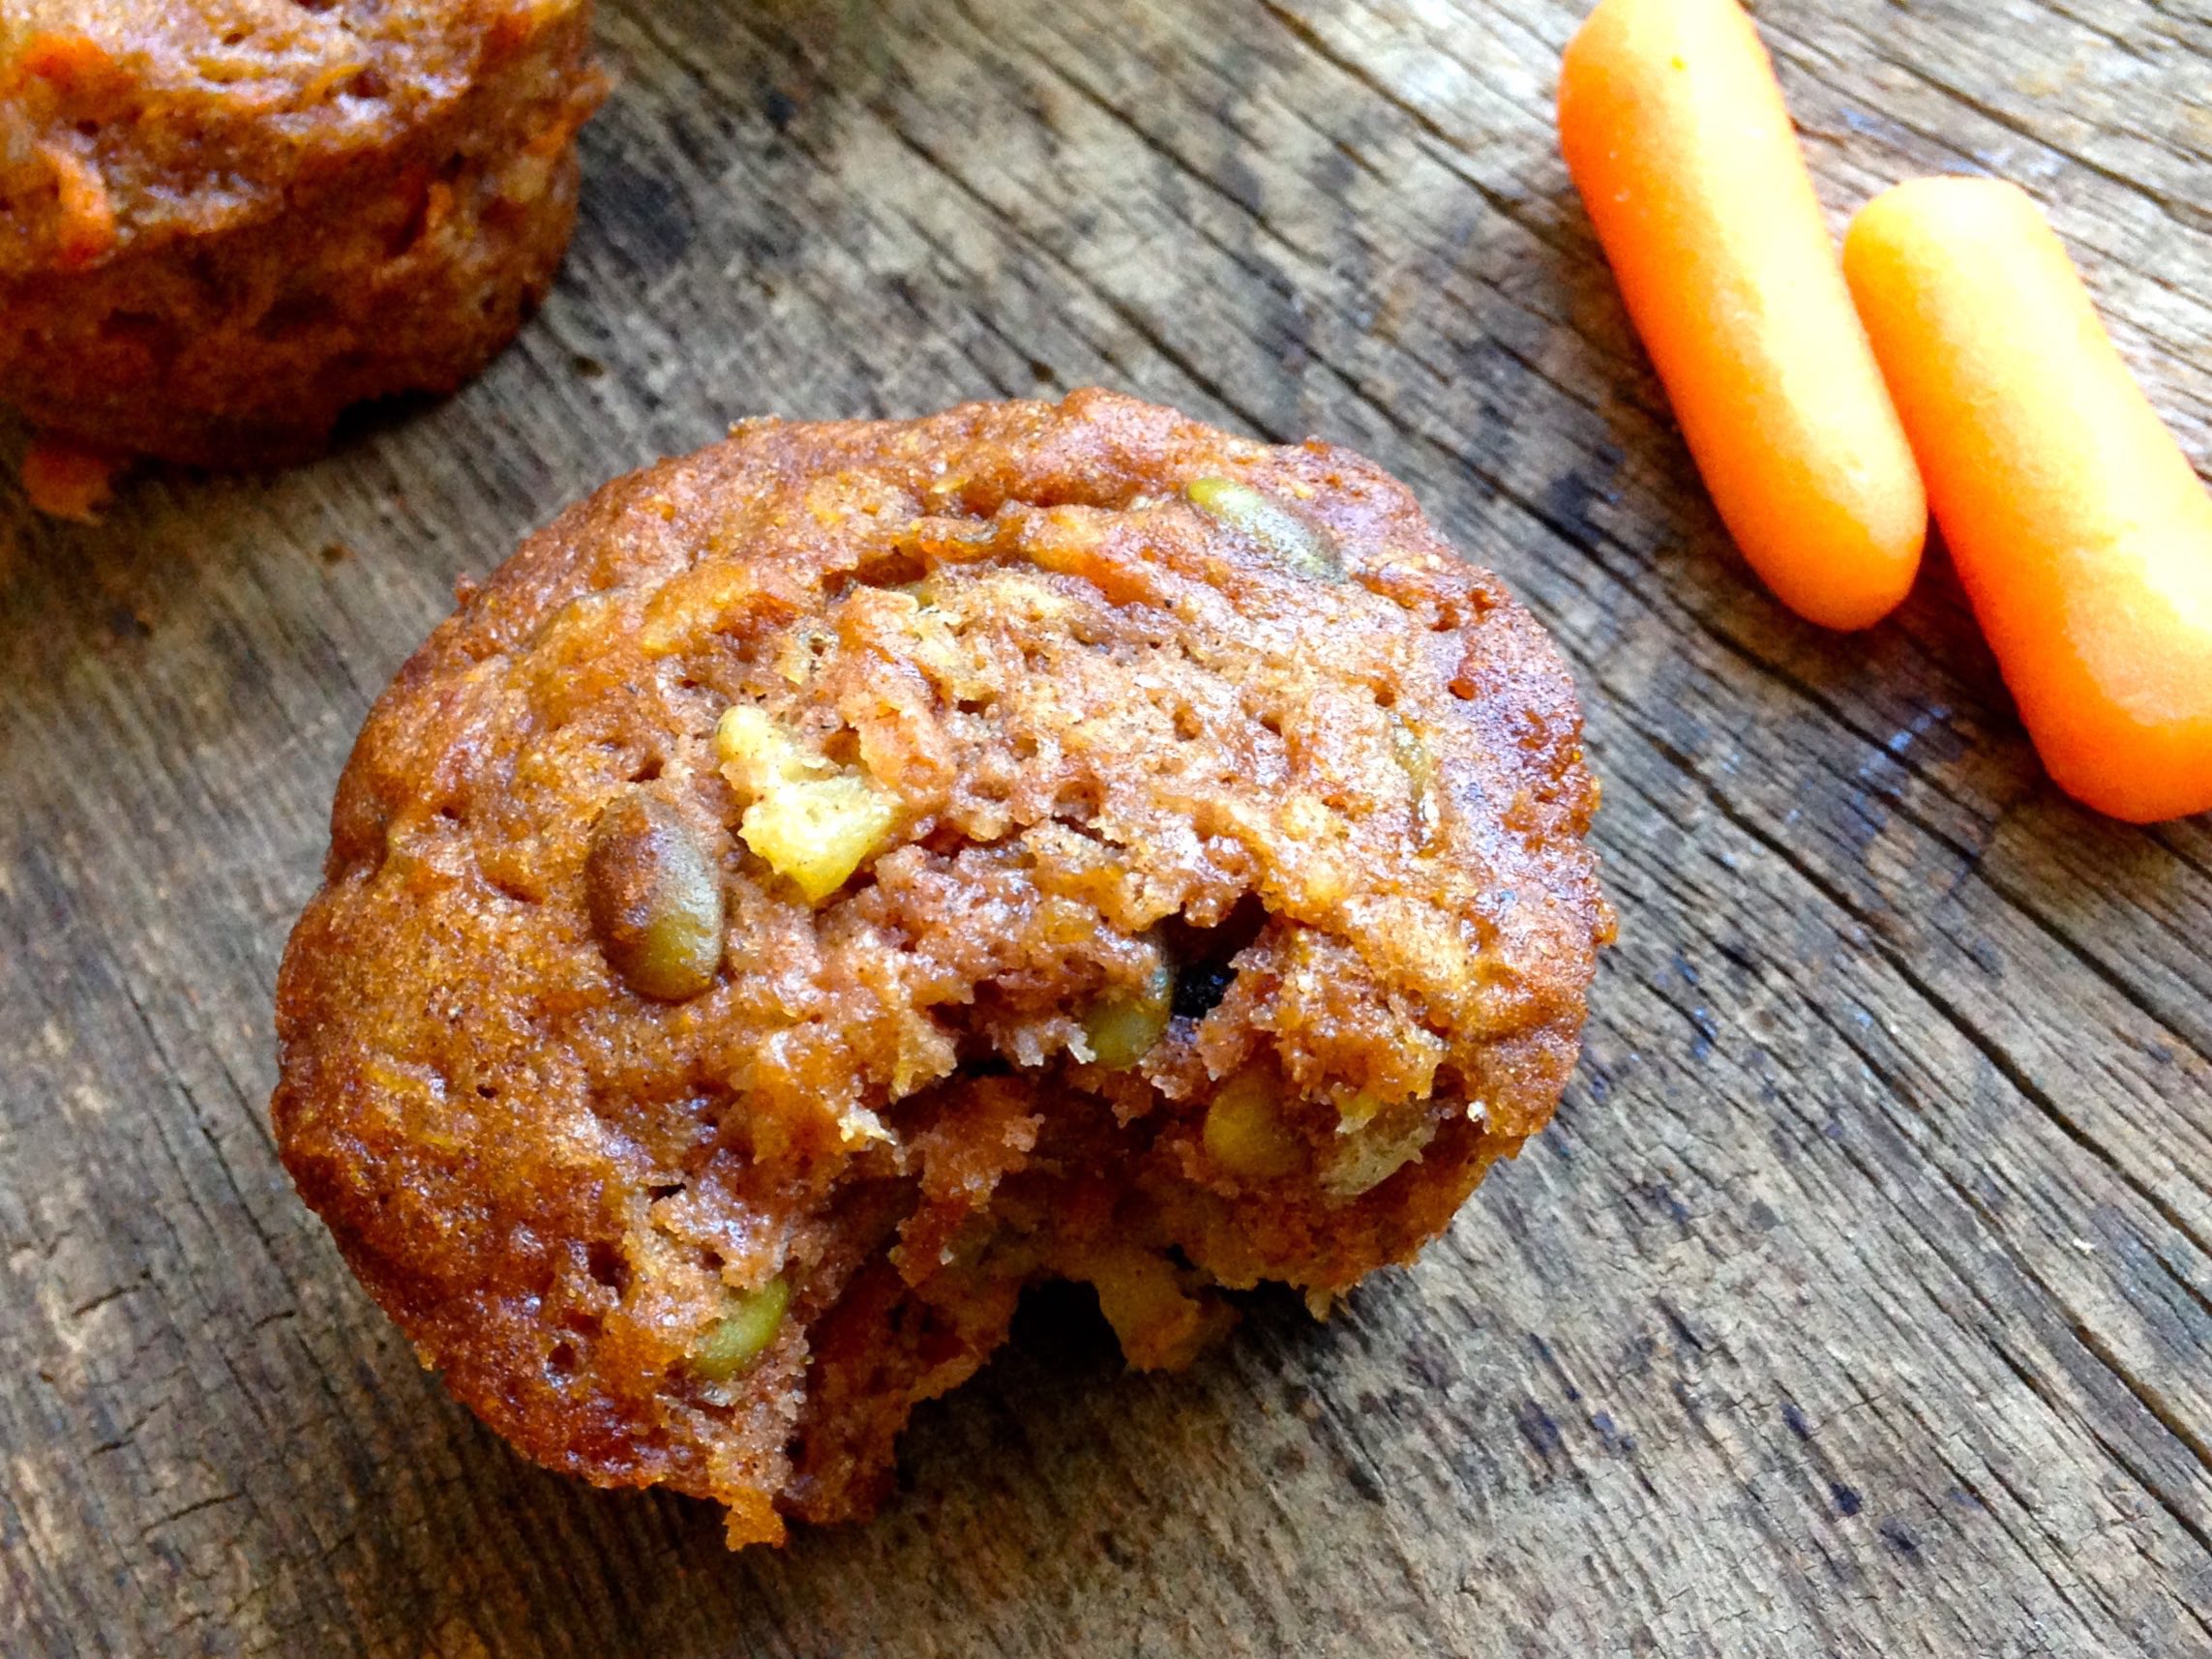
If you’re looking for a wholesome muffin with EVERYTHING in it, you’re in luck! We saw these printed in the paper and couldn’t wait to try them.
Literally these muffins have tons of good stuff in them! You’ll get your veggies in with the carrots and parsnips, your fruit from the pineapple and apple, and lots of crunch with pepitas or walnuts or pecans, your choice!
You can save yourself time if you get a helper to grate the carrots and apple, but otherwise these are easy to make.
Enjoy!
Golden Morning Muffins
Prep time:
Cook time:
Total time:
Serves: 2 dozen
Adapted from “Flavor Flours” by Alice Medrich
Ingredients
3/4 cup sugar
1/4 cup dark brown sugar
2 1/4 cups all-purpose flour
1 Tbsp. ground cinnamon
1/2 tsp. ground cardamon
2 tsp. baking soda
1/2 tsp. salt
1/2 cup shredded unsweetened coconut
1/2 cup golden raisins
1 grated apple
1 cup canned crushed pineapple
1 cup grated carrot
1/2 cup pepitas (pumpkin seeds)
3 large eggs
1 cup canola oil
1 tsp. vanilla extract
Instructions
Heat oven to 350 degrees F.
In a large bowl, whisk together sugars, flour, cinnamon, cardamon, baking soda, and salt. Add coconut, raisins, apples, pineapple, carrots and pipettes, stirring to combine.
In another bowl, whisk eggs, oil and vanilla together. Scrape mixture into bowl with dry ingredients and stir until combined.
Divide batter among muffin pans lined with muffin liners. Each liner will be 2/3 full. Place in oven and bake until wooden toothpick or skewer comes out clean, about 20-25 minutes. Let cool 15 minutes, then remove from pan.
Notes
You may substitute toasted walnuts or pecans for the pepitas. You can also add in 1 cup grated parsnip.
I hope everyone had a wonderful Christmas and New Years! It was crazy around our house with a new baby, Christmas shopping, traveling, seeing friends and family, and running errands, but it was fun.
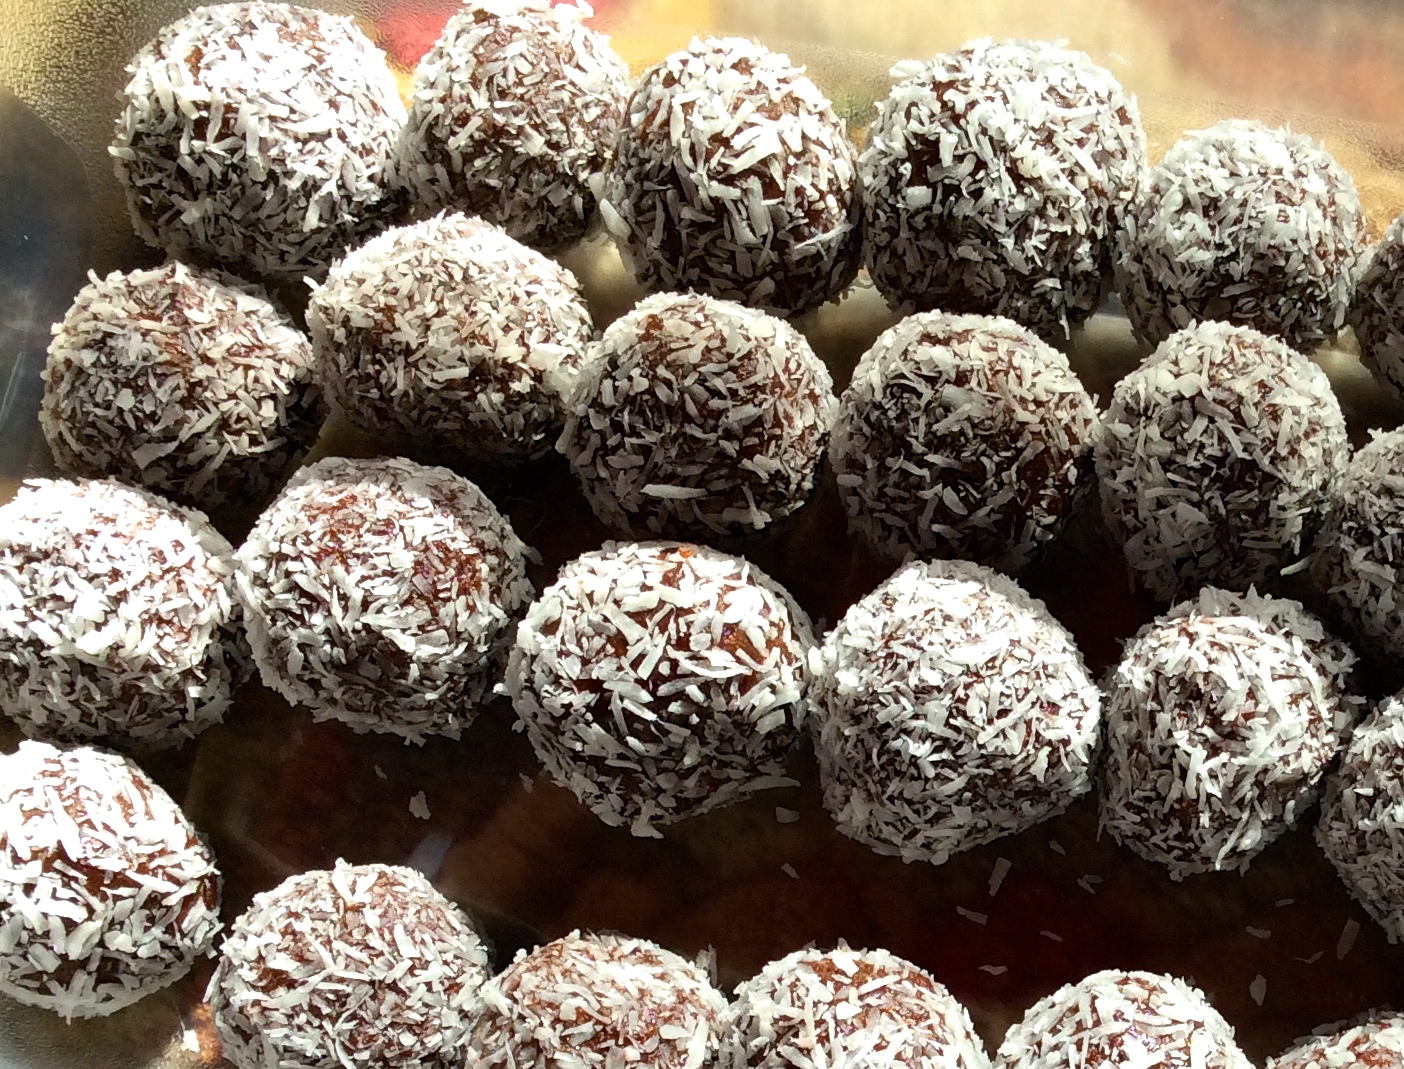
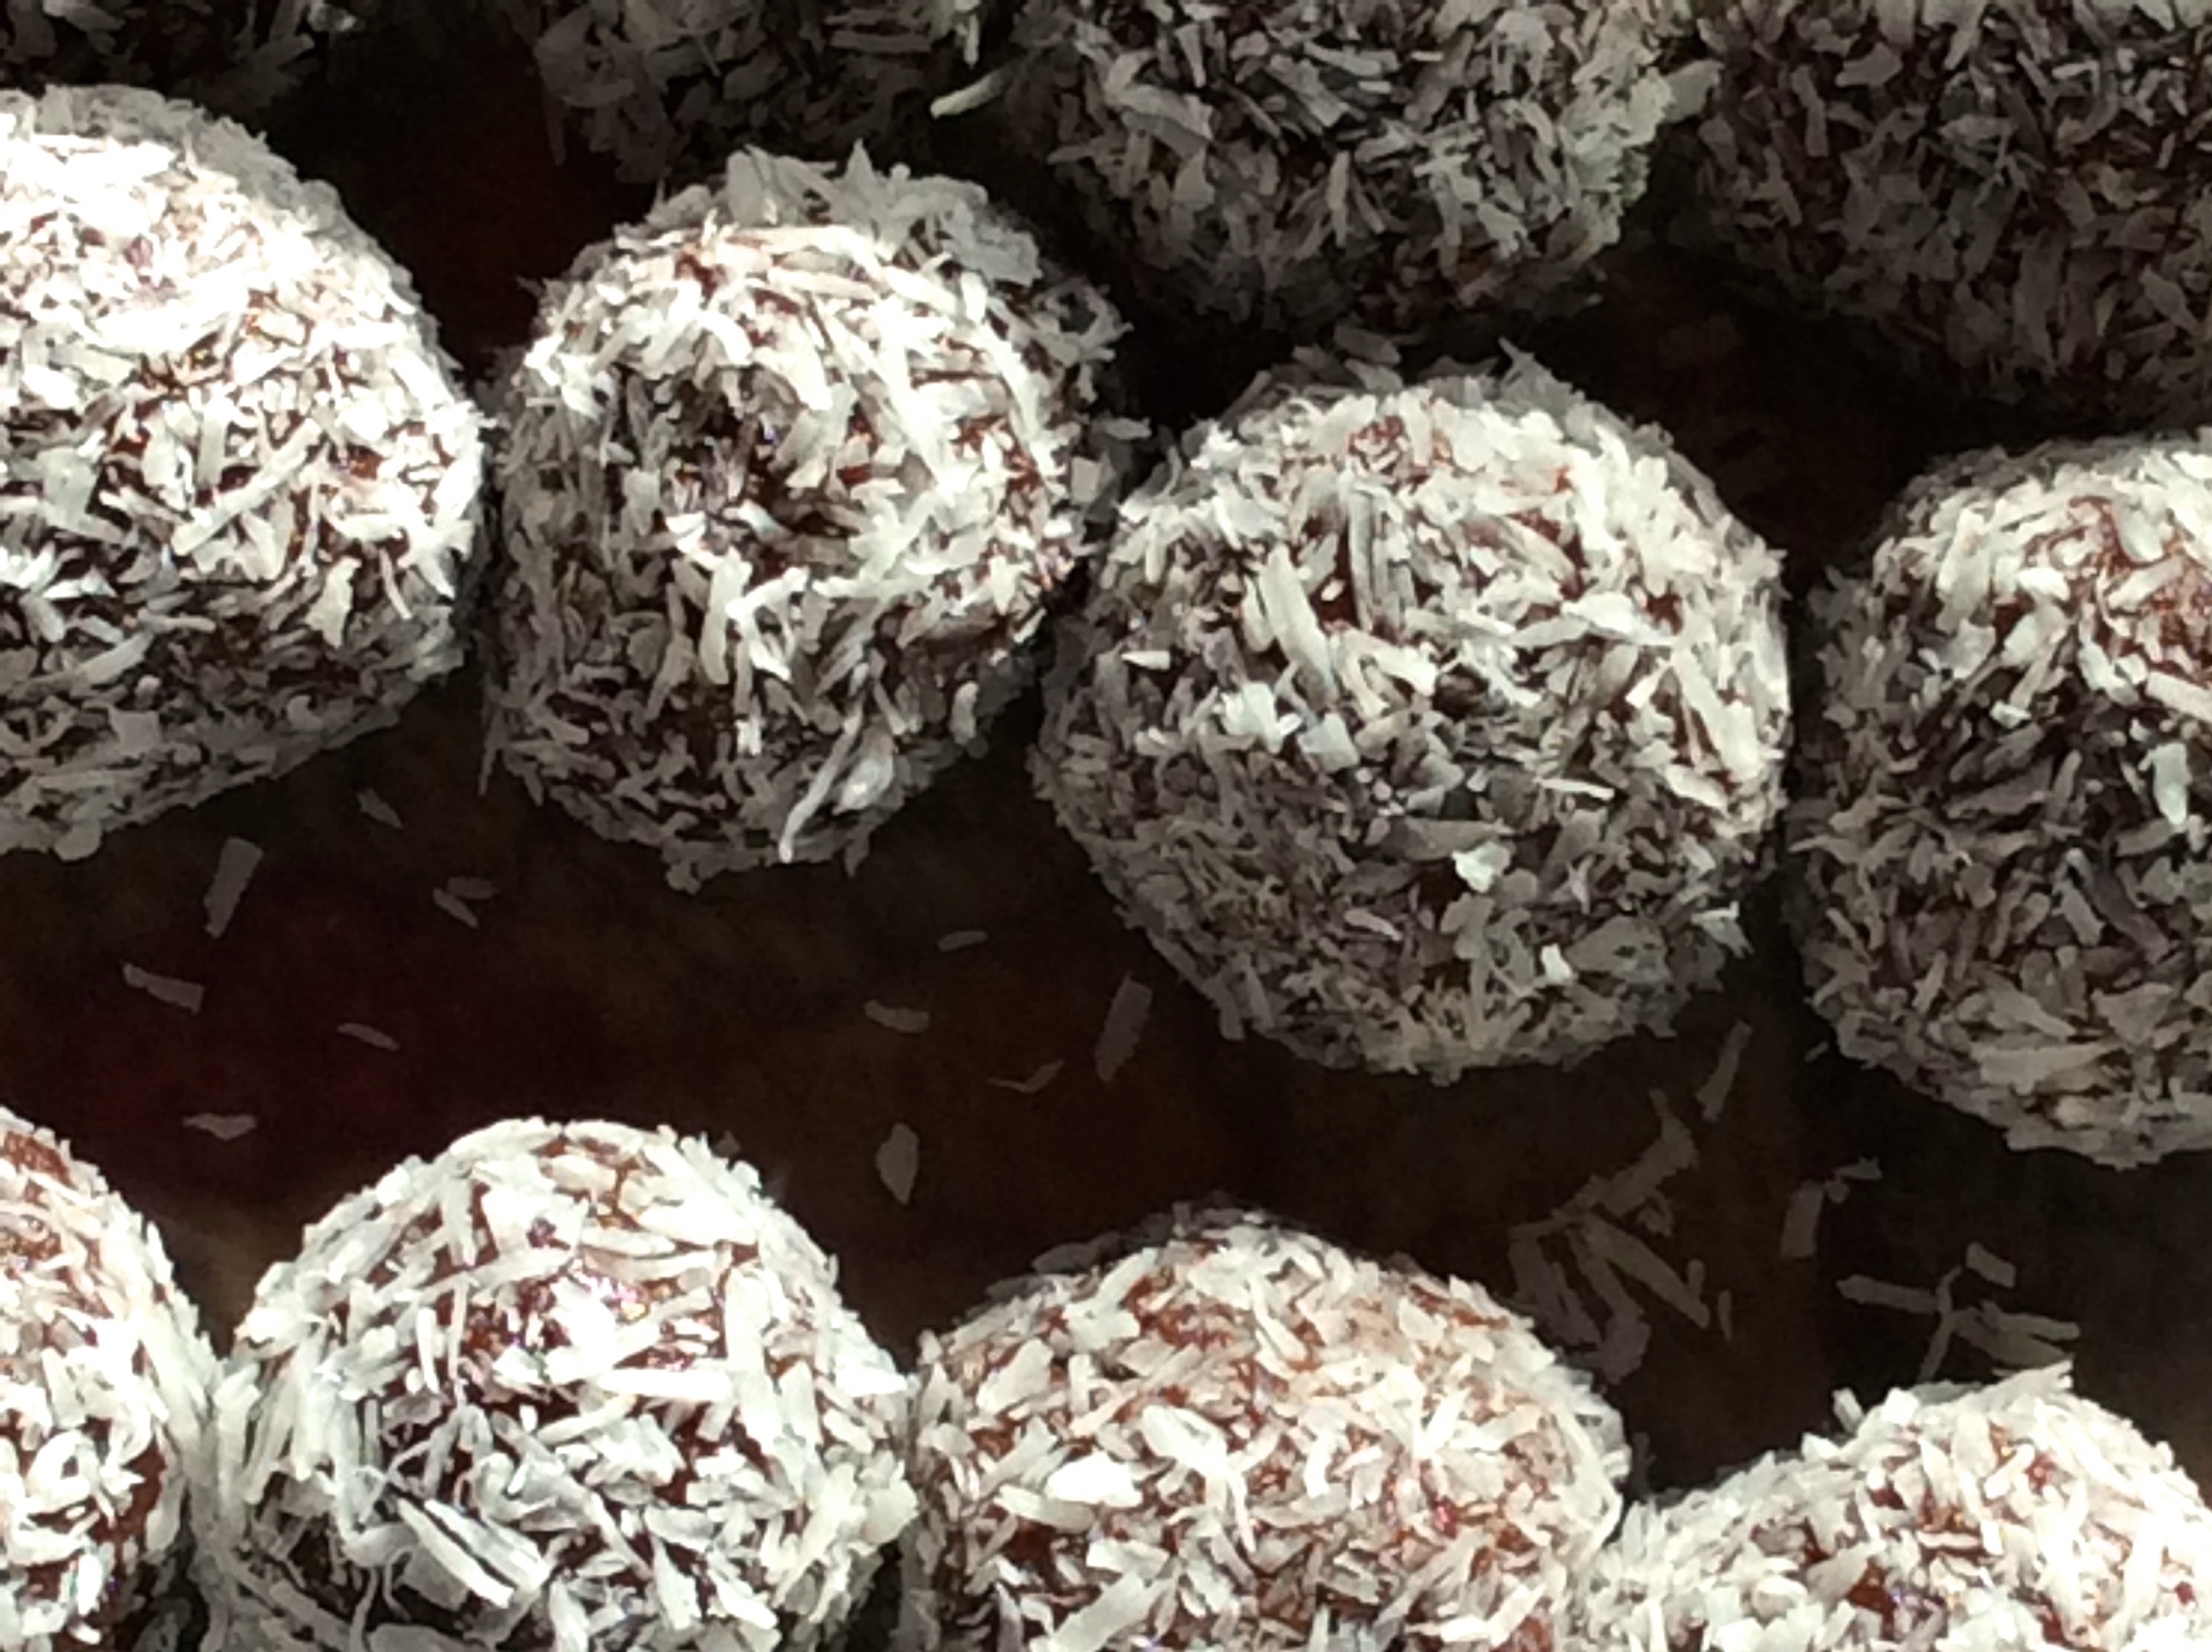
My mom made these chocolate snowballs for Christmas a little over a week ago. Plain butter cookies, espresso, and dark cocoa rolled in unsweetened coconut, make for one delicious chocolate snowball truffle!
The recipe calls for 18 snowballs, but we made them smaller and got 32; thus half the calories! So for those starting on their healthy new year’s resolutions today, you can still eat one a snowball a day, and not jeopardize your diet. 🙂
Credit goes to Johnny Iuzzini, author of the cookbook “Sugar Rush: Master Tips, Techniques, and Recipes for Sweet Baking”. He also has a Killer Chocolate Chip Cookie recipe, so I’d highly recommend purchasing his latest cookbook.
Enjoy!!
Chocolate Snowballs
Prep time:
Total time:
Serves: 1 1/2 dozen
Sugar Rush: Master Tips, Techniques, and Recipes for Sweet Baking” by Johnny Iuzzini
1/2 cup unsweetened desiccated (fine dried flakes) coconut (38 g)
Instructions
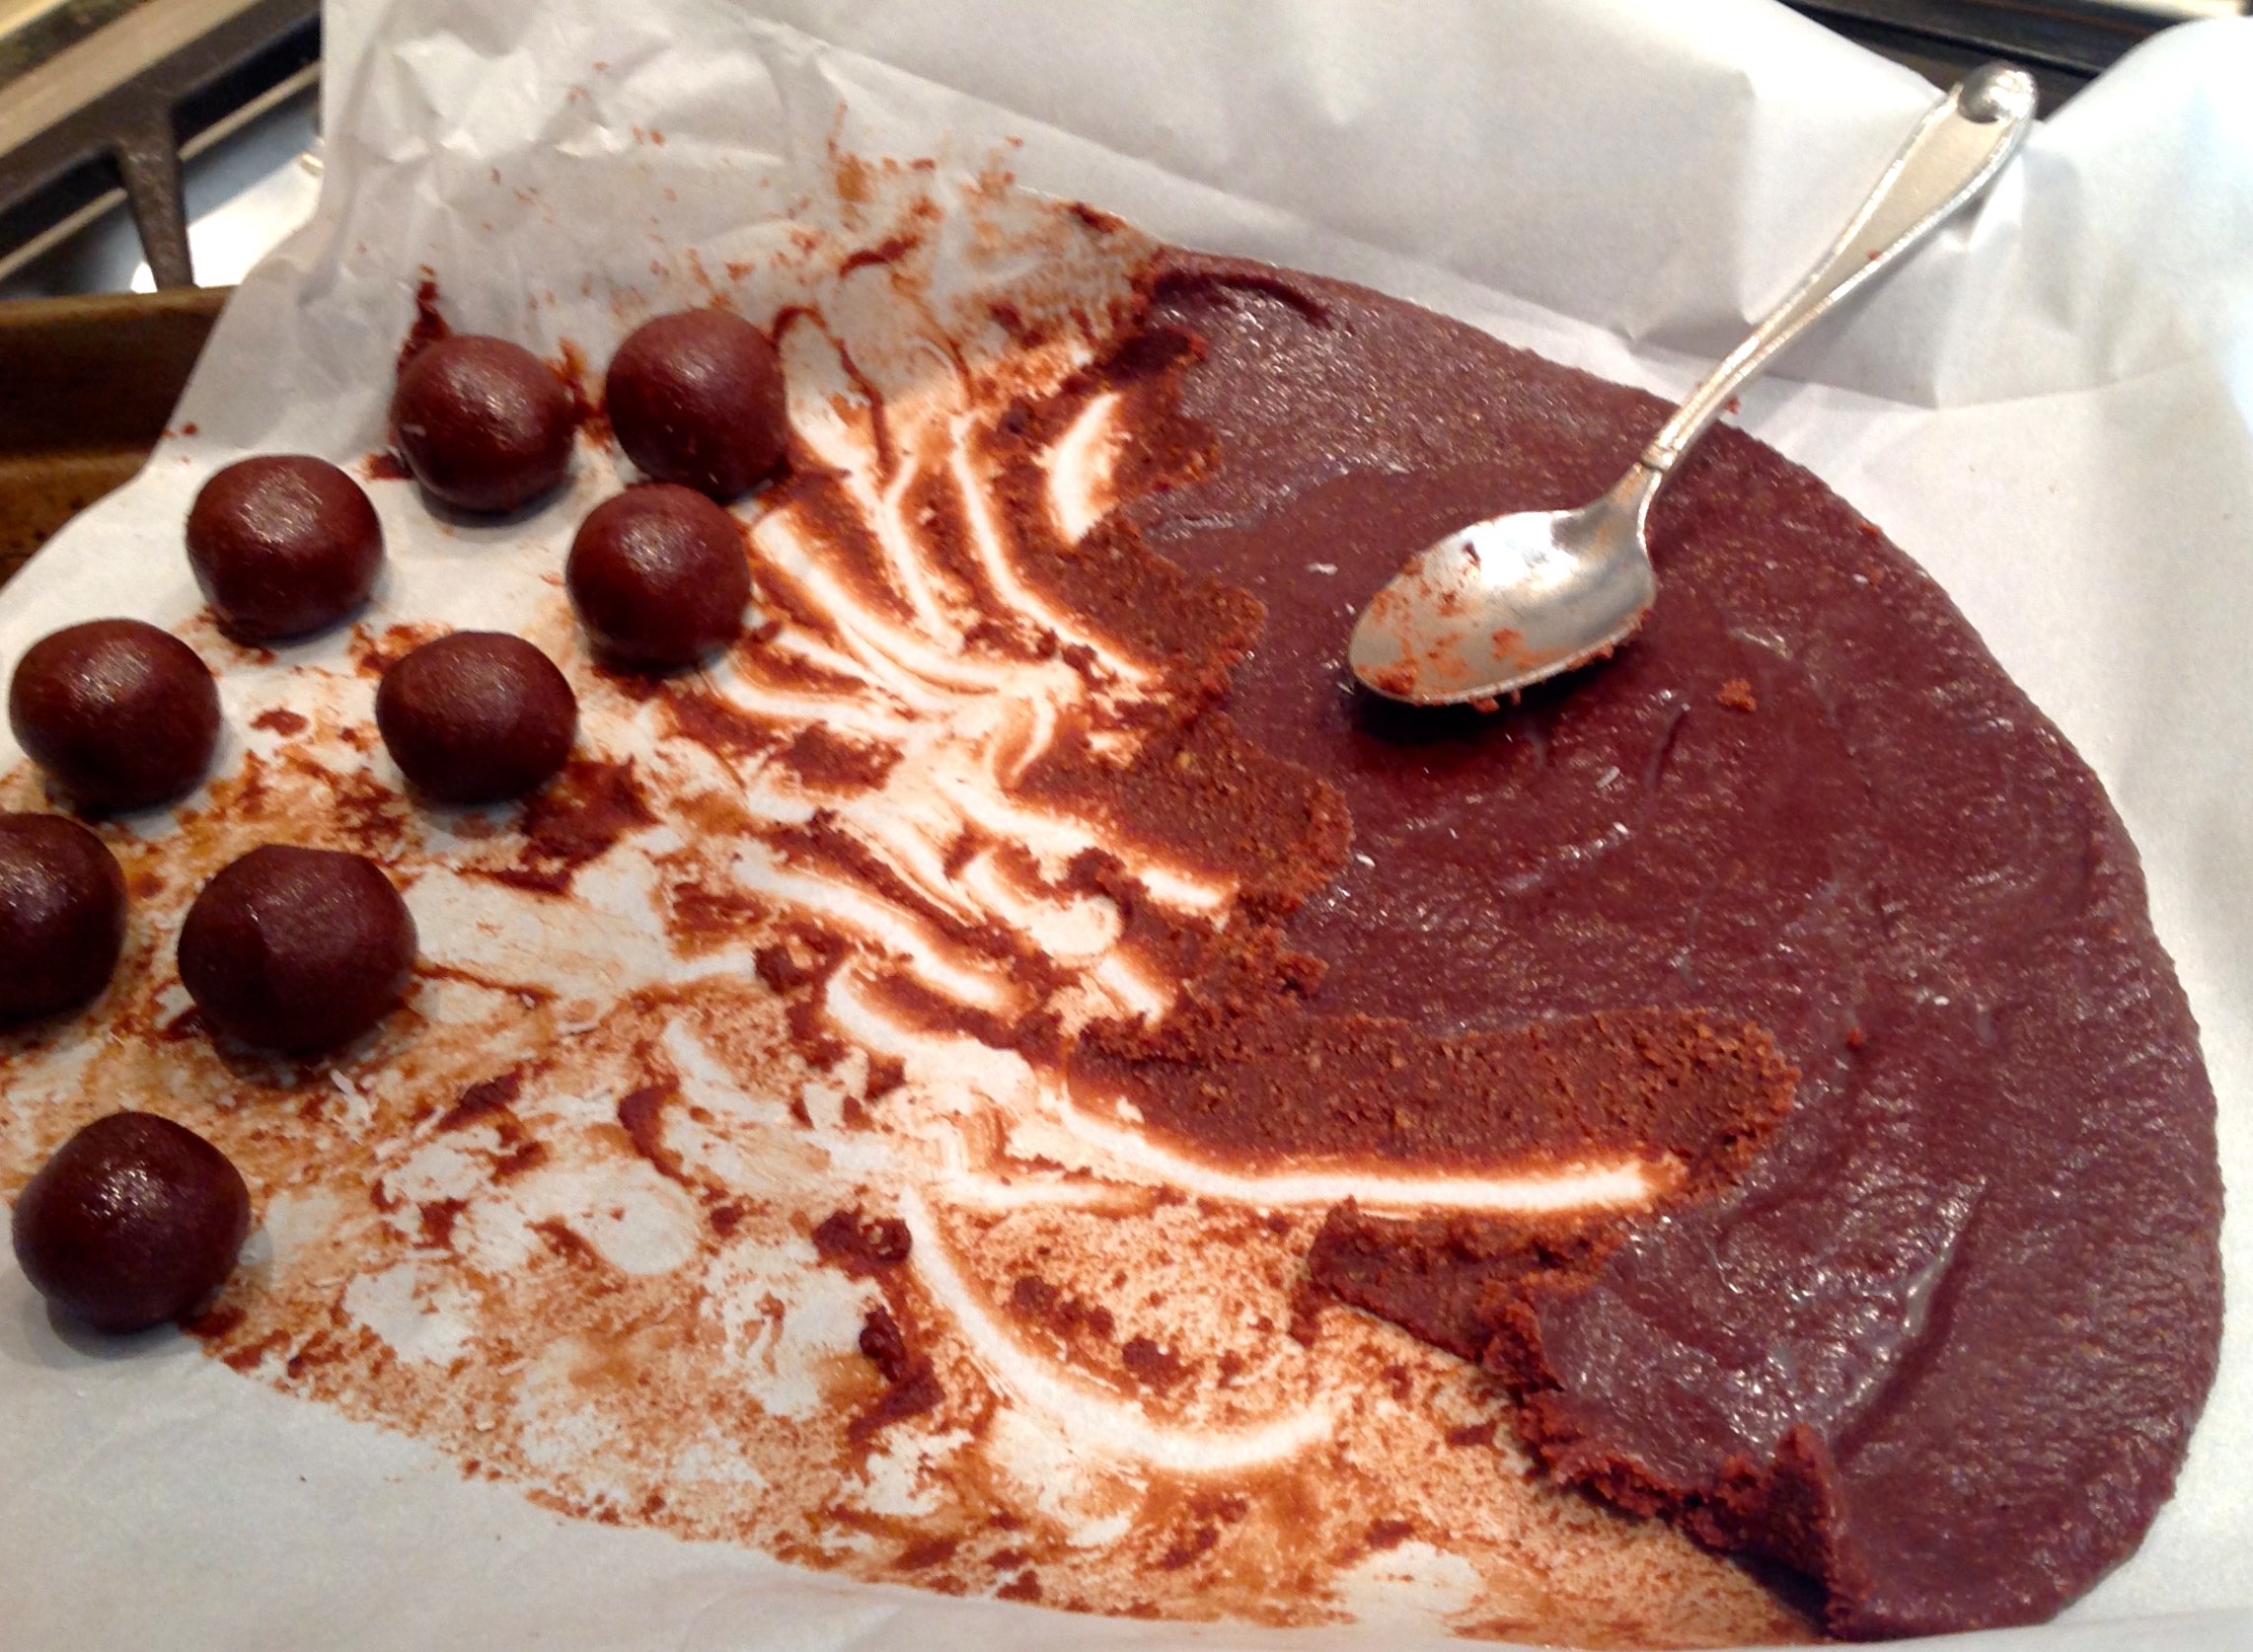
Put the butter, sugar, cocoa powder, and milk into a small saucepan and heat over medium-low heat, stirring occasionally, until the sugar is dissolved and the mixture is smooth. Remove from heat and stir in the espresso powder, vanilla, and salt.
Put the crumbs into a medium bowl and pour the warm liquid mixture over them; mix well until crumbs are evenly moistened. Line a small sheet pan with parchment paper and spread the mixture out on it in an even, thin layer. Refrigerate for 1 to 2 hours.
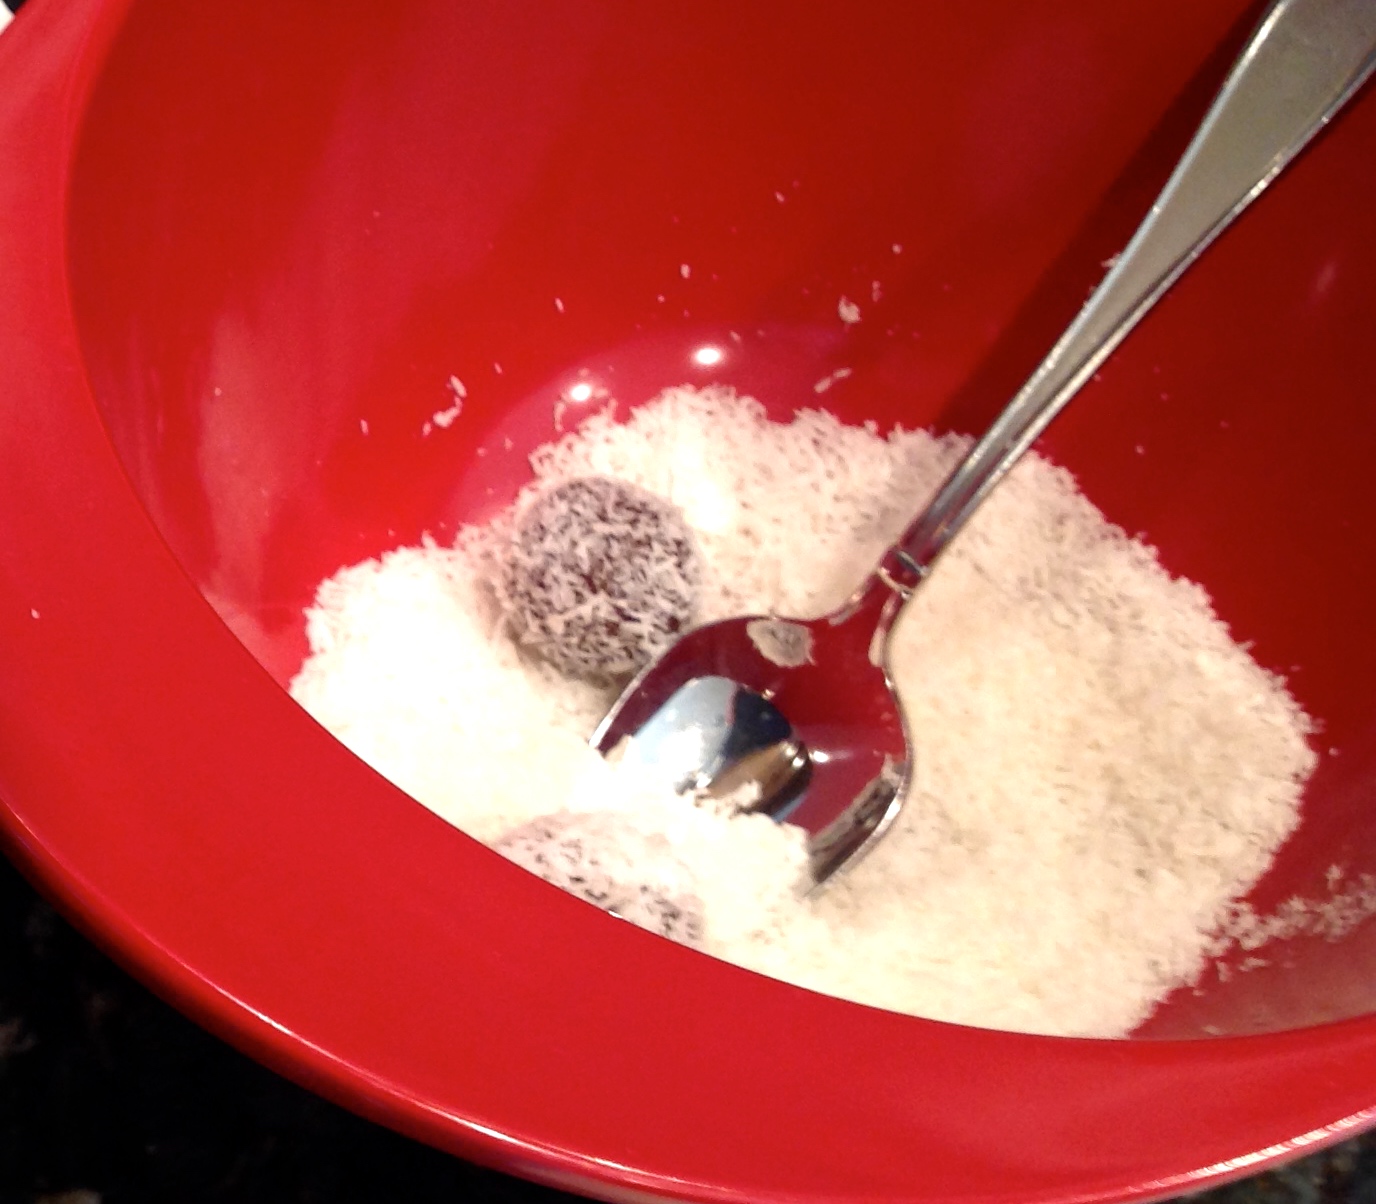
Scoop level tablespoon-sized portions and roll them into balls. Toss them in the coconut, rolling firmly with your hands to adhere the coconut. Refrigerate for at least 30 minutes before serving and up to 1 week.
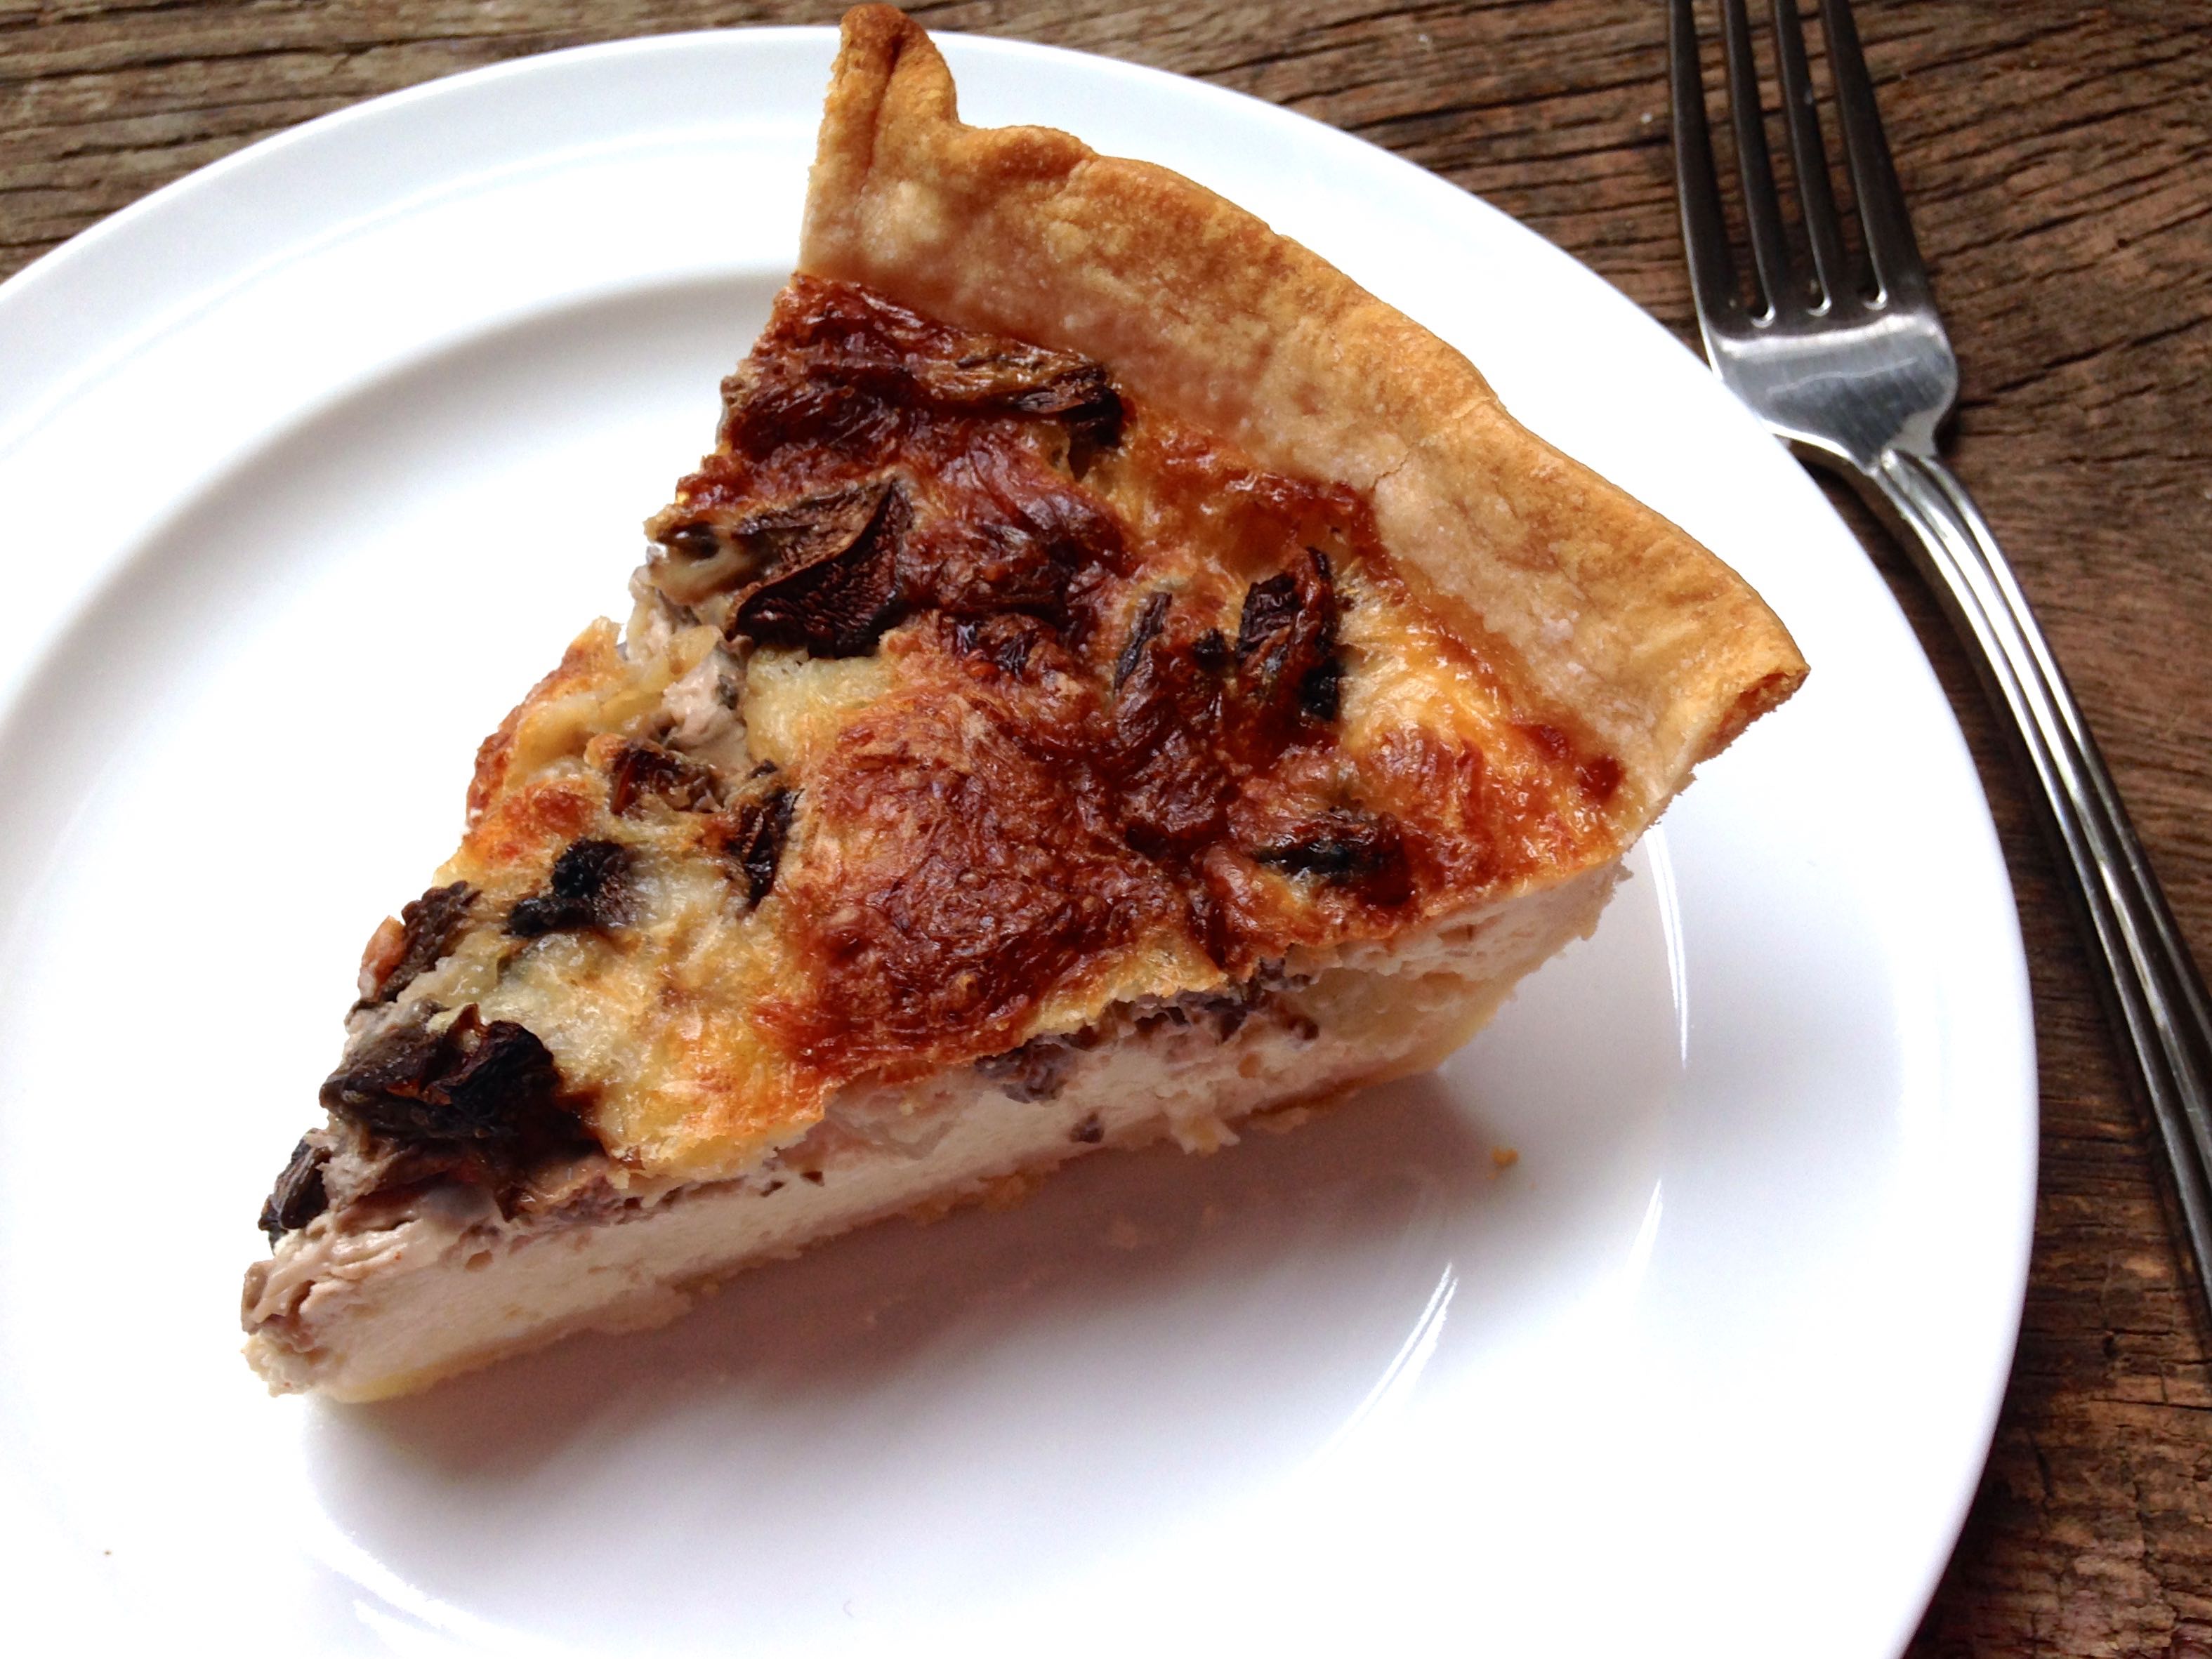
This is just about the easiest quiche you can make, especially if you buy a pre-made refrigerated pie crust. I made this when I was 2 weeks postpartum, and my mother-in-law Paula laughed and said, “You’re the one who just had a baby, and are offering me food to eat. It ought to be the other way around!”
Yep, it’s that easy!
My mom had originally made this quiche for me within a week of me coming home from the hospital. It was so good, I had to make it again!
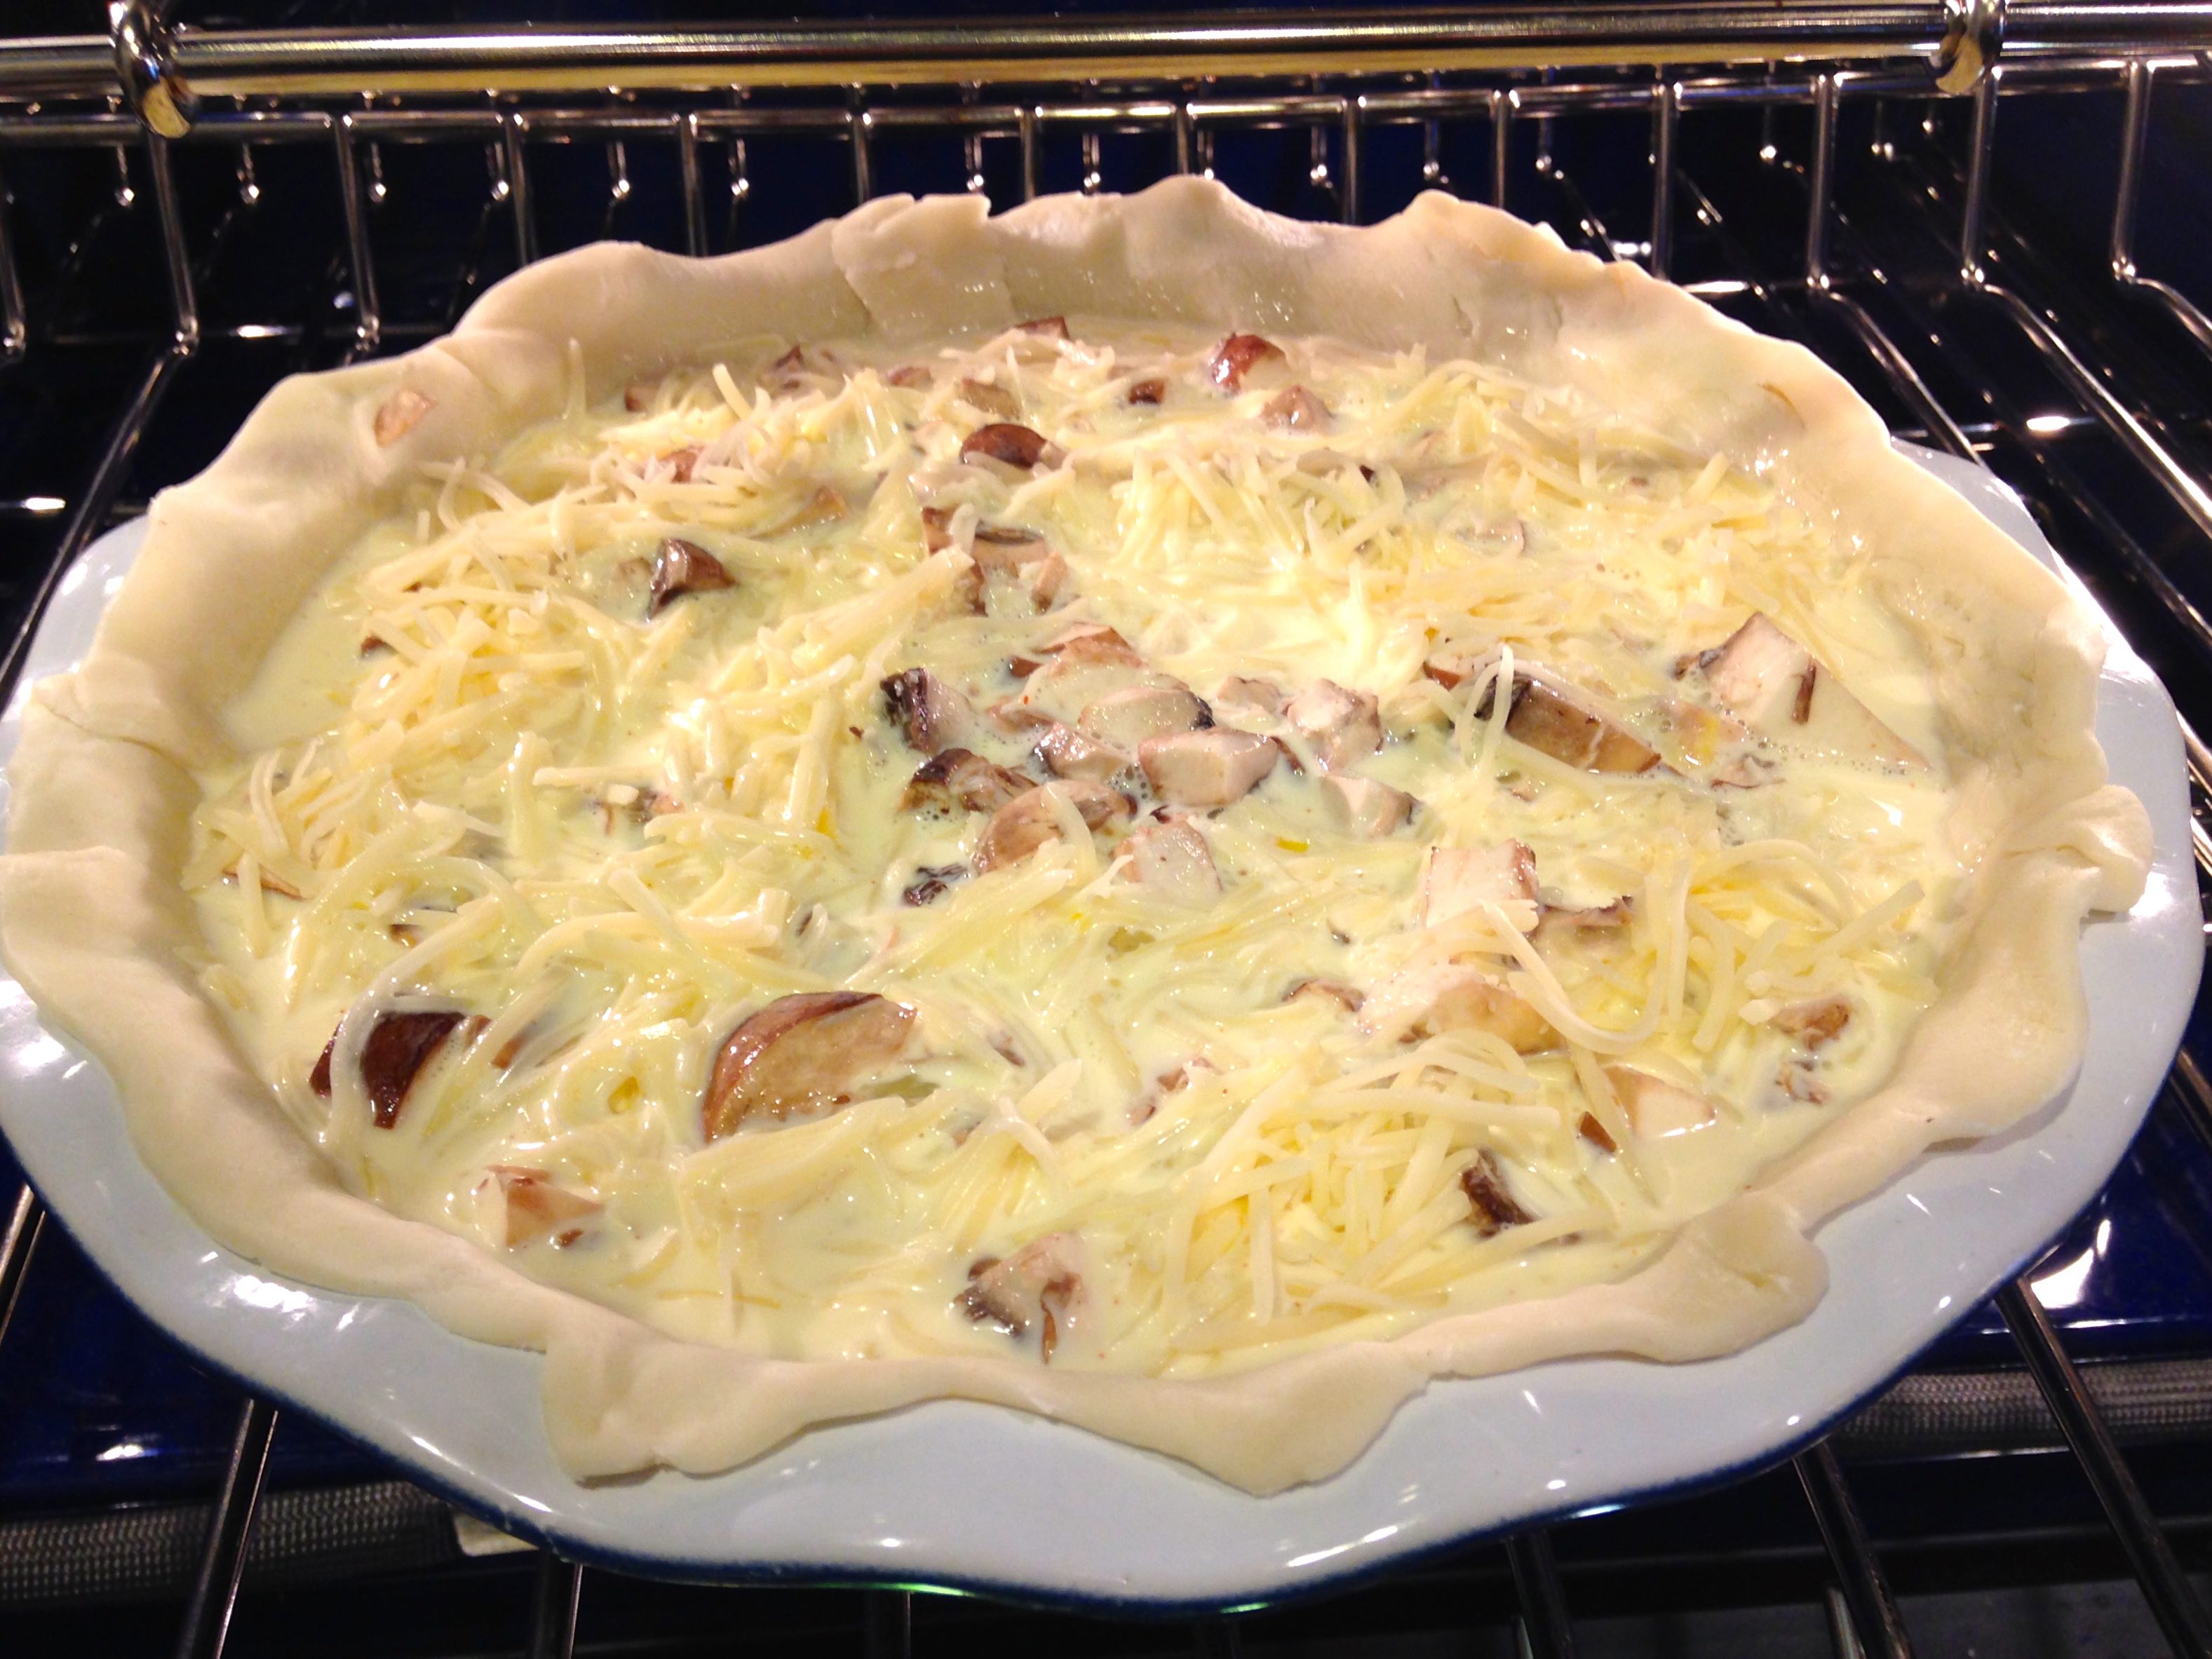
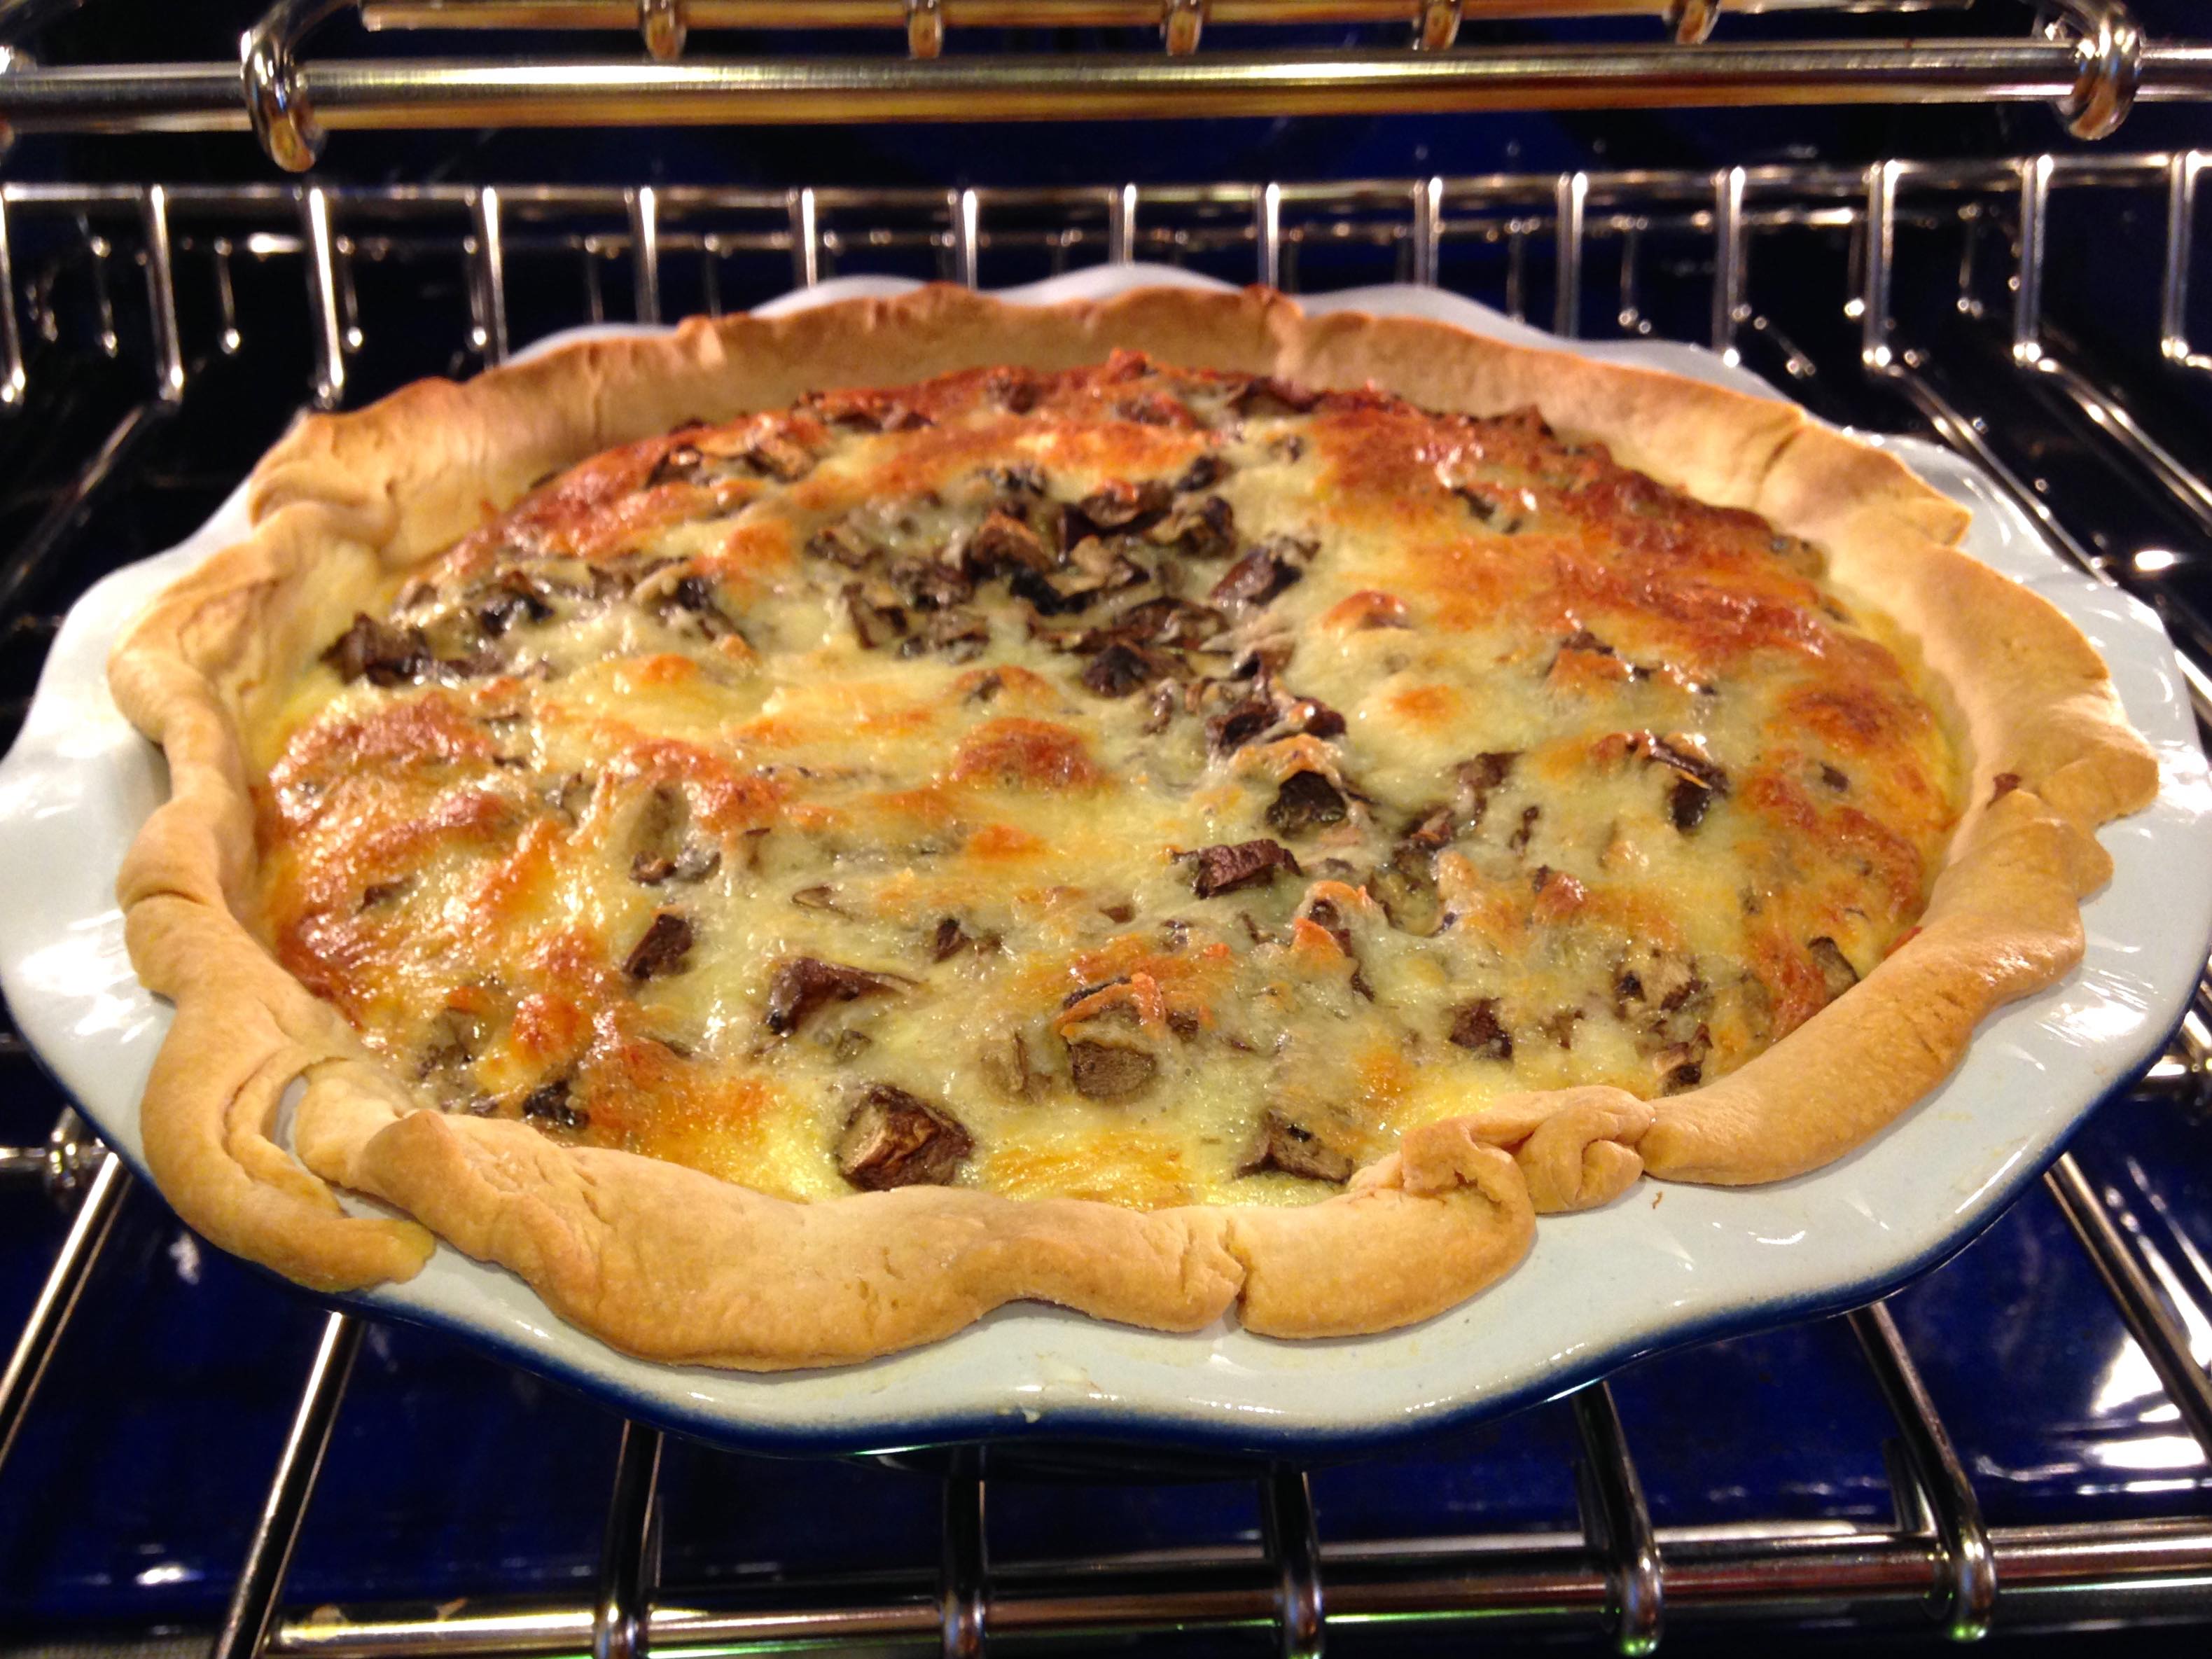
Most of the ingredients you should have on hand, which adds to the simplicity of this dish. The original recipe called for bacon, but I love mushrooms, so I added about 3/4 cup. You could even include both mushrooms and bacon if you wish.
Depending on which kind of pan you use, you may need to alter the baking time. My baking dish was the deep dish kind from Williams-Sonoma, so I probably cooked the quiche an extra 20 minutes because it was no where close to being done. It still tasted great, and browned up perfectly.
Enjoy!
Baby picture of the day: Can you find us? All dressed in camo!
Quiche
Prep time:
Cook time:
Total time:
Serves: 12
Ingredients
Pastry for 9-inch one-crust pie
3/4 cup mushrooms, finely chopped (can substitute 12 slices cooked and crumbled bacon)
1 cup shredded natural Swiss cheese (about 4 ounces)
1/3 cup minced onion
4 eggs
2 cups half and half
3/4 tsp. salt
1/4 tsp. sugar
1/8 tsp. cayenne red pepper
Instructions
Preheat oven to 425 degrees F. Prepare pasty.
Sprinkle mushrooms (or bacon), cheese and onion in a pastry-lined pie pan.
Beat eggs slightly; beat in remaining ingredients. Pour cream mixture into pie pan.
Bake 15 minutes.
Reduce oven temperature to 300 degrees F and bake 30 minutes longer or until a knife inserted 1 inch from edge comes out clean. Let stand 10 minutes before cutting.
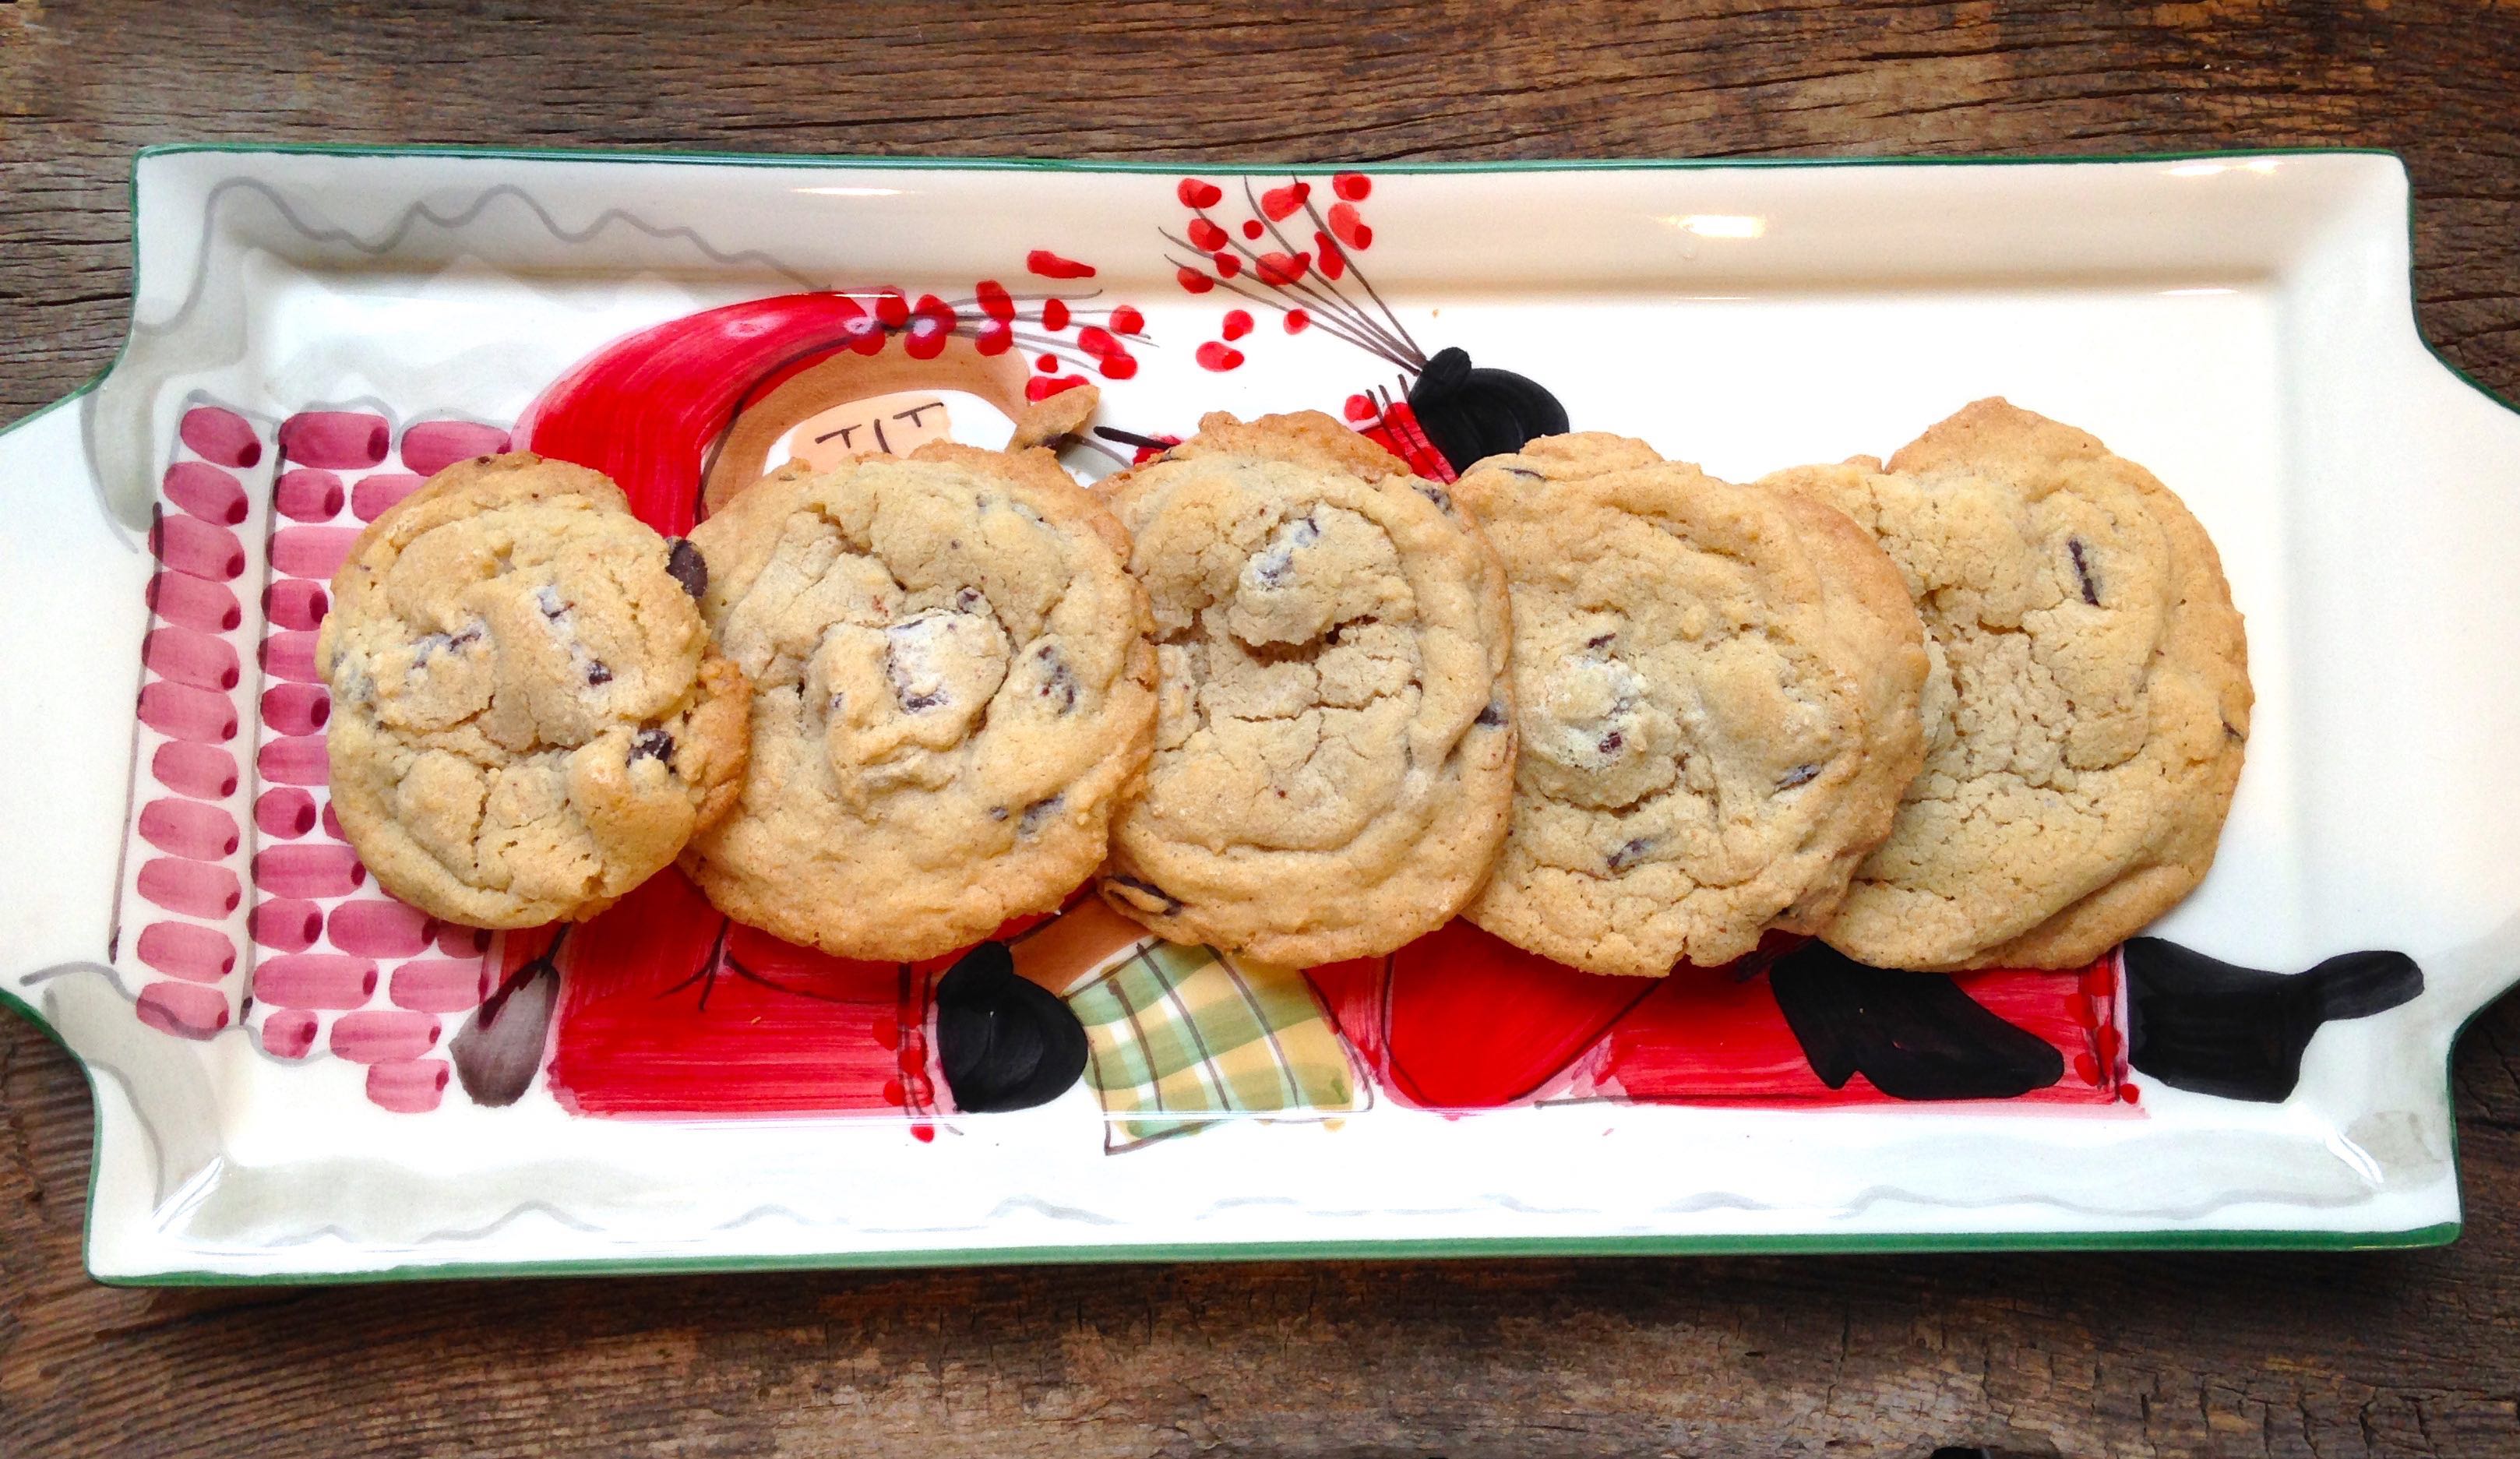
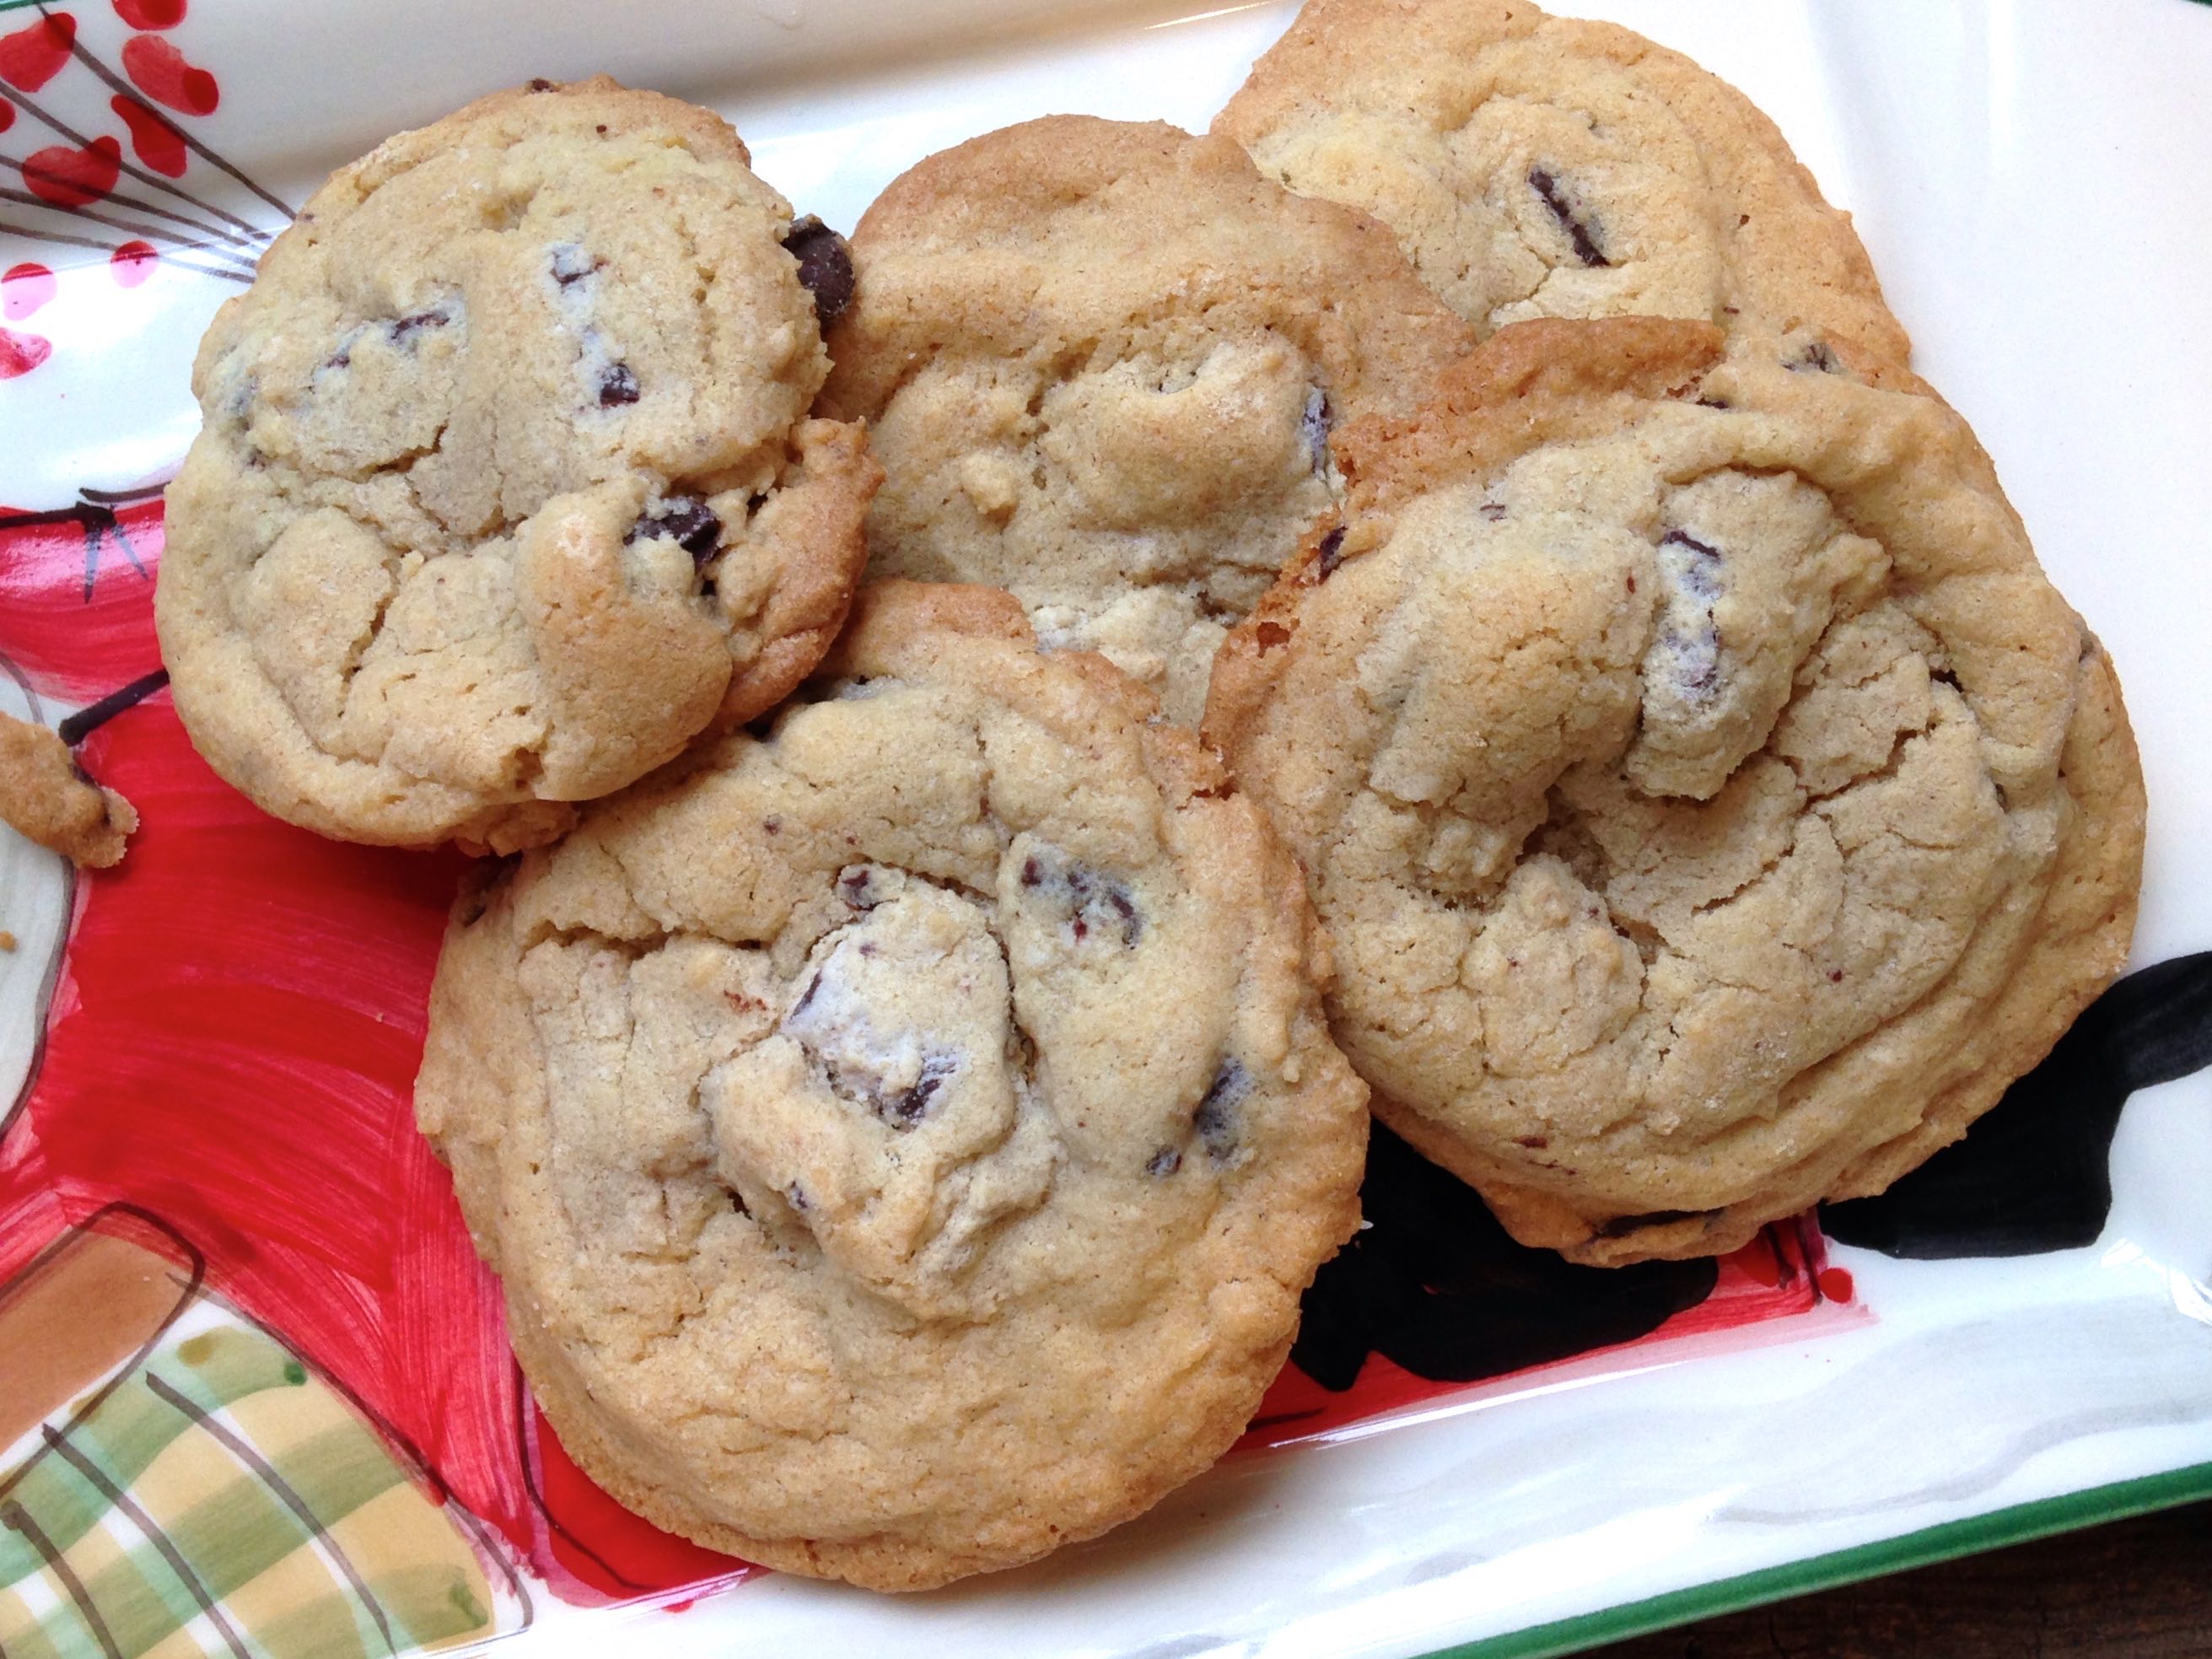
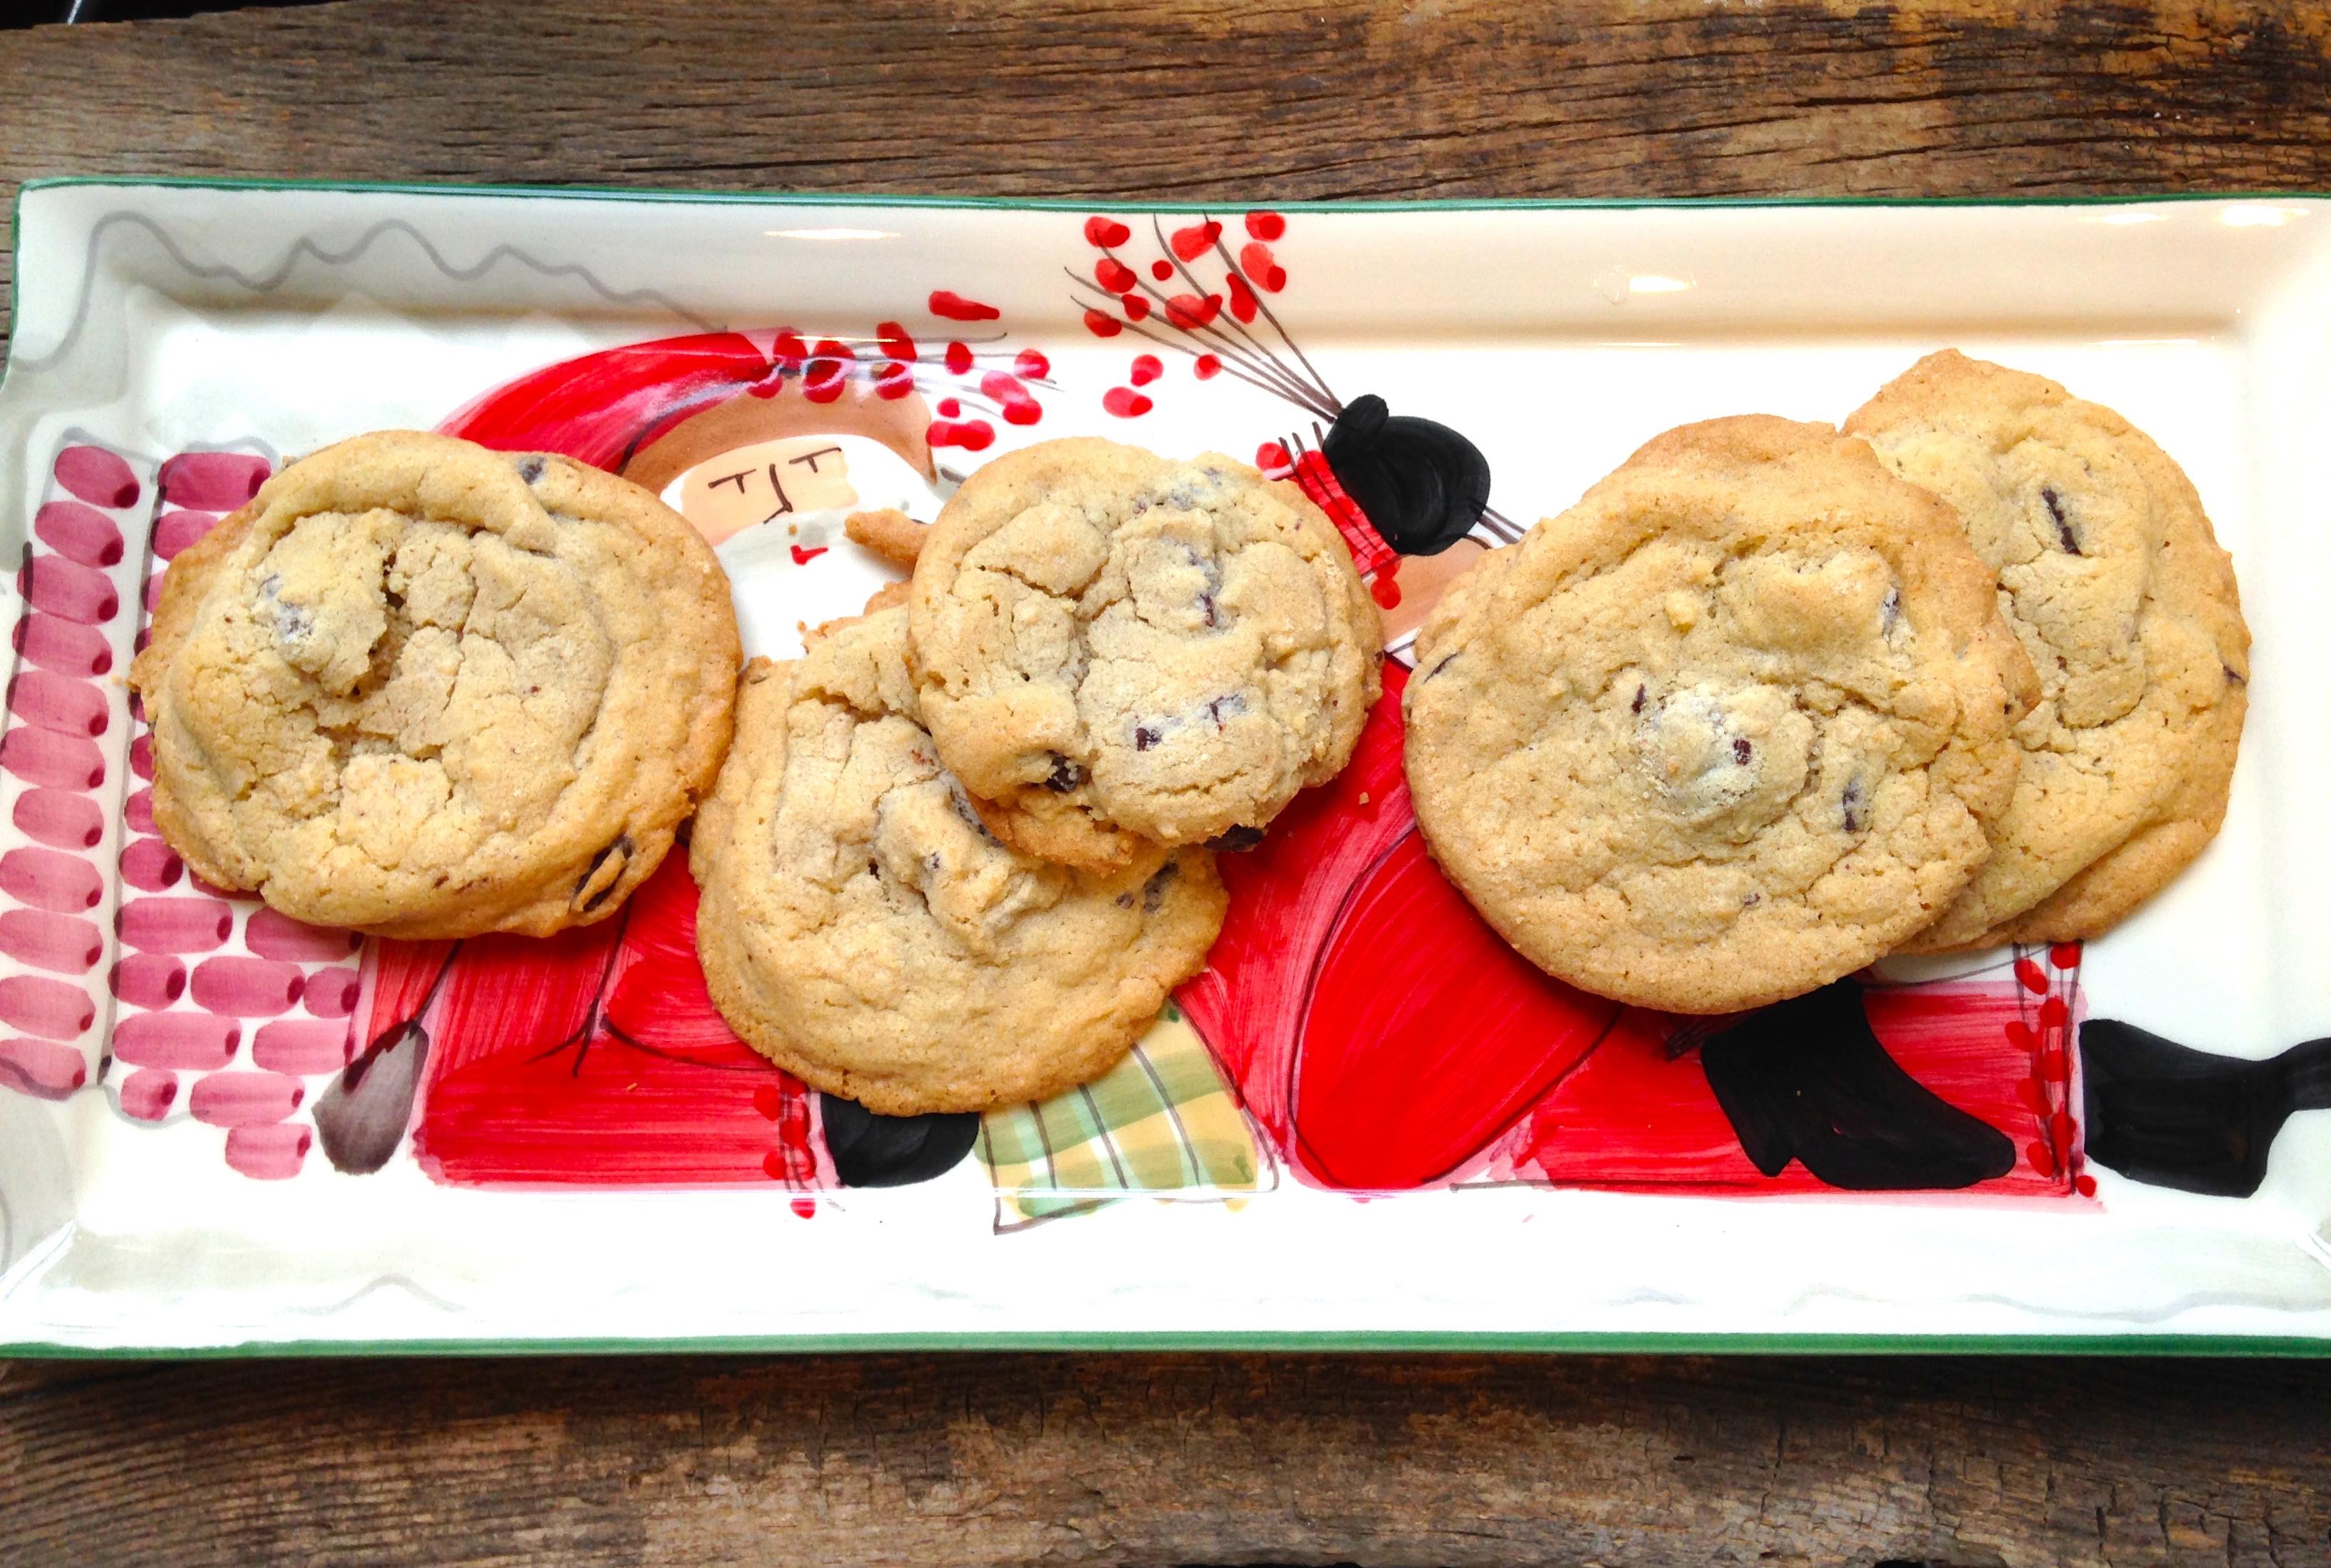
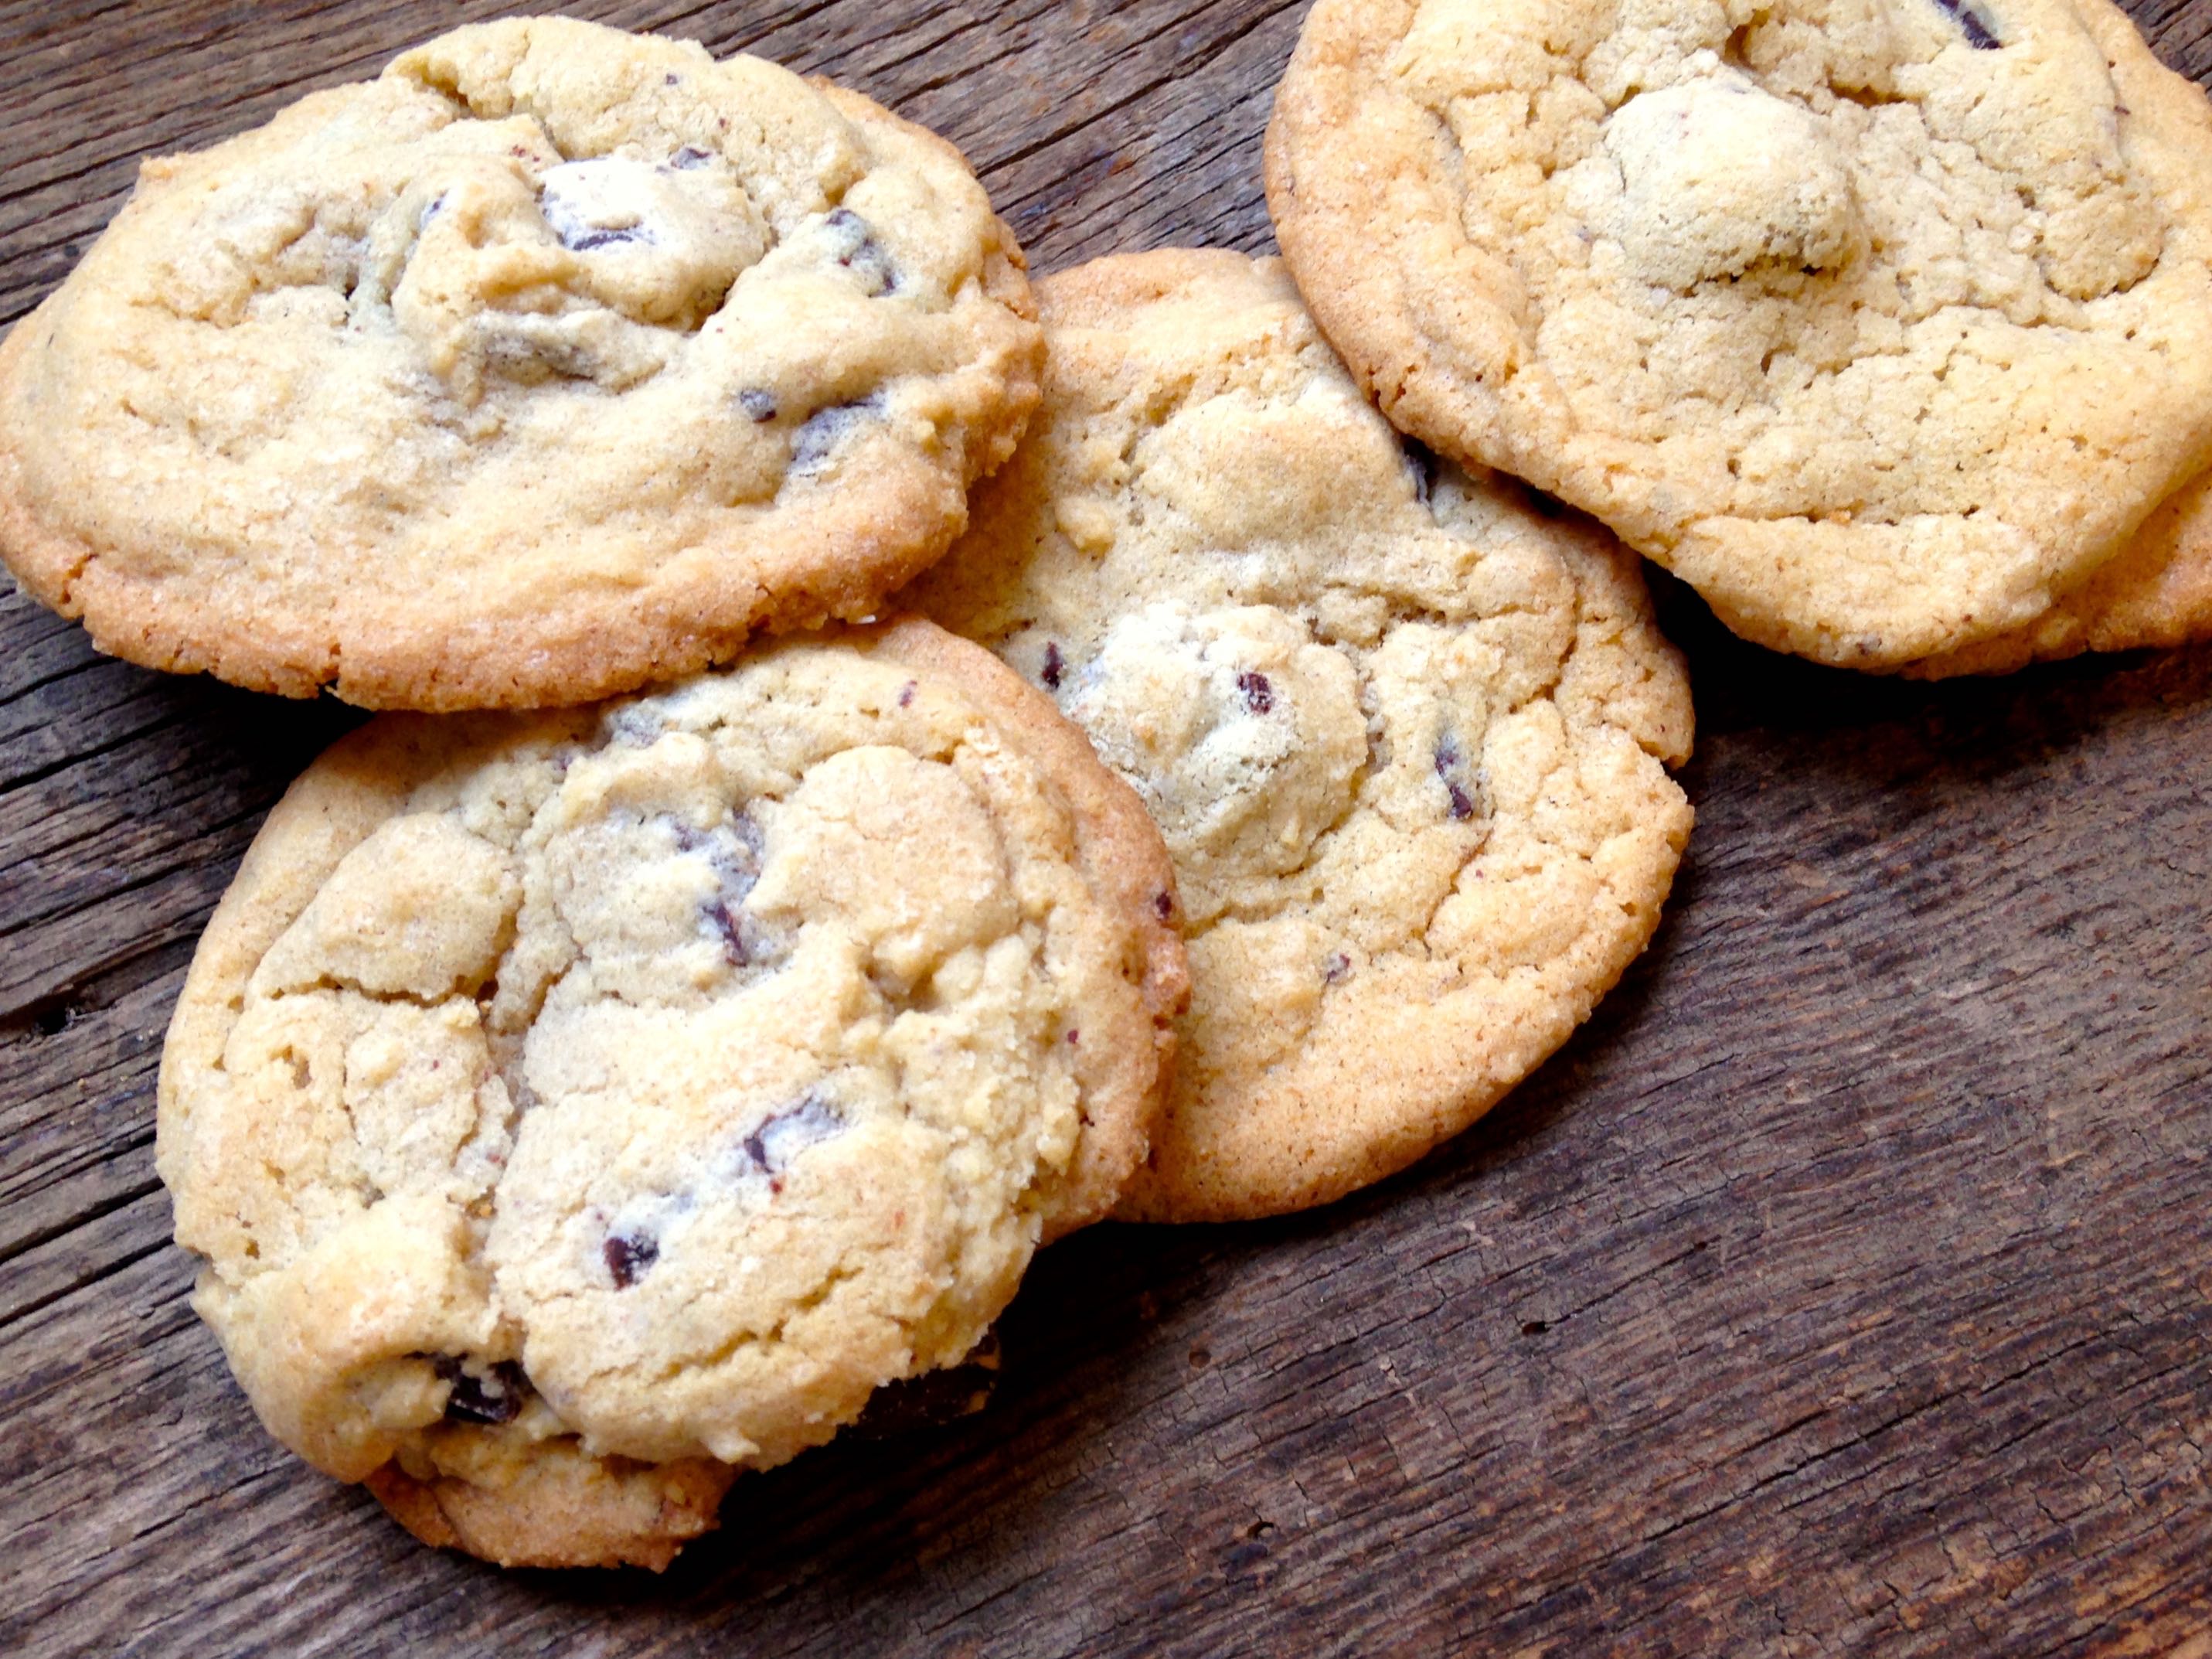
I feel like a have a thousand chocolate chip cookies on the blog, and all are noteworthy. So when my mom tried this new chocolate chip cookie recipe, I wasn’t expecting much.
Each cookie is unique in it’s own way. The Neiman’s cookies are great because they are super easy and have espresso powder in them. The chocolate chip dream cookies have instant vanilla pudding mix, and Jolene’s oatmeal chocolate chip cookies have everything; oats, milk chocolate, semi-sweet chocolate, and nuts!
What makes Johnny Iuzzini’s recipe unique you ask? It’s the almond extract. I’ve never had a chocolate chip cookie with anything but plain ole vanilla extract, and I could immediately taste the almond extract, which was delicious. These cookies also have a little bit of cinnamon, which I love in desserts, but it’s not very predominant; so don’t worry. Sea salt is included, which is a perfect combination to the sweet chocolate chunks.
These cookies are also easy to bake, and don’t require refrigeration of the dough. A lot of cookie recipes require refrigeration, which I find is super annoying, even if it makes the cookies taste better. I’m impatient, and don’t like chilling the dough. I want to bake and eat them as fast as I can!!
Who is Johnny Iuzzini? Besides having a really cool name, he is an American pastry chef, television celebrity, and cookbook author, who resides in New York. His latest cookbook, Sugar Rush: Master Tips, Techniques and Recipes for Sweet Baking just came out in September. According to Amazon, it “is a complete baking course in a book with everything a home baker needs to confidently turn out 150+ sweets with sophisticated flavors.” To purchase Iuzzini’s book, visit Amazon HERE. (Note: I actually discovered this cookie recipe via Monique’s lovely food blog, Ambitious Kitchen.)
This isn’t a chocolate chip cookie, but she’s pretty sweet! She says “give me a cookie!” 🙂
Johnny Iuzzini’s Killer Chocolate Chip Cookies
Prep time:
Cook time:
Total time:
Serves: 3 – 4 dozen
Source: adapted from Ambitious Kitchen
Ingredients
1/2 pound (2 sticks) cold unsalted butter, diced
1 cup granulated sugar
1 cup (packed) light brown sugar
3/4 tsp. vanilla extract
1/2 tsp. almond extract
1 large egg
2 large egg yolks
2 cups all-purpose flour
1 cup cake flour
1 tsp. baking powder
1 tsp. baking soda
1/2 tsp. ground cinnamon
1 tsp. kosher salt
14 oz. semi-sweet chocolate chunks
Instructions
Preheat oven to 350 degrees F. Line 2 baking sheets with silicone baking mats or parchment paper.
Put the butter, granulated sugar, and brown sugar into a standing mixer bowl and toss with your fingers until the butter is coated. Attach the bowl and paddle to the mixer and beat the butter and sugar on medium-low speed until a thick paste forms with no visible butter lumps.
Add the vanilla and almond extracts and mix well. With the motor on low speed, add the egg and egg yolks, one at a time, mixing well between additions. Stop the mixer and scrape down the bowl with a rubber spatula.
Meanwhile, in a separate bowl, sift together the flours, baking powder, baking soda, and cinnamon; sprinkle the kosher salt on top. With a mixer on low speed, slowly add the dry ingredients to the butter mixture, stopping frequently to scrape down the bowl. Mix until just combined; removed the bowl from the mixer and fold the chocolate into the dough by hand.
Using a small 1/2 ounce ice cream scoop, scoop level balls of dough and arrange them around 2 inches apart on the lined cookie sheets.
Bake for 12-13 minutes, rotating the pans once, until just set and bottoms are beginning to brown. Cool for 10 minutes on the pans before transferring to a rack to cool completely.
Store the cookies in an airtight container for up to 3 days.


