Strawberry Layer Cake

Believe it or not, this cake is actually “healthy”.  It comes from the Cooking Light:  Cooking Through the Seasons cookbook.  This is a nice and refreshing springtime cake with real strawberries, lowfat buttermilk, and egg whites in the batter, rather than a boring old cake mix.  The icing has 1/3-less-fat cream cheese, orange juice, and powdered sugar, for an exceptionally sweet frosting.
My mom decided to make this cake last Sunday for our family because we were in the  mood for something fruity, not chocolatey.  If you have ever been to Celebrity Cafe’ & Bakery in Colleyville, Highland Park, or Frisco, you’ll think we catered this cake from them because of its sweetness, and the fact it is pink (the entire inside, walls and everything are painted pink at Celebrity Bakery, and you’d be hard pressed to see a man in there!)
Enjoy this wonderful Strawberry Layer Cake….which I almost forgot to mention, we made into a one-layer, 9 x 13-inch pan rather than a two layer round cake.  It doesn’t matter if you choose the one or two layer presentation, it still tastes the same.  Enjoy!


Strawberry Layer Cake
Ingredients
1 1/4 cups sliced strawberries
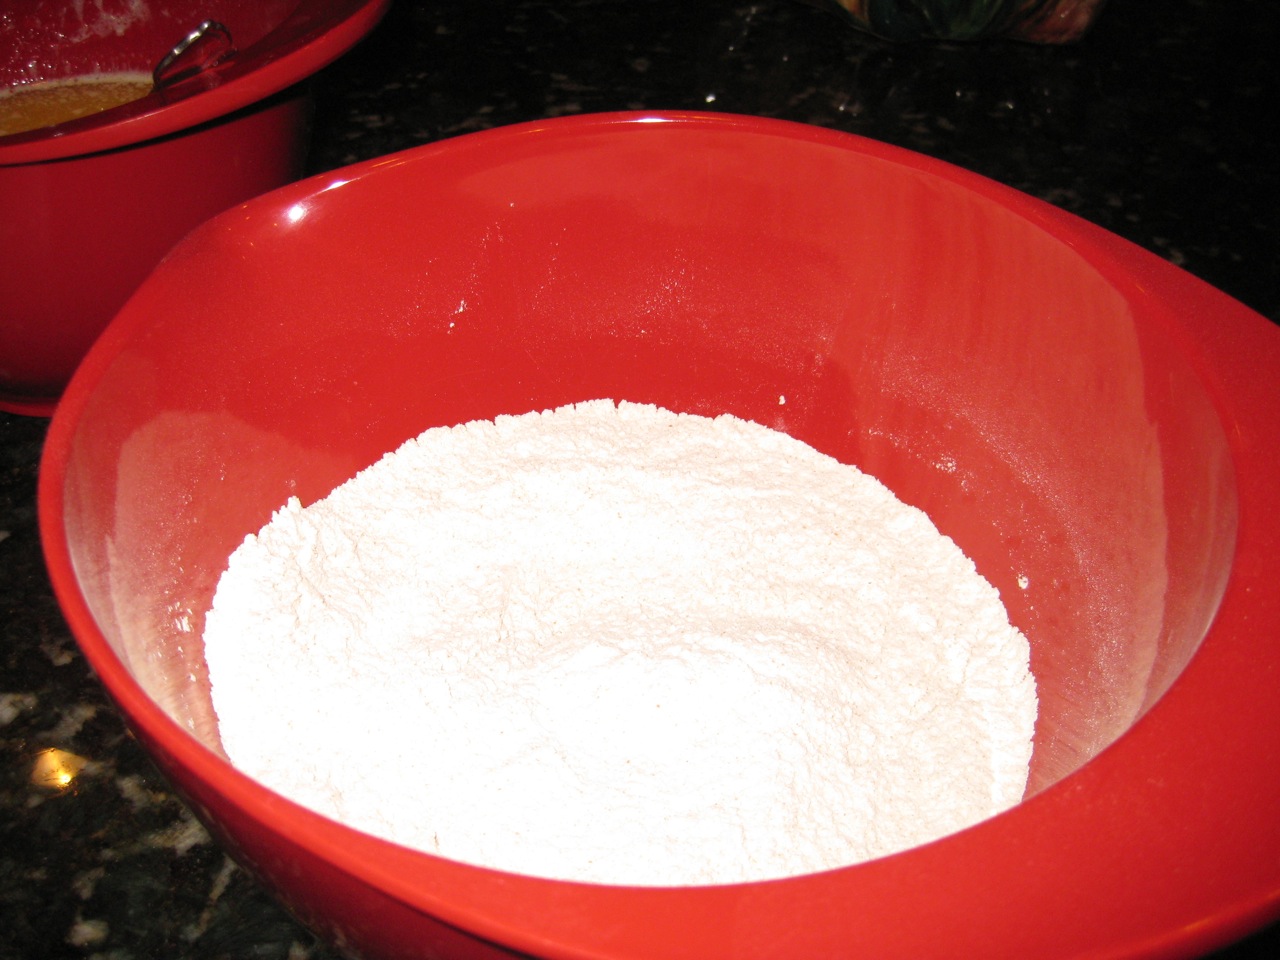
10 oz. all-purpose flour (about 2 1/4 cups)
2 1/4 tsp. baking powder
1/8 tsp. salt
1 1/2 cups granulated sugar
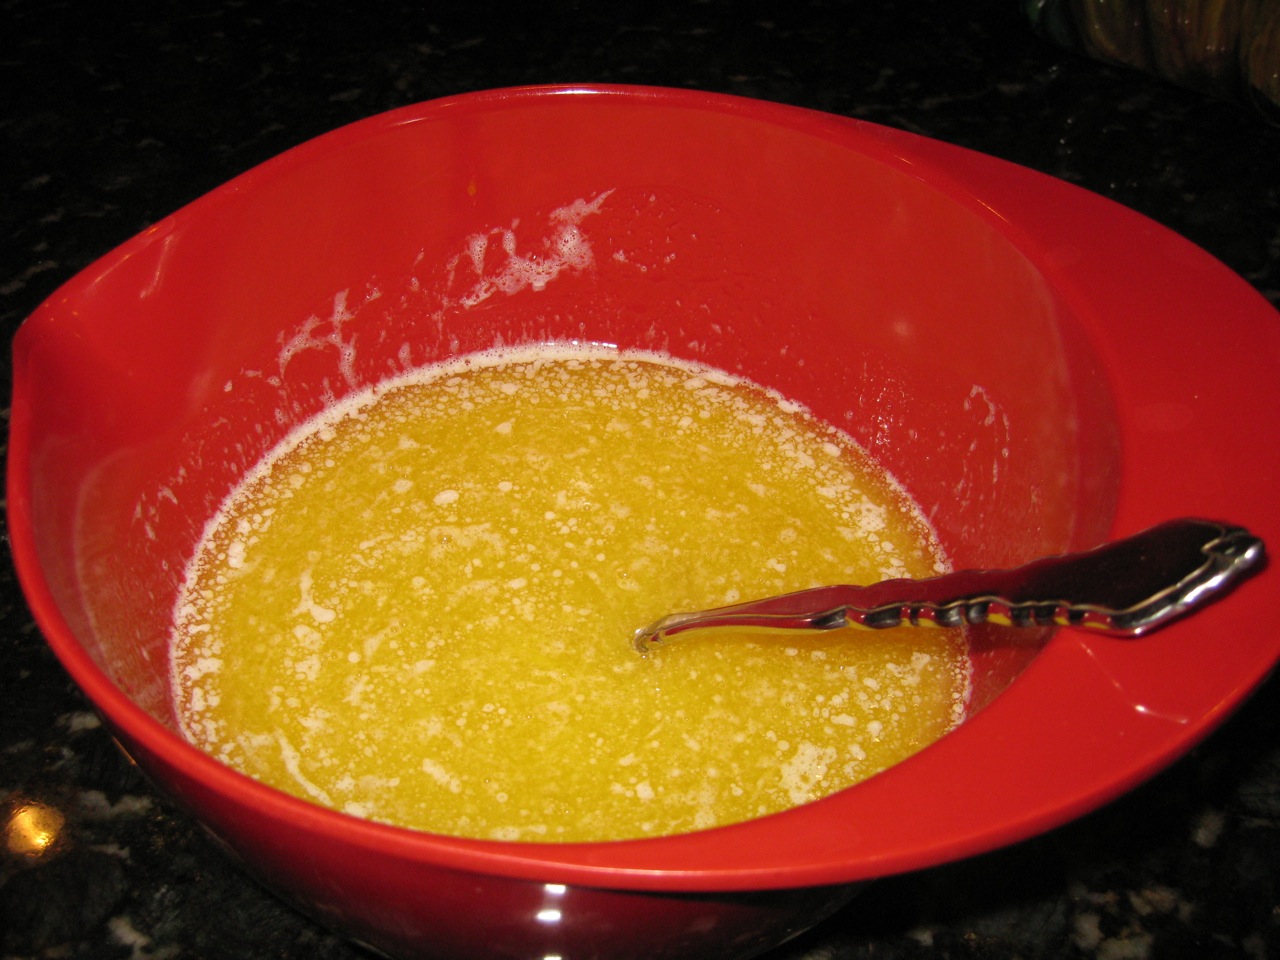
1/2 cup butter, softened
2 large eggs
2 large egg whites
1 cup low-fat buttermilk
1/4 tsp. red food coloring
Cooking Spray

Frosting:
1/3 cup (3 oz.) 1/3-less-fat cream cheese
1/3 cup butter, softened
2 Tbsp. Grand Marnier (orange-flavored liquor or orange juice may be substituted)
3 cups powdered sugar
12 whole strawberries

Directions
1.  Preheat oven to 350 degrees F.
2.  To prepare cake, place sliced strawberries in a food processor; process until smooth.
3.  Weigh or lightly spoon flour into dry measuring cups; level with a knife.  Combine flour, baking powder, and salt, stirring with a whisk.  Place granulated sugar and 1/2 cup butter in a large bowl; beat with a mixer at medium speed until well blended.  Add eggs, one at a time, beating well after each addition.  Beat in egg whites.  Add flour mixture and buttermilk alternatively to sugar mixture, beginning and ending with flour mixture.  Add pureed strawberries and food coloring; beat just until blended.
4.  Divide batter between 2 (8-inch) round cake pans coated with cooking spray.  (We just used one 9 x 13-inch pan).  Bake at 350 degrees F. for 30 minutes or until a wooden pick inserted in center comes out clean.  Cool pans on a wire rack for 10 minutes.  Remove from pans; cool completely on wire racks.
5.  To prepare frosting, place cream cheese, 1/3 cup butter, and liqueur in a medium bowl; beat with a mixer at medium speed until blended.  Gradually add powdered sugar, and beat until just blended.
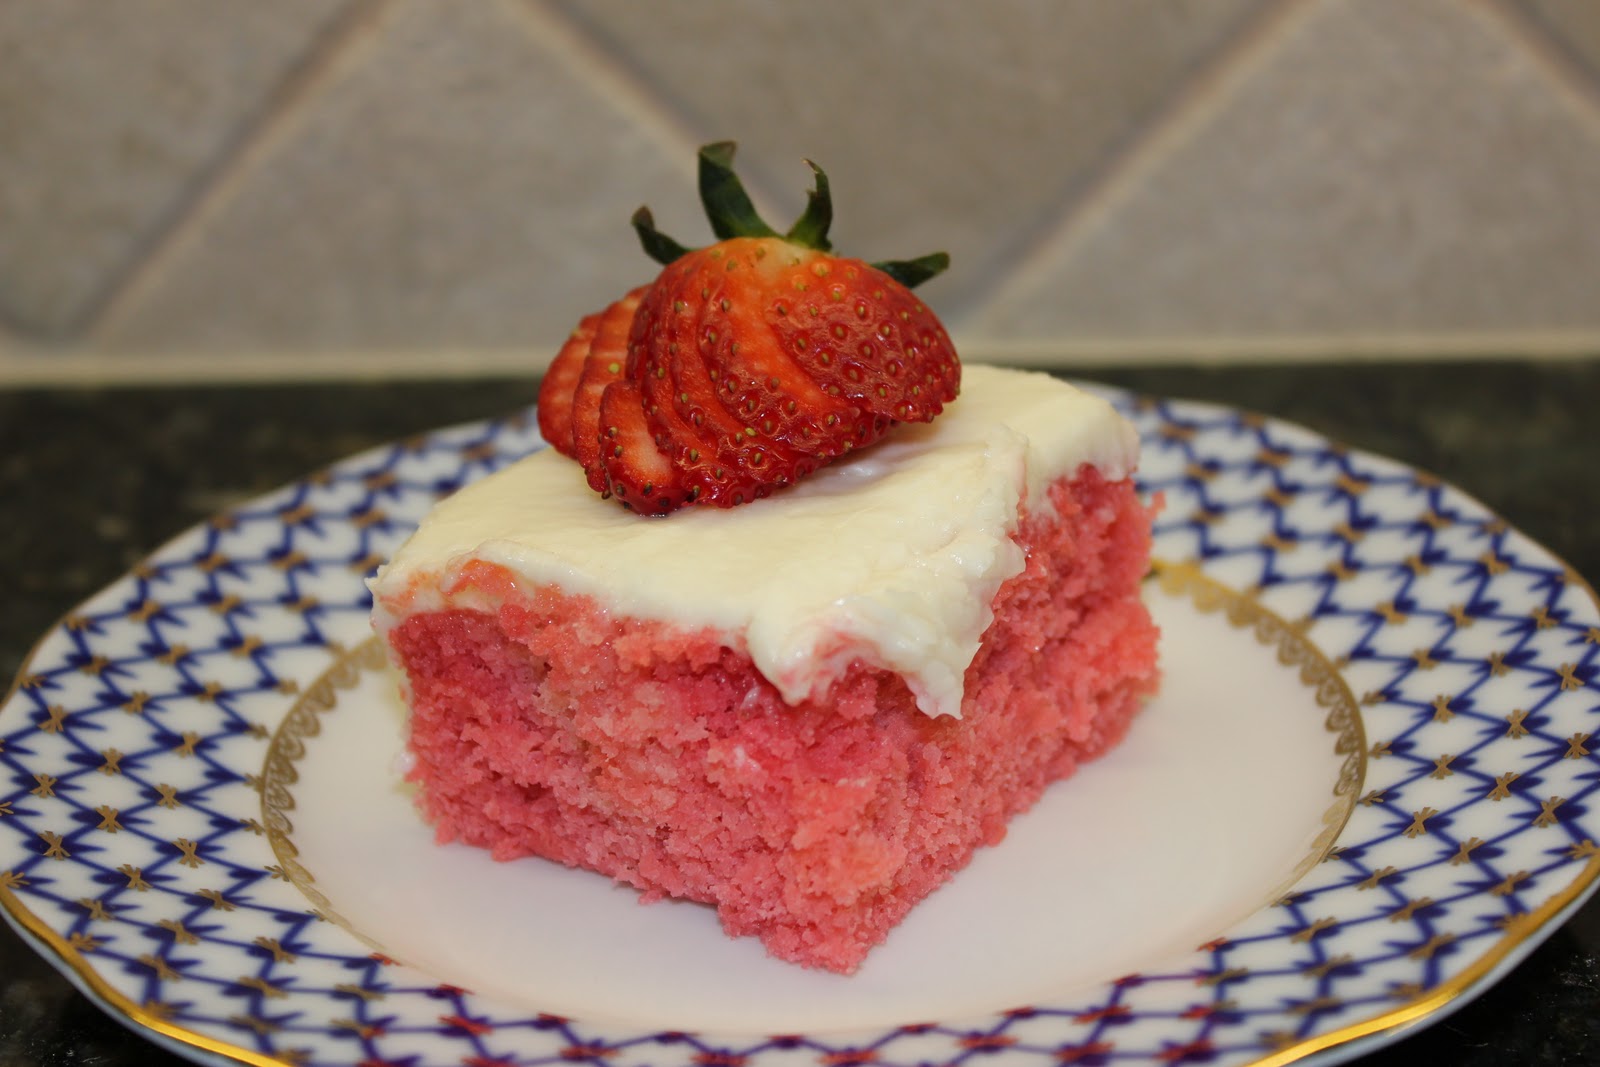
6.  Place 1 cake layer on a plate; spread with 1/2 cup frosting.  Top with remaining cake layer.  Spread remaining frosting over top and sides of cake.  Cut 1 whole strawberry into thin slices, cutting to, but not through, the stem end.  Fan strawberry on top of cake just before serving, if desired.  Cut remaining 11 strawberries in half.  Garnish cake with strawberry halves, if desired.  (If frosting a 9 x 13-inch cake, just layer frosting, evenly, on the top of the cake.)

Serves:  16
Cooking Light, May 2009

Nutritional Information
Calories:  348
Fat:  11.3 g
Protein:  4.3 g
Carbohydrate:  57.7g
Fiber:  0.7g
Cholesterol:  55mg
Iron:  1.1mg
Sodium:  212mg
Calcium:  74mg

Quick Chicken Parmesan

I love chicken, especially chicken coated in crisp, panko breadcrumbs.  Well, this Quick Chicken Parmesan recipe from Fine Cooking October/November 2010 issue will not disappoint.  The crisp chicken cutlets are topped with two cheeses (Parmesan and mozzarella) and a super-fast tomato sauce in this easy take on an Italian restaurant favorite.  I love how this recipe can be made and served in under 30 minutes, and it’s friendly on your budget too!
My husband loved this new recipe, so we will be making this on a weekly or every other week basis.  Enjoy!
In a shallow dish, combine salt, pepper, and flour.
Beat eggs with one tablespoon of water in a second shallow dish.
In the third shallow dish, prepare panko breadcrumbs.
Dip chicken cutlets in flour, egg, and panko, and heat in a saute’ pan over medium-high heat for 1 to 2 minutes per side, or almost cooked through.
Prepare baking sheet with foil lightly sprayed with cooking spray.  Transfer chicken to baking sheet and sprinkle Parmesan cheese on top.
Layer with thin layers of mozzarella cheese.  Bake at 425 degrees F. for 5-7 minutes, or until cheese is melted and bubbly.
Meanwhile, prepare sauce.  Cook onion and garlic in one tablespoon of olive oil over medium heat until onion is tender and lightly browned.  Pour in tomatoes and salt, and simmer for 4 to 5 minutes and thickened.  Remove from heat and stir in basil. Season with salt and pepper.

Serve sauce over chicken.  Can also serve the chicken parmesan over cooked spaghetti.


Quick Parmesan Chicken
Ingredients
Nonstick cooking spray
2 1/4 oz. (1/2 cup) unbleached, all-purpose flour
Freshly ground black pepper
2 large eggs
1 1/2 cups panko breadcrumbs
4 thin-sliced boneless, skinless chicken breast cutlets (about 14 oz.)
5 Tbsp. olive oil
3/4 cup freshly grated Parmigiano-Reggiano (use the small holes of a box grater)
4 oz. fresh mozzarella, thinly sliced
1 small yellow onion, chopped
2 medium cloves garlic, finely chopped
1 (14.5 oz.) can crushed tomatoes (preferably Muir Glen fire-roasted crushed tomatoes)
1/4 cup packed fresh basil, chopped (1/2 oz.)

Directions
1.  Position a rack in the center of the oven and heat the oven to 425 degrees F. Line a large rimmed baking sheet with foil and lightly coat the foil with nonstick cooking spray.
2. Mix the flour and 1/4 tsp. pepper in a wide, shallow dish.  In a second, wide shallow dish, lightly beat the eggs with 1 Tbsp. water.  Put the panko in a third wide, shallow dish.  Season the chicken with salt and coat each piece in the flour, tapping off the excess, then the egg, and then the panko, pressing the panko to help it adhere.
3.  Heat 2 tablespoons of the oil in a 12-inch nonstick skillet over medium-high heat.  Working in two batches, cook the chicken, flipping once, until the crumbs are golden, and the chicken is almost cooked through, 1 to 2 minutes per side, adding 2 tablespoons more oil for the second batch.  Transfer the chicken to the prepared baking sheet.  Sprinkle the chicken with the Parmigiano and then top evenly with the mozzarella.  Bake until the cheese is melted and the chicken is cooked through, 5 to 7 minutes.
4.  Meanwhile, wipe the skillet clean and set over medium heat.  Pour in the remaining 1 tablespoon of oil and then add the onion and garlic.  Cook, stirring often, until the onion is tender and lightly browned, 3 to 4 minutes.  Stir in the tomatoes and 1/4 teaspoon salt.  Simmer, stirring occasionally, until thickened, 4 to 5 minutes.  Remove from the heat and stir in the basil.  Season to taste with salt and pepper.  Serve the sauce over the chicken.

Serves:  4
Fine Cooking Magazine, October/November 2010

Better-Than-Crack Brownies (Peanut Butter Cup Crunch Brownies)

My sister is a wonderful cook.  She made these “Better-Than-Crack Brownies” for her boyfriend, Colby, and his best friend, Prentice, for another one of their pre-race desserts.  (Both guys run cross country and track for Oklahoma State University.  The OSU Cross Country team has been NCAA Champions for the past two years in a row.)  
These brownies are actually referred to as Peanut Butter Cup Crunch Brownies (on Brown Eyed Baker’s blog, where she got this recipe), but they also can be called the other name above, which I think is hilarious.  I’ve never had crack before, nor do I know anyone who has, so I don’t know how these brownies can be better … but the name sure is funny though!
My sister said that Prentice took one bite of these and made a face like he had died and gone to Heaven.  I cannot wait to try these myself because they look sinfully delicious! Be forewarned though, these brownies are insanely rich, so you probably should just eat one…if you have self control!  Enjoy!
Lay out 8 Reese’s Peanut Butter cups.
Roughly chop into pieces.
Measure out 1/2 cup of salted peanuts.
Prepare your favorite brownie recipe for a 9 x 13-inch pan.  Bake 5 minutes less than baking time.
Remove brownies from oven and sprinkle with peanuts and chopped Reeses.  Bake for another 5 minutes.
Meanwhile, melt chocolate chips, peanut butter, and butter in a medium saucepan over medium-low heat.  Stir in the cereal to evenly coat.
Remove the brownies from the oven and pour the chocolate and peanut butter mixture over the top.  Spread evenly.  
Refrigerate for 2 hours before cutting and serving.  Yum!
Better-Than-Crack Brownies (Peanut Butter Cup Crunch Brownies)
Ingredients
1 batch of your favorite brownie recipe for a 9 x 13-inch pan (I recommend Chewy Brownies)
1/2 cup salted peanuts
8 Reese’s peanut butter cups, chopped
1 1/2 cups milk chocolate chips
1 1/2 cups creamy peanut butter
1/2 Tbsp. unsalted butter
1 1/2 cups Rice Krispies cereal
Directions
1.  Prepare the brownies according to the directions and bake for about 5 minutes less than the recipe states.  Remove from the oven and sprinkle the top with the peanuts and chopped peanut butter cups.  Return to the oven and bake for 5 additional minutes.
2.  While they are finishing baking, melt the chocolate chips, peanut butter and butter in a medium saucepan over medium-low heat.  Stir in the cereal to evenly coat.  Remove the brownies from the oven and evenly pour the chocolate and peanut butter mixture over top.  Spread to cover evenly.  Refrigerate for 2 hours before cutting and serving.  Store in airtight container in the refrigerator.
Yield: 24 brownies

Classic Pound Cake

This is your Classic Pound Cake recipe comes out of the Fine Cooking Magazine April/May 2011 issue. We thought this pound cake looked gorgeous in the magazine, so we decided to make it last Sunday afternoon. 
 
I have only eaten one kind of pound cake in my life, and that is my Great Aunt Nanny’s Pound Cake recipe.  It is delicious and has been in our family for years.  The Classic Pound Cake from Fine Cooking is completely different:  it is extremely thick and dense. Nanny’s Pound Cake is much lighter, and more like an airy cake.  I have never had a cake this dense before, so I was a bit unsure at first.  My mother-in-law, Paula, loved the denseness of this cake, and raved to me about how wonderful the cake was.
I reflect on this dessert, I would give it a “thumbs up” and would make it again.  I would rate Nanny’s Pound Cake as number one though, probably because I grew up with that recipe. 
Pound cake is a classic dessert that can be “dressed up” in many ways.  Make it a Simple Shortcake and top slices of pound cake with fresh berries or poached or sauteed fruit (like peaches or pears) and add a dollop of whipped cream…like we did below.
Other ways to “dress up” your pound cake include making an Easy Triffle.  Drizzle cubes of cake with liqueur and in a large bowl, layer with custard, fruit, and whipped cream.  
Finally, call it Pound Cake a la Mode and serve slices with a scoop of vanilla ice cream and hot fudge sauce; with butter pecan ice cream and caramel sauce; or with chocolate ice cream, raspberry puree’ and fresh raspberries.  It’s up to you…make your pound cake your own work of art.  Enjoy!


Classic Pound Cake
Ingredients
8 oz. (1 cup) unsalted butter, slightly firm, plus 1 Tbsp. softened
8 oz. (1 3/4 cups) all-purpose flour, sifted
1/2 tsp. table salt
5 large eggs
1 1/2 tsp. pure vanilla extract
8 3/4 oz. (1 3/4 cups) superfine sugar
Nonstick cooking spray
Confectioner’s sugar, for dusting

Directions
1.  Position a rack in the center of the oven and heat the oven to 325 degrees F.  Using a pastry brush, thoroughly coat an 8 1/2 by 4 1/2 by 2 3/4-inch loaf pan with the 1 tablespoon softened butter.  Line the bottom with a rectangle of parchment.
2.  In a medium bowl, combine the flour, salt, and whisk thoroughly.
3.  Using a stand mixer fitted with the whisk attachment, beat the eggs on medium-high speed until thickened and lightened in color, 3 to 4 minutes.  Transfer to a medium bowl and set aside.  Clean the bowl of the stand mixer and fit with the paddle attachment.  Beat the butter on medium-low speed until smooth and creamy, 1 to 2 minutes.  Add the vanilla extract and mix 1 minute longer.  Add the sugar 1 to 2 tablespoons at a time, taking about 4 minutes to add it all and scraping the bowl as needed.
4.  Still on medium-low speed, slowly add half of the beaten eggs, taking about 2 minutes to add them.  Scrap the bowl as needed and beat for 30 seconds more.  Reduce the speed to low and add the dry ingredients alternatively with the remaining eggs (divide the flour into 3 parts and the eggs into 2 parts), mixing just until each addition is incorporated.  Scrape the bowl and beat on medium low for 10 seconds more.
5.  Spoon the batter into the prepared pan.  Smooth the top with the back of a large soup spoon, making sure to reach well into the corners.  Bang the pan on the counter two times to remove air pockets.
6.  Bake the cake until the top is golden-brown, the sides begin to pull away from the pan, and a thin wooden skewer inserted slightly off center into the cake (not into the crack) comes out clean, 1 hour and 20 to 25 minutes.  During the last 15 minutes of baking, lightly spray a 12-inch strip of aluminum foil with nonstick cooking spray and rest it loosely on top of the cake.  Transfer to a wire rack and let cool for at least 20 minutes before removing from the pan.
7.  To serve, dust the top with confectioners’ sugar and use a serrated knife to cut the cake into 1/2-inch slices.  Tightly wrap any remaining cake in plastic wrap and store at room temperature for up to 5 days.  (Do not refrigerate).

Serves:  6 to 8
Fine Cooking Magazine, April/May 2011

Neiman Marcus Turkey Meatloaf

This is not your everyday meatloaf, but it will undoubtably wow and satisfy your guests with its wonderful combination of spices and herbs.  Unfortunately I must disclose to you that my husband, Matt, did not like this meatloaf.  Maybe it was because I told him there was turkey rather than the traditional ground beef, but none the less, he didn’t like it.  He is just your “cookie-cutter” plain, picky eater that does not like trying anything that is different from his “norm”.  
That’s upsetting for me because I LOVED this meatloaf recipe!  It is healthier because of the lean turkey, and was a lot less greasy, which is easier on most of our stomachs.  
So I guess that leaves you to be the judge…if you’re up for trying something new, try this elegant Turkey Meatloaf from the “Neiman Marcus Cookbook” by Kevin Garvin with John Harrison.  This is one of my favorite cookbooks and includes my all-time favorite recipes of Popovers with Strawberry Butter and Neiman Marcus Chocolate Chip Cookies.  Enjoy!
Saute’ onions and garlic in a heavy bottomed skillet over medium heat for 3 to 4 minutes, or until translucent.  Add spices and heavy cream and bring to a simmer.  Simmer until liquid has reduced to one-third.  Let cool.
Combine cooled heavy cream and onion mixture with turkey, eggs, breadcrumbs, parsley, ketchup, salt and pepper.  Transfer to a loaf pan.  

Bake in a 350 degree F. oven for 1 hour, or until the internal temperature reaches 165 degrees F. on a meat thermometer.

Let cool, then invert to a platter, slice, and serve.

Turkey Meatloaf
Ingredients
1 Tbsp. olive oil
1 Tbsp. butter
1 1/2 cups minced onions
1 Tbsp. minced garlic
1 tsp. dried thyme
1 tsp. dried oregano
1/2 tsp. ground allspice
3/4 cup heavy cream
1 1/2 pound ground turkey
1 cup plain fine bread crumbs
2 eggs, lightly beaten
1/4 cup minced fresh Italian (flat-leaf) parsley
3 Tbsp. tomato ketchup
1 1/2 Tbsp. kosher salt (I did way less…probably about 2 tsp.)
1 1/2 tsp. freshly ground black pepper


Directions
1.  Preheat oven to 350 degrees F.
2.  Heat olive oil and butter in a heavy-bottomed saute’ pan or skillet over medium heat.  When the butter is melted, add the onions and garlic and saute’ for 3 or 4 minutes while stirring, or until translucent.  Add the thyme, oregano, allspice, and heavy cream, and bring to a simmer.  Continue to simmer, stirring frequently, until the liquid is reduced by one-third and has the consistency of oatmeal.
3. Transfer to a mixing bowl and let cool.  When cool, add the turkey, bread crumbs, eggs, parsley, ketchup, salt, and pepper, and mix well.
4.  Transfer the mixture to a 1 1/2 quart greased loaf pan (measuring 8 1/2 by 4 1/2 by 2 1/2 inches.)  Bake the meatloaf in the oven for about 1 hour or until the internal temperature reaches 165 degrees F. on a meat thermometer.
5.  Remove the meatloaf from the oven and let cool. When cool enough to handle, run a pairing knife around the inside of the loaf pan and invert the meatloaf onto a clean platter to unmold.

Serves: 4
“Neiman Marcus Cookbook” by Kevin Garvin with John Harrison

Chicken Capri

This is my grandmother, Nila’s Chicken Capri recipe.  It is wonderful and an super simple casserole that she used to serve back in the 1970’s in Ohio when they had friends come over.  To tell you had good this casserole is, my mom told me a story of when she and my dad had a friend over for dinner.  The man’s wife was out of town, so between him and my mom and dad (more so my dad than my mom),  they finished off this entire casserole in one sitting!
This casserole dates back to the 1970’s and supposedly serves 10 people.  This day in age, in 2011, I would more likely say it serves 6-8, since we as Americans eat larger portions and consequently weigh more than Americans did back in the 70s.  haha 🙂
Enjoy!
You will need chicken broth, Chow Mein Noodles, an onion, celery, a can of mushroom soup, a small jar of pimiento, and cashew nuts.
Cook chicken until done.  Chop into bite-sized pieces.  Simmer celery and onion in chicken broth.
Dilute soups with additional chicken broth.  Mix all ingredients together, reserving some nuts and noodles.
Place in a casserole dish and bake at 350 degrees F for 40 minutes.
Top with additional cashews and noodles during the last 10 minutes of baking.
We served ours with peas, strawberries, and blackberries.  Enjoy!


Chicken Capri
Recipe Type: Main
Serves: 6-8
Ingredients
  • 4 chicken breasts or 1 whole chicken
  • Salt and pepper to taste
  • 2 cups celery, chopped
  • 1 cup onion, chopped
  • 1/2 cup chicken broth, 1/2 cup additional chicken broth
  • 1 can mushroom soup
  • 1 small jar pimiento, chopped
  • 1 can Chow Mein Noodles
  • 1/2 cup cashew nuts, halved
Instructions
  1. Cover chicken with water seasoned with salt and pepper.  Cook until done, then de-bone chicken and chop into bite-sized pieces.
  2. Simmer celery and onion in chicken broth.  Dilute soup with 1/2 cup chicken broth.  Mix all ingredients, reserving some noodles and nuts.
  3. Place in casserole dish and bake at 350 degrees F for about 40 minutes or until bubbly.  Top with remaining noodles and nuts the last 10 minutes of baking.

Carrot Cake for my birthday!!!

As most of you may know, Thursday, March 3rd was my birthday.  As I’ve said before, growing up I would request Mrs. Kelm’s Chocolate Cake every year for my birthday.  My dad would take pictures of my laying down next to the decorated cake or some character like Barney, or some ballerina that my mom would make.  As I grew older, we discovered Mississippi Mud Cake, out of the “Pigtails and Froglegs” cookbook from Neiman Marcus.  This become our “birthday tradition” every year since.  If you know me well enough, you also know that I LOVE Oreos, so last year I requested an Oreo Cheesecake…yet to be blogged.  It is absolutely devine, sinfully rich, and delicious.
This year, on the contrast, I thought I would be “healthy”, so I requested a Carrot Cake, my most favorite “flavor” of cake in the whole world.  Since I had just recently made the Mississippi Mud and Mrs. Kelm’s Chocolate Cake, I was definitely not craving chocolate this year for my birthday.  My mom made this same delicious Carrot Cake last year for Easter out of Dorie Greenspan’s “Baking From My Home to Yours” cookbook.  We loved it…obviously!  Why else would I request this cake again?  My mom used her own recipe for the icing.
When we made this cake for Easter last year, we made it in a 9 x 13 inch pan…the easier method.
For my birthday, I requested, that she make it into a three-tiered cake….the most beautiful way you can bake a cake.  It turned out gorgeous and delicious and was the best birthday I could have ever asked for!
Carrot Cake
INGREDIENTS
2 cups flour
2 tsp baking powder
2 tsp baking soda
2 tsp ground cinnamon
3/4 tsp salt
3 cups grated carrots (about 9 carrots; we grated them in a food processor fitted with a shredding blade)
1 cup coarsley chopped walnuts or pecans
1 cup shredded coconut (sweetened or unsweetened)
1/2 cup moist, plump raisins (we omitted because the males in our family don’t like dried fruit)
2 cups sugar
1 cup canola or safflower oil
4 large eggs
DIRECTIONS
1. Preheat oven to 325 degrees. Butter a 9×13 inch cake pan, flour the insides and tap out the excess. (Can make into three 9×2 inch round cake pans instead).
2. Whisk together the flour, baking powder, baking soda, cinnamon and salt. In another bowl, stir together the carrots, chopped nuts, coconut, and raisins (if using).
3. In an electric mixer with a paddle attachment, beat the sugar and oil together on medium speed until smooth. Add the eggs one by one, and continue to beat until the batter is even smoother.
4. Reduce the speed to low and add the flour mixture, mixing only until the dry ingredients disappear. Gently mix in the chunky ingredients.
5. Pour batter in baking pan and bake for 40-50 minutes, until a thin knife inserted into the center comes out clean.
6. Cool until room temperature and then add the frosting.
Yield 8-10 servings
Baking From My Home to Yours by Dorie Greenspan
Cream Cheese Frosting
Ingredients
1 stick butter, softened
1 package (8 oz) cream cheese,
1 pound powdered sugar
1 tsp vanilla
1 cup pecans, chopped finely
Directions
1. In a large bowl, cream butter and cream cheese.
2. Add sugar and vanilla and blend, then mix in the nuts.
3. Spread on cooled carrot cake.
Yield: enough icing to ice one cake
My mother’s recipe

Sopa

I don’t know where my mom got this recipe for Sopa, but it has been in our family for years.  I cannot believe I have not blogged this yet, because it is delicious!  Sopa is like a Mexican lasagna, with layers of tortillas, chicken, cheese, soups, and onion.  It is very similar to our King Ranch Chicken recipe.  The only difference is that Sopa has flour tortillas instead of corn tortillas, the chicken is poached, not sauteed, and there are no bell peppers.  This is one of the easiest casserole dishes you can make… just mix the soups all together and pour over the top!  How much easier can you get?   Enjoy!!
Layer tortillas, chicken, cheese, and onion.

Pour soups and Rotel over top.  Sprinkle with grated cheese and salt and pepper to taste.

Bake for 45 minutes in a preheated 375 degree F oven.

Sopa
Ingredients
1/2 package tortillas
2 1/2 cups chicken, cooked and diced
1 small white onion
1 can cream of chicken soup
1 can cream of mushroom soup
1 can of Rotel Diced Tomatoes & Green Chilies
grated Monterey and Jack Cheese
salt and pepper to taste

Directions
1.  Preheat oven to 375 degrees F.  Grease a 9 x 13-inch casserole dish.
2.  Tear tortillas into strips.  In greased casserole dish, alternate layers of tortillas, cheese, chicken, and onion.
3.  Mix the soups with Rotel and pour over the top.  Sprinkle with salt and pepper.  If desired, add grated cheese on top.
4.  Bake for 45 minutes, or until bubbly.

Yield 6-8 servings

Maple Muffins

I’m so sorry that it has been over a week since my last post!  I think I almost burned myself out of cooking for a while due to the week of arctic weather we had here in Texas!  I cooked every single day since I couldn’t leave my house, so when we finally got some warm weather, I was outside running, washing cars, and NOT staying inside the house!
This is a new muffin recipe my mom tried, called Maple Muffins.  My dad said these are very good and that “they’re a keeper”.  I’ve never had a maple muffin, so these were a nice change to the typical blueberry or banana muffin we always make.  The maple flavoring is just right… not too subtle, but not overbearing either; just perfect.  You can serve these with jam, butter, MORE maple syrup, or my favorite…sweet honey.  I love the crunch from the walnuts or pecans in these.  These muffins are a great recipe for any breakfast brunch.
We got this recipe from Sarabeth Levine’s, Sarabeth’s Bakery:  From My Hand to Yours cookbook.  Levine writes, “This recipe was literally forced upon me by a customer who said her family had made these muffins for more than a hundred years.  She promised they would be fantastic, and she was right! Their rich, bold maple flavor and crunchy tops are simply irresistible.”  Enjoy!!!
Whisk the unbleached flour, whole wheat flour, baking powder, and salt together in a medium bowl.
Whisk the maple syrup, melted butter, and milk together in a another bowl.
Then whisk in the egg and yolk.

Add the dry ingredients to the wet ingredients and stir until smooth.

Stir in the walnuts (we used pecans).

Let the batter stand about 5 minutes so the dry ingredients can absorb the liquids.  Using an ice cream scoop, portion the batter into the prepared muffins cups.

Bake for 10 minutes at 400 degrees F.  Reduce oven temperature to 375 degrees F, and bake 15 minutes more, or until tops are golden brown and wire cake tester comes out clean.  Cool in pan for 10 minutes.  Remove from pan and cool completely.

Maple Muffins
Ingredients
Softened unsalted butter, for the pan
2 1/4 cups unbleached all-purpose flour
3/4 cup whole wheat flour
1 Tbsp. baking powder
1/2 tsp. fine sea salt
1 1/2 cups pure maple syrup, preferably Grade B
12 Tbsp. (1 1/2 sticks) unsalted butter, melted
1/2 cup whole milk
1 large egg plus 1 large egg yolk, at room temperature
1 cup coarsely chopped walnuts, toasted (we used pecans)

*Baker’s note:  Grade B maple syrup refers to its color and flavor.  It is darker and stronger than Grade A.  It does not mean that grade B is inferior.

Directions
1.  Position a rack in the center of the oven and preheat to 400 degrees F.  Brush the insides of 12 muffin cups with softened butter, then brush the top of the pan.  I used silicon pans and did not butter the pans.
2. Whisk the unbleached flour, whole wheat flour, baking powder, and salt together in a medium bowl.  Whisk the maple syrup, melted butter, and milk together in another bowl, then whisk in the egg and yolk.  Add the dry ingredients to the wet ingredients and stir until smooth.  Stir in the walnuts.  Let the batter stand so the dry ingredients can absorb the liquids, about 5 minutes.
3. Using a 2 1/2-inch diameter ice-cream scoop, portion the batter, rounded side up, into the prepared muffins cups.
4.  Bake for 10 minutes.  Reduce the oven temperature to 375 degrees F and bake until the tops of the muffins are golden brown and a wire cake tester inserted into the center of a muffin comes out clean, about 15 minutes more.
5. Cool in the pan for 10 minutes.  Remove the muffins from the pan and cool completely.

Yield: 12-14 muffins
Sarabeth’s Bakery:  From My Hand to Yours by Sarabeth Levine


Cowboy Cookies

Here’s another cookie recipe: Cowboy Cookies.  They are good, but not my favorite.  If you like sweet and salty, these are the cookie for you.  I was not a big fan of these because they are very flat, and a little crispy around the edges.  My favorite cookies are thick and soft, and have a gooey center, like in my “Dream” cookies.  However, the decision of taste is up to you!
I got this recipe from Baked Explorations by Matt Lewis and Renato Poliafito.  In their book, they describe how the name “Cowboy Cookie” refers to the sly, ruggedness implied by these cookies’ bigness and all-encompassing ingredients of oatmeal, chocolate chunks, coconut, expresso powder, and nuts.   We substituted the pretzels for the nuts for the crisp, crunchy outside, and chewy inside.  The name “Cowboy Cookie” was not invented by cowboys, or enjoyed by cowboys, or even made in honor of cowboys.  The name simply refers to “chunky, ruggedness”  of these cookies!  Enjoy!

Cowboy Cookies
Ingredients
1 3/4 cups flour
1 tsp baking soda
1 tsp baking powder
1/2 tsp salt
2 cups rolled oats
14 Tbsp. unsalted butter, cool but not cold, cut into 1-inch cubes
3/4 cups sugar
1 cup firmly packed dark brown sugar
1 large egg
1 large egg yolk
1 tsp. vanilla extract
1 tsp. instant expresso powder
2 cups semi-sweet chocolate chunks
3/4 cup thin, salty pretzels, broken into tiny pieces but not crushed

Directions
1.  In a medium bowl whisk together the flour, baking soda, powder, and salt.  Add the oats and stir to combine.
2.  In a mixer, beat the butters and sugars together until smooth and creamy.  Add egg and egg yolk, beating until the mixture looks light and fluffy.  Scrape down the sides and bottom of bowl.  Add the vanilla and beat for 5 seconds.  Dissolve the expresso powder in 1/4 cup hot water and add it to the bowl mixing until combined.
3.  Add half of the dry ingredients and mix for 15 seconds.  Add the remaining dry ingredients and mix until just incorporated. Scrape down the sides and bottom of bowl and fold in the chocolate chunks, and a 1/2 cup of pretzel pieces.
4.  Cover the bowl tightly and refrigerate for at least 4 hours.
5.  Preheat oven to 350 degrees.  Line two baking sheets with parchment paper.  Scoop out dough in 2 tablespoon size balls, and place dough balls on prepared baking sheet, about an inch apart.  Sprinkle the remaining 1/4 cup of pretzel pieces over the dough balls.  Use the palm of your hand to press the dough down lightly; don’t smash the cookie, just slightly flatten the ball, and press the pretzel pieces into the dough.
6.  Bake for 11-13 minutes, rotating the pan halfway through baking time until the edges of the cookies are golden brown, or just start to darken.
7.  Set the pan on a wire rack for 10 minutes to cool.  Use a spatula to transfer the cookies to a wire rack to cool completely.  Can be stored in an airtight container for up to three days.

Yield: 36 cookies
“Baked Explorations” by Matt Lewis and Renato Poliafito